
Hi ,
Do any of you bright sparks know if ,when you`re swaping a 16D for a 1Y can you use the alternator & water pump pulleys & belt setup that are on the 1Y ,or would you have to swap them for the one`s from the van.Sorry one more question I know you have to change the exhaust manifold but do you have to change the inlet manifold.
Gr8full for any help.
Cheers Charlie
1Y Alternator
Moderators: User administrators, Moderators
1Y Alternator
Member 2161
-
GusBus

- Registered user
- Posts: 7
- Joined: 13 Jan 2006, 10:48
- 80-90 Mem No: 2350
- Location: Ireland, Member No: 2350
Hi Charlie
I've just done this engine swap.
We used the alternator from my 1.6D (JP) because the 1Y didn't have one.
We also used the water pump from the JP too...the one on the 1Y was fooked and the pulley was bent.
We used the belt from the JP, because it was only a few months old.
I don't see any reason why you couldn't use the existing alt/w-pump on the 1Y if they are there and look OK?
You will need the bottom pulley wheel off the 1.6 though.
We did also use the JP's inlet manifold (and outlet manifold). The inlet one on the 1Y was all in one with the airfilter box, and there's no way I could see that fitting in a T3 engine bay? Are you sure you mean 'inlet' manifold? It was an easy swapover
Everything we wanted to swap over swapped with no problems...apart from the oil cooler mount (the one on my 1Y was munched), which has a different bolt pattern on the 1Y block. We sourced one from another 1.9 block locally.
-
Simon Baxter
- Trader
- Posts: 3184
- Joined: 08 Oct 2005, 19:36
- 80-90 Mem No: 1
- Location: Huddersfield, WeYo.
- Contact:
-
GusBus
- Registered user
- Posts: 7
- Joined: 13 Jan 2006, 10:48
- 80-90 Mem No: 2350
- Location: Ireland, Member No: 2350
GusBus wrote: You will need the bottom pulley wheel off the 1.6 though.
Not 100% sure about this bit? And its been on my mind all day whilst at work and away from pc.
We may just have needed to because we used the w/pump and alternator from the 1.6D and the belt wouldn;t fit/line up...because 1.9 wheel was smaller, and had dirty great spacer behind it!
Play this one by ear
can anyone confirm or deny if its needed or not for definite?
-
GusBus
- Registered user
- Posts: 7
- Joined: 13 Jan 2006, 10:48
- 80-90 Mem No: 2350
- Location: Ireland, Member No: 2350
We used the dipstick and sleeve from the 1.6D (Don't use the sleeve currently resident in the 1Y)
Due to the new angle of the 1Y, you obviously now need the longer dipstick and sleeve from the 1.6 (assuming you have that?)
Our sleeve had been tack welded onto the 1.6 crankcase, yours may well be held properly by a nut? (When weput it into the 1Y it was tack welded again)
Once we broke this weld the sleeve slid out easily from the guide hole in the crankcase.
The sleeve on the 1Y needs to be removed because this is too short.
Ours needed a bolt driven up from the underneath to remove it from the guide hole in the case. Can't remember if we had to undo something on top, but I dare say it would be obvious?
Depending on how your 1.6 is attached it may be worth marking it prior to removal to give the right oil reading. Mark it just above where it comes out of the crankcase, permanent marker or tippex will do.
The top of our 1.6 sleeve is attached to a small bracket (a mod I think from a previous engine swap) which is secured up near the injection pump, again yours may or may not have this.
A drop of Instant Gasket may help the seal at the crankcase if needed.
Let me know if you want some pics
Thanks for that GusBus ,one more question if you don`t mind ,I finally fitted the engine today only to find the top of the fuel pump were the accelerator cable connects is to high and is in the way of the engine bay lid .My first thought is to change the lever on top of the pump with the one off the 16D.Did you have this problem and if so how did you solve it.
Cheers Charlie
Cheers Charlie
Member 2161
-
GusBus
- Registered user
- Posts: 7
- Joined: 13 Jan 2006, 10:48
- 80-90 Mem No: 2350
- Location: Ireland, Member No: 2350
Aha!
This one is DEFINITELY going to need a photo in the the cold light of tomorrow morning! Which reminds me I didn't take that other pic for you...will do both tomorrow.
Where do I start? OK, the old set up on my 1.6D was heavily modded after it broke previously, and included a homemade bit.
We found the same problem as you in that the engine bay lid wouldn't sit down with the 1Y setup etc, so we knew we'd have to change it any way...so that's exactly what we did.
But the lid still wouldn't fit right...so the bit the actual accelerator cable attaches to was bent down even further.
Have to confess I didn't actively play a part in this bit...our very mechanical mate did most of this, he's also the guy who fixed mine when it was on the 1.6d and made the homemade bit to modify it previously. I was honorary tool-fetcher throughout this bit of our engine swap
Once the engine was running (took a lot to bleed it through, and my battery was half dead which didn't help) we put the engine lid on properly, and blipped the accelerator to check it worked and didn't stick.
It *IS* marking the padded lining inside the lid slightly...but it does work and it aint sticking. Its not marking enough to worry about, and it time it will wear its own groove I suspect.
Last edited by GusBus on 19 Mar 2007, 20:41, edited 1 time in total.

The top of our 1.6 sleeve is attached to a small bracket (a mod I think from a previous engine swap) which is secured up near the injection pump, again yours may or may not have this.
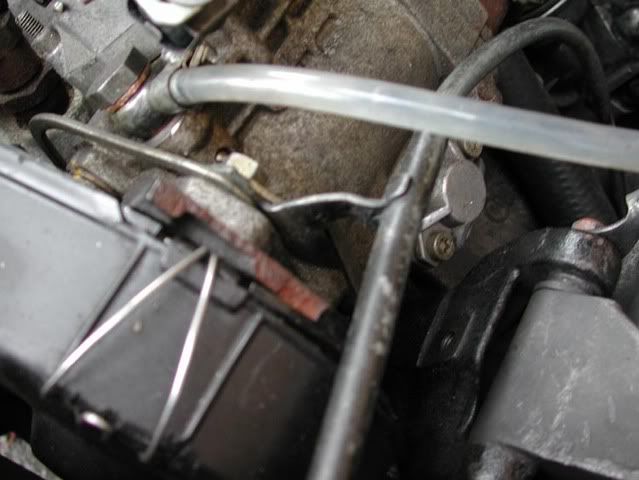
Fairly standard brckt. at back of cambelt cover/inj.pump bolt I think
The 80-90 Tech Wikipedia Your 1st port of call
Syncro Kastenwagen / 16" Kombi Camper
Syncronaut No. 1
-
GusBus
- Registered user
- Posts: 7
- Joined: 13 Jan 2006, 10:48
- 80-90 Mem No: 2350
- Location: Ireland, Member No: 2350
HarryMann wrote:The top of our 1.6 sleeve is attached to a small bracket (a mod I think from a previous engine swap) which is secured up near the injection pump, again yours may or may not have this.
Fairly standard brckt. at back of cambelt cover/inj.pump bolt I think
Cheers for that...new to us though, it definitely wasn't there before the previous engine swap...used to just wave about in the engine bay
-
GusBus
- Registered user
- Posts: 7
- Joined: 13 Jan 2006, 10:48
- 80-90 Mem No: 2350
- Location: Ireland, Member No: 2350
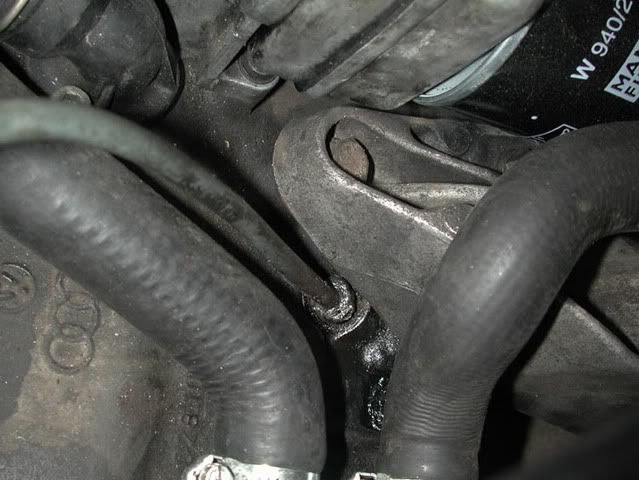
As promised, pics of how the 1.6d dipstick housing.sleeve thing is attached.
Here, where it goes into the crankcase. Our nut was gnarly and rounded, so its actually secured with tack welds.
And here's the bracket...your probably has one already, mine was missing and added during a previous engine swap (knackered 1.6 swapped for another knackered and even older 1.6 )
)
Here, where it goes into the crankcase. Our nut was gnarly and rounded, so its actually secured with tack welds.
And here's the bracket...your probably has one already, mine was missing and added during a previous engine swap (knackered 1.6 swapped for another knackered and even older 1.6
Nice pictures, I thought the dipstick was some sort of push fit into the crankcase, maybe with a sealant (always seems to be RTV around down there) - obviously a common problem getting it sealed well.. and maybe the absence of a windage tray doesn't help frothing and splashing up into that region.
The 80-90 Tech Wikipedia Your 1st port of call
Syncro Kastenwagen / 16" Kombi Camper
Syncronaut No. 1
-
GusBus
- Registered user
- Posts: 7
- Joined: 13 Jan 2006, 10:48
- 80-90 Mem No: 2350
- Location: Ireland, Member No: 2350
DON'T CUT ANY HOLES IN YOUR ENGINE LID...UNTIL YOU'VE SEEN THESE PICS! Hope I'm not too late! 
Injection pump pics as promised...
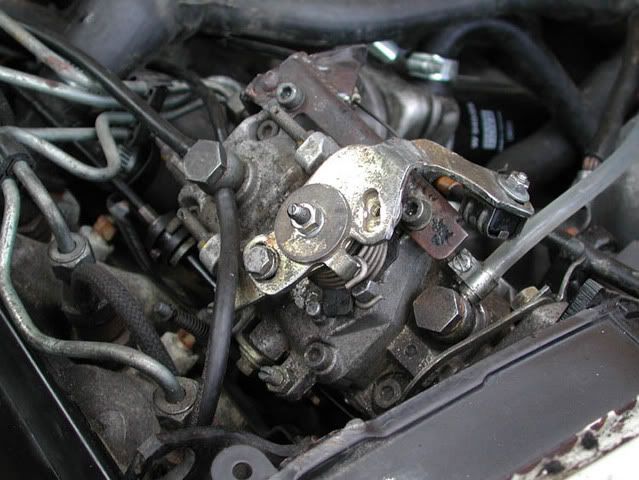
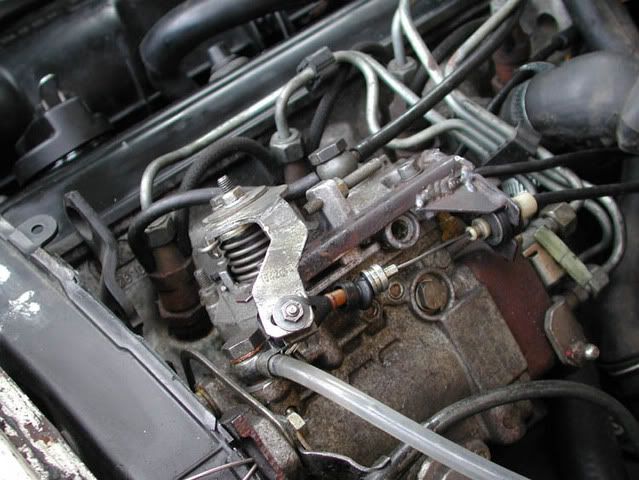
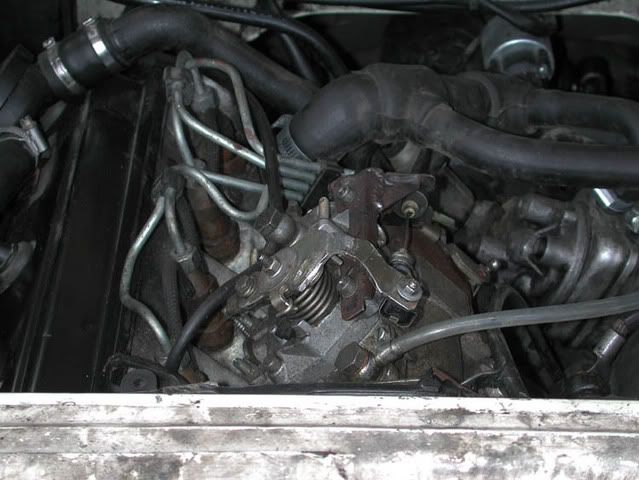
Proof that nothing sticks up above the engine bay to impede the engine lid and padding.
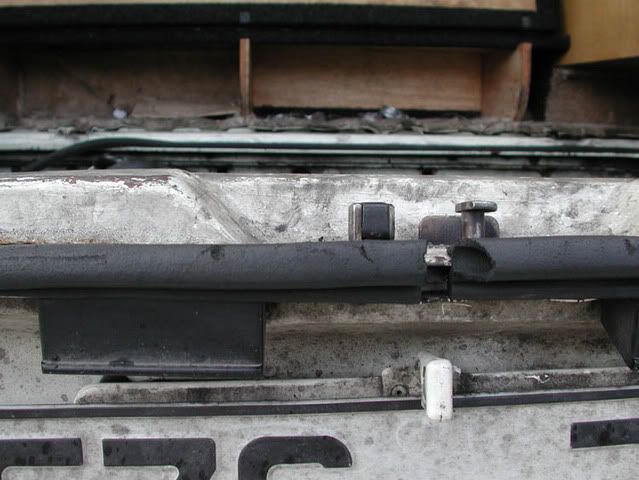
Here are the small marks in the engine lid padding (ignore the tears above, something the PO did ) What you're meant to be looking at are the small indents at centre stage.

The bits on the top of the injection pump were taken off my plain old 1.6D (JP code)
Injection pump pics as promised...
Proof that nothing sticks up above the engine bay to impede the engine lid and padding.
Here are the small marks in the engine lid padding (ignore the tears above, something the PO did
The bits on the top of the injection pump were taken off my plain old 1.6D (JP code)