Molly The Viking - Interior almost finished
Moderators: User administrators, Moderators
-
MOLLYTHEVIKING
- Registered user
- Posts: 50
- Joined: 20 Jan 2014, 22:08
- 80-90 Mem No: 0
Re: Bespoke Interior to replace my Viking original
I still haven't decided on what to do with regards to the water tank, for what we are going to use the camper for ( more day trips and weekends away) I may we'll go with a water carrier and pump rather than the tank. This will then free up a lot more storage space. Out of interest what tank are you using? If I find a suitable one I can play around with the design a bit more 

Re: Bespoke Interior to replace my Viking original
MOLLYTHEVIKING wrote:Out of interest what tank are you using? If I find a suitable one I can play around with the design a bit more
Just a cheapo rigid plastic water carrier - this one. I bought the one with the tap because it unscrews for storing under the cap but when it's removed the hole in the cap is about the right size for the pipe + pump cable.
"I'm a man of means, by no means....King of the Road!"
1983 Viking Xplorer, 2.1DJ
1983 Viking Xplorer, 2.1DJ
-
MOLLYTHEVIKING
- Registered user
- Posts: 50
- Joined: 20 Jan 2014, 22:08
- 80-90 Mem No: 0
Re: Bespoke Interior to replace my Viking original
I think this is the way I'll go, I can then free up a lot more storage space:) I'll see what I can come up with in that corner now:) out of interest what have you got in the way of holes in your floor?
Re: Bespoke Interior to replace my Viking original
MOLLYTHEVIKING wrote:I think this is the way I'll go, I can then free up a lot more storage space:) I'll see what I can come up with in that corner now:) out of interest what have you got in the way of holes in your floor?
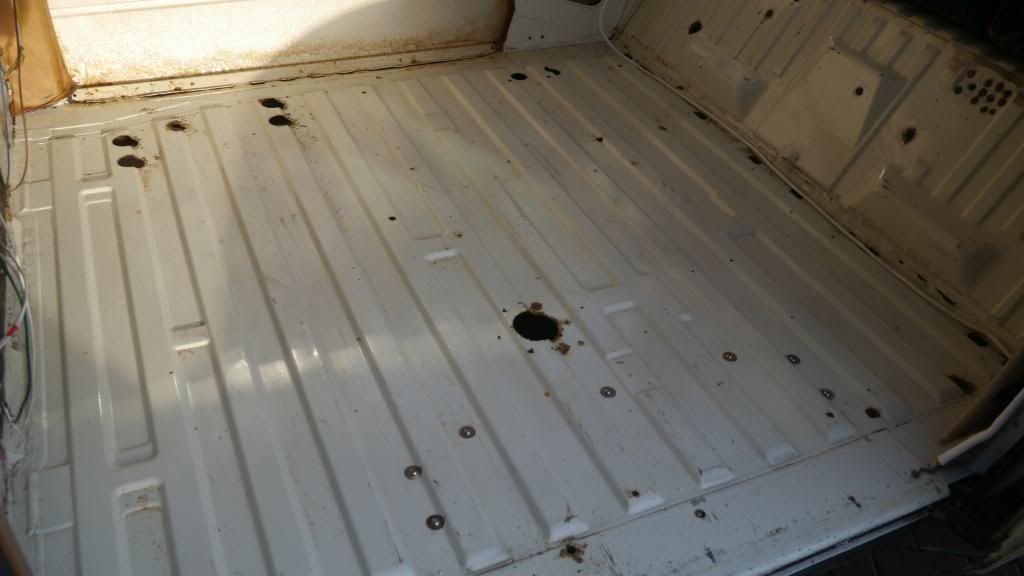
Two pairs of gas drop holes, with the sink waste between them, plus the central hole for the table support. I've just added a couple for the Propex in the far right corner. There's also the water tank overflow in the sloping part of the wheelarch. I've re-routed the water filler hose out of that hole, in case someone pours water in the external filler!
You?
Last edited by CJH on 06 Feb 2014, 21:47, edited 1 time in total.
"I'm a man of means, by no means....King of the Road!"
1983 Viking Xplorer, 2.1DJ
1983 Viking Xplorer, 2.1DJ
-
MOLLYTHEVIKING
- Registered user
- Posts: 50
- Joined: 20 Jan 2014, 22:08
- 80-90 Mem No: 0
Re: Bespoke Interior to replace my Viking original
Haha that's. Good idea re routing the water pipe:) I've got two behind the fridge which had vents on them, two under the hob area. One I think is to be able to drain the water tank and not sure what the other one is for? I have a vent higher up behind the fridge so not sure I'll need any in the floor now ?
Re: Bespoke Interior to replace my Viking original
MOLLYTHEVIKING wrote:I have a vent higher up behind the fridge so not sure I'll need any in the floor now ?
I think the gas drop holes in the floor are a requirement - the idea being that if you have a gas leak then the heavier-than-air gas will drop out through these vent holes. I'm not sure how many you're supposed to have, or of what size, so I'm just planning to reinstate the four that are there. I've bought new vent covers.
"I'm a man of means, by no means....King of the Road!"
1983 Viking Xplorer, 2.1DJ
1983 Viking Xplorer, 2.1DJ
-
MOLLYTHEVIKING
- Registered user
- Posts: 50
- Joined: 20 Jan 2014, 22:08
- 80-90 Mem No: 0
Re: Bespoke Interior to replace my Viking original
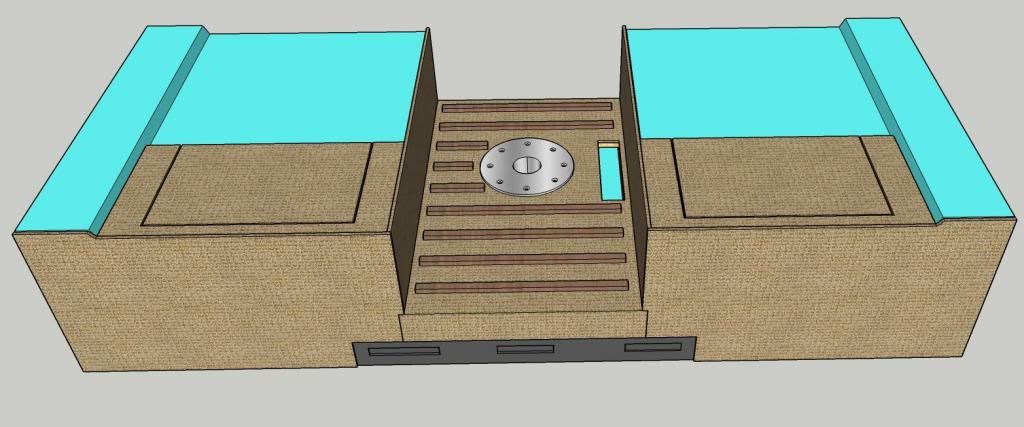
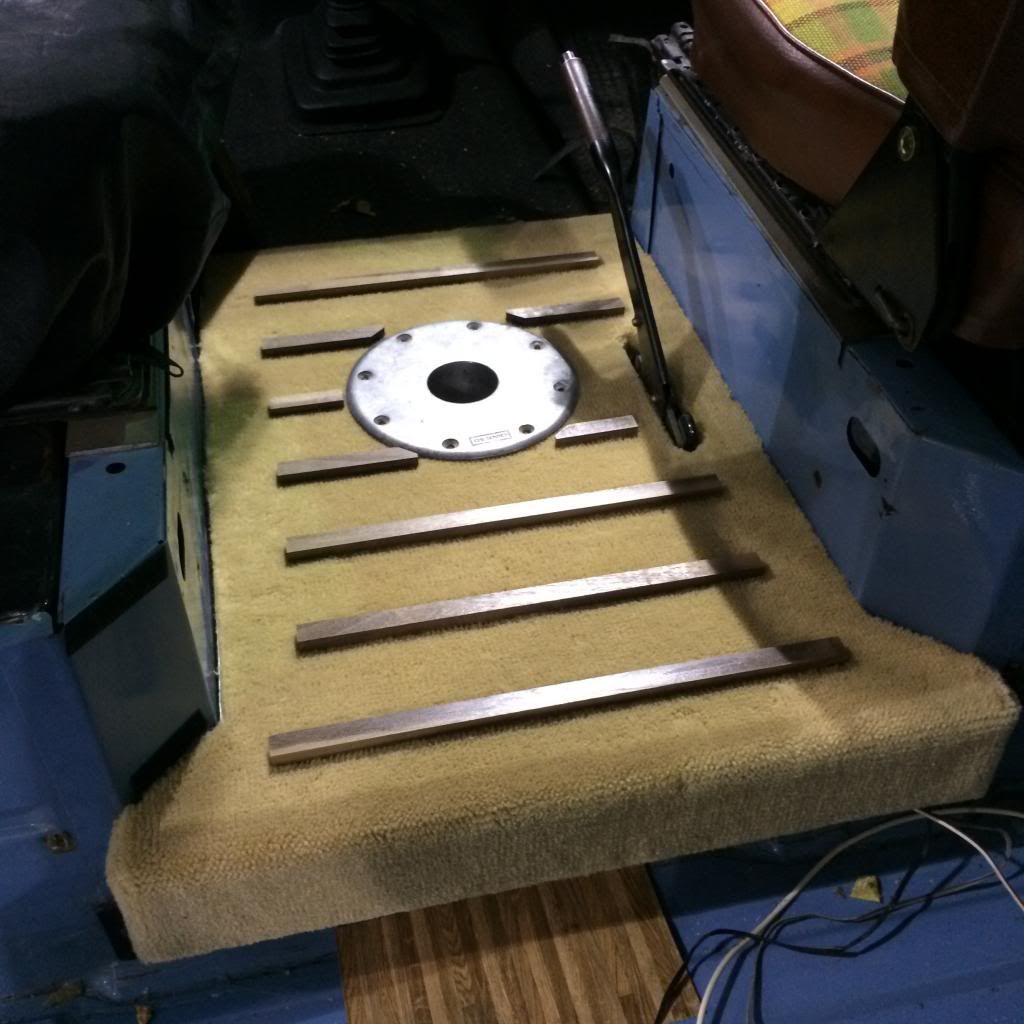
Reposted from the thread in 'chat' but this is another little job that i have looked at today, panelling off and carpeting the areas around and between the front seats. I then want to introduce some timber bars for protecting the carpet walk through when it is used for carrying long items in the back.
I am having the table leg socket polished and going to get a leather gator for the handbrake as well
I am having the table leg socket polished and going to get a leather gator for the handbrake as well

Last edited by MOLLYTHEVIKING on 05 Mar 2014, 08:44, edited 1 time in total.
-
MOLLYTHEVIKING
- Registered user
- Posts: 50
- Joined: 20 Jan 2014, 22:08
- 80-90 Mem No: 0
Re: Bespoke Interior to replace my Viking original
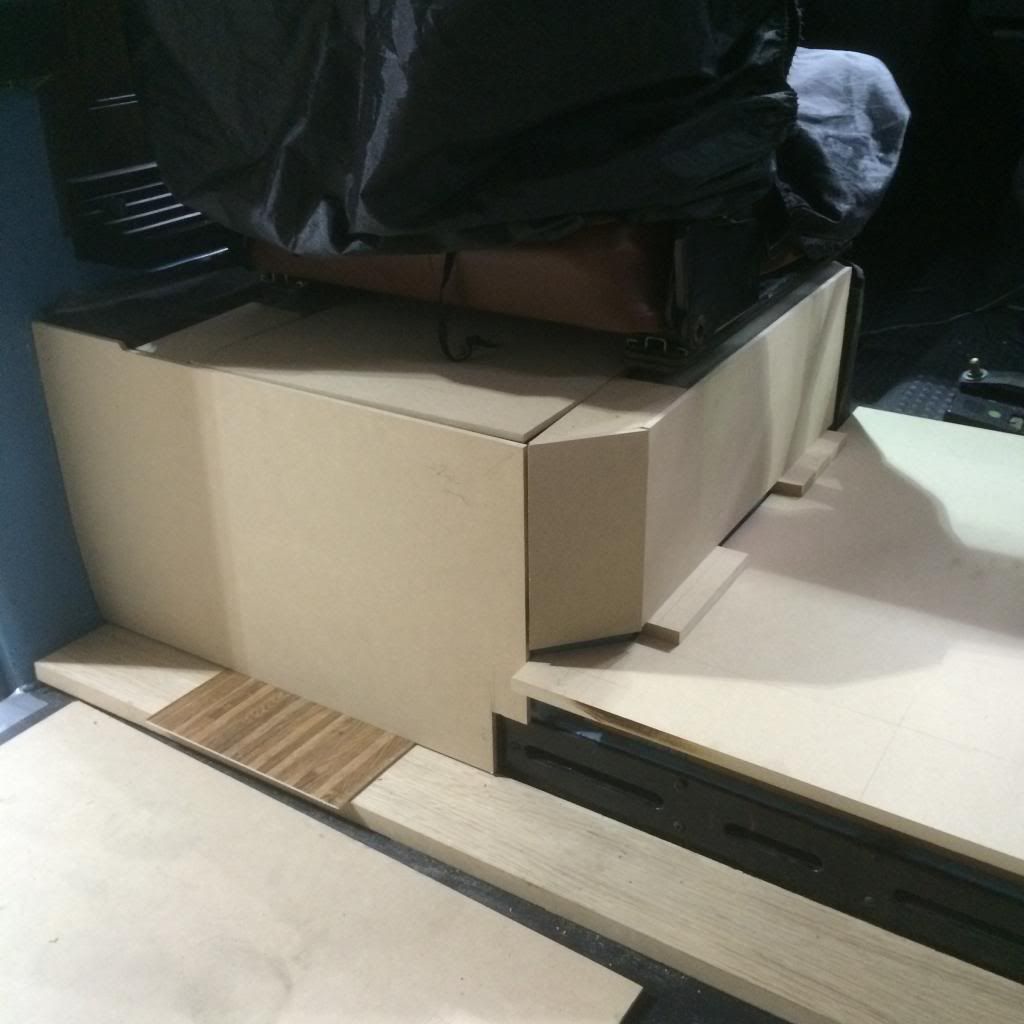
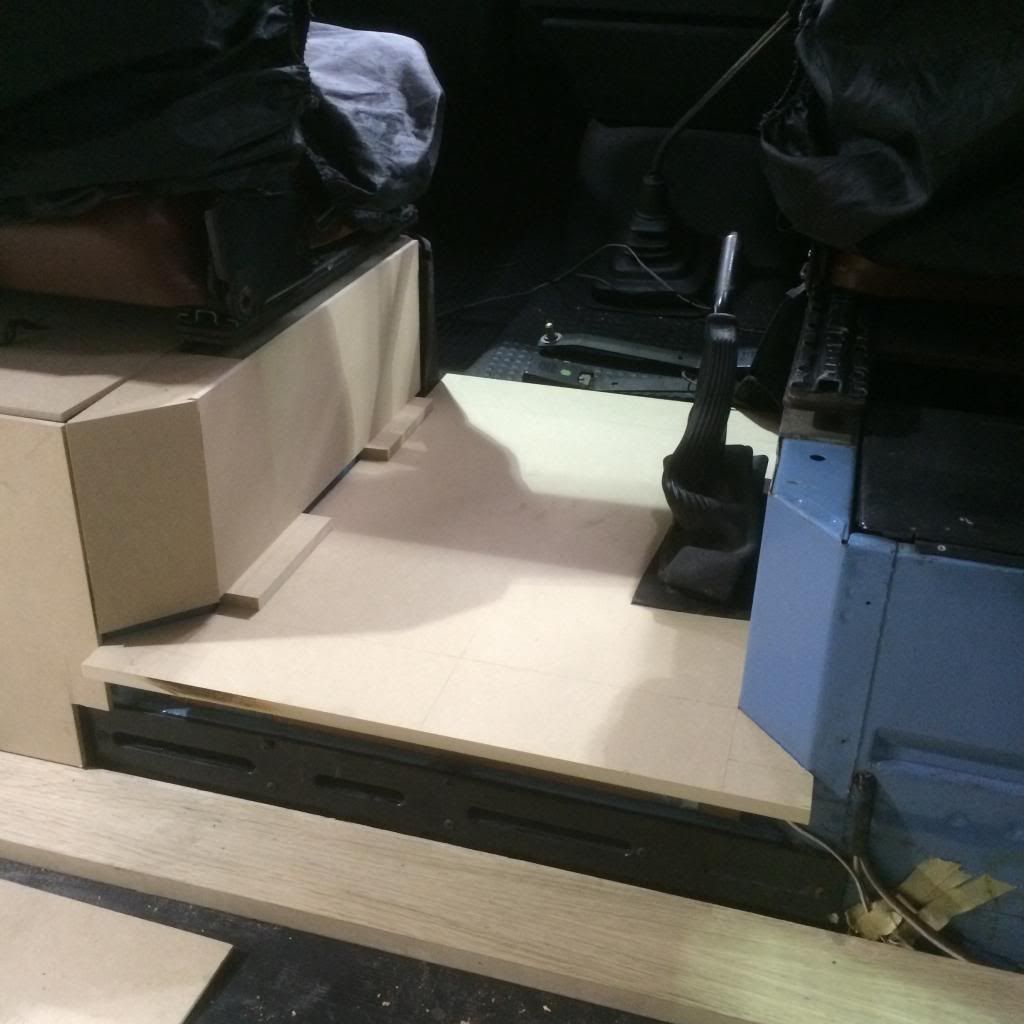
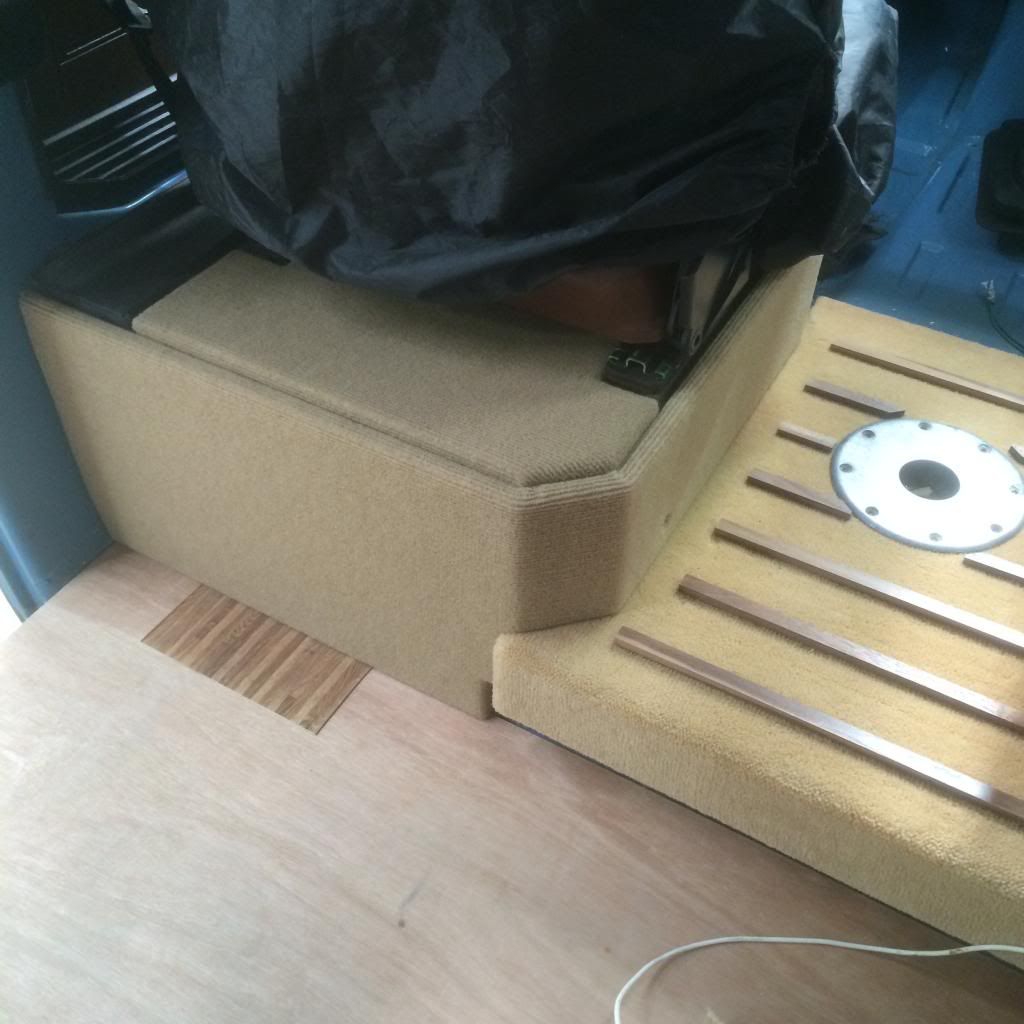
Not overly exciting, but I have now templated the walk through and boxing in of the seat bases. Just need to copy in plywood now and cover in carpet


Last edited by MOLLYTHEVIKING on 05 Mar 2014, 08:45, edited 1 time in total.
-
MOLLYTHEVIKING
- Registered user
- Posts: 50
- Joined: 20 Jan 2014, 22:08
- 80-90 Mem No: 0
Re: Molly The Viking - A work in Progress
So the centre section fits! now I just need to cover the boxing in that I have created around the seat bases. I then just need to wait until my welding has been carried out before I start re-fitting the new interior...

-
MOLLYTHEVIKING
- Registered user
- Posts: 50
- Joined: 20 Jan 2014, 22:08
- 80-90 Mem No: 0
Re: Molly The Viking - A work in Progress
Haven't got particularly far with the camper yet. have everything ready to go regarding welding the lower sill. Once this is done I can really get stuck into the interior. Finished the passenger side boxing in last night. Plan on getting the drivers side done tonight

-
MOLLYTHEVIKING
- Registered user
- Posts: 50
- Joined: 20 Jan 2014, 22:08
- 80-90 Mem No: 0
Re: Molly The Viking - A work in Progress

Floor now fully repaired and painted inside
-
MOLLYTHEVIKING
- Registered user
- Posts: 50
- Joined: 20 Jan 2014, 22:08
- 80-90 Mem No: 0
Re: Molly The Viking - A work in Progress

Lower half of this side from the door back now re-painted....
-
MOLLYTHEVIKING
- Registered user
- Posts: 50
- Joined: 20 Jan 2014, 22:08
- 80-90 Mem No: 0
Re: Molly The Viking - A work in Progress


Hopefully not too much longer now before its how I want it to be
-
lefty67
- Registered user
- Posts: 2108
- Joined: 29 Sep 2012, 12:00
- 80-90 Mem No: 11783
- Location: s. cheshire
Re: Molly The Viking - Starting to take shape
looks really good. Like what you've done in between the seats.
1.9td AAZ
T25 - an adventure before dementia
T25 - an adventure before dementia

Re: Molly The Viking - Starting to take shape
That is one nice looking bus.
1986 1.6 D Bundeswehr T3 Kombi