
To do stage 1 needs a high current switch and wire and an external water proof connection.
Red/White ( power) to red/blue just above fusebox, ths is a parallel switch to the thermo switch in radiator.
I'm sure it's been covered before but pics to share as usual

Hole was already there so may as well use it

E D I T 2018, pbucket pics will probably die soon so here are some more......
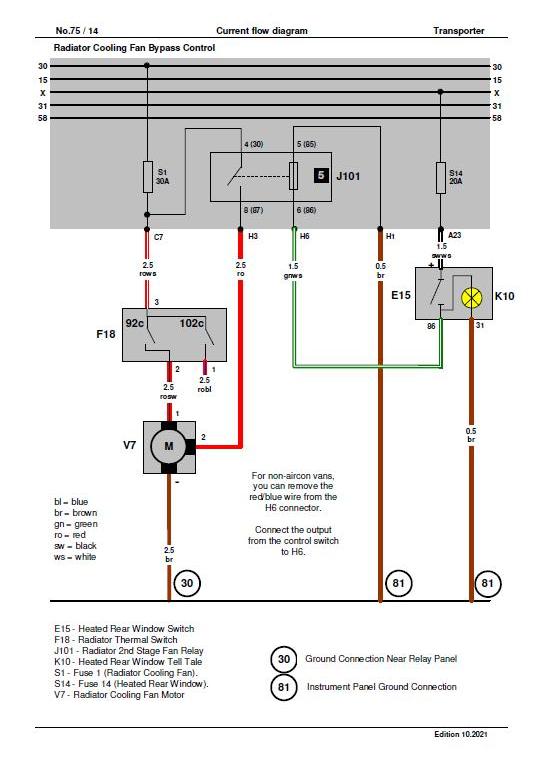
Here is a guide for a late van RHD 2 speed fan.....
You are adding a switch here between red/white and red/blue this essentially does the same job as the 102 deg C switch ( stage 2) in F18 which is your rad temp switch.
As you can see it only triggers a relay but best to use a 30A switch to make sure it's a good one.
The circuit has a 30A fuse so if any of the wiring was to short there the wires at 1.5mm2 and 30A switch can handle it and blow the fuse before melting.
you also need 30A connectors which is why I recommend Wago 222, pretty much idiot proof.
 chicken switch wiring diagram by Paul_Barr, on Flickr
drop down glovebox by bending tabs
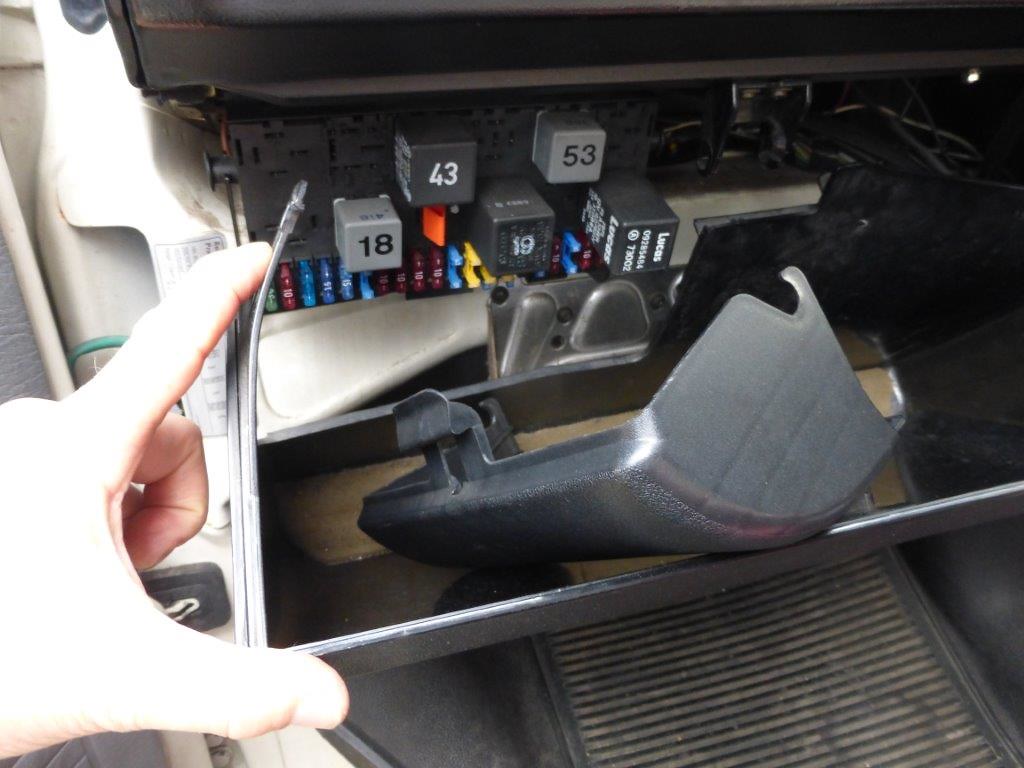 P1100280 by Paul_Barr, on Flickr
remove fusebox screw and lift fuse box off pegs
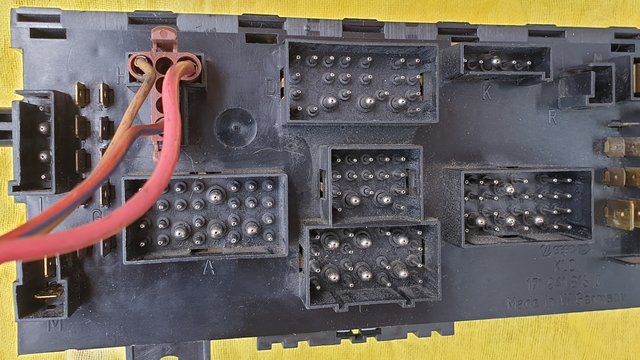
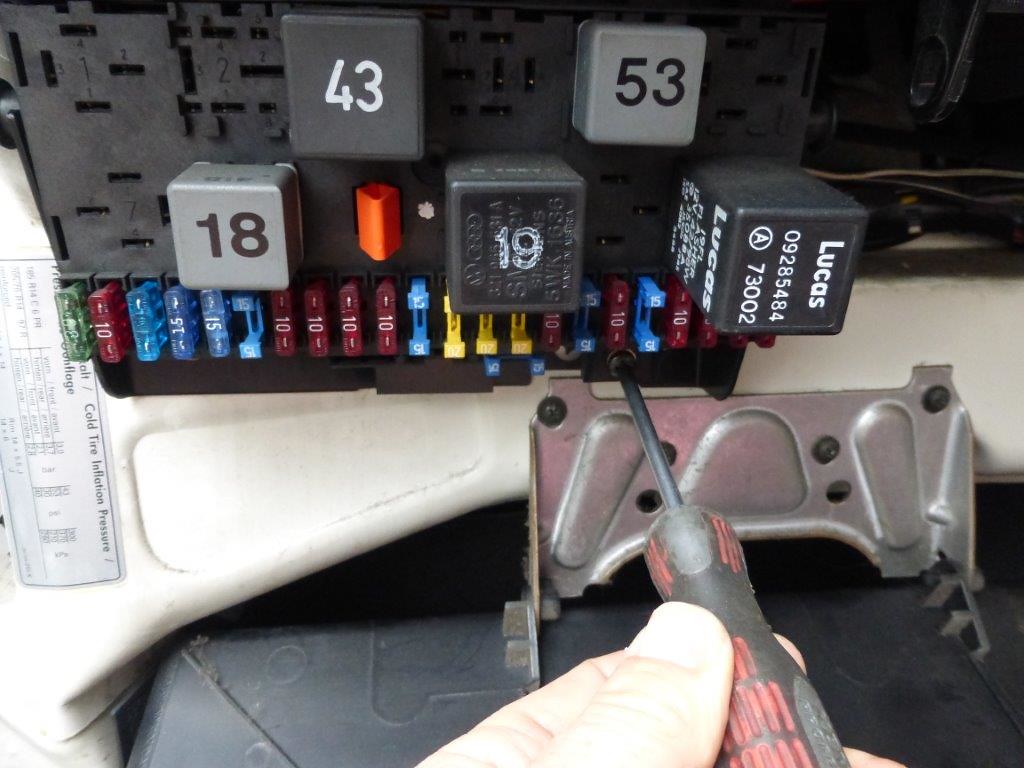 P1100281 by Paul_Barr, on Flickr
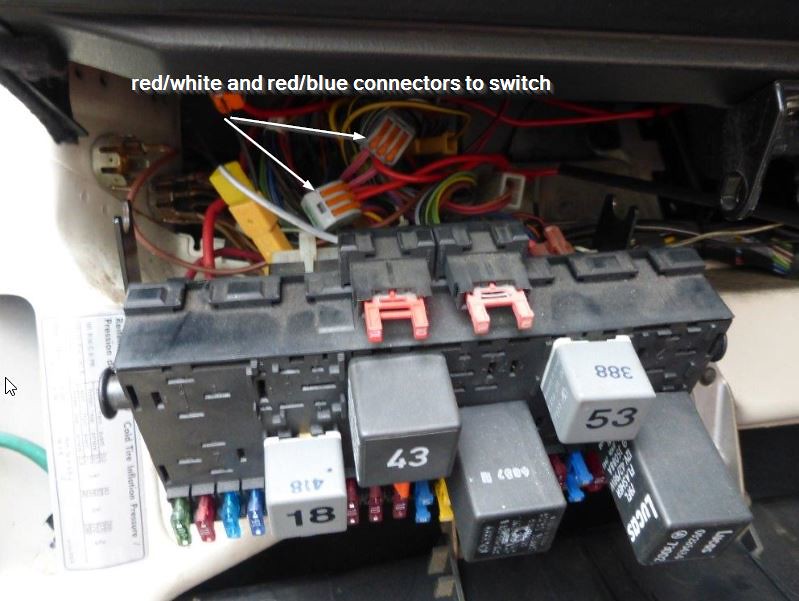 chicken switch fusebox by Paul_Barr, on Flickr
locate red/white and red blue wires, cut them strip then and rejoin with wago 222 connectors, then add 1.5mm2 switch wires to a 30A switch located in a suitable position.
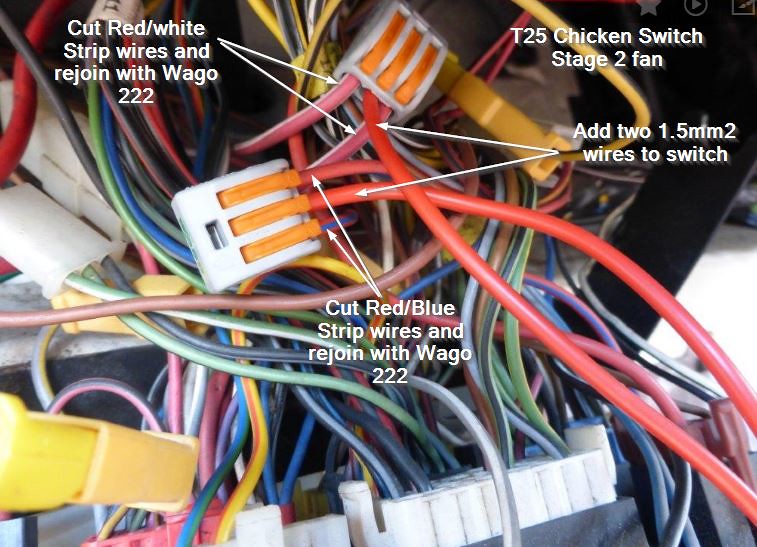 Chicken switch by Paul_Barr, on Flickr
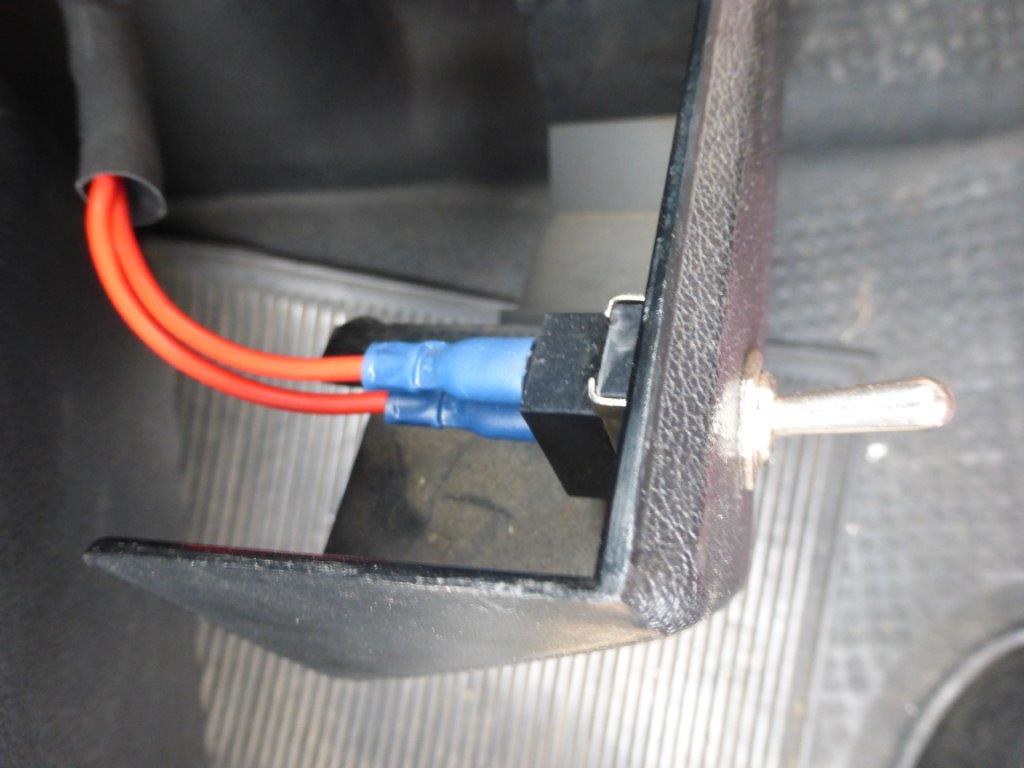 P1100279 by Paul_Barr, on Flickr


