Brilliant write up, very informative.
Regarding balancing the carbs. In your video it looks like you're using a motorbike style balancer that needs vacuum take-offs. The standard solexes don't have these ports, did you fit your own? If so where did you drill them?
Thanks in advance!
Oops!!
Moderators: User administrators, Moderators
-
bri-on-1
- Registered user
- Posts: 15
- Joined: 31 Jan 2008, 23:17
- 80-90 Mem No: 4765
- Location: newmarket, suffolk
Re: Oops!!
sarran1955 wrote:Hello,
Please........
No gasket sealant...
Get a good quality gasket set, about £30 for the CU..
American is best,,
In there are the 4 thin aluminium decompression rings that go at the top of the barrels
and 4 paper rings that go at the bottom of the barrels.... grease these when you fit..
The photos should show what you need..
or..(ahem).. click my link below and look at .. your buggy engine in 20 hours..
video how to..
have fun, take your time..
work warm clean and SAFELY..
Aircooled bliss..
Cordialement..
Thanks for the info, i am watching the 20hr buggy vid
membership number 4765
-
bri-on-1
- Registered user
- Posts: 15
- Joined: 31 Jan 2008, 23:17
- 80-90 Mem No: 4765
- Location: newmarket, suffolk
Re: Oops!!
Hi again, I see you have fitted some valve stem oil seals and i am trying to find some seals for my 2.0cu but i have tryed a few shops like just kampers ect and they do not sell them for the 2.0cu? So did vw ever fit them to this engine? I have also looked in the workshop manual and there is no mention of them?
Thanks,
Brian.
Thanks,
Brian.
membership number 4765
-
sarran1955

- Registered user
- Posts: 1504
- Joined: 11 Mar 2009, 18:51
- 80-90 Mem No: 6754
- Location: 6, les Hauts de Sarran 19800, Sarran ,Limousin ,FRANCE
Re: Oops!!
Hello,
This is 'Old school'
It helps stop the puff of smoke on start up..
Specially if you are reusing old valves and valve guides..
2 litre heads are much more fussy on valve guides.. its only CT's, beetles and bays that will happily drive all day with oval valve guides..
Trailing smoke...
They are 50 p each from usual suppliers, valve stem oil seal,..
If you are unsure , or havn't got the kit.. see the cylinder head build in Ooops..


You can post them to me and I can sort..
Minimum build(assuming you have fantastic valve guides within tolerances) MUST include NEW exhaust valves..£7 each
They are the hardest working part of this sort of motor..
Cordialement,

This is 'Old school'
It helps stop the puff of smoke on start up..
Specially if you are reusing old valves and valve guides..
2 litre heads are much more fussy on valve guides.. its only CT's, beetles and bays that will happily drive all day with oval valve guides..
Trailing smoke...
They are 50 p each from usual suppliers, valve stem oil seal,..
If you are unsure , or havn't got the kit.. see the cylinder head build in Ooops..
You can post them to me and I can sort..
Minimum build(assuming you have fantastic valve guides within tolerances) MUST include NEW exhaust valves..£7 each
They are the hardest working part of this sort of motor..
Cordialement,

-
bri-on-1
- Registered user
- Posts: 15
- Joined: 31 Jan 2008, 23:17
- 80-90 Mem No: 4765
- Location: newmarket, suffolk
Re: Oops!!
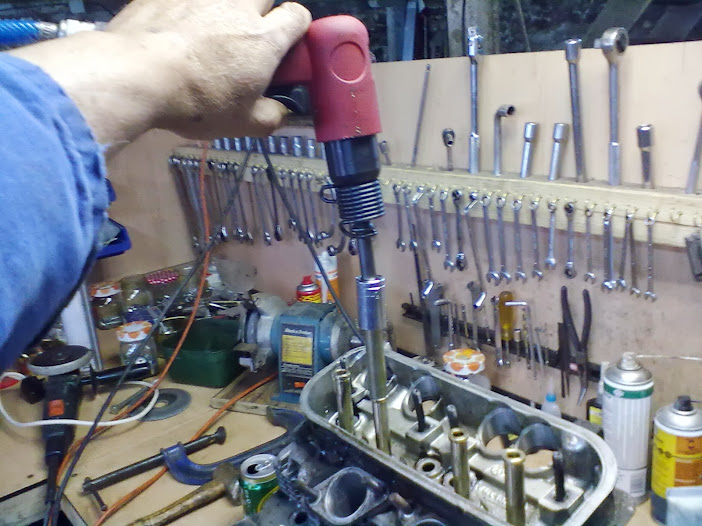
Thanks sarran, i have found the seals i wanted using you part number i have made good progress on the heads today and pulled out all the valve guides as there was just too much play in them. When the seals arrive i will be grinding in new valves all round. I also honed out my barrels today ready to fit my new rings. So progress is going well and i will be glued to your guide the whole step of the way One thing i did find was an exhaust guide had moved around 10mm and both head gaskets had a bad leak so its all going to be worth while. And i also found one piston had been put on the wrong way and two head bolts where only finger tight! I will keep you posted on my progress.
Many thanks,
Brian.
Many thanks,
Brian.
membership number 4765
-
sarran1955
- Registered user
- Posts: 1504
- Joined: 11 Mar 2009, 18:51
- 80-90 Mem No: 6754
- Location: 6, les Hauts de Sarran 19800, Sarran ,Limousin ,FRANCE
Re: Oops!!
Hello,
Still on the last few laps...
Right.. so the valve timing, ignition timing and the carbs were set up as per factory specs..
(this is all in the Haynes)..albeit poorly laid out..
However when I set up the gas analyser..the result was too lean..

indicating an air leak somewhere..also the engine had a tendancy to 'hunt' on tickover.. good sign of an airleak..
So after rechecking the tightness of all the pertinent parts.. (Go on Bobster..)..
I found the airleak was at the rubber elbows of the balance pipe between the manifolds..

and

Jubilee clips will suffice for now.. I don't know if these parts will still be available...
So.. with the tickover regulated..2 1/2 turns out of the base idle screws.. and the top left airscrew ar about 2 turns..
I was able to set the idle mixture..

13.2 on the scale..
Another point to watch out for are the actuator arms.. these have been maltreated in the past..the plastic ball joints are tired.. and if the setting is wrong
you will not be able to make the throttle stop screw 'sit' properly at idle..
Here is one..

The engine has now run for several hours..so the next step will be to fit a 'contactless' SVDA distributor..
Then set it up at 8 degrees BTDC,
Check everything again..take off my flywheel.fit the torque converter plate..alternator..drain the oil..fit new oil filter and rocker box gaskets..
Get it weighed. and prepared for despatch..
Cordialement..
Still on the last few laps...
Right.. so the valve timing, ignition timing and the carbs were set up as per factory specs..
(this is all in the Haynes)..albeit poorly laid out..
However when I set up the gas analyser..the result was too lean..
indicating an air leak somewhere..also the engine had a tendancy to 'hunt' on tickover.. good sign of an airleak..
So after rechecking the tightness of all the pertinent parts.. (Go on Bobster..)..
I found the airleak was at the rubber elbows of the balance pipe between the manifolds..
and
Jubilee clips will suffice for now.. I don't know if these parts will still be available...
So.. with the tickover regulated..2 1/2 turns out of the base idle screws.. and the top left airscrew ar about 2 turns..
I was able to set the idle mixture..
13.2 on the scale..
Another point to watch out for are the actuator arms.. these have been maltreated in the past..the plastic ball joints are tired.. and if the setting is wrong
you will not be able to make the throttle stop screw 'sit' properly at idle..
Here is one..
The engine has now run for several hours..so the next step will be to fit a 'contactless' SVDA distributor..
Then set it up at 8 degrees BTDC,
Check everything again..take off my flywheel.fit the torque converter plate..alternator..drain the oil..fit new oil filter and rocker box gaskets..
Get it weighed. and prepared for despatch..
Cordialement..
-
sarran1955
- Registered user
- Posts: 1504
- Joined: 11 Mar 2009, 18:51
- 80-90 Mem No: 6754
- Location: 6, les Hauts de Sarran 19800, Sarran ,Limousin ,FRANCE
Re: Oops!!
Hello,
Don't forget you will have to ream out the new valve guides after fitting.... as they will be tight in the middle where they have been squeezed by the head, and 'mushroomed' from when you drive them in..
They want to 'just pass'
Beware of the brass shavings when reaming.. they are VERY VERY sharp.
Cordialement,
bri-on-1 wrote: i have made good progress on the heads today and pulled out all the valve guides as there was just too much play in them.
Brian.
Don't forget you will have to ream out the new valve guides after fitting.... as they will be tight in the middle where they have been squeezed by the head, and 'mushroomed' from when you drive them in..
They want to 'just pass'
Beware of the brass shavings when reaming.. they are VERY VERY sharp.
Cordialement,
-
sarran1955
- Registered user
- Posts: 1504
- Joined: 11 Mar 2009, 18:51
- 80-90 Mem No: 6754
- Location: 6, les Hauts de Sarran 19800, Sarran ,Limousin ,FRANCE
Re: Oops!!
Hello,
Snowing here..
Maybe a ski this weekend.. if the sun shines
OK.. onto matters in hand.. yesterday evening I spent 1/2 an hour setting up the chokes..
Ambient about 4 Celsius..
The right hand (slave) carb is the one fitted with an after market choke..
Well it was not fully closed initially, so we need to move the outer case to tension the spring that bit more.. note the alignment marks..

The next thing to investigate is the reason why the throttle pushrod adjusting screw is so far back..

and for that we have to look at the adjusting links between the big throttle bar and the carb actuator arm itself..

Ho Hum it would appear that the previous artist had wound these right out..to compensate for the pushrod perhaps..
and thats why the throttle stops were not touching their 'stops' at tickover...
if you can call 1800 rpm..tickover....
So all the adjusters are set to mid way..being sure that the throttle stops are touching..closed..
(remember we set the gap of the throttle butterflies during the build up)

Be careful with the adjuster plastic balljounts.. they are very well made with a fastening clip on the bottom.. leave the bottom ones unclipped
during setting as they will be 'on and off' a few times..
Oh.. and as the rh carb is the mirror of the lh..the adjusting screw reversed threads are mirrored..
I'll let you work that one out...
So now we have done the throttle butterfly setting..the idle mixture screws (start at 2 1/2 turns), and the throttle linkages..
So now we should be able to set the idle speed with the main air control screw on the top of the master lh carb..
and so the engine starts to run better..

So tonight.. couldn’t resist..
0 celcius..
ignition on..open the throttles fully once.. check the choke flaps are fully closed,,
!/4 turn and starts first time..

That's steam by the way...
Starting to run nicely now..

and 30 psi or 2 bar oil pressure at tick-over..
So that’s it till the new distributor arrives..

and no it's not an 009.. its a 034 SVDA.. which we will try with the original coil ..
Thanks for the comments.. and keep the questions coming..
Cordialement,
Snowing here..
Maybe a ski this weekend.. if the sun shines
OK.. onto matters in hand.. yesterday evening I spent 1/2 an hour setting up the chokes..
Ambient about 4 Celsius..
The right hand (slave) carb is the one fitted with an after market choke..
Well it was not fully closed initially, so we need to move the outer case to tension the spring that bit more.. note the alignment marks..
The next thing to investigate is the reason why the throttle pushrod adjusting screw is so far back..
and for that we have to look at the adjusting links between the big throttle bar and the carb actuator arm itself..
Ho Hum it would appear that the previous artist had wound these right out..to compensate for the pushrod perhaps..
and thats why the throttle stops were not touching their 'stops' at tickover...
if you can call 1800 rpm..tickover....
So all the adjusters are set to mid way..being sure that the throttle stops are touching..closed..
(remember we set the gap of the throttle butterflies during the build up)
Be careful with the adjuster plastic balljounts.. they are very well made with a fastening clip on the bottom.. leave the bottom ones unclipped
during setting as they will be 'on and off' a few times..
Oh.. and as the rh carb is the mirror of the lh..the adjusting screw reversed threads are mirrored..
I'll let you work that one out...
So now we have done the throttle butterfly setting..the idle mixture screws (start at 2 1/2 turns), and the throttle linkages..
So now we should be able to set the idle speed with the main air control screw on the top of the master lh carb..
and so the engine starts to run better..
So tonight.. couldn’t resist..
0 celcius..
ignition on..open the throttles fully once.. check the choke flaps are fully closed,,
!/4 turn and starts first time..
That's steam by the way...
Starting to run nicely now..
and 30 psi or 2 bar oil pressure at tick-over..
So that’s it till the new distributor arrives..
and no it's not an 009.. its a 034 SVDA.. which we will try with the original coil ..
Thanks for the comments.. and keep the questions coming..
Cordialement,
-
81AirCooled
- Registered user
- Posts: 113
- Joined: 02 Aug 2010, 08:40
- 80-90 Mem No: 8770
- Location: Munich, Germany
Re: Oops!!
Dizzy is on it's way John. I'm getting very excited I must admit.
1981 2.0l Aircooled ex German post office van coverted to camper.
-
sarran1955
- Registered user
- Posts: 1504
- Joined: 11 Mar 2009, 18:51
- 80-90 Mem No: 6754
- Location: 6, les Hauts de Sarran 19800, Sarran ,Limousin ,FRANCE
Re: Oops!!
Hello,
Don't start holding your breath yet..
Tonight.. much warmer..
Start engine..
RHS (slave) carb choke butterfly..
sticks closed, but springs open with a light prod..
remember this is the one with the aftermarket thermospring..
well.. because it is presumably missing a bush the butterfly has far too much 'play' along the shaft..
Causing this...

which is sufficient' for the knife edge of the butterfly to burr up the side of the venturi..
It'll buff out..
But I will have to look for a new thermospring..
Any way..
For the video I want to demonstrate how to check the synchronisation of the carbs can be checked by measuring the airflow..
Either by vacuum gauges, or by a venturi gauge..
The reason for this is to show how to get the carbs balanced in real air terms.. and not by the master/slave method..
this is because while older carbs run well on petrol containing 10% ethanol, the Brazilians have been doing it for years..
it means that the specified setting for the throttle butterfly may no longer be correct..
also..how do you know that you have it set on one side REALLY equally with the other..
So the research department really blew the budget on this one.....
There is a rubber seal between (eventually) the air cleaner and warm air riser..

This is removed, oiled and put upside down on the carb thus:

So that it will accept my gunson venturi gauge.. nominally for for SU carbs and so on
Allowing a clear and easy reading both sides..

In fact the rhs is higher.. by 3 to 2 1/2 for the left..
So I will recheck the butterfly clearances..
Cordialement,
81AirCooled wrote: I'm getting very excited I must admit.
Don't start holding your breath yet..
Tonight.. much warmer..
Start engine..
RHS (slave) carb choke butterfly..
sticks closed, but springs open with a light prod..
remember this is the one with the aftermarket thermospring..
well.. because it is presumably missing a bush the butterfly has far too much 'play' along the shaft..
Causing this...
which is sufficient' for the knife edge of the butterfly to burr up the side of the venturi..
It'll buff out..
But I will have to look for a new thermospring..
Any way..
For the video I want to demonstrate how to check the synchronisation of the carbs can be checked by measuring the airflow..
Either by vacuum gauges, or by a venturi gauge..
The reason for this is to show how to get the carbs balanced in real air terms.. and not by the master/slave method..
this is because while older carbs run well on petrol containing 10% ethanol, the Brazilians have been doing it for years..
it means that the specified setting for the throttle butterfly may no longer be correct..
also..how do you know that you have it set on one side REALLY equally with the other..
So the research department really blew the budget on this one.....
There is a rubber seal between (eventually) the air cleaner and warm air riser..
This is removed, oiled and put upside down on the carb thus:
So that it will accept my gunson venturi gauge.. nominally for for SU carbs and so on
Allowing a clear and easy reading both sides..
In fact the rhs is higher.. by 3 to 2 1/2 for the left..
So I will recheck the butterfly clearances..
Cordialement,
-
sarran1955
- Registered user
- Posts: 1504
- Joined: 11 Mar 2009, 18:51
- 80-90 Mem No: 6754
- Location: 6, les Hauts de Sarran 19800, Sarran ,Limousin ,FRANCE
Re: Oops!!
Hello,
Rain and Snow here..
Decided to give the computer a big overhaul..
gearbox..back axles.. but didn't touch the 'twin core' engine..

Thanks to Nr 1 son..
Meanwhile.. 'Ooops' gets weighed..

using a calf weighing device..(non homologated)...

Giving an 'all up' weight..of 143 kgs..

I'm going to get a quote for delivery from work...
This is what the computer looks like tonight.. ready for video editing..

Cordialement,
Rain and Snow here..
Decided to give the computer a big overhaul..
gearbox..back axles.. but didn't touch the 'twin core' engine..
Thanks to Nr 1 son..
Meanwhile.. 'Ooops' gets weighed..
using a calf weighing device..(non homologated)...
Giving an 'all up' weight..of 143 kgs..
I'm going to get a quote for delivery from work...
This is what the computer looks like tonight.. ready for video editing..
Cordialement,
-
ed_the_robot

- Registered user
- Posts: 64
- Joined: 13 Apr 2012, 21:08
- 80-90 Mem No: 11937
- Location: Nottingham
Re: Oops!!
Ubuntu, good man
Owner of Doris, the Aircooled CT Campervan and Liberty Belle the 1.6 "GTD" Single Cab
-
Titus A Duxass

- Registered user
- Posts: 5777
- Joined: 24 Nov 2007, 08:22
- 80-90 Mem No: 4475
- Location: Cologne
-
benlawlor85

- Registered user
- Posts: 45
- Joined: 27 Feb 2013, 22:40
- 80-90 Mem No: 12078
- Location: St Ives, Duchy of Cornwall.
-
sarran1955
- Registered user
- Posts: 1504
- Joined: 11 Mar 2009, 18:51
- 80-90 Mem No: 6754
- Location: 6, les Hauts de Sarran 19800, Sarran ,Limousin ,FRANCE
Re: Oops!!
Hello,
Bit of luck this evening..
I worked Friday afternoon overtime.. when there was a delivery of gearboxes (from Italy) and drive chain (from China)..
I was able to grab the standard pallette sized ..China chain box..

Cost 20€.. goes into the Xmas fund..
It will be too late for this motor.. but I've just got this..

analog engine analyser
from the States..
which matches my gas analyser..

and is soooo compact..
So 'Ooops' for this weekend is.... rectify the rhs carb..
and fit the new SVDA distributor...
followed by alternator and aircleaner....
......................
I'm going to try a test video E D I T this evening.. with the Windows XP movie maker..in the 'virtual computer' (Oracle VM virtualbox)..
Linux and Ubuntu I know little about.. but for speed and ease of use.. this is excellent...
I used to insist on a 'Windows' look alike environment.. but I am learning to work ' out of the box'..(just a little)
Cordialement,
Bit of luck this evening..
I worked Friday afternoon overtime.. when there was a delivery of gearboxes (from Italy) and drive chain (from China)..
I was able to grab the standard pallette sized ..China chain box..
Cost 20€.. goes into the Xmas fund..
It will be too late for this motor.. but I've just got this..
analog engine analyser
from the States..
which matches my gas analyser..
and is soooo compact..
So 'Ooops' for this weekend is.... rectify the rhs carb..
and fit the new SVDA distributor...
followed by alternator and aircleaner....
......................
I'm going to try a test video E D I T this evening.. with the Windows XP movie maker..in the 'virtual computer' (Oracle VM virtualbox)..
Linux and Ubuntu I know little about.. but for speed and ease of use.. this is excellent...
I used to insist on a 'Windows' look alike environment.. but I am learning to work ' out of the box'..(just a little)
Cordialement,