Gunther's Body Makeover Commences

Thin bits of metal and bright blue light.

Moderators: User administrators, Moderators

Locked
Plasticman
Trader
Posts: 8077
Joined: 12 Oct 2005, 20:55
80-90 Mem No: 1948
Location: lincolnshire

Re: Gunther's Body Makeover Commences

Post by Plasticman »

should have brazed it :rofl
sorry couldnt resist
mm

User avatar
DibDub
Registered user
Posts: 67
Joined: 12 Jan 2013, 15:47
80-90 Mem No: 11951
Location: South Devon

Re: Gunther's Body Makeover Commences

Post by DibDub »

I've read through all of the pages and this is such a useful thread.
Thanks for taking the time to post all the information and the pictures. :ok
1989 1.9 watercooled HighTop T25

mm289
Registered user
Posts: 314
Joined: 31 Dec 2010, 22:00
80-90 Mem No: 9111
Location: Dover, Kent

Re: Gunther's Body Makeover Commences

Post by mm289 »

No worries, just wish it was a bit quicker :roll:

MM
'89 Autosleeper Trident
2.1 DJ
Member 9111

mm289
Registered user
Posts: 314
Joined: 31 Dec 2010, 22:00
80-90 Mem No: 9111
Location: Dover, Kent

Re: Gunther's Body Makeover Commences

Post by mm289 »

Got a few days off so chance to do a bit more on the roof repair.

First off tidied up the bits around the front of the a-post. Getting the brazed bits off is a real PITA, used a combination of very sharp small chisel and air grinder in the end.

The biggest decision is where to cut. The rain gutters on both sides are pretty good and seperating this section caused a lot of damage on the donor roof so I have decided to leave the original gutters on and cut in the roof on the side above the gutter.

Then fitted the roof roughly and marked of where the join will be.
Image
Image

The plan is to joggle the rear edge and puddle weld then lead like Mike did on kevtherevagon. So gave myself a but of leeway (the black line) and a few minutes later with the nibbler and we are in a better place :)
Image
Image

On the o/s the replacement roof section has a bit of rust so I am trying to work around this when fitting to the original. Have cut out the worst of the rust on the original and will try and lead in the pitted bits.
Image

N/s is in better nick on the replacement so can cut a bit more of the original roof back.
Image

And trial fitted,
Image
Image

Plan is probably to seam weld the joins down the sides although have left a bit of extra metal in case I change my mind tomorrow.

Next job is to clean up the inner roof, possibly hit with some Hydrate 80 on the bits of surface rust, then tidy up the edges. Might sand and put the replacement in white 2k epoxy primer before I fit it as the red doesn't exactly match the van :shock:

At least its progress :ok

Cheers,

MM
'89 Autosleeper Trident
2.1 DJ
Member 9111

Plasticman
Trader
Posts: 8077
Joined: 12 Oct 2005, 20:55
80-90 Mem No: 1948
Location: lincolnshire

Re: Gunther's Body Makeover Commences

Post by Plasticman »

it is :D now go and buy some decent snips
mm :ok

mm289
Registered user
Posts: 314
Joined: 31 Dec 2010, 22:00
80-90 Mem No: 9111
Location: Dover, Kent

Re: Gunther's Body Makeover Commences

Post by mm289 »

metalmick8y wrote:now go and buy some decent snips
:rofl :rofl

Every update I try and put something interesting for you, deliberatley placed the tin snips in picture to see if you noticed - well done :lol:

Old pair I got in a box of tools a while back - quite sharp actually, no where near as much fun as the nibbler though. :ok

MM :ok
'89 Autosleeper Trident
2.1 DJ
Member 9111

boatbuilder
Registered user
Posts: 804
Joined: 09 Aug 2009, 21:53
80-90 Mem No: 8265
Location: County Monaghan, Ireland

Re: Gunther's Body Makeover Commences

Post by boatbuilder »

Aviation snips are a great job.
1984 1.9D (AEF Code) T25 tintop

Plasticman
Trader
Posts: 8077
Joined: 12 Oct 2005, 20:55
80-90 Mem No: 1948
Location: lincolnshire

Re: Gunther's Body Makeover Commences

Post by Plasticman »

gilbows for serious cutting
mm

mm289
Registered user
Posts: 314
Joined: 31 Dec 2010, 22:00
80-90 Mem No: 9111
Location: Dover, Kent

Re: Gunther's Body Makeover Commences

Post by mm289 »

Yep, Gilbows are best, these are "footprint" or something, British made though and can take quite a fine edge off :)

MM
'89 Autosleeper Trident
2.1 DJ
Member 9111

Plasticman
Trader
Posts: 8077
Joined: 12 Oct 2005, 20:55
80-90 Mem No: 1948
Location: lincolnshire

Re: Gunther's Body Makeover Commences

Post by Plasticman »

oh i have a small pair of prints very nice but need a new pivot bolt and they are tapered and splined and not avail :cry:
mm

mm289
Registered user
Posts: 314
Joined: 31 Dec 2010, 22:00
80-90 Mem No: 9111
Location: Dover, Kent

Re: Gunther's Body Makeover Commences

Post by mm289 »

OK, first off measured and tidied up the edge on both panels with the electric shears and measured it all up. Next job was to drop in the swage on the rear of the replacement panel so it will lip under the original roof.

Got my new joggler/joddler out but blooming hard work on oe panels which are about 1.2mm as opposed to the 1.0mm of replacement stuff. Worked my way down the whole back edge but wasn't happy with the depth of the swage so out with the jaws and after a bit of work with a disc and file the jaw had been relieved another .25mm.

This worked better, just meant I had to do the whole edge again :roll: - if I make a habit of this I can see a bead roller adding itself to the armoury :shock: Re-fitted with swage in rear allows me to check fit better.

Image

Then cleaned up both edges and used the punch end of the joggler to drop the holes in for the puddle welds.

Image
Image

Following Mick's advice when I did the sill panel I will puddle from the inside out so there is less of a visible spot on the outside surface. Where the reinforcing bar runs over the top of the door you can't get access from underneath so at the ends I will have to weld from on top.

Image

Cleaned up and dressed the windscreen frame on the original and replacement and also put a coat of Hydrate 80 on the bits of surface corrosion to neutralise it.

Image
Image

Had a couple of repairs to the top of the a pillar on both sides. this is the n/s before....

Image

and after a bit of Mig brazing to fill the hole.

Image

Also treated everything to a coat of Etchweld weld thru primer then ready to do final assembly.

Don't have clamps with long enough reach so out with the skin pins. Edges lined up nicely

Image
Image

And along the top

Image
Image

Got the front and ends tacked but ran out of time and didn't want to rush so will finish off tomorrow. The main challenge now is to get the roof sections to line up over the cab middle. It feels like the original roof is wider than the replacement so it wants to "ruck" between pins/fixings. I think it is because i need to raise the new roof so that it "stretches" and pushes against the original rather than pushing the original down to touch the new.

That probably makes no sense, but suffice to say, getting it to look flat without any big ripples/creases will be the test of how good a job I have done!!

More tomorrow :ok

MM
'89 Autosleeper Trident
2.1 DJ
Member 9111

mm289
Registered user
Posts: 314
Joined: 31 Dec 2010, 22:00
80-90 Mem No: 9111
Location: Dover, Kent

Re: Gunther's Body Makeover Commences

Post by mm289 »

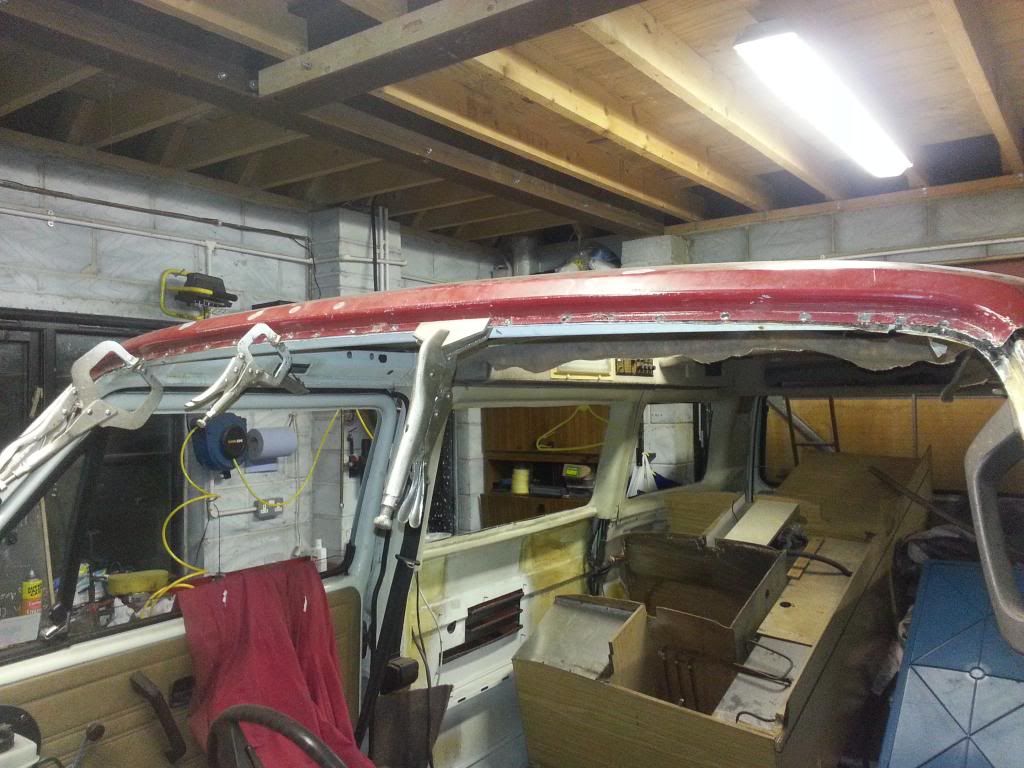
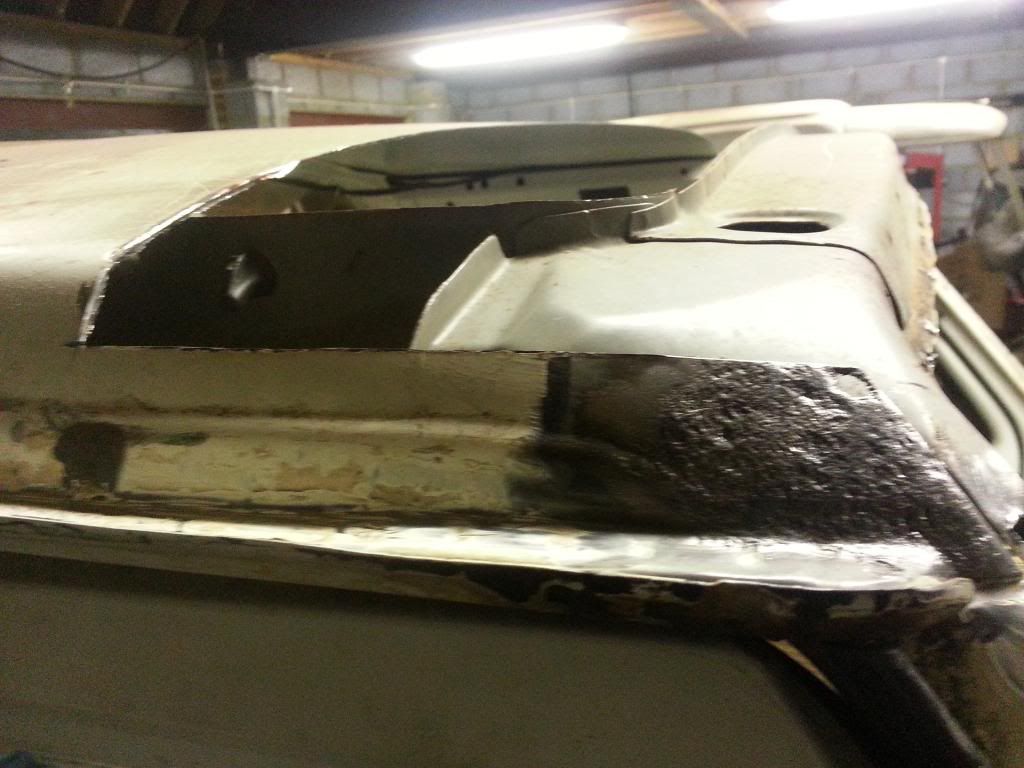
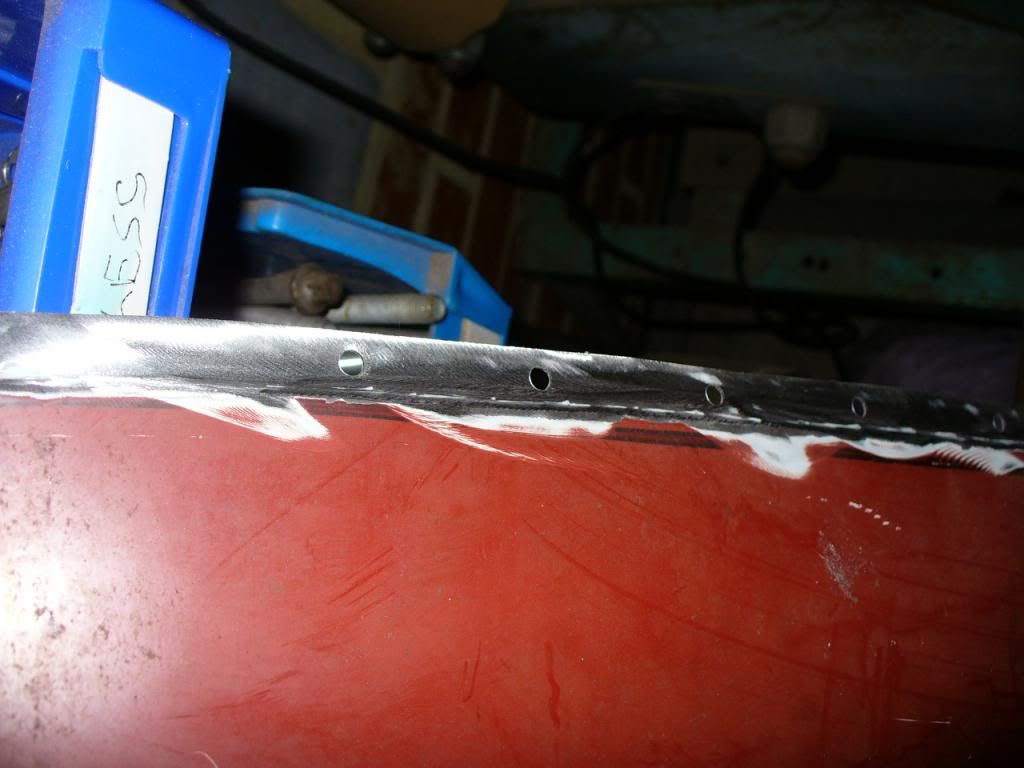
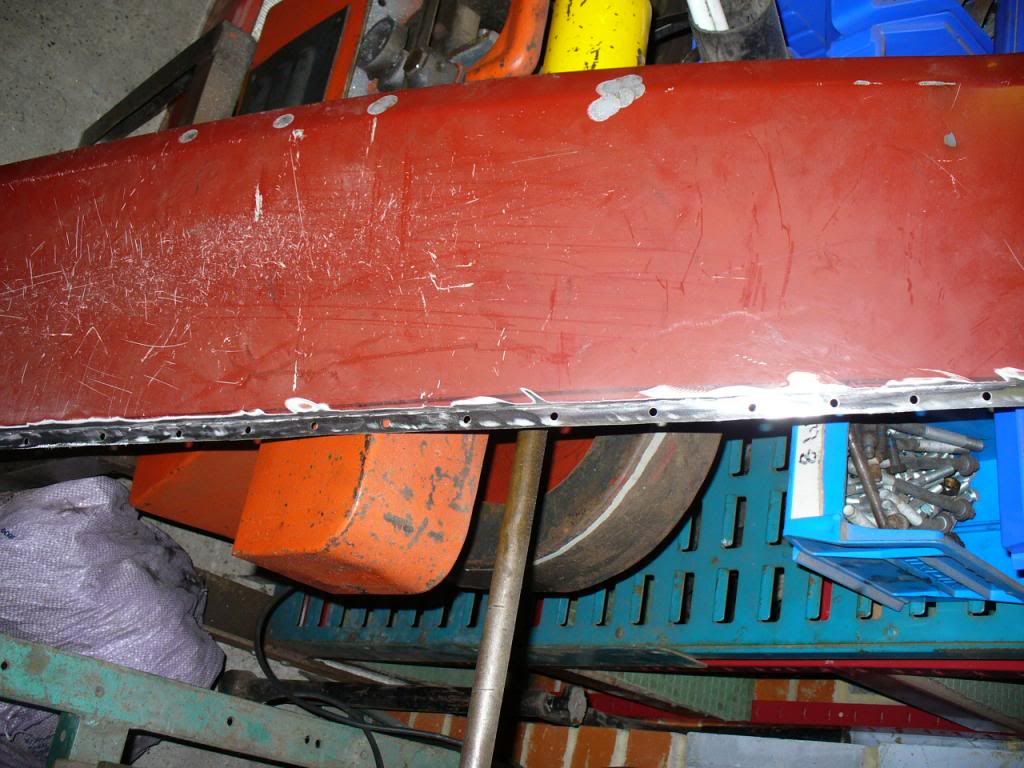
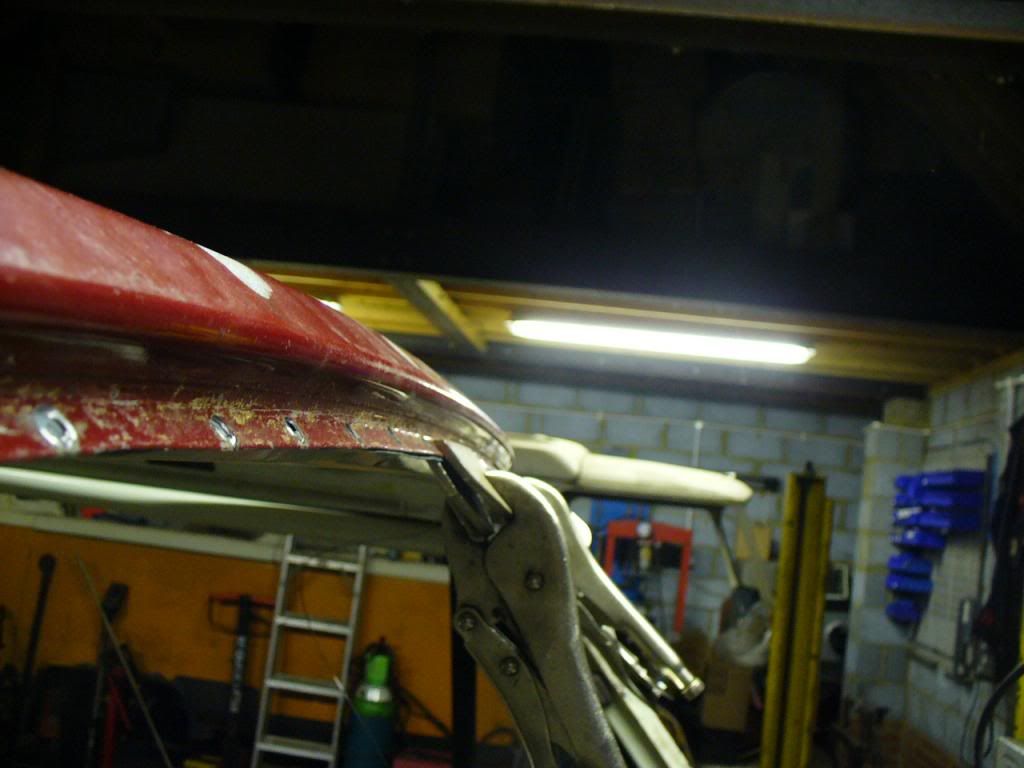
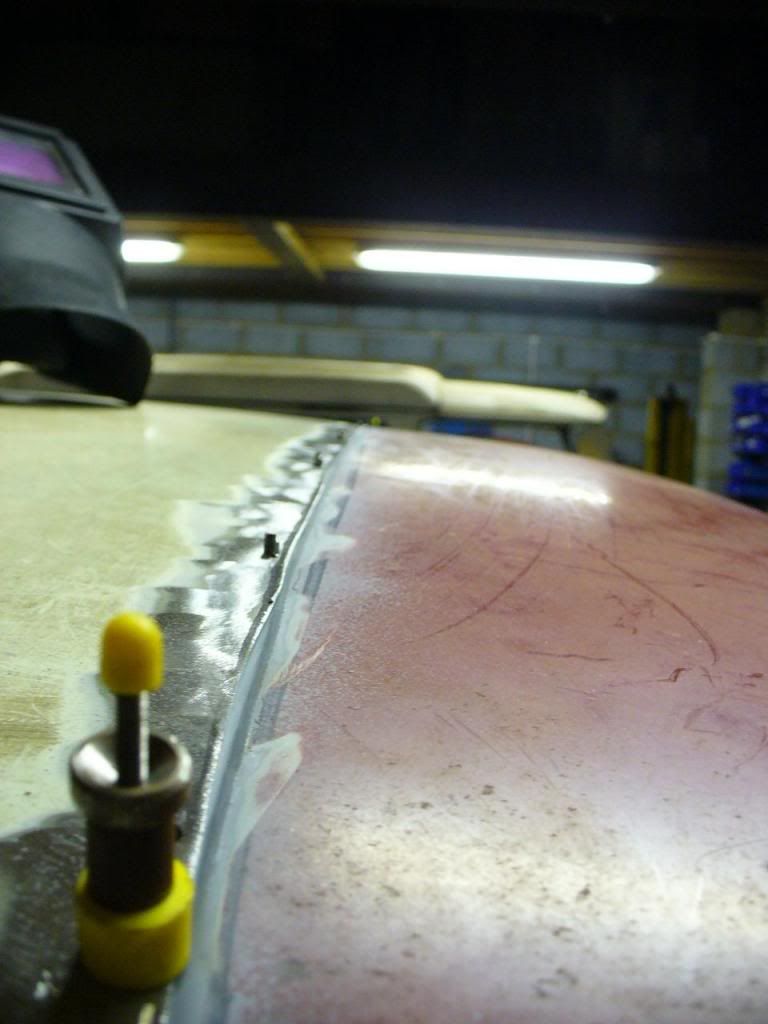
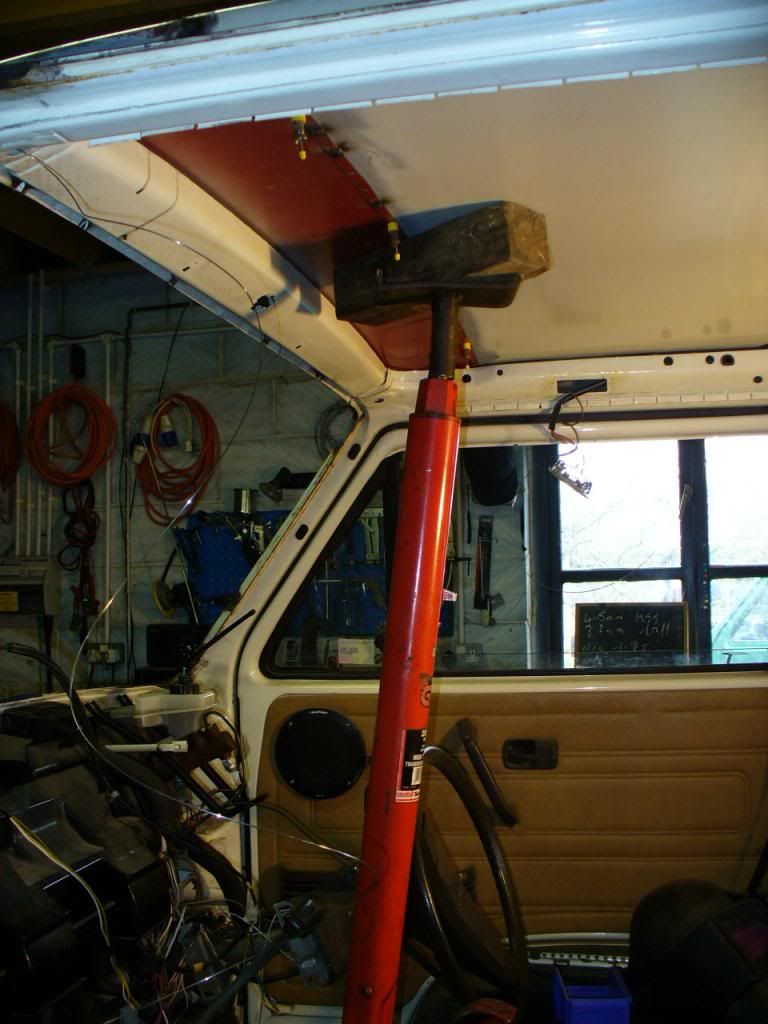
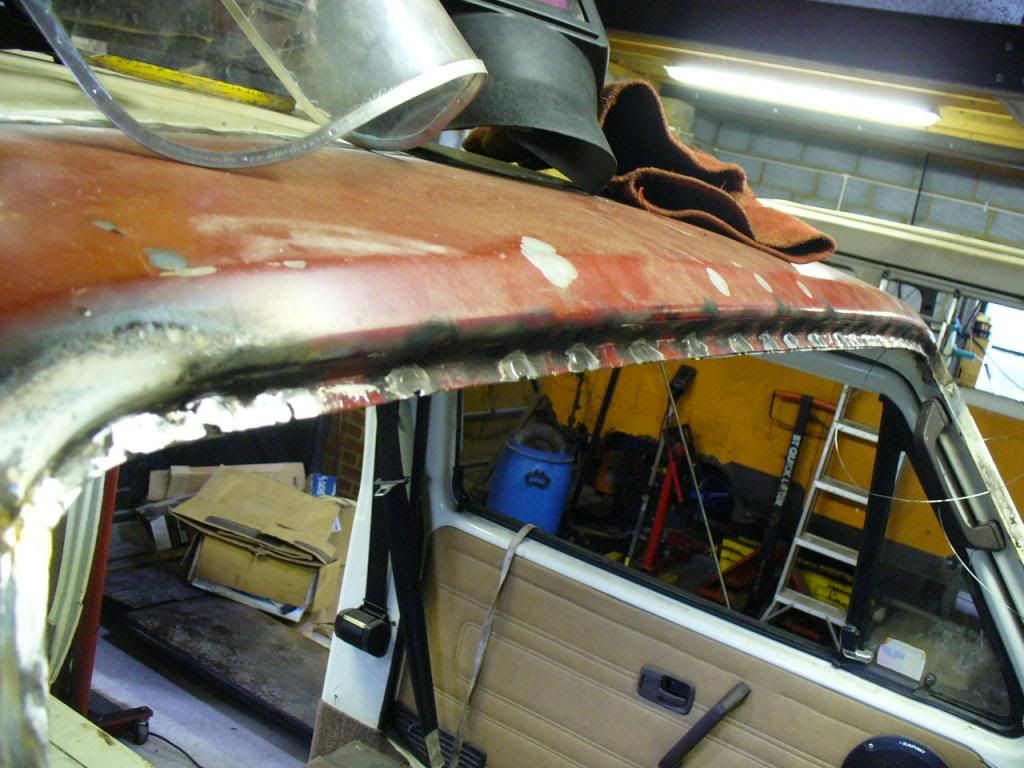
One of the challenges in fixing the roof is maintaining the shape of the "bow" in the roof. Now I know it will never be seen under the high top but I wanted to see how close I could get it. Really needed one of those extending plasterers aids but haven't got one of those so press ganged a transmission jack into use :)

Image

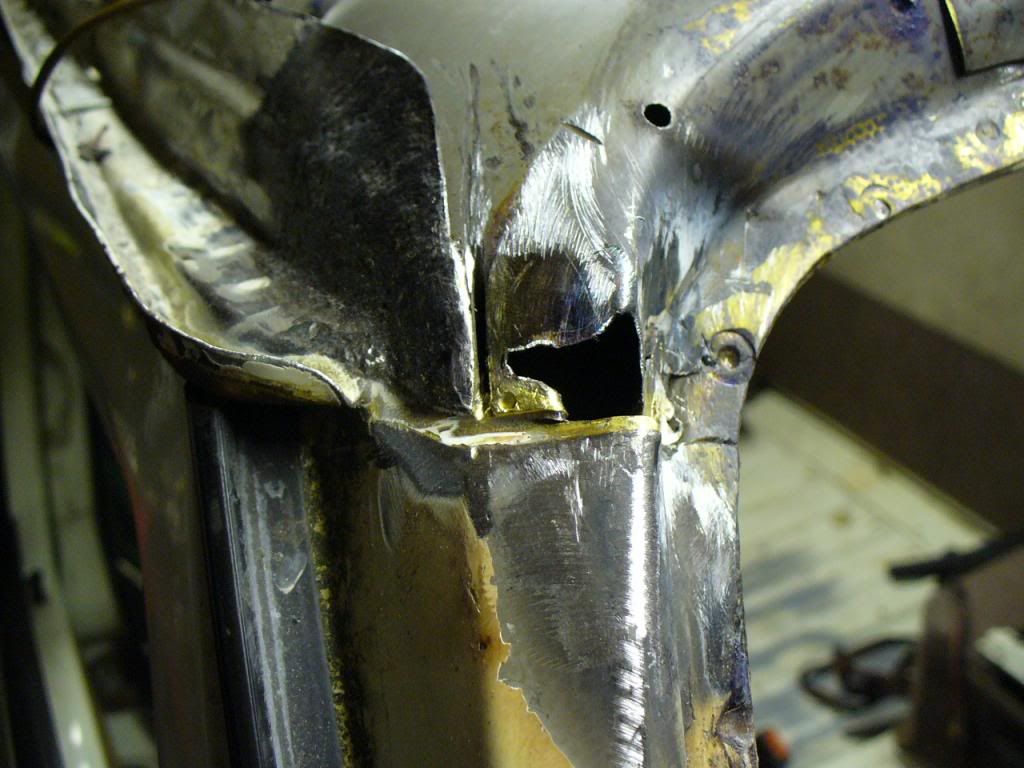
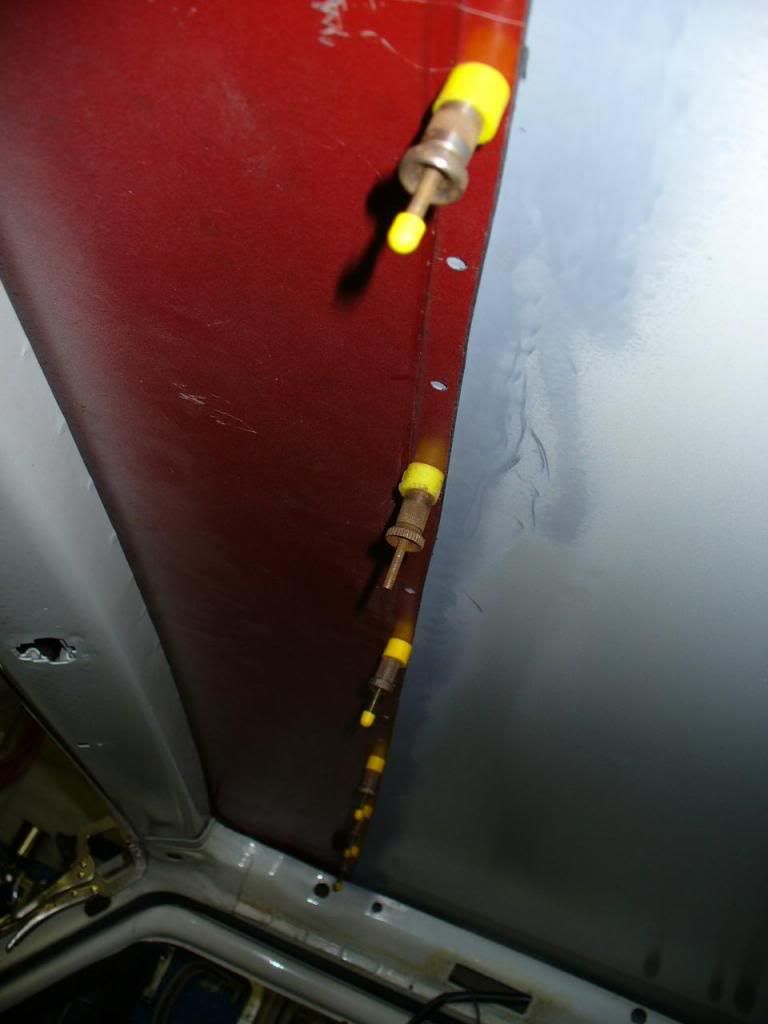
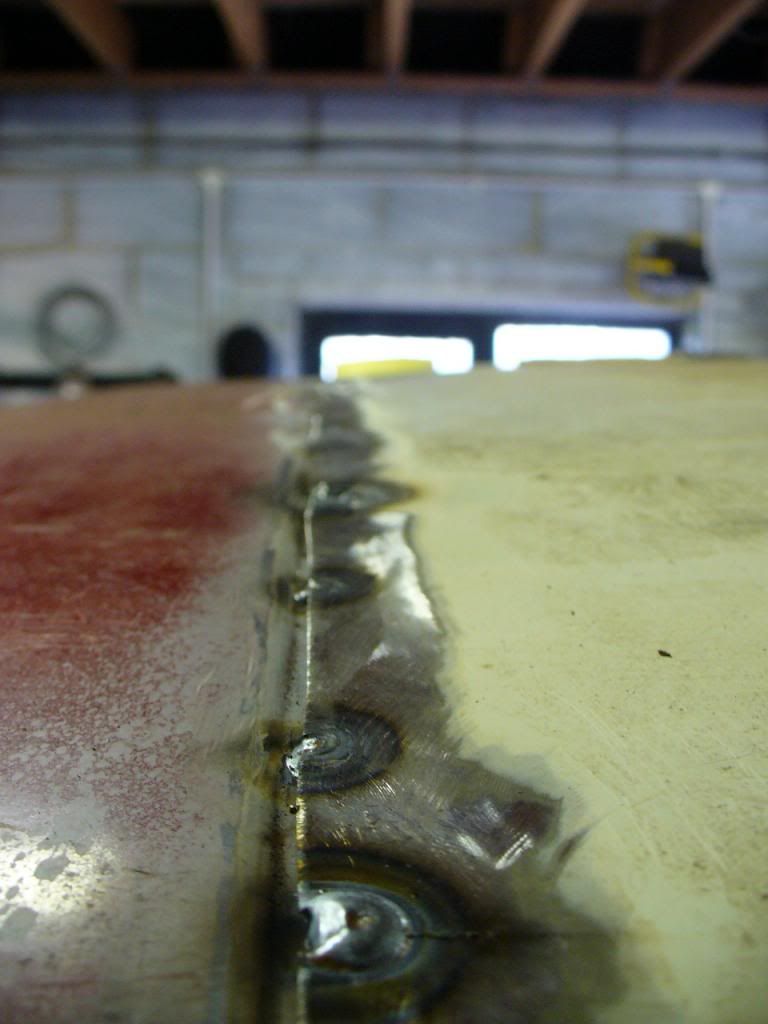
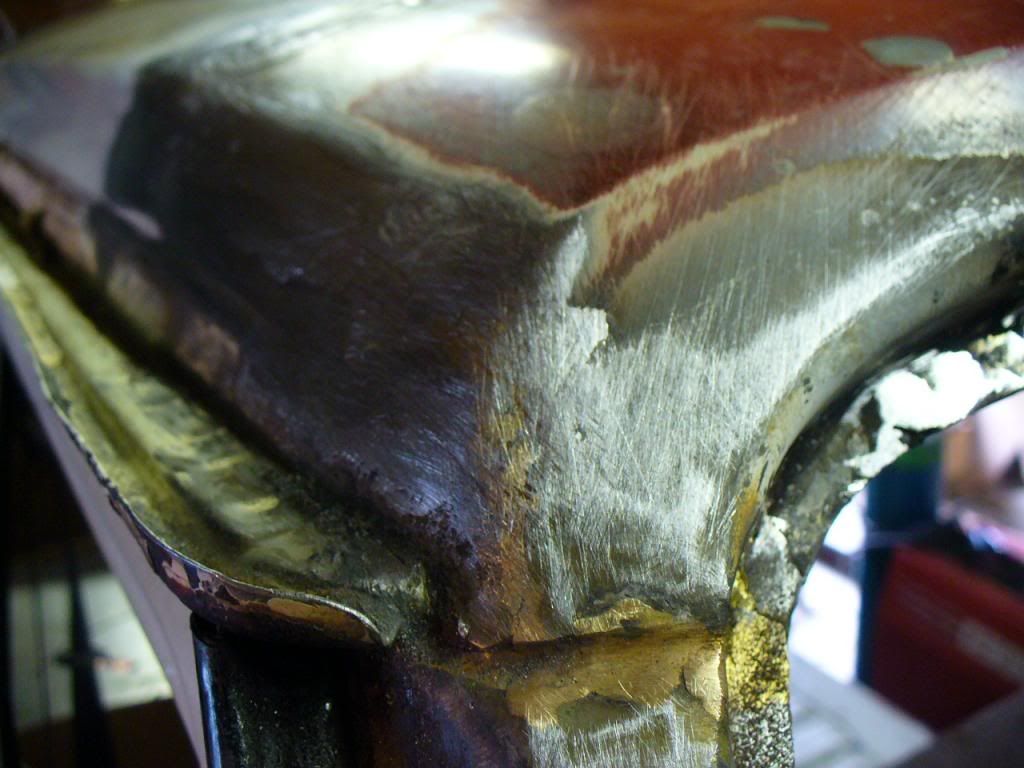
Then puddle welded starting at the edges and doing 1 in every 3 to try and keep the lines as straight as possible.

Image
Image

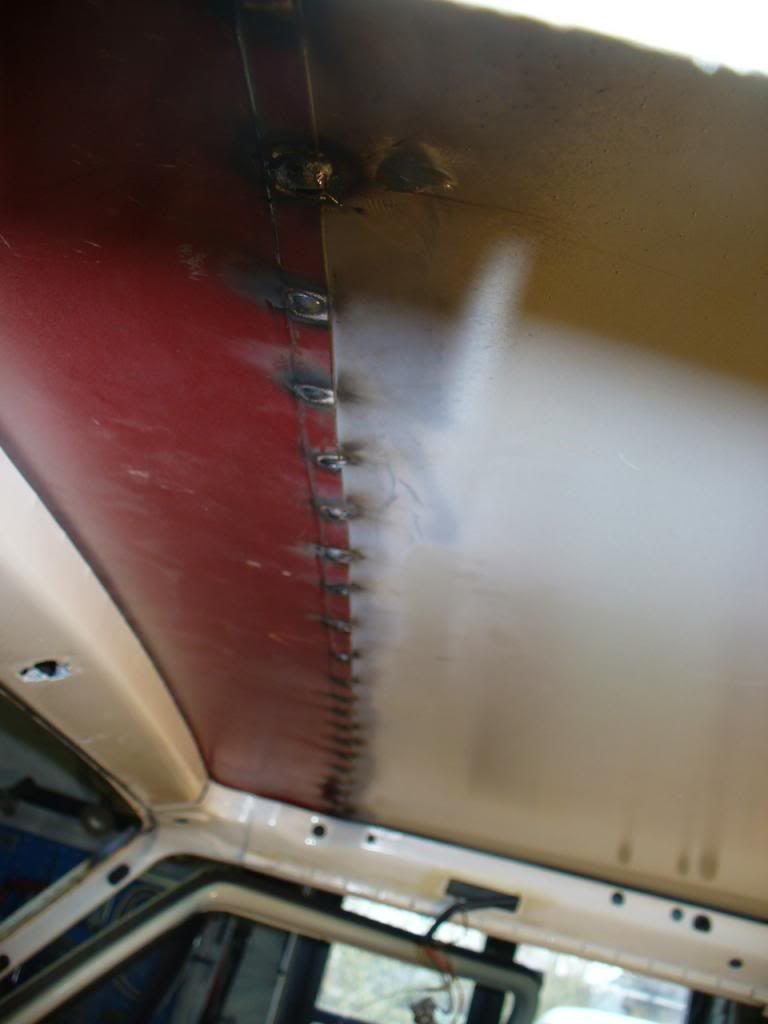
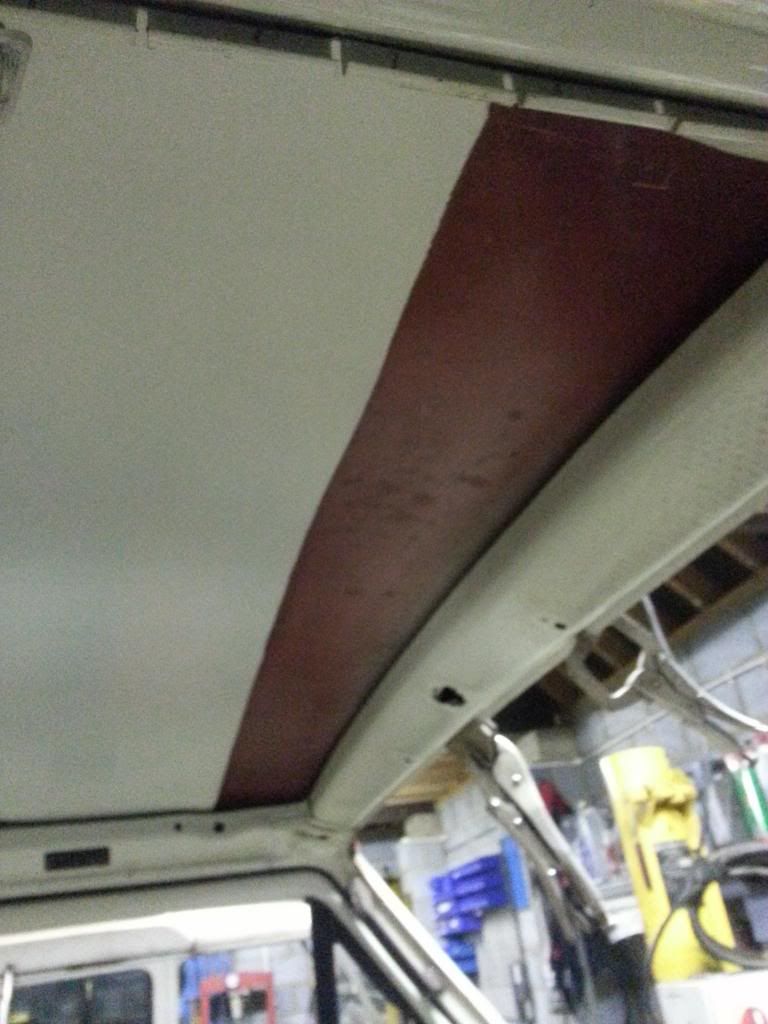
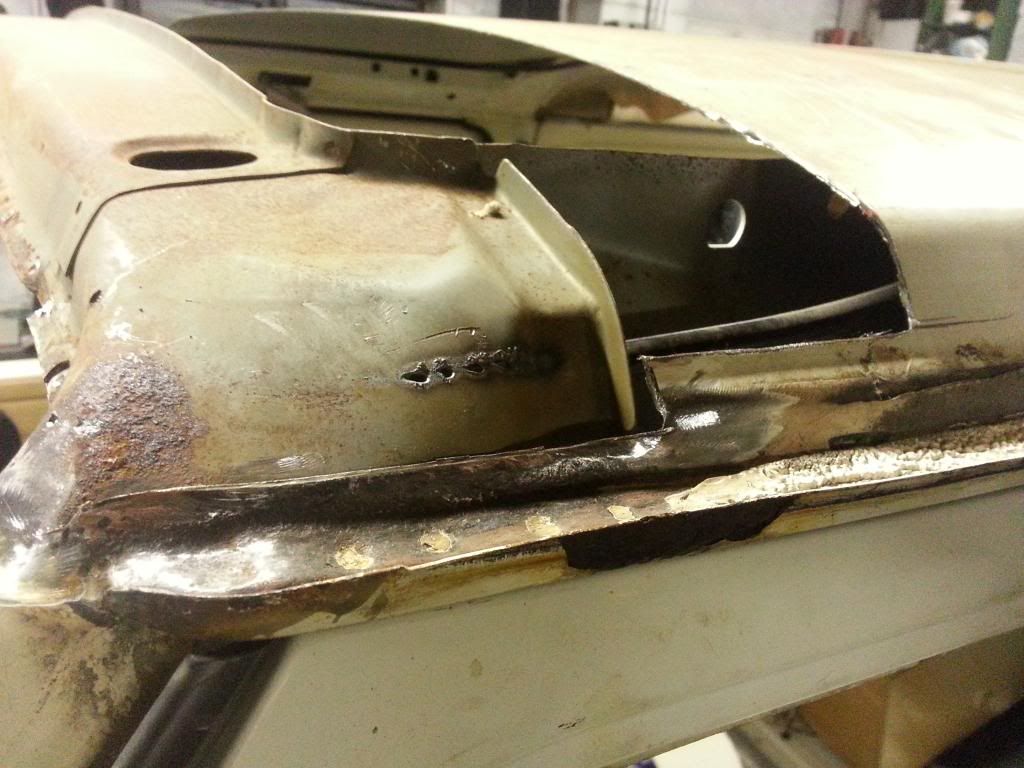
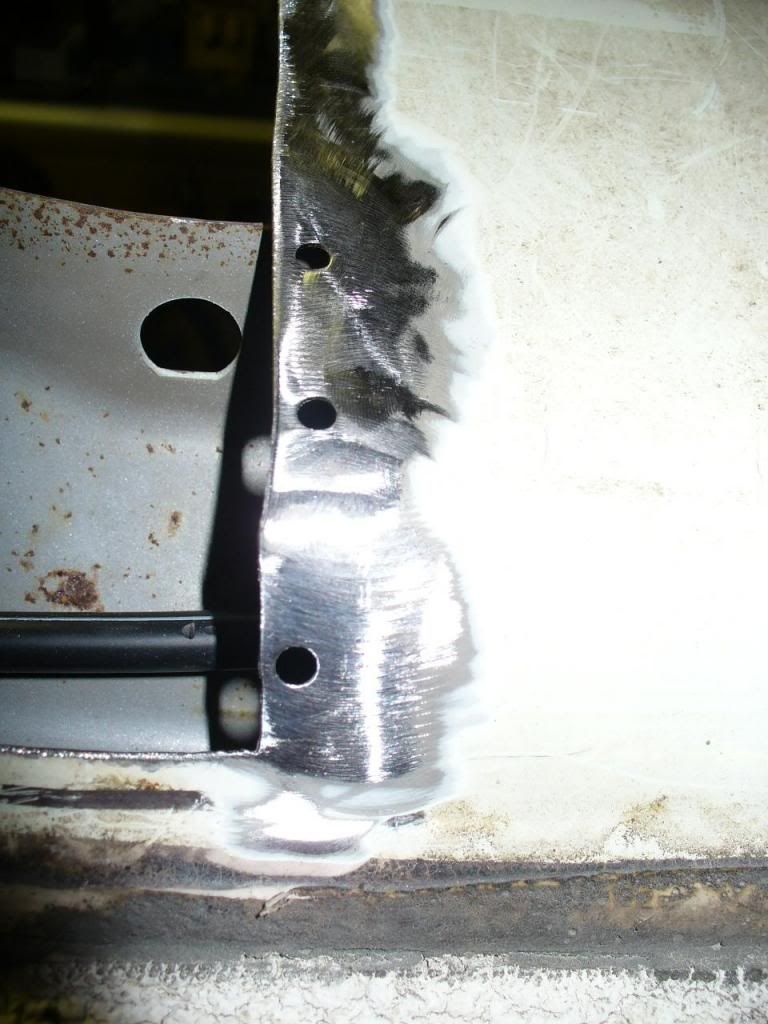
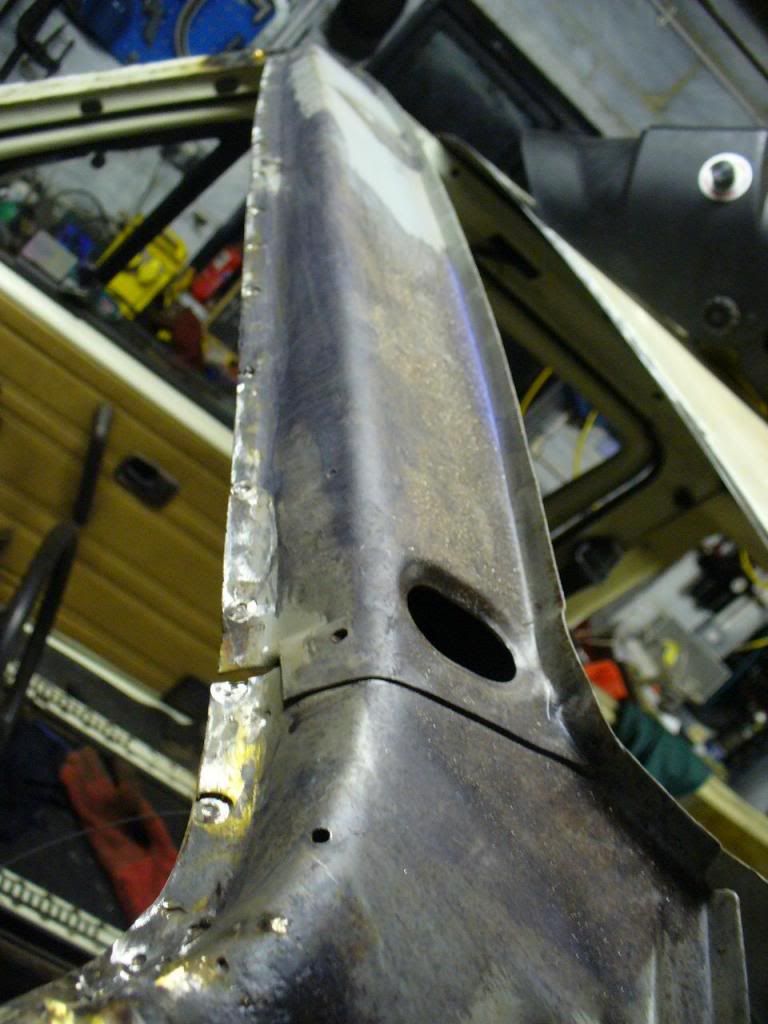
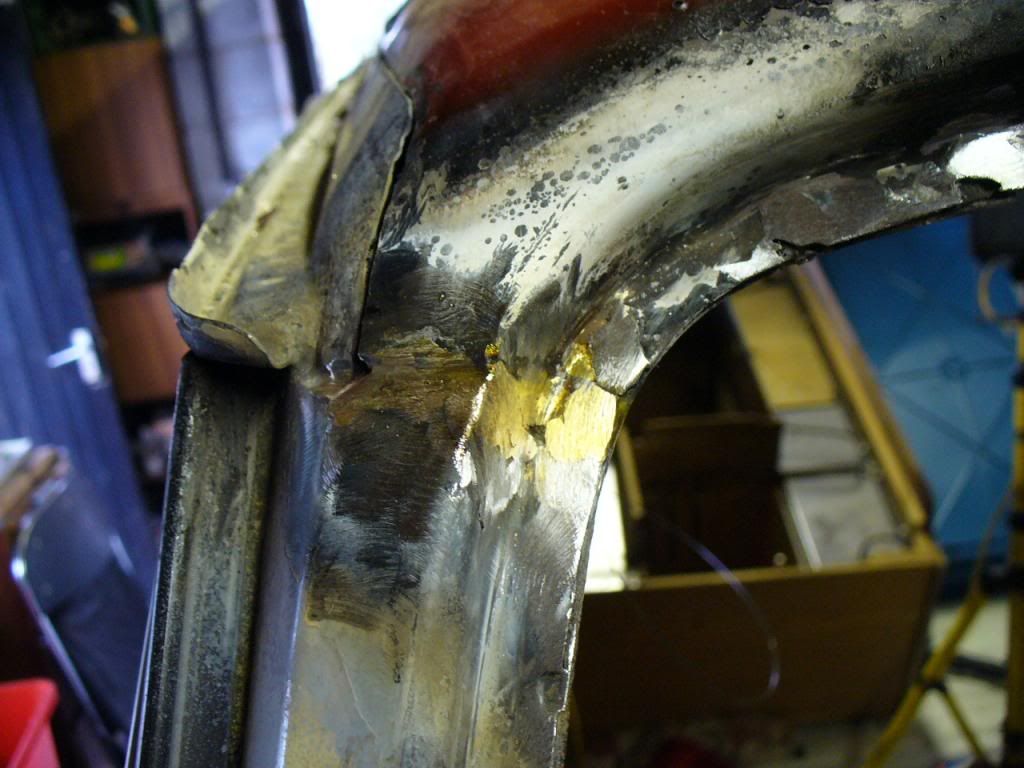
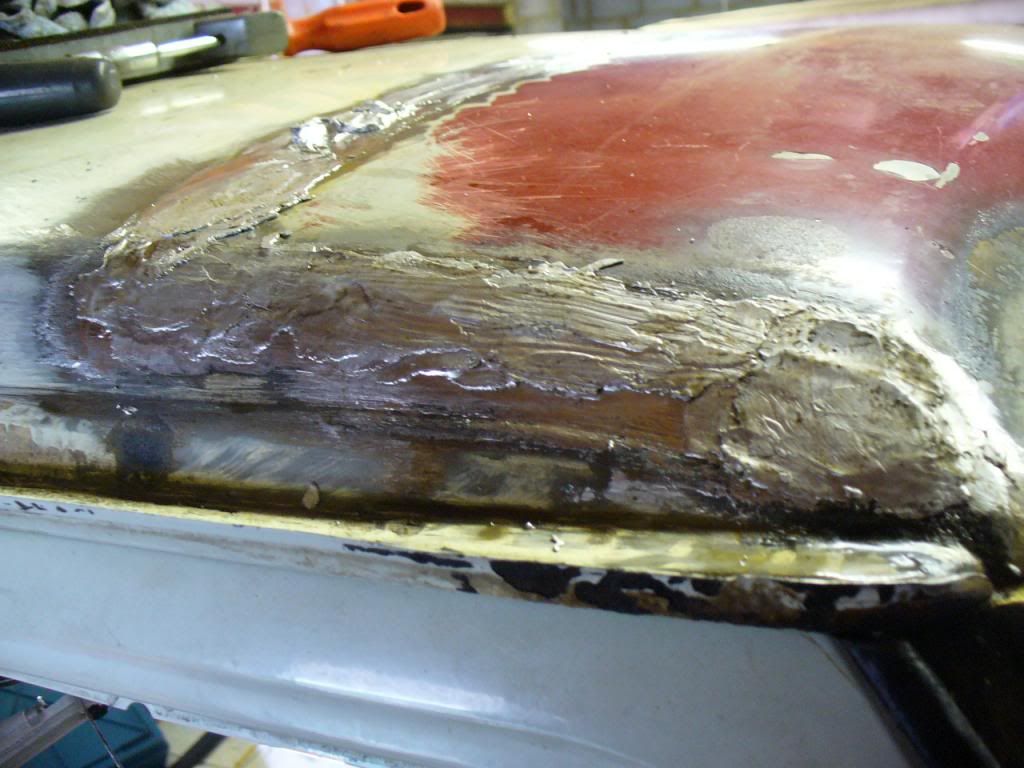
Not a bad result, Mig brazed in the corners and tidied up and then finished the windscreen surround.

Image
Image
Image

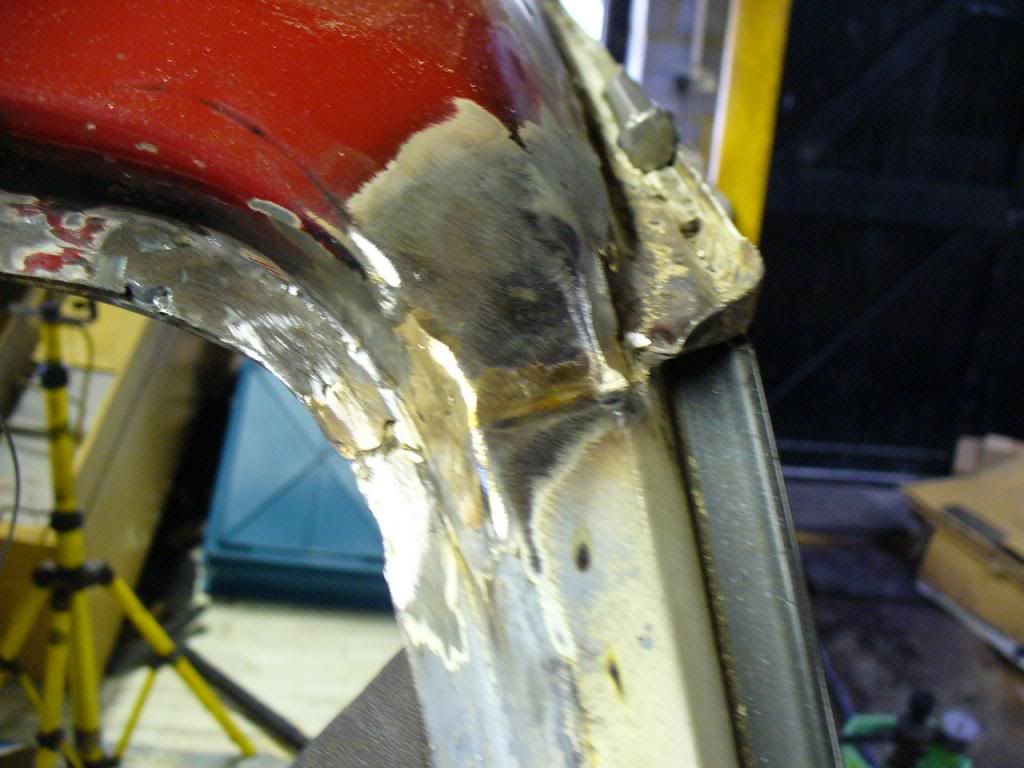
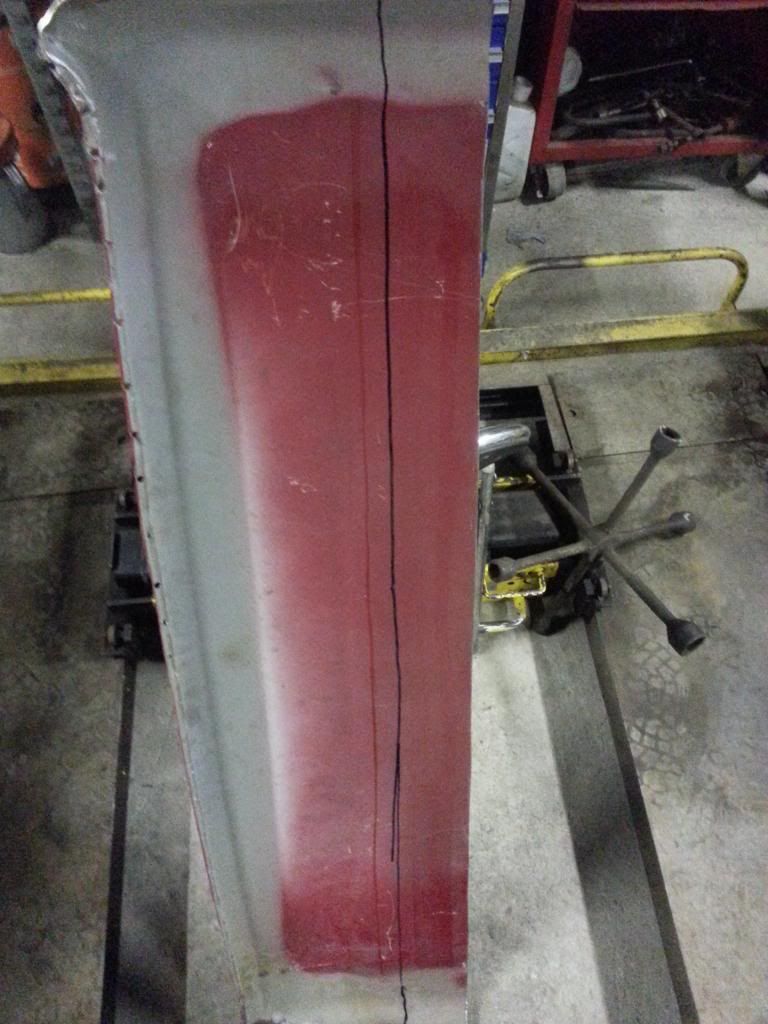
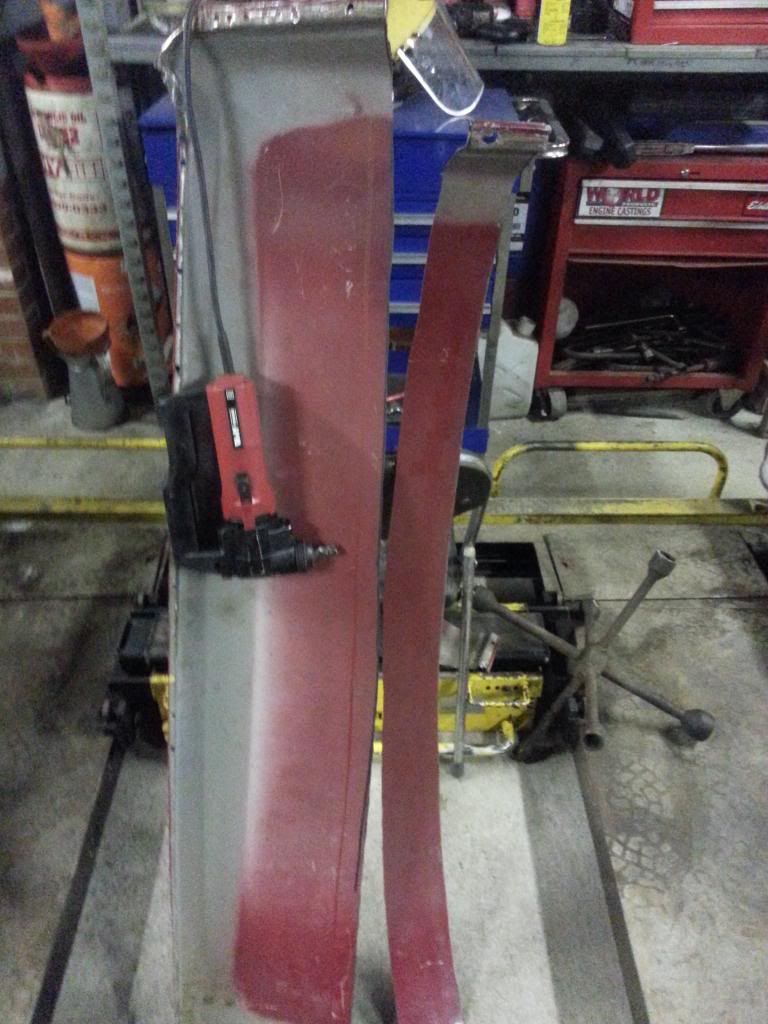
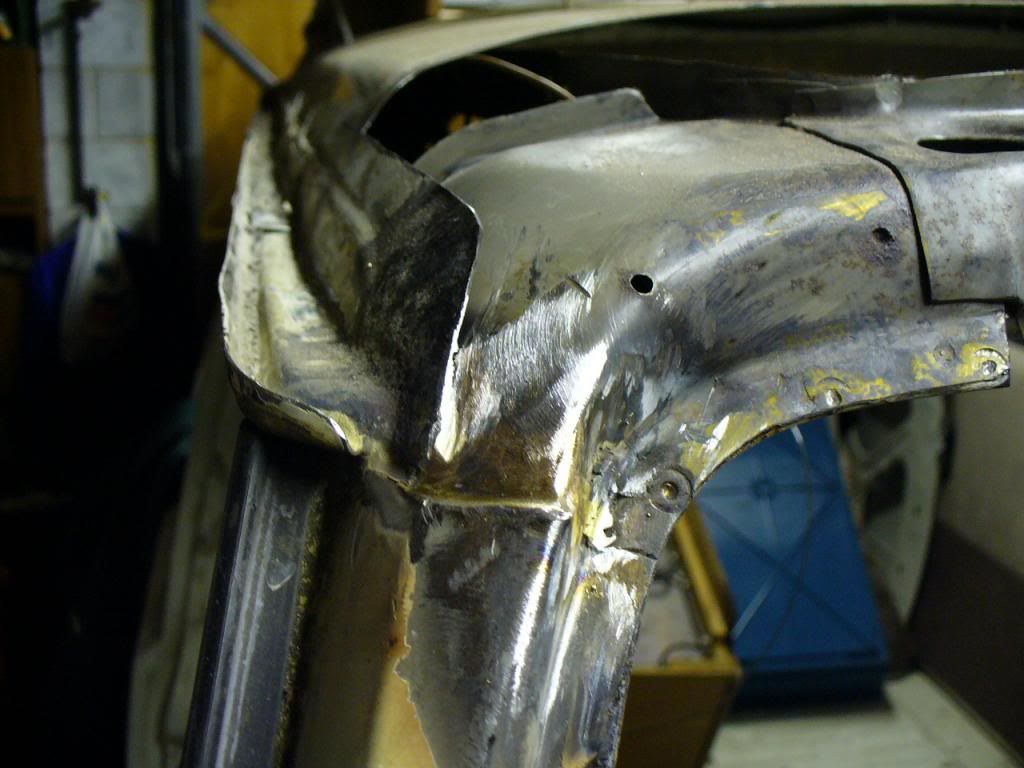
Then finished off the edges, the braze comes up as looking like rust on the camera for some reason, it looks better in real life :0

Image

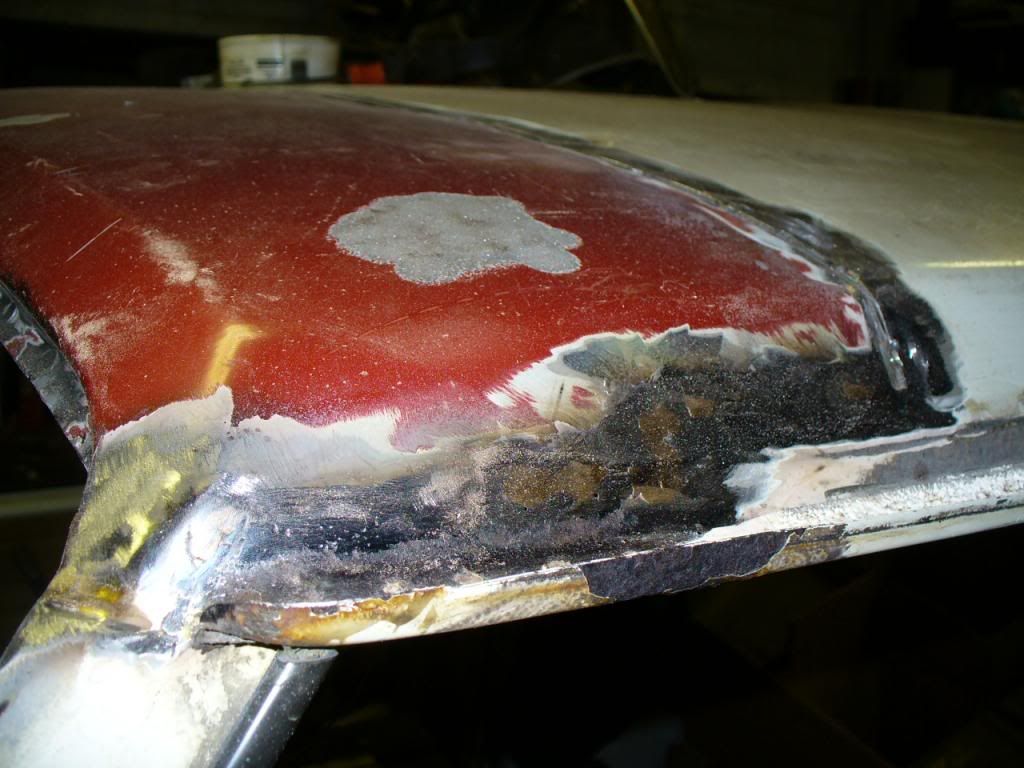
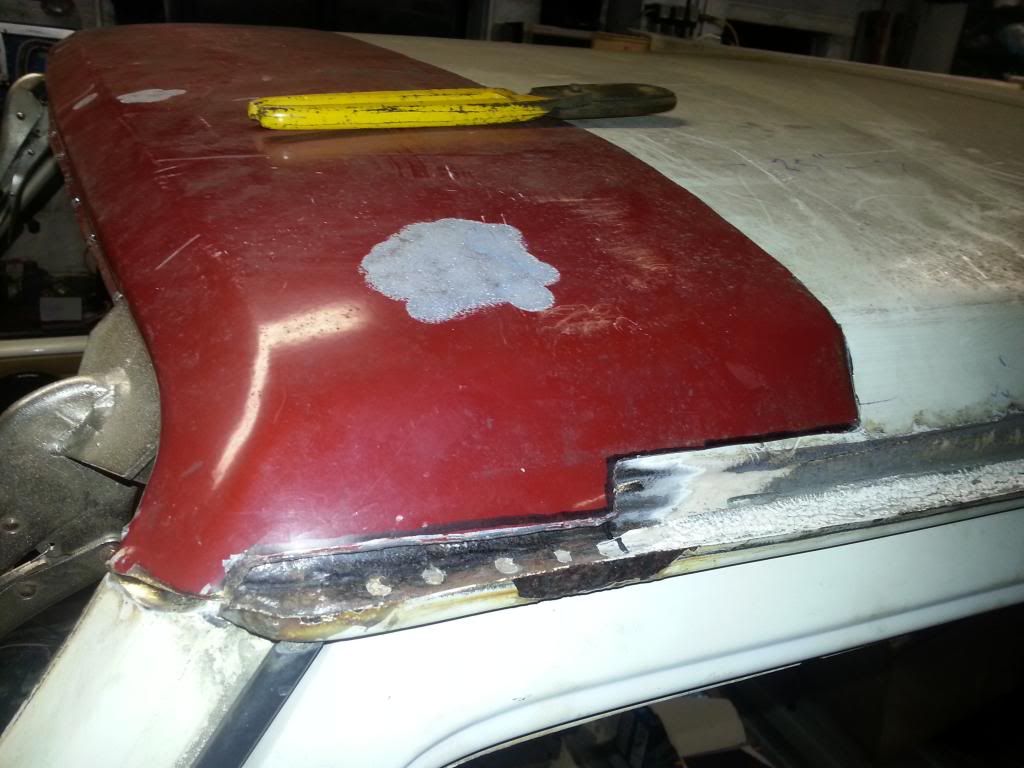
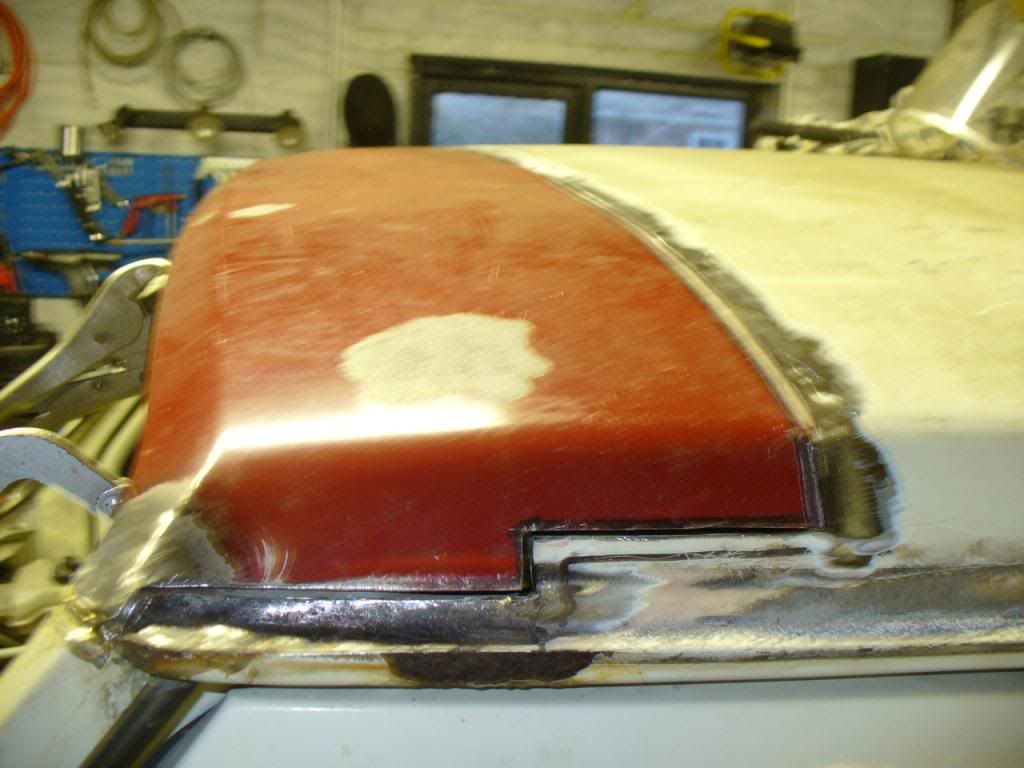
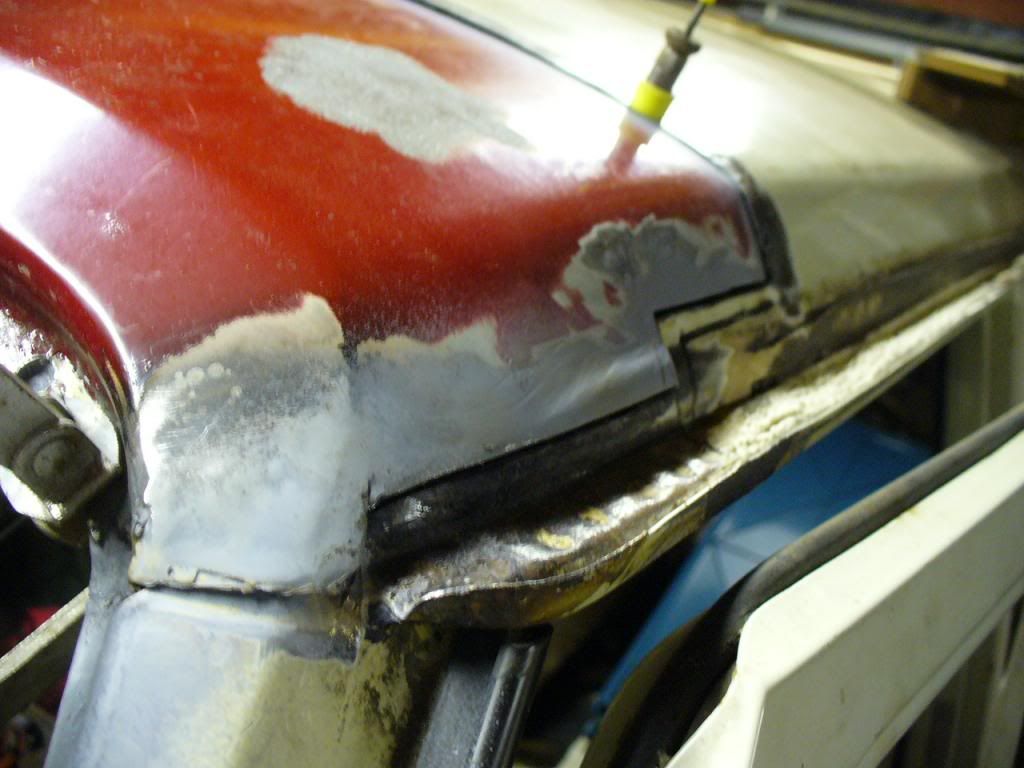
Next job was to lead in (body solder) the edges and the roof join. Again the roof doesn't really need it as it will be under the hightop but I wanted a bit of practice at leading anyway as I had struggled last time.

First attempt was a mess, couldn't bear to take any pics :oops: something wasn't right.

So after many e-mails with Mike and going back to basics I decided to check the lead sticks I had been supplied. This is what one looks like BTW

Image

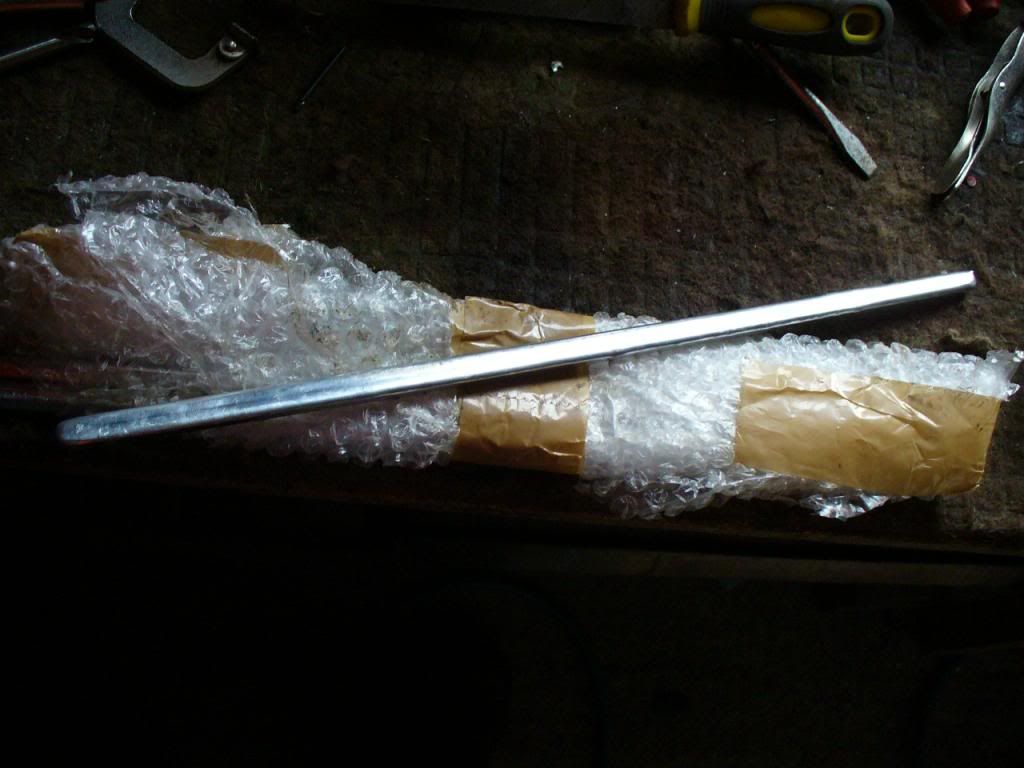
So, quick lesson is body solder.......body solder sticks are usually 70:30 lead:tin or some use 60:40, so when you buy a "60:40" it is usually 60% lead. This is important as it affects the melting point and workability of the solder. Turns out that Solder Connection when they quote 60:40 mean 60% Tin. When you read there tech materials there "20 years experience of supplying materials for the auto trade" leads them to supply a "60:40" for horizontal panels and a "23:73" i.e. 73% lead for vertical panels. Why do they supply a different mix for vertical panels? Well the high tin content in their 60:40 means you only have a 5 degree window in which the solder becomes "plastic" i.e. workable as opposed to a 20 - 30 degree window with 70:30.

So guess what? When you heat it you can't control to within 5 degrees so you either have solid or liquid and nothing in between, makes it impossible to work with :evil: or at least it does for me - not seen anyone using 60:40 with only 40% lead anywhere else but stand to be corrected?

To check my theory I melted down a couple of sticks and added a few old lead fishing weights to boost the lead content and, hey presto, perfect results.

Slapped some on the offside join

Image
Image

Then filed it down. Still got a couple of low points to fill but looking really nice now - its all a learning experience! :mrgreen:

From this......

Image

To this......

Image
Image

Then ran out of gas for the heat gun :roll:

Cheers,

MM
'89 Autosleeper Trident
2.1 DJ
Member 9111

Plasticman
Trader
Posts: 8077
Joined: 12 Oct 2005, 20:55
80-90 Mem No: 1948
Location: lincolnshire

Re: Gunther's Body Makeover Commences

Post by Plasticman »

ah .live and learn. we use onbe grade for all leading, whichever has the longest work time, the ones with higher tin content are a bit stronger so do get used in places,
when you get a nice area sort of part way right , then instead of dragging the block or whatever your using over it , use a paddling action and press, this will compact it so to speak and the excess will spread to the periphery,never force the lead as it cools ,just add a touch more heat to keep a balance, because as soon as it cools it will pick up and drag
mm

Locked