I know California Dreaming has improved his exterior lighting with additional relays but, Martin, when we discussed it I got a bit lost! Perhaps you could explain it again.
All my exterior bulbs are standard and my lighting is fairly poor. I was thinking about LED indicators etc Is this the solution or am I better upgrading the wiring which is what I think Martin did?
The headlights are also poor. What bulbs should I put in there?
Can anyone recommend anywhere to buy LED replacement bulbs at a fair price.
Thanks,
lighting upgrade
Moderators: User administrators, Moderators
-
The Bishop

- Registered user
- Posts: 763
- Joined: 14 Jul 2011, 11:44
- 80-90 Mem No: 10021
- Location: Near Ipswich
lighting upgrade
1986 1.9 Petrol/LPG with Devon pop up.

Re: lighting upgrade
Its not the bulbs its the voltage drop from the battery to the lights thats the problem normally - I did the lighting mod and it made a world of difference - was well worth crawling about under the van running cable. The mod allows you to reduce the voltage drop by cutting out the dash pod and the benefit of new copper wires.
T25 1.9D Hi-Top Canterbury Camper 1985
-
California Dreamin
- Registered user
- Posts: 2673
- Joined: 03 Apr 2007, 12:54
- 80-90 Mem No: 8386
- Location: Nottingham
Re: lighting upgrade
Two options:
1) Add relays to the existing wiring (mounted on the fuse box) to eliminate the voltage drop across the switch gear.
This is the simpler mod and certainly does improve things BUT you still keep the original tired and fairly lightweight wiring to the lamps themselves so some voltage drop will still be likely.
2) Completely rewire to relays mounted near the headlamps (weather protected of course) and use the original wiring only to switch the new relays.
More complex and expensive but done well the voltage drop is almost none existent and headlamp intensity is as good as it gets keeping standard units.
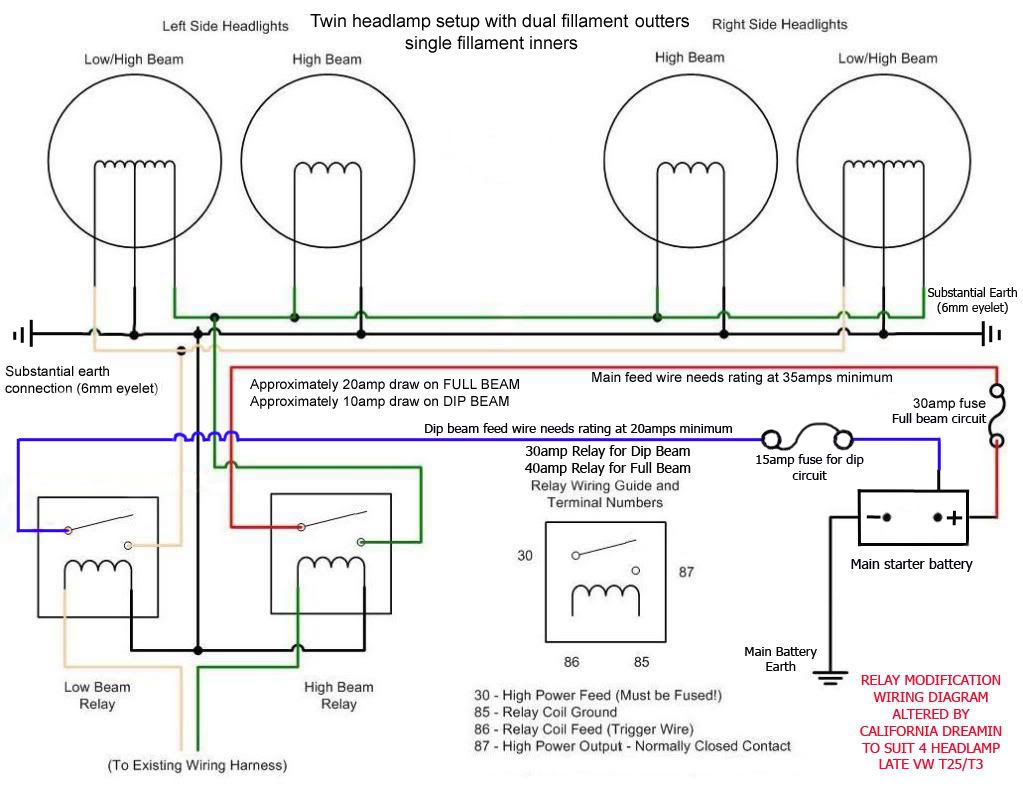
I can't remember whether yours are twin square lamps but I will attach a diagram representing my setup.
I really could not be more happy with the results and reckon there has been somewhere in the region of a 30 - 40% improvent in the intensity of the lights.
Don't forget to get some quality headlamp bulbs....my favourites are Osram Night Breaker Plus + H4's
You will have to have a peak at mine next time we meet.
Martin
1) Add relays to the existing wiring (mounted on the fuse box) to eliminate the voltage drop across the switch gear.
This is the simpler mod and certainly does improve things BUT you still keep the original tired and fairly lightweight wiring to the lamps themselves so some voltage drop will still be likely.
2) Completely rewire to relays mounted near the headlamps (weather protected of course) and use the original wiring only to switch the new relays.
More complex and expensive but done well the voltage drop is almost none existent and headlamp intensity is as good as it gets keeping standard units.
I can't remember whether yours are twin square lamps but I will attach a diagram representing my setup.
I really could not be more happy with the results and reckon there has been somewhere in the region of a 30 - 40% improvent in the intensity of the lights.
Don't forget to get some quality headlamp bulbs....my favourites are Osram Night Breaker Plus + H4's
You will have to have a peak at mine next time we meet.
Martin
1989 California 2.1MV
-
Dazco

- Registered user
- Posts: 2297
- Joined: 18 Dec 2011, 15:44
- 80-90 Mem No: 10544
- Location: Sheffield. 1984 autosleeper trooper. 1.9 petrol called Jambo
Re: lighting upgrade
Great wiring diagram . Ill be copying that and using it once ive got my van sorted. 
Auto sleeper fitted with EJ 20 subaru lump
-
California Dreamin
- Registered user
- Posts: 2673
- Joined: 03 Apr 2007, 12:54
- 80-90 Mem No: 8386
- Location: Nottingham
Re: lighting upgrade
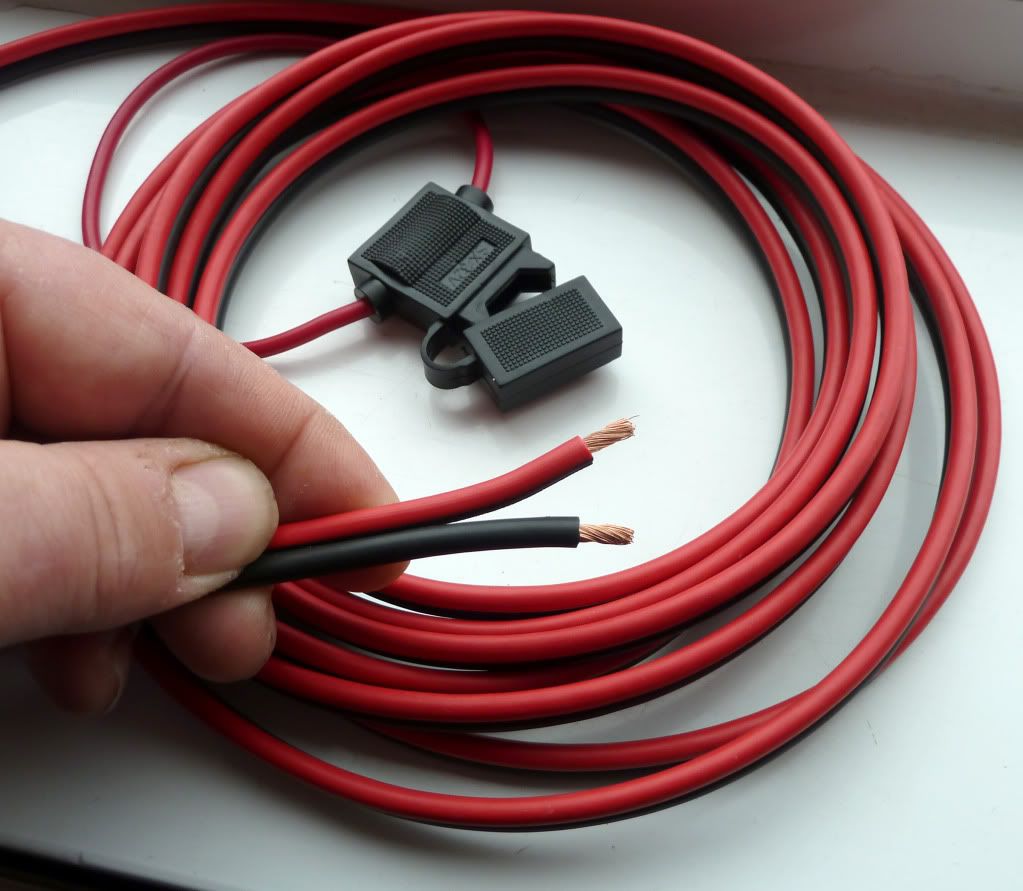
To be honest, the TWO main feeds I used were heavy twin core amp cable, rated at 45amps each wire. The reasoning behind two feeds is redundancy (thanks to James for pointing it out) that if one relay or fuse blows you still have either dip or main working. Both have heavy duty blade fuse holders close to the starter battery (dip 15amps, full 30amps)
I also gave each side a seperate earthing post so all wires are kept to a minimum length, (earth wiring needs to be as heavy duty as the feeds) I used 6mm soldered eyelets to bare chassis leg.
I've kept the original wiring (just in case in the future someone wants to revert it back) taped it all up but took 1mm feeds using male spade connectors from the dip and full beam terminals to trigger each of the relays.
The relays themselves are mounted in a small waterproof junction box mounted on the bulkhead behind the lights.
Keeping the original wiring isn't the neatest thing to do so you might prefer just to chop and terminate the old wiring....
Martin
Last edited by California Dreamin on 04 Sep 2012, 20:20, edited 1 time in total.
1989 California 2.1MV
Re: lighting upgrade
If you decide to do this mod there is no harm in running a 3rd cable from the battery at same your crawling about under ther - this comes in handy for 12V power points etc at the dash.
T25 1.9D Hi-Top Canterbury Camper 1985