loaded. cant find more but will do
mm
Gunther's Body Makeover Commences
Moderators: User administrators, Moderators
-
Plasticman
- Trader
- Posts: 8085
- Joined: 12 Oct 2005, 20:55
- 80-90 Mem No: 1948
- Location: lincolnshire
-
jimpainter
- Registered user
- Posts: 418
- Joined: 25 Aug 2009, 06:47
- 80-90 Mem No: 0
- Location: crewe
Re: Gunther's Body Makeover Commences
mm289 wrote:Cheers Mike, I was pretty happy especially with the paint actually as it was my first time with a proper rig rather than rattle cans.
The best episode of Boyd Coddington for me was one where they were building a rod (chopped . . or Willy's - cant remember) and all they had were hand drawings from Boyd.
They took it to an old timer who had a metal fab shop with his sons and the built the body from scratch outta sheet. I could just keep watching those guys shape metal for hours and thats what switched me onto doing my own metalwork really
The rest of the Coddington crew I could happily leave behind
MM
If its the same episode I think it was the alumitub. It was on the other night. Nice looking motor when it was finished.
It always makes me laught when you see them put all that effort into the bodywork etc then they cover the whole thing in (bondo)
Why not just save the time and cover it in bondo anyway. It will hide the rust for a few months
JRP Automotive welding,bodywork, resprays, servicing and repair.
Classic Vw's
Cheshire
07854516387
Classic Vw's
Cheshire
07854516387
-
New Kentish Campers

- Registered user
- Posts: 1739
- Joined: 12 Oct 2010, 06:16
- 80-90 Mem No: 8994
- Location: Near Linton, Kent.
- Contact:
Re: Gunther's Body Makeover Commences
Nice job on the sill MM, particularly as its your first attempt 
That seems to be the norm for US repairers. I can sort of see the advantage though because sometimes you can be 'chasing' an edge for ages trying to get it completely flat to a panel whereas if the entire panel is skimmed with some cack then providing you dont bust straight though again into the metal underneath you can actually get a very good flat finish, particularly on bodysides for example. And of course, not seeing the 'join' once its painted
It always makes me laught when you see them put all that effort into the bodywork etc then they cover the whole thing in (bondo)
Why not just save the time and cover it in bondo anyway. It will hide the rust for a few months
That seems to be the norm for US repairers. I can sort of see the advantage though because sometimes you can be 'chasing' an edge for ages trying to get it completely flat to a panel whereas if the entire panel is skimmed with some cack then providing you dont bust straight though again into the metal underneath you can actually get a very good flat finish, particularly on bodysides for example. And of course, not seeing the 'join' once its painted
-
billybigspud
- Registered user
- Posts: 635
- Joined: 11 Mar 2011, 15:59
- 80-90 Mem No: 9454
- Location: southampton
Re: Gunther's Body Makeover Commences
mm289 wrote:Cheers Mike, I was pretty happy especially with the paint actually as it was my first time with a proper rig rather than rattle cans.
The best episode of Boyd Coddington for me was one where they were building a rod (chopped . . or Willy's - cant remember) and all they had were hand drawings from Boyd.
They took it to an old timer who had a metal fab shop with his sons and the built the body from scratch outta sheet. I could just keep watching those guys shape metal for hours and thats what switched me onto doing my own metalwork really
The rest of the Coddington crew I could happily leave behind
MM
was it the alumitub? if not then that is a must see for ya.
-
Plasticman
- Trader
- Posts: 8085
- Joined: 12 Oct 2005, 20:55
- 80-90 Mem No: 1948
- Location: lincolnshire
Re: Gunther's Body Makeover Commences
I will try find some pickies but I have had ally bodies made for old classics and zero filler just perfection, etch prime and be done,
I made/make these and all the body tubes are 1" ally as well with vitually zero filler,looks beetr when painted mindst

so it beats me that sometimes they bodge bits on in a way that you dont really see even on this forum
mm
this is the difference painted

I made/make these and all the body tubes are 1" ally as well with vitually zero filler,looks beetr when painted mindst
so it beats me that sometimes they bodge bits on in a way that you dont really see even on this forum
mm
this is the difference painted
-
mm289
- Registered user
- Posts: 314
- Joined: 31 Dec 2010, 22:00
- 80-90 Mem No: 9111
- Location: Dover, Kent
Re: Gunther's Body Makeover Commences
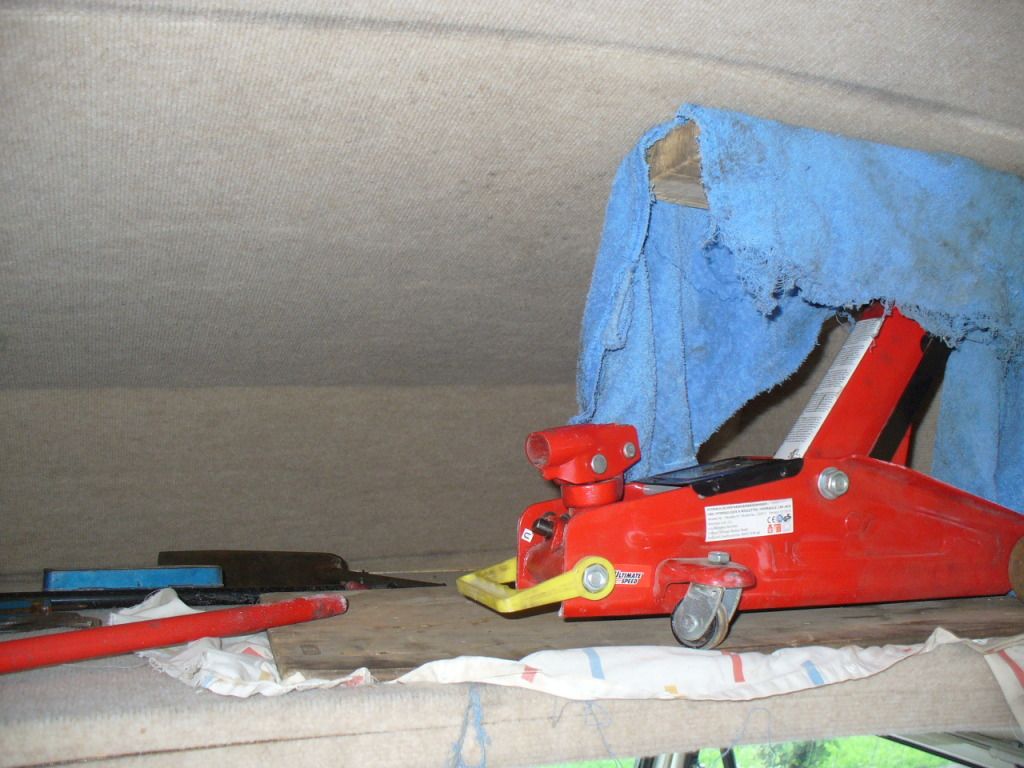
The weather has brightened so it is finally time to start doing some more work on Gunther (hi-top....won't fit in workshop....can only work on outside....  )
)
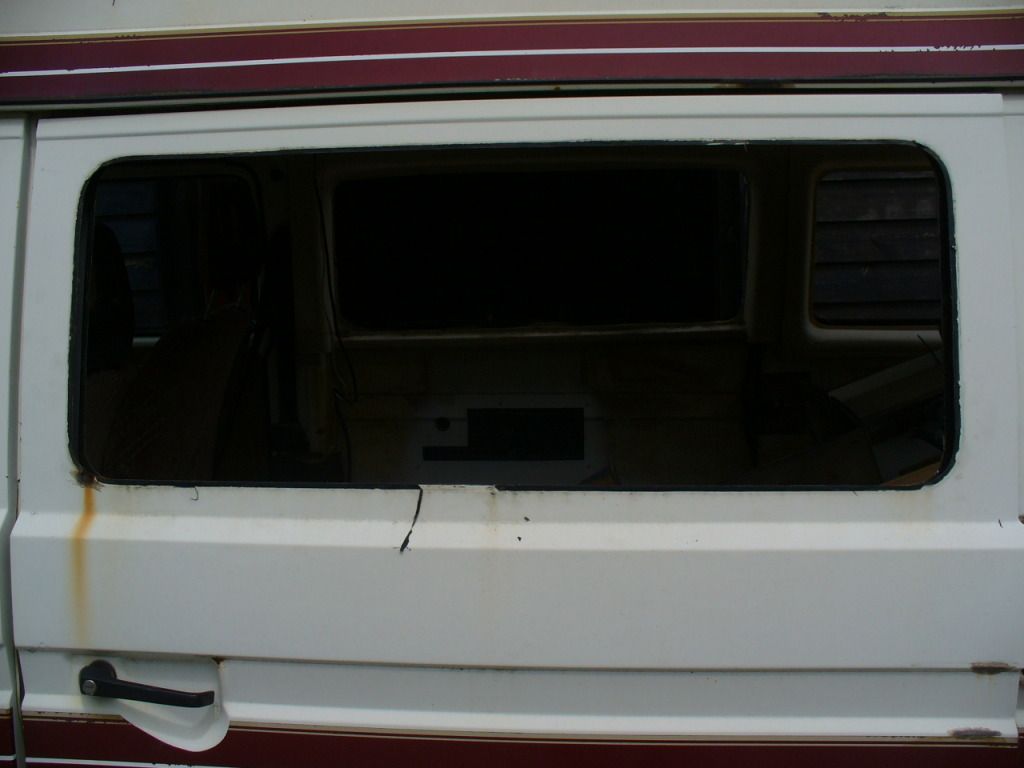
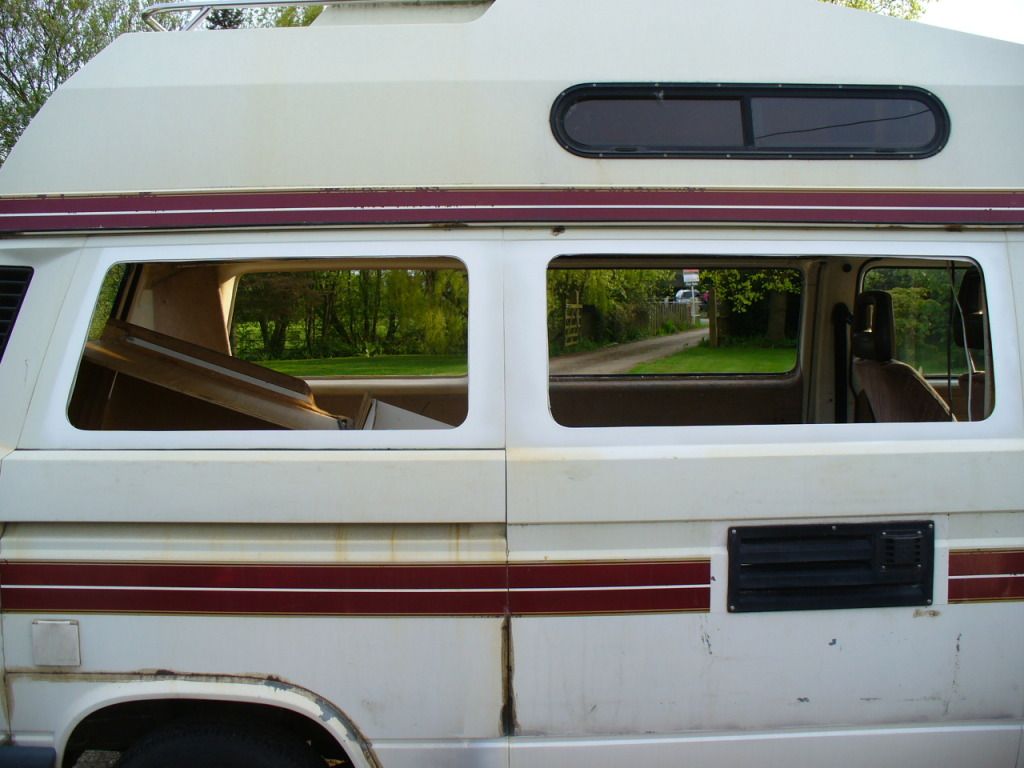
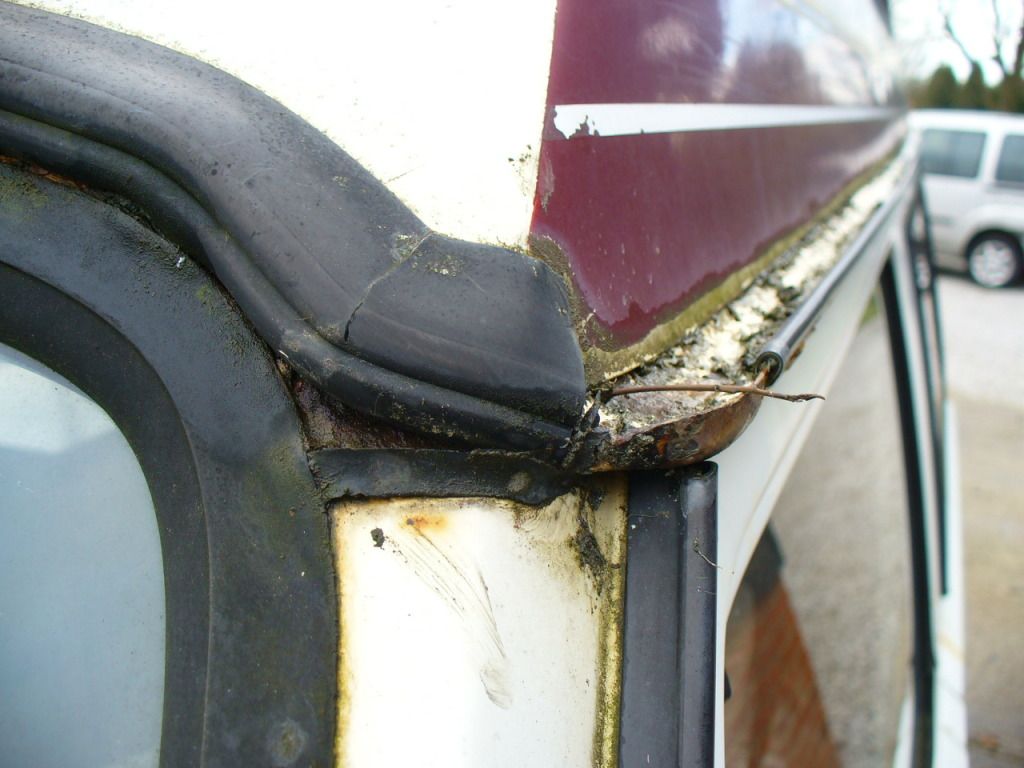
So, before I start on the interior I want to get the window frames sorted so I know its water tight. Started today with the drivers side.....
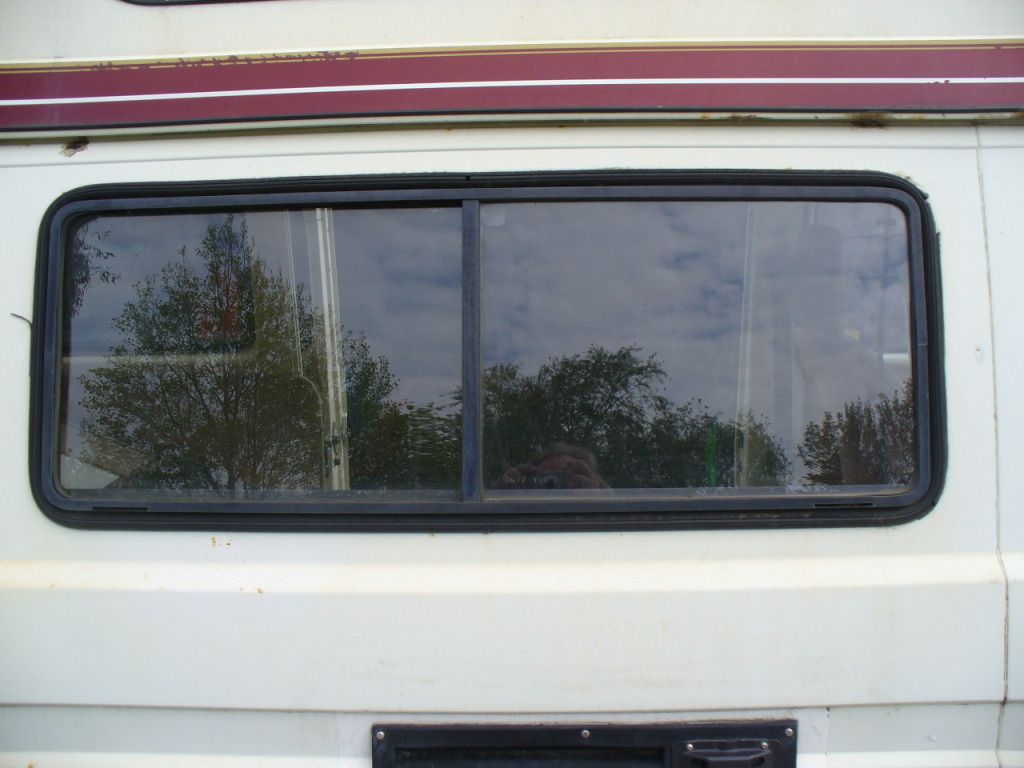
Didn't look too bad from the outside although all the seals were badly perished and falling apart
Ripped the outer side of the U-channel off (well it pretty much fell off really) and then pulled out the locking rubber. The windows then just push into the inside. The metal work is actually pretty good
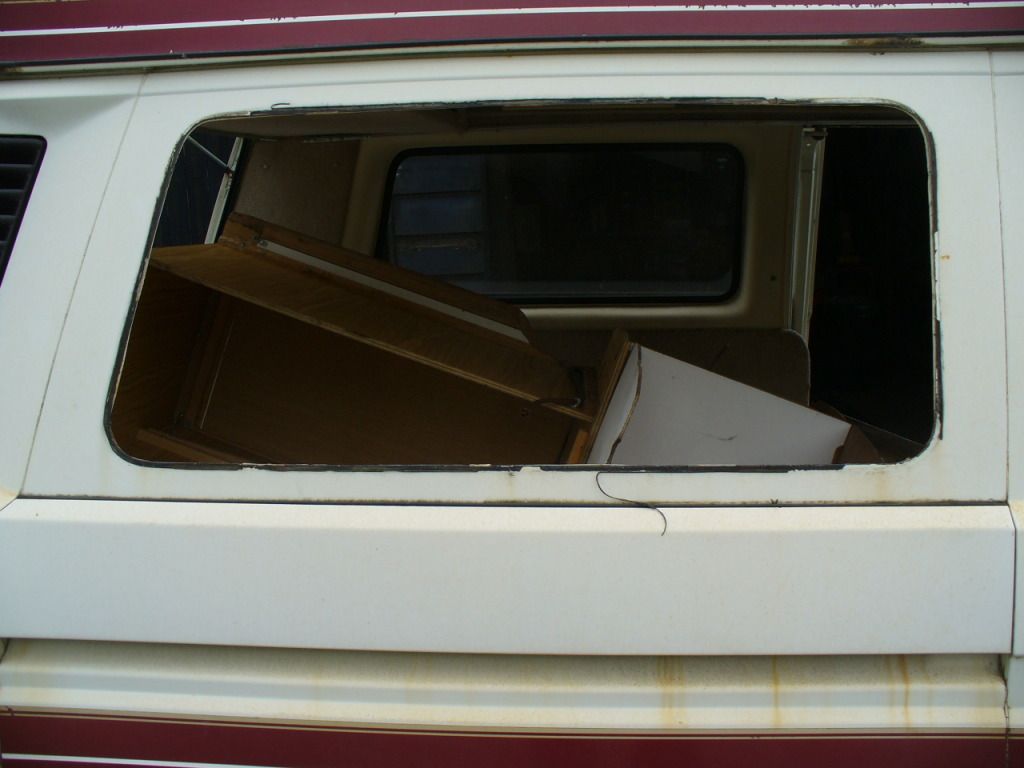
Just a bit of cleaning, scotchbrite and sanding on the few scabby bits prior to applying some Hydrate 80.
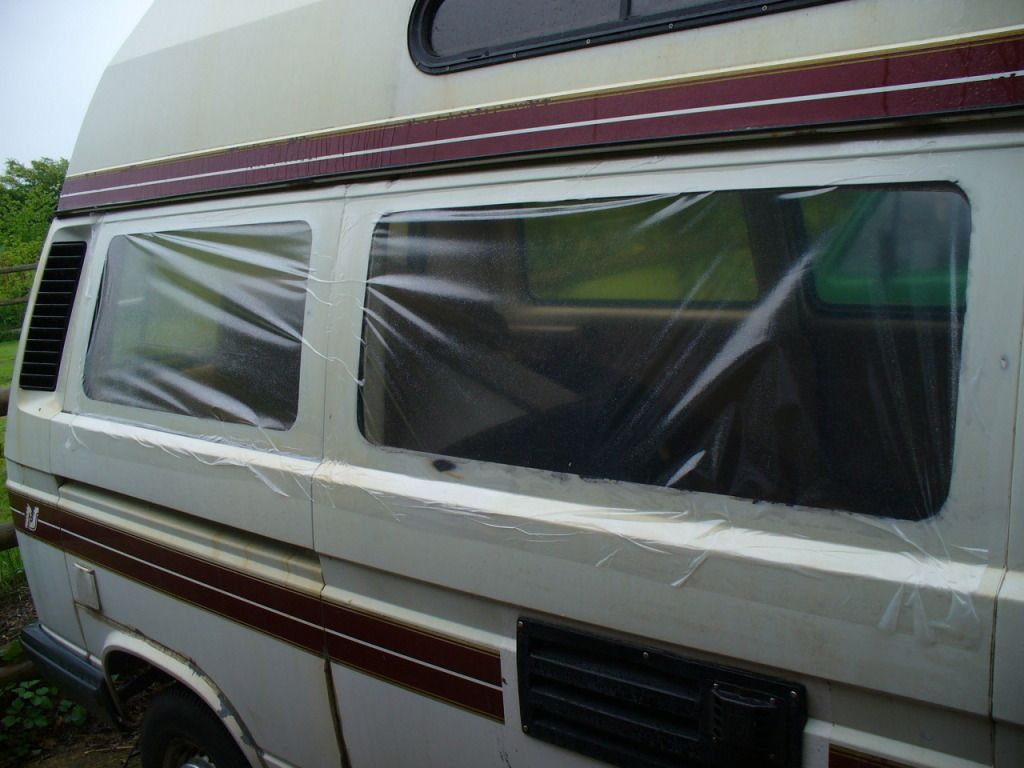
Then, just as I was enjoying working outside for a change, listening to the cricket....... it started RAINING
So, on with the crash wrap and decamp into the garage.
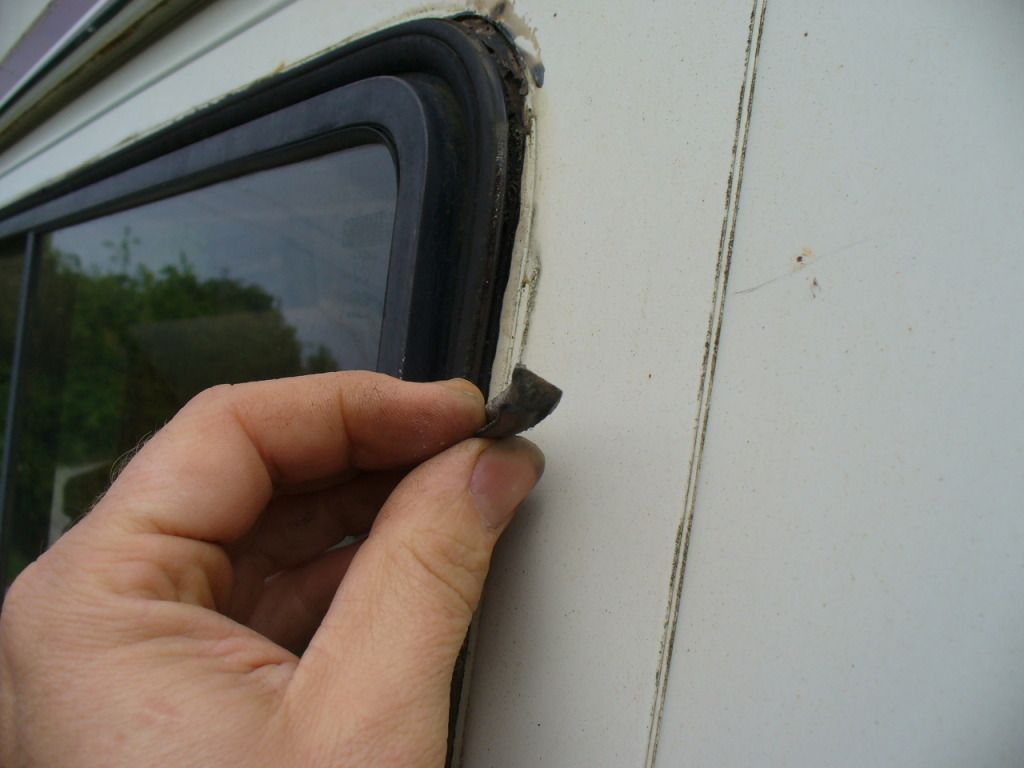
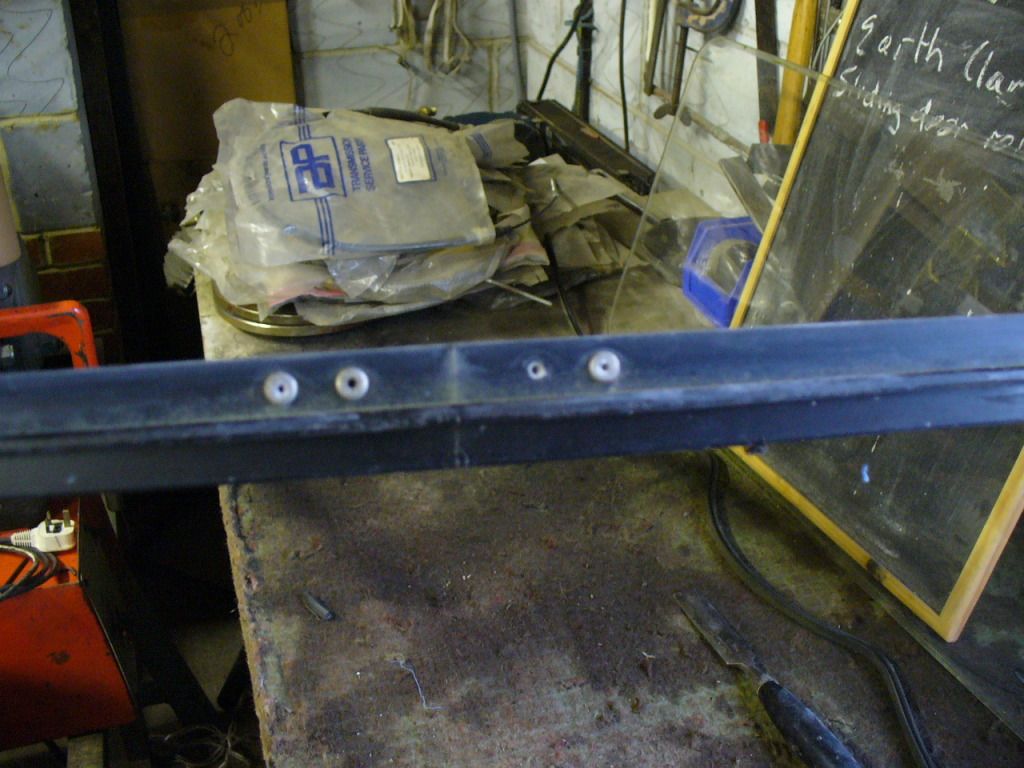
Started to strip the sliding window. The frame is in 2 pieces held together with a riveted plate on each end. The only way you can replace the seals is to split the frame.
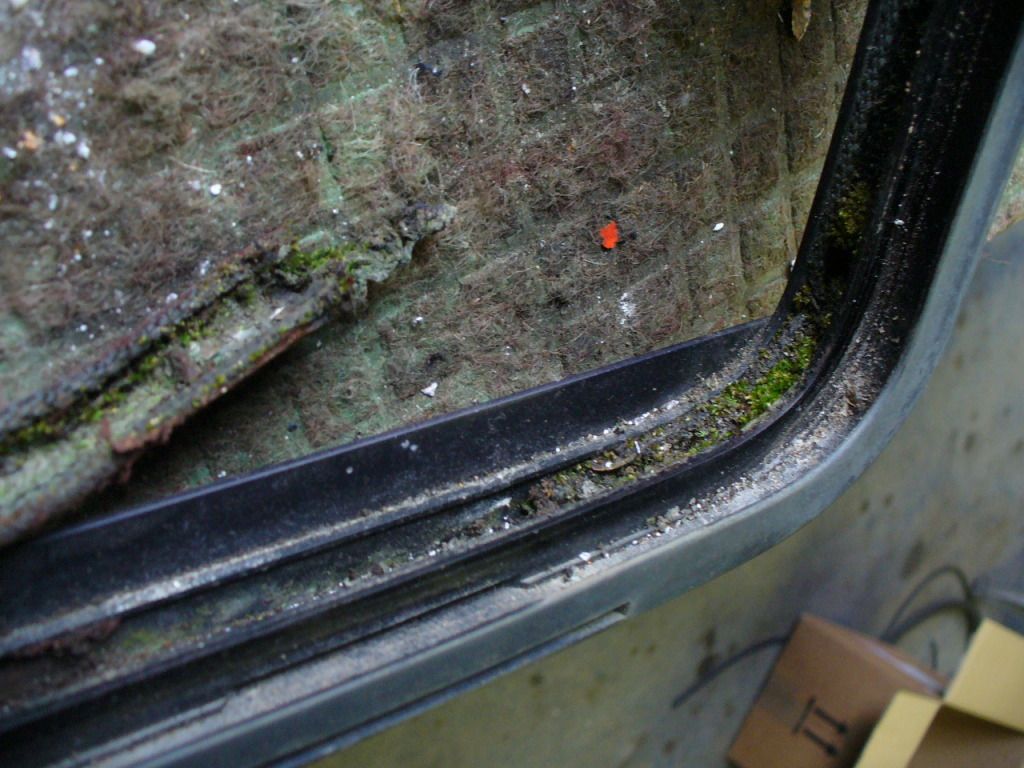
Why would you want to split the frame? 'Cause after years of water sitting in it the seals are shot and look like this
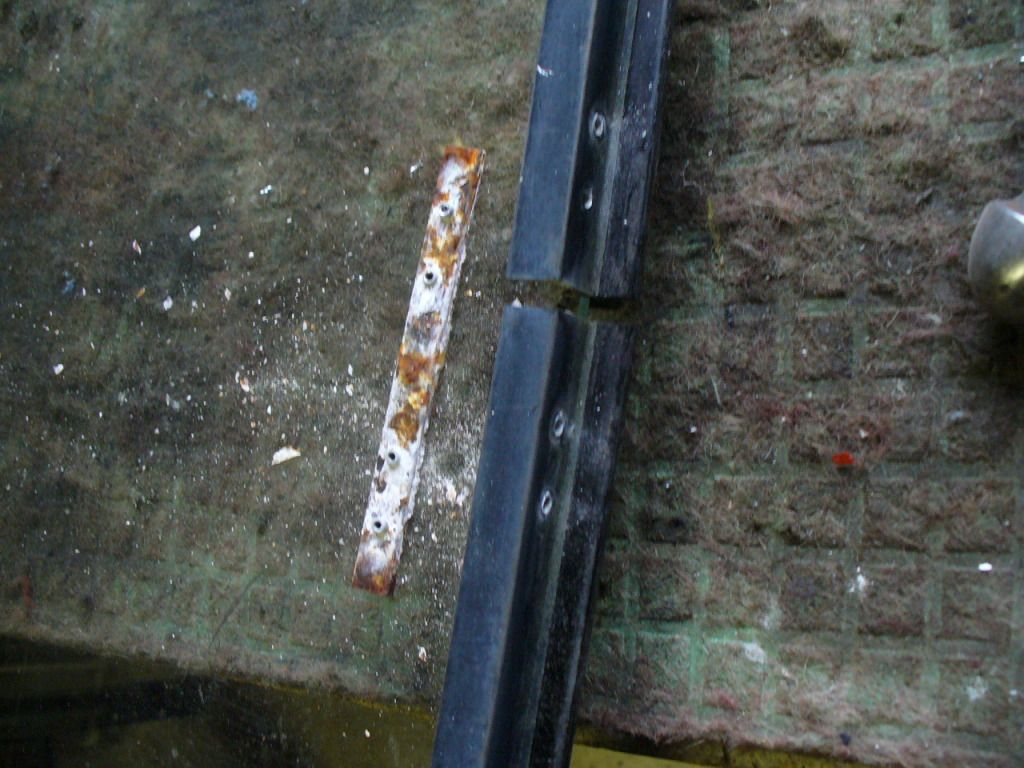
Carefully drilled out the rivets and opened up the frame, then stripped all the seals (there's a lot of them!)
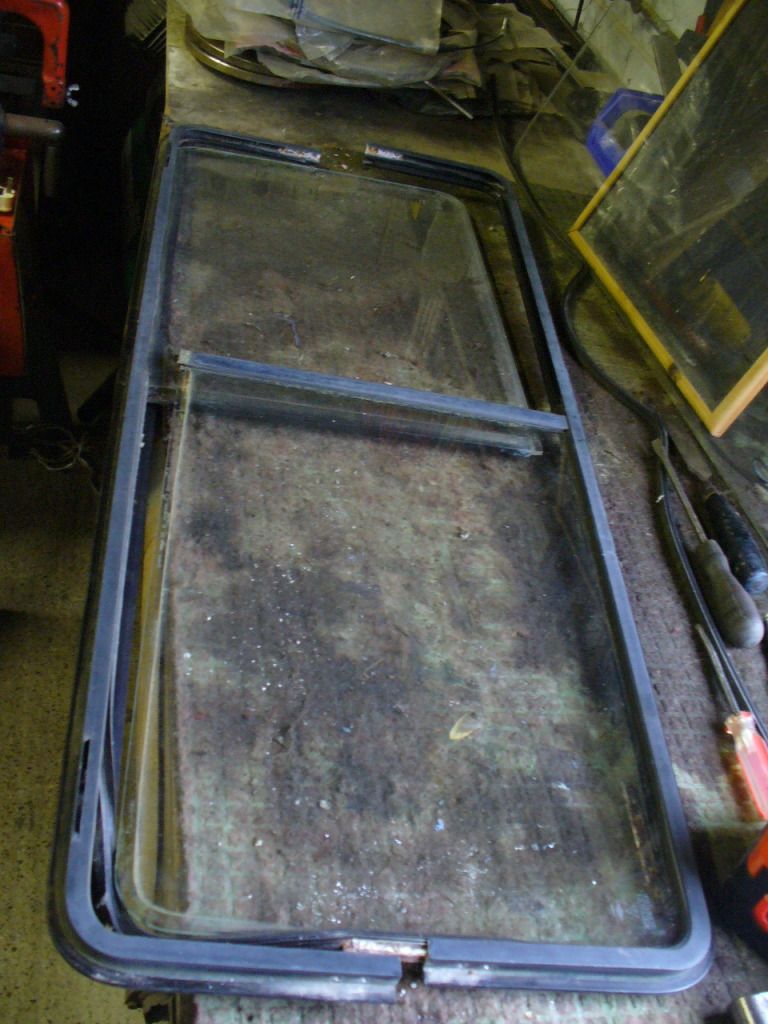
The frames are alloy so don't corrode but the plate the rivets anchor too is steel so looks a bit the worse for wear.
Off to the media blaster with those then,
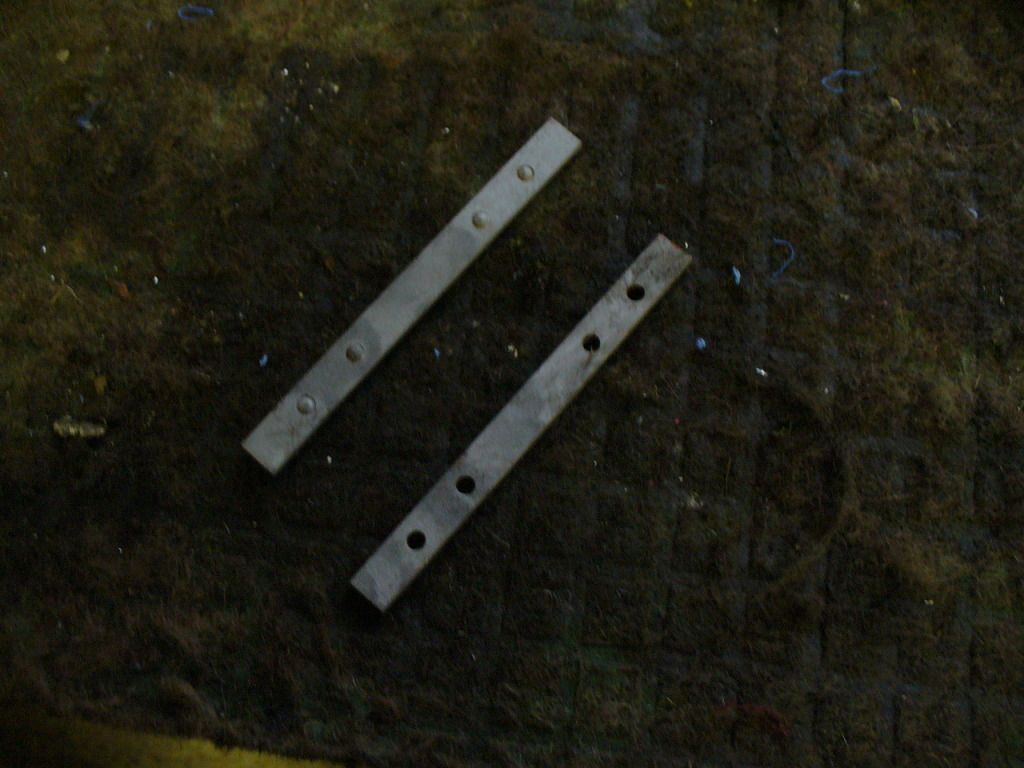 .
.
Then down to a local supplier to get 12m of new seals ready to re-fit both sides once I have prepped and painted. They will be coming back out again for the full respray but at least will be nice and clean and water tight in the meantime
Cheers,
MM
So, before I start on the interior I want to get the window frames sorted so I know its water tight. Started today with the drivers side.....
Didn't look too bad from the outside although all the seals were badly perished and falling apart
Ripped the outer side of the U-channel off (well it pretty much fell off really) and then pulled out the locking rubber. The windows then just push into the inside. The metal work is actually pretty good
Just a bit of cleaning, scotchbrite and sanding on the few scabby bits prior to applying some Hydrate 80.
Then, just as I was enjoying working outside for a change, listening to the cricket....... it started RAINING
So, on with the crash wrap and decamp into the garage.
Started to strip the sliding window. The frame is in 2 pieces held together with a riveted plate on each end. The only way you can replace the seals is to split the frame.
Why would you want to split the frame? 'Cause after years of water sitting in it the seals are shot and look like this
Carefully drilled out the rivets and opened up the frame, then stripped all the seals (there's a lot of them!)
The frames are alloy so don't corrode but the plate the rivets anchor too is steel so looks a bit the worse for wear.
Off to the media blaster with those then,
.Then down to a local supplier to get 12m of new seals ready to re-fit both sides once I have prepped and painted. They will be coming back out again for the full respray but at least will be nice and clean and water tight in the meantime
Cheers,
MM
'89 Autosleeper Trident
2.1 DJ
Member 9111
2.1 DJ
Member 9111
-
fodtommo

- Registered user
- Posts: 213
- Joined: 29 Oct 2010, 19:48
- 80-90 Mem No: 8963
- Location: Forest of Dean, Gloucestershire
Re: Gunther's Body Makeover Commences
Can I ask where you get the crash wrap from!? - im about to pull my windows and this would be really handy. Ive got so fed up with the weather im gonna buy a 10' x 20' marquee off of flea bay for £60.
1986 Leisurdrive Poptop, 1.6d - Rebuilt and Camping with a Vengeance
-
mm289
- Registered user
- Posts: 314
- Joined: 31 Dec 2010, 22:00
- 80-90 Mem No: 9111
- Location: Dover, Kent
Re: Gunther's Body Makeover Commences
I use Pete at Consumable Express,look here
http://www.consumablesexpress.co.uk/50m ... egory_id=0
MM
http://www.consumablesexpress.co.uk/50m ... egory_id=0
MM
'89 Autosleeper Trident
2.1 DJ
Member 9111
2.1 DJ
Member 9111
-
mm289
- Registered user
- Posts: 314
- Joined: 31 Dec 2010, 22:00
- 80-90 Mem No: 9111
- Location: Dover, Kent
Re: Gunther's Body Makeover Commences
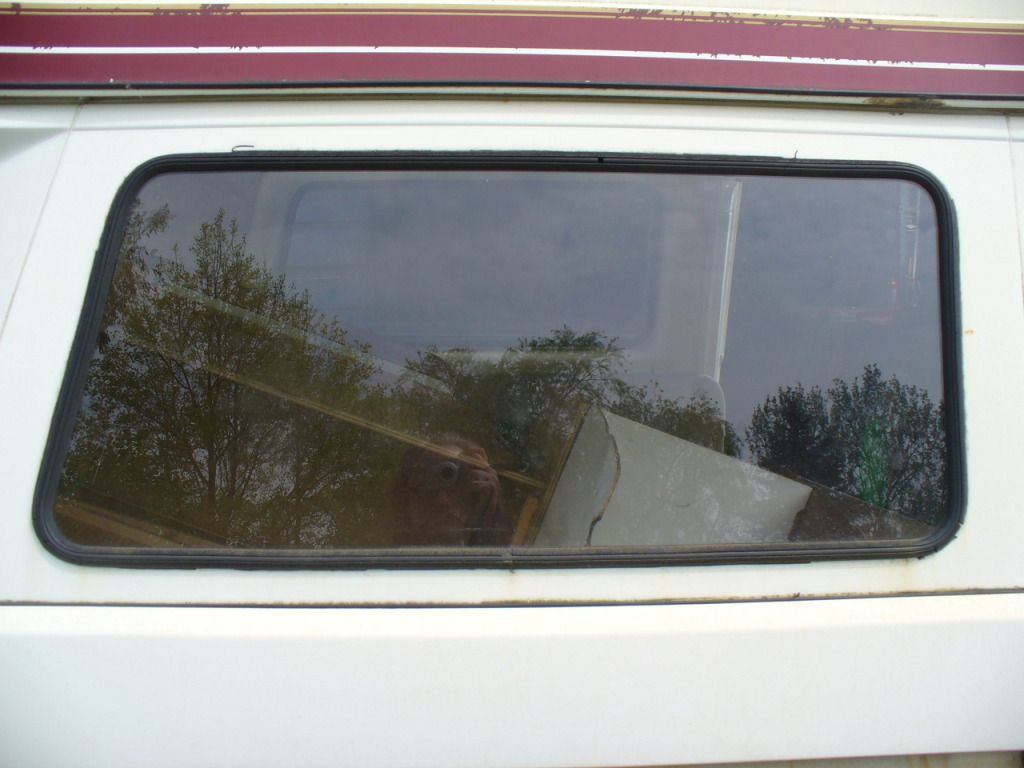
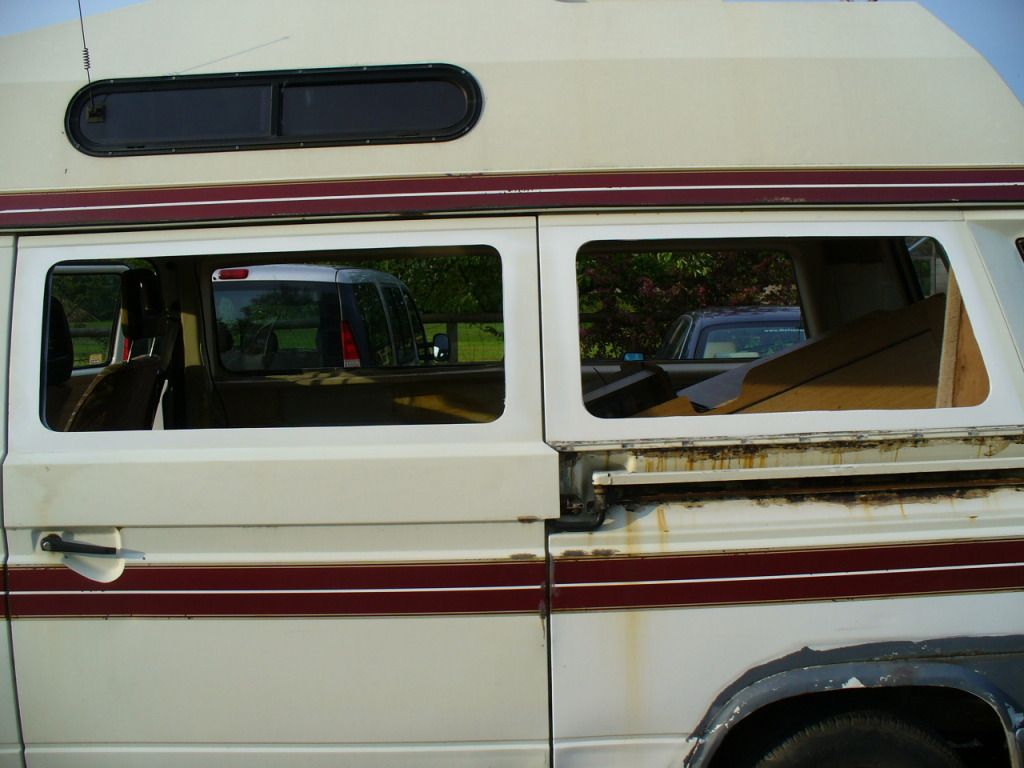
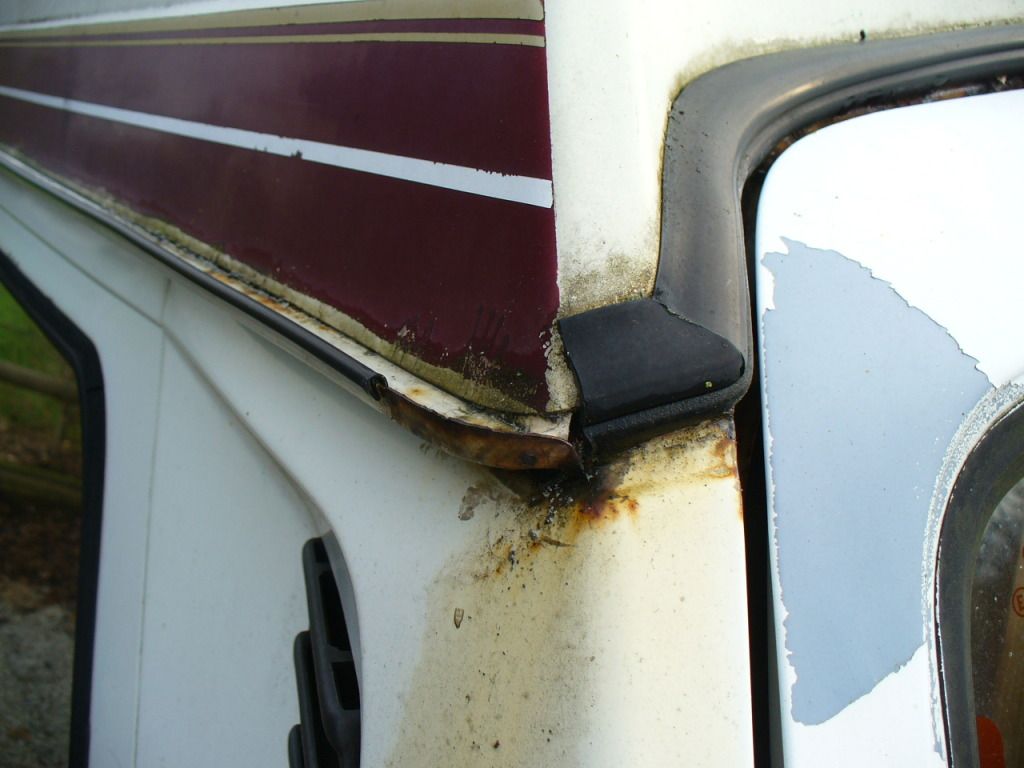
Right, bit more sunshine today so pulled the windows out on the passenger side as well.
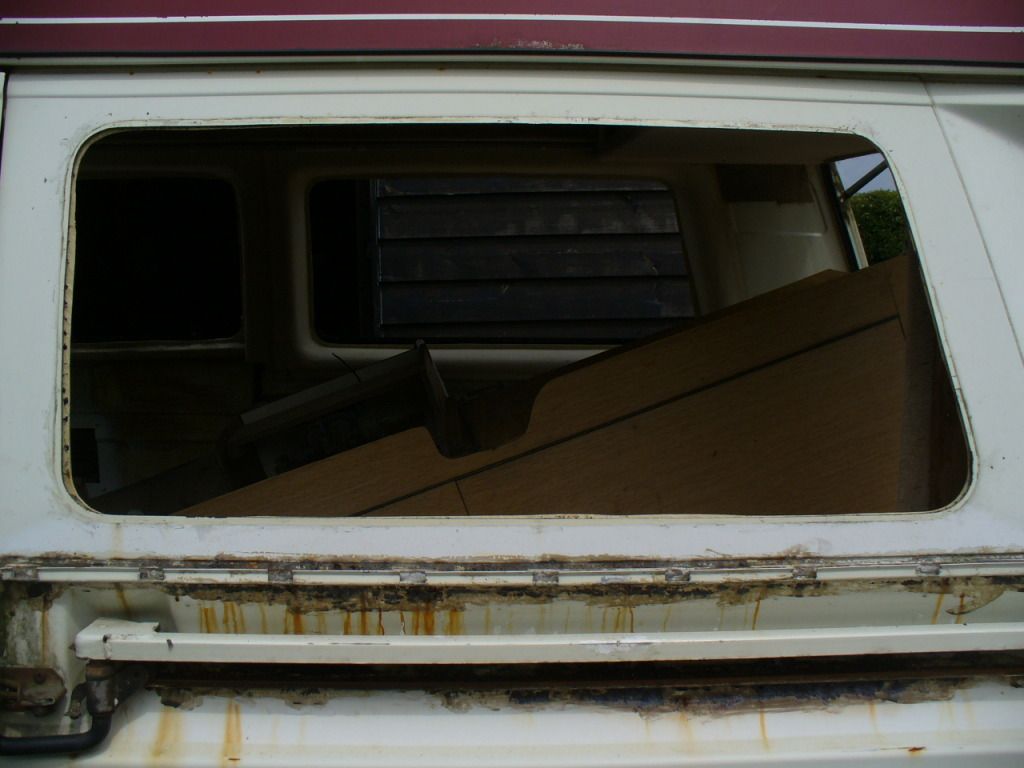
Again not to bad although there is quite a bit of corrosion around the rail that secures the door track cover. Also some corrosion on the lower front edge of the sliding door window.
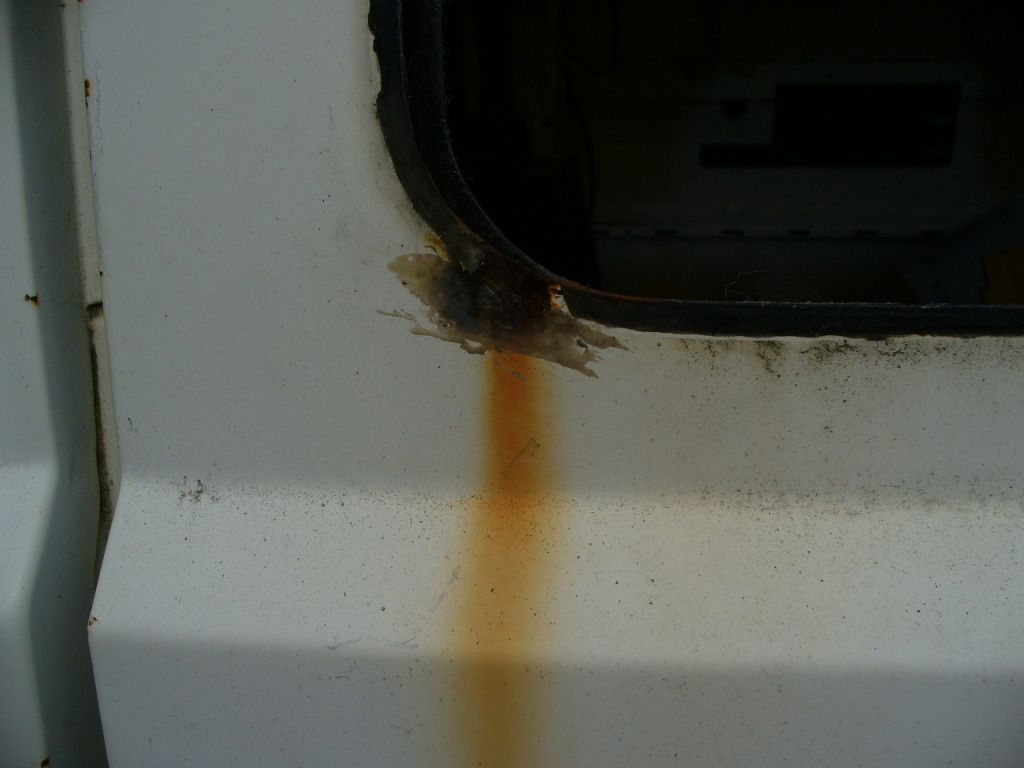
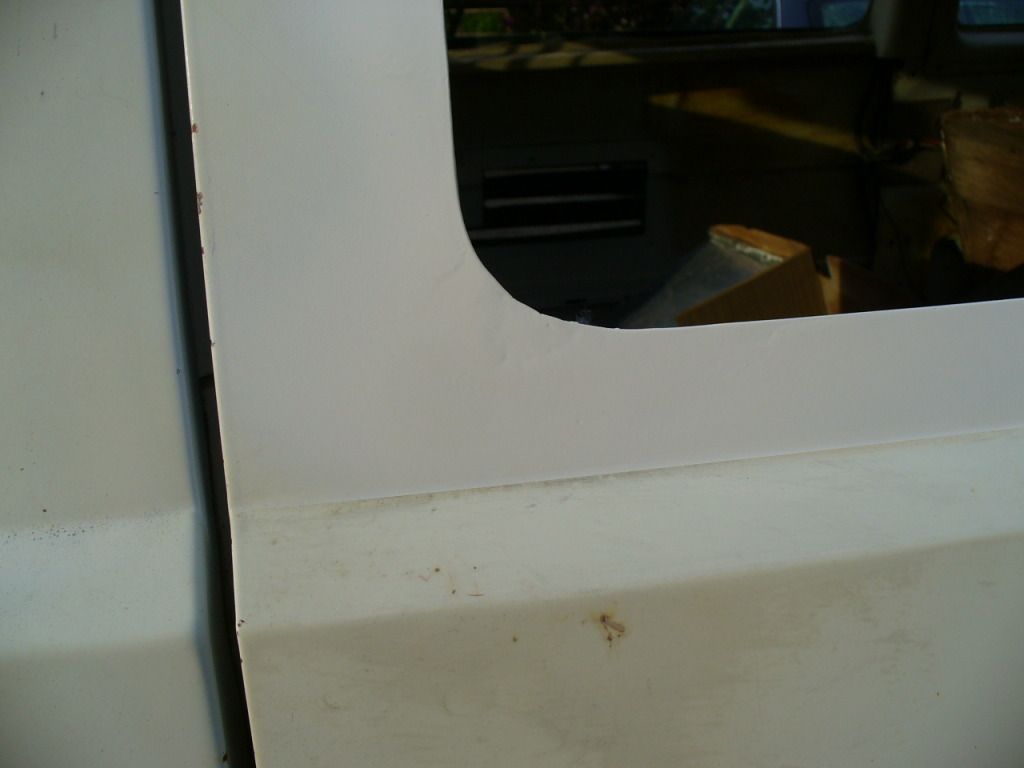
Treated all the corrosion with Hydrate 80 again, and sanded/Scotchbrite'd the frames. There was some small holes and corrosion on the sliding door corner so popped a few bits of MIG weld in.....(bit messy as I'm out of gas so had to use my back up machine with a diddy bottle of CO2
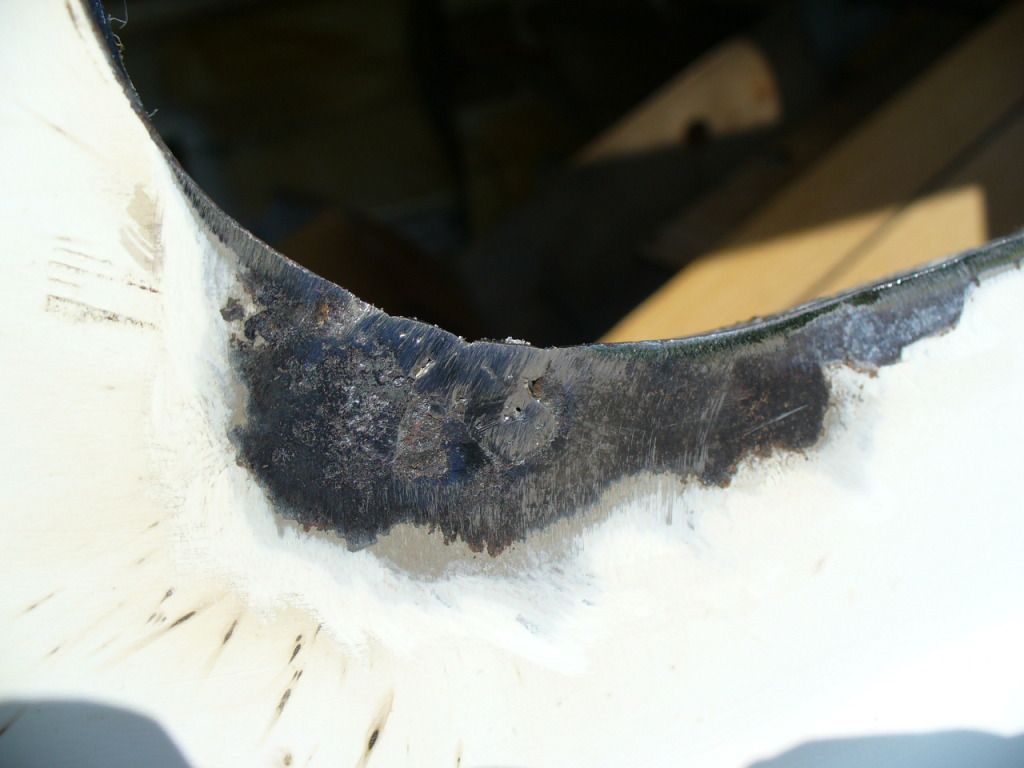
then leaded it up, so hopefully should be nice and sound now
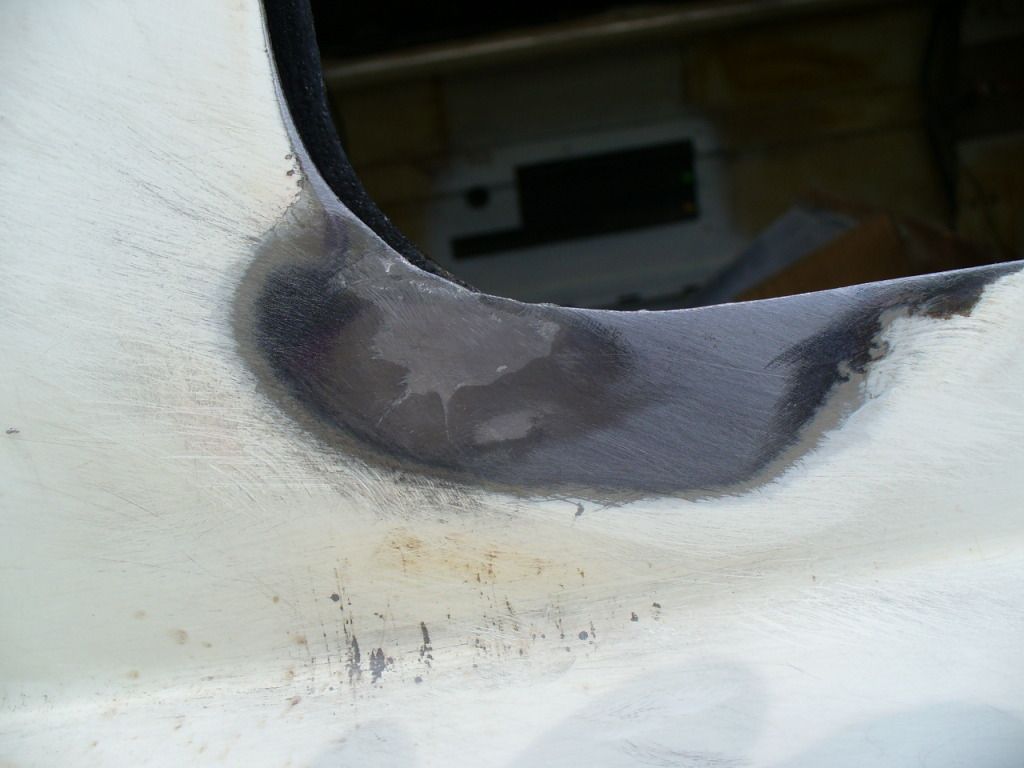
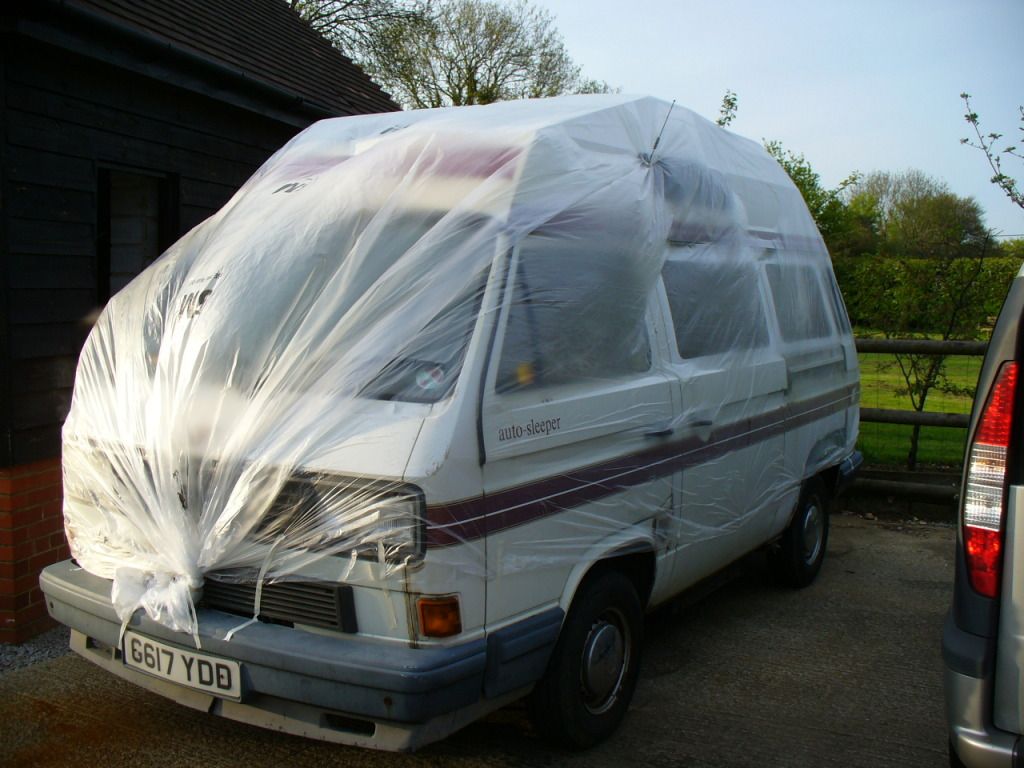
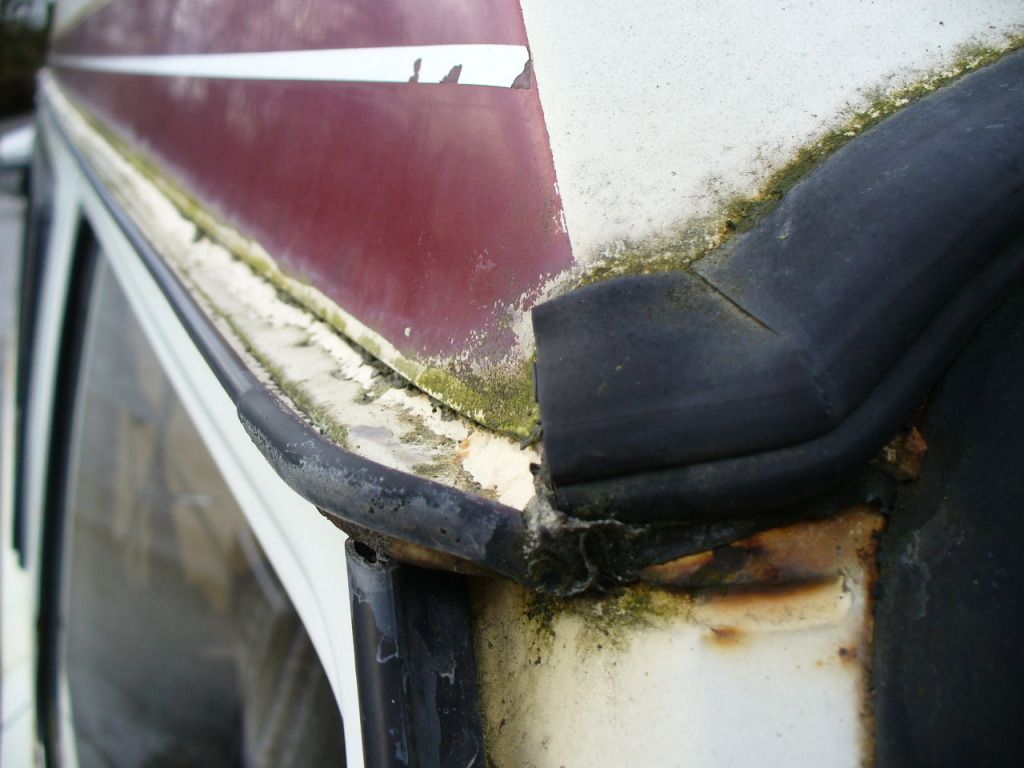
Still nice and warm so decided to shoot a couple of coats of 2k Epoxy Primer on. This will protect the metal till I am ready to spray the van and forms a good strong waterproof primer as well.
Masked up all the windows and then shot the primer....... ended up not looking to bad
And this is the repaired corner, will need a bit of fine putty or hi-build to finish it before paint, but its fine for know.
Then time to go watch the Champions League final so wrapped him up for the night - hope it doesn't get too windy
Cheers,
MM
Again not to bad although there is quite a bit of corrosion around the rail that secures the door track cover. Also some corrosion on the lower front edge of the sliding door window.
Treated all the corrosion with Hydrate 80 again, and sanded/Scotchbrite'd the frames. There was some small holes and corrosion on the sliding door corner so popped a few bits of MIG weld in.....(bit messy as I'm out of gas so had to use my back up machine with a diddy bottle of CO2
then leaded it up, so hopefully should be nice and sound now
Still nice and warm so decided to shoot a couple of coats of 2k Epoxy Primer on. This will protect the metal till I am ready to spray the van and forms a good strong waterproof primer as well.
Masked up all the windows and then shot the primer....... ended up not looking to bad
And this is the repaired corner, will need a bit of fine putty or hi-build to finish it before paint, but its fine for know.
Then time to go watch the Champions League final so wrapped him up for the night - hope it doesn't get too windy
Cheers,
MM
'89 Autosleeper Trident
2.1 DJ
Member 9111
2.1 DJ
Member 9111
-
Plasticman
- Trader
- Posts: 8085
- Joined: 12 Oct 2005, 20:55
- 80-90 Mem No: 1948
- Location: lincolnshire
Re: Gunther's Body Makeover Commences
you might want to unspot the cover securing rail and sort the rust and refit ,, ?getting along nicely now int it
mm
mm
-
mm289
- Registered user
- Posts: 314
- Joined: 31 Dec 2010, 22:00
- 80-90 Mem No: 9111
- Location: Dover, Kent
Re: Gunther's Body Makeover Commences
metalmick8y wrote:you might want to unspot the cover securing rail and sort the rust and refit ,, ?getting along nicely now int it
mm
Yep, wish I had decided to take the roof of last year then I could of been working on it over the winter instead of buying a Bay to fill the space
Rail will be coming off defo, you can see the rust perforating through when you look inside the panel so will probably end up letting in a few new pieces of metal or mig'ing up the holes if they aren't too bad
MM
'89 Autosleeper Trident
2.1 DJ
Member 9111
2.1 DJ
Member 9111
-
Plasticman
- Trader
- Posts: 8085
- Joined: 12 Oct 2005, 20:55
- 80-90 Mem No: 1948
- Location: lincolnshire
Re: Gunther's Body Makeover Commences
I like the subtle differences between mm and MM, yes but if you left the bay outside it would be rusting worse than a fjord
mm
mm
-
mm289
- Registered user
- Posts: 314
- Joined: 31 Dec 2010, 22:00
- 80-90 Mem No: 9111
- Location: Dover, Kent
Re: Gunther's Body Makeover Commences
So I had decided to complete the windows this weekend and get the floor in but........
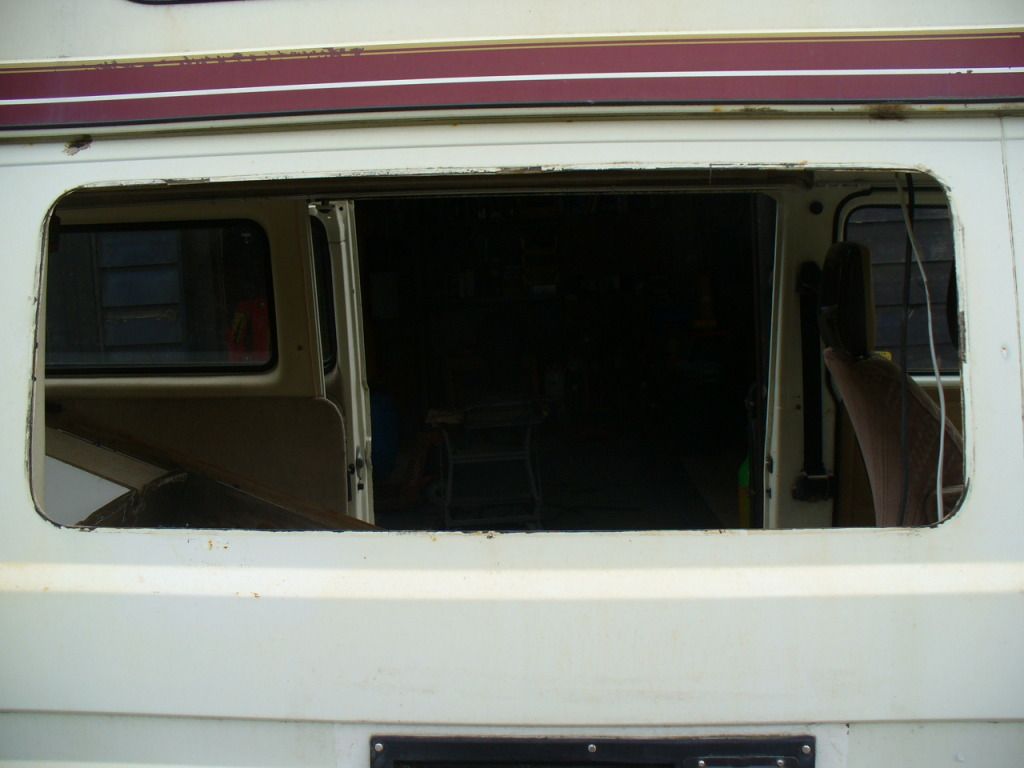
Local supplier of the window seals was closed on Friday and one of the rear windows shattered, then there was no point doing the floor as the van wasn't water tight ( as the weather showed when it lashed it down )....
Best laid plans and all that
So decided to bite the bullet and take the roof off as the more I looked at the seals the more it looked pretty grim. So with a bit of guidance from Mike's Kevtherevagon thread we attacked the roof. Kev's van had had the roof refitted at some stage whereas Gunther's is the original undisturbed fitment, so I have taken loads of pics incase it helps anyone else doing an Autosleeper roof!
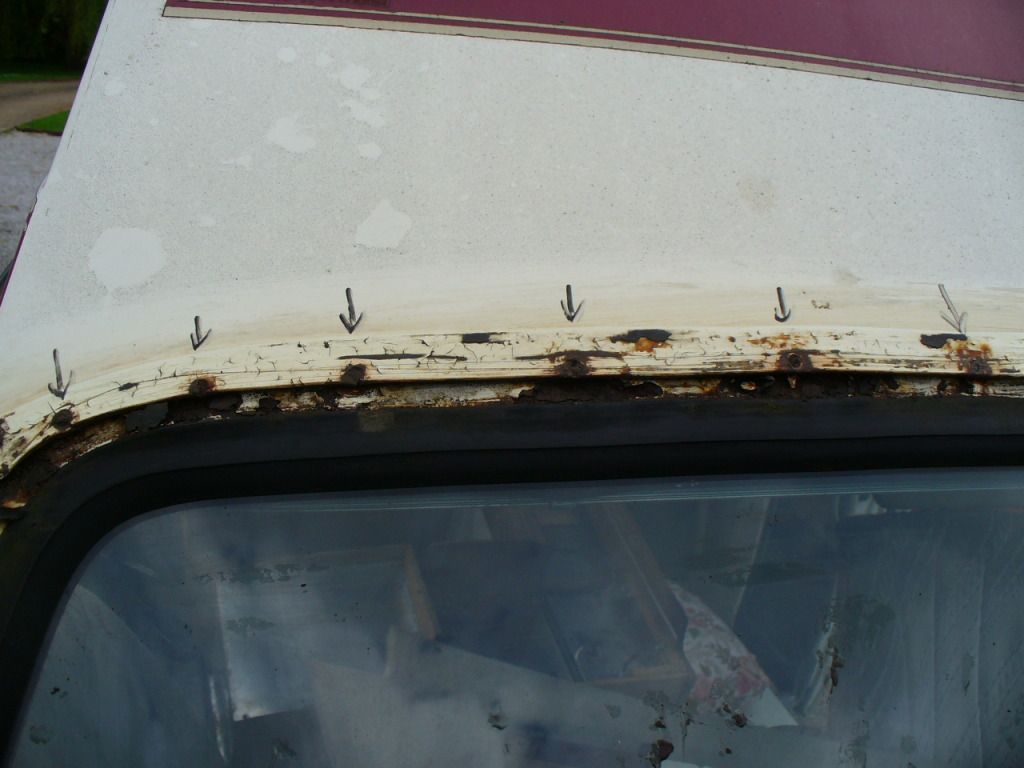
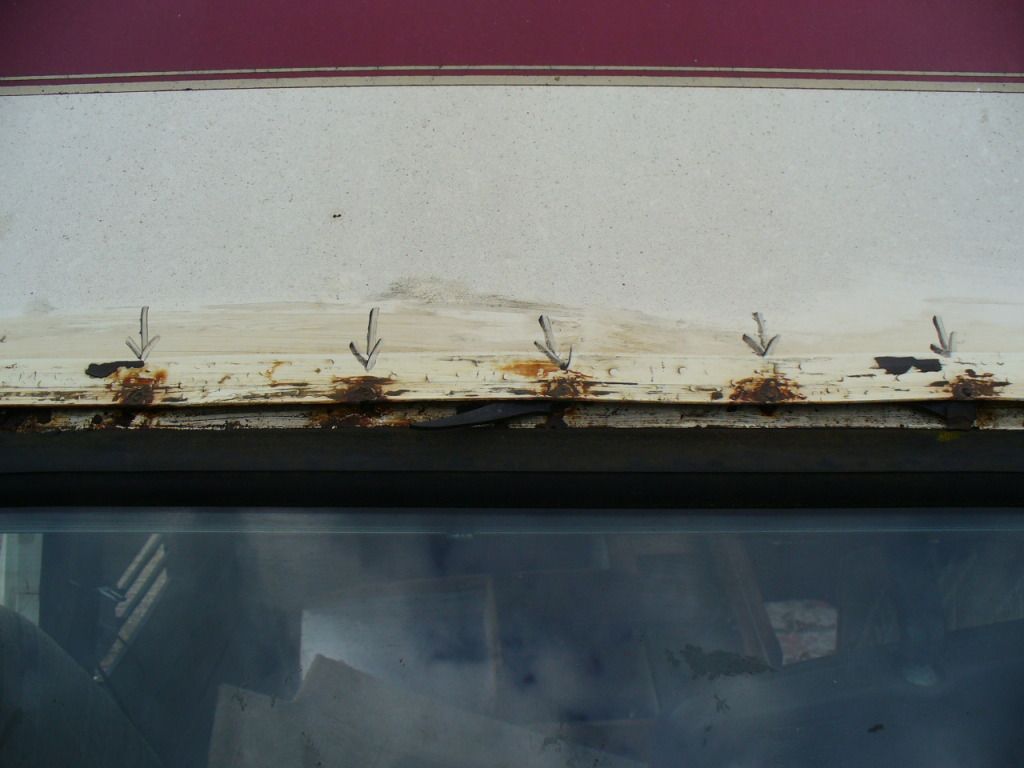
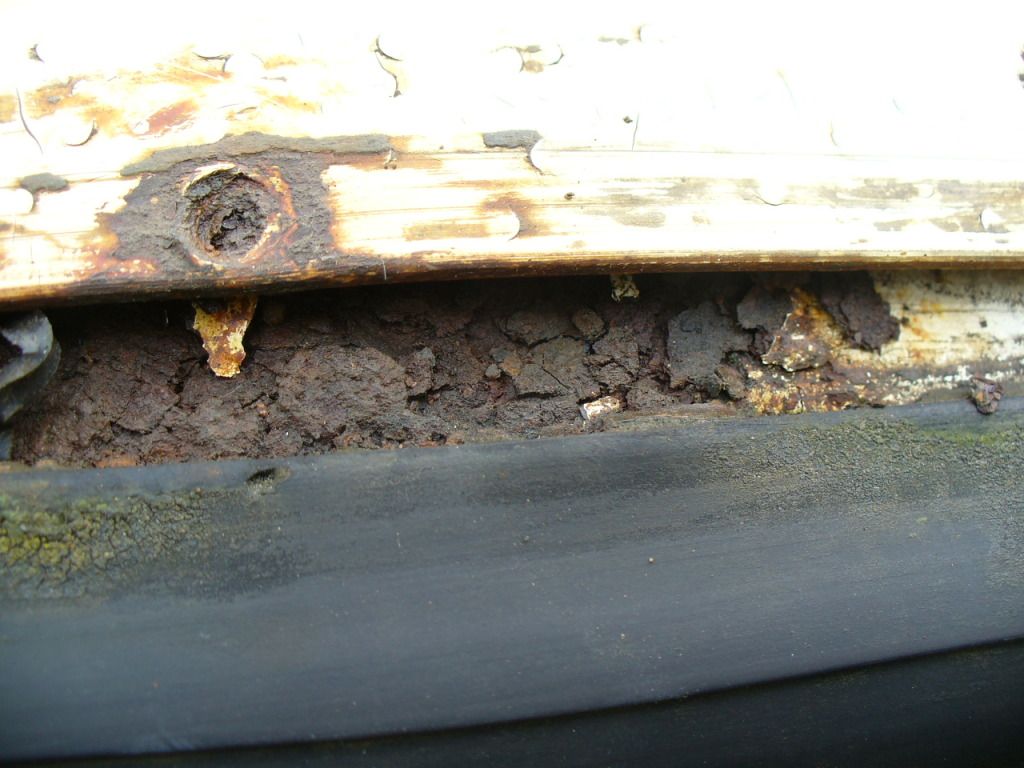
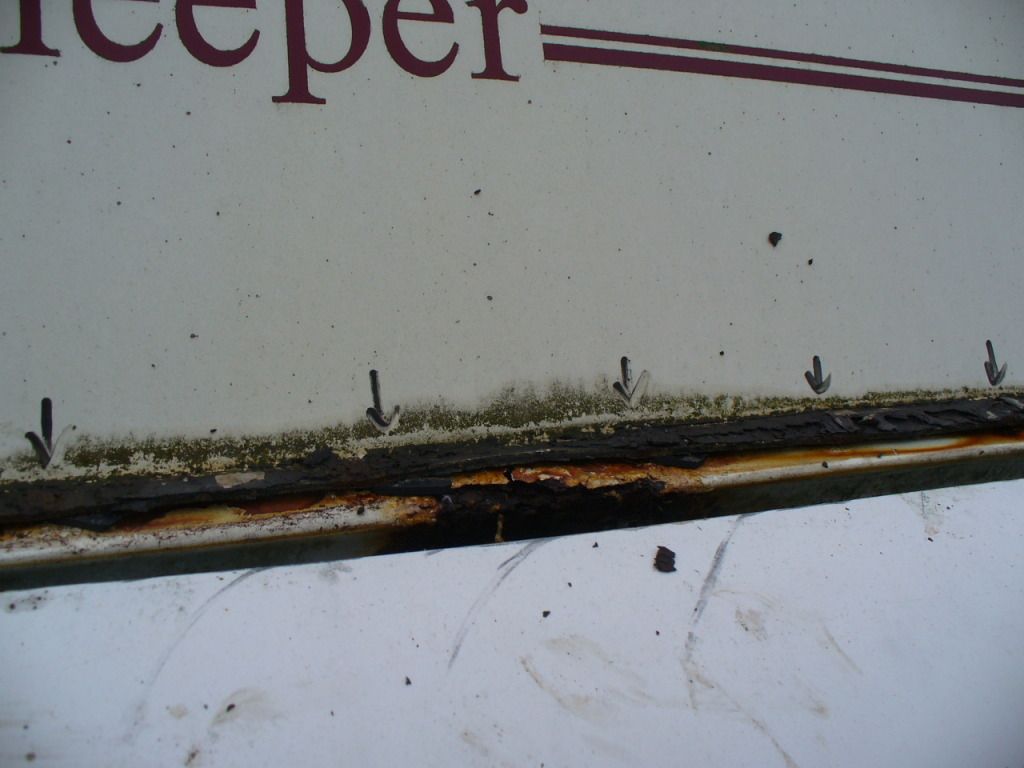
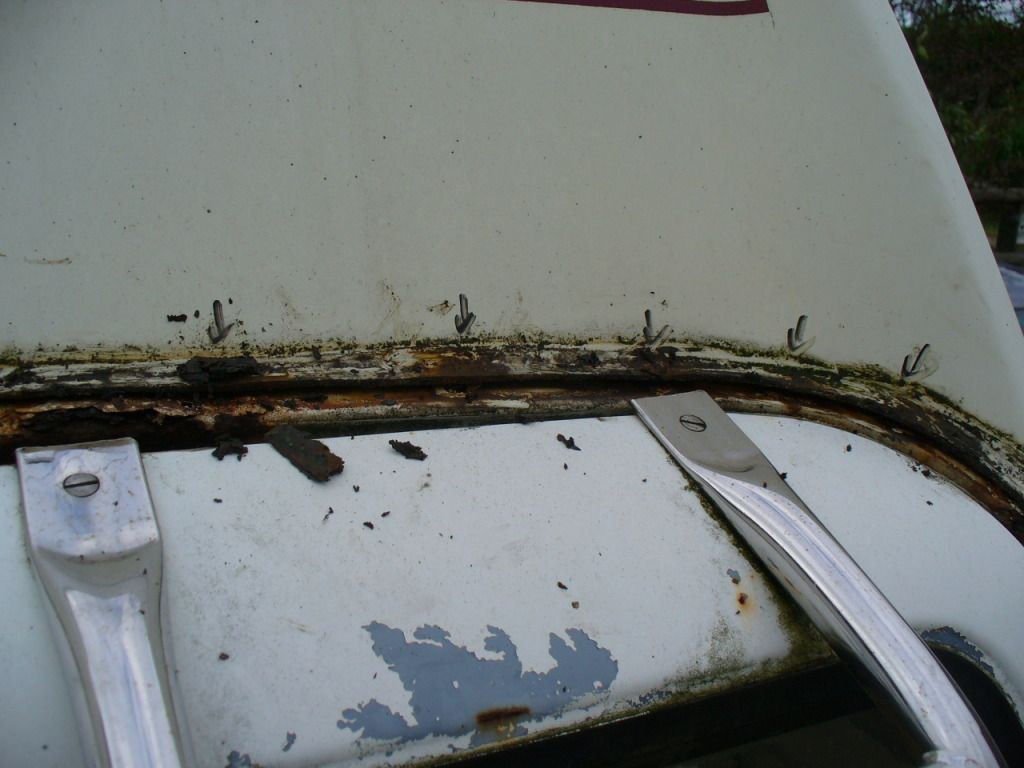
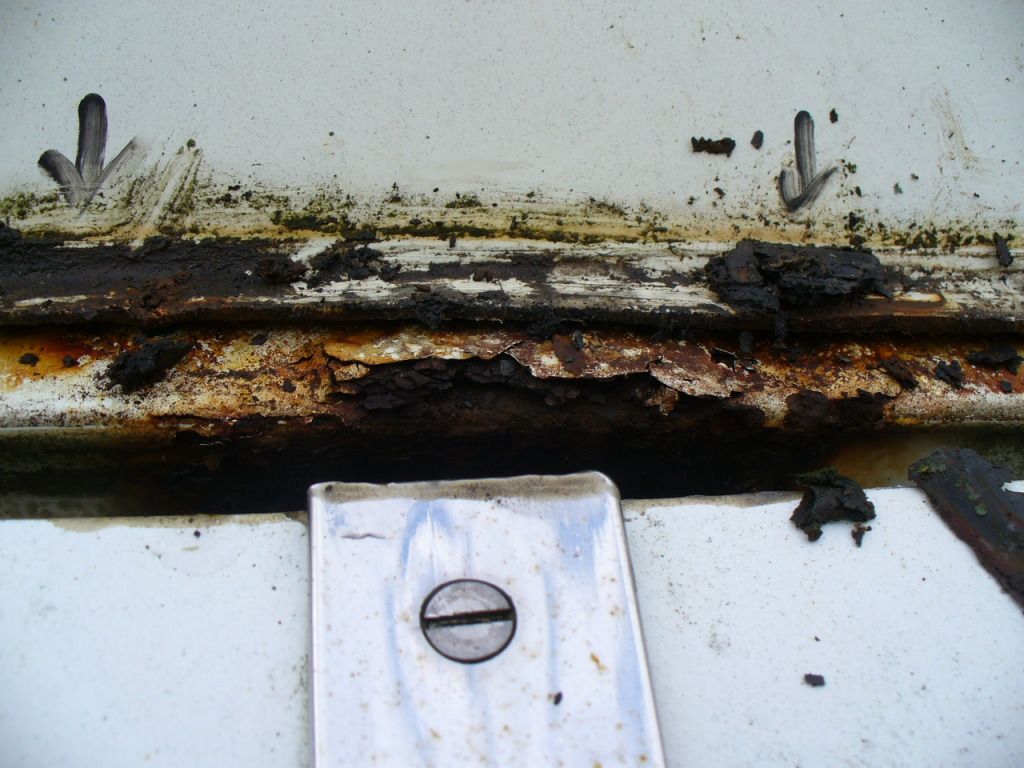
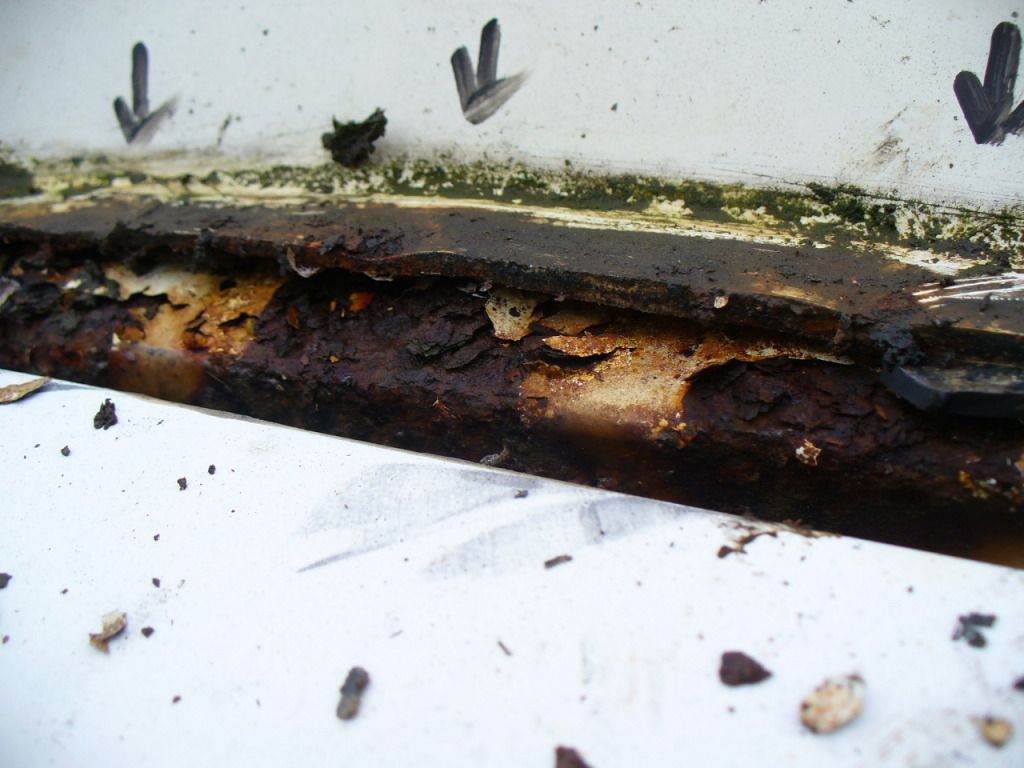
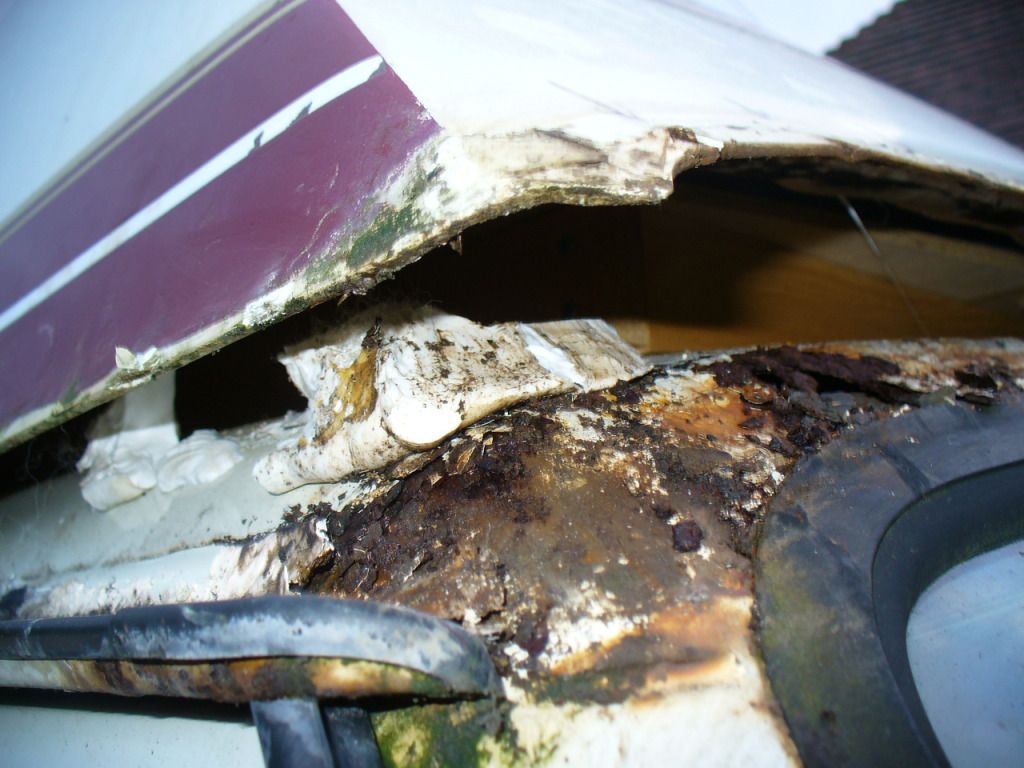
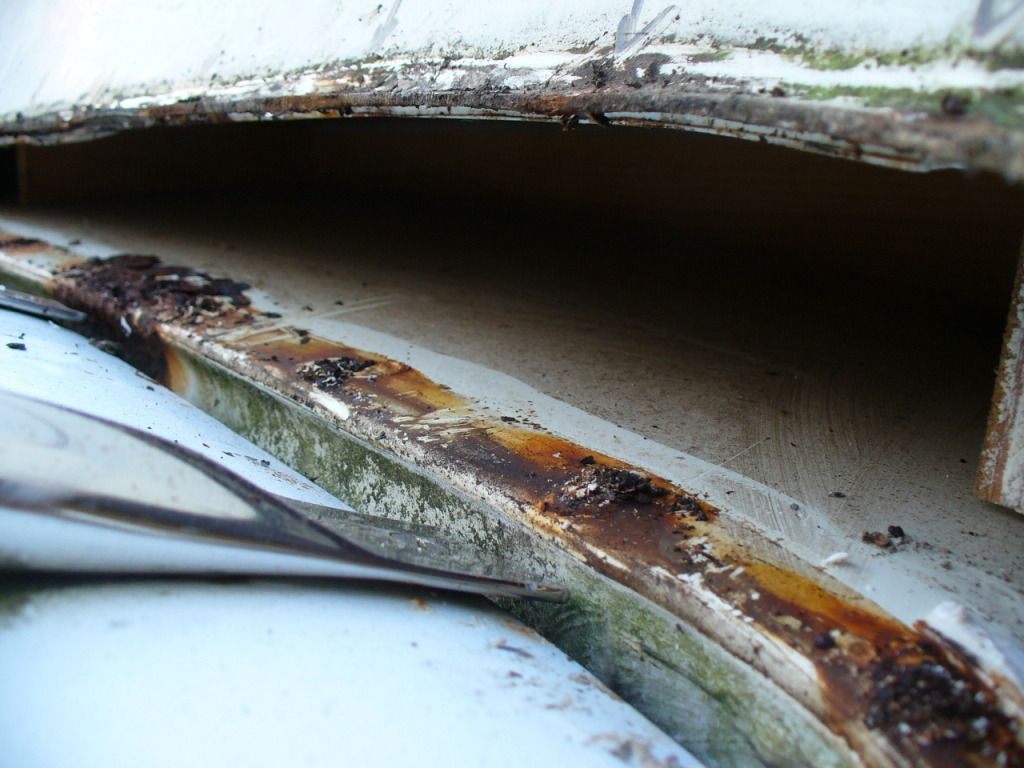
From the outside the signs of rot were pretty obvious:
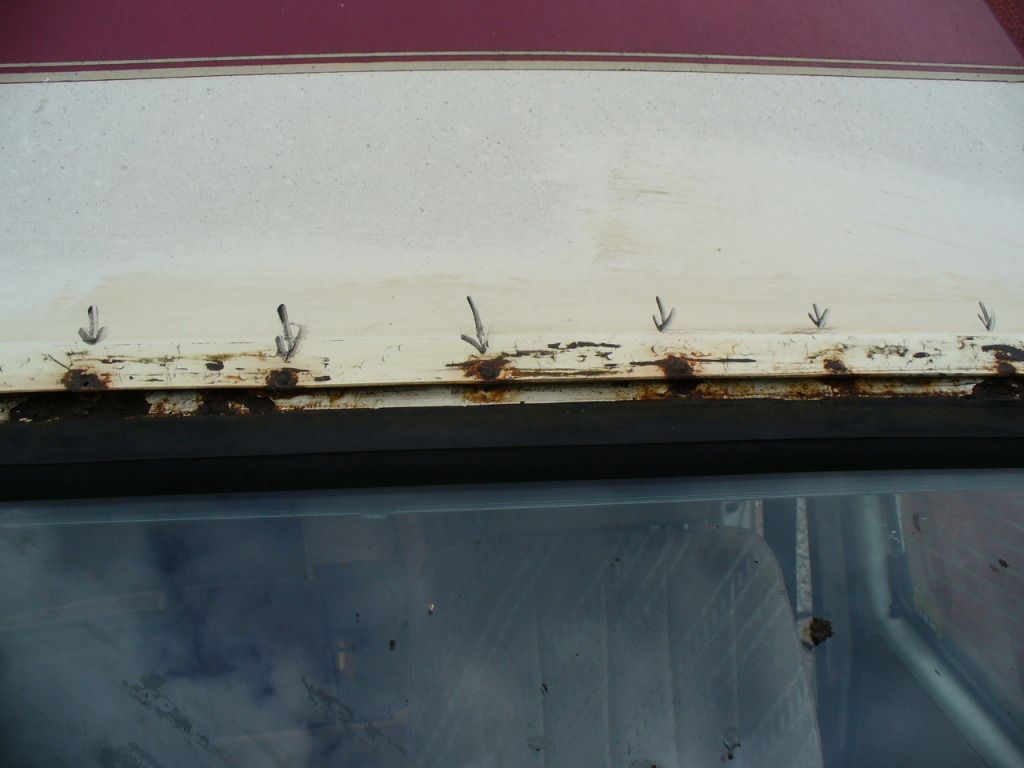
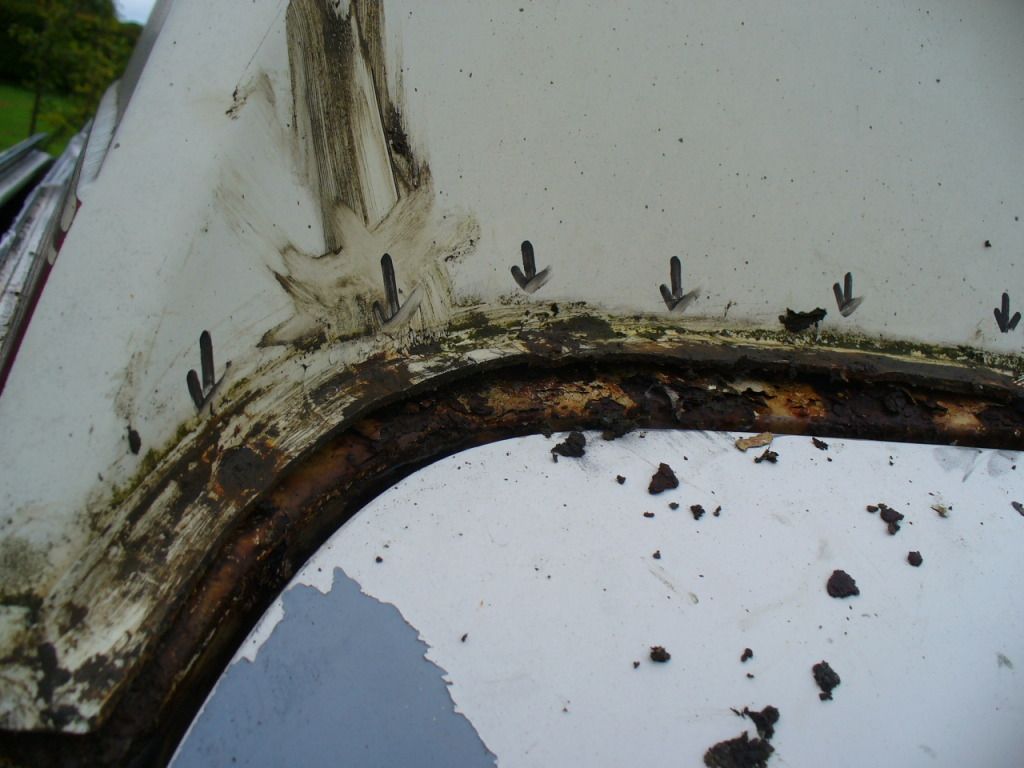
On removing the seals the damage was somewhat worse , the arrows show the location of the original rivets.
At the front:
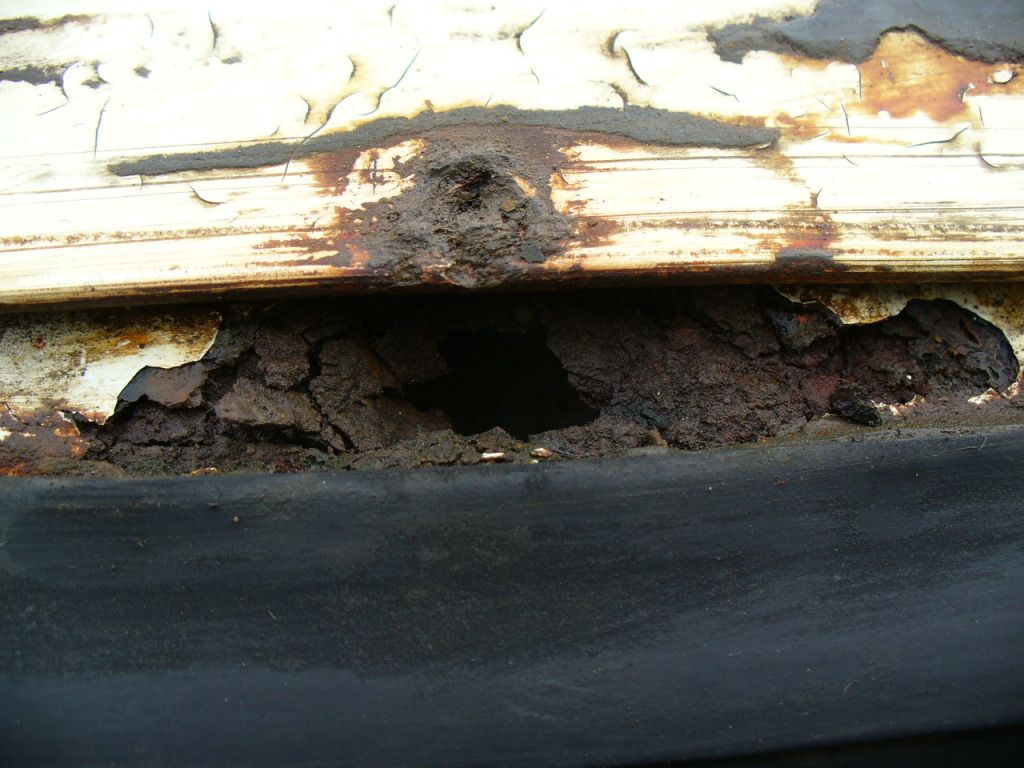
And in close up!
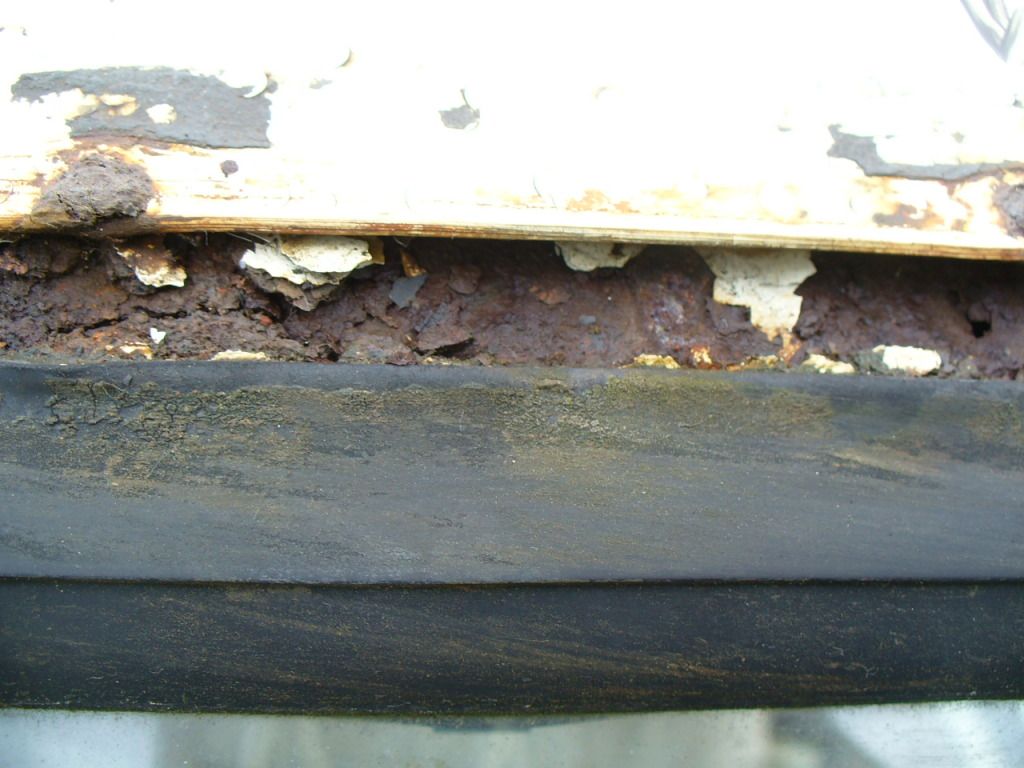
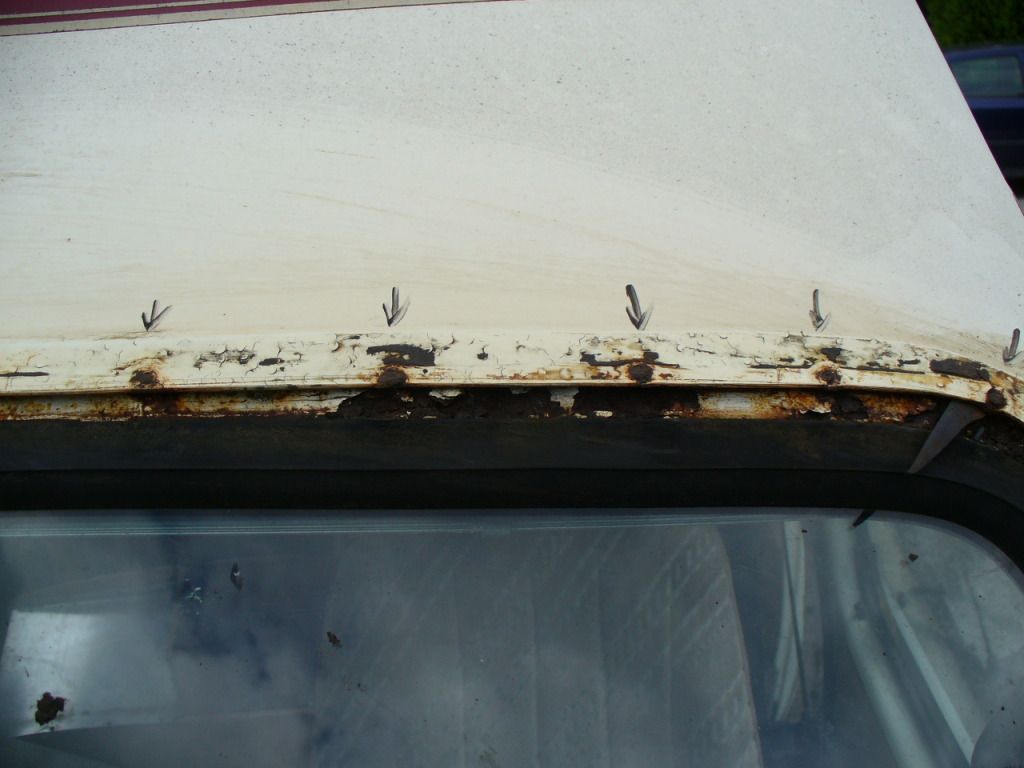
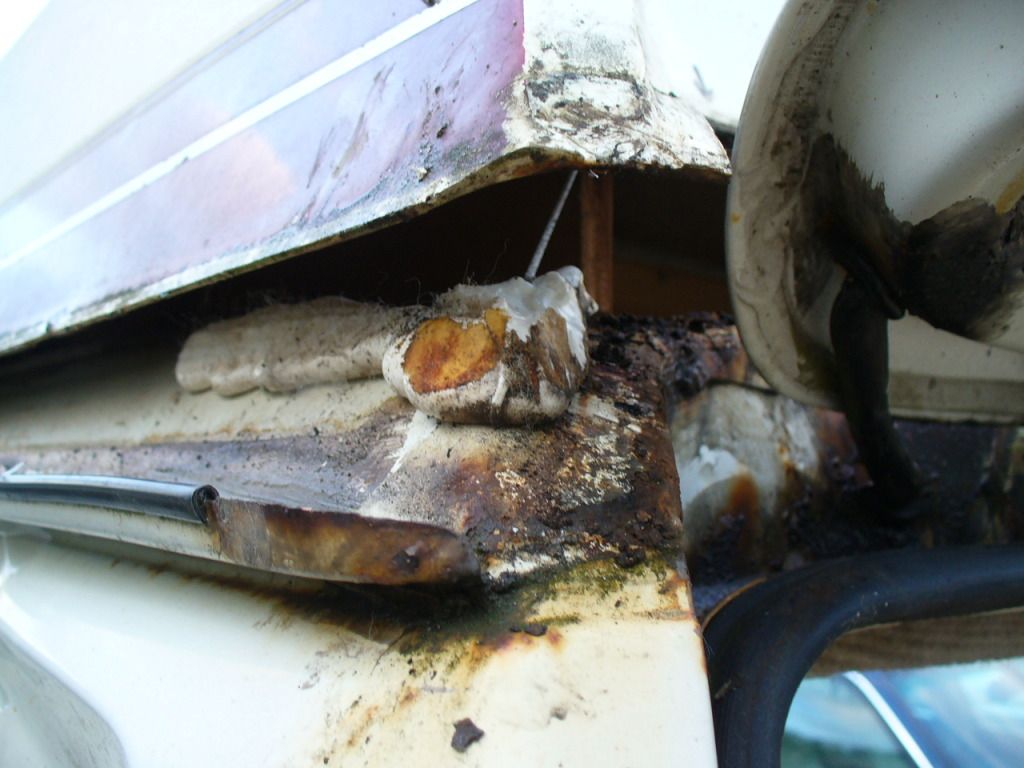
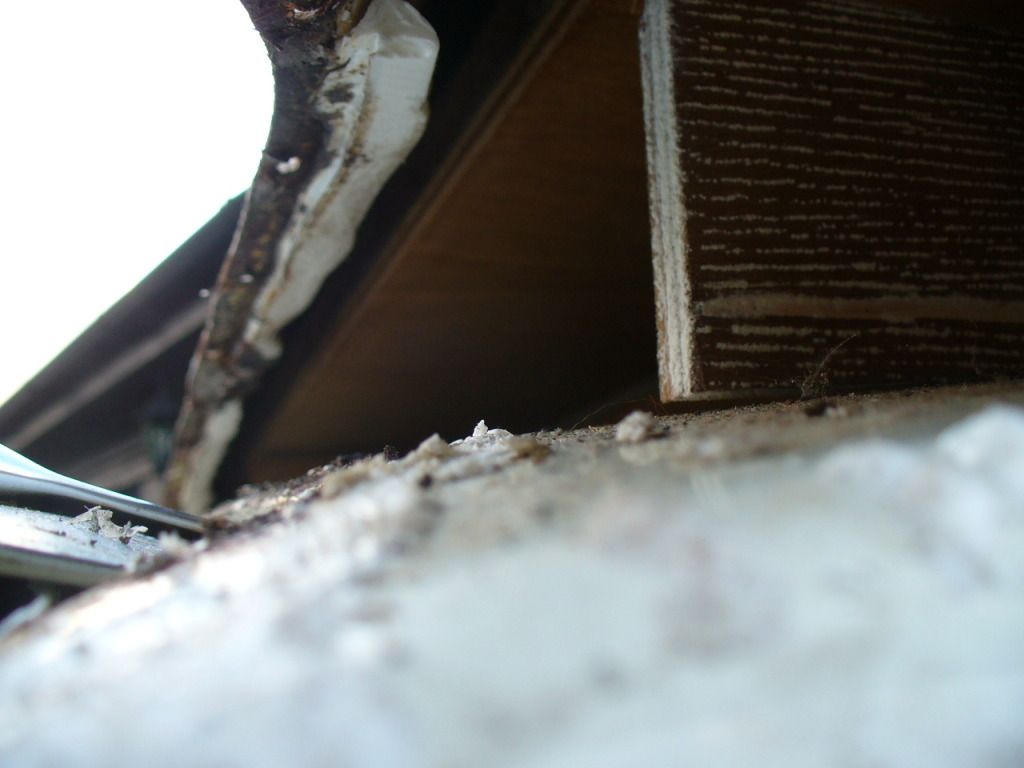
The rear hasn't faired much better
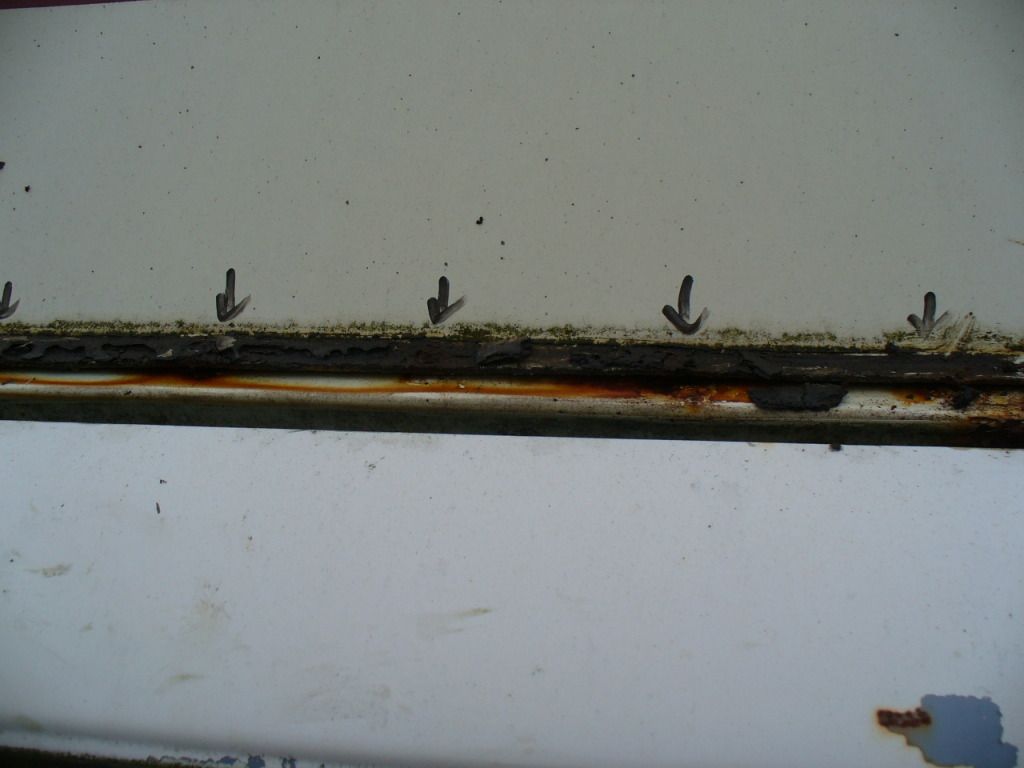
and in close up
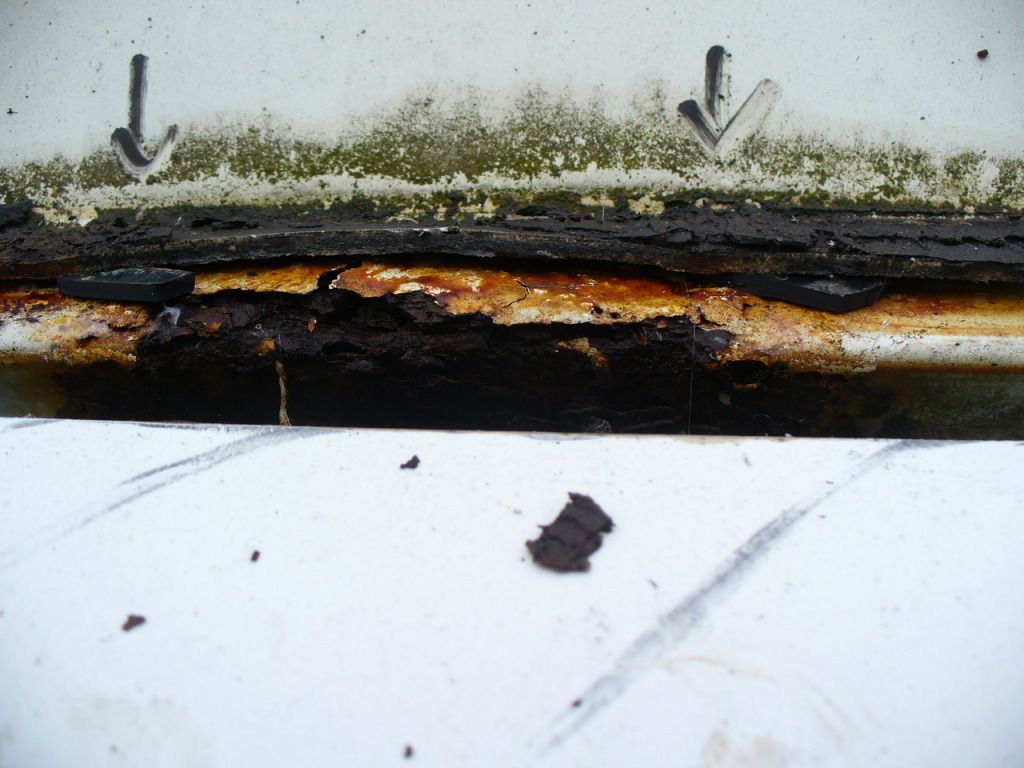
What a mess!! The problem seems to lie in the approach to securing the roof. The roof is rested on to the tin top of the van and then a rubber seal is fitted. The seal is a "U" shape, with one lip going between the tin and the fibre glass and the other resting over the fibre glass.
The roof is then riveted down onto the tin, with the rivet going through the lower part of the rubber seal. Problem is, by definition the fibre glass isn't a close fit to the roof, so the rivets cannot pull the roof down in a perfect fit.
Add to this the fact that they don't put any sealant on the seal whatsoever, and you have a perfect recipe for rot , Rivets going into metal = bare metal, no sealant = water ingress, rubber seal = water held in --> ROT
They do put lots of sealant in the gutters though, which does a great job of filling in the drain channel so the water sits against the roof itself.
On at least 60% of the roof the side of the roof was loose and not actually sealed against the tin so go figure.
To seperate the roof sides from from the tin I started by removing the the front cupboard, complete with rusted in screws
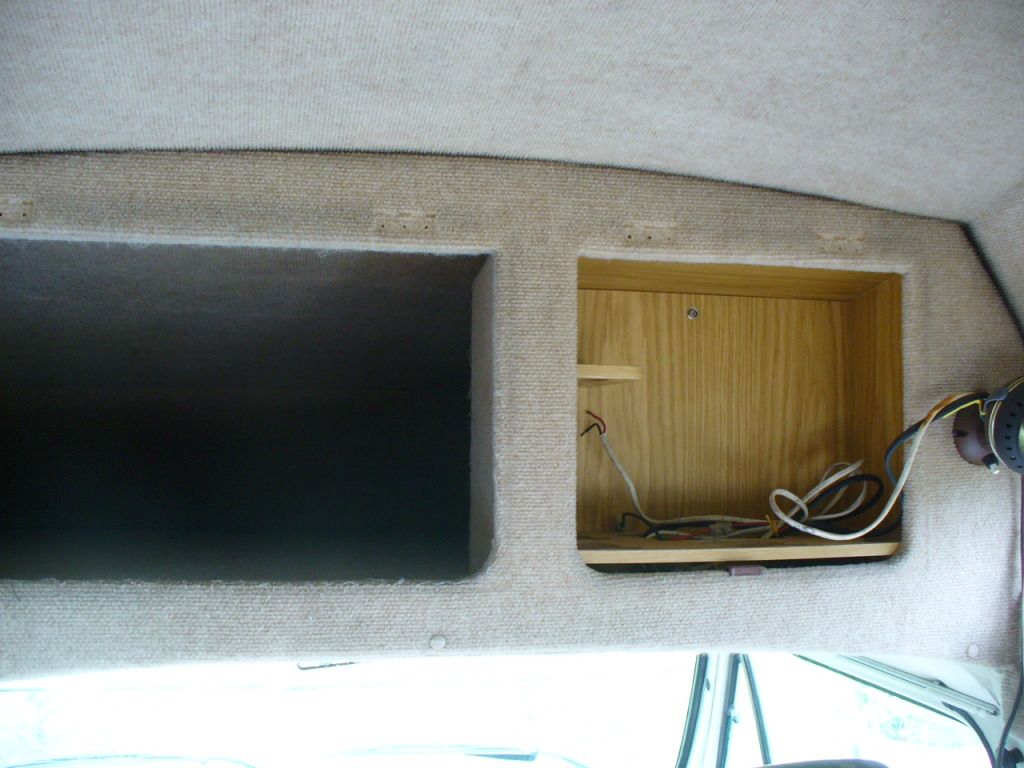
I didn't want to remove the cupboard and bed bases so needed to find a way of breaking the seal that still existed between the tin and sides of the roof. If you remove the ZIG panel you can get an idea of how the tin/roof works.
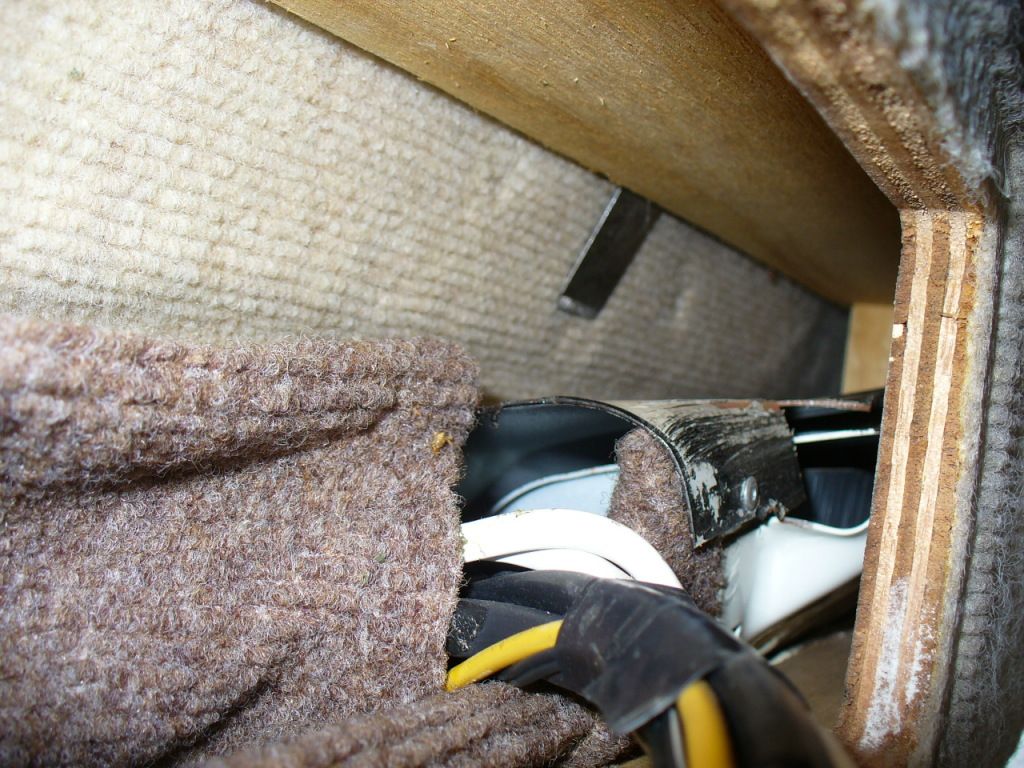
Interesting that AS carpet all the way down the inside of the roof!
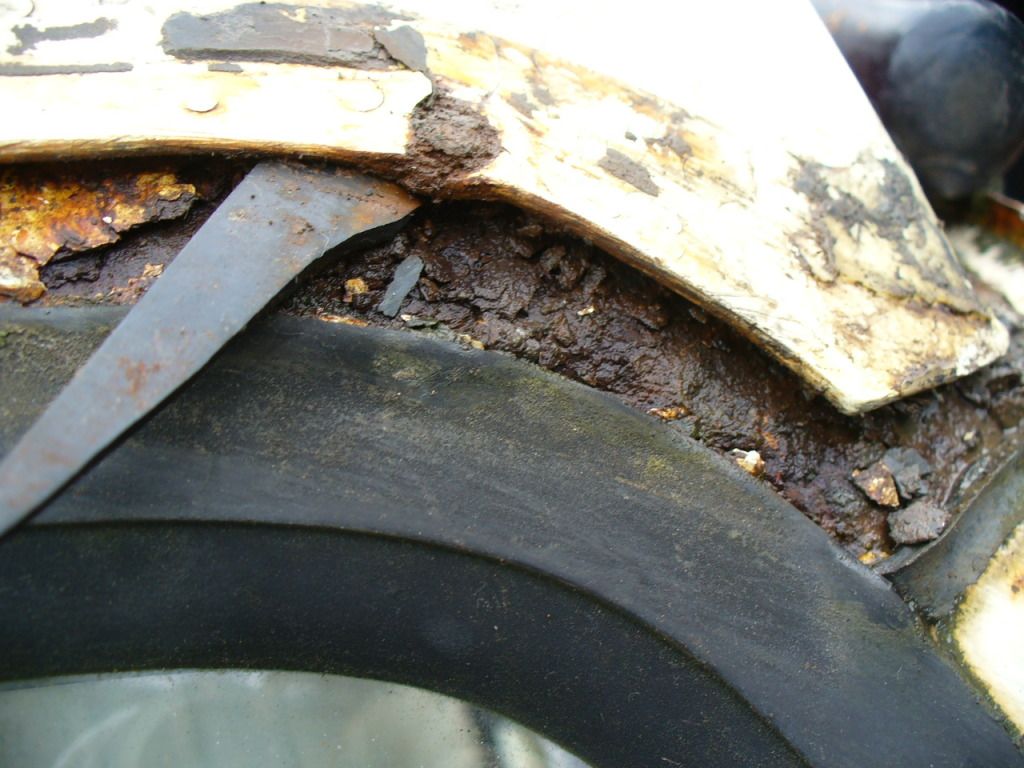
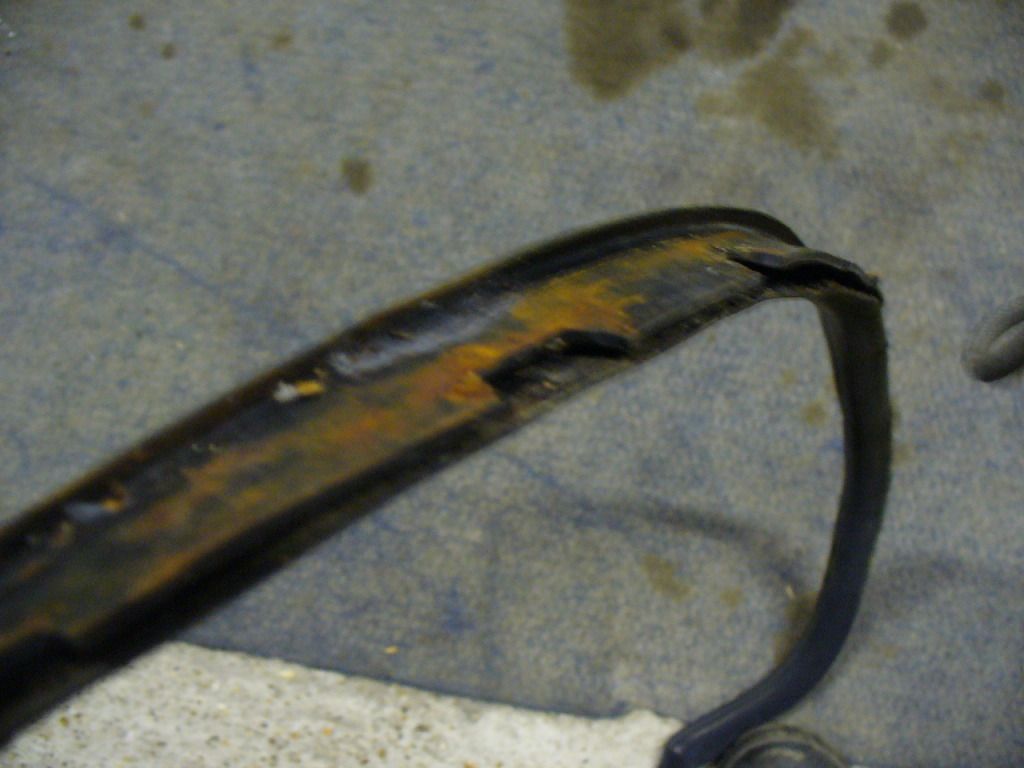
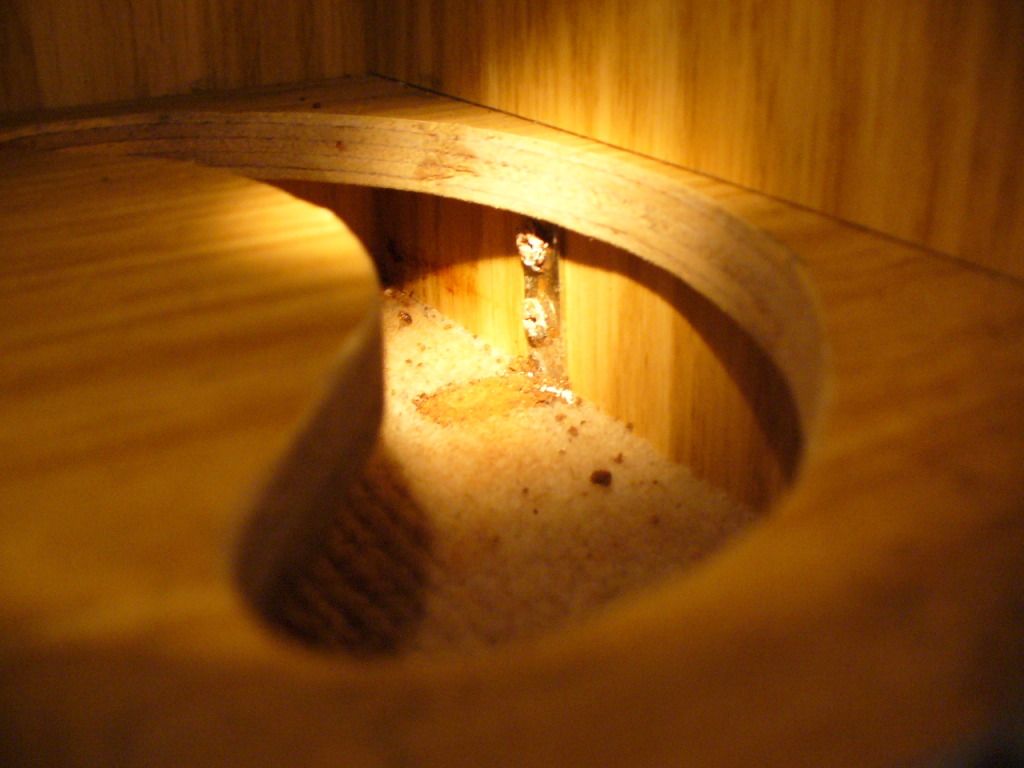
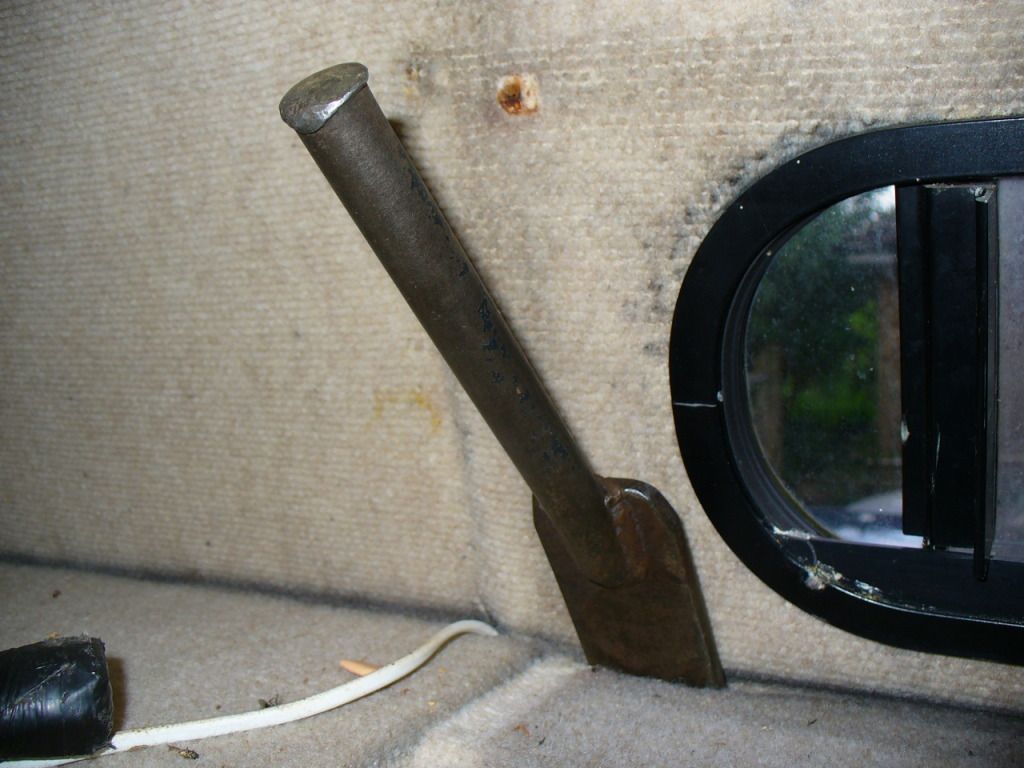
So, scout'd around the workshop and found the ideal tool, and old slapper I use for planishing panels.
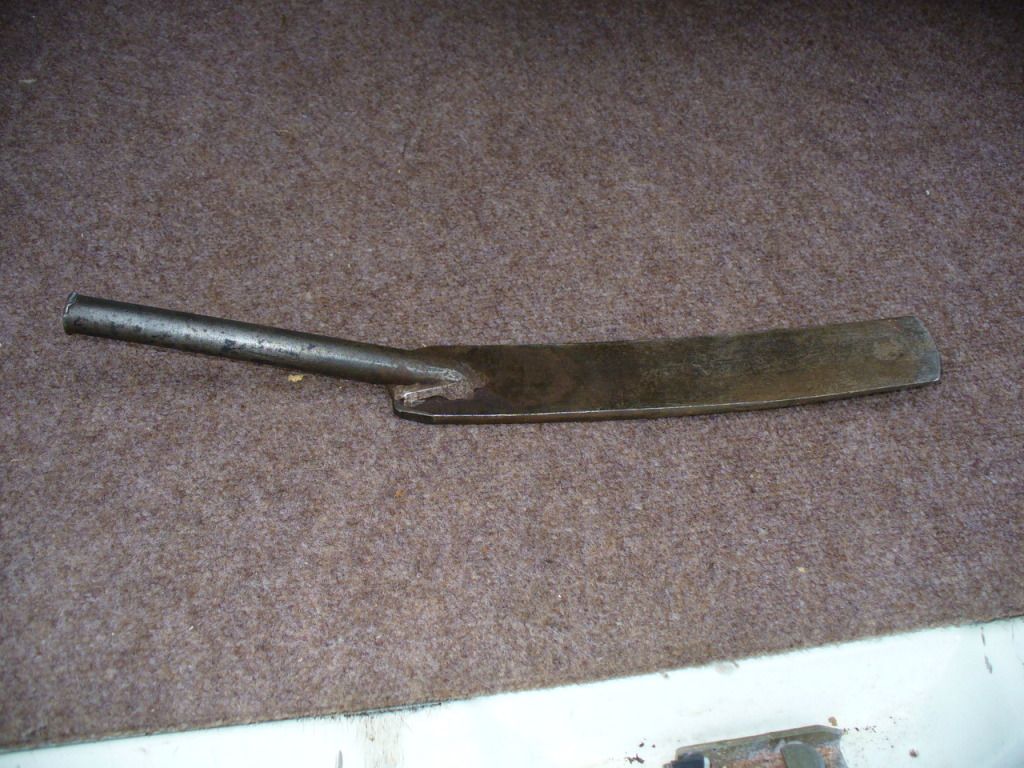
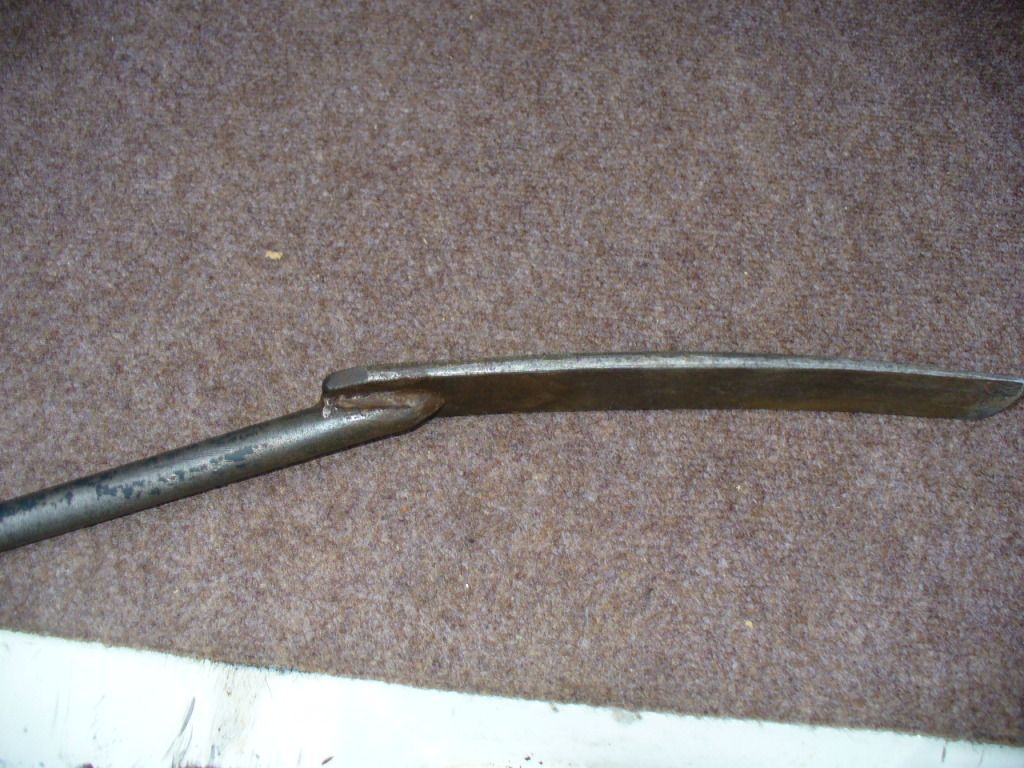
Slips down between the roof and tin works and then cuts the seal and can lever the roof clear. Just be careful not to put too much pressure in any one part of the roof.
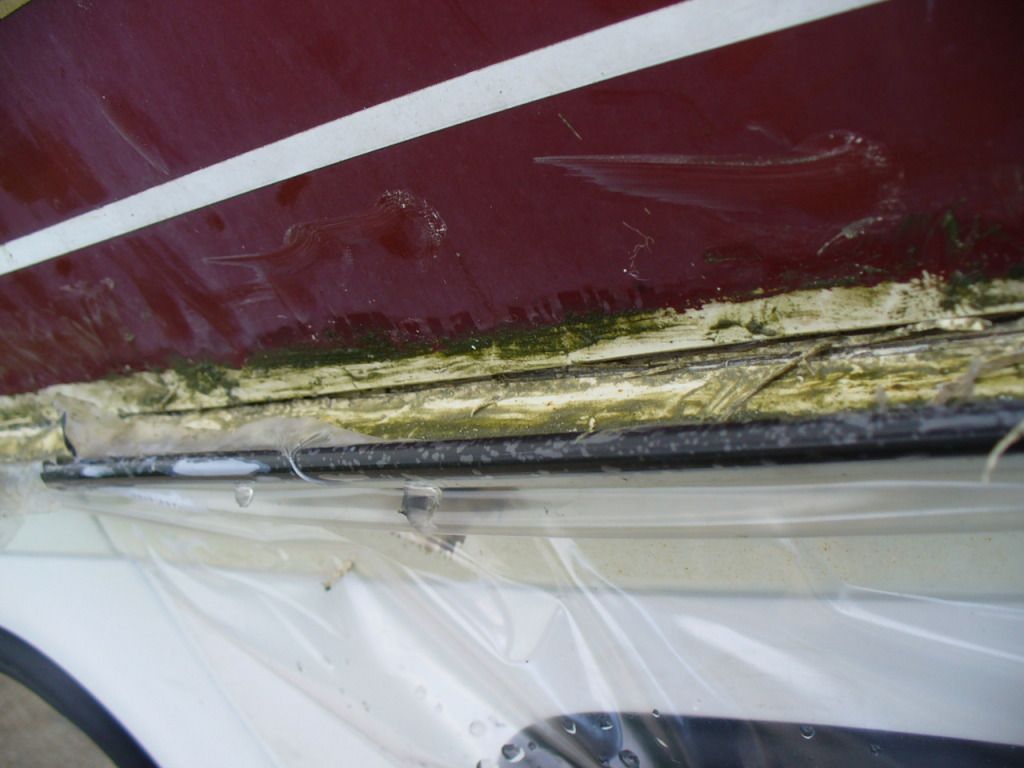
Most of it is easy to split apart from the 4 corners, reason being AS put about 1lb of sealant in each corner!
I carefully jacked the roof to break the final parts of the sealant
and then you can see this.
Roof comes off tomorrow, possibly with some help from the local "rent an 80-90 helping hand" crew then I can see if we are into body cuts or just patch repairs.
Cheers,
MM
Local supplier of the window seals was closed on Friday and one of the rear windows shattered, then there was no point doing the floor as the van wasn't water tight ( as the weather showed when it lashed it down
Best laid plans and all that
So decided to bite the bullet and take the roof off as the more I looked at the seals the more it looked pretty grim. So with a bit of guidance from Mike's Kevtherevagon thread we attacked the roof. Kev's van had had the roof refitted at some stage whereas Gunther's is the original undisturbed fitment, so I have taken loads of pics incase it helps anyone else doing an Autosleeper roof!
From the outside the signs of rot were pretty obvious:
On removing the seals the damage was somewhat worse
At the front:
And in close up!
The rear hasn't faired much better
and in close up
What a mess!! The problem seems to lie in the approach to securing the roof. The roof is rested on to the tin top of the van and then a rubber seal is fitted. The seal is a "U" shape, with one lip going between the tin and the fibre glass and the other resting over the fibre glass.
The roof is then riveted down onto the tin, with the rivet going through the lower part of the rubber seal. Problem is, by definition the fibre glass isn't a close fit to the roof, so the rivets cannot pull the roof down in a perfect fit.
Add to this the fact that they don't put any sealant on the seal whatsoever, and you have a perfect recipe for rot
They do put lots of sealant in the gutters though, which does a great job of filling in the drain channel so the water sits against the roof itself.
On at least 60% of the roof the side of the roof was loose and not actually sealed against the tin so go figure.
To seperate the roof sides from from the tin I started by removing the the front cupboard, complete with rusted in screws
I didn't want to remove the cupboard and bed bases so needed to find a way of breaking the seal that still existed between the tin and sides of the roof. If you remove the ZIG panel you can get an idea of how the tin/roof works.
Interesting that AS carpet all the way down the inside of the roof!
So, scout'd around the workshop and found the ideal tool, and old slapper I use for planishing panels.
Slips down between the roof and tin works and then cuts the seal and can lever the roof clear. Just be careful not to put too much pressure in any one part of the roof.
Most of it is easy to split apart from the 4 corners, reason being AS put about 1lb of sealant in each corner!
I carefully jacked the roof to break the final parts of the sealant
and then you can see this.
Roof comes off tomorrow, possibly with some help from the local "rent an 80-90 helping hand" crew
Cheers,
MM
'89 Autosleeper Trident
2.1 DJ
Member 9111
2.1 DJ
Member 9111
-
jes*b
- Registered user
- Posts: 879
- Joined: 25 May 2008, 09:41
- 80-90 Mem No: 10335
- Location: folkestone, kent
Re: Gunther's Body Makeover Commences
Well mm whad-do-ya-know - turns out MM lives a mile from me! Went along to check progress and ...... Came away slightly embarrassed by my meagre rust issues which still remain untackled. Sh*t the bed this high top is a project and a half. Look forward to helping out as & when. Some very fine work indeed. Worried about getting your 2 wd up and down your drive in winter tho, think you should look yourself out a Syncro as well
-
mm289
- Registered user
- Posts: 314
- Joined: 31 Dec 2010, 22:00
- 80-90 Mem No: 9111
- Location: Dover, Kent
Re: Gunther's Body Makeover Commences
jes*b wrote:, think you should look yourself out a Syncro as well
I do keep my eye out for one, trouble is you lot have made them all soooo expensive
Phone call on its way to help lift the roof off
MM
'89 Autosleeper Trident
2.1 DJ
Member 9111
2.1 DJ
Member 9111