Gunther's Body Makeover Commences

Thin bits of metal and bright blue light.

Moderators: User administrators, Moderators

mm289
Registered user
Posts: 314
Joined: 31 Dec 2010, 22:00
80-90 Mem No: 9111
Location: Dover, Kent

Re: Gunther's Body Makeover Commences

Post by mm289 »

OK, so its been age's since the last post. The "small ramp" or bulge where the two panels met turned out to be a right PITA :twisted:

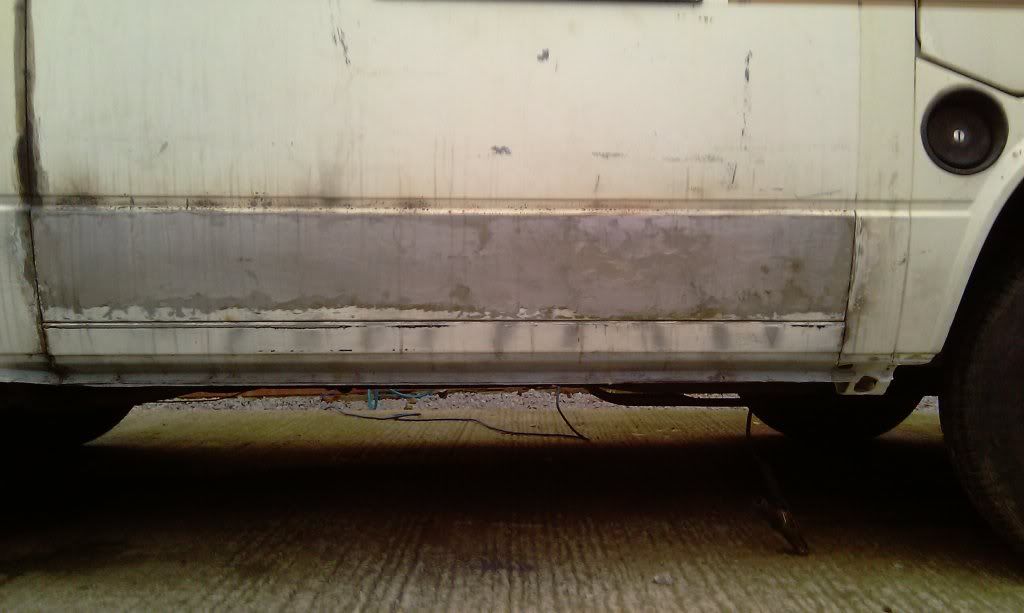
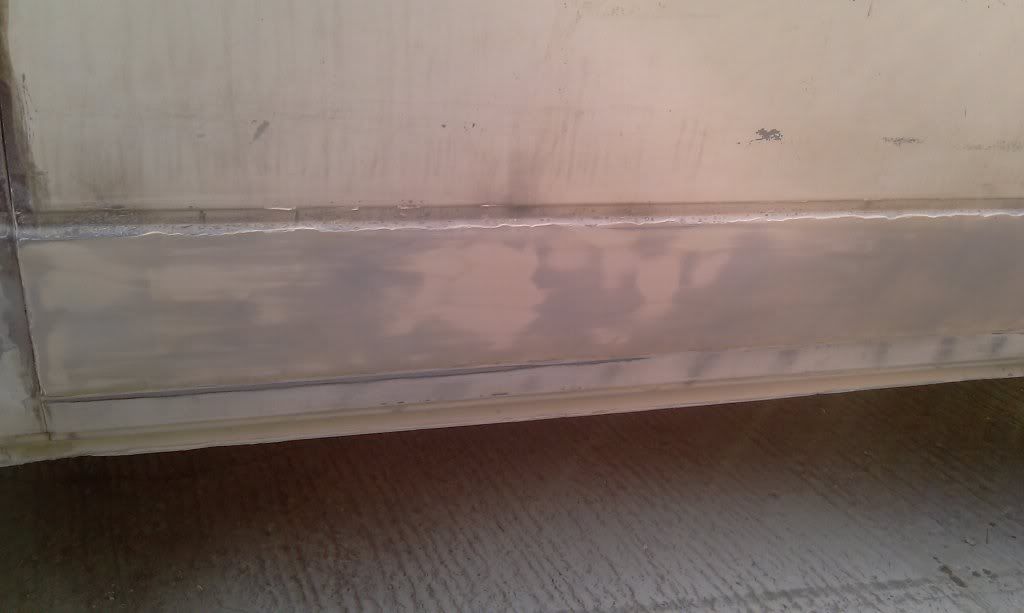
Basically, I have now learnt if you insist on butt welding a long panel leave a small (1mm) gap between edges. I had carefully trimmed mine so they were dead tight and when I applied the weld the extra metal from the MIG caused a bulge at the join.

You can't planish (hammer) it out cause its too hard and just stretches the metal around and when you grind you end up with metal the same as a "wafer thin mint" (ask me how I know :roll: )

Eventually after lots of help and advice from Mike (Metal Mickey - what a great guy :ok ) I put in a reinforcing strip behind and then lead loaded the front. Still need to put a skim of filler on to level and shape but this is what it looks like at the mo.
Image

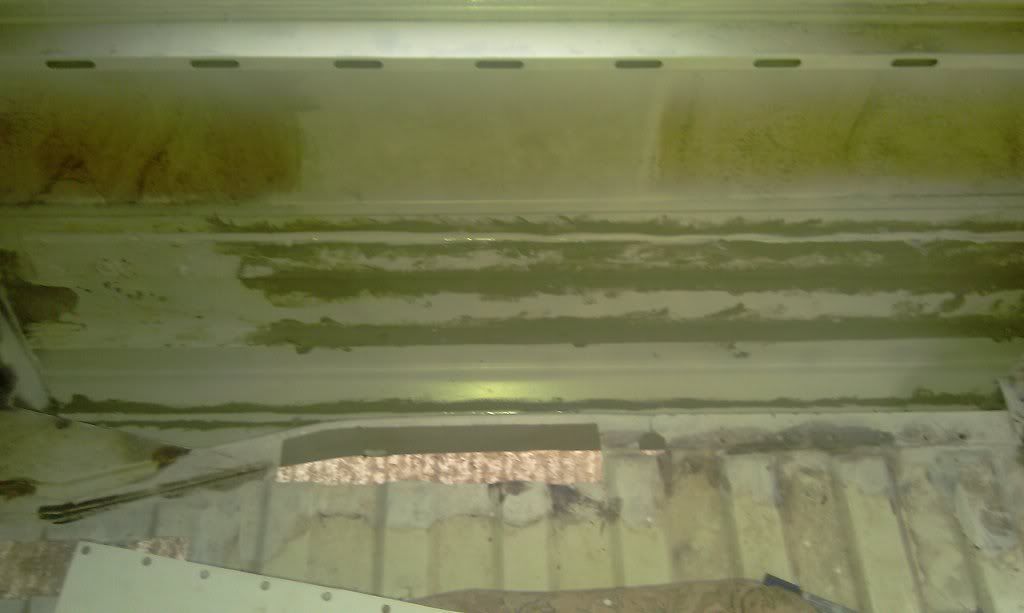
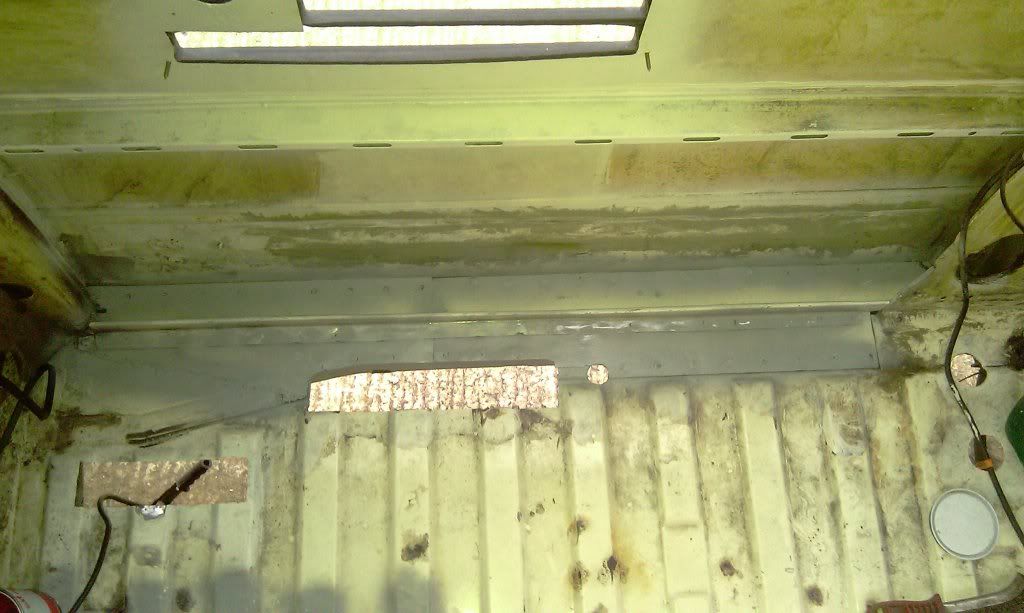
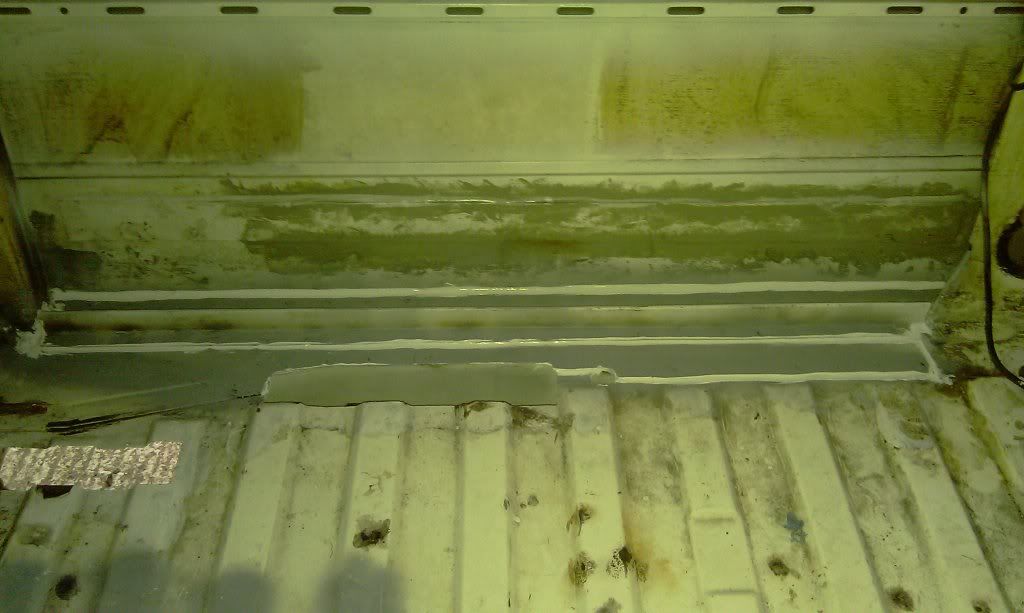
Turning to the inside I had painted the inside of the sills with epoxy primer then went over all the joins and welds with brushable seam sealer before going over the joins again with Poly Urethane seam sealer. Then also sprayed waxoyl equivalent from 3M in all the cavities. Finished article looked like this.
Image

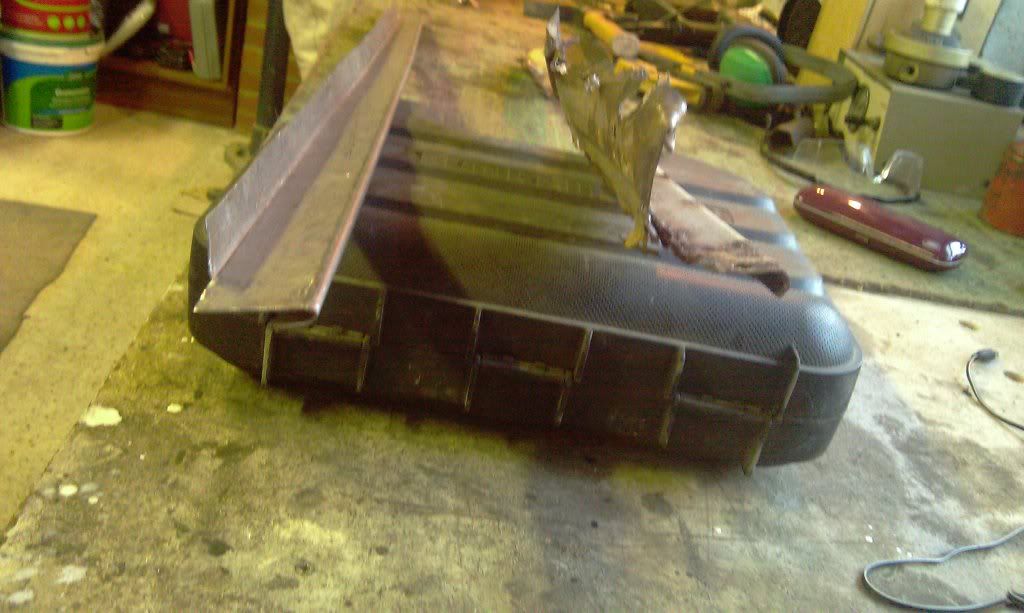
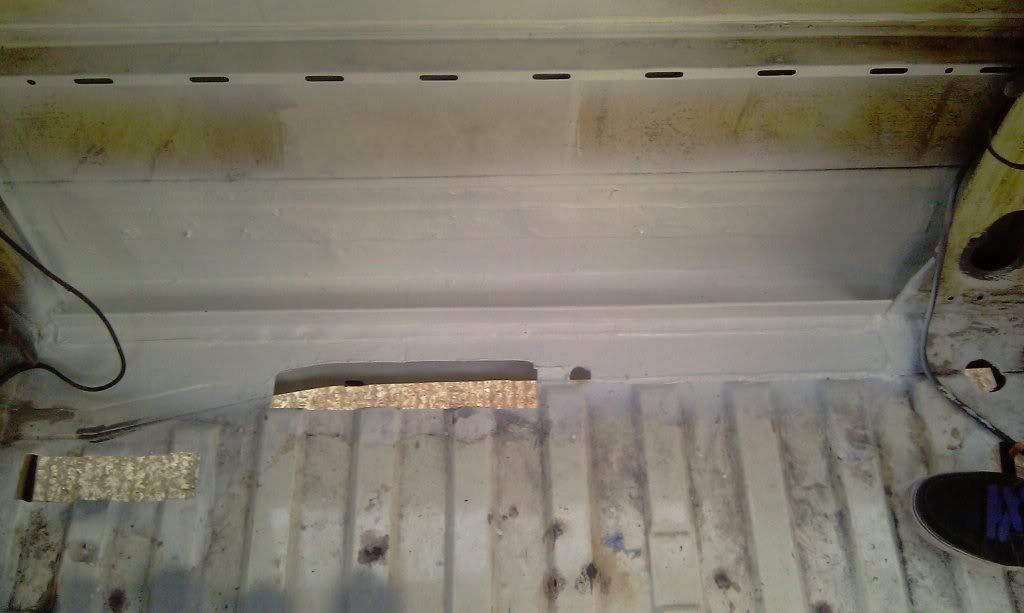
With everything treated internally I then took the 2 panels I had made up earlier using the carboard templates and sprayed them with epoxy primer before puddle welding into place to seal the cavity. I had also made up a new "upstand" which had rotted out on mine (Mike had said this is used to fix the side panel too). This isn't required on a camper but for completeness a new one was made up anyway :)
Image

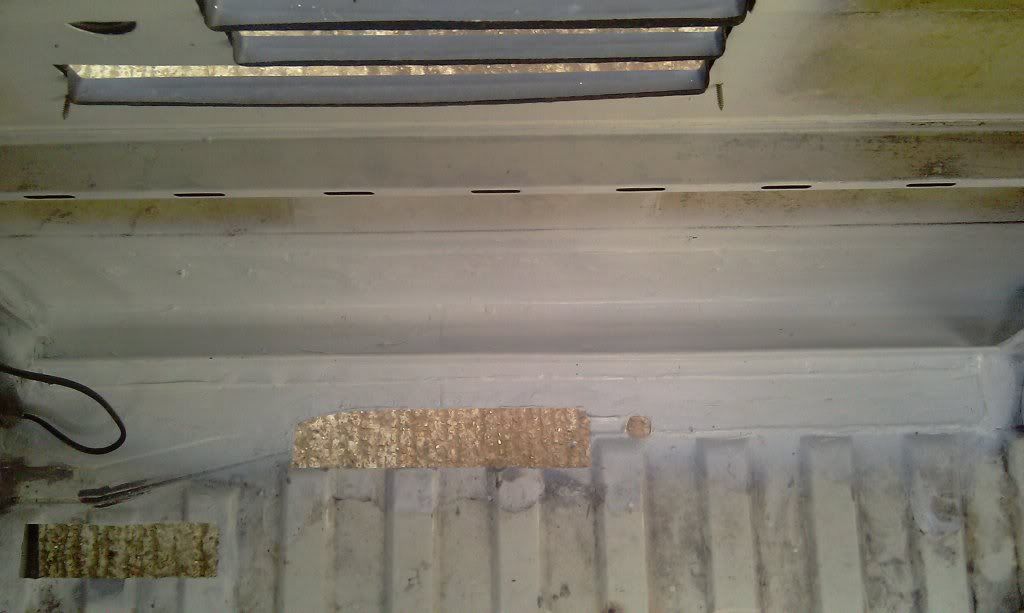
This was then puddled on top of the new top plates and the welds dressed then given a coat of etch primer.
ImageImage

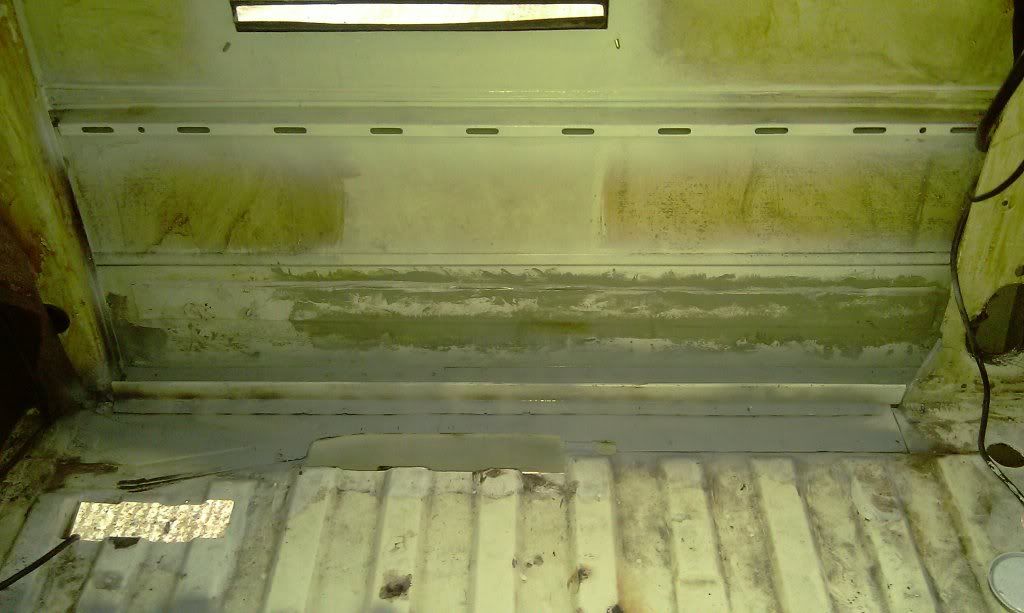
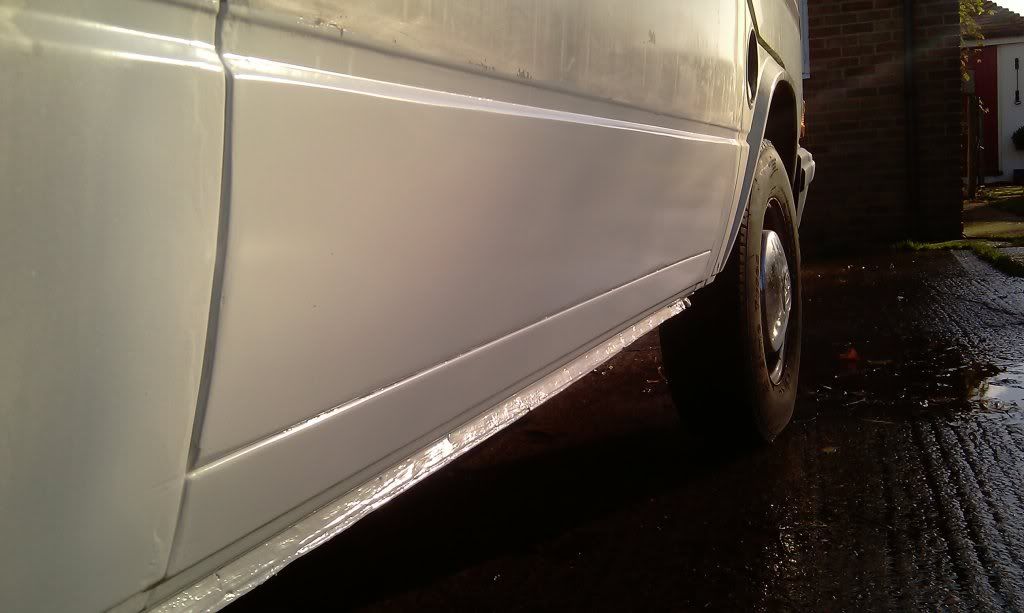
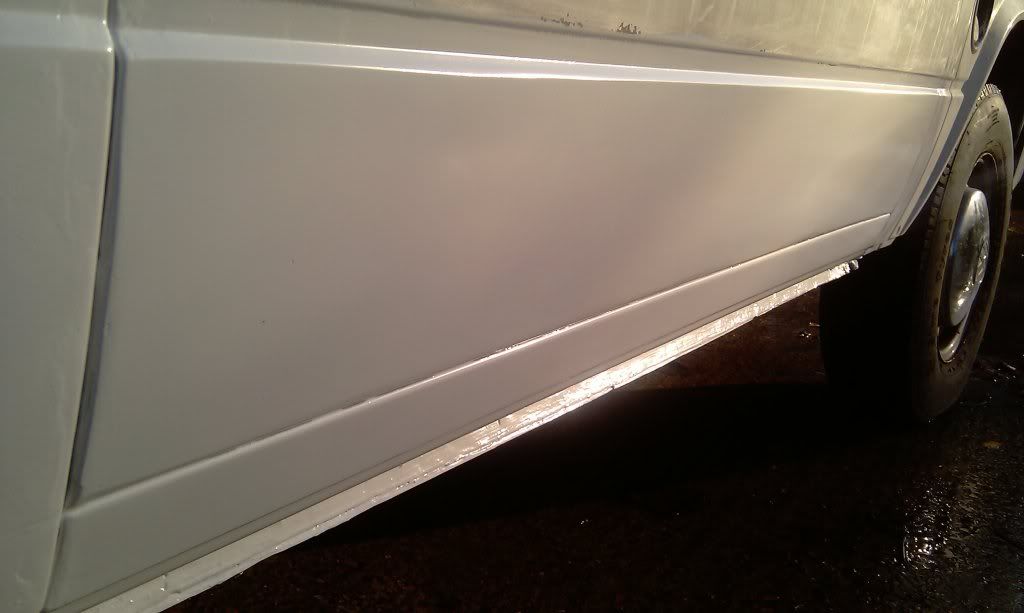
And finally, all the seams/edges are dressed in PU sealer again.
Image

Once this has dried I will go over all the welds with brushable seam sealer just in case I have any porosity then hit the whole lot with another couple of coats of epoxy primer. Hopefuly that will keep the rust at bay for a week or two at least :D .

MM
'89 Autosleeper Trident
2.1 DJ
Member 9111

Jonnyb416
Registered user
Posts: 965
Joined: 17 Feb 2011, 22:07
80-90 Mem No: 9259
Location: Wigan

Re: Gunther's Body Makeover Commences

Post by Jonnyb416 »

Just had a good read through your thread and it's been very interesting. Completing a lot of similar jobs to my van. Good luck with anything else you need to do. Jon.
1982 Diesel hightop. 1Y engine. Still work in progress but running and taking us on holidays.

Plasticman
Trader
Posts: 8077
Joined: 12 Oct 2005, 20:55
80-90 Mem No: 1948
Location: lincolnshire

Re: Gunther's Body Makeover Commences

Post by Plasticman »

Thats now looking very nice indeed, can I send you some to do :D
mm :ok

mm289
Registered user
Posts: 314
Joined: 31 Dec 2010, 22:00
80-90 Mem No: 9111
Location: Dover, Kent

Re: Gunther's Body Makeover Commences

Post by mm289 »

metalmick8y wrote:Thats now looking very nice indeed, can I send you some to do :D
mm :ok

:rofl :rofl :rofl

Takes you 2 months to do a van, takes me 3 months to do a panel :shock:

Think I still need to improve Obi Wan :lol:

It is coming together now though, gonna put it in for an MoT this week so at least it is mobile. Would really like to sort out some of the windows as well as they are leaking a bit before I put the interior back in. Bit difficult when you have to work outside though, might look for a cheap awning or try and rig up a cover of some sort :roll:

Hope your feeling better, I had similar about 3 weeks ago, knocked me sideways - hope you can't catch it from PM's otherwise I might have given it to you :D

MM
'89 Autosleeper Trident
2.1 DJ
Member 9111

mm289
Registered user
Posts: 314
Joined: 31 Dec 2010, 22:00
80-90 Mem No: 9111
Location: Dover, Kent

Re: Gunther's Body Makeover Commences

Post by mm289 »

PS, with the sill repair finished Gunther passed his MoT first time today, not even an advisory. Not sure who was most surprised, me or the tester - although he did make some nice comments about my shiny engine :ok

Downside was we developed a loud knocking on the way back :twisted: happens on overun not throttle and is at a low frequency (speed related as well) makes me think it might be a UJ/driveshaft problem rather than TC/flex plate.

Oh well.......... back to mechanical challenges :roll:

MM
'89 Autosleeper Trident
2.1 DJ
Member 9111

mm289
Registered user
Posts: 314
Joined: 31 Dec 2010, 22:00
80-90 Mem No: 9111
Location: Dover, Kent

Re: Gunther's Body Makeover Commences

Post by mm289 »

Quick pic of the finished repair after a couple of coats of epoxy primer. I'm not intending on top coating this as it will be under the floor/behind the cupboards.

ImageImage

MM
'89 Autosleeper Trident
2.1 DJ
Member 9111

Plasticman
Trader
Posts: 8077
Joined: 12 Oct 2005, 20:55
80-90 Mem No: 1948
Location: lincolnshire

Re: Gunther's Body Makeover Commences

Post by Plasticman »

looks good but its back to that big hole with the slots in it :rofl your going to have to stop all the water coming in and undoing the good work youve done.
mm

mm289
Registered user
Posts: 314
Joined: 31 Dec 2010, 22:00
80-90 Mem No: 9111
Location: Dover, Kent

Re: Gunther's Body Makeover Commences

Post by mm289 »

Yep, all the while the fridge is out I am going to put a plastic sheet behind vent and seal off the aperture. probably tape up the holes in the floor as well.

Now got to figure out my knocking, sounds like it is nearer the middle of the van than the rear which is transmission rather than driveshafts :(

MM
'89 Autosleeper Trident
2.1 DJ
Member 9111

mm289
Registered user
Posts: 314
Joined: 31 Dec 2010, 22:00
80-90 Mem No: 9111
Location: Dover, Kent

Re: Gunther's Body Makeover Commences

Post by mm289 »

This isn't the end,
This isn't even the start of the end,
But this is the end of the beginning :D

Finally got the time to finish of the fridge panel and sill repair this week, gee this has taken a long time :shock:

So, last time out we had leaded in the repair panel to the side panel on the van, next step was to put a thin skim of filler on partly to smooth out the finish but also to get the right profile on the panel.

slowly built up a couple of skims and then block sanded using a guide coat, part way through it looked like this
Image

Filler is maybe 2mm in places which is more than I wanted but after the challenges I had getting the join flat this is fine for me and gives the right profile to the panel.

After 3 or 4 applications ( the last 2 just touching in low spots shown up by the guide coat) I had a pretty much glass like finish.
Then got the spray gun out and laid down 2 coats of Lechler Epoxy Primer. End result looks like this.

Image
Image
Image

Given this is just with epoxy primer on (to preserve it until I am ready to spray the whole van) so no hi build primer, no flatting between coats etc, i am pretty happy :D

There are a few nibs (sprayed outside in the wind :shock: ) and a few pin holes in the filler (which i could only see with paint on) and one or two imperfections still to sort but overall I am well chuffed.
Image

Next job is to put some sealant in the seams and new seal in the window above which is leaking as well :roll:

So from this:
ImageImage

to this:
ImageImage

in about 4 months :shock: , might have it ready for summer 2014 :roll:

MM
'89 Autosleeper Trident
2.1 DJ
Member 9111

Plasticman
Trader
Posts: 8077
Joined: 12 Oct 2005, 20:55
80-90 Mem No: 1948
Location: lincolnshire

Re: Gunther's Body Makeover Commences

Post by Plasticman »

perfect job there. dont be fearfull of filler, its only a bodge when used to cover/fill rot, its purpose is to attain a profile or surface shape. if you want to see mass filling bthen watch the dolts on quest hotrod they often do nice metalwork,other times they coat it in filler
mike

mm289
Registered user
Posts: 314
Joined: 31 Dec 2010, 22:00
80-90 Mem No: 9111
Location: Dover, Kent

Re: Gunther's Body Makeover Commences

Post by mm289 »

Cheers Mike, I was pretty happy especially with the paint actually as it was my first time with a proper rig rather than rattle cans.

The best episode of Boyd Coddington for me was one where they were building a rod (chopped Ford or Willy's - cant remember) and all they had were hand drawings from Boyd.

They took it to an old timer who had a metal fab shop with his sons and the built the body from scratch outta sheet. I could just keep watching those guys shape metal for hours and thats what switched me onto doing my own metalwork really :D

The rest of the Coddington crew I could happily leave behind :o

MM
'89 Autosleeper Trident
2.1 DJ
Member 9111

Plasticman
Trader
Posts: 8077
Joined: 12 Oct 2005, 20:55
80-90 Mem No: 1948
Location: lincolnshire

Re: Gunther's Body Makeover Commences

Post by Plasticman »

yep, they have the skills but what we see on the box is no doubt edited/dumbed down to make tv,
heres a link to some detailing i did a bit back.plus im putting somew picks on of offroad stuff Ive built,bit nquicker than the syncros ...
http://s42.photobucket.com/albums/e308/ ... oxdone.jpg" onclick="window.open(this.href);return false;
if the link works that is
mie

mm289
Registered user
Posts: 314
Joined: 31 Dec 2010, 22:00
80-90 Mem No: 9111
Location: Dover, Kent

Re: Gunther's Body Makeover Commences

Post by mm289 »

metalmick8y wrote:,bit nquicker than the syncros ...
I should think so,some serious carb's on the white 'n blue Lookers car - what engine you running?

Presumably built to compete in off road racing up against V8 Landy specials?

MM
'89 Autosleeper Trident
2.1 DJ
Member 9111

Plasticman
Trader
Posts: 8077
Joined: 12 Oct 2005, 20:55
80-90 Mem No: 1948
Location: lincolnshire

Re: Gunther's Body Makeover Commences

Post by Plasticman »

No, they tried to compete with us, :rofl we won,enough races and champiuonships,
on the blue one it started off as a heavy webbed rover v8, overbored and fitted with merc spun cast liners, a whole catalogue of parts, wasnt stroked though we went to 4.1 on bores,lol heads had very nice work done , carbs supplied by makers cost ,lookers had a rolling road too. fitted a torqueflite box that was heavily modded and I made a ratchet shift for it so keep hitting the stick forwards.hehe, had a special converter built by a guyt in london that did some works astons and the dynamic balance was done by trevor wilkinson in brum, it was only geared for about 100mph and redlined at 6300, I will load a few of it airborn, it was 20+ years ago :lol: latest ones have bmw v10 with factory mods to 600-620brake, now they do shift, plains et valees,des cimes and our hill rallies but they come in at near 80k.
mike

mm289
Registered user
Posts: 314
Joined: 31 Dec 2010, 22:00
80-90 Mem No: 9111
Location: Dover, Kent

Re: Gunther's Body Makeover Commences

Post by mm289 »

metalmick8y wrote:No, they tried to compete with us, :rofl we won,enough races and champiuonships,
on the blue one it started off as a heavy webbed rover v8, overbored and fitted with merc spun cast liners, a whole catalogue of parts, wasnt stroked though we went to 4.1 on bores,lol heads had very nice work done , carbs supplied by makers cost ,lookers had a rolling road too. fitted a torqueflite box that was heavily modded and I made a ratchet shift for it so keep hitting the stick forwards.hehe, had a special converter built by a guyt in london that did some works astons and the dynamic balance was done by trevor wilkinson in brum, it was only geared for about 100mph and redlined at 6300, I will load a few of it airborn, it was 20+ years ago :lol: latest ones have bmw v10 with factory mods to 600-620brake, now they do shift, plains et valees,des cimes and our hill rallies but they come in at near 80k.
mike

Thats some serious mambo, must have been wild (surprised you can still walk, is your back all there!) Ping me when the pics are loaded :ok

MM
'89 Autosleeper Trident
2.1 DJ
Member 9111

Locked