Gunther's Body Makeover Commences

Thin bits of metal and bright blue light.

Moderators: User administrators, Moderators

Plasticman
Trader
Posts: 8077
Joined: 12 Oct 2005, 20:55
80-90 Mem No: 1948
Location: lincolnshire

Re: Gunther's Body Makeover Commences

Post by Plasticman »

1mm-1.2mm should be fine, get fidget to post you the templates rolled up :D
I leave you to pick and choose the order of fitment.
dont try to grind out the pits by doing as you suggest as you will remove loads from the good shiny and still never get to the bottom of it, it will be a cullender, (no spellcheck here mate)
if you can get a hold of a decent grit blaster then this will do the job very well, as will cut out and remove but that is a bit drastic for the surface crap alone, and yes use vactan or fertan or one of the matheys inhibitors/primers
mike
oh and as your doing, trial fit and tack untill you have it all lined up nicely..

mm289
Registered user
Posts: 314
Joined: 31 Dec 2010, 22:00
80-90 Mem No: 9111
Location: Dover, Kent

Re: Gunther's Body Makeover Commences

Post by mm289 »

Cheers Mike, making the metal too thin/full of holes was my concern with trying to grind them out.

Fortunately i have a grit blaster (use it with a soda blasting setup when cleaning engines) so will convert it to supafine and give it a whirl on this. Might try it on the seams where I am not removing panels but they have started to bubble and see how deep it penetrates.
:ok

MM
'89 Autosleeper Trident
2.1 DJ
Member 9111

Plasticman
Trader
Posts: 8077
Joined: 12 Oct 2005, 20:55
80-90 Mem No: 1948
Location: lincolnshire

Re: Gunther's Body Makeover Commences

Post by Plasticman »

thats the way, get an industrial blade for the stanley knife as these cut into the seams well, keep at it to gouge as much as you can out,then hit it with the blaster and repeat etc,as there will be factory sealant deep down :shock:
M

mm289
Registered user
Posts: 314
Joined: 31 Dec 2010, 22:00
80-90 Mem No: 9111
Location: Dover, Kent

Re: Gunther's Body Makeover Commences

Post by mm289 »

Had a few hours spare yesterday and today so time to do a bit more on Gunther.

First off had to get my welder back into decent working order. Hadn't used it for years and it is only a hobby one, really need to get a semi pro but thats a bit further away (and a lot of dosh! :shock: )

SO a few hours later, new liner fitted, new tips, played with the motor and tension and finally got round to fitting a proper gas setup
Image

Life is sooooo much easier welding with a proper Argon mix rather than no gas :D

Having sorted the welder out I turned my attention back to panels..... played with the outer sill a little more to get the swage lines lining up nicely then started on the floor panels.
Made some templates with cardboard
Image

Thats soooo easy, think I might just leave it like that - will it pass the MoT though? :run

Then transferred the template to metal. Have done it as two pieces partly cause I didn't have a long enough sheet available in the workshop, but also 'cause I have re-made the detail around the pillars at each end and not sure if it will slot in in one piece.
ImageImage

All fitted up it looks like this.....
Image
Image

Plan is to:
- tack the outer sill then check fitment of the floor plates.
- If they are OK I will puddle weld the ends of the outer sill
- then fit the floor plates on the inner side by puddle weld to the floor
- I will have predrilled the inner seam of the outer sill and puddle weld through this onto the floor plates (I am sliding these under the outer sill seam)
- When I have made the lower body panel I will puddle weld this to the outer seam (in different places to where I welded the outer seam to floor plates)
- I will then weld up the join between the two floor plates when everything is solid and can't move and puddle weld an upstand to the floor plate to replace the one that would have originally been there.

My only outstanding decision is how to fix the top of the new lower repair panel to the existing panel where I have cut out. I have thought about joggling the new panel in behind the original so the seam is inside and puddle welding onto it.

Also though about butt welding the two panels together but not sure how hard this will be to get a good finish on that length of panel even with the "spot at different places and move around" approach?

Still, its getting there, just got to make up the lower repair panel then can grit blast, rust treat/zinc etch prime then start tacking panels in place.

Hopefully get it sorted next week :ok

MM
'89 Autosleeper Trident
2.1 DJ
Member 9111

fidget
Registered user
Posts: 126
Joined: 04 May 2010, 20:45
80-90 Mem No: 9027
Location: Braintree, essex

Re: Gunther's Body Makeover Commences

Post by fidget »

Great work there mate :ok

james
If Pac-Man affected us as kids, we'd all be running around in darkened rooms, munching magic pills and listening to repetitive electronic music

Plasticman
Trader
Posts: 8077
Joined: 12 Oct 2005, 20:55
80-90 Mem No: 1948
Location: lincolnshire

Re: Gunther's Body Makeover Commences

Post by Plasticman »

that should be ok, I would make sure the upstands as near the B post are reduced to a max of 1/2".
If you leave the floor to sill welding then you have easier job of welding the 2 outer sills together with the ability to clamp with grips or whatever, floor is dead easy to hold down in place.
mike

User avatar
silver surfer
Registered user
Posts: 11
Joined: 11 Jan 2007, 21:54
80-90 Mem No: 12717
Location: Cumbria

Re: Gunther's Body Makeover Commences

Post by silver surfer »

Good work :lol: . You have inspired me.

Looking at what you have got done so far i will have to decline the race :cry: :cry: :cry: :cry: i don't hink I would be a worthy adversary
______________________________________________________________________

Life, don't talk to me about life!!!!!!!!!!!!!!.............brain the size of a small planet blah, blah, blah :) :)

mm289
Registered user
Posts: 314
Joined: 31 Dec 2010, 22:00
80-90 Mem No: 9111
Location: Dover, Kent

Re: Gunther's Body Makeover Commences

Post by mm289 »

don't be so sure, keep getting distracted with other family cars that need mot's and engine repairs :roll:

MM
'89 Autosleeper Trident
2.1 DJ
Member 9111

mm289
Registered user
Posts: 314
Joined: 31 Dec 2010, 22:00
80-90 Mem No: 9111
Location: Dover, Kent

Re: Gunther's Body Makeover Commences

Post by mm289 »

OK, back on the case today :ok

Had a carp week including house sale falling through :cry: , spending 2 1/2 days getting the wifes Doblo through its MoT (replaced most of the front suspension and have now invested in a hydraulic macpherson strut compressor for the workshop as I gave up on spring clamps - too damm dangerous!) and endless hassle trying to get legals sorted on a local sports centre redevelopment I am a (voluntary) trustee for.

And finally,we get to do some FUN things :D

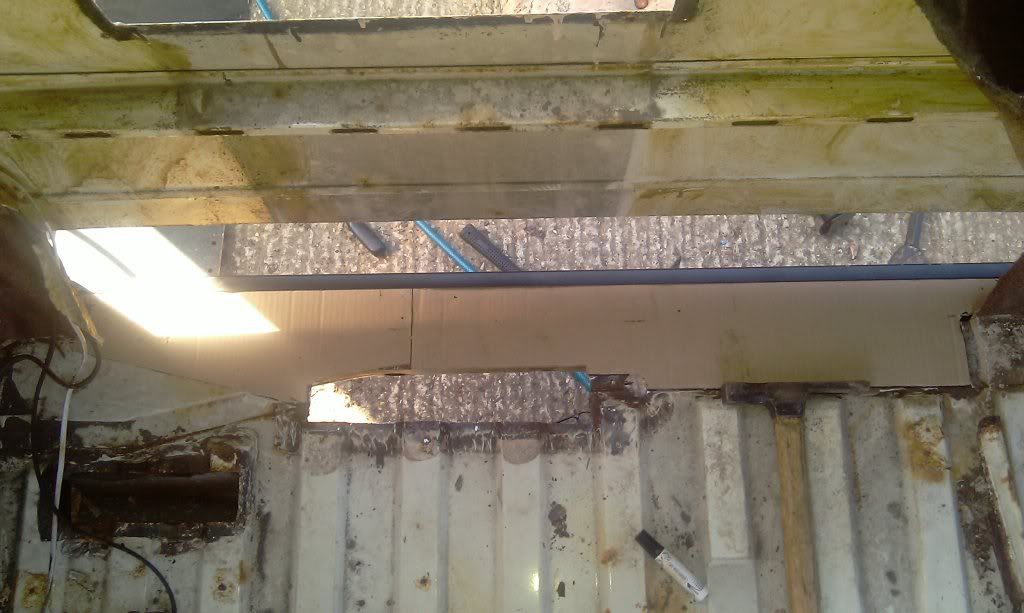
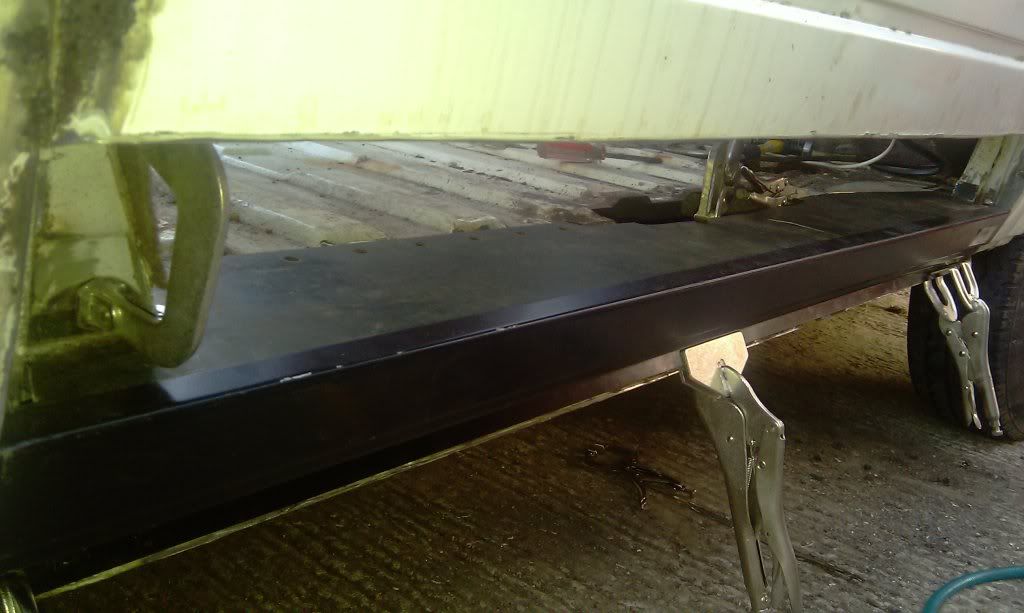
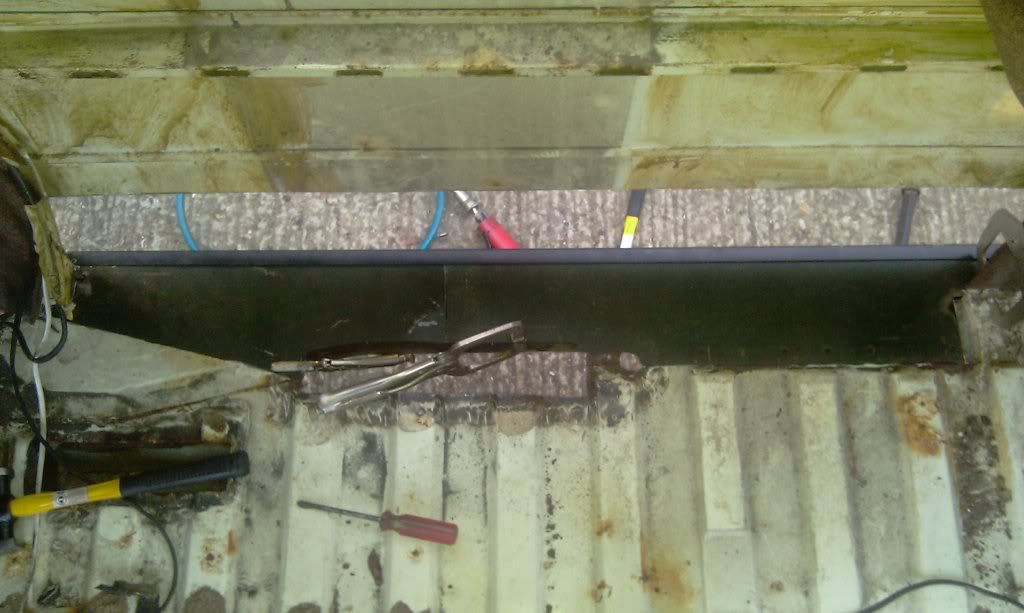
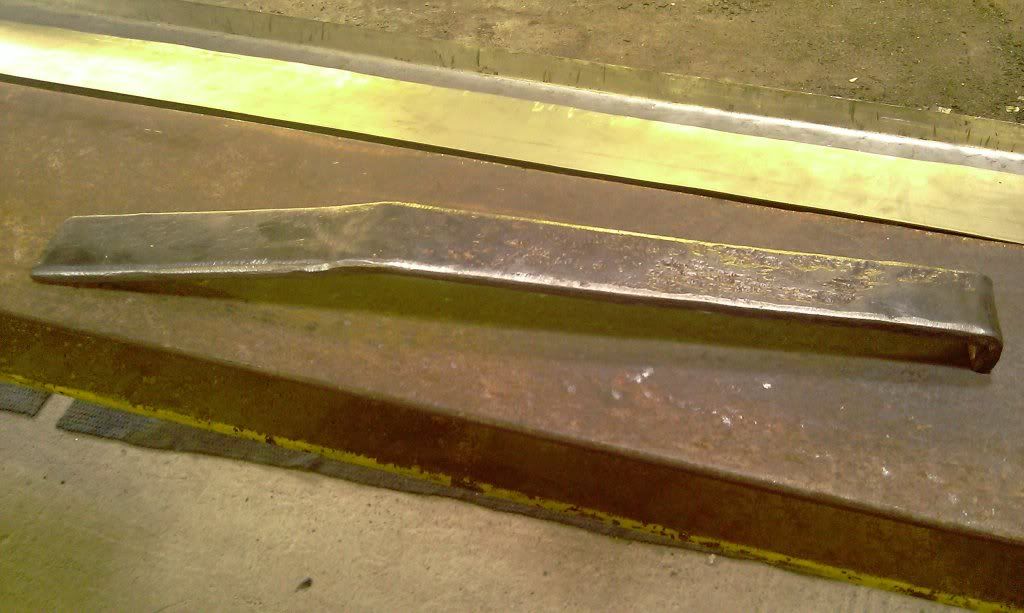
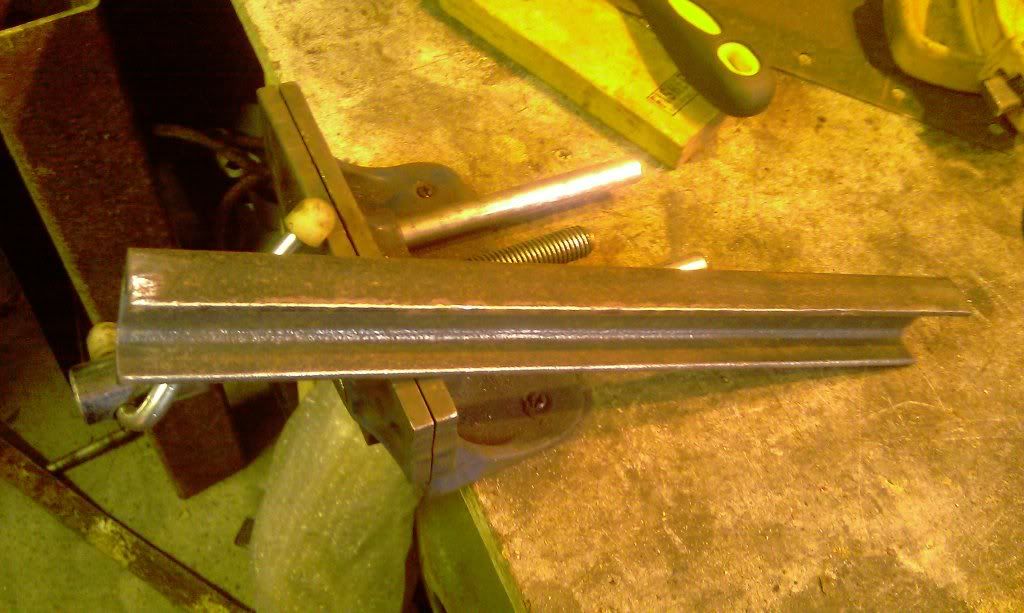
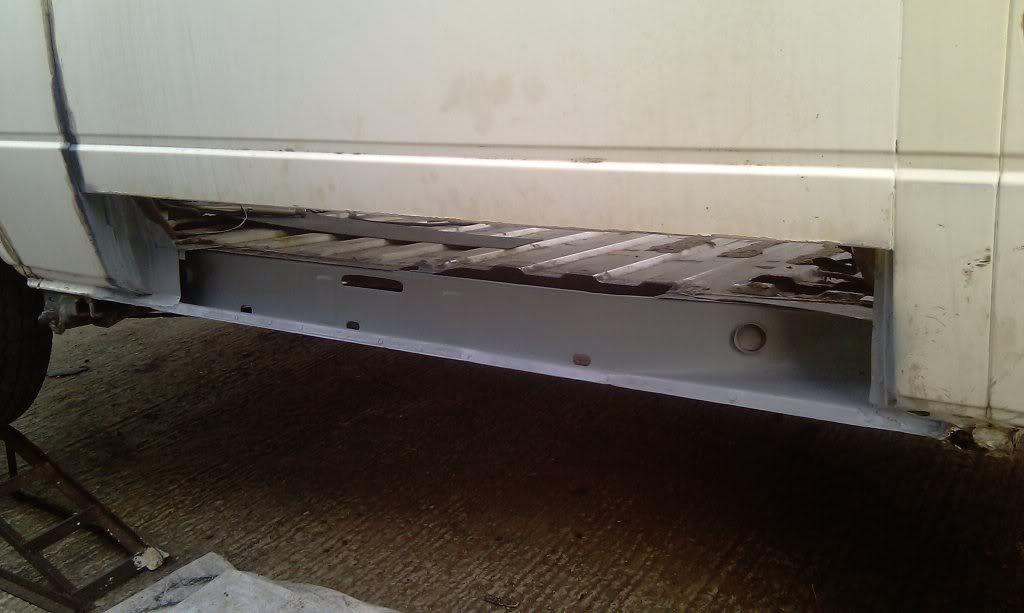
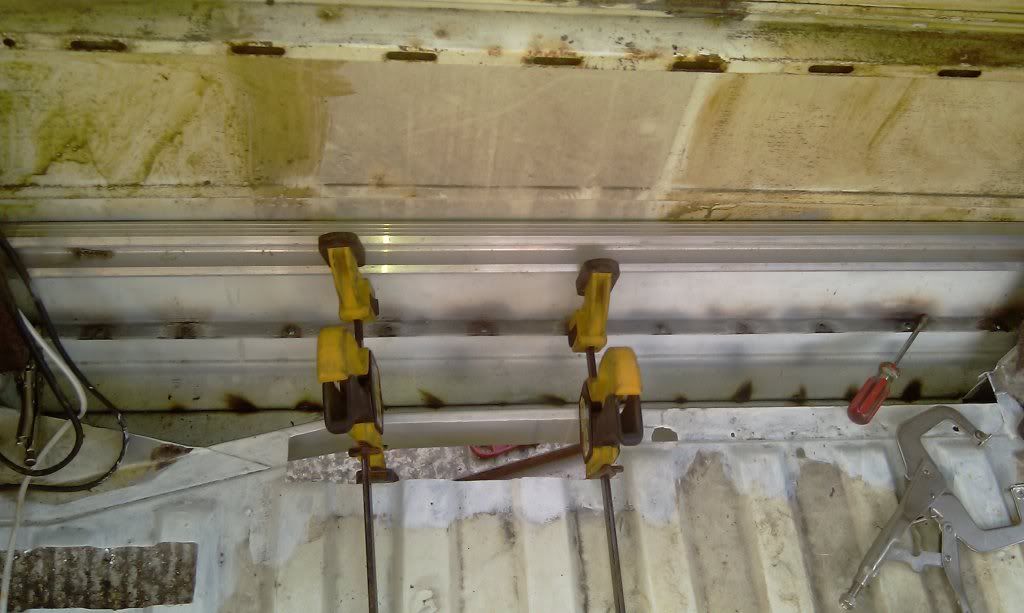
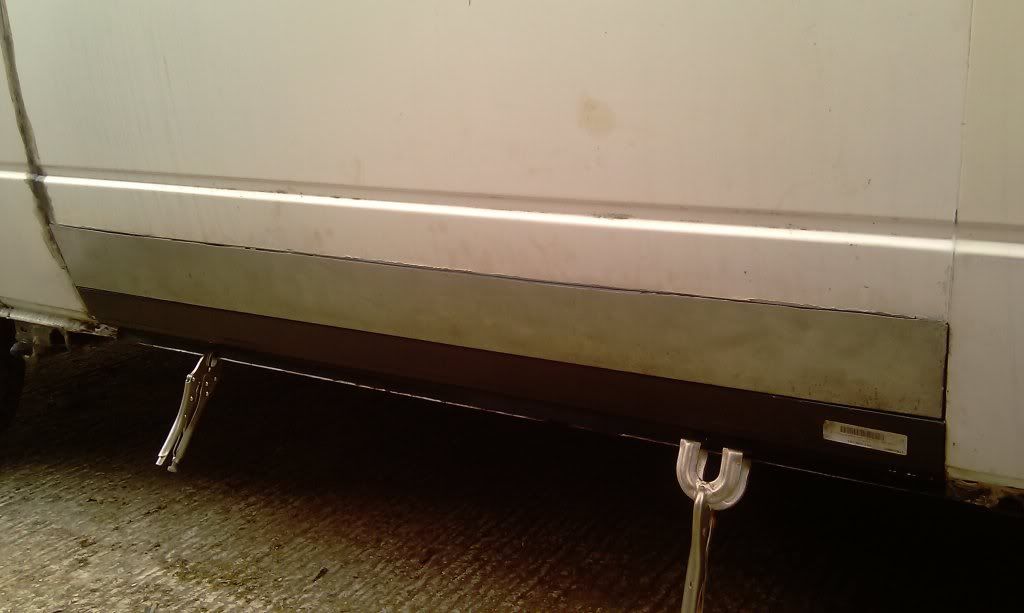
Needed to make up a lower panel for the sill repair, the only ones you can get pre-made are for the lower panel and sill complete, but these are a "false" sill panel. So started from scratch with a sheet of 1mm.

Made the bottom and side returns and mock fitted
Image

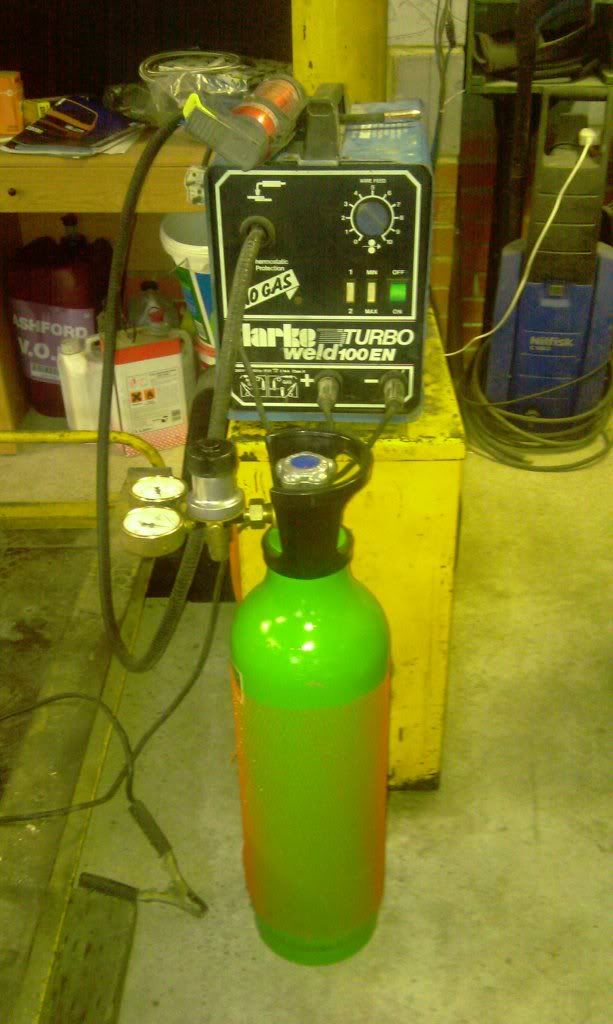
Then cut to size and put a slight curve in the panel. Tried tuck shrinking the ends to make the curve but was only partially succesfull so ended up cuting small "v"'s in the end returns and hammering panel over a gas bottle (thanks Mick :ok )

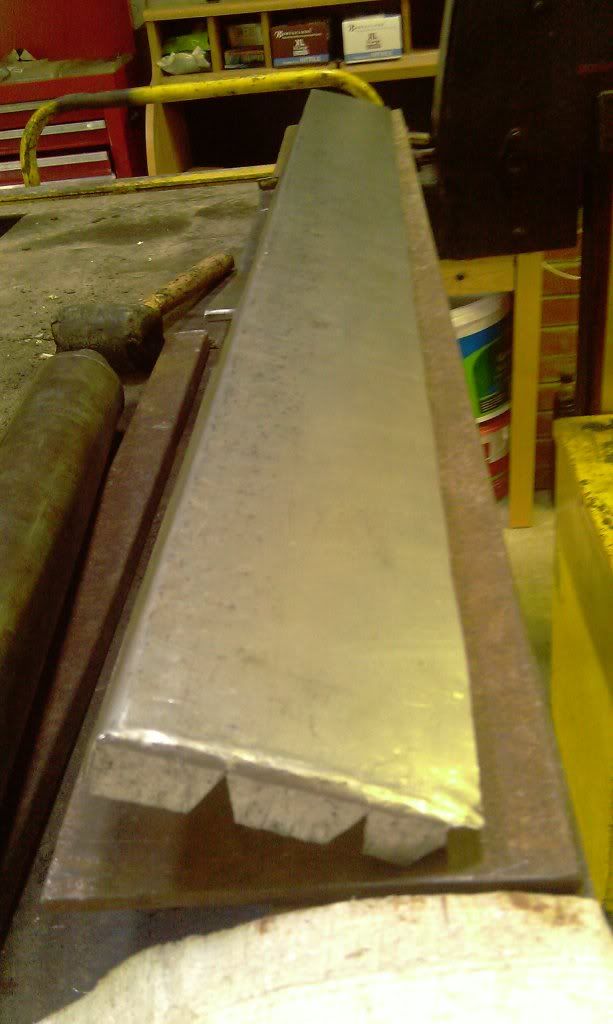
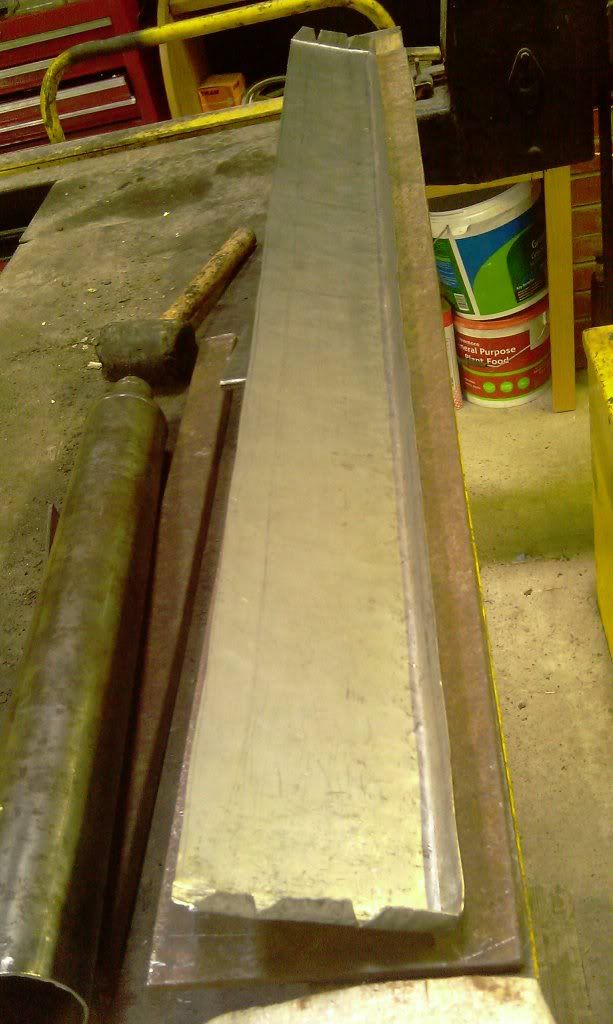
Ended up looking like this
Image

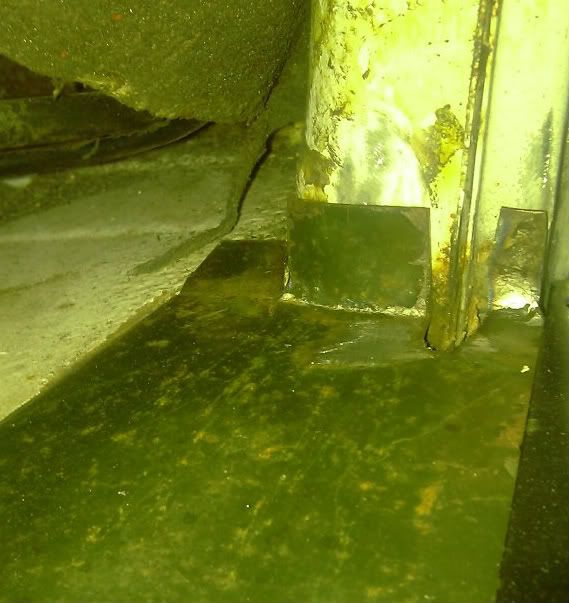
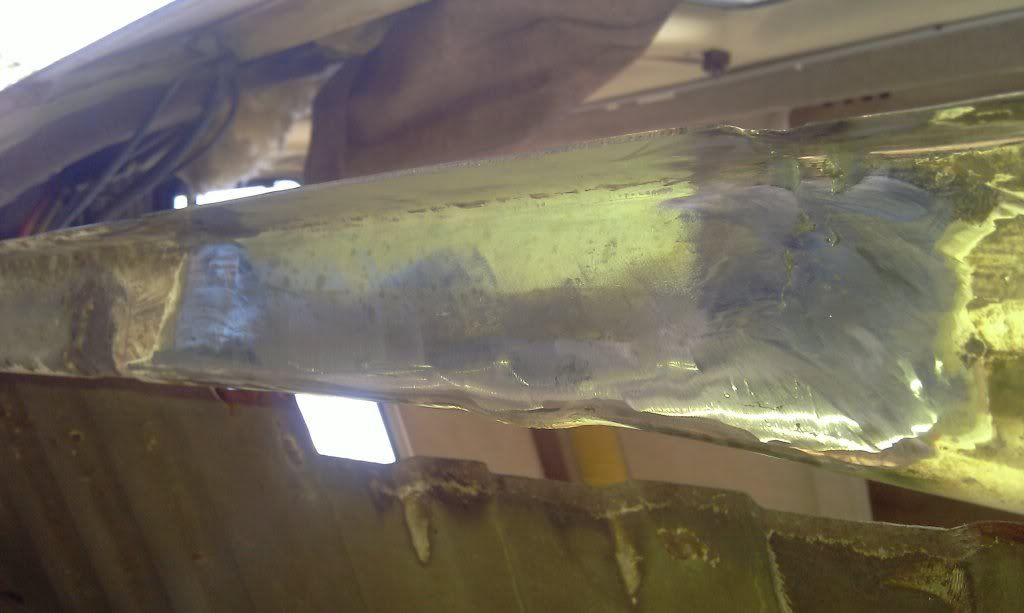
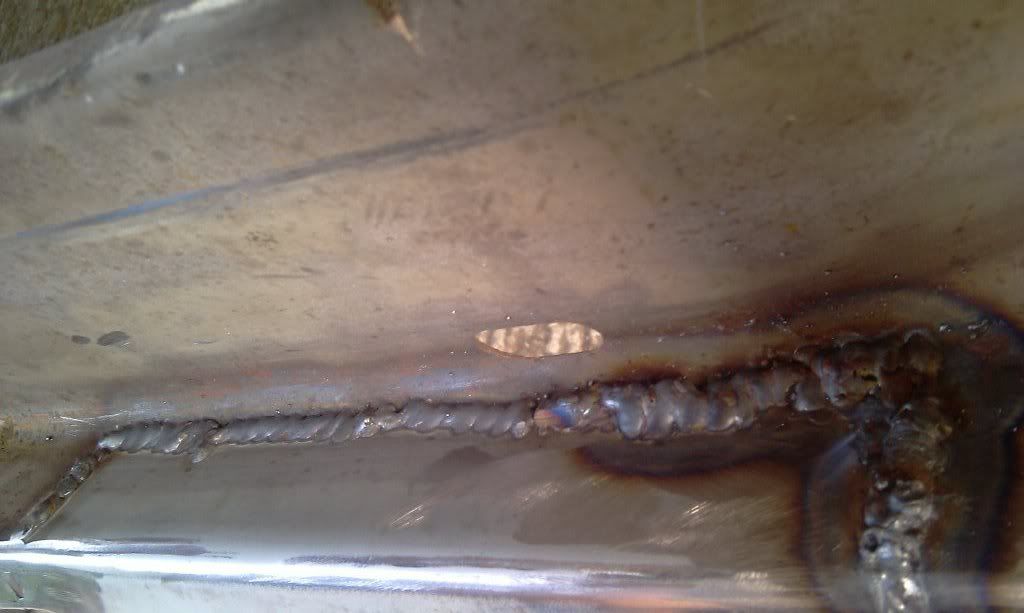
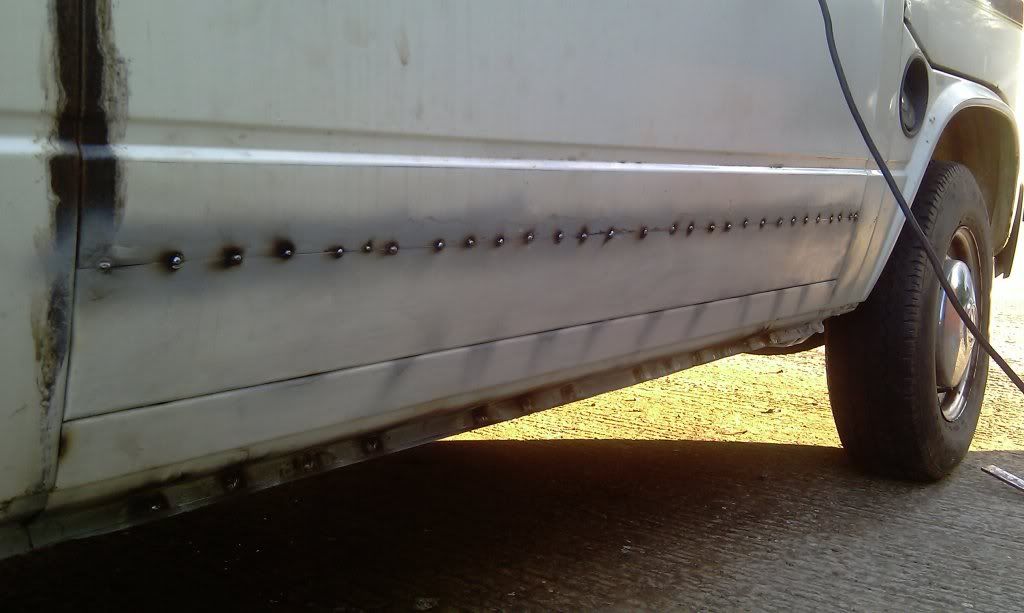
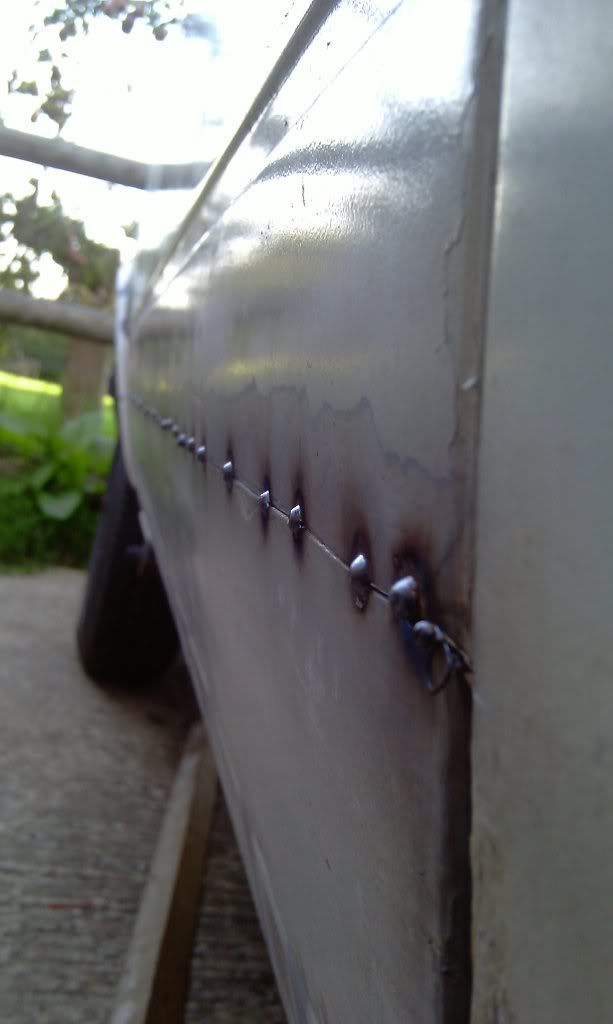
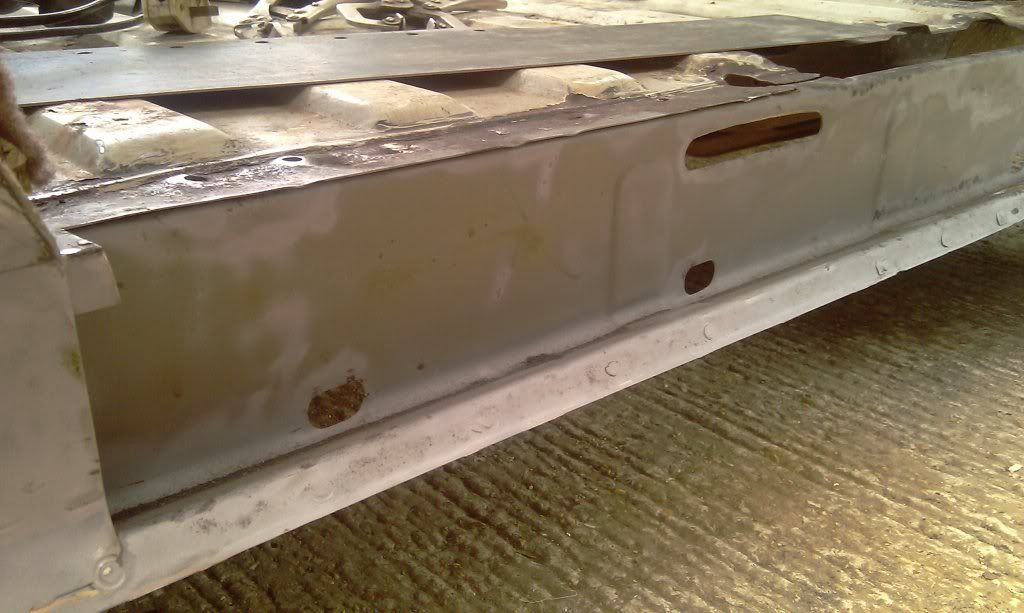
Then decided to attack the seams that are rusting. This is what a "good" seam looks like, haven't decided if I am going to dig out all the good ones yet, any thoughts?
Image

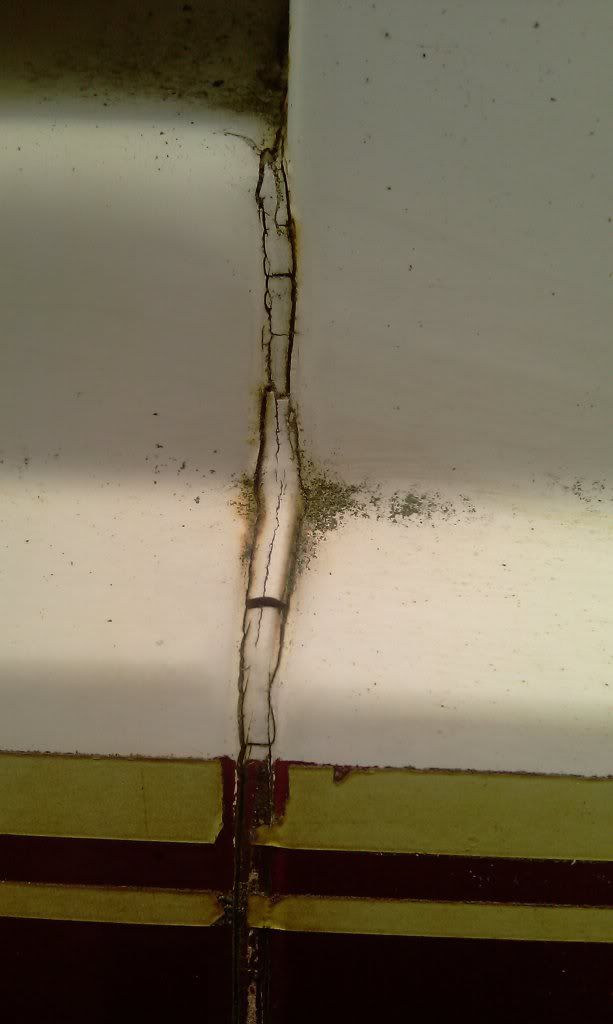
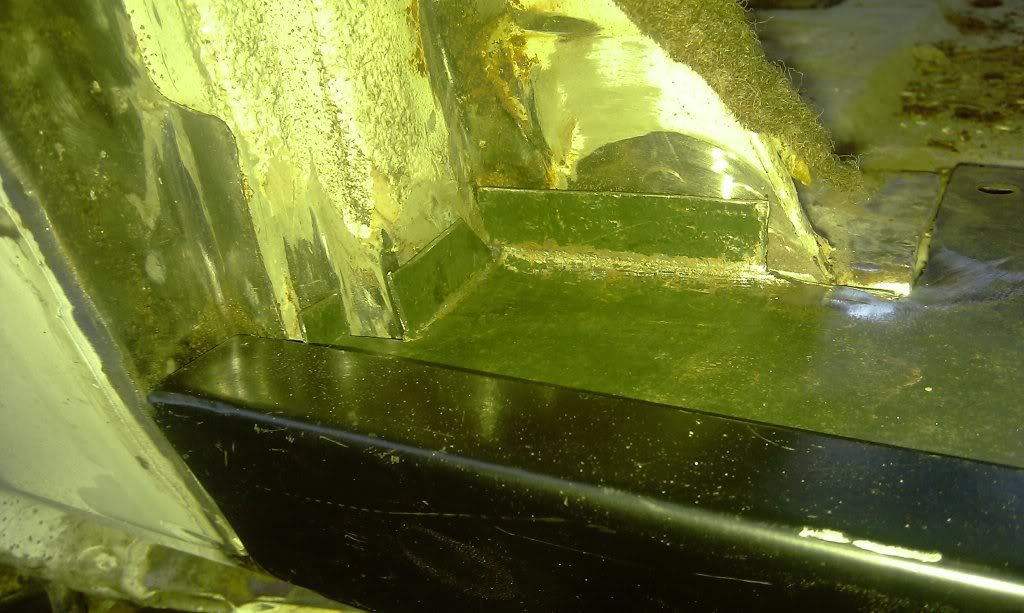
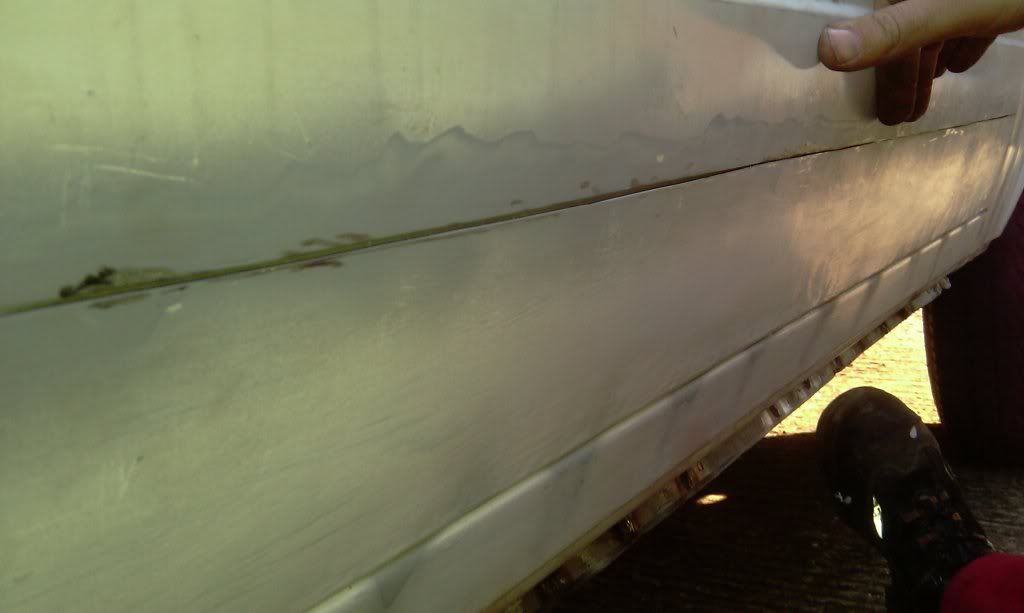
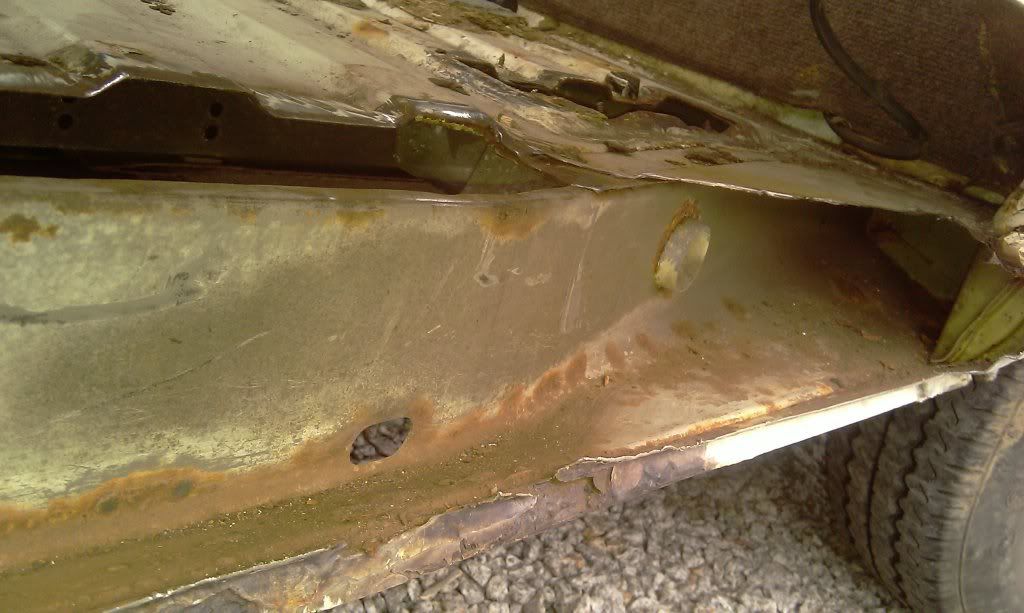
This is what a bad one looks like, lots of these :(
Image

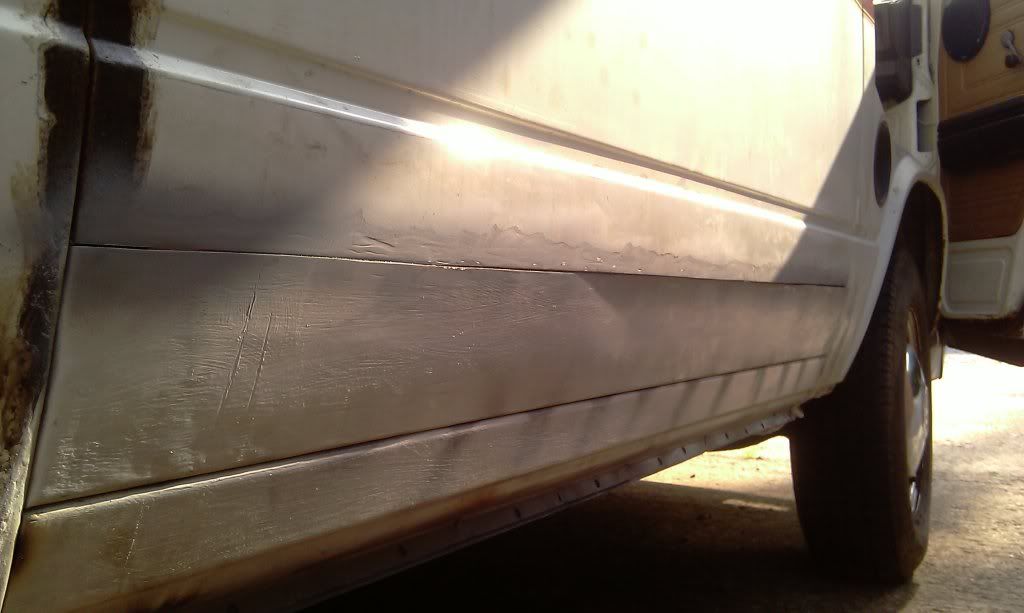
This is what one looks like after digging out with a stanley knife
Image

At this point it sounds like I am making decent progress - I wish :roll:

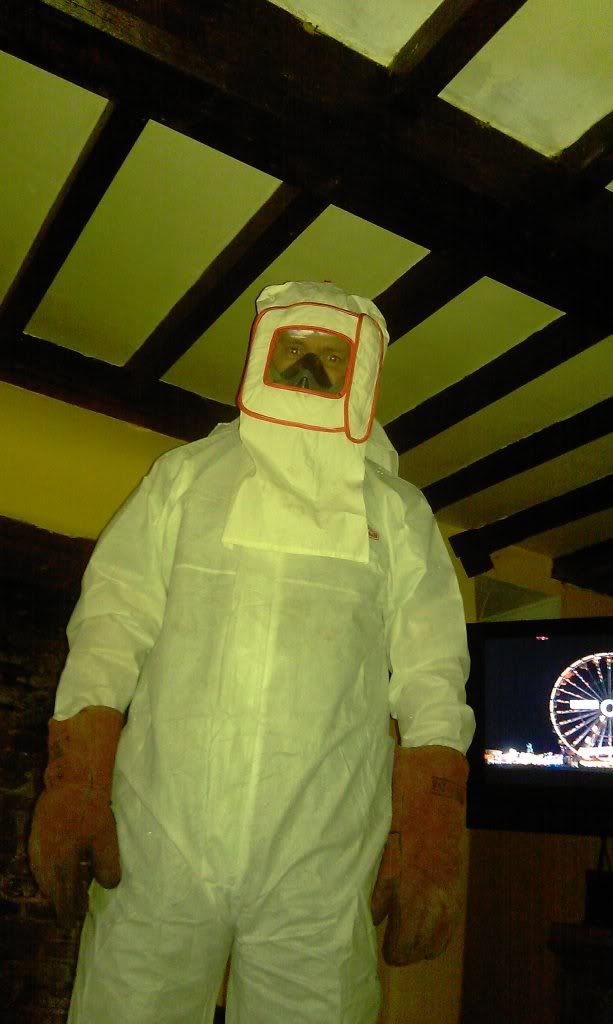
the wife has gone down with "woman flu", you know, like man flu but MUCH MUCH WORSE obviously :roll: so having to look after her as well as Gunther. Still, you will be pleased to know I am taking all necessary precautions
Image
:rofl :rofl :rofl (fortunately she doesn't read these posts, although I might show her this one to cheer her up....bless :mrgreen: )

Anyway, whilst I was all togged up I got the grit blaster out, and this is what a seam looks like after blasting
Image

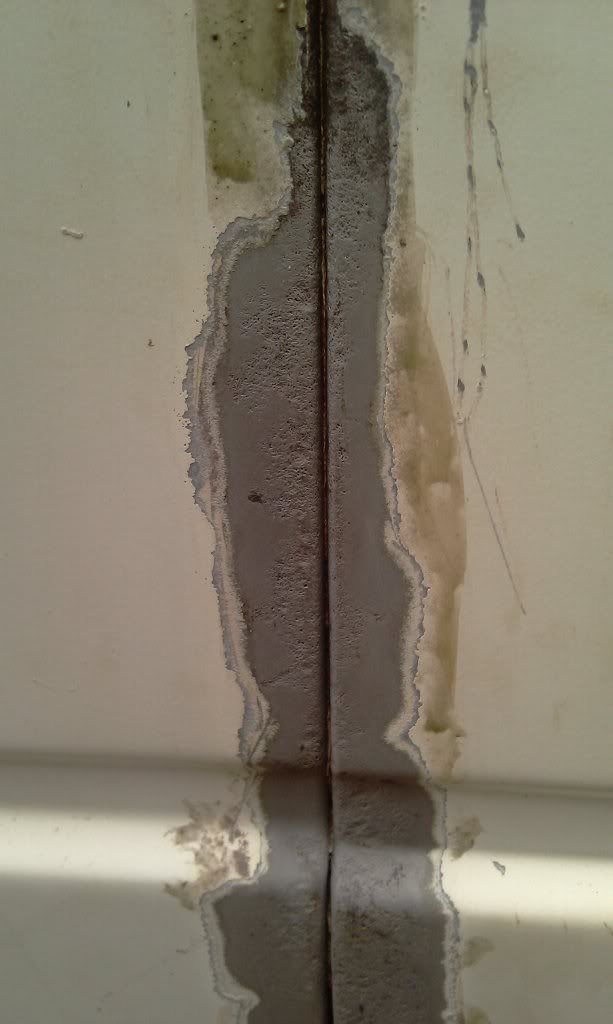
Looks much better - I love grit blasters - although you can see how much pitting the rust has caused on the panel. More worrying is if you look at the reverse of the panel you can see the rust coming through on the back of the seam, no way I can get in there and the grit blaster won't go that far in as it is past the spot welds :o Ideas?

This is what the rest of the original lower sill looks like when blasted,
Image

compared to this before blasting
Image

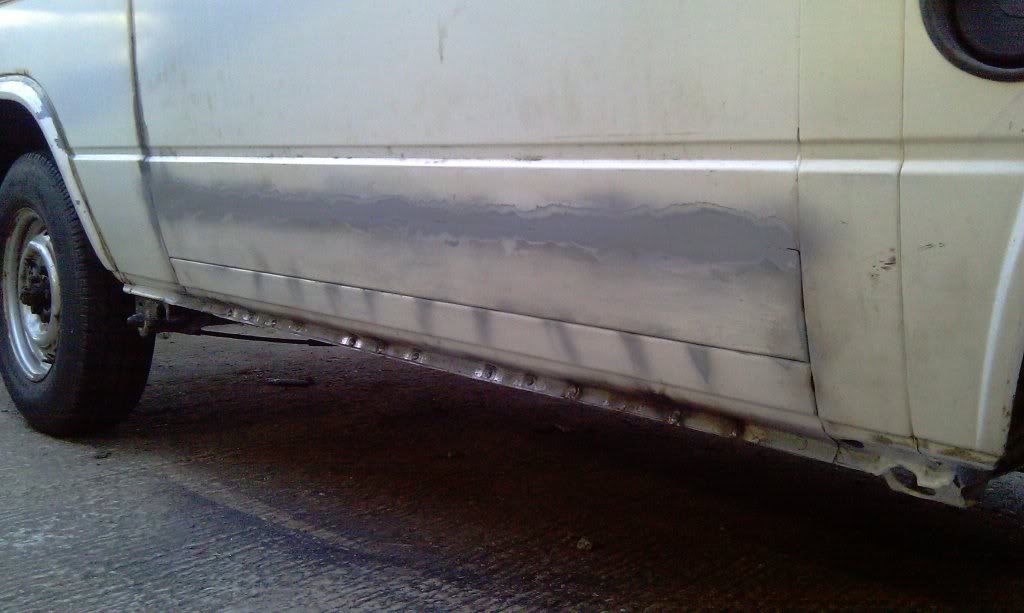
Just got too put some hydrate 80 on the remnants of corrosion, paint in epoxy primer, put some weldthru zinc primer on the bits to be welded - oh and weld a little patch into the lower sill where it is corroded.

Getting there slooooowly 8)

MM

Plasticman
Trader
Posts: 8077
Joined: 12 Oct 2005, 20:55
80-90 Mem No: 1948
Location: lincolnshire

Re: Gunther's Body Makeover Commences

Post by Plasticman »

As youve found, the good seam is still hacky inside, there are waysssssssssss, panal looks ok dont it, prior to folding the ends over drill an 1/8 hole some say 3/16" from the edge then cut a very very slight V uo to the 1/8 hole, this helps keep a more constant radius and also means you have continuose metal into the seam,
blasters are good arent they,
that would seem to be just sufficient protection your wearing but never can be too carfull when dealing with the flu you speak of.lol
mike

mm289
Registered user
Posts: 314
Joined: 31 Dec 2010, 22:00
80-90 Mem No: 9111
Location: Dover, Kent

Re: Gunther's Body Makeover Commences

Post by mm289 »

Pouring down with rain this morning so couldn't do much on the van. Decided to make myself some metal working tools instead :D

When I made the lower panel I got loads of little dimples when bending over the long edge (1250mm) as I hammered it over a piece of angle as don't have a metal bender/shaper yet. (got to start looking for some disposal sales to see if I can find some proper metal working/shaping gear 8) )

So decided to have a go at making a "slapper" or planisher I think there called. Had an old leaf spring and cut/ground it too look like this.
Image

Not perfect as the spring was pretty rusty but got a reasonably good finish, haven't got any oxy so cant finish the handle yet as can't get enough heat to bend it. Still, it works pretty well and gives you a much larger area to beat metal with than a hammer!

After playing with shaping a curve into the lower sill panel over a gas bottle I wanted something a bit more useable and spotted an old driveshaft in a corner of the workshop. Got the BIG angle grinder out and 10 mins later had this..
Image

Looks a bit like a bazooka tube but really usefull for shaping curves I think :D

And finally, (nearly stopped raining) wanted to make a small bit of angle to help form returns and get a nice clean bend so cut and ground this..
Image

The end result of all these is the lower panel is a lot tidier and looks like this, hopefully you can just make out the curve.
ImageImage

So, now time to get on with the bodywork. Thought I was about there but looked at the small repair patch I had welded into the lower sill yesterday and wasn't happy with it. I had cut out the corroded metal, but the surrounding metal was pitted and the welds weren't taking well. When i ground them back they just fell apart and every time I re-welded the old sill evaporated quicker than a "wafer thin mint" :roll:

Also was using 1.0mm sheet which I used for the lower panel but the lower sill is actually a bit thicker, about 1.3mm which didn't help with making the repair invisible! Had some 1.3mm in the 'shop so cut out a larger section and made a whole new patch.

Much easier to weld in and the same thickness so it fits/looks better. Bottom (visible) side ground down (not great at taking pictures upside down)
Image

and topside which i won't grind as it will be hidden inside the sill.
Image

OK the weld at this end is pretty rubbish, but it was really windy down here which was playing havoc with the gas and the trigger on the welder is playing up too -may have to look at a new one if I do much more of this :( (or thats my excuse at least :lol: )

Finally, treated some of the remaining dark (old rusty) areas then slapped a coat of etchweld on. Epoxy primer should be turning up tomorrow (in white) so will brush that on inside the sill as added protection.
Image

Took half a day to do this, hope I get quicker as I get better :shock:

MM
'89 Autosleeper Trident
2.1 DJ
Member 9111

Plasticman
Trader
Posts: 8077
Joined: 12 Oct 2005, 20:55
80-90 Mem No: 1948
Location: lincolnshire

Re: Gunther's Body Makeover Commences

Post by Plasticman »

Your work looks good to me, practice will make you quickwer to a point but ........enjoy it
this is what I meant with the holes and notches
Image
Image
this way you get to formj the curve much easier,, if you havent got a set of rollers it dont matter much , for the amount of curvature your adding then shaping with hand pressure over any round tube 3"dia++ will work fine
mike :ok

mm289
Registered user
Posts: 314
Joined: 31 Dec 2010, 22:00
80-90 Mem No: 9111
Location: Dover, Kent

Re: Gunther's Body Makeover Commences

Post by mm289 »

Gotcha, thats kinda how I imagined it, I had already done mine when you posted hence the "v"'s.

So do you curve first then bend over ends or bend over ends then curve?

MM
'89 Autosleeper Trident
2.1 DJ
Member 9111

Plasticman
Trader
Posts: 8077
Joined: 12 Oct 2005, 20:55
80-90 Mem No: 1948
Location: lincolnshire

Re: Gunther's Body Makeover Commences

Post by Plasticman »

Notch it,roll it and then bend over :shock: if using rollers then could be done the other way but would need grooves cutting in the rollers for the lip..
m

mm289
Registered user
Posts: 314
Joined: 31 Dec 2010, 22:00
80-90 Mem No: 9111
Location: Dover, Kent

Re: Gunther's Body Makeover Commences

Post by mm289 »

Nearly 3 weeks since the last post :shock: Never did get Gunther finished in time for the hols so had to throw the tent in the boot and set off for Somerset.

Lovely C&CC site up on North Hill above Minehead, great for walking on edge of Exmoor etc - shame I put my back out on the first night putting the tent up, oh and then ripped the air bed getting it outta the car, oh, then had a flat battery on the car cause the fan was staying on etc etc etc :run

Still, I think we had fun :roll:

Back to the van........

Fitted the outer sill, drilled and puddle welded, took a while to get the settings right on the Mig but got there in the end. Then trial fitted the lower panel I made myself. After a lot of trimming and having puddle welded the lower lip to the top of my new lower sill it looks like this
Image
Image

Would of been much easier to joggle/lap weld the top edge but I reckon a butt weld will give a better finish and won't leave any moisture traps.

The side panel has a natural curvature front to back as well as top to bottom. The top to bottom was less of a concern as I had rolled a gentle curve into my repair panel but where the bottom of the side panel had been cut out the top half was way out as it had no stiffness. I was also wondering how to clamp the two pieces to be butt welded together and after a bit of creative thinking I came up with this idea.

Cut a length of aluminimum channel to length and then wedged it against the side panel from within till it formed the required curvature that mirrored the top of the panel.
Image

This also gave me the advantage of a heat sink on the back of the panel when welding and gave a brace against which I could push both panels together from the outside. Could then brace the panels with a bit of wood whilst I applied some spot welds.
Image

Was pretty please with the way it worked :lol:
Image

Then just a case of filling in between the welds trying not to apply too much heat. Ground back the welds and this is how it came out
Image

Still a bit of finishing to do, have got a couple of small holes where the weld has blown through and a bit of a ramp where the two edges join. Could really do with a body file or two to make life easier (keep looking for a retired panel beater getting rid of his tools but no luck so far :( )

Still gave it a coat of primer to keep it clean until i can get back on it and it doesn't look too bad really :D
Image

Not sure how people make a living out of this though - it is pretty time consuming :shock:

MM
'89 Autosleeper Trident
2.1 DJ
Member 9111

Locked