Gunther's Body Makeover Commences

Thin bits of metal and bright blue light.

Moderators: User administrators, Moderators

Locked
mm289
Registered user
Posts: 314
Joined: 31 Dec 2010, 22:00
80-90 Mem No: 9111
Location: Dover, Kent

Gunther's Body Makeover Commences

Post by mm289 »

So having rebuilt and re-installed the engine (surprised how well a 2.1 pulls, lovely and smooth coupled to the auto :D ) it is now time to start on the bodywork.

Plan is to completely restore the body to what it would have been - or make it look like one of Metalmicky's which seems to amount to about the same thing :shock:

Now engines are normally my "thing" rather than bodywork so I may ask a few dumb questions, but with the help of you lot what can go wrong? :ok

Been up and spent a day with Doug (New Kentish Campers) who gave me some pointers which was great, so now feel ready for the task in hand.

Thought I would do this post in sections like the van to make it easier to follow, so every post will start with a title showing what panel I am working on - hope that makes sense.

Thought we would start with a few quick "before" shots of the whole van:
ImageImageImageImage

Lots of small spots and seam rash in the usual places most of which I have treated earlier in the year just to put the corrosion into a "holding pattern" until I got time to look at it.
ImageImageImageImageImageImageImageImageImage

The worst area is the fridge panel (o/s sill) and this has prompted starting the body early as it has popped a hole in the sill which is an MOT failure - and guess what - the MOT is due :( As we want to use it for our hols this will be the first job so I can get it tested and on the road in the next couple of weeks hopefully.
'89 Autosleeper Trident
2.1 DJ
Member 9111

mm289
Registered user
Posts: 314
Joined: 31 Dec 2010, 22:00
80-90 Mem No: 9111
Location: Dover, Kent

Re: Gunther's Body Makeover Commences

Post by mm289 »

Fridge panel & o/s sill

So as mentioned the worst bit is the sill and fridge panel. Lots of posts on this incl the wiki which have been read. Current state looks like this:
ImageImage

The panel below the swage line where you can see the rust is rotten as a pear and as you can see the bottom of the panel where it rolls over and meets the sill has rotted out as well.

Next job is to remove the interior and get a look from inside to see how much of the floor has gone and how far back I need to cut.

One initial question:
1. I was planning to media blast the vertical seem between this panel and the rear qtr and cut in a replacement panel below the swage line - does that sound sensible or would you take out a bigger piece - say to above the fridge vent? (I usually try to keep as much original metal as possible as it is still better than the replacement parts after 20 years!)

Time to start cutting :)

MM
'89 Autosleeper Trident
2.1 DJ
Member 9111

Plasticman
Trader
Posts: 8077
Joined: 12 Oct 2005, 20:55
80-90 Mem No: 1948
Location: lincolnshire

Re: Gunther's Body Makeover Commences

Post by Plasticman »

that might not be the worst :rofl sorry..
well youve seen what it should be constructed like in there, it should have the lower outer sill ,this covered by the floor above and the side panal sat on this, you can go the easy route and fit the tall over panal but make sure you tack weld a small say 1" flange where the seam should be so you have something to fix to inside,
or fit a lower sill then floor bit which will be shot then make the upper part. your call......
fun int it
mike :ok

mm289
Registered user
Posts: 314
Joined: 31 Dec 2010, 22:00
80-90 Mem No: 9111
Location: Dover, Kent

Re: Gunther's Body Makeover Commences

Post by mm289 »

metalmick8y wrote:that might not be the worst :rofl sorry..
mike :ok

LOL, at least this is the only bit that will fail the MoT!

Thanks for the suggestions. I will se what it is like once I get the carpet up and go from there :)

MM
'89 Autosleeper Trident
2.1 DJ
Member 9111

mm289
Registered user
Posts: 314
Joined: 31 Dec 2010, 22:00
80-90 Mem No: 9111
Location: Dover, Kent

Re: Gunther's Body Makeover Commences

Post by mm289 »

OK, finally got all the cupboards out. In addition to the excellent wiki on Autosleeper pop top cupboard removal, high top owners should not there are 3 screws holding the wardrobe top panel in place accessed from inside the overhead storage compartment at the rear of the hi top. They are buried in the carpet and difficult to find!! :shock:

With cupboards removed it look like this
Image

Then lifted the carpet and chipboard floor which has been glued and screwed, some of the glued stuff will not move at all :evil: but ended up looking at the bare metal (rust) eventually.
Image

Looks to me like the floor has gone and needs replacing above the red line
Image

An planning to cut the o/s panel roughly where the red line is (just below the swage)
Image

Not sure about the condition of the inner sill yet, will get the outer and bottom of panel off then have another look.

Any thoughts before I start cutting?

MM
'89 Autosleeper Trident
2.1 DJ
Member 9111

Plasticman
Trader
Posts: 8077
Joined: 12 Oct 2005, 20:55
80-90 Mem No: 1948
Location: lincolnshire

Re: Gunther's Body Makeover Commences

Post by Plasticman »

last picky, I would cut an inch or more below (lower) you can always cut more off later, dependant on which way you repair it.
get inside and stab a big screwdriver through the void that was your sill top/floor, if as I suspect it goes right through then you know the answer,
cut all the bad out where practical and then easy to plan the new steel
will look forward to following this
M :ok

mm289
Registered user
Posts: 314
Joined: 31 Dec 2010, 22:00
80-90 Mem No: 9111
Location: Dover, Kent

Re: Gunther's Body Makeover Commences

Post by mm289 »

There's a hole in my camper, dear Lisa, dear Lisa
There's a hole in my camper, dear Lisa, a hole!
Image
:rollin :rollin :rollin
Side panel and outer sill cut away, stoped about 1/2" short of the seams so I could be a bit more carefull not to damage the adjoining panels.
Whats the best way of seperating the seam, drill out spot welds, grind off????

Inner sill looks ok, apart from about 2" so I will just make up a plate and drop in here.
ImageImage

The bits that look a bit tricky are the ends of the outer sill where it meets the jacking points, looks like lots of metal folded together here. My theory is to unpick the outer sill remnants and hopefully a new outer sill will just fit straight over ---- or am I being naive :)
Image

On the picture below above the red line there is the remnant of a seam/return about 1" high that runs along the floor. Is this part of the floor or part of the sill i.e. which repair panel has this included?
Image
So plan is, new outer sill, lower panel repair panel (if such a thing exists) and make up a repair panel for the floor to fill in the gaps.

Sound like a plan? :ok

MM
'89 Autosleeper Trident
2.1 DJ
Member 9111

Plasticman
Trader
Posts: 8077
Joined: 12 Oct 2005, 20:55
80-90 Mem No: 1948
Location: lincolnshire

Re: Gunther's Body Makeover Commences

Post by Plasticman »

have a look at fidgets post ref the sill joining into the outriggers-j/p's.
now then the red line...the floor goes to the red line or just past and the bit under is in effect the top of the sill, so no problem if its solid?
outer sill lower is available but the panal above from this up to swage is not , I made one.
https://club8090.co.uk/forum/viewtopic.p ... 6&start=45" onclick="window.open(this.href);return false;
I think its around here.
alternative is to get a wrap over panal and tack a 1" lip where the false seam is so you have something to weld the floor to
mike

mm289
Registered user
Posts: 314
Joined: 31 Dec 2010, 22:00
80-90 Mem No: 9111
Location: Dover, Kent

Re: Gunther's Body Makeover Commences

Post by mm289 »

Gotcha, the upper lip of the inner sill that the floor goes onto is solid so thats OK.

The floor has a bit of pitting where it meets this to the right of the fridge vent cut out but I am thinking to just clean and treat this rather than replace.

The bit I am confused over is this
Image

Its a 1" upstand with a rolled edge, looks like it was part of the floor? (not any longer though :shock: )

VW Heriatge do a alower side panle so I might have a look at this and see if I can cut it down to fit.

MM
'89 Autosleeper Trident
2.1 DJ
Member 9111

Plasticman
Trader
Posts: 8077
Joined: 12 Oct 2005, 20:55
80-90 Mem No: 1948
Location: lincolnshire

Re: Gunther's Body Makeover Commences

Post by Plasticman »

the upstand is for securing the side trim panal to, so any lip if you choose to make / fit will do
mike

mm289
Registered user
Posts: 314
Joined: 31 Dec 2010, 22:00
80-90 Mem No: 9111
Location: Dover, Kent

Re: Gunther's Body Makeover Commences

Post by mm289 »

Aha, this is all hidden behind cupboards in the camper so no trim panel, hence why I didn't get what it was for :D

Just looked at fidgets again and it is all starting to make sense,

Just need to get the seams tidied up and the old metal off :roll:

MM
'89 Autosleeper Trident
2.1 DJ
Member 9111

fidget
Registered user
Posts: 126
Joined: 04 May 2010, 20:45
80-90 Mem No: 9027
Location: Braintree, essex

Re: Gunther's Body Makeover Commences

Post by fidget »

Cripes

when I saw the first pics of the floor and the inner sill I thought it was a gonna, even the top/f;oor part of my inner sill wasnt that bad.

Looks pretty solid now youve cleaned it up a bit :ok .

Ive kept the templates I made for the floor pieces to fill the gap above the sill that mount to the side of the body, they fit pretty well . Give us a shout If you want the dimensions even if its only for a rough guide, it will save you some time :ok .

Keep up the good work Ive got something to follow now , started work on me seat belt mounts now and compared to the sill there a bit dull to do :(

James
If Pac-Man affected us as kids, we'd all be running around in darkened rooms, munching magic pills and listening to repetitive electronic music

mm289
Registered user
Posts: 314
Joined: 31 Dec 2010, 22:00
80-90 Mem No: 9111
Location: Dover, Kent

Re: Gunther's Body Makeover Commences

Post by mm289 »

cheers James,i'll keep that in mind.

It's funny you can look at loads of pictures but until I actually started stripping mine it didn't make much sense! :roll:

Now I can see it in the flesh I have re-read yours and Mike's posts and it is all falling into place.

Quite excited about getting some panels and sheet, resurrecting the welder and getting to work now :D

Paul.
'89 Autosleeper Trident
2.1 DJ
Member 9111

jimpainter
Registered user
Posts: 418
Joined: 25 Aug 2009, 06:47
80-90 Mem No: 0
Location: crewe

Re: Gunther's Body Makeover Commences

Post by jimpainter »

Your going aboutt it the right way. Keep it up and dont rush it it will all fall into place. :ok
JRP Automotive welding,bodywork, resprays, servicing and repair.
Classic Vw's
Cheshire
07854516387

mm289
Registered user
Posts: 314
Joined: 31 Dec 2010, 22:00
80-90 Mem No: 9111
Location: Dover, Kent

Re: Gunther's Body Makeover Commences

Post by mm289 »

OK, been buried in the office doing "real" work for the last couple of days and then had to do a transmission oil change on a mates E32 so not had much chance to do anything to Gunther till today.

Anyway, started tidying up the seams on the lower sill and front/rear wing panels ready to offer up the new outer sill I picked up from VW Heritage - was the more expensive one they do - think its a Klokkerholm - and looks reasonably well made and decent gauge steel. (gonna experiment a bit with panels to see which ones seem to be the most consistent)

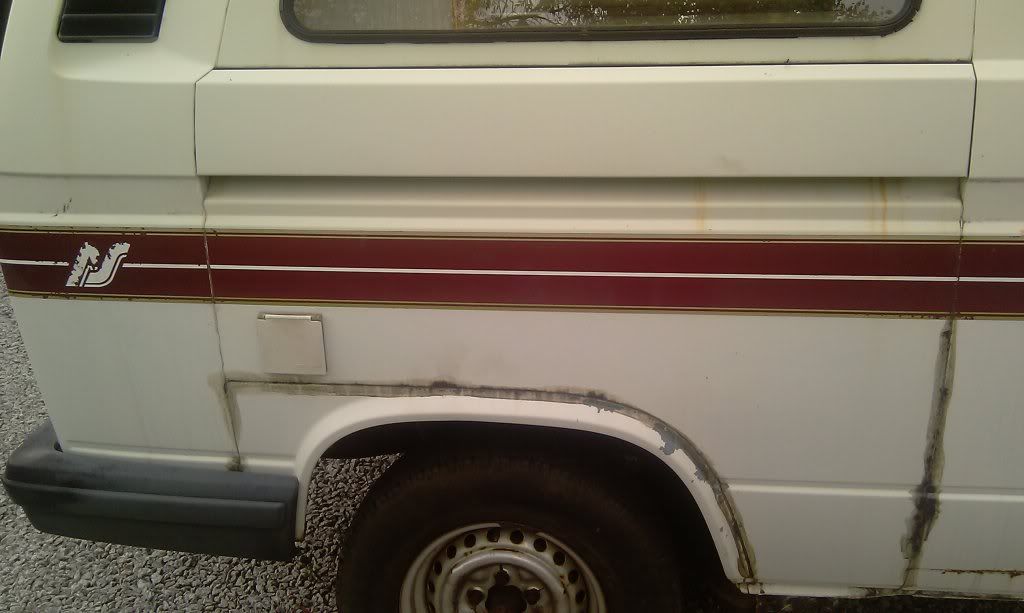
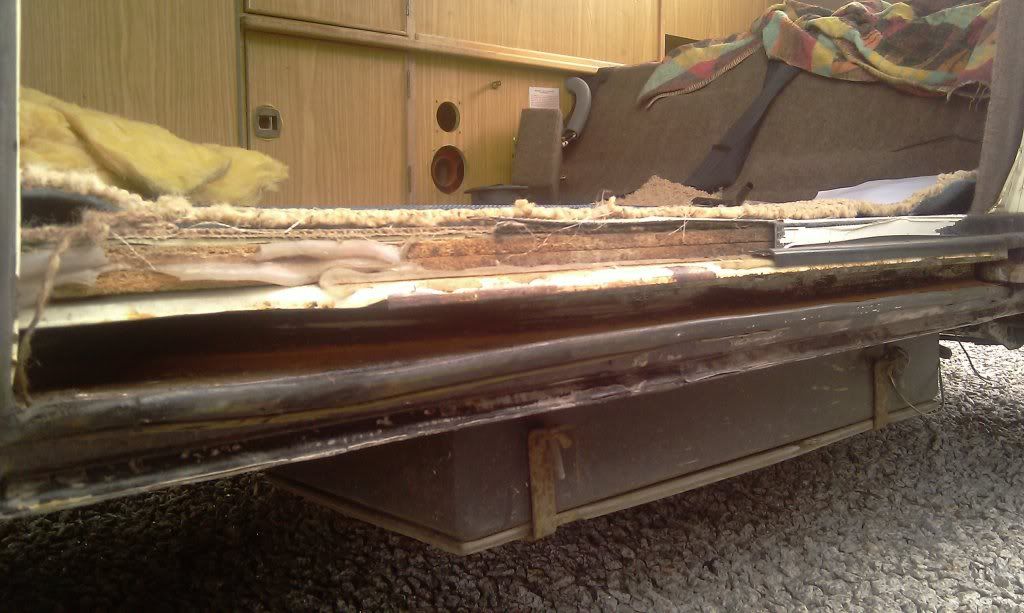
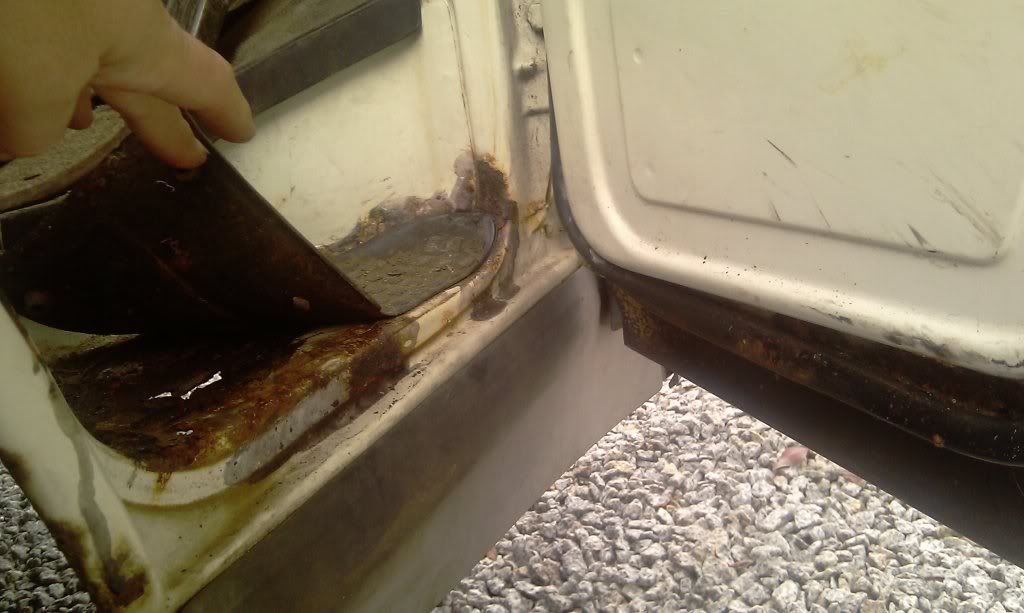
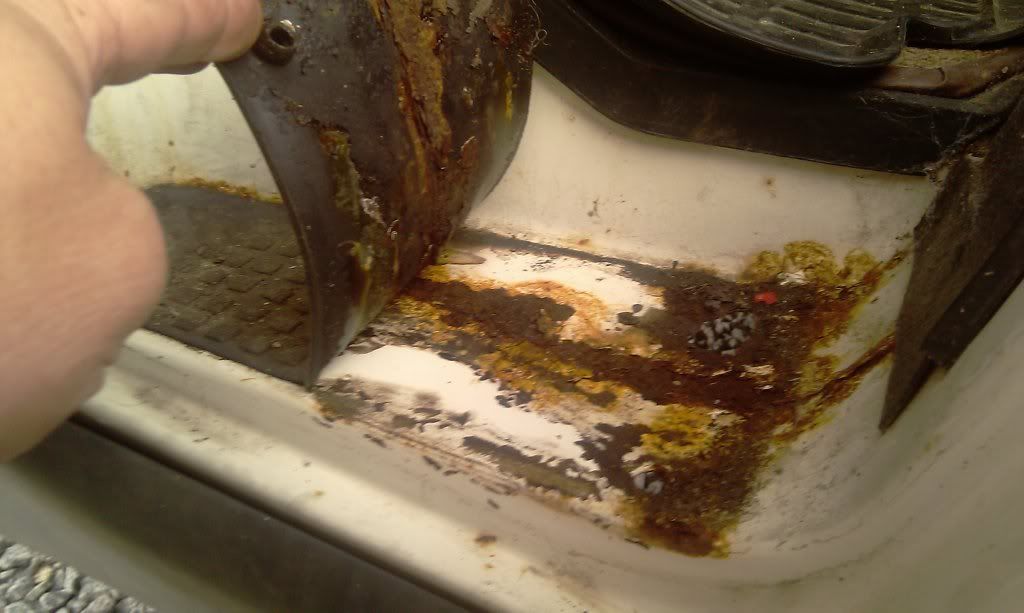
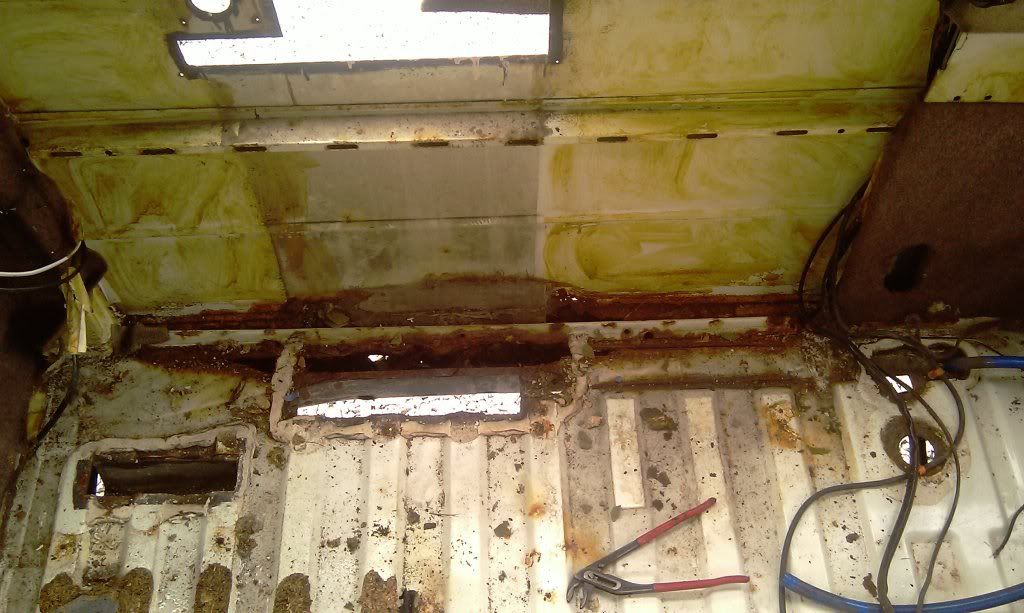
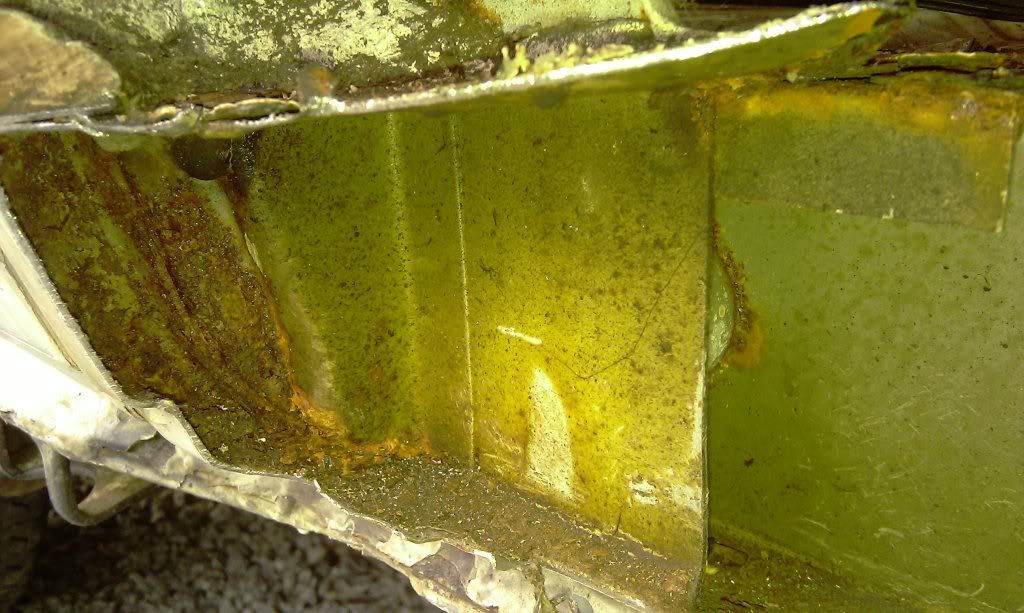
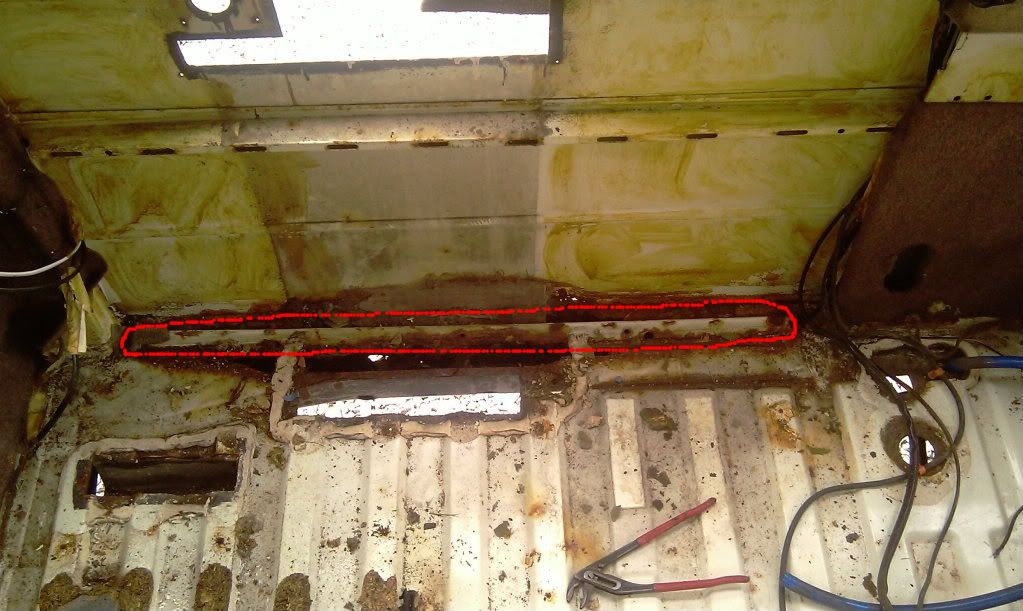
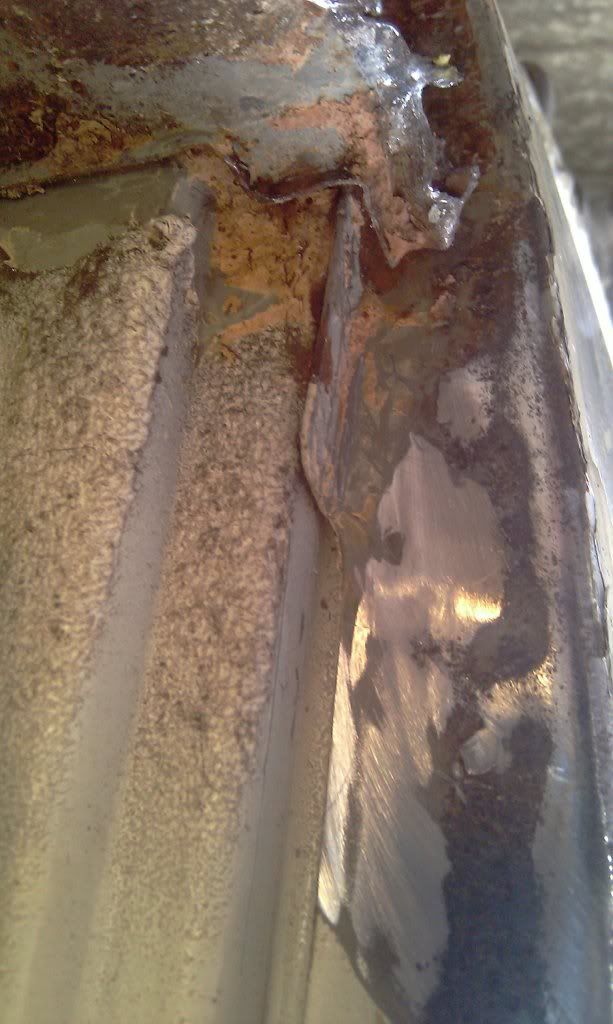
Unpicked the remnants of the floor-to-sill "filler panel" from where they meet with the wing panels, quite a complicated junction, looks like this:
Image

Plan is to shape the fill panel I make up to replicate this so it fits neatly round this "pillar". What it does mean is that I will have to think carefully about the order of fit - if I do the floor panels first and weld them in place I will block access to the outer sill, If i do the outer sill first then access to this detail will be tricky, hmm....... :?:

Got the rest of the old panel seam off and discovered what a wonderful tool spot weld cutters are - until you use them on 10 welds and they go blunt :evil: was using one of these http://www.cromwell.co.uk/KEN5031200K which I am guessing is normal carbon steel - looks like we might have to try and find a cobalt tipped one. :roll:

Also am a big fan of 3M roloc disks which I use in my die grinder, brill for cleaning up metal and grinding back welds :D

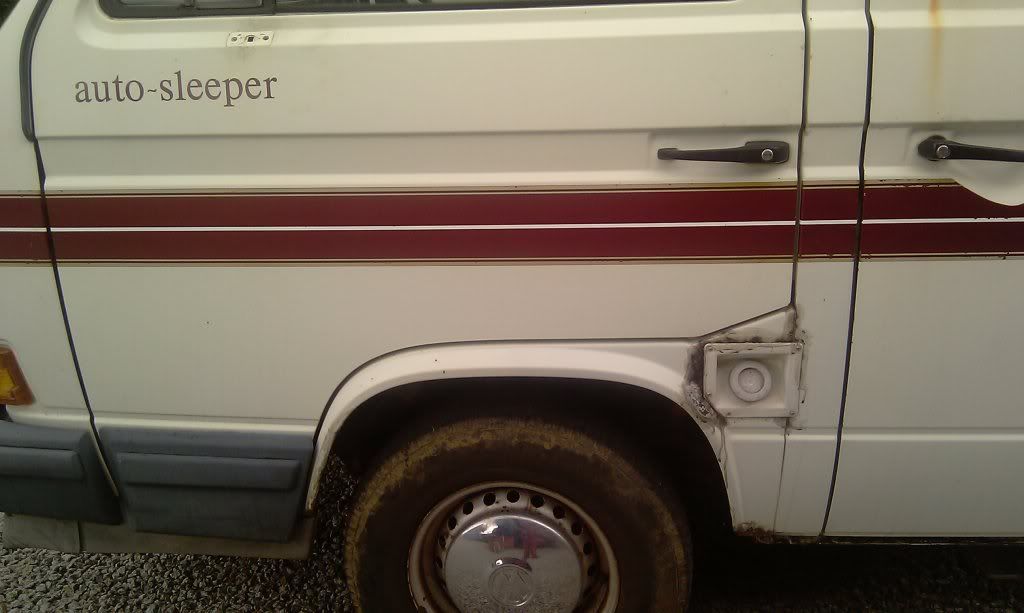
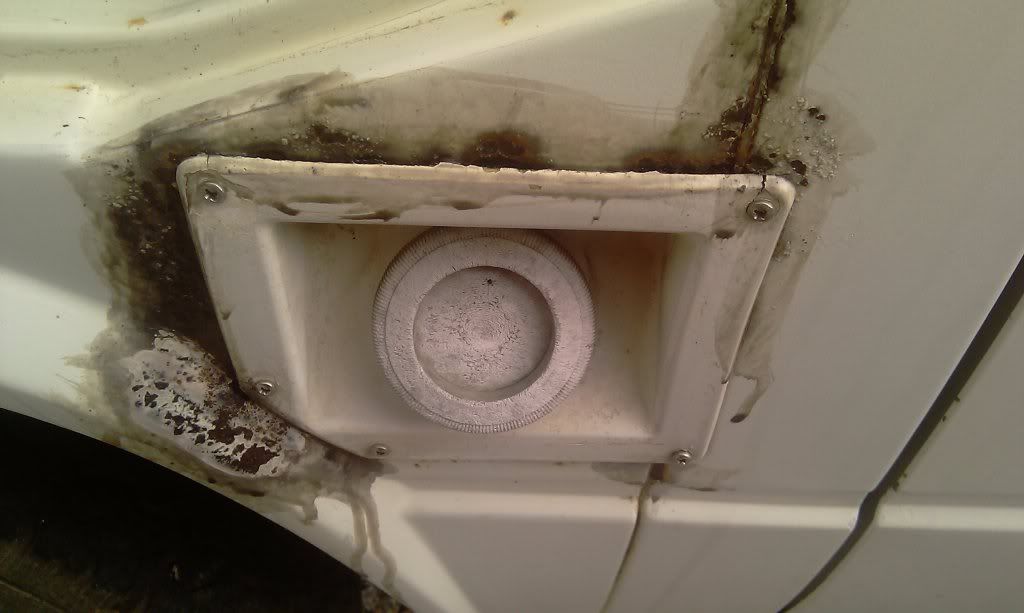
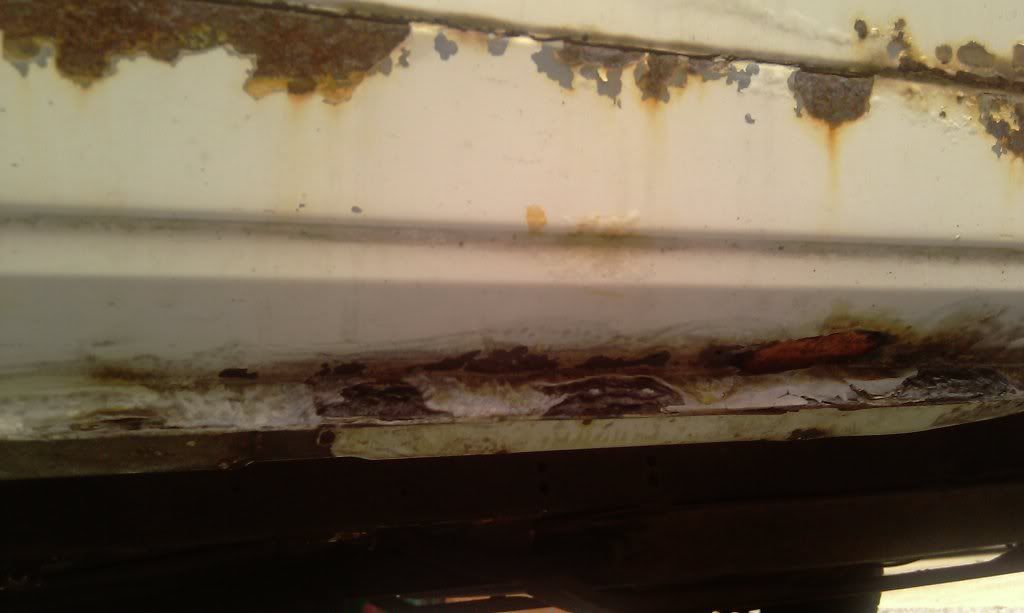
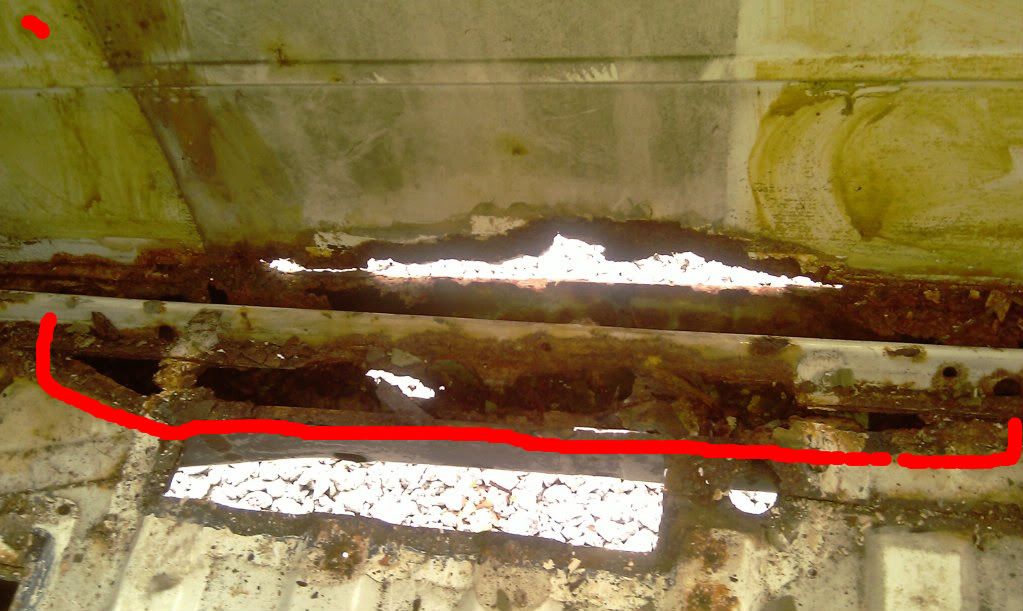
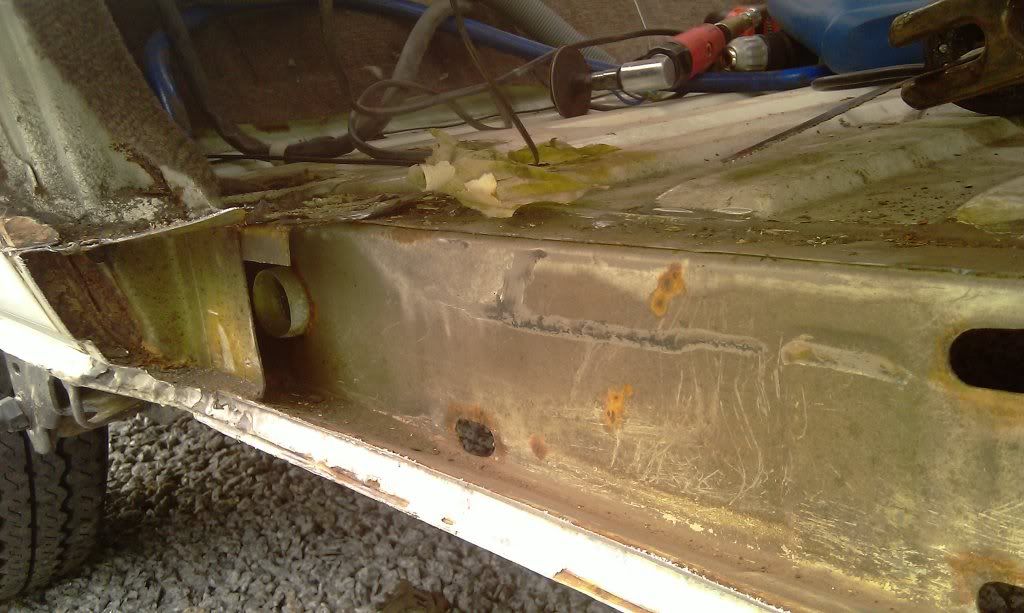
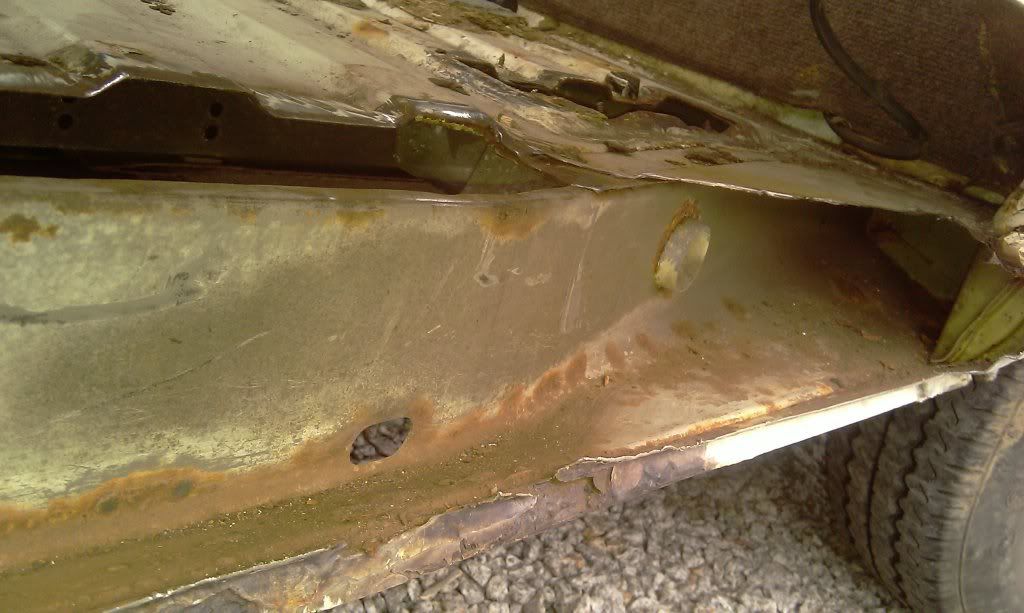
So here's a question for you. Having cleaned up the seams they look like this:
ImageImage

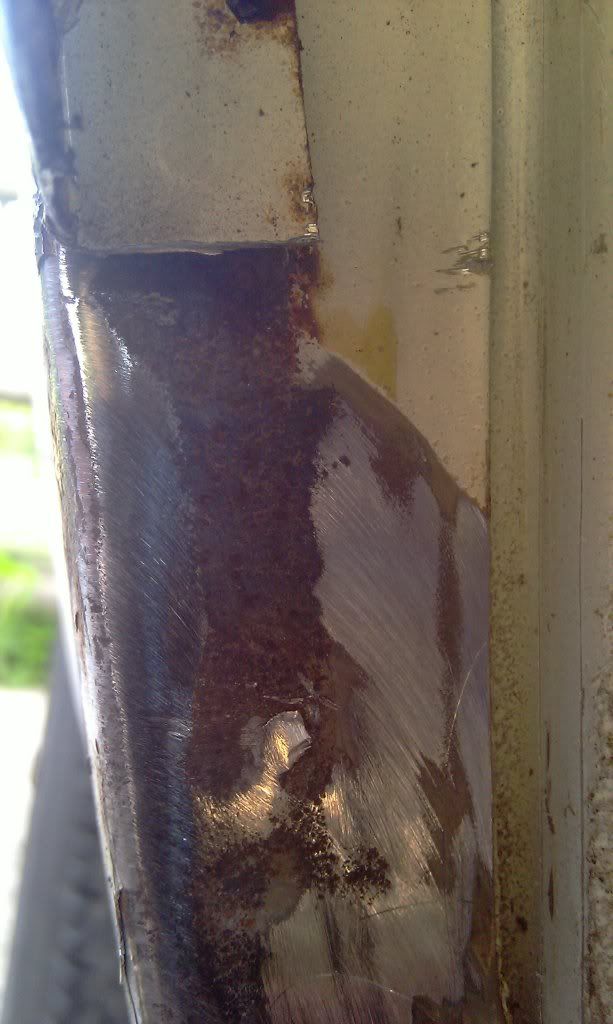
The bright bits are bare metal (obviously :rollin ) the dark bits are where rust in the seam has pitted the metal. I have cleaned all this up with a wire brush etc but am left with a number of option:
1. Grind the metal right back till even the pitted areas are back to bare metal
2. Treat the pitted areas with Vactan/Hydrate 80 and leave
3. Cut out pitted areas and lay in new metal

Given I want to do this properly and not be coming back to these seams every year what do you suggest? :?:

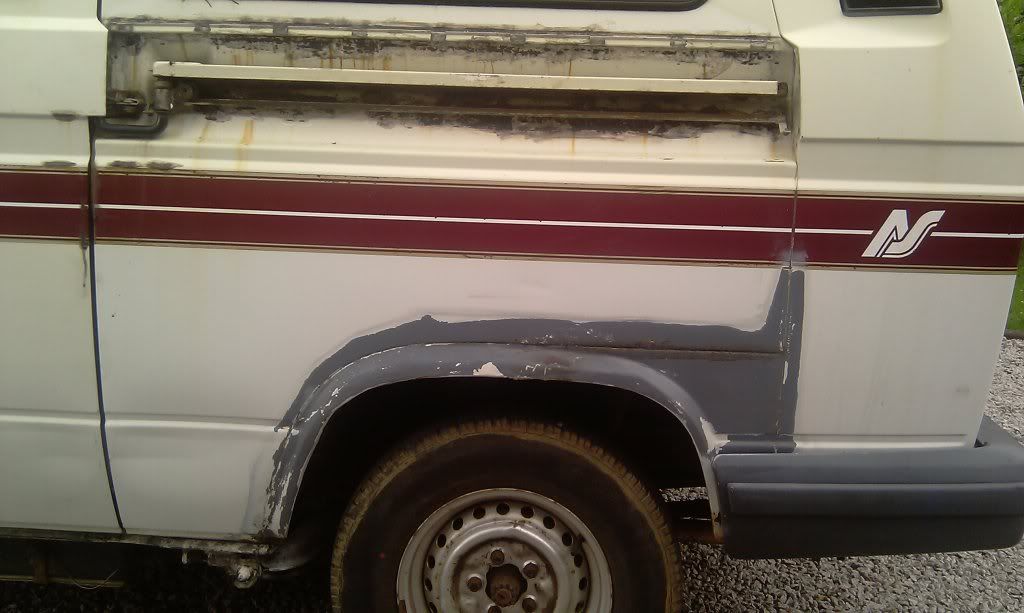
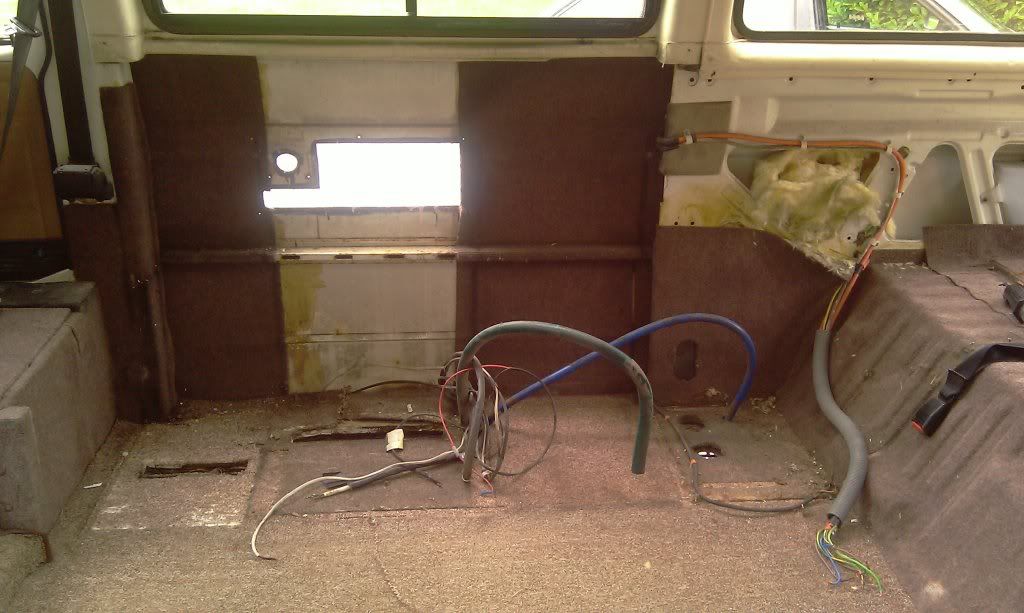
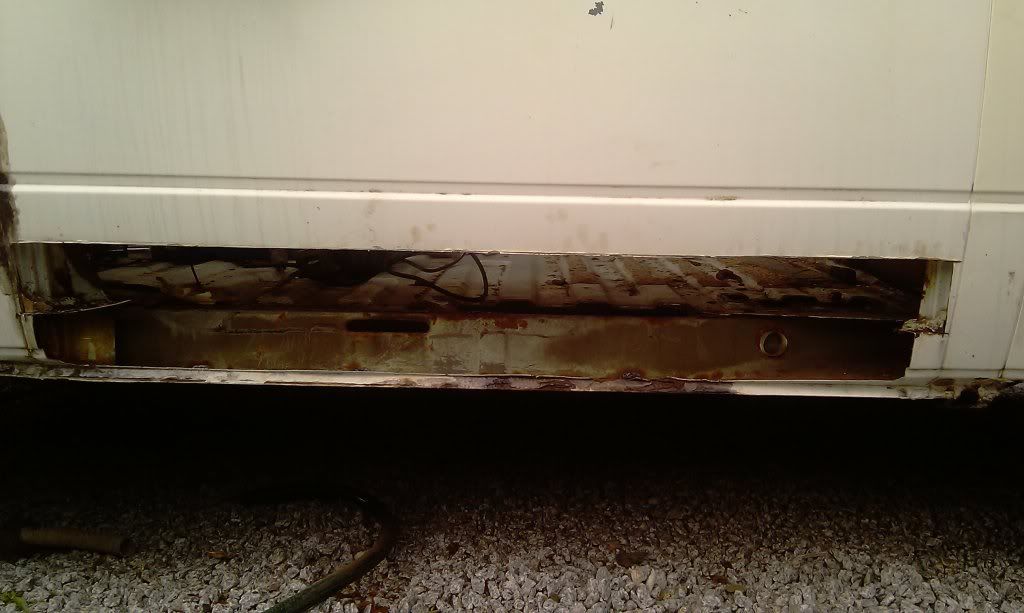
And finally, this is what it looks like with the lower sill in place. No where near ready for fitting yet but it gives me a boost to see it offered up :ok
Image

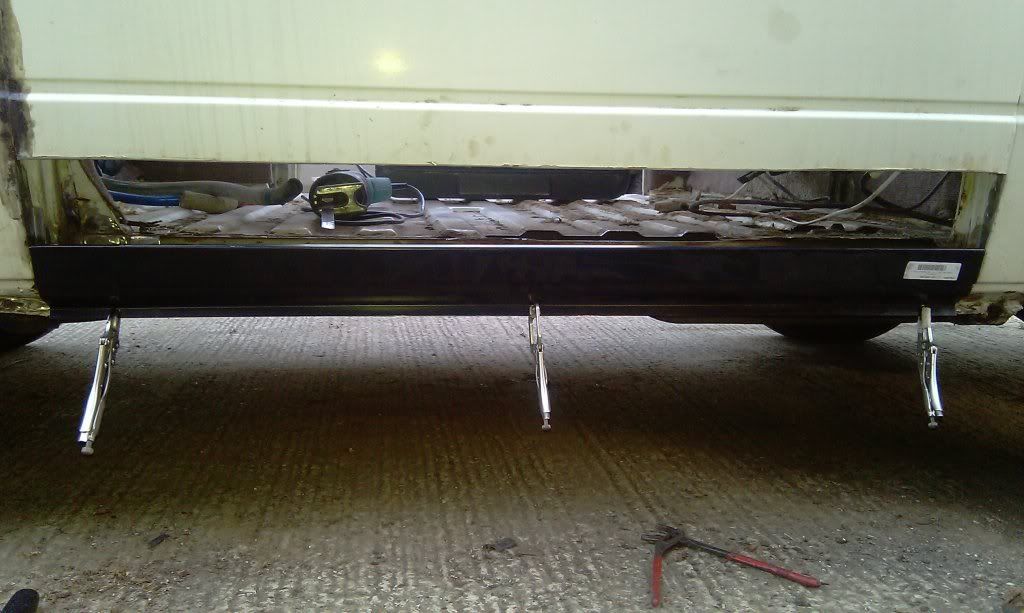
Next job is to make up the lower panel and then the floor plates (will PM you for those dimensions fidget)

Hopefully get onto making these up over the next few days - what thickness steel do you use BTW, is 1.0mm to thin?

Cheers,

MM
'89 Autosleeper Trident
2.1 DJ
Member 9111

Locked