Green Luna Camper Project!
Moderators: User administrators, Moderators
-
boatbuilder
- Registered user
- Posts: 804
- Joined: 09 Aug 2009, 21:53
- 80-90 Mem No: 8265
- Location: County Monaghan, Ireland
Re: Green Luna Camper Project!
I think you'd be amazed the difference gas makes. And get an autodarkening helmet if you don't already have one.
1984 1.9D (AEF Code) T25 tintop

Re: Green Luna Camper Project!
Been busy with the van these last 10 days. Still no welding done as the regulator for the gas only arrived today. I cleaned up the long vertical seam on the fridge side with a little dremmel wheel and cut out all the old sealant and gave the seam 2 treatments of Fertan a week apart.
Then a couple of days later I painted over the anti rust with some Ferpox epoxy primer to lock it all in. Tomorow once the epoxy has fully cured, I will rub down the primer and reseal the seam with sikaflex 220 and some filler on the back of the arch to smooth over the dimples caused by the rust. Over this I will add another layer of primer and wet sand smooth before either the rustoleum procedure or oven spray job.

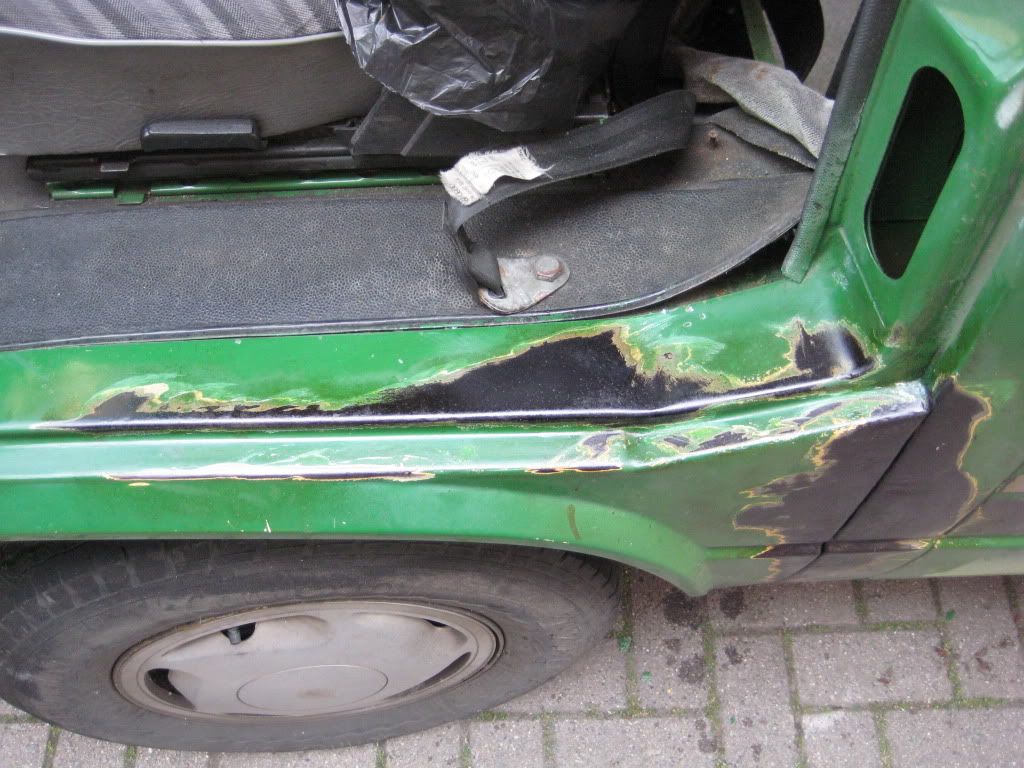
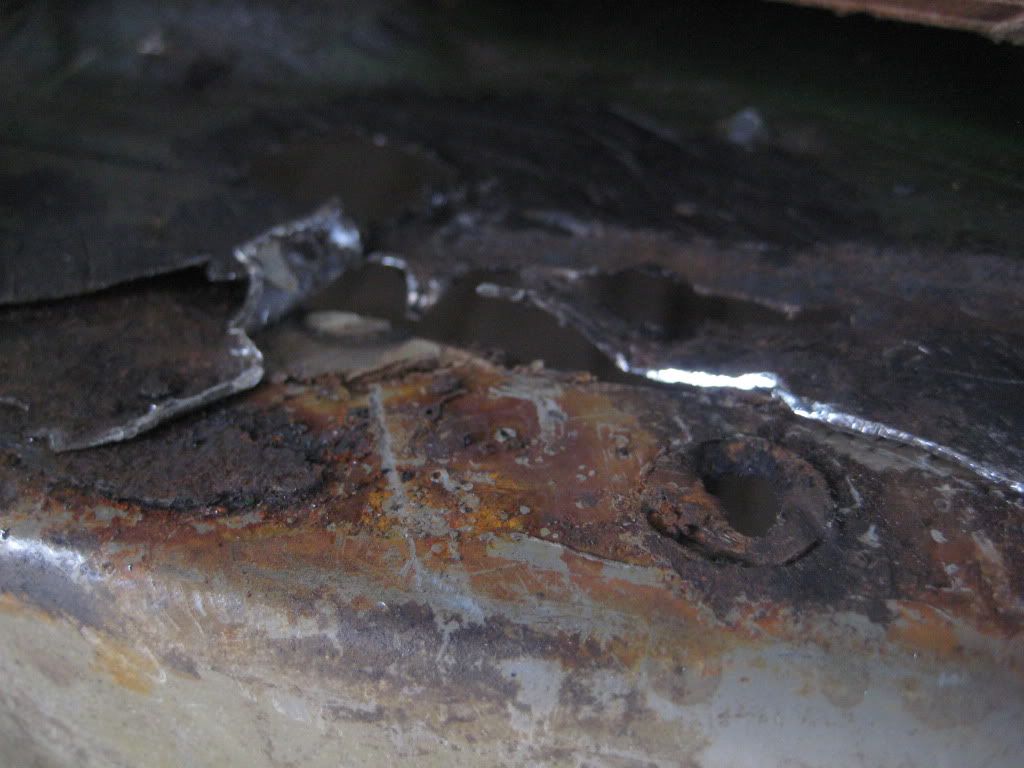
Under the wheel arch.I’m not sure how these little holes got there. They seem to be perfectly formed and only surface rust around them. I am debating whether to simply cover them with p40 fibreglass filler or weld some new metal in. In any case the epoxy paint has dried with a very hard and rubbery texture.
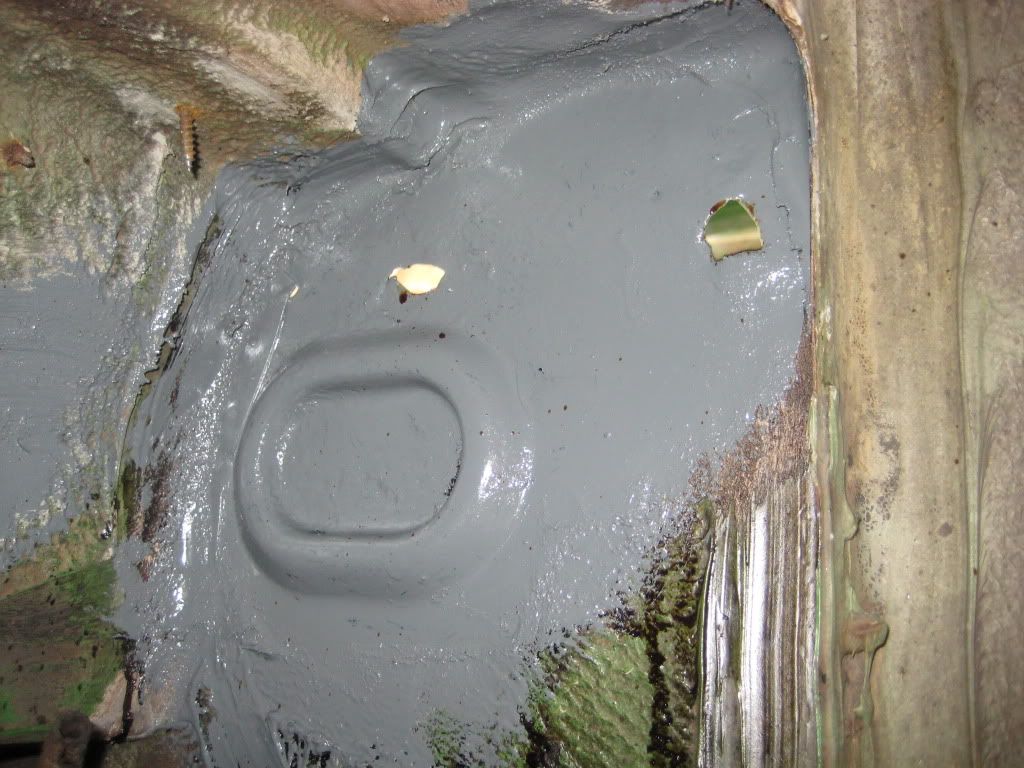
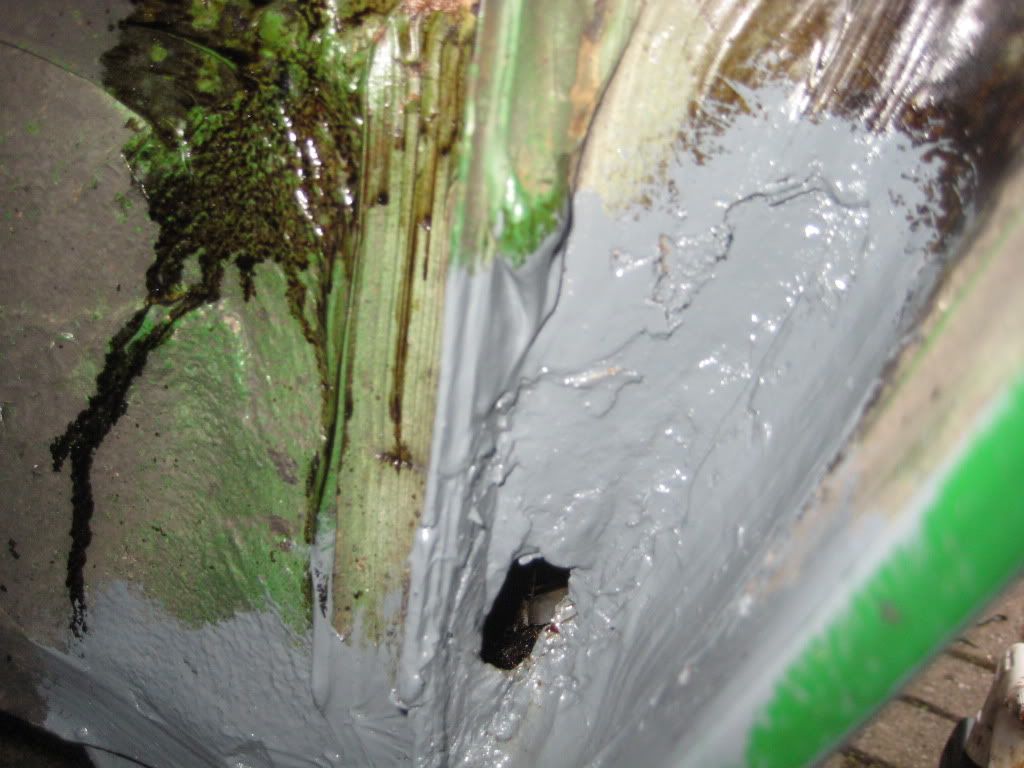
Lower down the wheel arch.Again not sure here weather to weld or fill. I’ve treated with Fertan before the primer and it is all solid around the hole. I think I will probably weld a piece in.
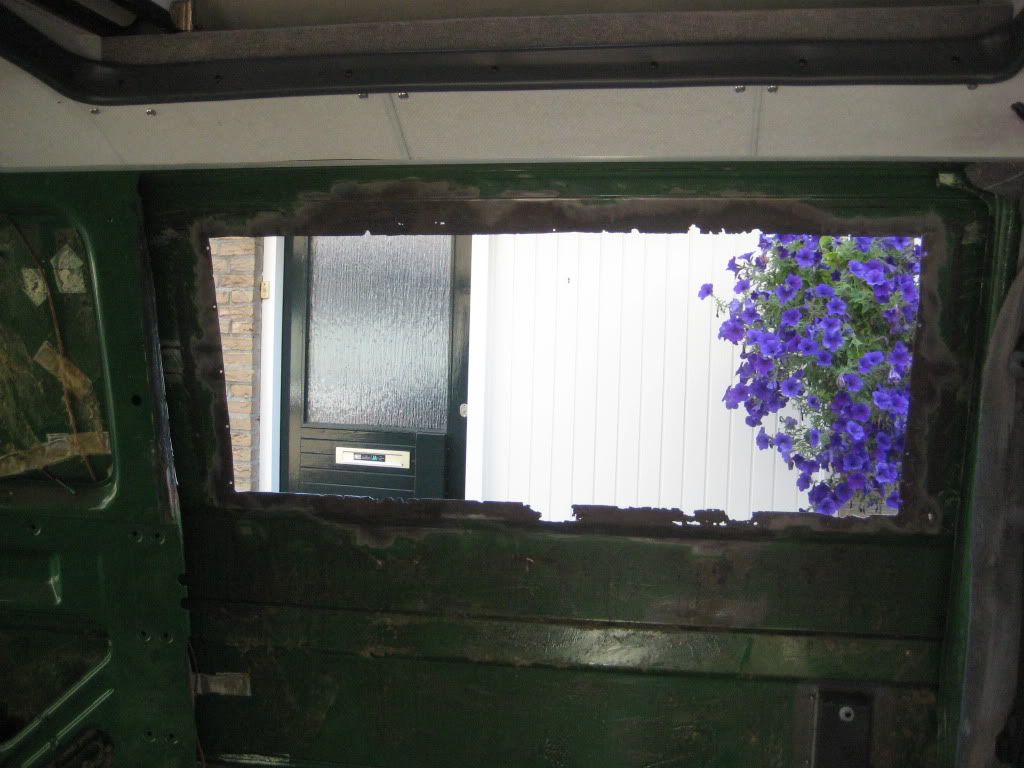
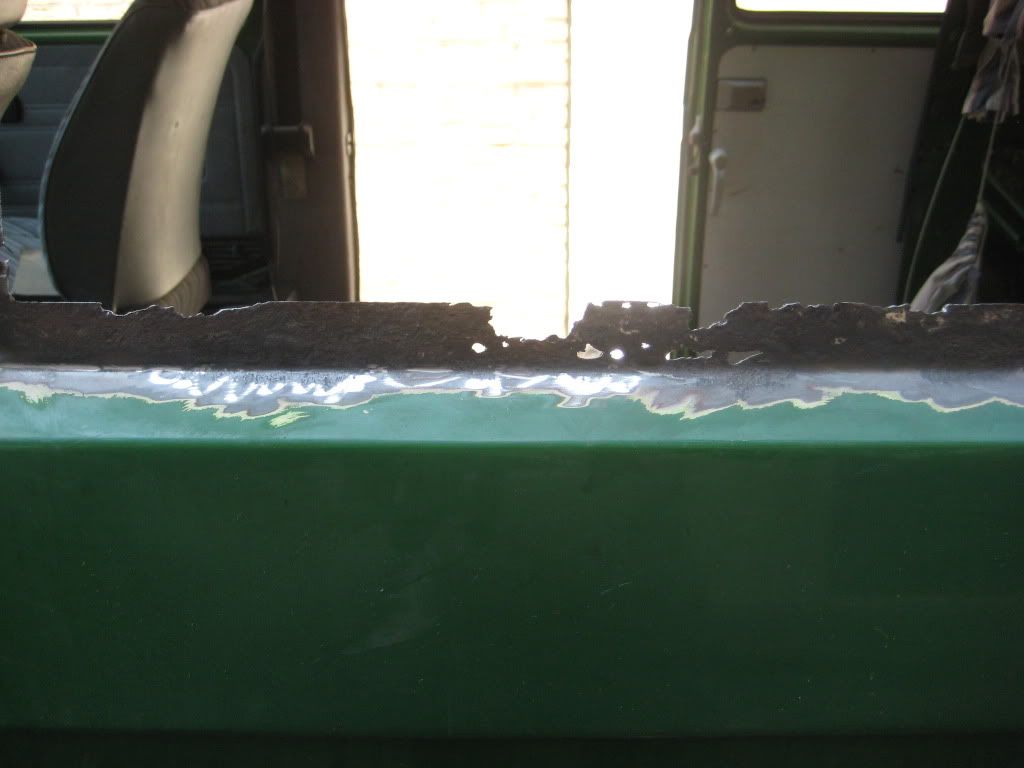
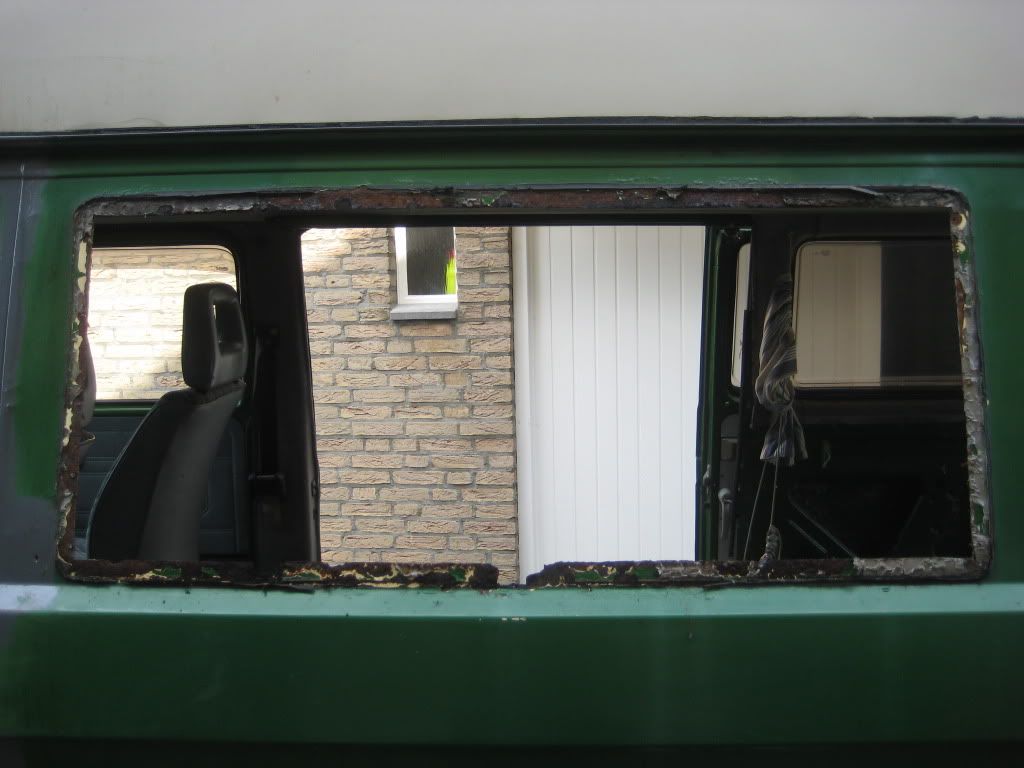
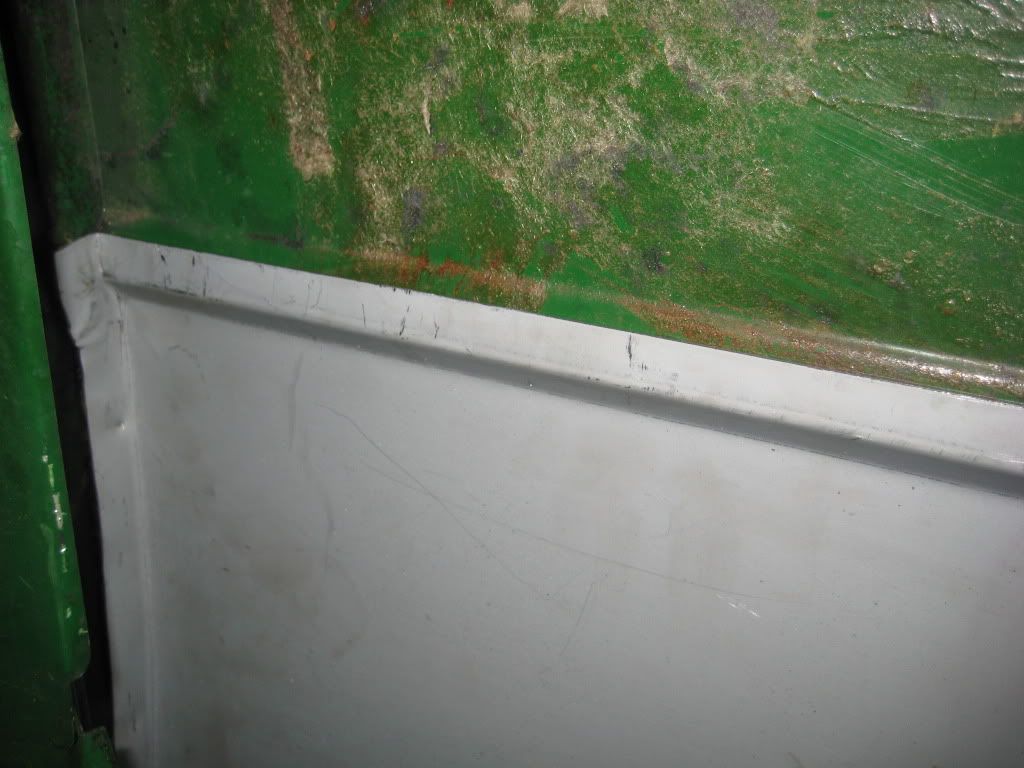
Took the window outYep lots of work to be done here.
That’s it for this update. Hopefully by the end of the week I will have welded my step back together.
Then a couple of days later I painted over the anti rust with some Ferpox epoxy primer to lock it all in. Tomorow once the epoxy has fully cured, I will rub down the primer and reseal the seam with sikaflex 220 and some filler on the back of the arch to smooth over the dimples caused by the rust. Over this I will add another layer of primer and wet sand smooth before either the rustoleum procedure or oven spray job.
Under the wheel arch.I’m not sure how these little holes got there. They seem to be perfectly formed and only surface rust around them. I am debating whether to simply cover them with p40 fibreglass filler or weld some new metal in. In any case the epoxy paint has dried with a very hard and rubbery texture.
Lower down the wheel arch.Again not sure here weather to weld or fill. I’ve treated with Fertan before the primer and it is all solid around the hole. I think I will probably weld a piece in.
Took the window outYep lots of work to be done here.
That’s it for this update. Hopefully by the end of the week I will have welded my step back together.
1990 Volkswagen Type 2 (T3). Campervan conversion by Luna.
1.7 L (1,715 cc) (54 bhp) (Serial # KY)
Resoration photos http://forum.club8090.co.uk/viewtopic.php?f=38&t=85759
LUNA-FREIZEITMOBILE GMBH: http://tinyurl.com/6mjerz8
1.7 L (1,715 cc) (54 bhp) (Serial # KY)
Resoration photos http://forum.club8090.co.uk/viewtopic.php?f=38&t=85759
LUNA-FREIZEITMOBILE GMBH: http://tinyurl.com/6mjerz8
-
Cyrus

- Registered user
- Posts: 616
- Joined: 22 Jan 2011, 09:26
- 80-90 Mem No: 9165
- Location: Hastings, E/Sussex
Re: Green Luna Camper Project!
Also with MIG make sure you have a good bare metal to clamp the earth to and replace the tips regularly (the amount of crap weds I've done due to the wire slopping around in a worn tipjimpainter wrote:Everybody has to start somewhere. Flux wire is ok but a bit messy. Definatly better to get a gas bottle and use that. Your better off using some metal to practise on before welding your van. You need to make sure the metal is spotless as well. Any sign of rust and it will affect your weld.
Keep it up you're doing fine.
Re: Green Luna Camper Project!
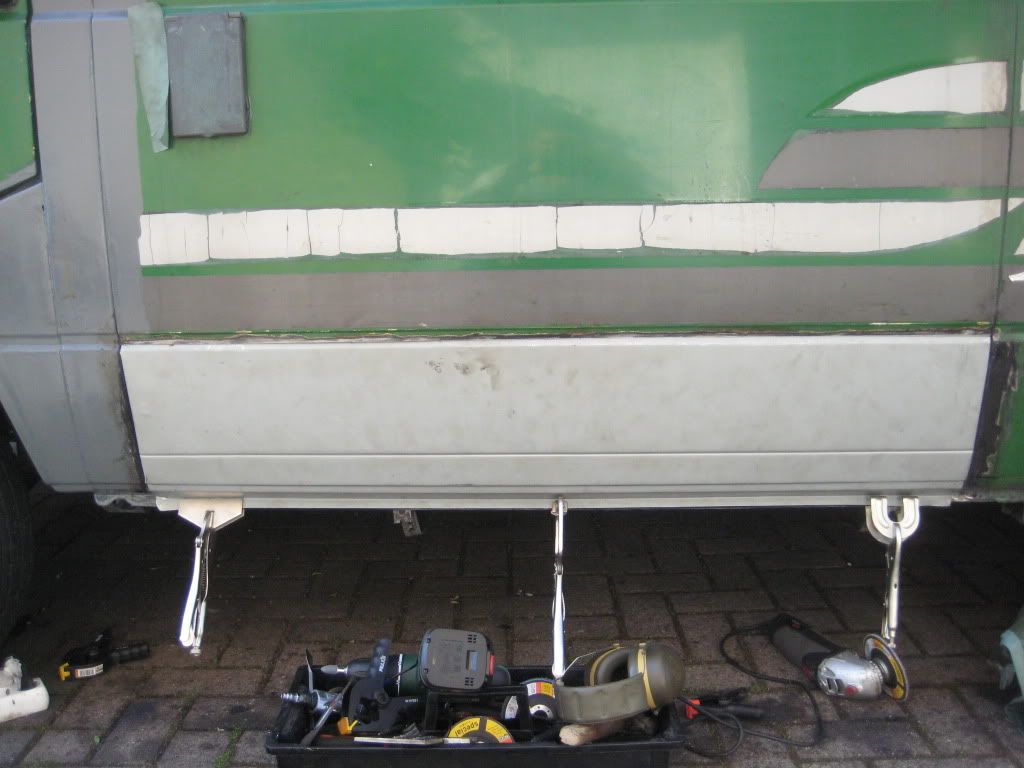
Finished the preliminary work on the fridge side wing.
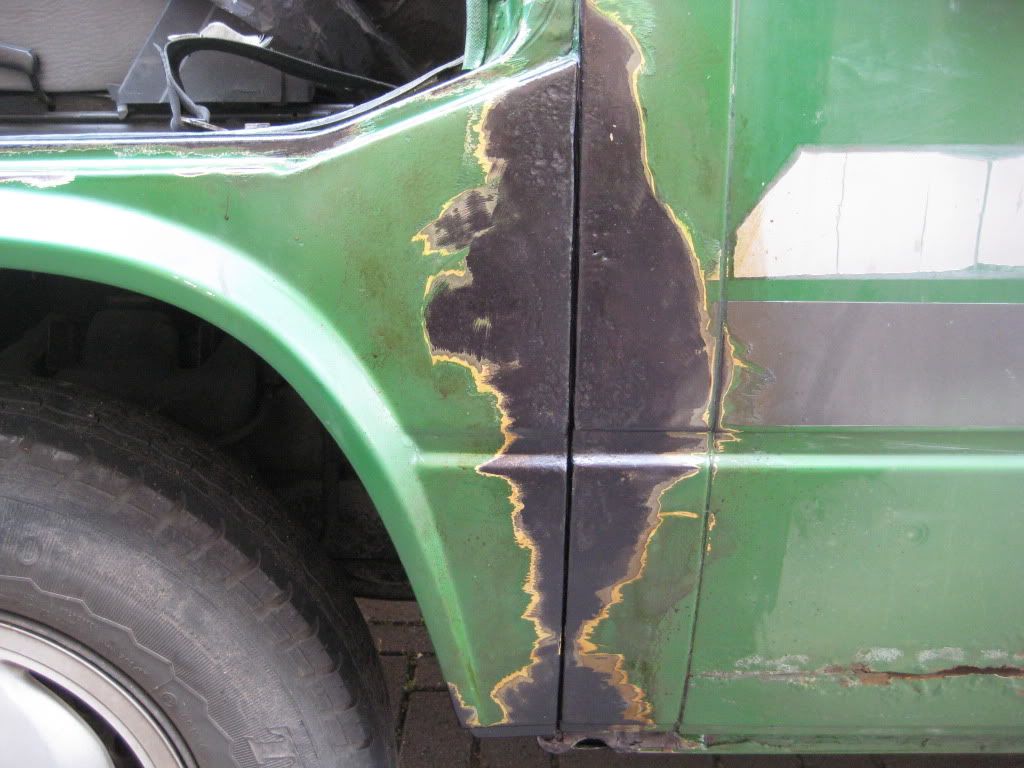
This is how this area looked when I got the bus. Lots of bubbling paint. When I first looked at this I thought “what I am supposed to do here then”. It was only through reading posts and the 8090 wiki that gave the information I needed to proceed
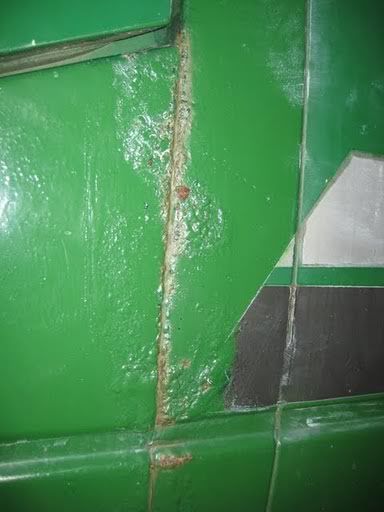
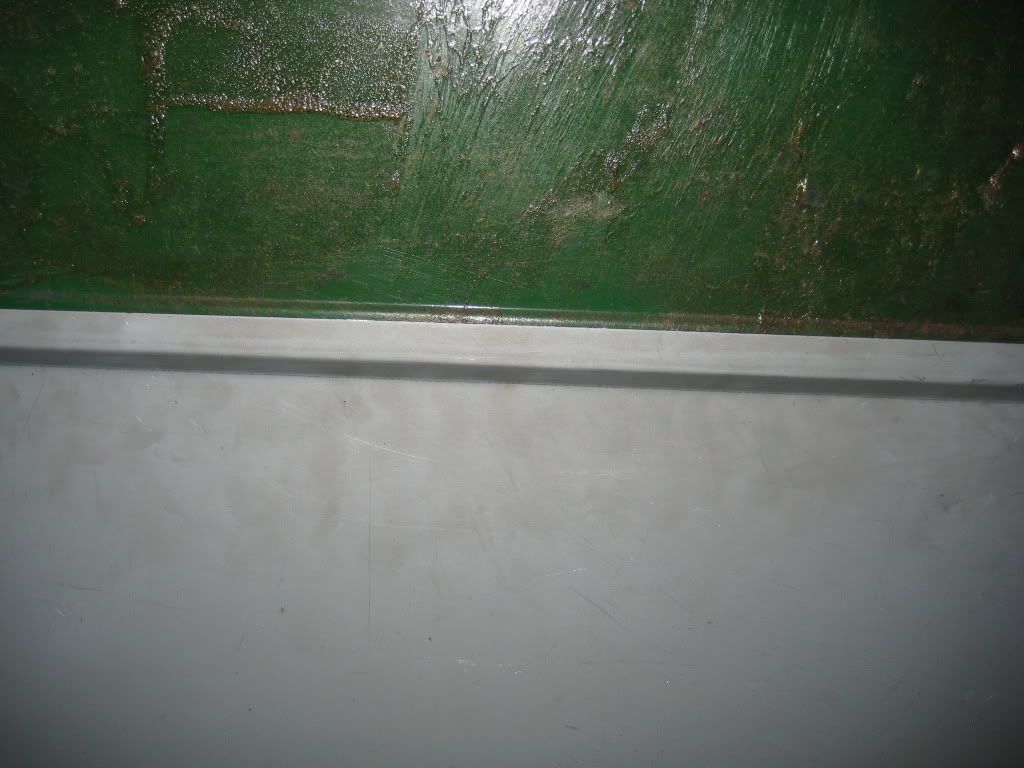
Many on here recommend Vatcan for rust treatment. I have not used this as it is not available localy to me. Therefore I have used Fertan which is similar stuff. It is used in the marine industry and likes to be applied in damp wet conditions. Whenever it rains I brush it into seams and let the moisture and capillary action do the work as it is very thin. This is after 2 applications and some rain in-between. I could see the Fertan coming through the other side of the seam. Note the pitting. I could change the arch and I will if this does not work and slow the rusting of the area.
This is after the first undercoat (Ferpox) was applied and it flowed into the seam nicely.
Added seam sealer. Rubbed down and applied second coat of Ferpox. Ferpox has rust inhibiting chemicals in it too.

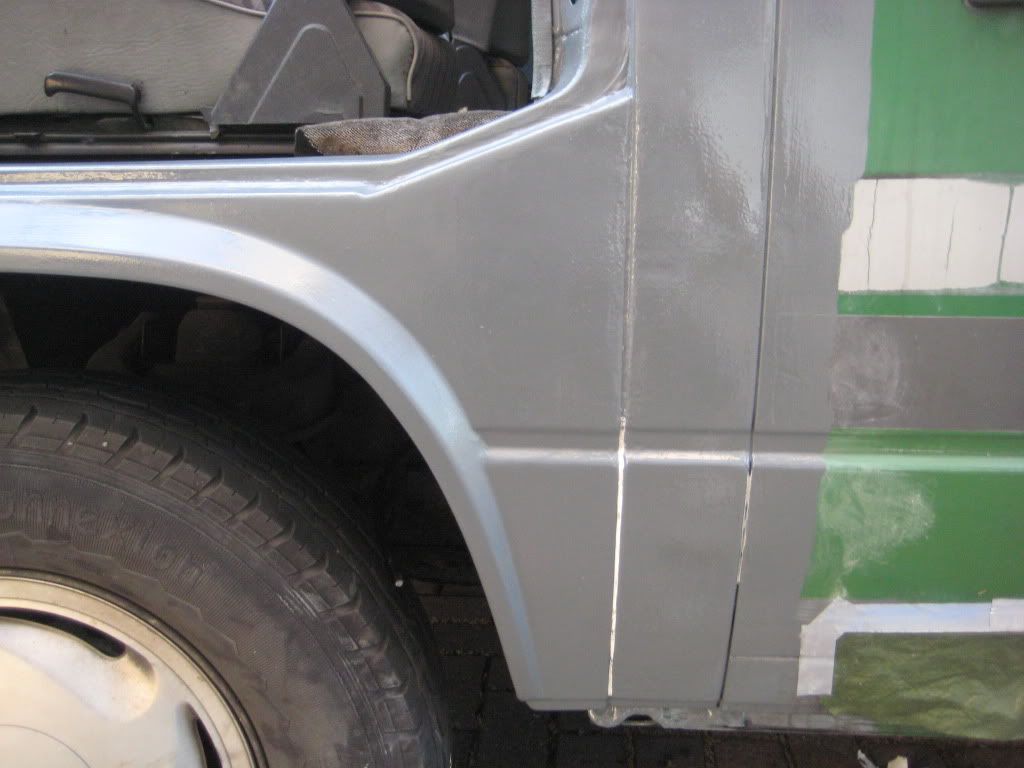
I am pleased with the result and I will monitor the area until I am ready to roller the van in September.
This is how this area looked when I got the bus. Lots of bubbling paint. When I first looked at this I thought “what I am supposed to do here then”. It was only through reading posts and the 8090 wiki that gave the information I needed to proceed
Many on here recommend Vatcan for rust treatment. I have not used this as it is not available localy to me. Therefore I have used Fertan which is similar stuff. It is used in the marine industry and likes to be applied in damp wet conditions. Whenever it rains I brush it into seams and let the moisture and capillary action do the work as it is very thin. This is after 2 applications and some rain in-between. I could see the Fertan coming through the other side of the seam. Note the pitting. I could change the arch and I will if this does not work and slow the rusting of the area.
This is after the first undercoat (Ferpox) was applied and it flowed into the seam nicely.
Added seam sealer. Rubbed down and applied second coat of Ferpox. Ferpox has rust inhibiting chemicals in it too.
I am pleased with the result and I will monitor the area until I am ready to roller the van in September.
Last edited by pmoc_2001 on 15 Jun 2011, 12:18, edited 1 time in total.
1990 Volkswagen Type 2 (T3). Campervan conversion by Luna.
1.7 L (1,715 cc) (54 bhp) (Serial # KY)
Resoration photos http://forum.club8090.co.uk/viewtopic.php?f=38&t=85759
LUNA-FREIZEITMOBILE GMBH: http://tinyurl.com/6mjerz8
1.7 L (1,715 cc) (54 bhp) (Serial # KY)
Resoration photos http://forum.club8090.co.uk/viewtopic.php?f=38&t=85759
LUNA-FREIZEITMOBILE GMBH: http://tinyurl.com/6mjerz8
Re: Green Luna Camper Project!
Good morning,
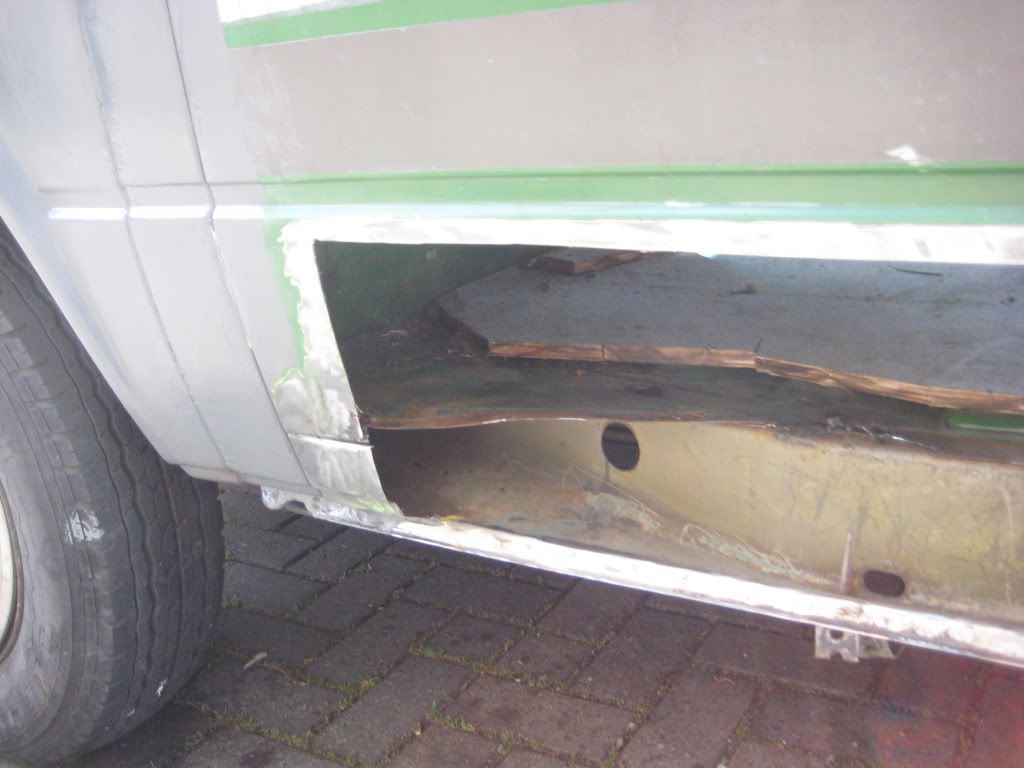
I started cutting out the fridge side panel at the weekend. Quite a pleasurable and satisfying job. Broken up with kids, football and beer.
I started out making a few cuts with a 1mm disk in a grinder to get this:
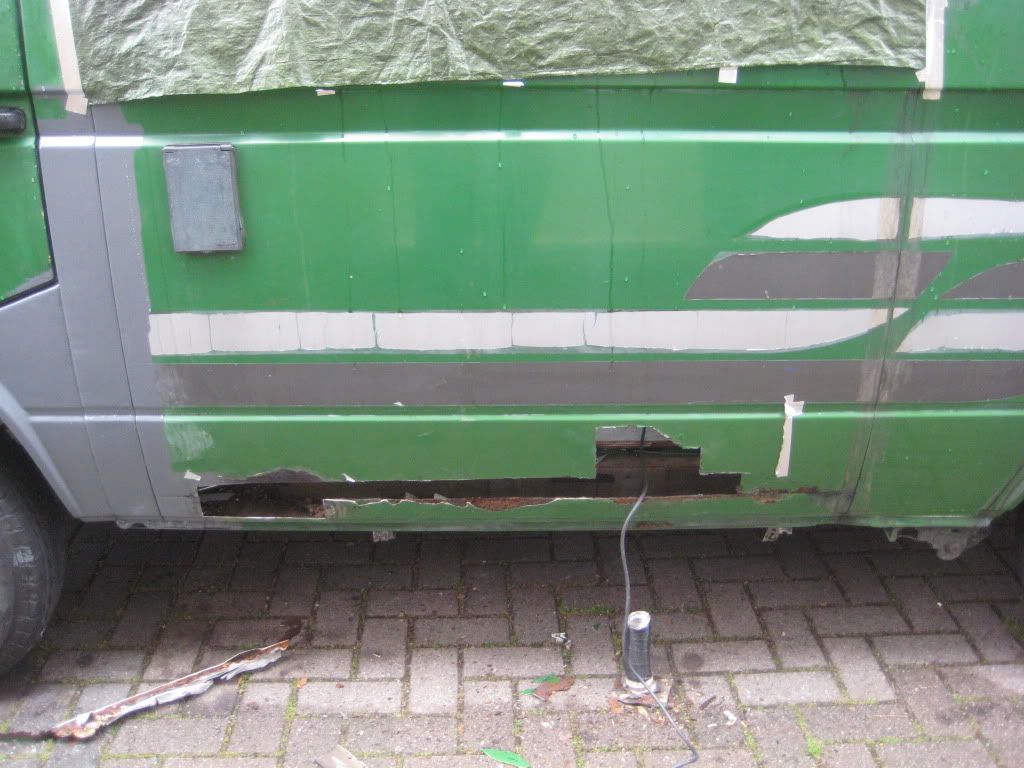
Carefully cutting bit by bit trying to get the edges as straight as possible:
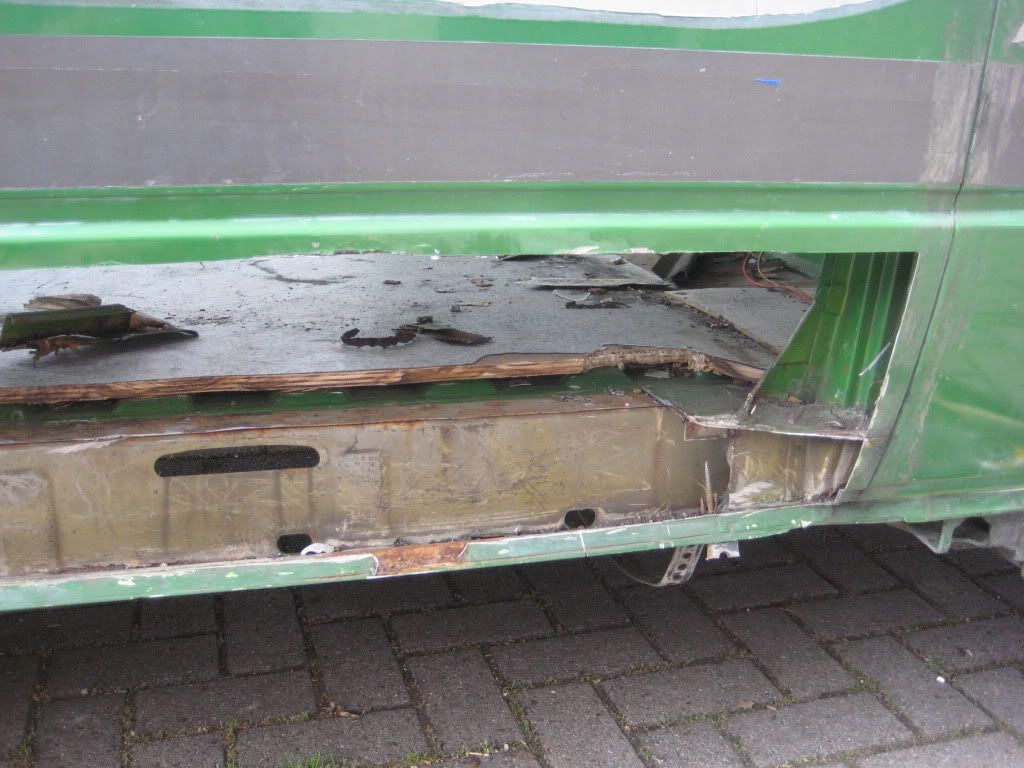
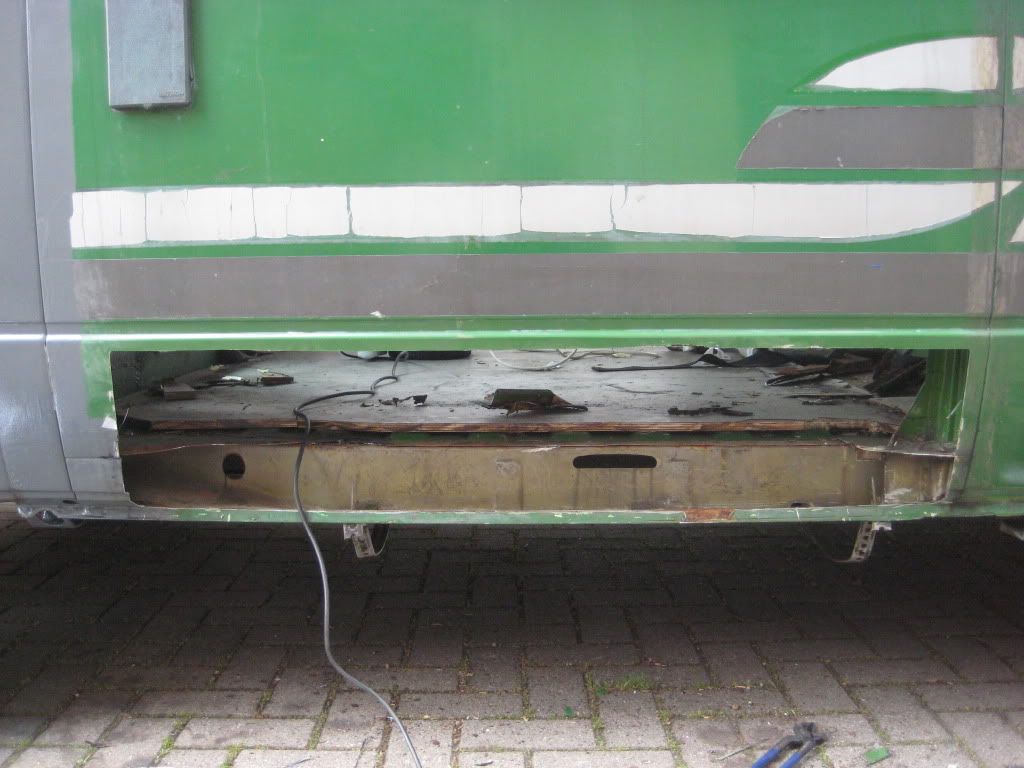
This area needs more metal removing to allow the panel from AH Schofield to fit. The panel is actually too long as it extends over the middle pillar (the pillar between the front door and this panel). My plan is to cut 15mm beyond the fake seam on the new panel and bend the metal to make a flange to puddle weld to the pillar:

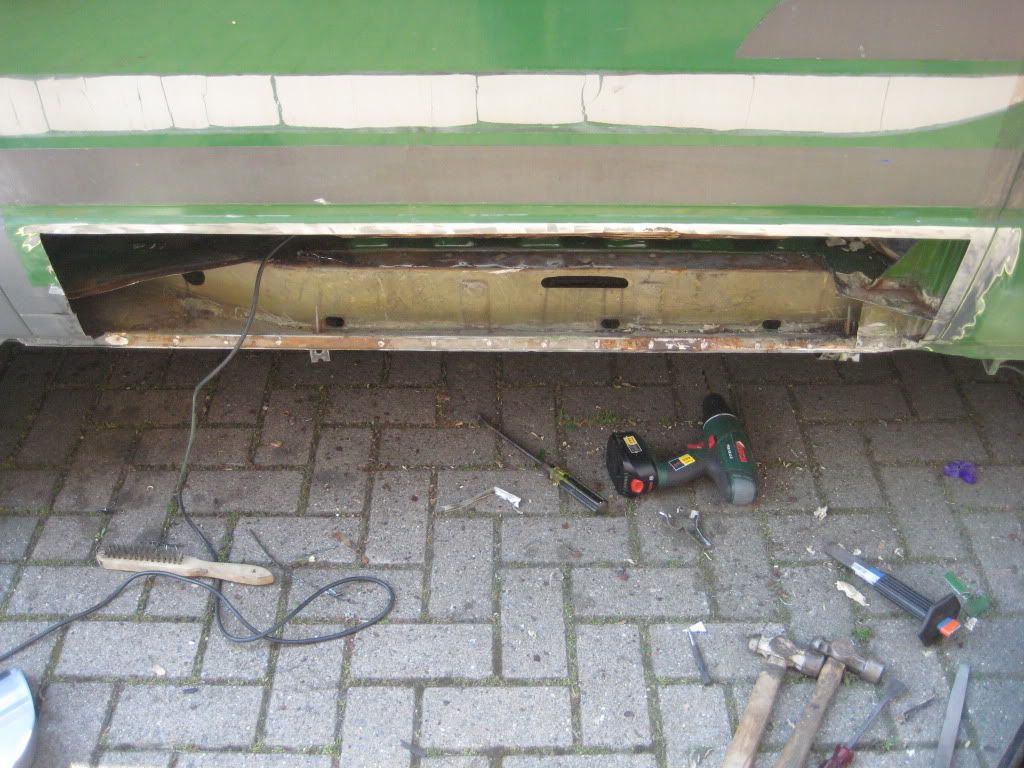
I cleaned up the old spot welds with a chisel and a 60 grit flap disk.
This part of the floor will need a patch:
Well that’s all for now. I need to clean up the rear pillar end of the repair (remove the spot welds). I also need to decide how high to go with the repair and how to join at the top. I’m thinking of a strip of metal and puddle welds top and bottom.
Some videos of the job I took. Sorry about the production quality.
http://youtu.be/OF3A6KwwM6I" onclick="window.open(this.href);return false;
http://youtu.be/FMMykTuamcI" onclick="window.open(this.href);return false;
http://youtu.be/pOgsAK7r578" onclick="window.open(this.href);return false;
I started cutting out the fridge side panel at the weekend. Quite a pleasurable and satisfying job. Broken up with kids, football and beer.
I started out making a few cuts with a 1mm disk in a grinder to get this:
Carefully cutting bit by bit trying to get the edges as straight as possible:
This area needs more metal removing to allow the panel from AH Schofield to fit. The panel is actually too long as it extends over the middle pillar (the pillar between the front door and this panel). My plan is to cut 15mm beyond the fake seam on the new panel and bend the metal to make a flange to puddle weld to the pillar:
I cleaned up the old spot welds with a chisel and a 60 grit flap disk.
This part of the floor will need a patch:
Well that’s all for now. I need to clean up the rear pillar end of the repair (remove the spot welds). I also need to decide how high to go with the repair and how to join at the top. I’m thinking of a strip of metal and puddle welds top and bottom.
Some videos of the job I took. Sorry about the production quality.
http://youtu.be/OF3A6KwwM6I" onclick="window.open(this.href);return false;
http://youtu.be/FMMykTuamcI" onclick="window.open(this.href);return false;
http://youtu.be/pOgsAK7r578" onclick="window.open(this.href);return false;
1990 Volkswagen Type 2 (T3). Campervan conversion by Luna.
1.7 L (1,715 cc) (54 bhp) (Serial # KY)
Resoration photos http://forum.club8090.co.uk/viewtopic.php?f=38&t=85759
LUNA-FREIZEITMOBILE GMBH: http://tinyurl.com/6mjerz8
1.7 L (1,715 cc) (54 bhp) (Serial # KY)
Resoration photos http://forum.club8090.co.uk/viewtopic.php?f=38&t=85759
LUNA-FREIZEITMOBILE GMBH: http://tinyurl.com/6mjerz8
Re: Green Luna Camper Project!
Nearly finished the side panel. Spent time getting it to fit snug after I chopped off the extra pillar bit and did some cutting and bending to avoid it bulging in the wrong places where the creases were pressed.
I have learned allot already. Especially that what you do to metal bending it for example - will have an effect else where and is a process that needs to thought through before hand. Bending ad-hock is no good.
All that remains is to drill the holes and weld. I tell you what the time it takes to prep and make things fit seems to be the hardest part.
1990 Volkswagen Type 2 (T3). Campervan conversion by Luna.
1.7 L (1,715 cc) (54 bhp) (Serial # KY)
Resoration photos http://forum.club8090.co.uk/viewtopic.php?f=38&t=85759
LUNA-FREIZEITMOBILE GMBH: http://tinyurl.com/6mjerz8
1.7 L (1,715 cc) (54 bhp) (Serial # KY)
Resoration photos http://forum.club8090.co.uk/viewtopic.php?f=38&t=85759
LUNA-FREIZEITMOBILE GMBH: http://tinyurl.com/6mjerz8
-
tabbytiger23

- Registered user
- Posts: 113
- Joined: 24 Jan 2011, 12:08
- 80-90 Mem No: 8287
- Location: Leicestershire
Re: Green Luna Camper Project!
Love this thread!!

Lime Green VW t25 Autohomes conversion, 1.9DG 1987
I saw weird stuff in that place last night. Weird, strange, sick, twisted, eerie, godless, evil stuff... and I want in.
I saw weird stuff in that place last night. Weird, strange, sick, twisted, eerie, godless, evil stuff... and I want in.
Re: Green Luna Camper Project!
Please could an experienced welder give me some advice?
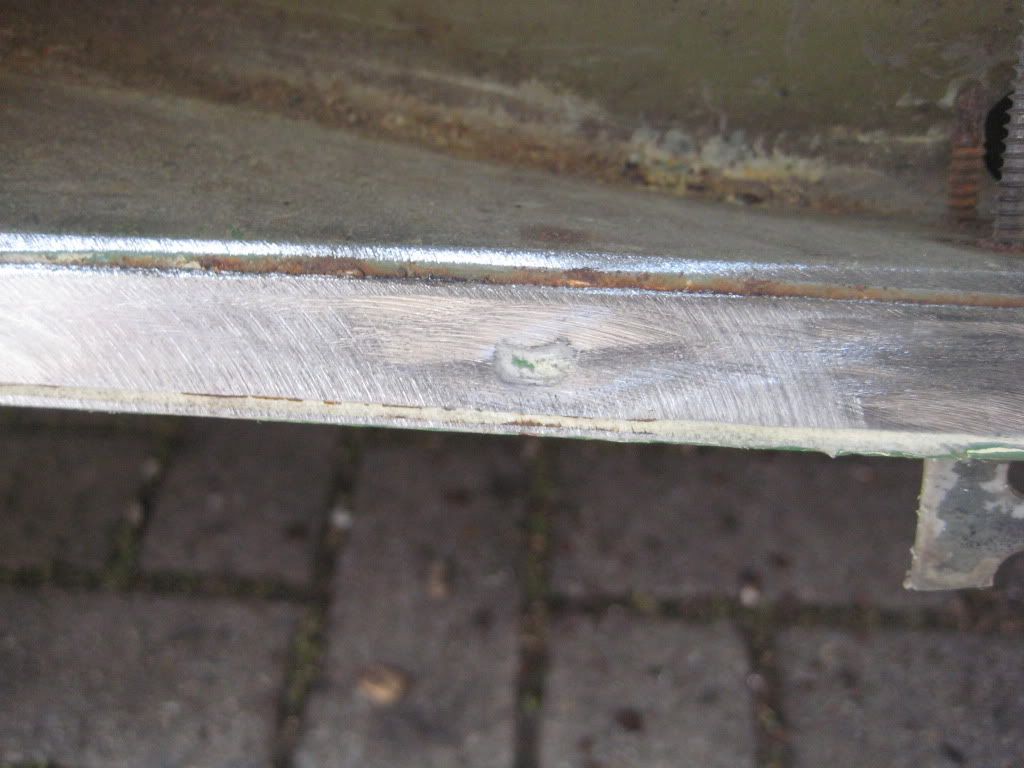
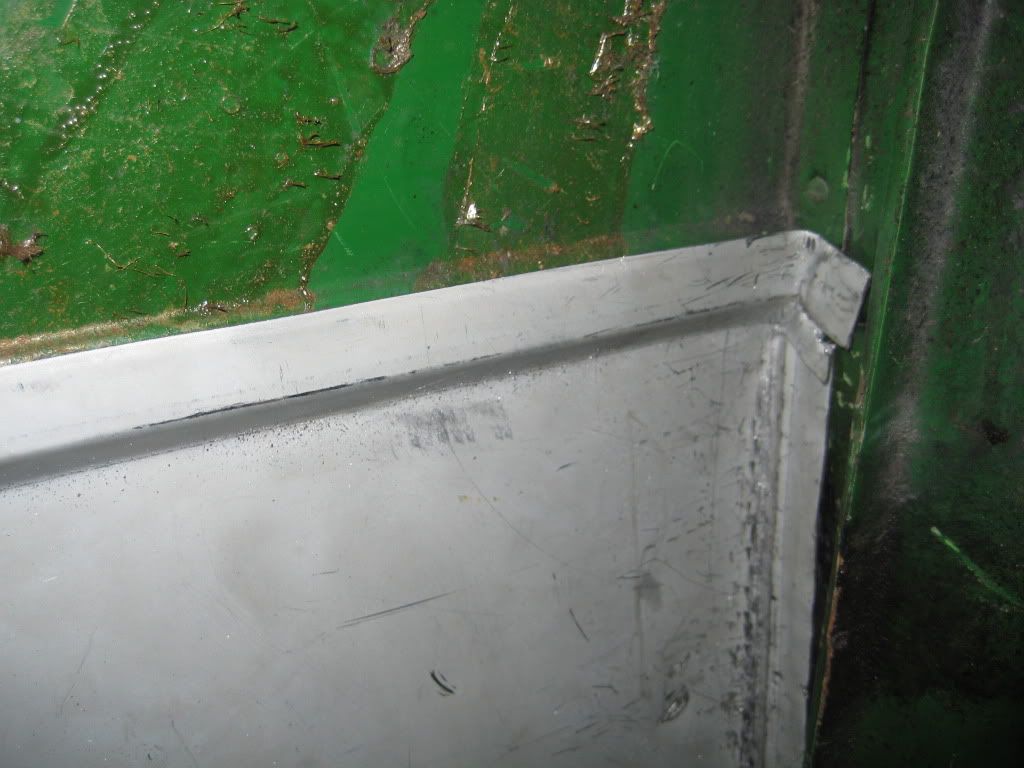
Sanity check
Is there a reason why I should not puddle weld the upper part of the panel shown below. I'm going to use 80mm holes all round.
Many thanks
Pmoc.
Sanity check
Is there a reason why I should not puddle weld the upper part of the panel shown below. I'm going to use 80mm holes all round.
Many thanks
Pmoc.
1990 Volkswagen Type 2 (T3). Campervan conversion by Luna.
1.7 L (1,715 cc) (54 bhp) (Serial # KY)
Resoration photos http://forum.club8090.co.uk/viewtopic.php?f=38&t=85759
LUNA-FREIZEITMOBILE GMBH: http://tinyurl.com/6mjerz8
1.7 L (1,715 cc) (54 bhp) (Serial # KY)
Resoration photos http://forum.club8090.co.uk/viewtopic.php?f=38&t=85759
LUNA-FREIZEITMOBILE GMBH: http://tinyurl.com/6mjerz8
-
fidget
- Registered user
- Posts: 126
- Joined: 04 May 2010, 20:45
- 80-90 Mem No: 9027
- Location: Braintree, essex
Re: Green Luna Camper Project!
Im not an experianced welder but till one comes along, Ill say theres no probs puddle welding the inside . But I'd reccomend 8mm holes  .
.
you may need to weld on the outside too tho to be sure
James
you may need to weld on the outside too tho to be sure
James
If Pac-Man affected us as kids, we'd all be running around in darkened rooms, munching magic pills and listening to repetitive electronic music
-
boatbuilder
- Registered user
- Posts: 804
- Joined: 09 Aug 2009, 21:53
- 80-90 Mem No: 8265
- Location: County Monaghan, Ireland
Re: Green Luna Camper Project!
Not experienced either, but....
Clean the mating surfaces well and spray on some weld-through primer before welding it in.
It helps to scrape off the bit of primer through the hole with a screwdriver before you weld it.
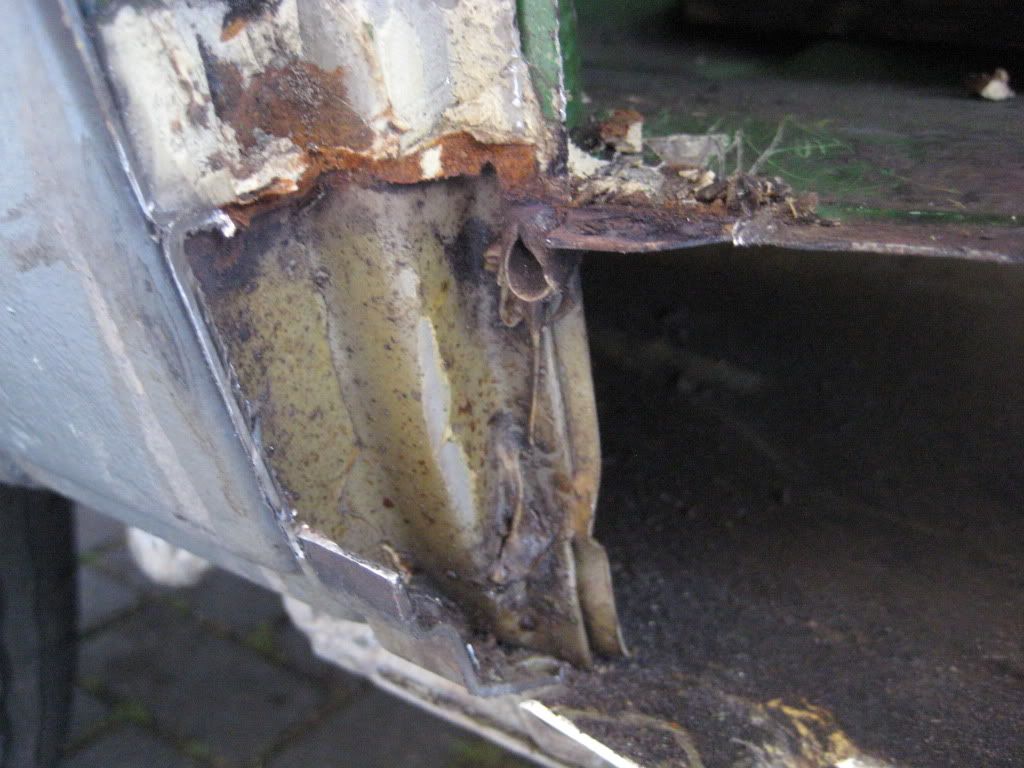
Some nasty holes there in the window surround.....how do you plan to tackle that?
Clean the mating surfaces well and spray on some weld-through primer before welding it in.
It helps to scrape off the bit of primer through the hole with a screwdriver before you weld it.
Some nasty holes there in the window surround.....how do you plan to tackle that?
1984 1.9D (AEF Code) T25 tintop
-
Plasticman
- Trader
- Posts: 8085
- Joined: 12 Oct 2005, 20:55
- 80-90 Mem No: 1948
- Location: lincolnshire
Re: Green Luna Camper Project!
Grind clean Both sides of the old panal and also grind all the useless paint of Both sides of the pattern panal, drill your 80mm holes though I and many others would stick to 8mm choice is yours  through the pattern panal then puddle weld through, no real need to weld the out side as only more work and more grinding, its not going anywhere is it.
enjoy
mike
 through the pattern panal then puddle weld through, no real need to weld the out side as only more work and more grinding, its not going anywhere is it.
 enjoy
mike
-
VAN with a PLAN

- Registered user
- Posts: 129
- Joined: 08 Feb 2011, 18:35
- 80-90 Mem No: 9602
- Location: Wokingham, Berkshire.
Re: Green Luna Camper Project!
Interesting that a number of you mention 8mm holes - is there any science behind the size of the hole? I've always gone for 5 or 6mm primarily because I have a cheap joggler with a hole punch, something like this:
http://www.holden.co.uk/displayproduct. ... de=095.484
This forms a nice clean 5mm hole - should I be opening these up to 8mm?
http://www.holden.co.uk/displayproduct. ... de=095.484
This forms a nice clean 5mm hole - should I be opening these up to 8mm?
The funniest thing about this particular signature is that by the time you realise it doesn't say anything it's to late to stop reading it!
1986 Caravelle 1.9DG 5spd
1986 Caravelle 1.9DG 5spd
-
New Kentish Campers

- Registered user
- Posts: 1739
- Joined: 12 Oct 2010, 06:16
- 80-90 Mem No: 8994
- Location: Near Linton, Kent.
- Contact:
Re: Green Luna Camper Project!
pmoc_2001 wrote:Please could an experienced welder give me some advice?
Sanity check
Is there a reason why I should not puddle weld the upper part of the panel shown below. I'm going to use 80mm holes all round.
Many thanks
Pmoc.
I'd agree with the others; one other thing to make sure you do is to have the new and old panel nice and tight to each other as you weld or you risk heat distortion, i.e more work... If you dont have suitable clamps then you could use some small self tappers in places to pull-in and hold everything in place, and once all nicely welded up, remove them and weld their holes up. And stagger the welds too, this too helps the risk of heat distortion.
-
Plasticman
- Trader
- Posts: 8085
- Joined: 12 Oct 2005, 20:55
- 80-90 Mem No: 1948
- Location: lincolnshire
Re: Green Luna Camper Project!
No reason at all you cant do the size you have, as long as you can get a good weld through into the panal behind,VAN with a PLAN wrote:Interesting that a number of you mention 8mm holes - is there any science behind the size of the hole? I've always gone for 5 or 6mm primarily because I have a cheap joggler with a hole punch, something like this:
http://www.holden.co.uk/displayproduct. ... de=095.484
This forms a nice clean 5mm hole - should I be opening these up to 8mm?
I dont use 8mm (nasty metric) if puddling then 1/4 or 3/8"
mike
Re: Green Luna Camper Project!
boatbuilder wrote:Some nasty holes there in the window surround.....how do you plan to tackle that?
Very interested too, mine are very similar. Keep up the good work and the piccies
1982 Diesel hightop. 1Y engine. Still work in progress but running and taking us on holidays.