Blunderbus

Thin bits of metal and bright blue light.

Moderators: User administrators, Moderators

jimpainter
Registered user
Posts: 418
Joined: 25 Aug 2009, 06:47
80-90 Mem No: 0
Location: crewe

Blunderbus

Post by jimpainter »

Right this is another bit of welding i have been asked to do.
Image
Image
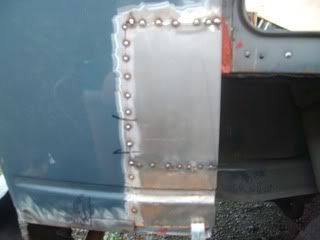
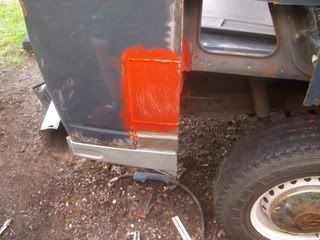
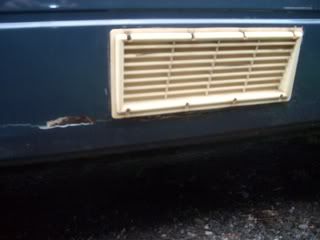
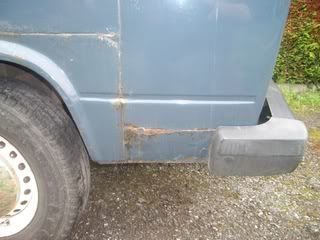
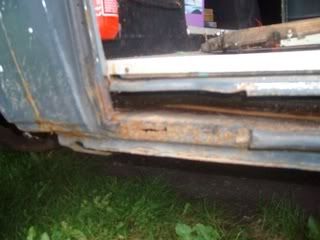
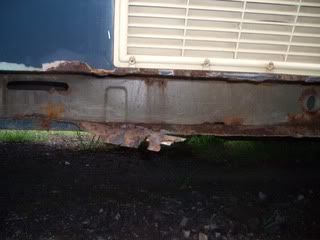
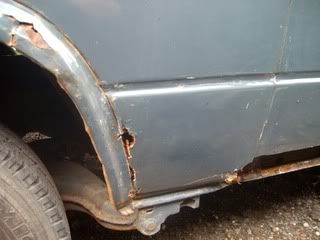
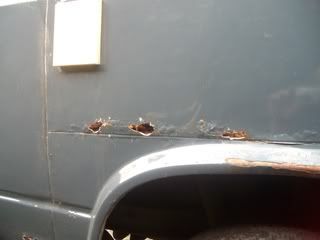
Side panel/sill gone
Image
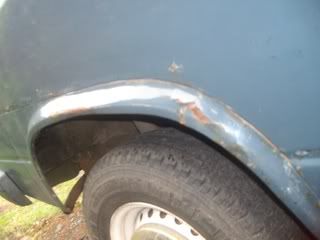
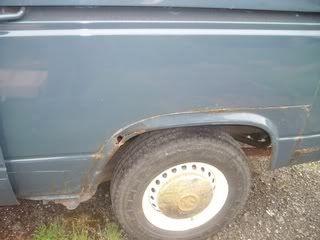
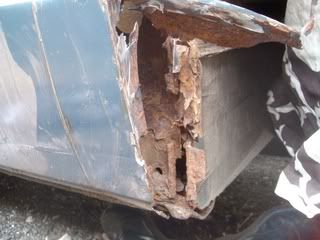
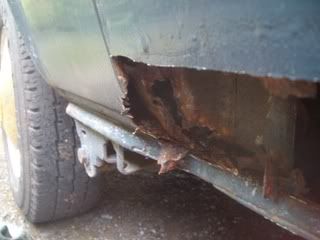
Arches and quarters are gone.
Image
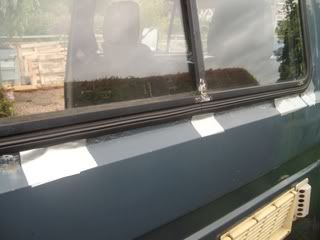
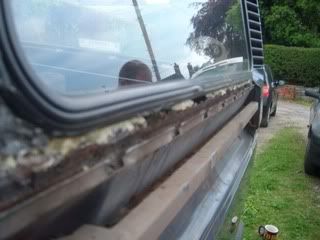
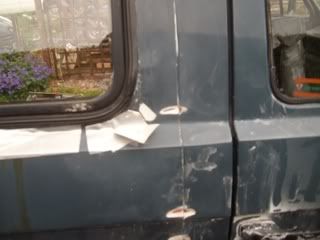
Windows all need repair.
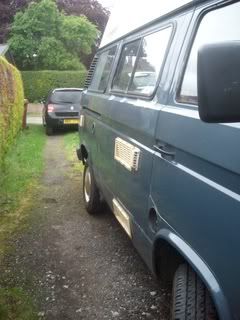
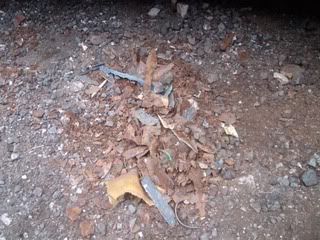
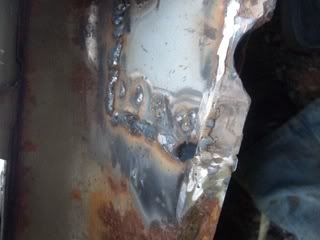
The best
Image
The worst
Image
More on that window frame later. See if you can guess whats coming :evil:
Image
Image
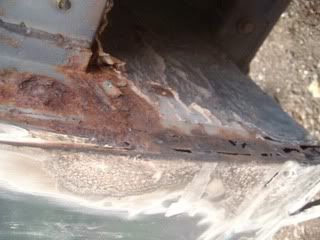
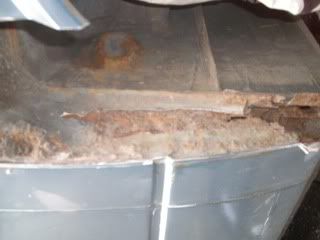
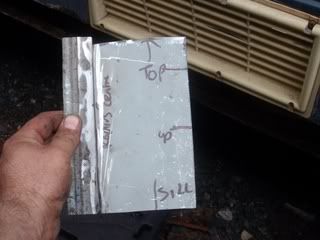
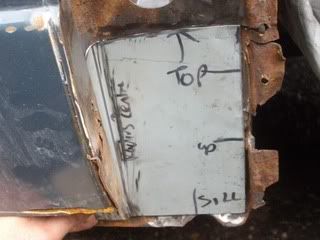
Outer sliding door sill and seal channel gone
Image
Image
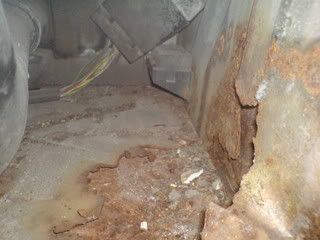
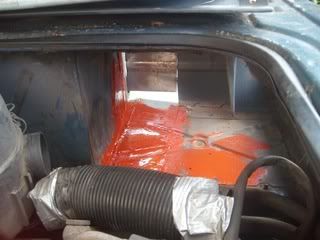
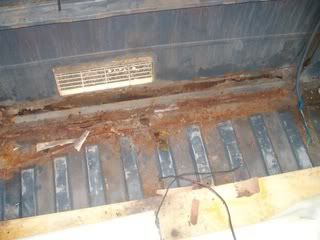
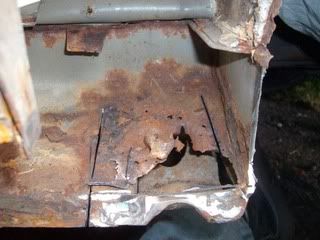
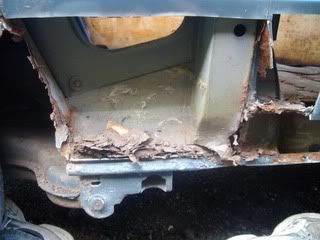
Floor has gone. Bloody fridges
Image
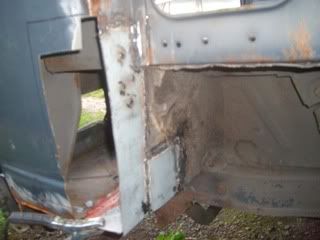
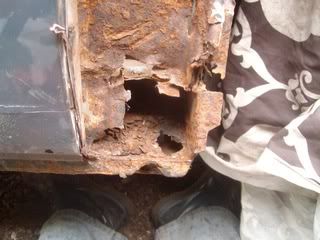
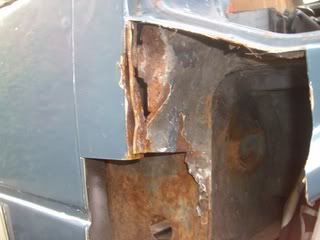
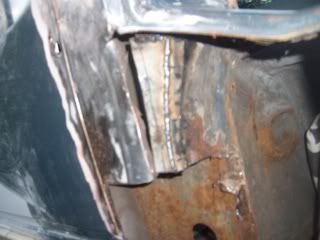
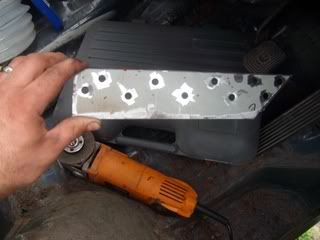
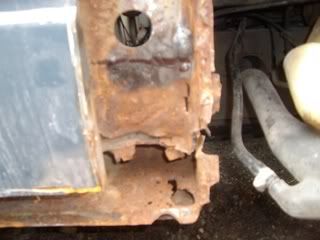
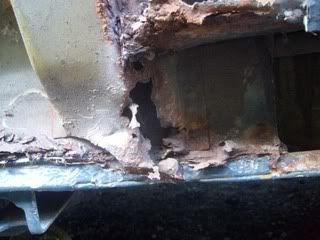
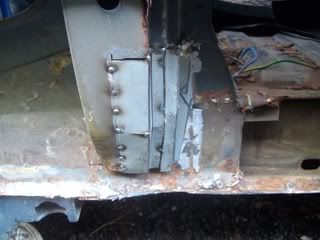
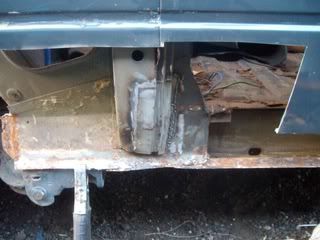
B post is going to need some work
Image
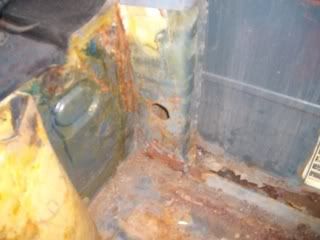
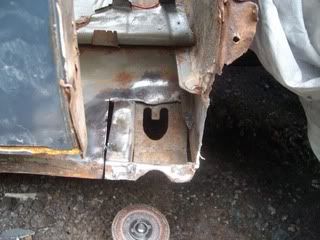
Same B post from the outside, note the internal jacking point has dissapeared
Image
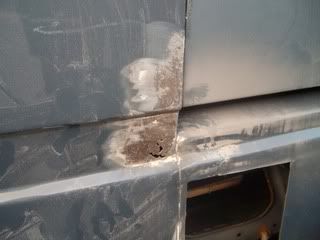
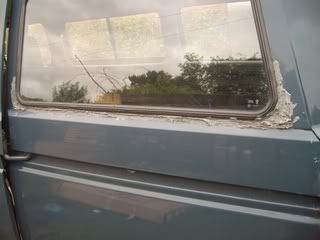
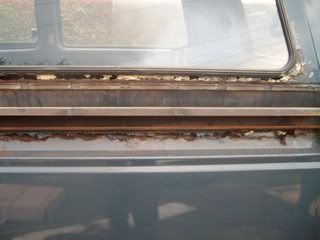
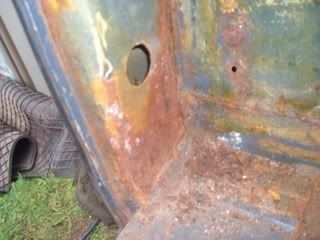
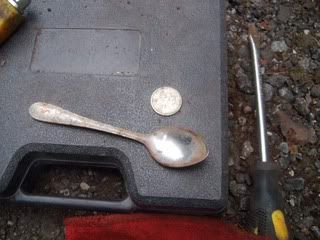
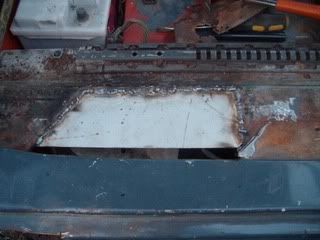
This is what was under the filler holding the window in
Image
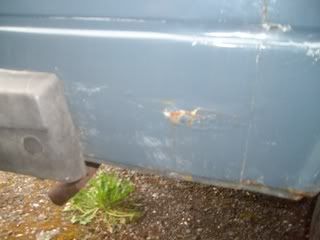
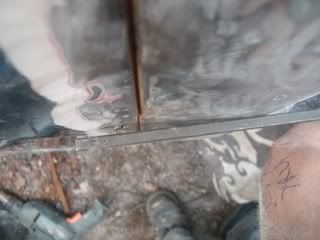
A bit of rust, expander foam and filler. :evil:
Image
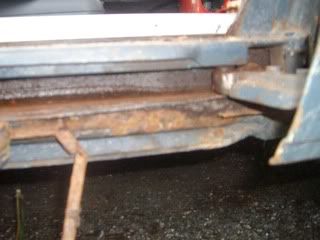
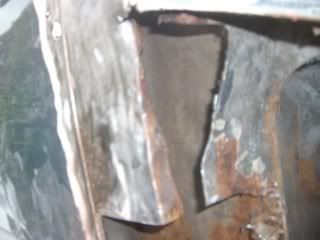
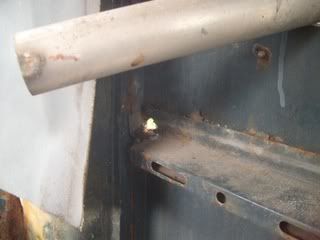
And the same again but under the sliding door track.
Image
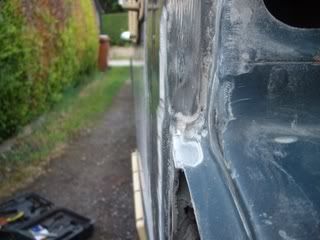
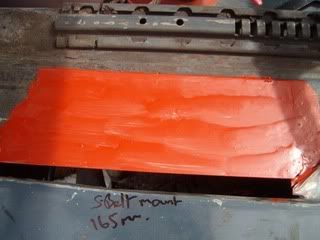
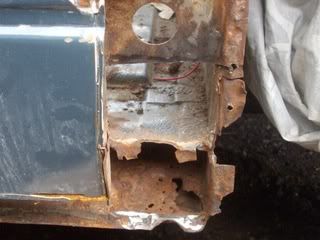
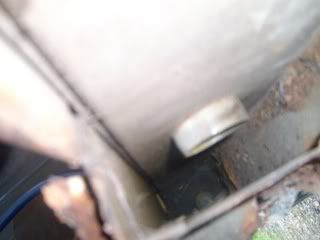
Both seatbelt mounts
Image
Image
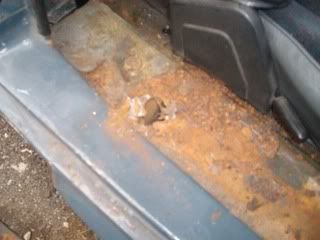
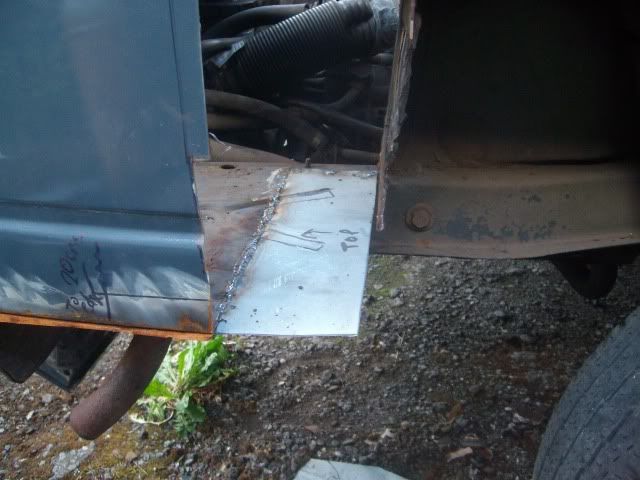
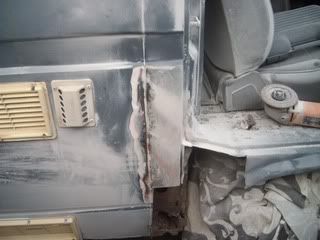
Cab floor will need some work
Image
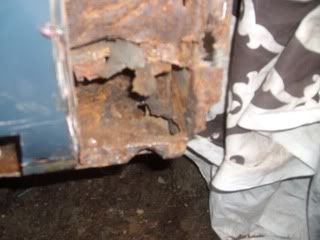
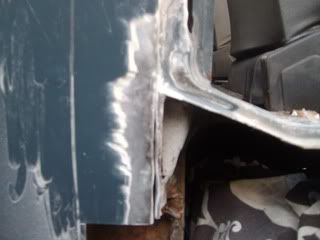
And the sliding door side B pillar isnt great
Image

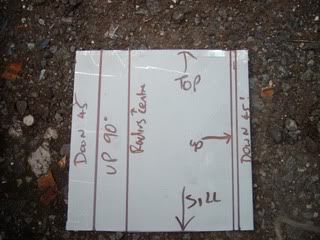
After going through the bus throughly this is what needs doing
Windscreen panel

Drivers side : Seatbelt mount, Bpost and jacking point plus bits sorting on the inside, Outer sidepanel/sill, Middle and rear window frames, Sliding door track area, quarter panel, lower rear corner, battery tray.

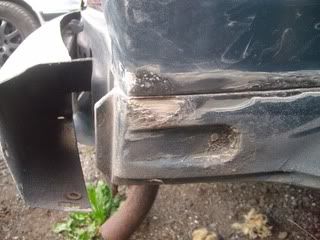
Passenger side: Lower rear corner, battery tray, rear and middle window frames, sliding door track, rear quarter panel, C pillar is non existent at the bottom, B pillar will need repairs on the inside, Outer sill/sliding door seal channel, seat belt mount, and cab floor.

However when i start digging this could turn into yet more, and think there may be a fair bit of structural work needed due to not having panels off yet.
JRP Automotive welding,bodywork, resprays, servicing and repair.
Classic Vw's
Cheshire
07854516387

User avatar
pmoc_2001
Registered user
Posts: 10
Joined: 05 May 2011, 21:03
80-90 Mem No: 9627

Re: Blunderbus

Post by pmoc_2001 »

Hi Jim,

Thanks for the detailed descriptions and the pictures. Looks like quite a job. I will keep an eye on your thread as I am planning to rebuild the floor and outer sill in my van soon (fridge side).
1990 Volkswagen Type 2 (T3). Campervan conversion by Luna.
1.7 L (1,715 cc) (54 bhp) (Serial # KY)
Resoration photos http://forum.club8090.co.uk/viewtopic.php?f=38&t=85759
LUNA-FREIZEITMOBILE GMBH: http://tinyurl.com/6mjerz8

jimpainter
Registered user
Posts: 418
Joined: 25 Aug 2009, 06:47
80-90 Mem No: 0
Location: crewe

Re: Blunderbus

Post by jimpainter »

Yeah its a pretty big job :rofl
I am only going to be doing it in evening/ weekends as and when i get chance but i will update as and when i can. :ok
JRP Automotive welding,bodywork, resprays, servicing and repair.
Classic Vw's
Cheshire
07854516387

boatbuilder
Registered user
Posts: 804
Joined: 09 Aug 2009, 21:53
80-90 Mem No: 8265
Location: County Monaghan, Ireland

Re: Blunderbus

Post by boatbuilder »

I'd be interested to see how you tackle under the slider rail and also the sill under the sliding door. Not that many photos of rust repairs on those areas on the forum....
1984 1.9D (AEF Code) T25 tintop

jimpainter
Registered user
Posts: 418
Joined: 25 Aug 2009, 06:47
80-90 Mem No: 0
Location: crewe

Re: Blunderbus

Post by jimpainter »

Going to try and get a donor cut from another van if possible :rofl
If not i will have to fab something up. :D
JRP Automotive welding,bodywork, resprays, servicing and repair.
Classic Vw's
Cheshire
07854516387

User avatar
Cyrus
Registered user
Posts: 616
Joined: 22 Jan 2011, 09:26
80-90 Mem No: 9165
Location: Hastings, E/Sussex

Re: Blunderbus

Post by Cyrus »

Keep us posted
Looks like a lot of work, I'm glad to see a bus as bad as mine was. :ok
My sliding door track is rusty, not held by expanding foam, but could do with cutting and new metal fitting. Will be watching with an eagle eye. :shock:

jimpainter
Registered user
Posts: 418
Joined: 25 Aug 2009, 06:47
80-90 Mem No: 0
Location: crewe

Re: Blunderbus

Post by jimpainter »

Well started cutting bits away. :shock:
What i started with. Looks ok
Image
After cutting the front arch off saw the extent of the problem
Image
Getting bigger as i clean and prod.
Image
Slowly its dropping to bits :roll:
Image
Had to chop away some of the b post to get access
Image
Again after a bit of poking and prodding the jacking point dropped off and the b post collapsed
Image
Ended up with a hole on the inner sill. Not a big problem though
Image
Removed the lower portion of the outer sill as it was not attached anyway. The rest of the inner sill is really solid
Image
After removing the outer the rear quarter dropped off at the bottom and showed up another problem. I thought the cpost
on the drivers side was solid......I was wrong
Image
This is what fell out of the inner sill

Image
Image
Also a tea spoon and a polish coin.
Image
Thats it for now. Going to go and start having nightmares i think :run
JRP Automotive welding,bodywork, resprays, servicing and repair.
Classic Vw's
Cheshire
07854516387

User avatar
Cyrus
Registered user
Posts: 616
Joined: 22 Jan 2011, 09:26
80-90 Mem No: 9165
Location: Hastings, E/Sussex

Re: Blunderbus

Post by Cyrus »

Don't loose heart. Things get worse before they get better.
You can see my progress in my signature
My bus looked ok, it looked rusty but I thought I could tackle it easy enough, I'm 3 yrs on now ( working around other commitments a baby was one :D ) I'm starting to see the light at the end of the tunnel.

jimpainter
Registered user
Posts: 418
Joined: 25 Aug 2009, 06:47
80-90 Mem No: 0
Location: crewe

Re: Blunderbus

Post by jimpainter »

I dont have to lose heart. Its not my van :lol:
Its just a challenge at the end o the day and one step closer to the bigger plan. :mrgreen: :mrgreen:
JRP Automotive welding,bodywork, resprays, servicing and repair.
Classic Vw's
Cheshire
07854516387

User avatar
Cyrus
Registered user
Posts: 616
Joined: 22 Jan 2011, 09:26
80-90 Mem No: 9165
Location: Hastings, E/Sussex

Re: Blunderbus

Post by Cyrus »

jimpainter wrote:I dont have to lose heart. Its not my van :lol:
Its just a challenge at the end o the day and one step closer to the bigger plan. :mrgreen: :mrgreen:
Cool, sorry I thought it was your bus :oops:

jimpainter
Registered user
Posts: 418
Joined: 25 Aug 2009, 06:47
80-90 Mem No: 0
Location: crewe

Re: Blunderbus

Post by jimpainter »

not a problem :ok
JRP Automotive welding,bodywork, resprays, servicing and repair.
Classic Vw's
Cheshire
07854516387

jimpainter
Registered user
Posts: 418
Joined: 25 Aug 2009, 06:47
80-90 Mem No: 0
Location: crewe

Re: Blunderbus

Post by jimpainter »

Time for an update even though there hasnt been a lot of progress....
Image

Well i started off with good intentions of fixing some of this.

Image

Which i did to an extent.

Image

I cant do anything with the b post at the min hence where work stopped.


But in doing the wheel arch i found this on the b post

Image

Doesnt look too bad i hear you say....

Well it went to this

Image

It doesnt really show it that well but its fairly thick

Image

To this

Image

To this. More holes

Image

Image


And from inside. The bam that goes across isnt connected either really

Image


Its not a great picture but thats a straight edge going across.

Image


It turns out that at some point the van has had a bump and then a pi$$ poor repair. The b post panel isnt fitted straight. Sure it lines up with the door but a it goes back towards the side panel it goes inwards. So the b post has been filled to get it level with the door but then the side panel is the same..... Full of filler. And rotten, so i have been on to volkshaen today to see if they have any bodycuts to replace the side panel and the b post right up to the 2nd swage line. This is where the filler just about stops.


Anyway also started on the seatbelt mount. Thought i had better get some fresh metal in

Image

Cut out.


Patch

Image


And fit

Image


Obviously a little more to do but hey ho.

Jim
JRP Automotive welding,bodywork, resprays, servicing and repair.
Classic Vw's
Cheshire
07854516387

jimpainter
Registered user
Posts: 418
Joined: 25 Aug 2009, 06:47
80-90 Mem No: 0
Location: crewe

Re: Blunderbus

Post by jimpainter »

Another update,
I have cleaned up the first weld on the first piece of the seatbelt mount and red oxided it.

Image

I then made up the second repair piece for the seatbelt mount.

It will be seam welded to the existing arch and then plug welded to the wheel tub for strength.

Image

And there we go all complete apart from fixing a spreader plate/nut for the bolt.

Image

Image

Needed to starton this

Image

So i took a load of measurments and transfered them onto a piece of sheet steel ready for bending

Image

I then cut out the b post to where it was solid and pretty much rust free.

Image

B post was bent up ready for fitting. I made a slight mistake on one of the flanges so i have had to cut it off and i will remake it and weld it to the main post. This will be fine.

Image

And how it should fit, you can clearly see where i ballsed up because i already cut the flange off. The return on the crossmember has got to be made up yet as well.

Image

But before i fir the b post i have to repair the inner sill. The rest of the sill is fine it was just the jacking point area, but as i have the b post off it makes it all the easier for getting in and repairing.

Image

Cut out and ready for a piece to be let in.

Image

And there we go all welded in and solid again. The panel has been seam welded around 4 sides then plug welded to the cross member as well as per original.

Image

Image

Image

And now onto the ongoing saga of the side panel. I cleaned some of the paint off from above the 2nd swage where i thought the filler stopped. I was wrong. Its deeper than ever at this point. You can see on the second pic that the filler is up to the height of the window.

Image

Image

I have been to a local scrappy today because they had a panel van in. It turns out the side panel is really good and so im going to go and get a cut out of it next week as i have reserved it. £30 for a full side panel. The lower sill is going to need repairing as they always do with these things.

Will get more up in the week.
JRP Automotive welding,bodywork, resprays, servicing and repair.
Classic Vw's
Cheshire
07854516387

jimpainter
Registered user
Posts: 418
Joined: 25 Aug 2009, 06:47
80-90 Mem No: 0
Location: crewe

Re: Blunderbus

Post by jimpainter »

I have had a go at doing a bit more. The rear arcg/quarter was obviously rotten and full of filler and i needed to remove some of it anyway to get a proper look at the c post.
The arch/quarter

Image

Image

Image

With the bottom of the quarter removed all became clear.

The c pillar wasnt quite as bad as i thought.

Image

Image

The inner sill looks ok on the inside

Image

I started on a c post repair. It was a pain in the a*** to make up all the angles and the radius so instead i made it up out of 2 parts. I then tacked it all into position and made it right, i then welded it all together for strength.

Image

Tacked in

Welded and dressed. I didnt go mad dressing the welds though as they arnt really seen.

Image

And oxided

Image

I started to clean up the rear corner and ended up with this.

Image 
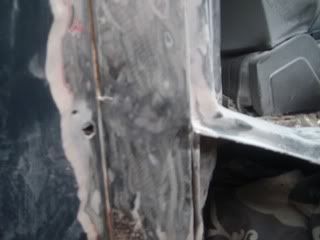
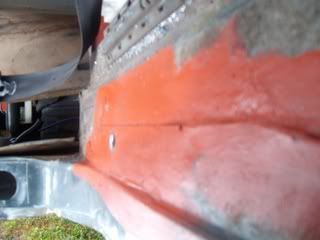
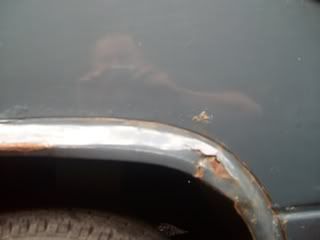
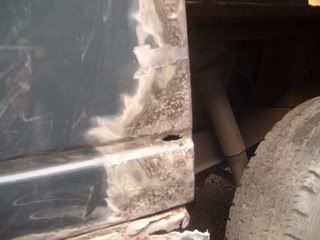
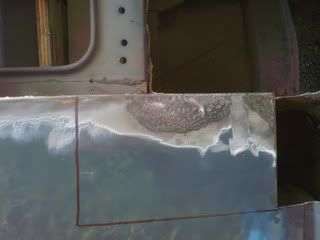
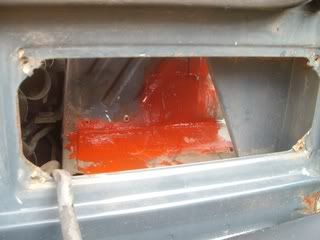
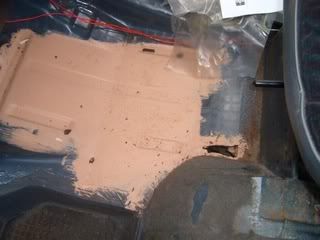
If you look at the centre of the picture you can see a hole which had been filled and behind it was the original vw underseal.

I had a bit more bubbling on the rear corner/quarter seam so i decided to clean it up while i had the quarter off.

I found this all covered by filler.

Image

And also this at the second swage line

Image

Its too bad just to ignore and treat, so it will all be cut out and new pieces made up and let in.

The return for the quarter panel was rotten as well anyway.

Image

Image

Inside the battery tray there was a gaping hole that had just been covered with a patch that was just rusting again anyway. S its all being cut out and new put in.

Image

Image

Anyway rain stopped play at this point, but heyho.
JRP Automotive welding,bodywork, resprays, servicing and repair.
Classic Vw's
Cheshire
07854516387

jimpainter
Registered user
Posts: 418
Joined: 25 Aug 2009, 06:47
80-90 Mem No: 0
Location: crewe

Re: Blunderbus

Post by jimpainter »

Well its been a while since i last updated but i have been drilling hundreds of spot welds out of used good panels. The weather hasnt been brilliant either but im hoping for a better week next week or my unit to be finished so i can move the van inside.
Image

This is where we finished off last time. With the offside battery tray knackered and had been patched poorly.

Image

Marking off how much metal i need to move to erradicate the rust off the rear corner.

Image

Started to make up a battery tray. i made it too short but didnt realise until i had welded it in. (Thicko)

Image

I dont have a bead roller (yet) so all swages were made by hand.

Image

A couple of peices needed letting in to make this solid.

Image

Image

Battery tray finished and oxided. I did dress the first weld but the second weld where i had to add the bit i didnt bother as its covered by the air filter tube and the ignition system gubbins.

Image

And letting in a piece that was getting rid of the rust. Not the easiest panel to get to line up due to it being double curvature. It is pretty close though and will only need a thin skim of filler to get right.

Image

And thats where we are at for now.

Happy days
JRP Automotive welding,bodywork, resprays, servicing and repair.
Classic Vw's
Cheshire
07854516387

Locked