My project bus. 18/04/11 finally updated.
Moderators: User administrators, Moderators
-
melmelody
- Registered user
- Posts: 256
- Joined: 19 May 2009, 15:57
- 80-90 Mem No: 6934
- Location: paderborn germany
Re: My project bus. 09/06/10 Update.
i see you managed to get your rustoleum then.been having a look for you but could'nt find anywhere down in your area of germany.found a few places up near paderborn though so when i'm ready to do the top coat i'll be able to buy big cans instead of small 3/4 of a litre ones.also noticed that the ivory white match is not 100 % but think its close enough.vans looking good though keep supplying the piccies for us all to look at
Re: My project bus. 09/06/10 Update.
I actually found an online supplier in Germany. Instandhaltung24.com supply the full range of basic colours in the 2.5lt and 750ml tins. They are ordering it straight from the factory and don't carry stock so it takes just under 2 weeks for it to arrive after you order. Mine is actually the light grey. RAL 7035. I'm kinda liking it as depending on the light conditions the colour changes a fair bit from looking straight white in bright sunlight, through to grey when it's cloudy/dark.
Re: My project bus. 04/07/10 Update.
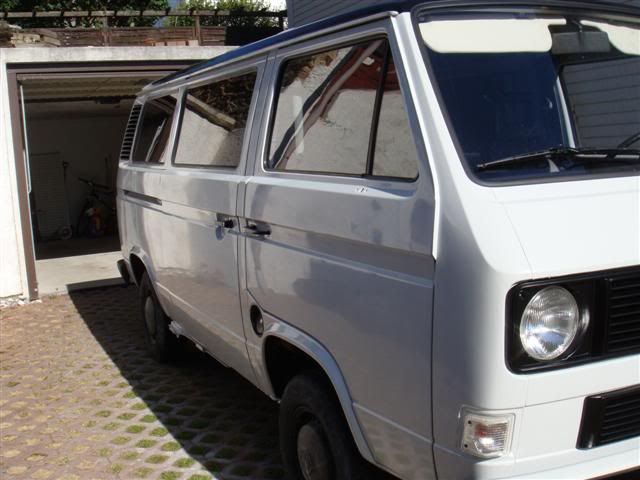
As in the paint thread, the 3rd coat has been put on the van. Here is a couple of pics.
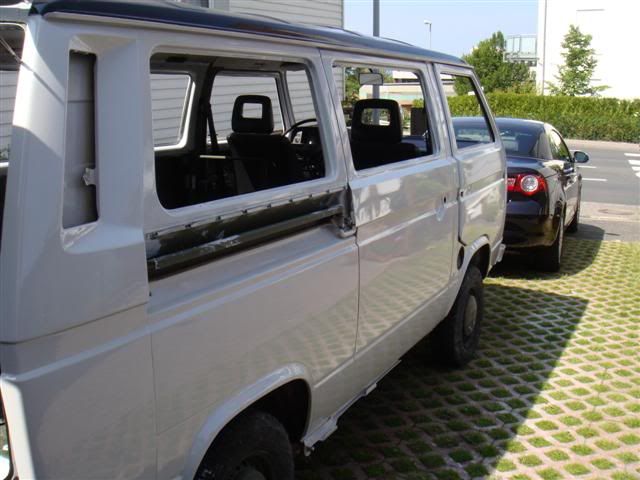
The bumpers have been painted with rustoleum too. Same colour as the roof. As the van is now needed it's going to be put back together over the next couple of days. Tinted windows going in with new seals, white indicators, new bumper corners etc. Going to be a busy couple of days! Will stick up pics whilst doing it.
The bumpers have been painted with rustoleum too. Same colour as the roof. As the van is now needed it's going to be put back together over the next couple of days. Tinted windows going in with new seals, white indicators, new bumper corners etc. Going to be a busy couple of days! Will stick up pics whilst doing it.
Re: My project bus. 04/07/10 Update.
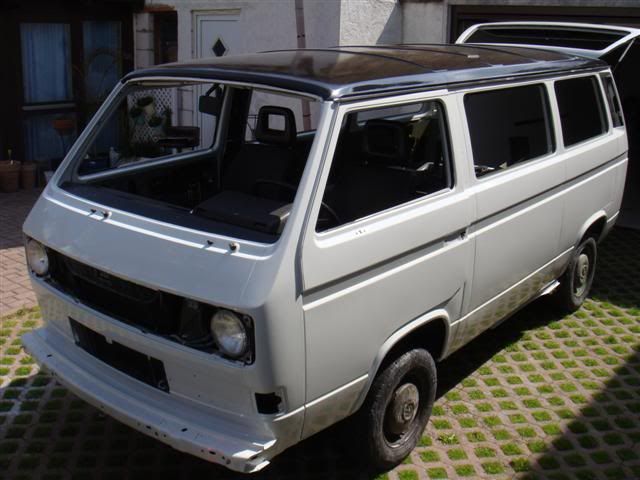
It's pretty much back together now, just waiting for 2 new mirrors to arrive then it can be used whilst I work on the interior/suspension/wheels etc.  Will it never end!?
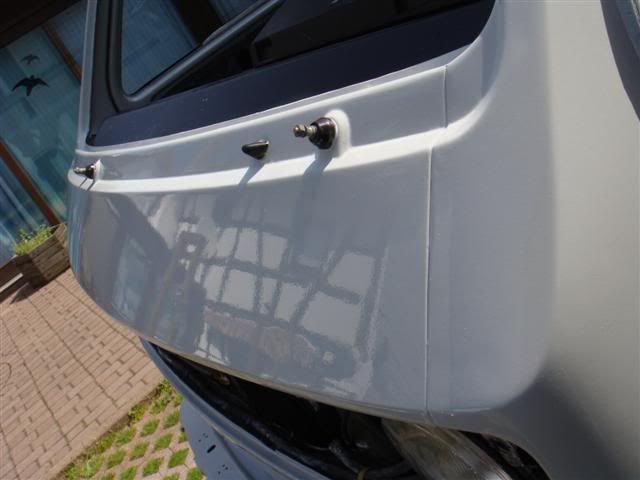
The 3rd coat of rustoleum was smoothed off with 1200 grade sandpaper then cut with 3M paint finish stuff (can't remember the name off the top of my head!). It was then polished with Meguires polish and when the pics were taken had yet to be waxed. The bumpers as said before were done with the same shade as the roof and got the same cutting/polishing treatment. The badges were painted with the same colour the wheels are going to be so although they look a little out of place at the minute I'm hoping they will tie in nicely.
Oh, and the name 'The F Bomb' was chosen by my wife.
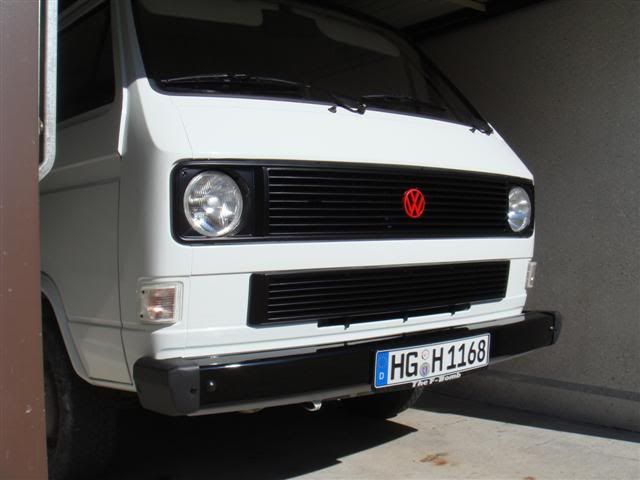
Re: My project bus. Paint Finished Pics!!
that looks very nice
-
chuckle-bus-tom

- Registered user
- Posts: 2818
- Joined: 07 Nov 2007, 17:37
- 80-90 Mem No: 4368
- Location: Hackney, London
- Contact:
Re: My project bus. Paint Finished Pics!!
Should just call it "Da Bomb" fo shizzle.
-
Fin
- Registered user
- Posts: 314
- Joined: 21 Jan 2010, 19:40
- 80-90 Mem No: 8714
- Location: Bradford On Avon
- Contact:
Re: My project bus. Paint Finished Pics!!
Looks very tidy, good work - very brave.
An inspiration to us all, it's making me think more about my dents/rust/character.....
What were the brackets used for on the Army set up? window mesh/cage thingys??
An inspiration to us all, it's making me think more about my dents/rust/character.....
What were the brackets used for on the Army set up? window mesh/cage thingys??
Single cab pickup, running 1996 Subaru WRX STI engine, Aiden talbot gearbox.
Re: My project bus. Paint Finished Pics!!
Fin wrote:What were the brackets used for on the Army set up? window mesh/cage thingys??
They are for attaching camo covers for all windows, the headlights and the set even included 2 bags for going over the mirrors. This is so the sun doesn't glint off off anything when the vans are hidden in forests etc. The set came with the van but I sold them on ebay as I had no use for them.
The only part of the army set up I have kept is the flag holder. Look at the last pic just after the door and you see it on the pillar!
Re: My project bus. Paint Finished Pics!!
Time for a wee update.
It it now sitting a lot lower than before as I've fitted some lowering springs to it. Curiously the springs fitted are supposed to give a 60mm drop all around but it hasn't actually done that.
I had always thought my vans nose sat way too high in the air, so much so if you were walking up to it you would think it was a syncro looking straight at the front! The springs that I have removed look to be in good condition and the front and rears do have the same colour code (green & yellow) marks on them so they are not miss-matched and have the VAG logo so they are original VW.
Here is the before pic.
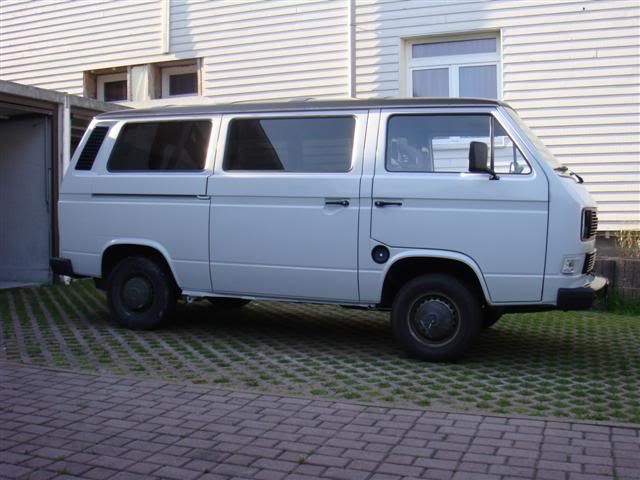
The driveway has a downward slope too!
From floor to arch at the center of the wheel the distances were Front 745mm and Rear 718mm. The measurements were taken in the garage on the level.
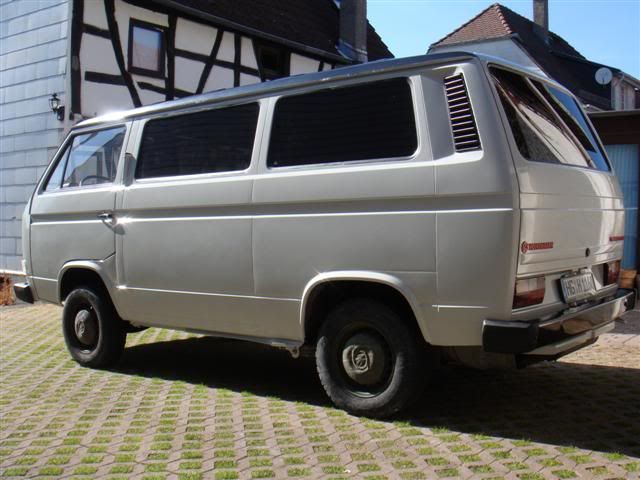
After...
The measurements are now Front 662mm and Rear 677mm.
The '60mm' lowering springs have actually dropped the front 83mm but the rear only 41mm.
Makes me think the springs that were fitted were actually supposed to give that stance!
It now sits nice and level compared to before and is exactly the height I was looking for at the front. New shocks are now on order and it's booked in to get its alignment done.
It it now sitting a lot lower than before as I've fitted some lowering springs to it. Curiously the springs fitted are supposed to give a 60mm drop all around but it hasn't actually done that.
I had always thought my vans nose sat way too high in the air, so much so if you were walking up to it you would think it was a syncro looking straight at the front! The springs that I have removed look to be in good condition and the front and rears do have the same colour code (green & yellow) marks on them so they are not miss-matched and have the VAG logo so they are original VW.
Here is the before pic.
The driveway has a downward slope too!
From floor to arch at the center of the wheel the distances were Front 745mm and Rear 718mm. The measurements were taken in the garage on the level.
After...
The measurements are now Front 662mm and Rear 677mm.
The '60mm' lowering springs have actually dropped the front 83mm but the rear only 41mm.
Makes me think the springs that were fitted were actually supposed to give that stance!
It now sits nice and level compared to before and is exactly the height I was looking for at the front. New shocks are now on order and it's booked in to get its alignment done.
-
Nomadd1001

- Registered user
- Posts: 119
- Joined: 13 Jul 2009, 19:56
- 80-90 Mem No: 7095
- Location: Mansfield, Notts
Re: My project bus. 8/8/10 Now lowered.
Wow,
Ya won't get a nose bleed when ya get in now. Looks cool lowered mate!!
Ya won't get a nose bleed when ya get in now. Looks cool lowered mate!!
1981 tintop 2.0 Aircooled..............don't pull out on me. you are my crumple zone!!
Re: My project bus. 11/8/10 New Pics.
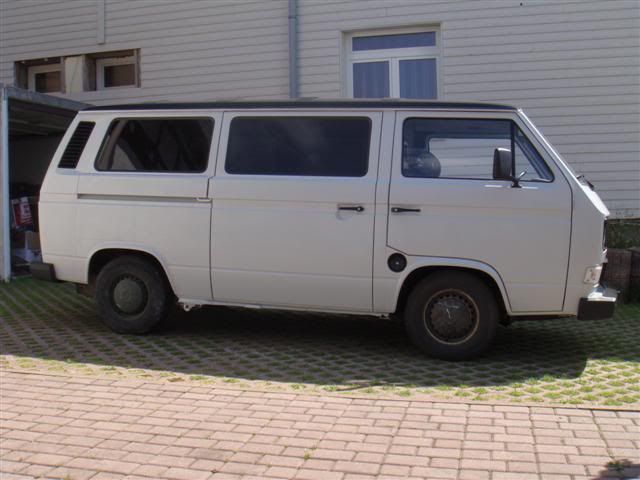
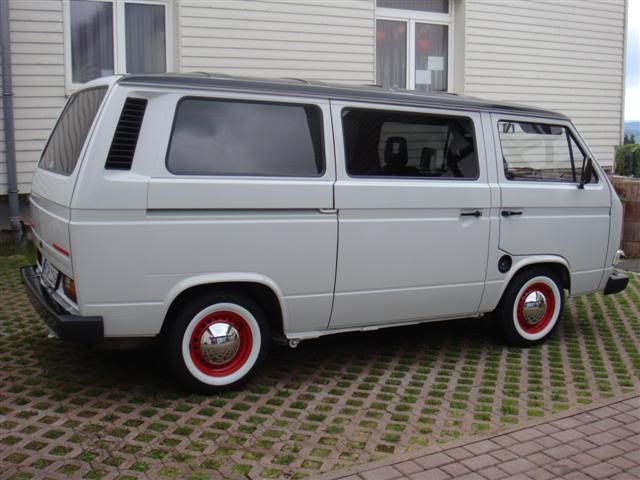
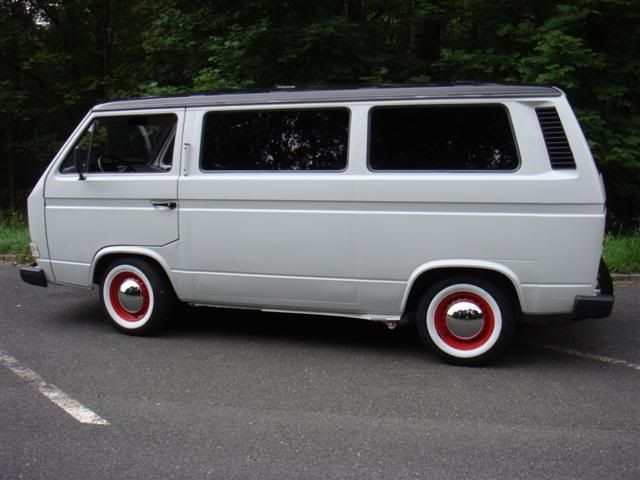
Today I put the wheels back on after giving them a paint and sticking a set of JK's whitewall flaps on. This was really just a trial to see if red wheels and whitewalls suited it. I think it does, so I'm going to get another set of steelies and get them powder coated and try and source some real whitewalls for it now. I've nothing against the flaps and I'm initially quite impressed with them but I would rather have the real thing. I went a bit daft with the camera as I'm very happy with the way it looks now.

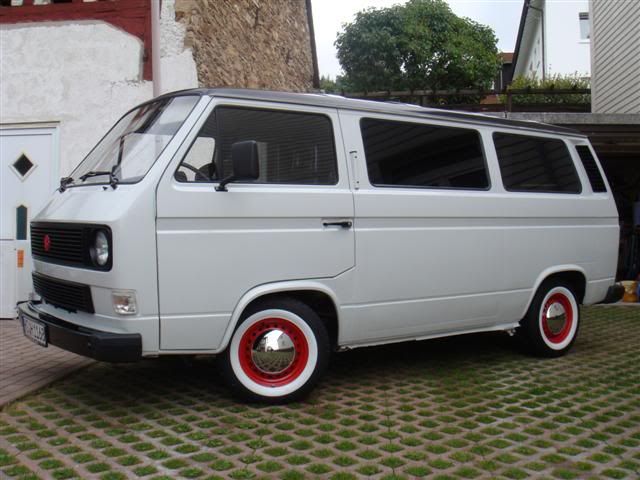
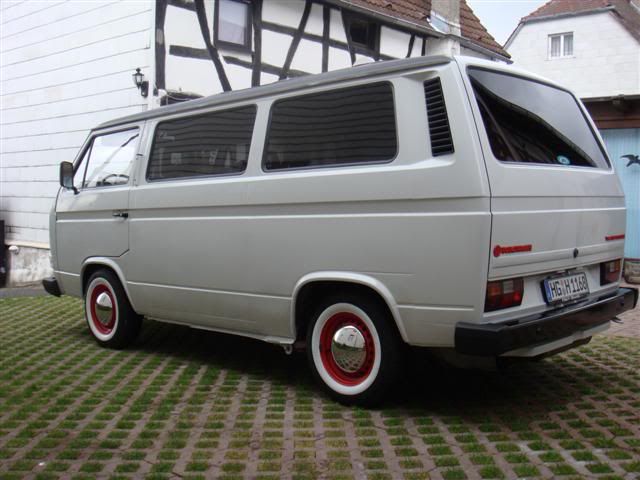
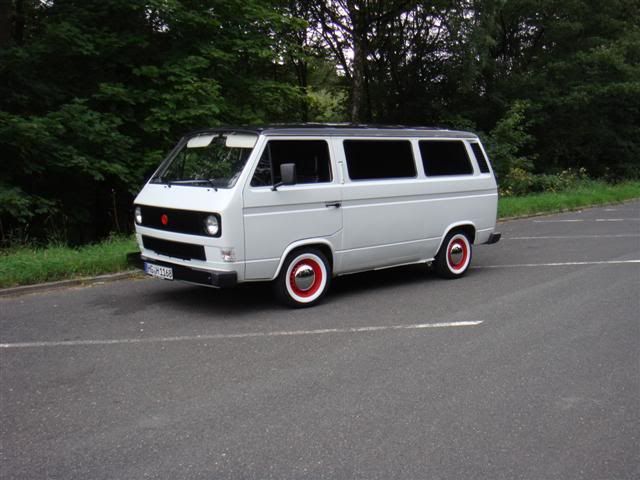
Next will either be fit the 1Y engine and DK gearbox that are sitting in the garage or as I'd quite like to enjoy the thing whilst the weather is still good I might make a start on the interior proper.
Next will either be fit the 1Y engine and DK gearbox that are sitting in the garage or as I'd quite like to enjoy the thing whilst the weather is still good I might make a start on the interior proper.
-
Gunslinger

- Registered user
- Posts: 1426
- Joined: 16 Jul 2007, 14:14
- 80-90 Mem No: 3874
- Location: 3874 Leighton Buzzard
Re: My project bus. 11/8/10 New Pics.
That is dead cool. You are to be congratulated. Loving the wheels
-
Nomadd1001
- Registered user
- Posts: 119
- Joined: 13 Jul 2009, 19:56
- 80-90 Mem No: 7095
- Location: Mansfield, Notts
Re: My project bus. 11/8/10 New Pics.
One word.............................
Swwwwwwwwwwwwweeeeeeeeeeeeeeeeeeeeeeeeeeeeeetttttttttttttttttttttttt!!!!!!!!!!!!!!!!!!!!!!!!!
Swwwwwwwwwwwwweeeeeeeeeeeeeeeeeeeeeeeeeeeeeetttttttttttttttttttttttt!!!!!!!!!!!!!!!!!!!!!!!!!
1981 tintop 2.0 Aircooled..............don't pull out on me. you are my crumple zone!!
-
81AirCooled
- Registered user
- Posts: 113
- Joined: 02 Aug 2010, 08:40
- 80-90 Mem No: 8770
- Location: Munich, Germany
Re: My project bus. 11/8/10 New Pics.
Looking good Do you have to remove the tyres to put on the whitewall flaps?
1981 2.0l Aircooled ex German post office van coverted to camper.
Re: My project bus. 11/8/10 New Pics.
No need to remove the tyres.
It says on the instructions for fitting to tubeless tyres cut 7mm off of the inside lip of the trims with a knife of scissors.
Let the air out of the tyre, I removed the valve to completely flatten it. Then the way I fitted them was to work my way around slowly, pushing down the lip of the tyre with the wooden end of a hammer about 3cms out from the rim and inserting the trim as I worked around. I didn't push it all the way in on the first 'round' but went around 3 times in total moving it in a bit more each time, that way it shouldn't twist or bunch the trim causing it to bulge when reinflated. It appeared its best to keep going until the final lip of the trim is sitting basically just below the lip of the wheel, then when you reinflate it sits just right on the edge of the rim. I also had removed the wheel weight and didn't put it back on until the tyre was reinflated but I don't know if this makes any difference.
When it was reinflated, again as mentioned in the instructions I lightly greased between the tyre and the trim. This is to stop any friction between the two.
Hope that makes sense!