My project bus. 18/04/11 finally updated.

Thin bits of metal and bright blue light.

Moderators: User administrators, Moderators

gaz f
Registered user
Posts: 515
Joined: 27 Apr 2009, 13:06
80-90 Mem No: 6697

My project bus. 18/04/11 finally updated.

Post by gaz f »

Hi All,
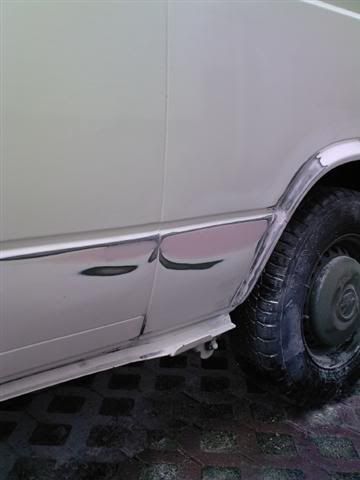
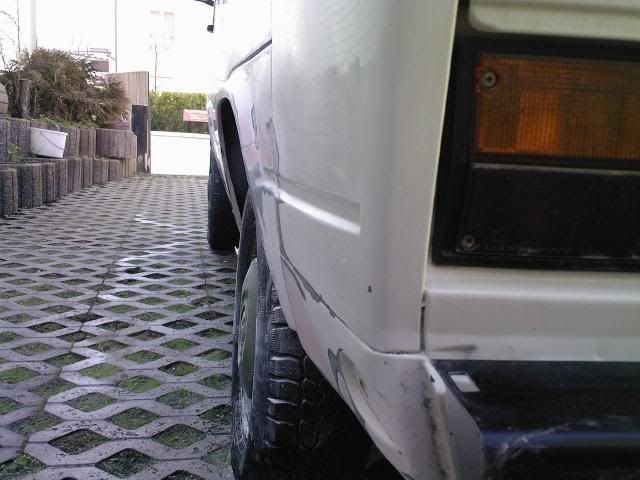
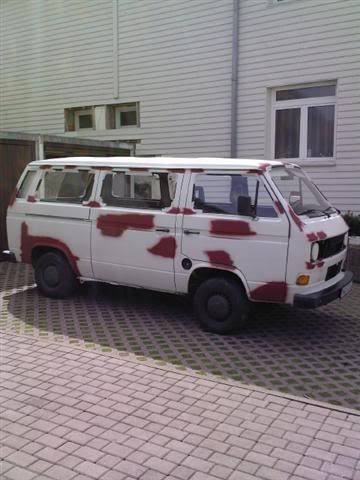
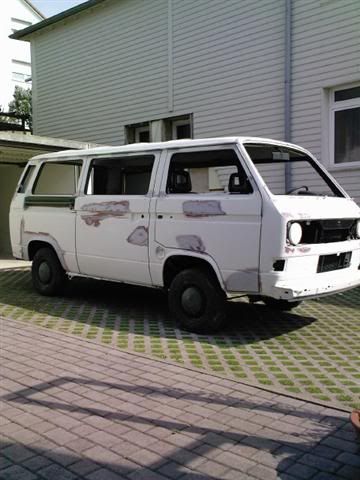
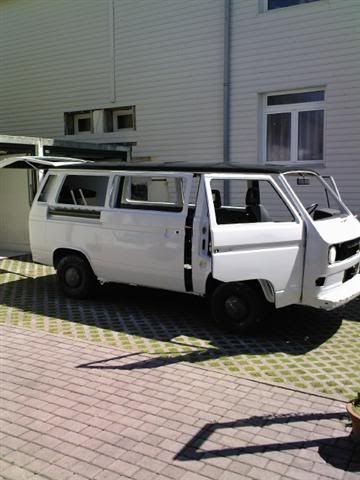
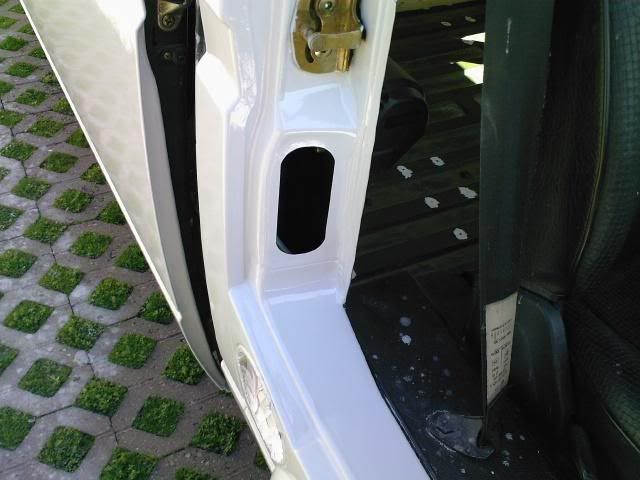
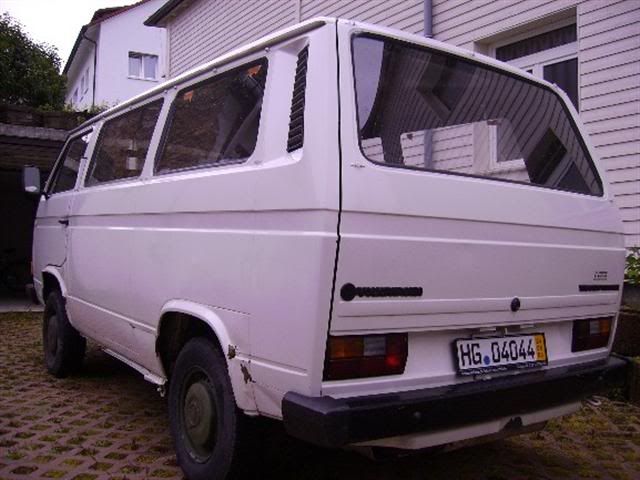
I've decided to start a thread on my van to catalogue the work I'm doing on it. Maybe some of it will help others and also folks can point me in the right direction if they think I'm doing something the wrong way (more likely!). I bought it last year and since then basically just drove it whilst playing around with small stuff. It's a 1985 1.6D ex German army Transporter. All that had been done since it came out of the army was a really bad paint job and someone dented the hell out of the drivers side wheel arches. This is when i bought it, no radio, still had the army extra floor and panels in it.
Image

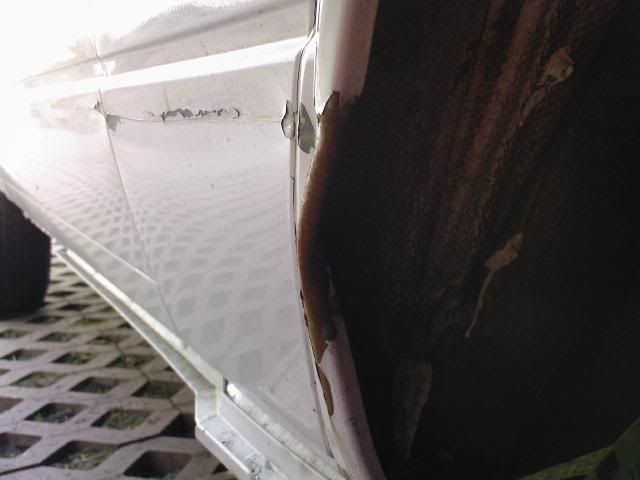
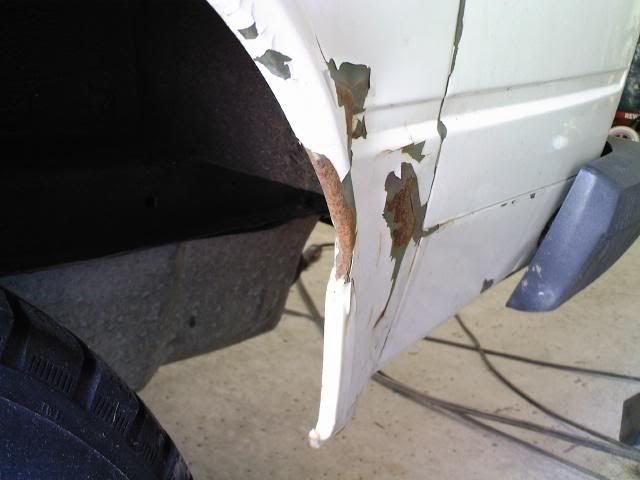
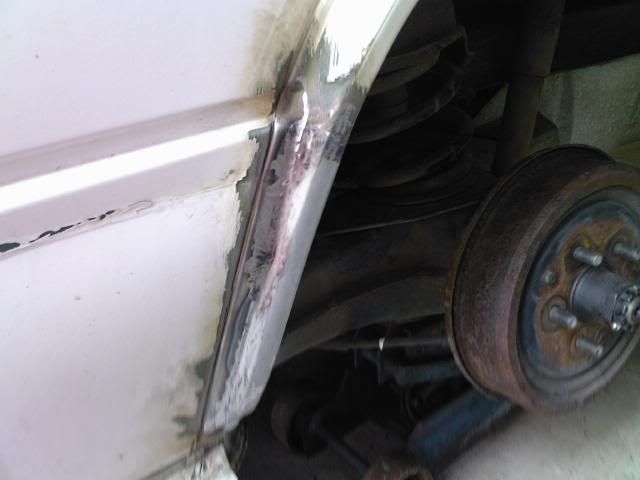
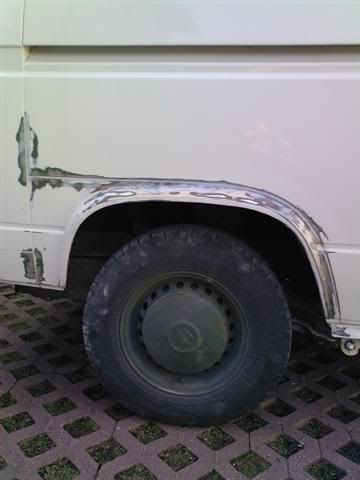
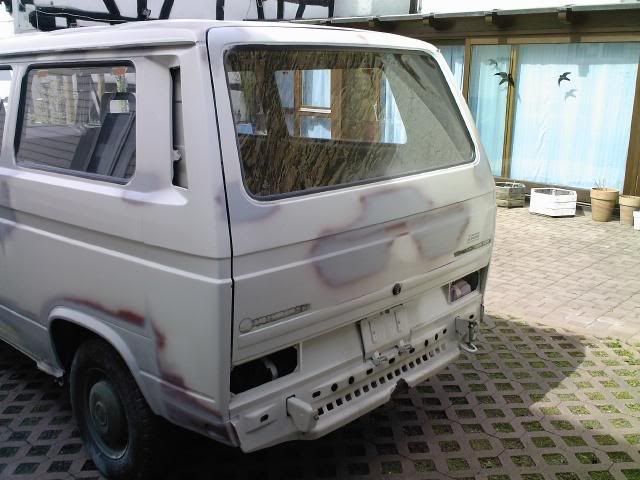
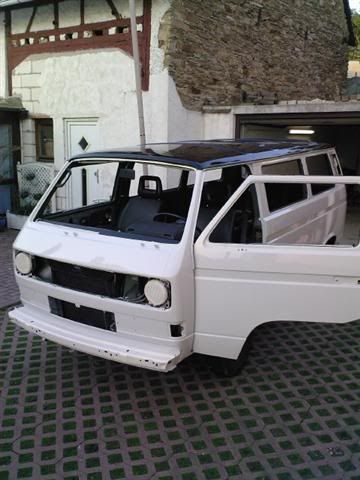
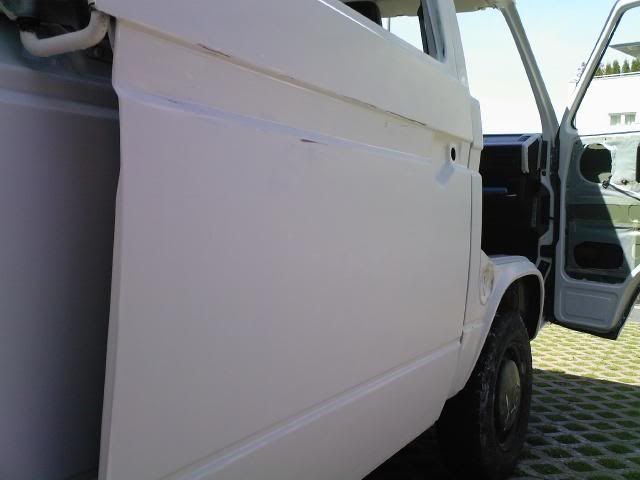
This past while I have finally started on the bodywork. The reason I left it so long was that apart from the damage and dodgy paint there wasn't much wrong with the body and I feared I'd make it worse rather than better as I'm not an expert, more an enthusiastic amature! The first job was to tackle the damaged front arch.
Image
Image
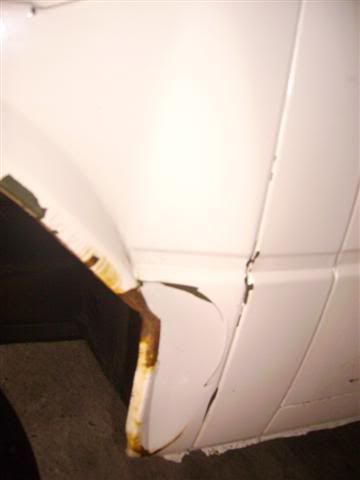
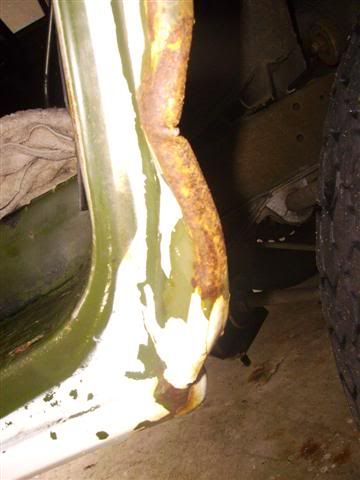
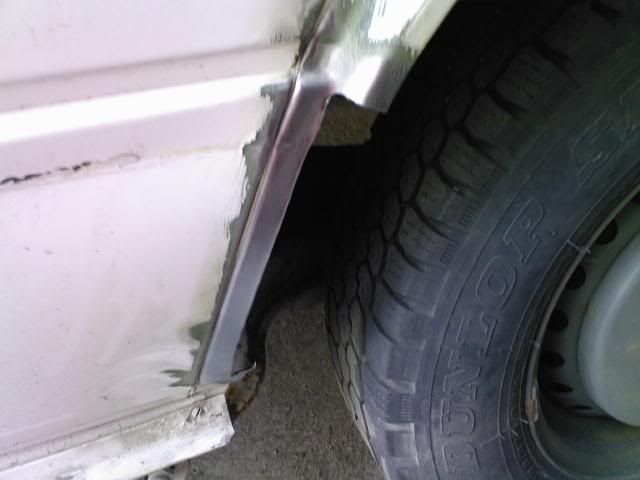
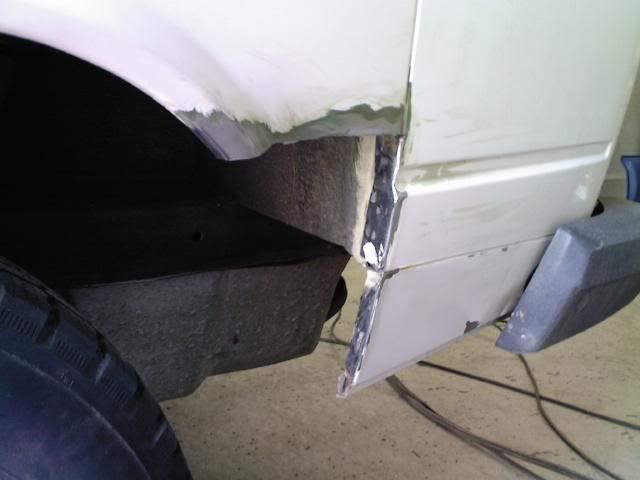
It was so bad there was no other option but to cut it off and replace it completely...
Image
Image
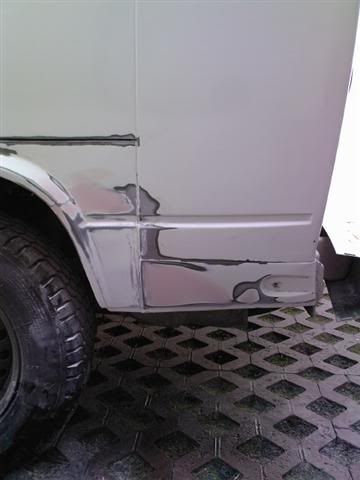
After welding it on I gave it 3 coats of zinc primer, 3 coats of red oxide primer and 2 coats of white hammerite to keep it rust free in the meantime as I had to go back to work. (Offshore in the Uk)

More to come!
Last edited by gaz f on 18 Apr 2011, 14:25, edited 9 times in total.

gaz f
Registered user
Posts: 515
Joined: 27 Apr 2009, 13:06
80-90 Mem No: 6697

Re: My project bus

Post by gaz f »

I then decided as I was doing the bodywork that it should really get a new paint job as the white spray job that was done on it is terrible with lots of runs. The van has also picked up a few parking dents down it's flanks so having studied the paint rollering thread many times I have chosen to go down this route as one of my main priorities is to keep the costs as low as possible on my project. :lol: Yeah right, like that's going to work! So the next job was the rear arch damage.
Image

Image
As the seam was in good condition both inside and out I really didn't want to replace the entire arch, so I only cut out the bad bits.
Image

Image
I bought a replacement rear arch from ebay.de (same people I had got the front one from) the quality is ok, not great but as I was cutting it up anyway I wasn't too bothered. Then welded in the new bits.
Image

Image
Then it needed a bit of filling before and after the arch due to the dent/score it had recieved.
Image

Image

Image

Now the arches are done it's time to get started on the small dents etc on the rest of the body.

gaz f
Registered user
Posts: 515
Joined: 27 Apr 2009, 13:06
80-90 Mem No: 6697

Re: My project bus

Post by gaz f »

The only rusty seam on the van is the non damaged rear arch.
Image
So it got cleaned up using tips from threads on here. I didn't have any vatcan but I used kurust instead once it was all cleaned up. Both inside and out.
Image
Then the bit I was dreading. You may have noticed in the first pic that the van has lots of brackets that are riveted on around it's windows and headlights. 46 of them to be exact! I wanted these off as I just want a clean look, and the fact that you can spot a mile off that it's ex-army because of them.
Image
I ended up drilling the heads of the rivets and gently prising the brackets off. Then I ground back the rivit 'poles' flush and gave them a little filler. Took ages to do them all! :x I then filled in a few dents and gave all the repairs a little red oxide primer so the bus then looked a little sick.
Image

Just before I left to come over here again (I'm at work just now) I went over the repair sections again with some filler primer.
Image

That is how it's looking just now. The plan is when I go home (a week and a bit to go :cry: ) to take all the windows out of it and get it all keyed up and hopefully get at least one coat of paint on it. The paint was ordered a couple of days ago and I'm just away to order new seals for all the windows. I know I could just mask them up but the originals on the sides don't look too good and they are covered in overspray from the last paint job.

gaz f
Registered user
Posts: 515
Joined: 27 Apr 2009, 13:06
80-90 Mem No: 6697

Re: My project bus

Post by gaz f »

Talking about the windows, I just realised I left my measurements at home. :oops: What width and lenght of window tint film do I need to do from the B pillar back?? I wanted to buy it over here in the UK before I go home as it's cheaper! :ok

User avatar
ricicles
Registered user
Posts: 934
Joined: 16 Mar 2008, 17:47
80-90 Mem No: 6350
Location: wymondham

Re: My project bus

Post by ricicles »

its looking so much better, it must be great having a reasonably rust free bus. keep us updated.

User avatar
marke
Registered user
Posts: 45
Joined: 28 Feb 2010, 19:12
80-90 Mem No: 8599
Location: Somerset
Contact:

Re: My project bus

Post by marke »

MOAR MOAR!!!

gaz f
Registered user
Posts: 515
Joined: 27 Apr 2009, 13:06
80-90 Mem No: 6697

Re: My project bus

Post by gaz f »

I have spent the last 3 days removing the windows and doing the final prepping for the paint. I think it is now about as good as it's going to get before applying the paint (*read* I'm getting fed up sanding the thing! :rofl ) I went over the whole thing with 240 wet and dry (wet) then again with 400 wet and dry (wet again) then finally with 400 dry sand paper. The reason for going over it with the rough stuff first was due to the bad white paint job that was already on it, there was so many runs and orange peel looking areas that when I tried to start with the 400 w'n'd it just wasn't cutting through it. Here is how it's now looking...
Image

Here is a look down the side to show that it's now fairly straight and dent free.
Image

All the sanding has been done by hand, mainly because my small compressor doesn't have the oomph to run an orbital sander and I don't have an electric one! The compressor did come in handy for blasting the dust out of all the nooks and crannies though. Sods law but as I finished the prep this morning it has now started raining and it's supposed to be like this for the next few days. :roll: So until the weather improves a bit my next task is going to be attempting to tint the windows. Something I've never tried before. Should be a laugh then! :lol:

gaz f
Registered user
Posts: 515
Joined: 27 Apr 2009, 13:06
80-90 Mem No: 6697

Re: My project bus. 26/05 update.

Post by gaz f »

Got the windows tinted yesterday, wasn't as bad a job as I thought it would be thankfully but I have no idea how folks can do this with the windows in the van! They look ok, still need to dry out completely. Although there is one annoying hair stuck in the middle of the back window that I didn't notice when I applied the film so I guess it will have to remain there. I would love to be able to blame my wife or my daughter for it but as soon as I spotted it I realised where it came from... my goatee. :evil: I think clean shaven would have been a better idea... :run

The hair.
Image

How they look.
Image

Still waiting for it to stop raining so I can paint the thing!!

gaz f
Registered user
Posts: 515
Joined: 27 Apr 2009, 13:06
80-90 Mem No: 6697

Re: My project bus. 26/05 update.

Post by gaz f »

It stopped raining so I gave it the first coat of Rustoleum. I'll post details of the issues with the paint in the 'paint your wagon with a roller' thread but overall it has turned out quite well.
Image

Image

Image

Image

Now need to leave it to dry properly before I can rub it down for the second coat. :ok

poshbuggers
Registered user
Posts: 1352
Joined: 23 Oct 2005, 19:15
80-90 Mem No: 0
Location: Nottinghamshire

Re: My project bus. Now with a coat of paint!!

Post by poshbuggers »

Great work. Mine is in a similar state to yours I suppose.

One rust hole on the back quarter (near the bumper side panel) and some small scuffs and seam discolouration to tidy. I guess it looks worse on plain white vans.

Your body prep looks good. I'm no body man so I am dreading that stage. I too will be rollering it.

Keep up the good work - can't wait to see the final coat of paint on.

'90 Syncro Hightop. Ex-BUPA/Rowan ambulance with 2.0L GTI power and some curious windows.
)

User avatar
Nomadd1001
Registered user
Posts: 119
Joined: 13 Jul 2009, 19:56
80-90 Mem No: 7095
Location: Mansfield, Notts

Re: My project bus. Now with a coat of paint!!

Post by Nomadd1001 »

Looking good and likin' the black roof. (then again, I am kinda biased!!)

:ok :ok :ok :ok
1981 tintop 2.0 Aircooled..............don't pull out on me. you are my crumple zone!!

User avatar
murdoch
Registered user
Posts: 129
Joined: 31 Oct 2006, 20:08
80-90 Mem No: 1829
Location: Bude

Re: My project bus. Now with a coat of paint!!

Post by murdoch »

good work bud :ok
murdoch

poshbuggers
Registered user
Posts: 1352
Joined: 23 Oct 2005, 19:15
80-90 Mem No: 0
Location: Nottinghamshire

Re: My project bus. Now with a coat of paint!!

Post by poshbuggers »

Nomadd1001 wrote:Looking good and likin' the black roof. (then again, I am kinda biased!!)

:ok :ok :ok :ok

Yeah, we saw yours on the Rainworth-Mansfield stretch of dual carriageway. Looked sweet!

If you see a ratty (for now) white Syncro give us a wave.

'90 Syncro Hightop. Ex-BUPA/Rowan ambulance with 2.0L GTI power and some curious windows.
)

gaz f
Registered user
Posts: 515
Joined: 27 Apr 2009, 13:06
80-90 Mem No: 6697

Re: My project bus. Now with a coat of paint!!

Post by gaz f »

Poshbuggers. I don't have a lot of patience and to be honest prepping it was a pain but I'm glad I stuck at it going by the condition of the first coat. What has appeared to work for me is when I got to the point I thought it was ready, I did it once more!

As the van was orginally army green and the previous paintjob didn't include the inside at all I spent a few hours yesterday going around the windows and inside of the doors with the rustoleum but applying it with a small 15mm crafting paintbrush using some of the previously mixed paint that I had left in a tub. It was only 1 'quick' coat (took 3 hours to do though!) and it will need another coat but I want the metal panels to be the same colour inside as it is out. Only did the bits that would be a pain to do once the windows are put back in or would be dodgy to do once the outside is complete. ie. Around the inside edges of the doors. Other sections like down the panel where the seatbelts mount can be done at anytime so will remain green for now. No pictures taken though.

gaz f
Registered user
Posts: 515
Joined: 27 Apr 2009, 13:06
80-90 Mem No: 6697

Re: My project bus. Now with a coat of paint!!

Post by gaz f »

The first coat of paint has been rubbed down again and the second coat has been applied.
1st coat rubbed down.
Image
2nd coat applied.
Image

I have also got another 2 coats of paint applied to the inside metal areas of the van that will be seen when the panels etc are in and around the inside of the doors etc. I think it's looking quite good for being applied with a brush. I do intend to use some cutting compound on it to bring it up even more though but at least when you open the doors or tailgate it's not going to be so obvious that it's a cheapo paint job!
Couple of pics of the inside..
Image
Image
Image

It's taking a lot of time but I think it's going to be worth it in the end. If I ever get there... :rofl

Locked