Areas that rust - Offside outer sill
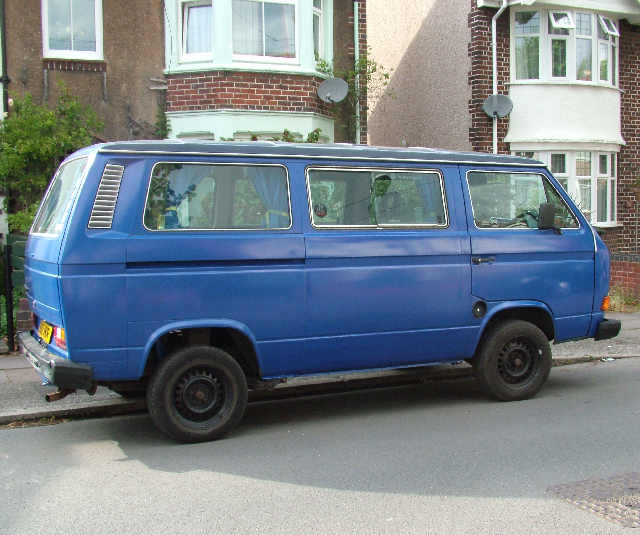
Covkid: The area in question is the panel directly opposite the sliding door and on most campers, where the cooker and sink is.
Introduction
The first sign of trouble in this area is rust along the horizontal seam of the outer sill where it meets the bodywork. By the time you see it, Mr rusty has been far busier on the inside behind cupboards and whilst you can (and many do) put a plate across the seam, you won't achieve much more than a temporary reprieve and it will keep spreading if you don't deal with it.
AngeloEVS and I are of the opinion that corrosion in this area could be attributed to water leaking from the lower corners of the sliding window frame (depending on its design and method of construction) and/or rot in the window aperture itself, both of which could drip water on to the section of floor hidden by interior trim. By the time you discover its there (and they ALL suffer from it to some degree), the damage is more extensive. Fridges which vent on to this side will also cause rot. Condensation is not a great thing in a camper at the best of times as most interior panels have a very thin coat of paint - not much protection.
A few examples are shown in the 80/90 threads and not all of them great examples of dealing with rot I have to say. My view is cut out as much as you can and don't leave anything to chance for repeat problems, unless you're simply patching for MOT work.
Your first job is to remove the cupboards and/or any interior trim panels so you can see whats going on in there. If its bad, then almost all of this article will apply and you'll be cutting as shown. If its mild you MAY be able to treat, but chances are it'll come back and you'll end up doing the job anyway, but do dig around thoroughly!
The task involved
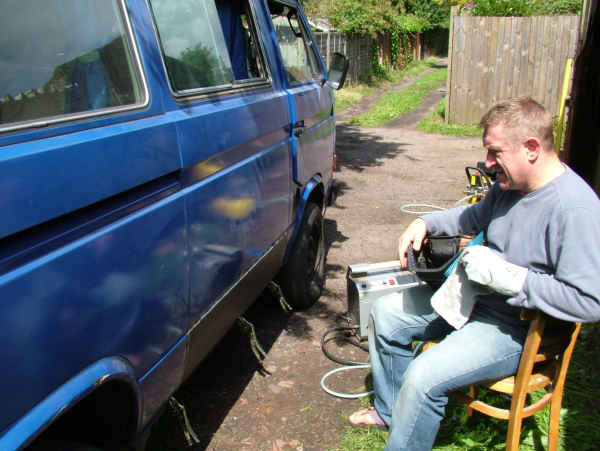
The only way you can sort this is to cut out the rot, beyond it, and replace. The prospect of cutting a big hole down one side of your van/camper may sound horrific, but actually it is dooable providing you have a 4" angle grinder , four pairs of mole grips, and a MIG welder. I'm not proficient with mig welding so this job was put together my me with a great deal of help from others (especially AngeloEVS for his input, and Chickenkoop who can be seen welding), so this project is presented here on the basis that you have limited kit and/or experience but want to try or at least understand whats involved. It should take 2-3 leisurely days although at a push I guess you could do it in the one day.
I'm not allowing for any other problems you may have to attend to, so factor that in if things look considerably worse. Member Dugcati had serious rot in his - see Dugcati's van rot
This project is based on the long repair panel 91-13-002, available from several places. It was around £38 including VAT when I bought mine in July 2009. It has no flanges like the original and is basically a flat panel with body lines and creases added. However, it can be easily cut/adapted and will work for the lower part of pillars too. If you're using another type of panel, perhaps from VW, some of the information here will be less relevant and you may find a better or easier way to do this job but its documented here for whoever wants to know more and however you do it, the construction of the vehicle is still important to understand.
Cautionary Advice - Please Read
Always wear goggles, best by far is a full-face mask to BS or EU standards. You do not want shards of hot metal in your eyes, equally they can scar your face. That brings me to the secondary points, cut or ground metal gets hot so don't touch these areas until they have cooled. Be very careful with edges now exposed - they are very nasty edges and cut skin easily. I sustained two cuts so be warned.
HM: I immediately deburr them with a file or triangular scraper - having taken a really deep cut from one once - they can be like razor blades!
I use cheap grinding discs and most of the time they're OK but goggles (a full face mask is best) are good protection in case one breaks up on you. High quality thin 1mm cutting discs (e.g. Kronberg, Hilti etc) can now be bought for about £1 a piece and are one of the best things to come along for DIY bodywork in many years. Once cutting don't change the angle or twist so carry on straight or remove and start again at the correct angle (Scribe or mark-up your lines if a long cut). Don't push the speed of cut, it's unsafe and wears the disc much faster.
Please read the full safety cautions for grinding and welding here:
Goggles & full-face masks (grinding)
Goggles & full-face masks (welding)
Getting started
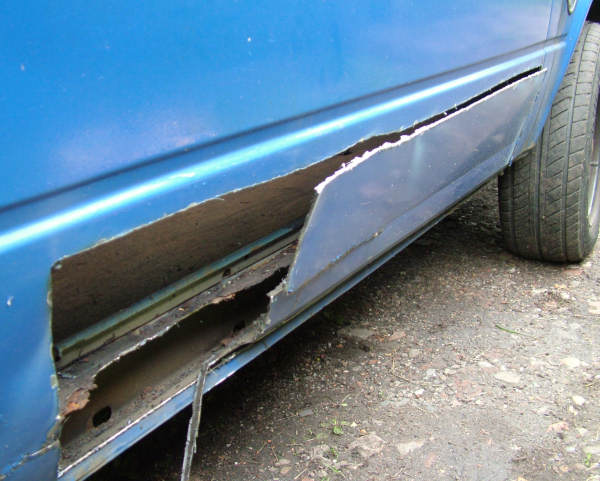
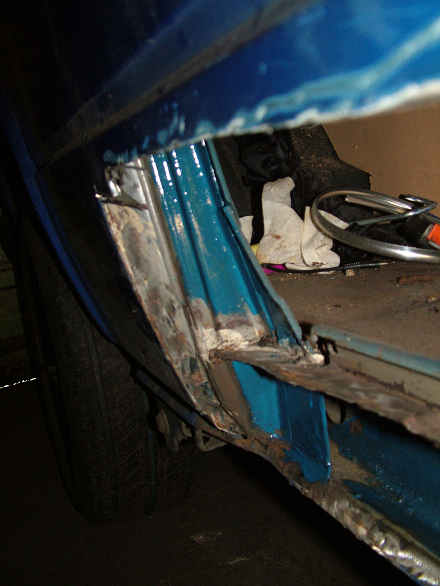
Firstly you should remove any cupboards and trim that could catch fire. Ideally, gut the vehicle and certainly remove soft furnishings. Even if they don't catch fire they will get filthy from grinder dust! Remove interior trim panel and cover everything else with dust sheets. Next, cut an access hole more or less like that shown in the first pic, checking there are no cables or other odds and ends that you or the previous owner placed in the cavity. You'll be cutting a lot further, but its useful to get a sizeable hole in there to start with so you can understand the construction.
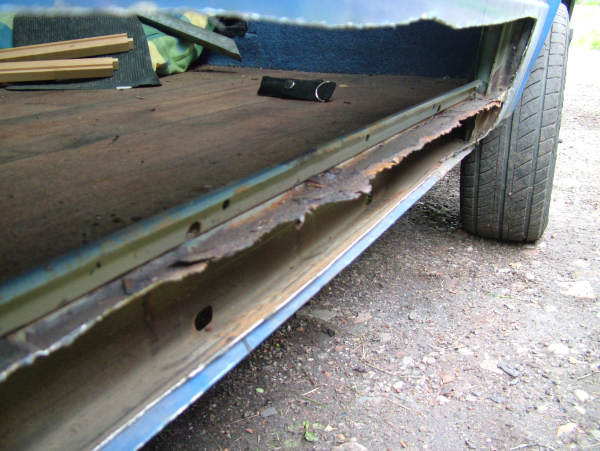
The sill (or at least the upper sill line) also partially supports the edge of the floor. Although no weight is actually on this floor section the section forms a stiffener for the side of the vehicle and arguably a crumple zone of sorts but could, I'm sure be replaced last with a suitably sized piece of sheet steel using self-tapping screws and a super-duper adhesive - I'll cover that later. Either way, cut this as you remove old sill section, grinding back to firm metal.
Cutting out the old
Chances are the floor has mostly departed company from the sill or exceedingly 'crunchy' and thats why you're seeing rust along the sill seam line. Cut an access hole as shown. You may not want to cut as high as shown in the photo but it does give you more room to work if you do. Decide how you're going to join new panel before cutting out more than you need. In this article we describe how you could join to body crease line and therefore our cutting is based on that, but you may wish to do it differently.
Leaving roughly an inch at each end where the panel fastens to the pillars and an inch below the first crease line above the upper sill seam line. This all has to be removed further (CAREFULLY) but cutting a large chunk out with the angle grinder makes it easier to see where you're going, grind back floor and treat with plenty of rust retardent and paint. Cut the remains of the floor sheet back to solid metal.
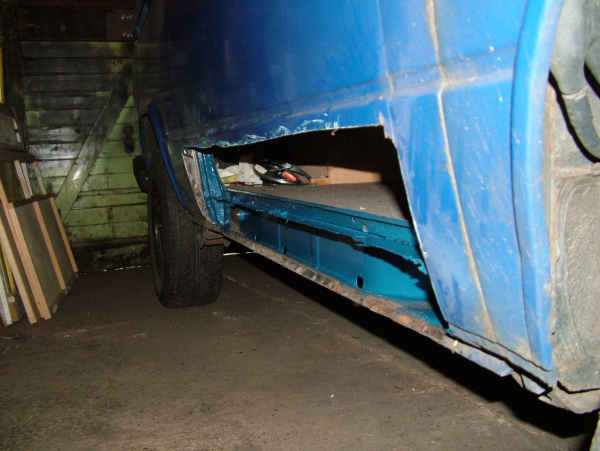
Next you need to remove any remnants of the old panel from the lower sill fixing point (thats the very lowest point of the van) with the grinder. The panels was spot welded on so go steady and aim to remove all of the old sill panel without grinding too much away. A stop-start approach is best (ie grind, check, grind etc). This is particularly important on the pillars as you don't want to be patching them when they didn't need it in the first place. The upright fixings of the old panel (flanges) are fiddly to get at but you need to get them out. I found once I'd ground them down a bit, I could use a sharp screwdriver to lift the thin flakey metal left behind to help decide where the natural level was when grinding. It becomes fairly obvious what has to be removed once you get started but essentially you're cutting out all evidence of the old outer sill and part of the panel above.
As for the top part, in the end we cut right across the side panel (CAREFULLY), level with the lower lip and up each side of the lip so that the lip would be forced back a little, allowing the new panel to sit on this lip and look more or less right. Worked for us anyway!
To fix the panel, you could make flanges by fixing a couple of lengths of 15mm mild steel angle and tack the panel to those (we welded without any). You can cut notches in this angle stuff to make it curve. If you do fix any, make sure they sit back, roughly the thickness of the new panel so that when the panel is offered up, it goes on flush with the surrounding bodywork. Subsequent filler and obligatory seam sealer will hide any exposed edges. We just didn't bother, prefering instead to tack the panel flush from the outside, then welding properly from the inside. This meant a good fixing, and no hassle to create 'mock' seams on the outside afterwards with the edge of an angle grinder.
While the side was off, I thought i'd wirebrush the inside of the inner sill and gave it a good coat of hammerite.
I'm not a big fan of hammerite but on an unseen area like this its no bad idea prior to closing everything in. Mind you, if you've discovered far more extensive rot than my example, you'll need to be dealing with that first. I also painted what was left of the floor edge (top and bottom). You may prefer some other paint or coating but worth doing now before it all disappears behind the new panel.
Welding
Once everything has been ground, painted, dry and ready, you can move on to fitting the panel. The one I bought was longer by about three inches (whatever that is in metric) so you'll need to measure ACCURATELY the required length and hacksaw or grind it down. Aim for a similar size to that removed - ie with sifficient space for later seam sealer. Better to grind slowly to a scratched line, check on the vehicle, then grind some more. If you don't go steady and end up making the panel too short, you'll give yourself far too much work.
You also need to drill holes in the lower edge of the panel - see your existing sill for the spacing of these, as these holes provide an easy way to weld that panel edge.
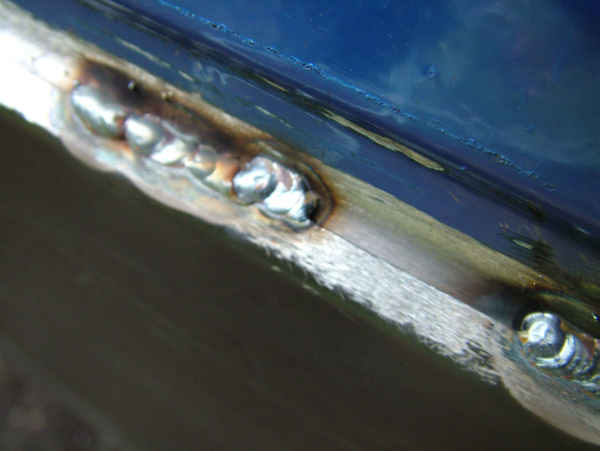
To start with, we decided to weld directly to the lip of the crease above the sill.
Not the easiest area to grind afterwards. In hindsight we would suggest it is tacked on the top lip on the outside and seam-welded on the inside, finally filled and smoothed on the outside, but that said, we figured a way to smooth it out afterwards and it provides a stiff base to work to as well as strengthening the side.
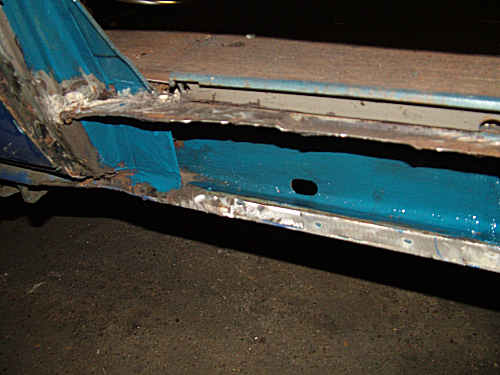
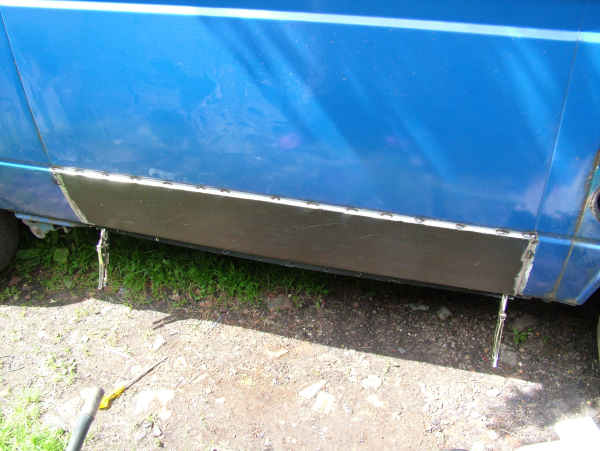
Heres the panel tacked in place.
Its important to go steady and let things cool down between welds to avoid any buckling. Then you can start welding between the tacks, just 20mm runs at a time and allowing to cool until you have a contnuous weld line.
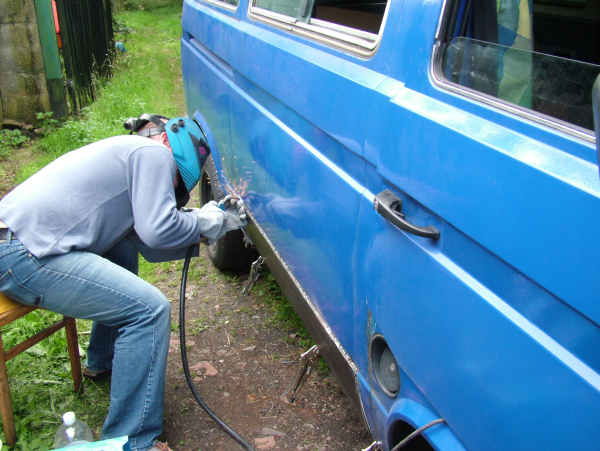
The lower fixing point is actually the last job as this needs a few mole grips (not too tight) then a knock with the hammer on the sill edge to get the two sill edges to line up. We welded inside (vertically) to provide sufficient metal to allow for the 'mock' seams to be ground into side of van afterwards. You just need a light touch with the edge of the grinder to give the 'impression' of a seam.
Vertical joins
The vertical joins, (the original seams) were tackled by cutting the panel to the exact width minus a smidgen for clearance. Then we actually seam welded from the rear for the vertical joins. Afterwards you can smooth the outside surface of weld and use filler if required, then use a felt tip to mark where vertical seam lines should be and touch with an angle grinder to establish a mock seam. The point is it won't rust there again but looks right visually.
Finishing
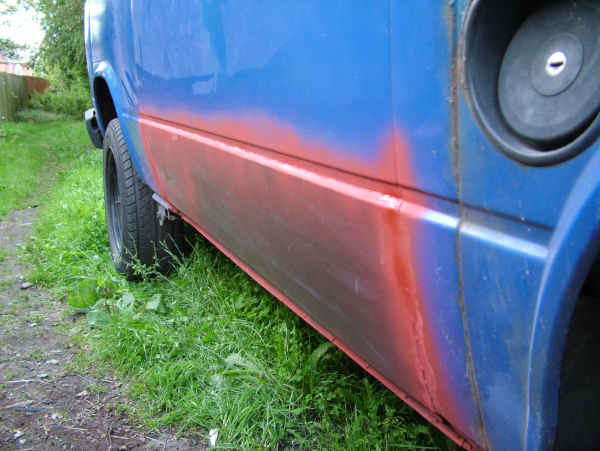
Clean up time. Case of grinding flat and smooth and if you can do it the same day, fill along rough edges, particularly crease lip. We recommend you make some kind of former that you can run along the crease once the filler is on, to make a smooth line. This final pic shows the finished panel prior to smoothing and the recreation of seam lines. We just gave it a coat of red oxide to protect it whilst we did other jobs.
Before you replace the missing floor, you could run some sealant or rust preventative in the groove above the very lowest part you welded. Not sure it matters much but might offer added protection against corrosion in the future. Just a thought.
Finally, paint (inside and out). No horizontal line to rust and a free passage for any moisture inside. Job done.
