Page 1 of 1
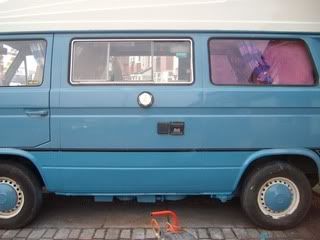
Friends rusty bus
Posted: 11 Mar 2011, 23:54
by jimpainter
Re: Friends rusty bus
Posted: 16 Mar 2011, 23:47
by jimpainter
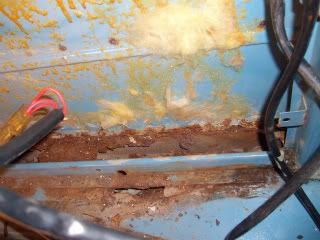
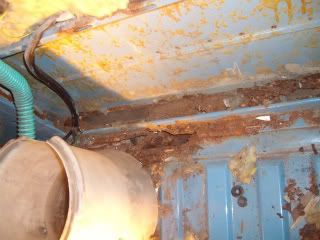
Just a quick update on whats been happening.
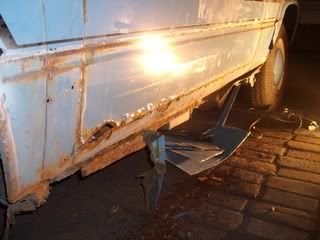
Cut off the 2nd skin
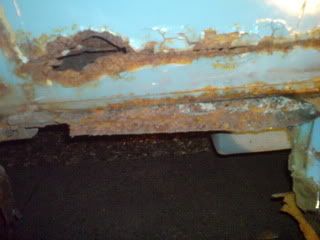
Found another hole but no surprise really
B pillar and front arch are ok

Rear arch seems ok. You can see the second skin on the bottom of the sill and the rear arch.
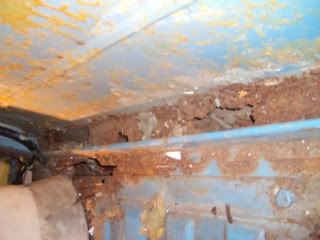
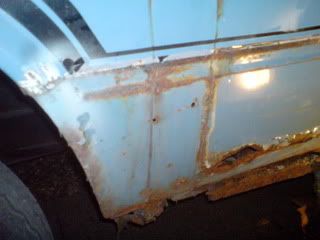
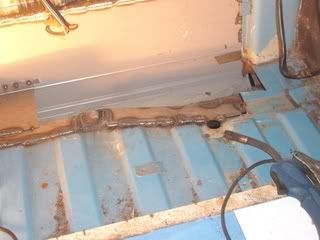
Started to cut out the outer sill original
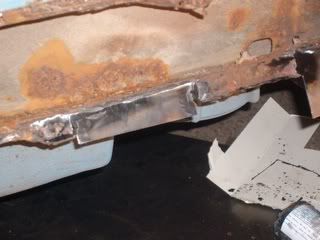
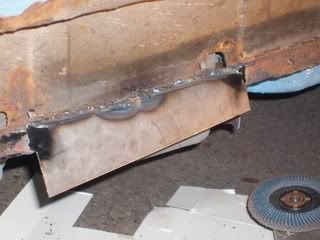
And finally a couple of sill repairs.
More soon
Re: Friends rusty bus
Posted: 25 Mar 2011, 22:55
by jimpainter
A quick update.
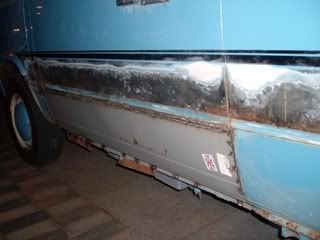
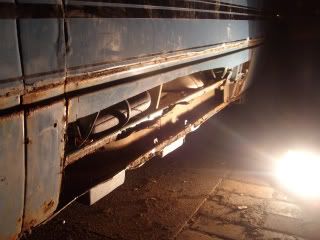
Outer sill fitted, looks a lot more solid now. The excess metal from the inner sill repairs has been trimmed off now.
Inner sill top lip fabed up and seam welded in. I know it shouldnt be seam welded to the floor but this is only a temporary repair for the mot. It will all be coming out again soon to have a new inner sill in and done to original spec. Funds didnt allow at the min for a new inner sill and time off the road, this is my mates daily you see.
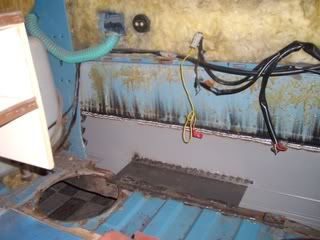
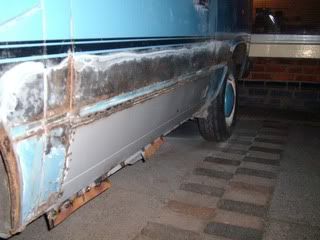
First bit of new floor going in
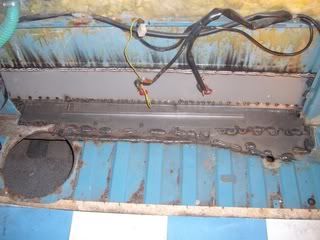
All completed

Before i get shot please remember this is only a temp repair for MOT purposes and will all be removed as and when my mates time/money allows, hence the reason it doesnt look original.
He is pleased with it which is always good.
Jim
Re: Friends rusty bus
Posted: 26 Mar 2011, 17:53
by pierce
jimpainter wrote:Before i get shot please remember this is only a temp repair for MOT purposes and will all be removed as and when my mates time/money allows, hence the reason it doesnt look original.
He is pleased with it which is always good.
Jim
It looks solid enough to me
I would imagine that that area wont be seen again for a very long time once the kitchen unit goes back in

Re: Friends rusty bus
Posted: 27 Mar 2011, 08:05
by jimpainter
Its plenty solid enough but i like to do things back to original but it was just a fact time didnt allow, so it was a quick job to get it sorted. I know that sometimes you can get people that are a bit funny about non original repairs thats why i put that it wasnt and just a temp repair.

Re: Friends rusty bus
Posted: 27 Mar 2011, 20:56
by scottbott
just curious but roughly how much would that amount of work cost??,often see photo's of welding being done but I do not have the faintest idea what the costs involved are
Re: Friends rusty bus
Posted: 31 Mar 2011, 21:09
by jimpainter
Well we finally got done today bar going back in a few days to flat back and polish the paint.
Managed to get all dents etc filled up and sanded back. I did get a very slight ripple in the new panel but a light skim of filler sorted it, probably 1mm at its deepest.
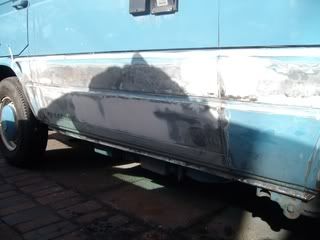
Got it masked up and away we went with primer
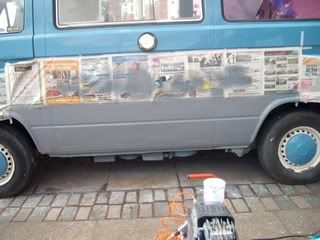
Top coat next
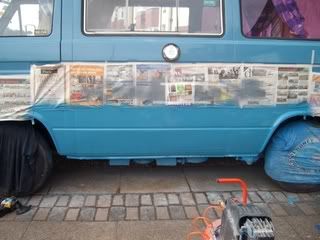
And all done, the paint isnt a perfect match but it was closest we could get at the time, its not bad though. I think once its flatted back and the stripes are back on it will break it up enough so its not as obvious.