Page 1 of 9
A few rust bubbles
Posted: 20 Jan 2010, 19:53
by tetleysid
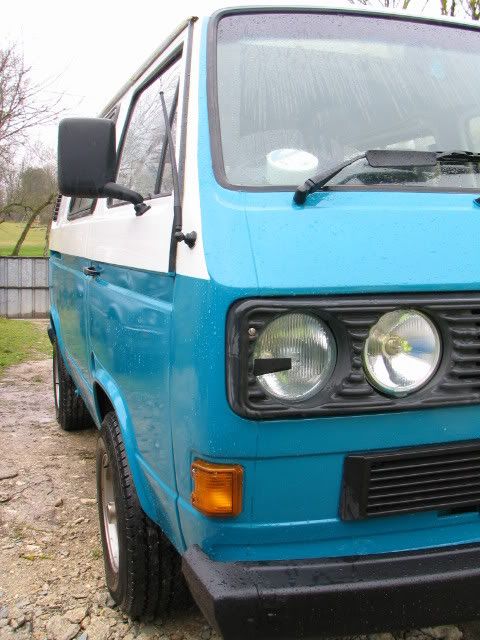
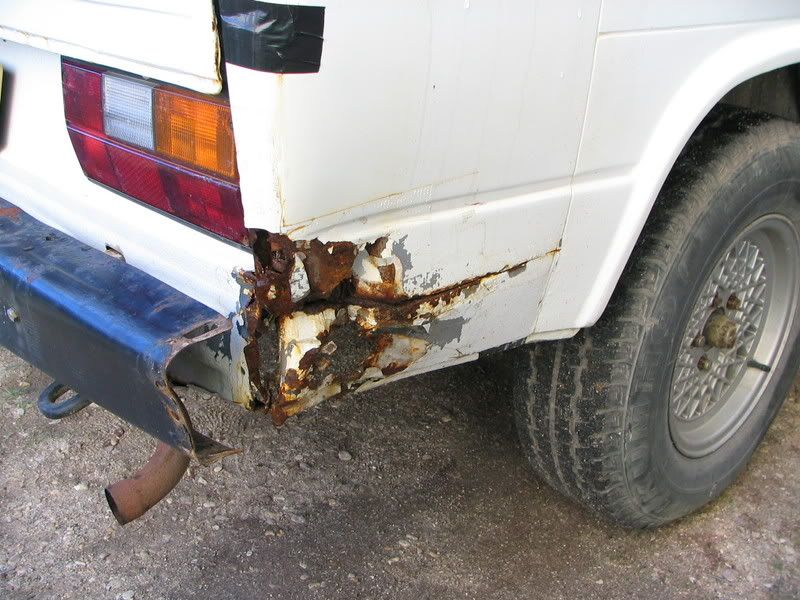
Oh dear, had this van a 2.1 power steering 5 speed for 2 years and inititially tidied the bottom half up and resprayed Turqoise. Thought I'd do the whole body this winter ready for some summer road trips to Normandy and Provence (I live in France). Spotted a few little rust bubbles.... don't you just hate 'em? I do! These small bubbles turned into a BIG can of worms and now it looks like its out with the angle grinder welder et al

This is what she looked like after last winters bottom half tidy up (see next post) ......... .
Re: A few rust bubbles
Posted: 20 Jan 2010, 20:00
by tetleysid
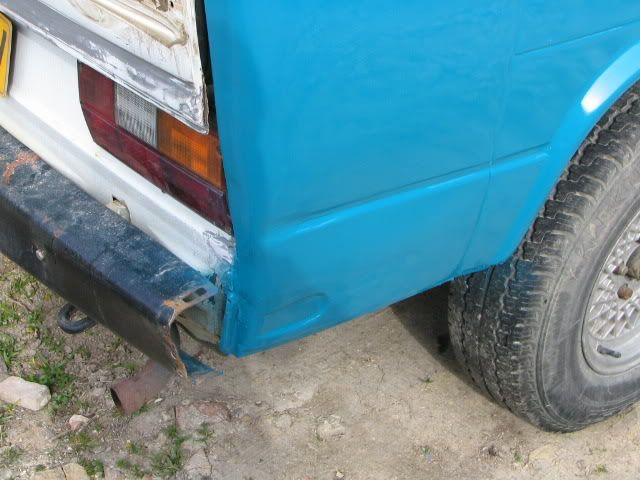
Actually this was taken the day after I did the bottom, not in Rustoleum I hasten to ad but I am going to try that soon, this was 2 pack and very expensive compared to Rustoleum
Re: A few rust bubbles
Posted: 20 Jan 2010, 20:34
by tetleysid
Turn the clock back one year and this was my first problem....... . .
Out with monsuir grinder and....... . .
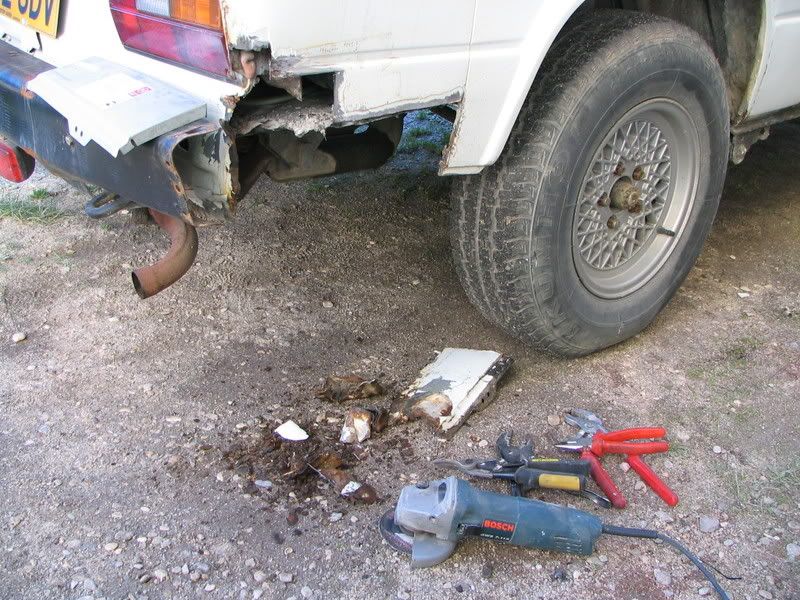
cut back to rust free area and weld in new repair panel.....

A coat of filler and a lot of flatting to get that profile good...... . . .
Re: A few rust bubbles
Posted: 20 Jan 2010, 21:16
by syncroandy
Hope you did the bit under the gaffer tape too
Re: A few rust bubbles
Posted: 20 Jan 2010, 21:22
by tetleysid
syncroandy wrote:Hope you did the bit under the gaffer tape too
Oh yes, it was plastered with gaffer tape when I bought it so I expected trouble

Re: A few rust bubbles
Posted: 22 Jan 2010, 21:30
by tetleysid
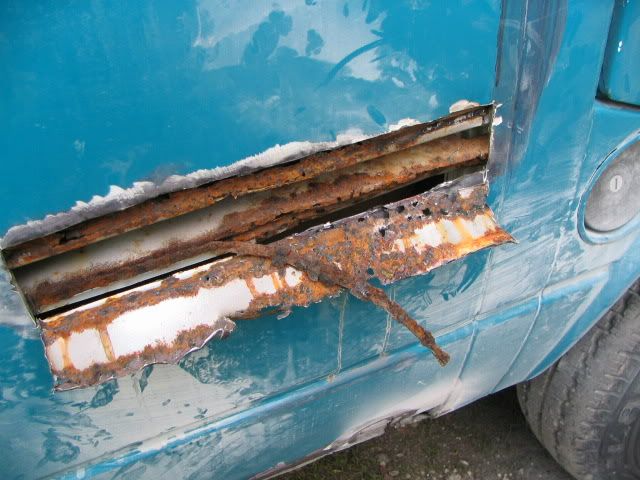
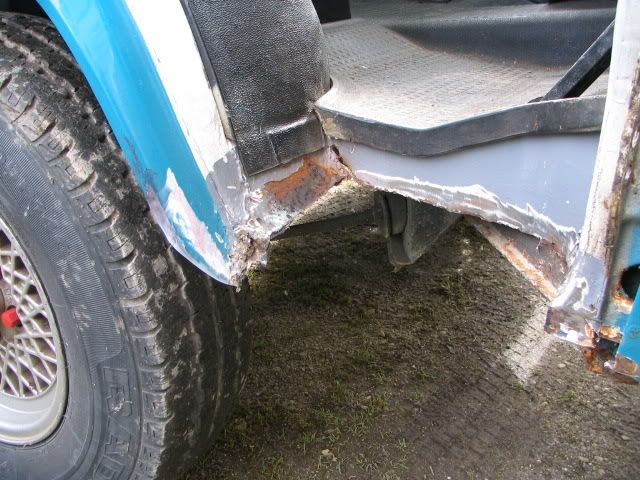
The sill exposed
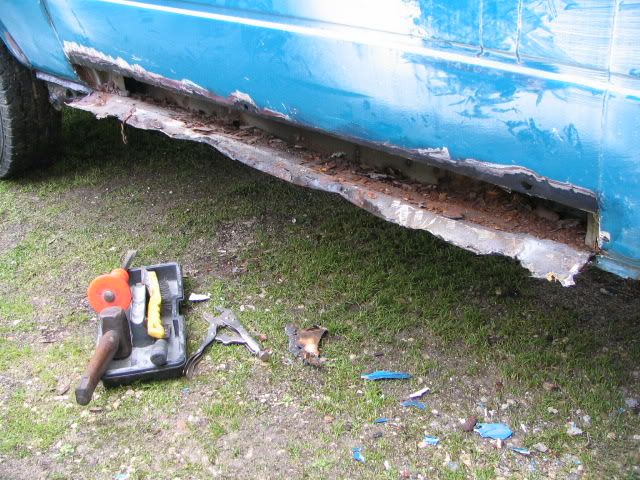
and the side panel problem exposed, water leaking in from the window above has succeeded in corroding out the sill and spar on the inside of the side panel
Re: A few rust bubbles
Posted: 22 Jan 2010, 21:33
by tetleysid
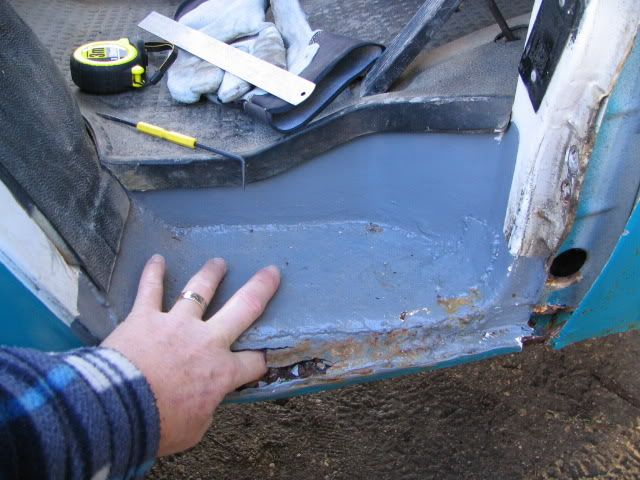
Side panel cleaned up waiting for a fresh patch of metal
The sill may need to have a new panel, shapes a bit complicated and I am too idle to fabricate another. On second thoughts I have a cunning plan
Re: A few rust bubbles
Posted: 22 Jan 2010, 22:27
by CovKid
Better if you can rework drain holes in inner sill to allow any moisture to drain out, likewise floor edge (left it out in my rebuild for that reason) and forget lower seam altogether. Thats what Chickenkoop and I did and panel was under £40:
https://club8090.co.uk/wiki/Ar ... outer_sill" onclick="window.open(this.href);return false;
Re: A few rust bubbles
Posted: 23 Jan 2010, 18:23
by tetleysid
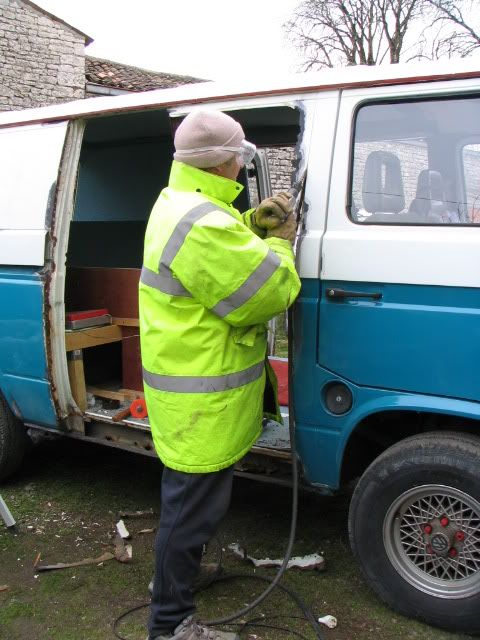
Thanks for that link Covkid but afraid my van is a lot worse than any on that thread so I decided to bite the bullet and chop out the whole rotten panel............ . . . .
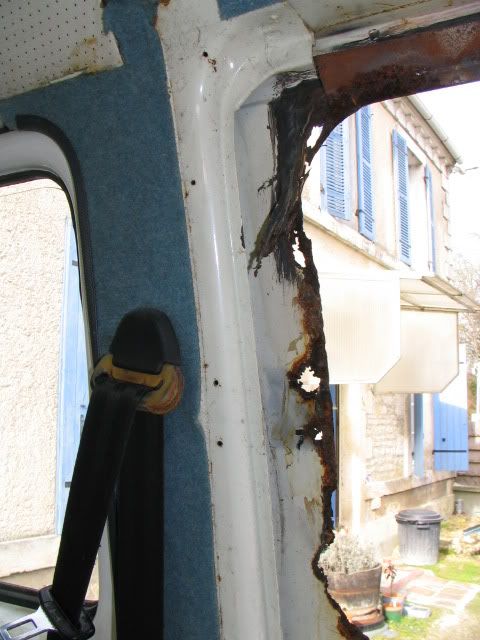
you can see just how bad the side window frame is so not much point in trying to bodge it up as someone already has and failed to seal it..... . .
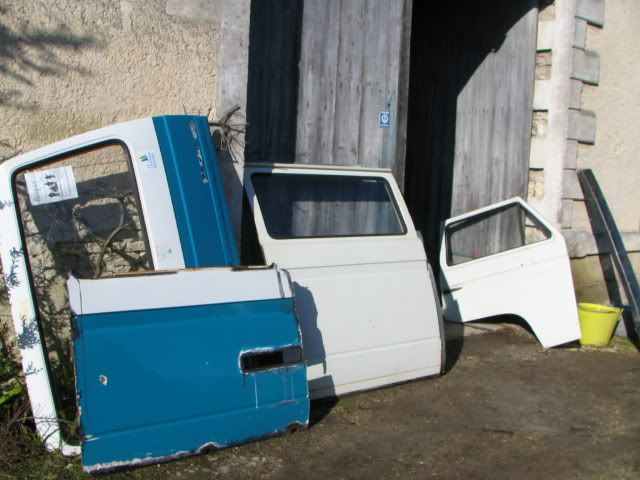
Fortunately here in France vans are not as corroded due to little salt being laid in the winter so chances of finding a better panel are good.......
Re: A few rust bubbles
Posted: 31 Jan 2010, 20:21
by tetleysid
Re: A few rust bubbles
Posted: 31 Jan 2010, 20:31
by tetleysid
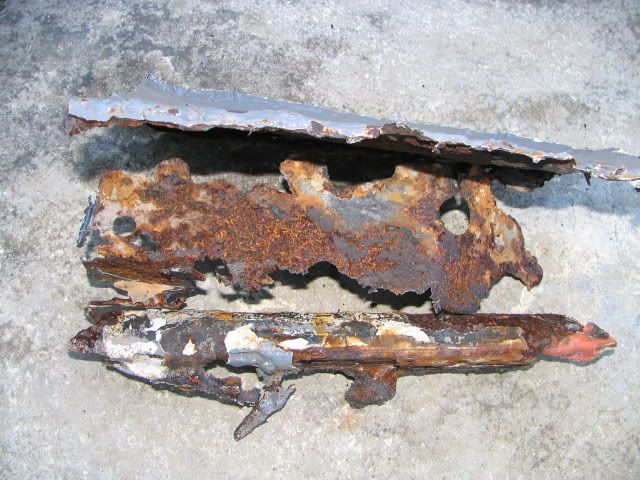
As you can see went through just with finger pressure

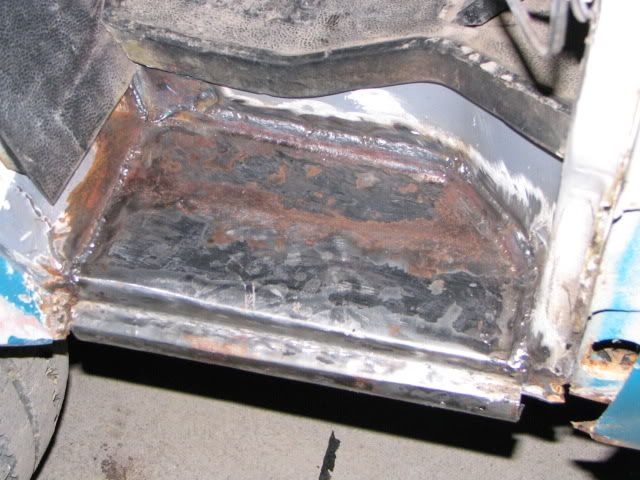
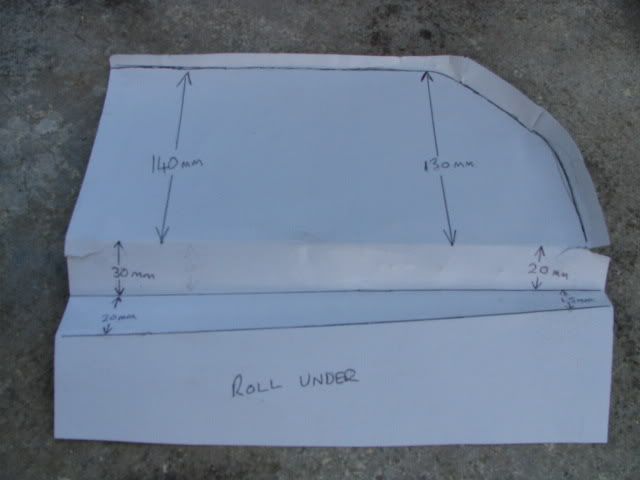
So now I have to convert this...... . . .
Into a nice fresh step, first started off with template......... . .
Re: A few rust bubbles
Posted: 31 Jan 2010, 22:41
by fullsunian
Some interesting work going on there, keep the picture updates coming

Re: A few rust bubbles
Posted: 01 Feb 2010, 21:17
by tetleysid
Cheers bud, will be getting stuck into it again tommorow all being well

Re: A few rust bubbles
Posted: 02 Feb 2010, 20:52
by tetleysid
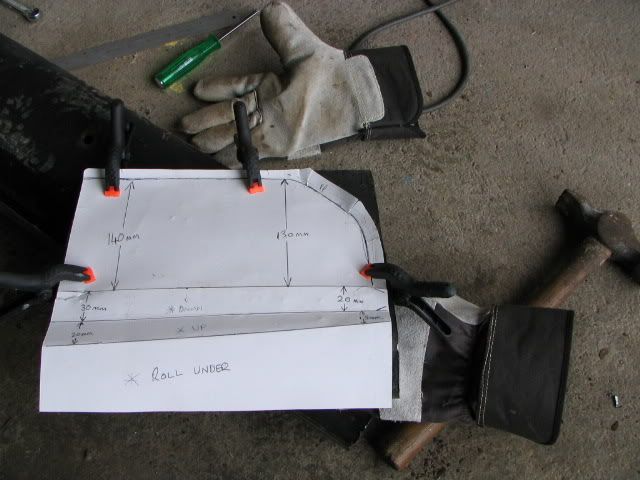
Managed another 3 or 4 hours on the old van today, used the old back bumper to fabricate a step after chopping out all that rusty crap
Took around 2 hours to bend and form that old bumper, man that mother was tough steel, only rudimentery tools don't help either

First I remeasured the dimensions and when I was happy used my template to scribe up that flattened out back bumper...... . . .
Re: A few rust bubbles
Posted: 02 Feb 2010, 20:57
by tetleysid
After a couple of hours bashing and crashing I ended up with a half decent panel....... . . .
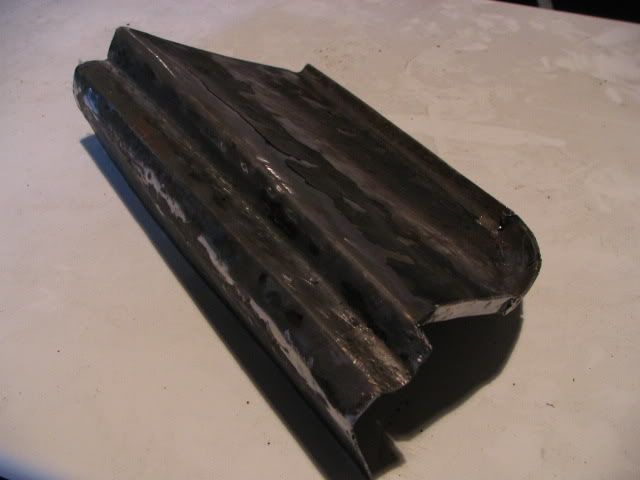
Finally welded in just before last light, just a couple of end fillets to finish it off.......... . . .