

Intro: (updated February 2017)
Welcome to the beginning of a VERY long thread I started over ten years ago. I have since had to come back and re-E D I T this first post to recap and provide quick links to all the important stuff. Now in excess of half a million views and almost 3,000 posts, the thread is full of ideas and first hand experience by all those that have followed my instructions for repainting a T25 for under £50. If you don't want to read it all, who can blame you, but this first page should provide the essential links to get you started.
Firstly, there is now a 45 minute DVD available for £7.50 as an MP4 download which includes a PDF helpsheet, showing you how to tackle this entire project. It covers the materials needed, preparation, masking, mixing, painting and finishing:
http://roller.epizy.com/55554/" onclick="window.open(this.href);return false; for MP4 download.
Its amusing in places and many will find it much easier to follow than trawling this thread and helps avoid classic schoolboy blunders.
For those that wish to learn more, feel free to read through these pages as they contains all theoretical answers you might need to transform a tired and chipped surface into a clean, vibrant one - even a change of colour. Since I started this, the concept has taken off in a big way and I'm constantly seeing T25s even in my own area that have been rollered. The low-cost coupled with a rust-inhibiting paint, makes it a project within the reach of almost anyone, helps preserve the bodywork and perfect on such a large vehicle that you don't want off the road for months. The ladies particularly, seem to have a flair for this, perhaps due to their attention to detail but I do suggest you work in pairs - one to paint, one to spot errors. The DVD explains all this and more.
Some Rustoleum Combicolor suppliers (particularly paintshop.ie who are well aware of this thread) will give 80/90 members a discount.
Because the thread is now rather large, I've created this revised intro and you might like to find a comfy chair and just plod through it. Some comments have since been transferred to the WIKI along with relevant photos. Body repairs are a different issue and you need to do all of that before even attempting this. Also, if you paint and your T25 has very old window rubbers, when it rains these will ruin the paint job, so consider the general condition of the body and window seals FIRST and put these right.
Before and after Roller Gallery: https://club8090.co.uk/forum/viewtopic.p ... 9#p7693819" onclick="window.open(this.href);return false;
For those only interested in spraying, theres a thread for that too: https://club8090.co.uk/forum/viewtopic.php?f=2&t=66623
Returning to the story..............
Time for an update: (posted April 2007)
I left things a week and fortunately we had at least a day or so of baking sun to really harden the paint up. I wasn't keen on the prospect of using wet and dry the day after painting. Paint has a habit of remaining soft underneath and as its basically like an acrylic, it can take a few days to really set. I gave it a full week and would recommend anyone else who wants to try this method of painting allow three weeks really.
First I tackled the front (bonnet if you like) with soapy 600 grade wet and dry. I'd say thats about right for flatting back. You can use finer but you'll be working hard if you do. I basically flatted it back baby smooth again - few areas where the old paint showed through but thats to be expected.
Second coat was a lot easier as by now I'd got the mix right (around 10-18% thinnners). I use a new tray and roller head every time and this seems to be the way to do things. Second coat seemed to gloss out better (less orange peely).
Trick is not to spend more time on an area than needed to cover it and work briskly, one roll to cover it, one to even paint out and a gentle roll (pressure of roller only) to assist any air bubbles out. Don't be tempted to go back to areas unless you have to (ie a bad run somewhere) as within about 3 mins its unworkable and you'll end up putting too much paint on in one go. After about 8 minutes it'll level out and start to skin over. Every layer should be THIN. Don't try to pile on paint as you'll give yourself no end of grief doing that. Just keep layers smooth (no hard lines) and then LEAVE IT ALONE to dry.
Rob came round and said the finish was no worse or better than his properly sprayed job but with a final flat and polish theres no reason why you couldn't actually end up with a paint job that equals a good spray job and unlike a lot of automotive paints, this stuff doeswn't need primer and will go over rust too.
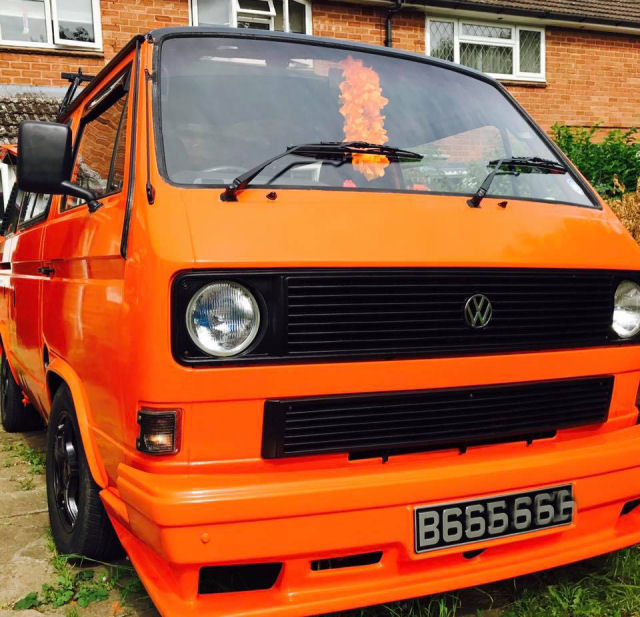
Don't paint in blazing sun. It'll dry VERY quickly in the sun but if you have no choice, you must thin the paint even more! Anyway I'm on second coat now and I've gone from:

to:

This is a stock blue from the Rust-oleum range but you could get it mixed professionally if you wanted a particular shade I guess.


