Procrastinating never got anyone anywhere
Moderators: User administrators, Moderators
-
mshaw1980
- Registered user
- Posts: 588
- Joined: 10 Aug 2015, 06:50
- 80-90 Mem No: 14800
- Location: Peel, Isle of Man
Re: Procrastinating never got anyone anywhere
I got a schofield inner sill and it fits perfect. Need to use the front outrigger and rear crossmember as reference points after removing the old one.
1987 VW T25: Subaru EJ20 using RJES parts (If it was meant to go fast it wouldn't be brick shaped!)
-
RogerT
- Registered user
- Posts: 1815
- Joined: 10 May 2013, 11:59
- 80-90 Mem No: 13706
- Location: Central Scotland
Re: Procrastinating never got anyone anywhere
Trouble is the rear swing arm mount is still there to complicate matters, defining the space available between the top of the inner sill (top of the rear crossmember) and bottom of the inner sill (top of the swing arm mount). Chop off the swing arm mount? Put some packing pieces in?
Have you ever seen an unhappy fool?
88 Transporter with hitop camper conversion, 1.6td.
88 Transporter with hitop camper conversion, 1.6td.
-
adie89
- Registered user
- Posts: 293
- Joined: 04 Sep 2012, 21:25
- 80-90 Mem No: 11532
- Location: Wiltshire
Re: Procrastinating never got anyone anywhere
Because the top plate is out I can wiggle the sill in, it just came up as too short front to rear and when I went to match the profile to the front crossmember it was short in height on the inside edge, it was too short between floor and crossmember and it didn’t match the lower profile by a good 10-15mm. It was also way too shallow between the floor and jacking point at the rear.. Then when I dry fit the new sliding door channel the space wasn’t physically big enough for it to fit, it didn’t even fit the old top plate. Plus the lower outer edge didn’t one up with the outer sill by about 20mm. Maybe they were having a bad day when they built mine my other schofields stuff has been bob on.
Greta: 85’ LHD 2.5L Subaru 14in Syncro
http://forum.club8090.co.uk/viewtopic.php?t=165773
http://forum.club8090.co.uk/viewtopic.php?t=165773

Re: Procrastinating never got anyone anywhere
Procrastinating never got anyone anywhere
it did but not Today
____________________________________________
84 CaravelleGL 1.9 DG WBX Bronze Beige Metallic auto
84 CaravelleGL 1.9 DG WBX Bronze Beige Metallic auto
-
RogerT
- Registered user
- Posts: 1815
- Joined: 10 May 2013, 11:59
- 80-90 Mem No: 13706
- Location: Central Scotland
Re: Procrastinating never got anyone anywhere
Cobra88 wrote:Procrastinating never got anyone anywhere
it did but not Today
If there was a like button...
Have you ever seen an unhappy fool?
88 Transporter with hitop camper conversion, 1.6td.
88 Transporter with hitop camper conversion, 1.6td.
-
adie89
- Registered user
- Posts: 293
- Joined: 04 Sep 2012, 21:25
- 80-90 Mem No: 11532
- Location: Wiltshire
Re: Procrastinating never got anyone anywhere
RogerT wrote:Cobra88 wrote:Procrastinating never got anyone anywhere
it did but not Today
If there was a like button...
Greta: 85’ LHD 2.5L Subaru 14in Syncro
http://forum.club8090.co.uk/viewtopic.php?t=165773
http://forum.club8090.co.uk/viewtopic.php?t=165773
-
adie89
- Registered user
- Posts: 293
- Joined: 04 Sep 2012, 21:25
- 80-90 Mem No: 11532
- Location: Wiltshire
Re: Procrastinating never got anyone anywhere
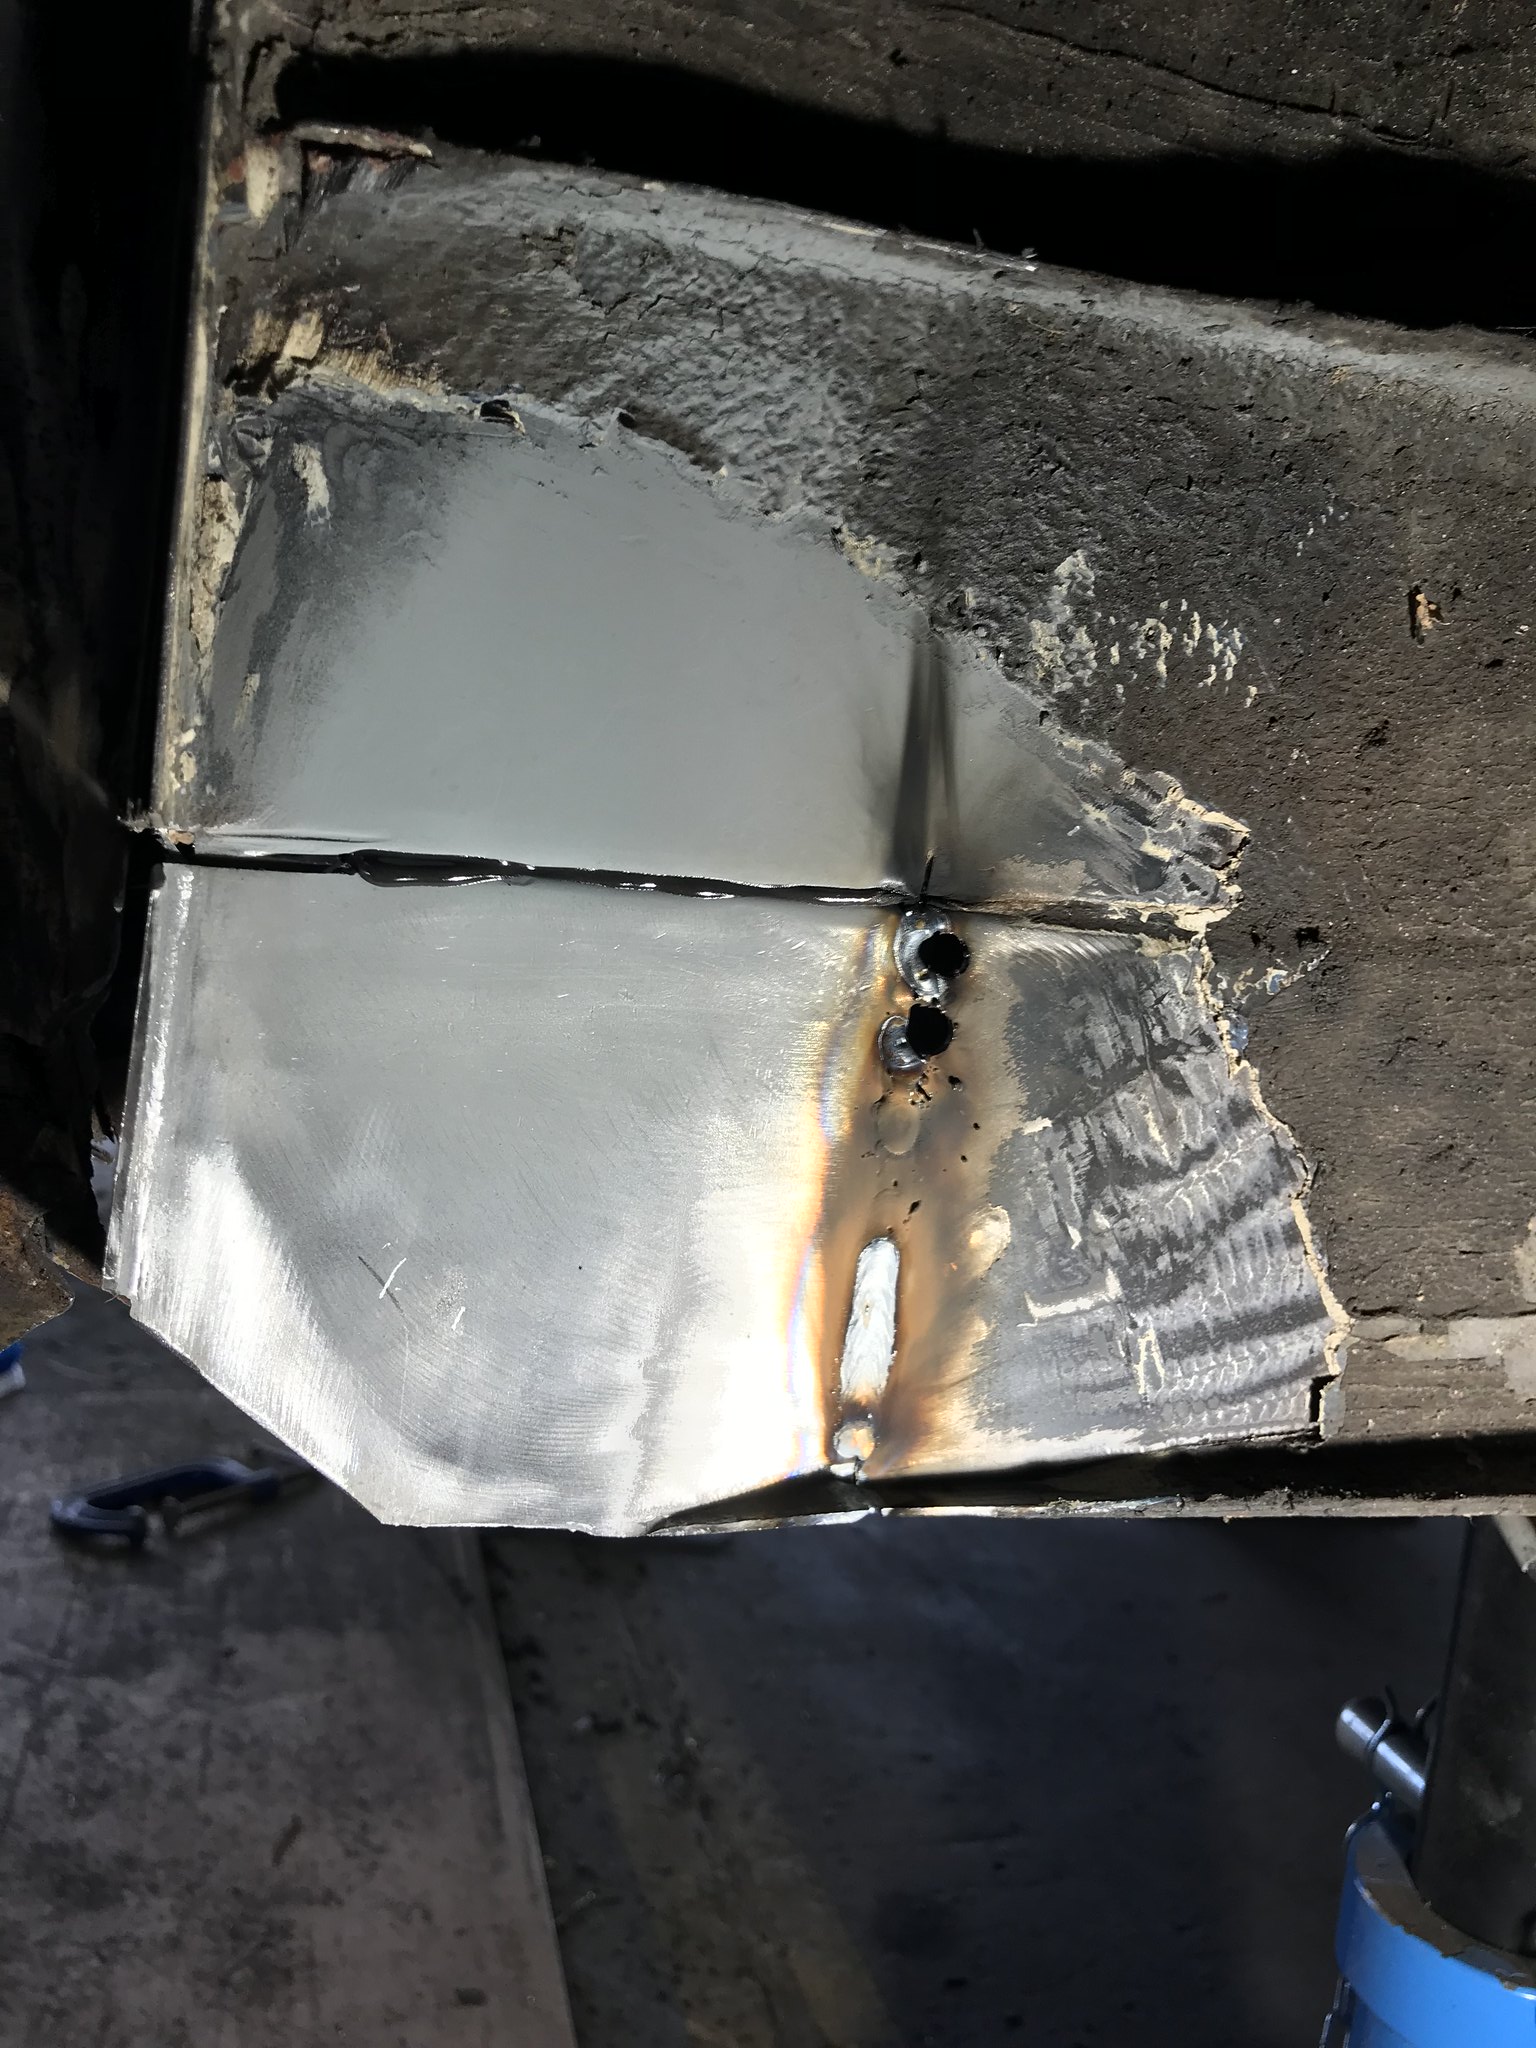
So today was a momentous occasion, the first new metal went in! It was only a 10cm by 2cm strip, but it was new metal nonetheless. Ground flat, and zinc primered ready for the chassis piece I have folded up to get panel bond and plug welded in.
Test fit of the chassis piece, the 2mm steel was tough to shape. The c pillar on the right is a previous repair that I will cut out and redo once I’ve got my chassis and inner sill reference points back in.
That’s it for today, most the morning was lost setting up my new welder and picking up a gas bottle.
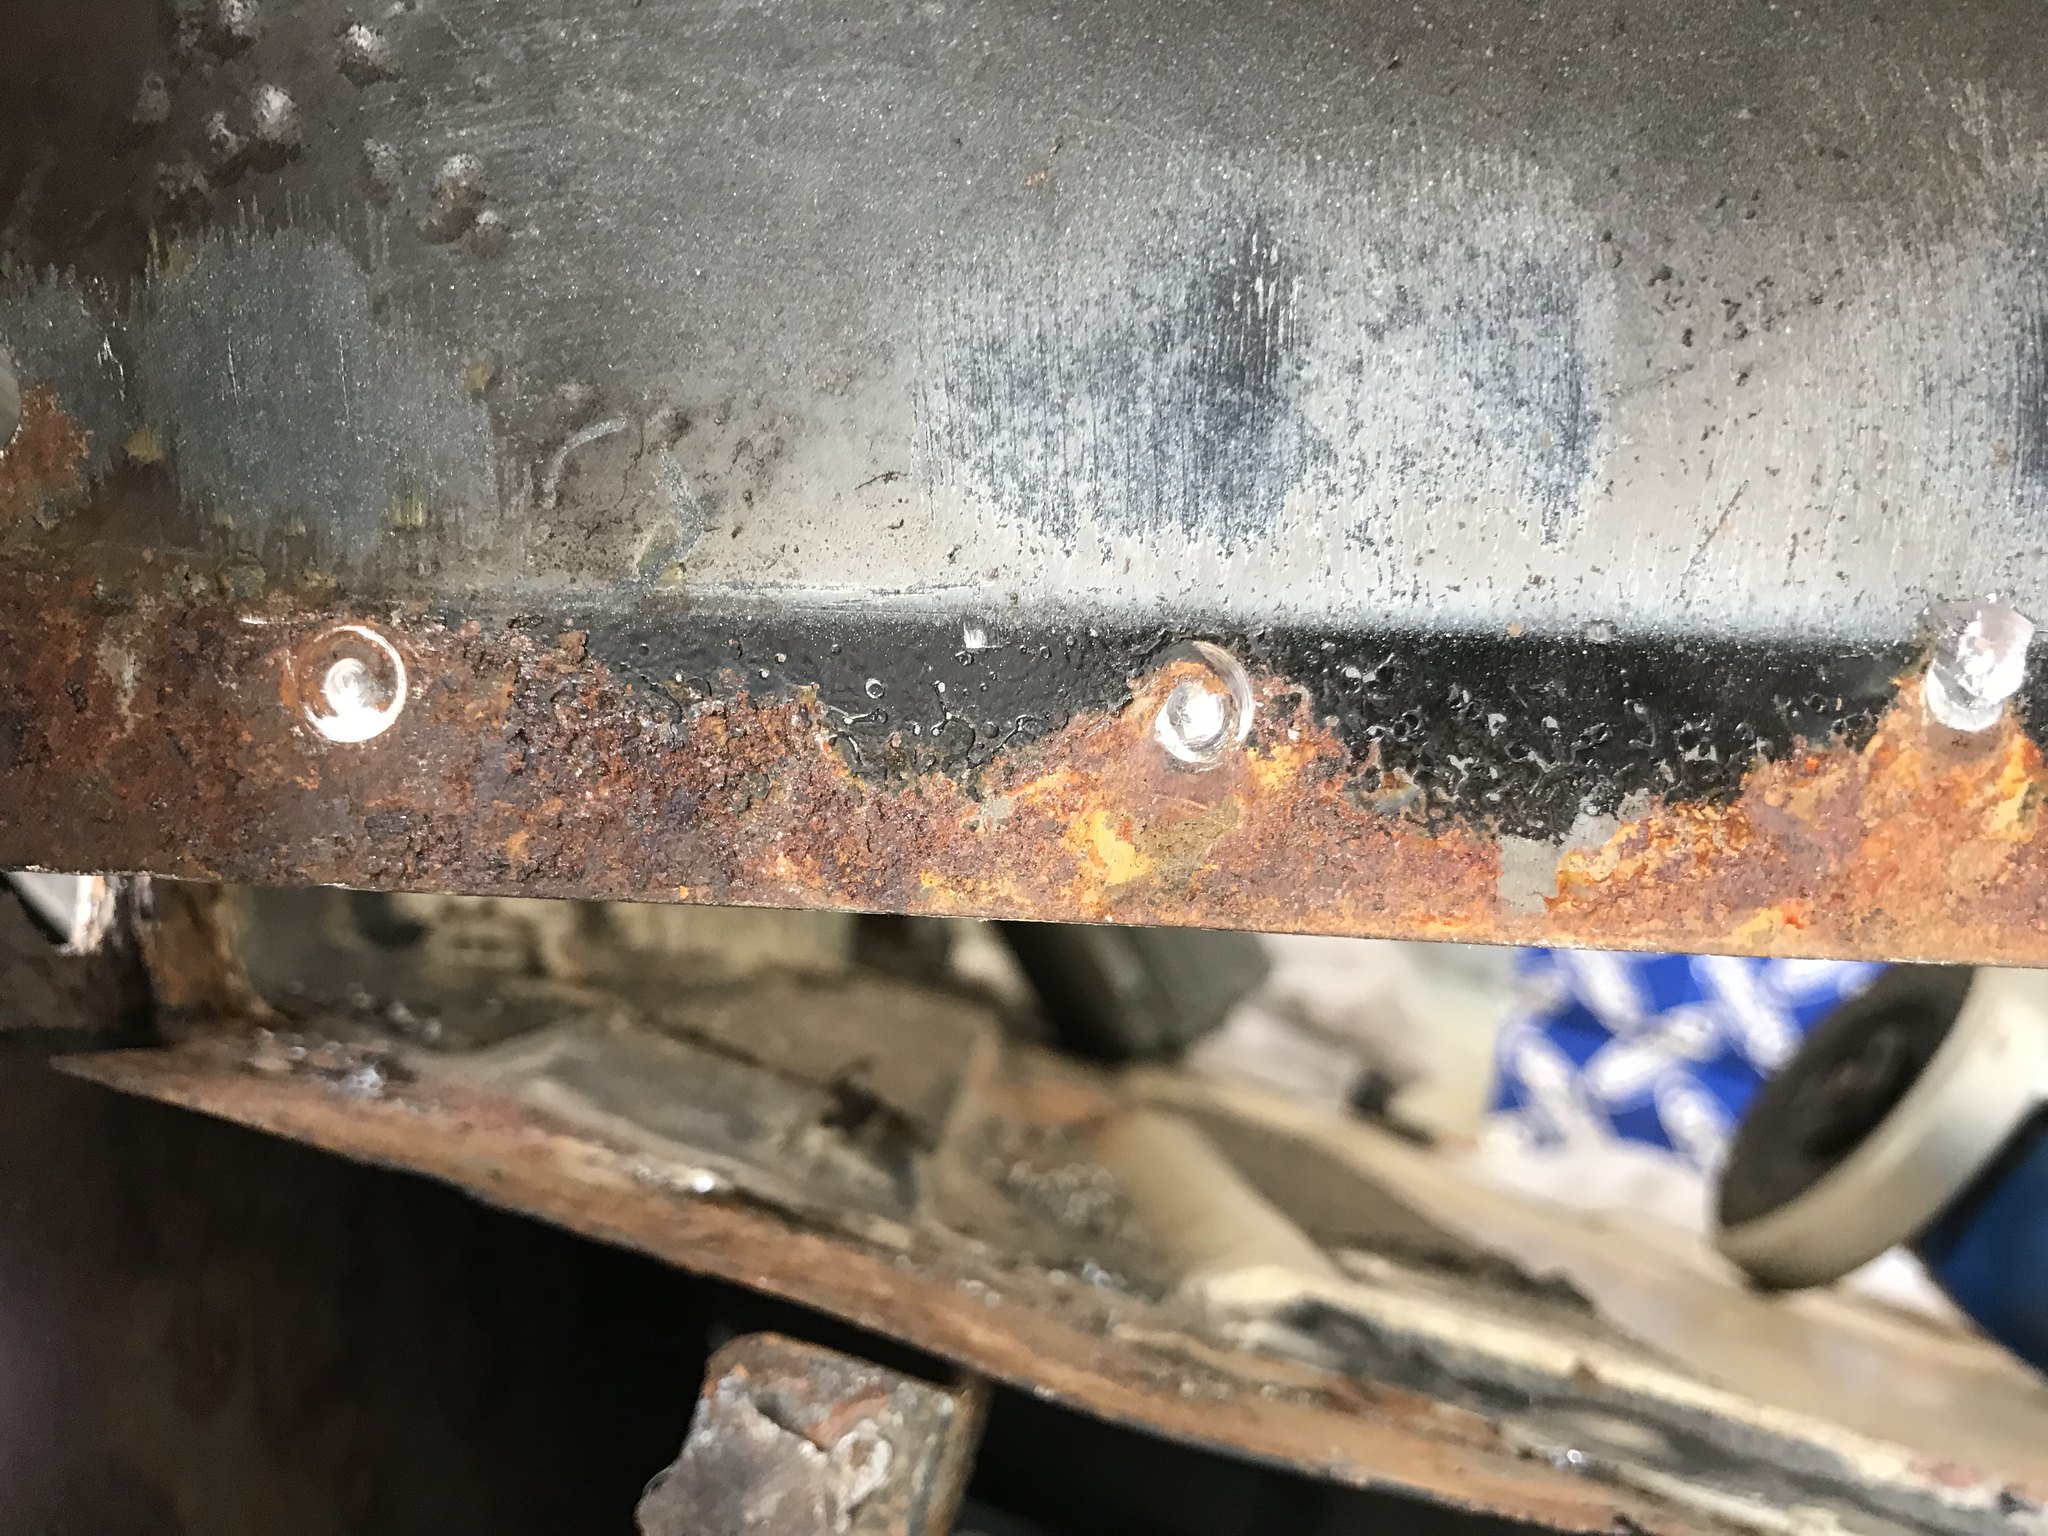
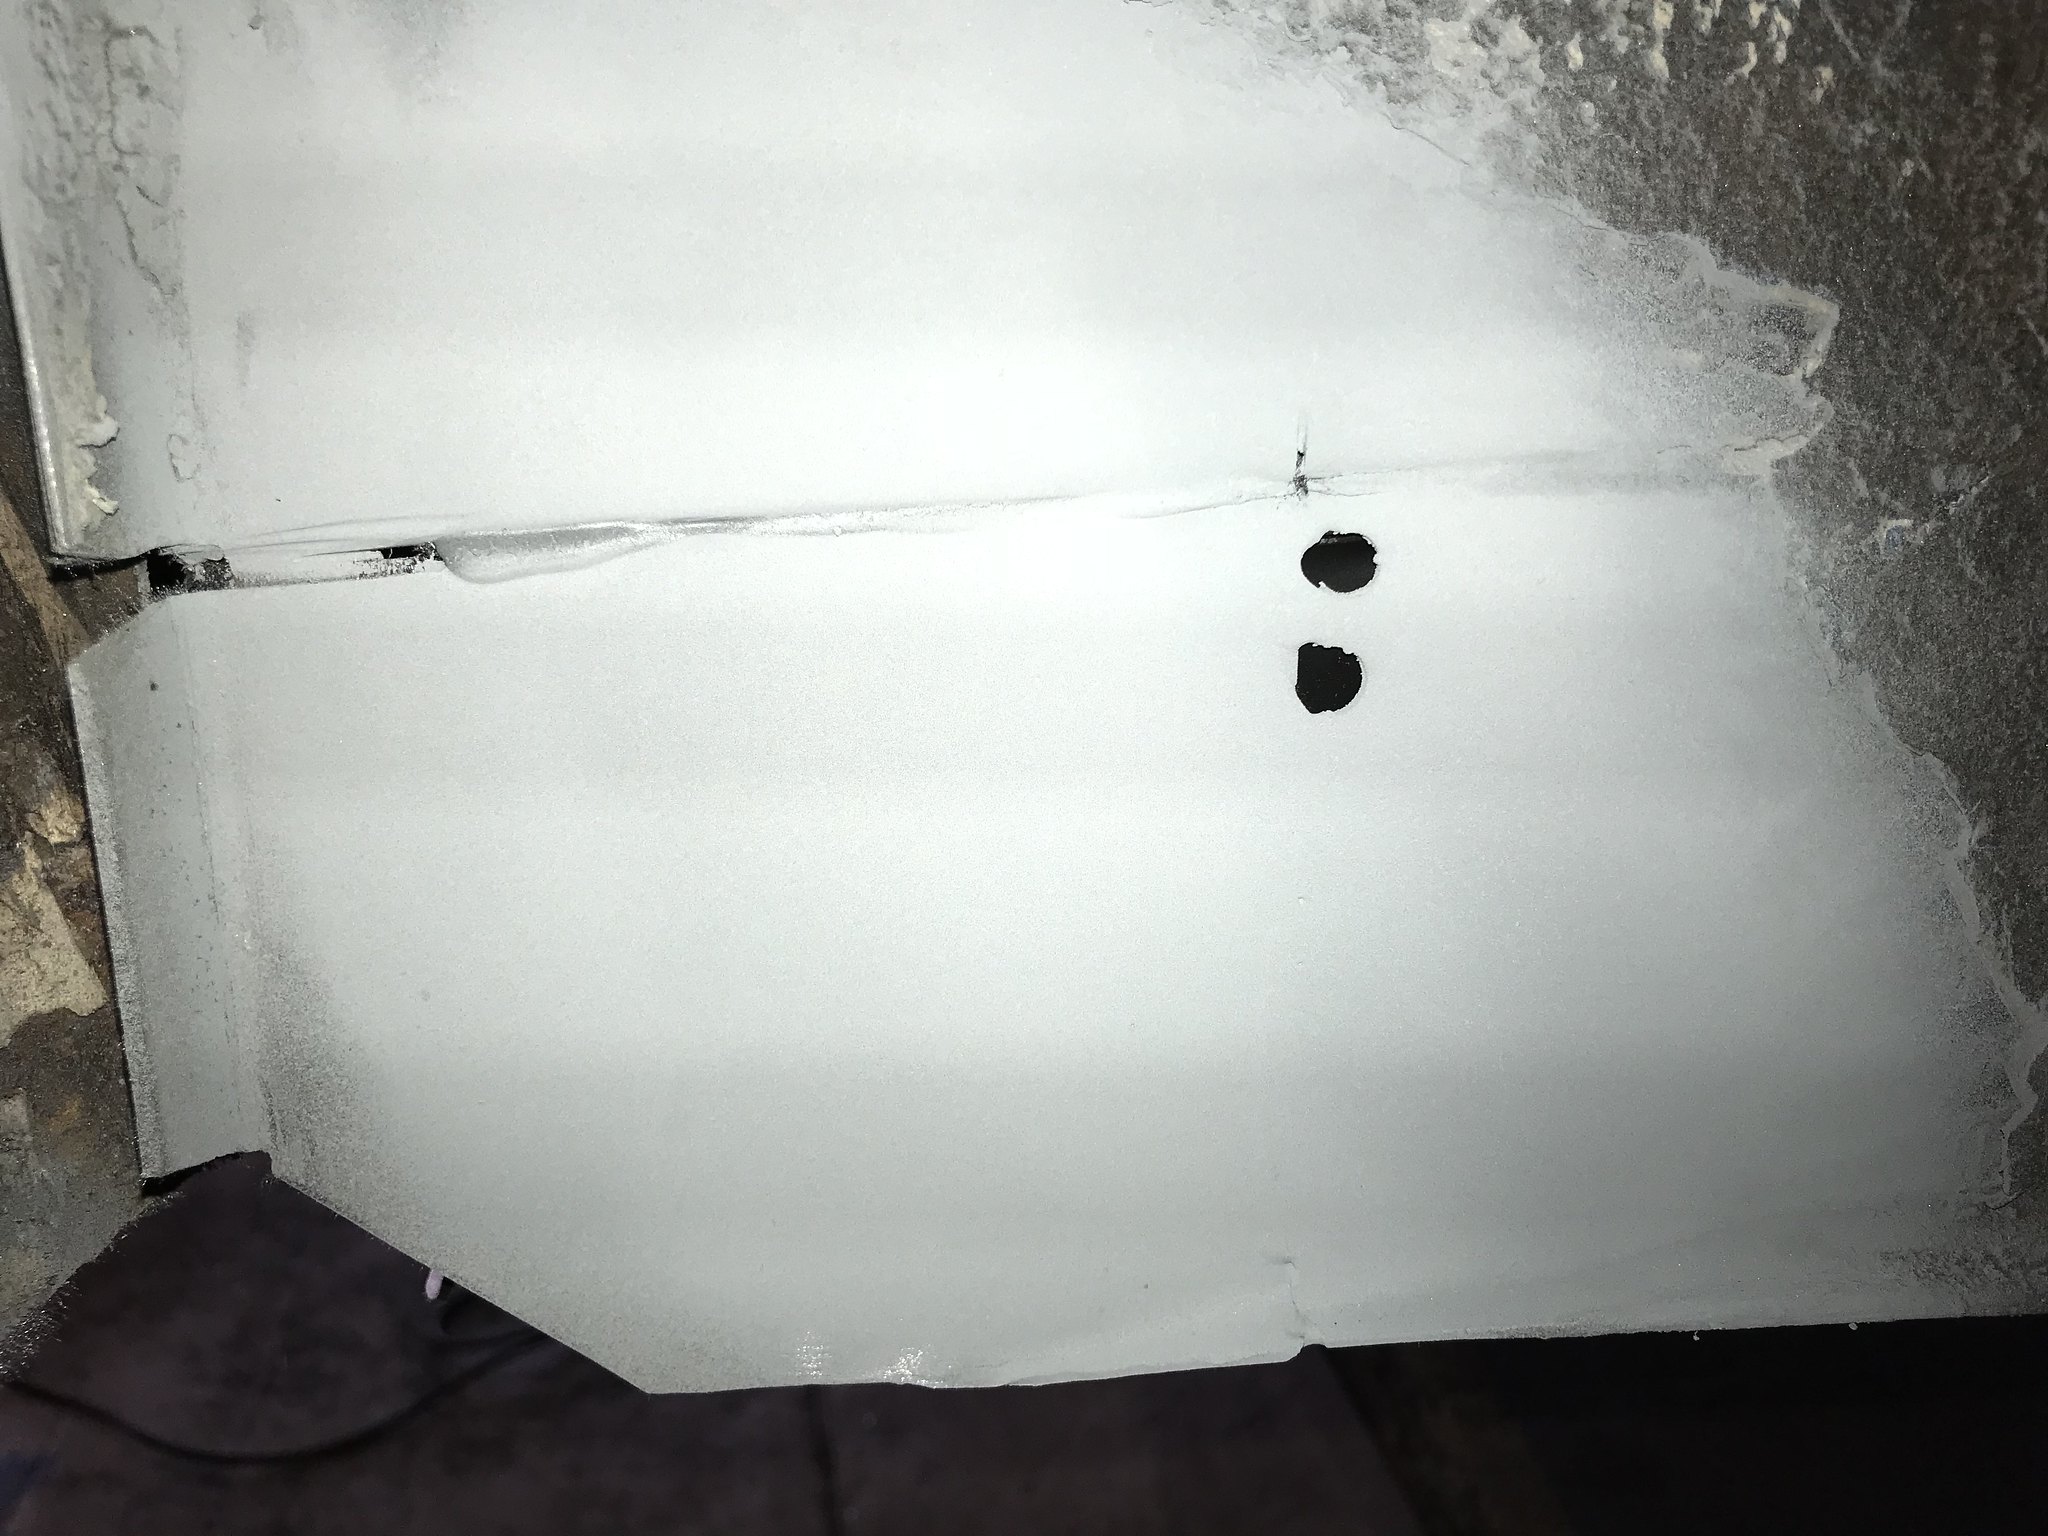
One FYI point, my father in law has been a painter and body shop man for 40 odd years now and he explained why old spot welded panels pull apart. The picture below shows where the rust began to form from the spot welds because as the spot weld is made it creates an air gap. This is an interior panel not exposed to the elements, so you can see quickly why we get seam rash. This can be combated these days by using weld thru panel bond when redoing spot welds or with a bit more hassle plug welds too, you have to clean the bond out of the hole though. This then fills the gap after spot welding as it goes off much like a deeply applied seam sealer. These products weren’t available when our buses were first built. Even modern cars that are at the lower end and not expected to last still don’t use it for cost. So the theory goes a repair should last even longe than the original and it will be much stronger as it is now glued and spot welded.
Test fit of the chassis piece, the 2mm steel was tough to shape. The c pillar on the right is a previous repair that I will cut out and redo once I’ve got my chassis and inner sill reference points back in.
That’s it for today, most the morning was lost setting up my new welder and picking up a gas bottle.
One FYI point, my father in law has been a painter and body shop man for 40 odd years now and he explained why old spot welded panels pull apart. The picture below shows where the rust began to form from the spot welds because as the spot weld is made it creates an air gap. This is an interior panel not exposed to the elements, so you can see quickly why we get seam rash. This can be combated these days by using weld thru panel bond when redoing spot welds or with a bit more hassle plug welds too, you have to clean the bond out of the hole though. This then fills the gap after spot welding as it goes off much like a deeply applied seam sealer. These products weren’t available when our buses were first built. Even modern cars that are at the lower end and not expected to last still don’t use it for cost. So the theory goes a repair should last even longe than the original and it will be much stronger as it is now glued and spot welded.
Greta: 85’ LHD 2.5L Subaru 14in Syncro
http://forum.club8090.co.uk/viewtopic.php?t=165773
http://forum.club8090.co.uk/viewtopic.php?t=165773
-
adie89
- Registered user
- Posts: 293
- Joined: 04 Sep 2012, 21:25
- 80-90 Mem No: 11532
- Location: Wiltshire
Re: Procrastinating never got anyone anywhere
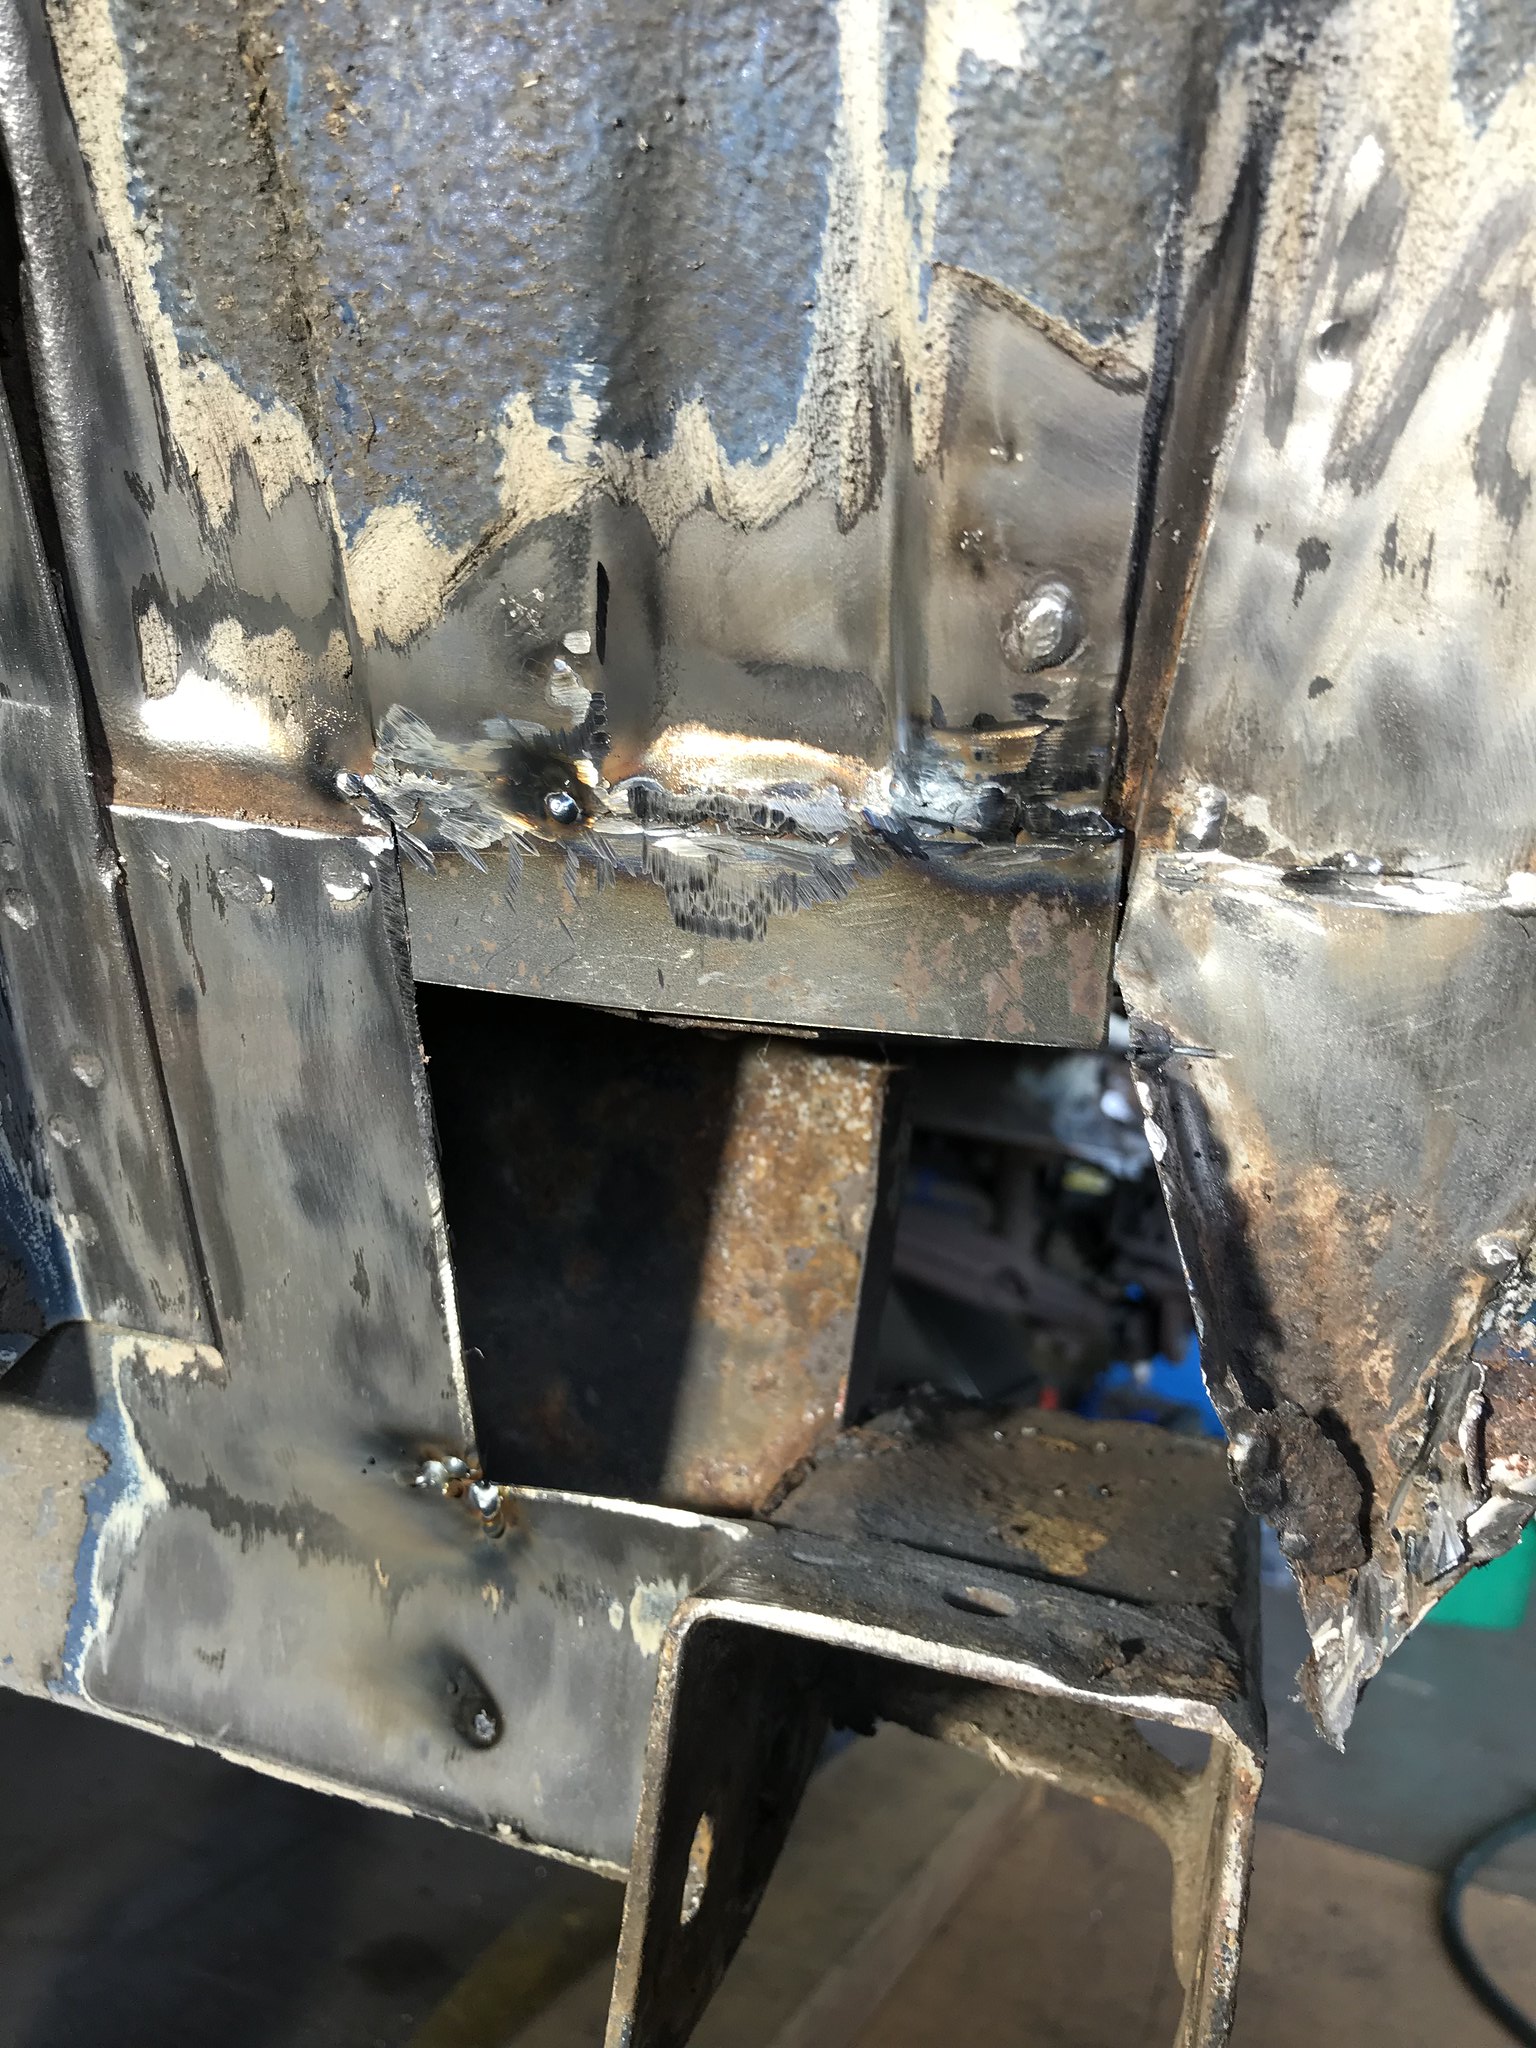
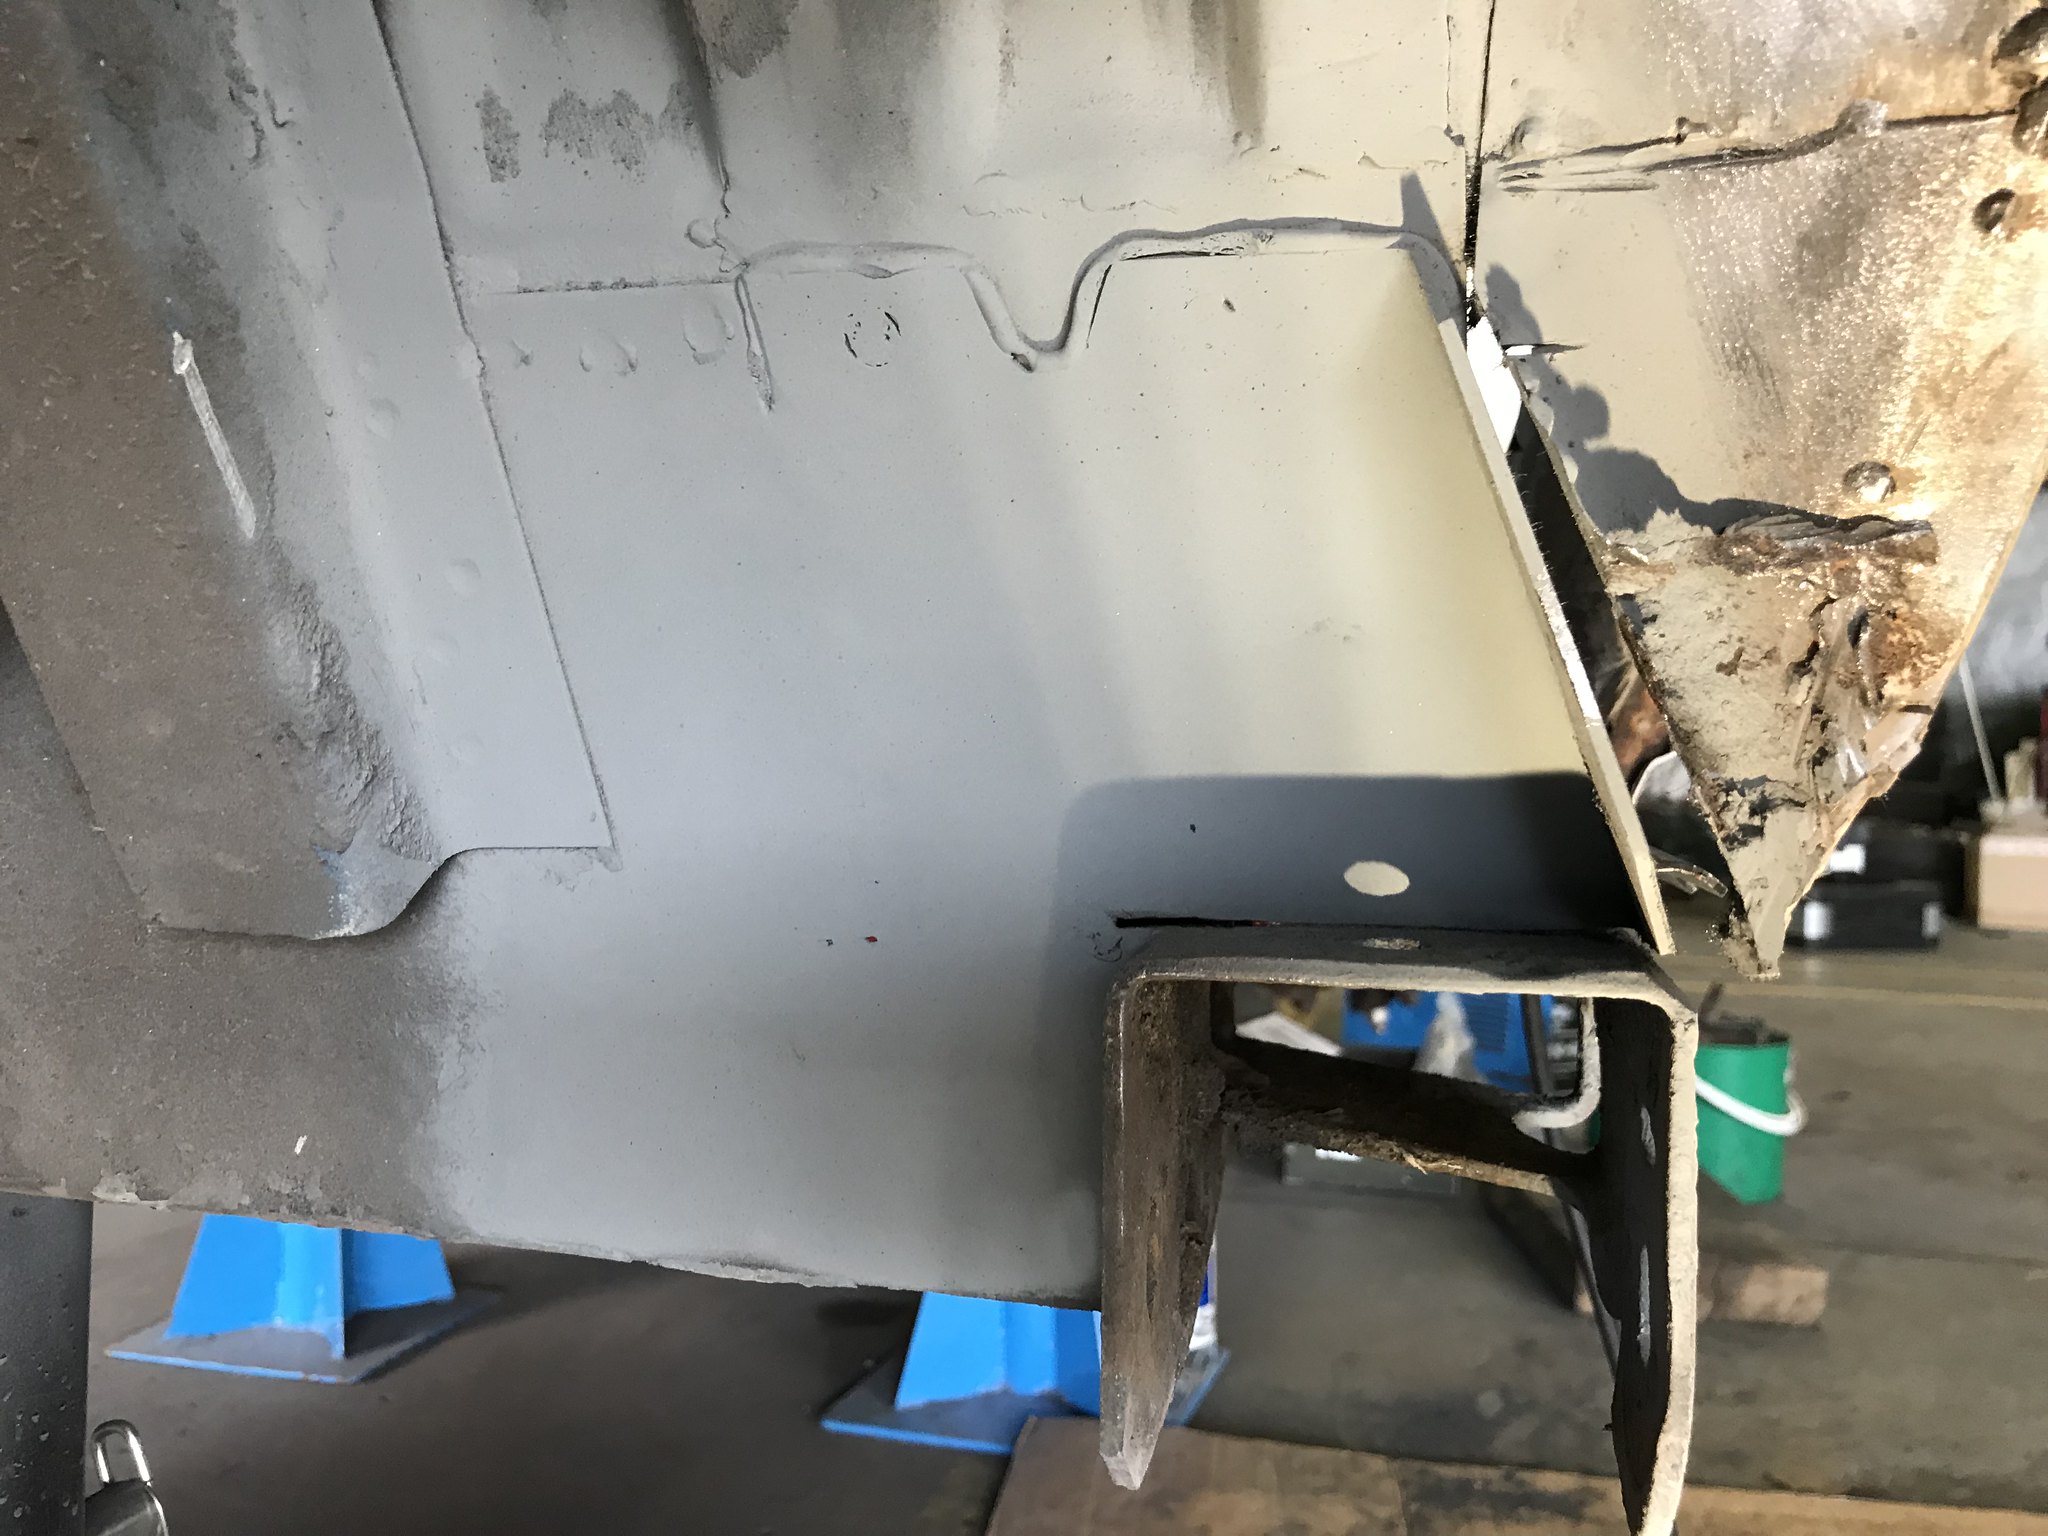
So the rear chassis piece got panel bonded and plug/butt welded in.

Same for the front chassis pieces, I deliberately left the holes to help line up the inner sill.
So now I’m waiting for the inner sill and wheel arch panel to turn up then I can repair the b and c pillars.
So I decided to replace the trailing arm spring seat while I waited and found this
So now I’m waiting on advice from here to decide to repair, replace with 14 arms or upgrade to 16 arms, but I couldn’t find info on what else I would need to replace for 16 parts
Last edited by adie89 on 29 Aug 2018, 20:44, edited 1 time in total.
Greta: 85’ LHD 2.5L Subaru 14in Syncro
http://forum.club8090.co.uk/viewtopic.php?t=165773
http://forum.club8090.co.uk/viewtopic.php?t=165773
-
adie89
- Registered user
- Posts: 293
- Joined: 04 Sep 2012, 21:25
- 80-90 Mem No: 11532
- Location: Wiltshire
Re: Procrastinating never got anyone anywhere
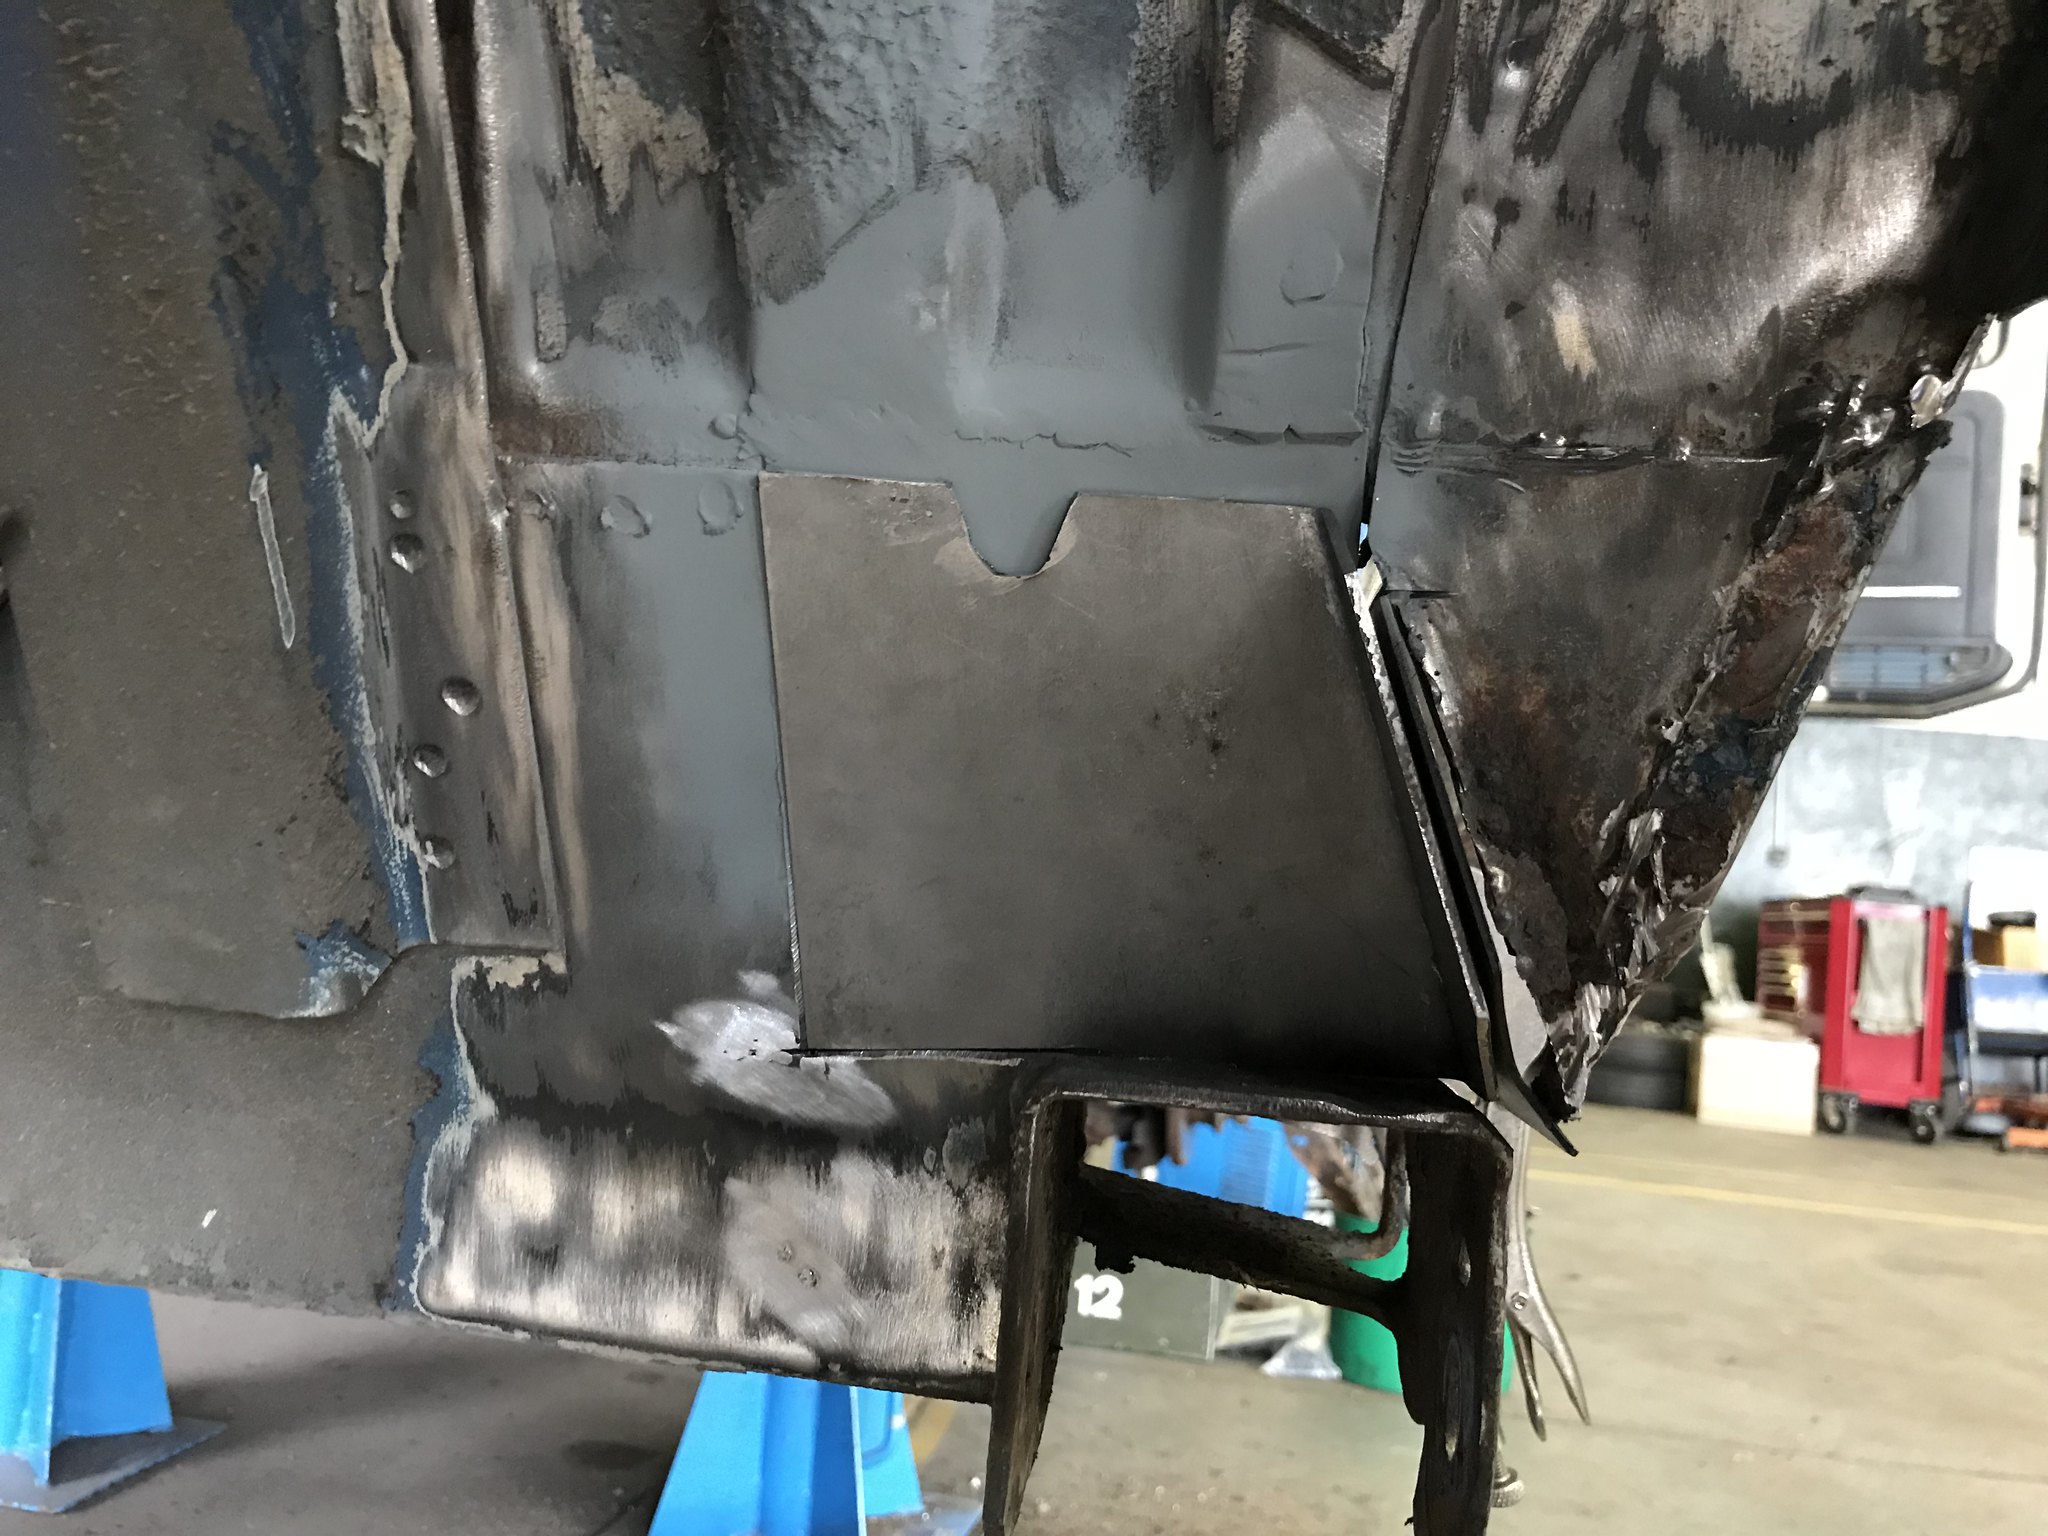
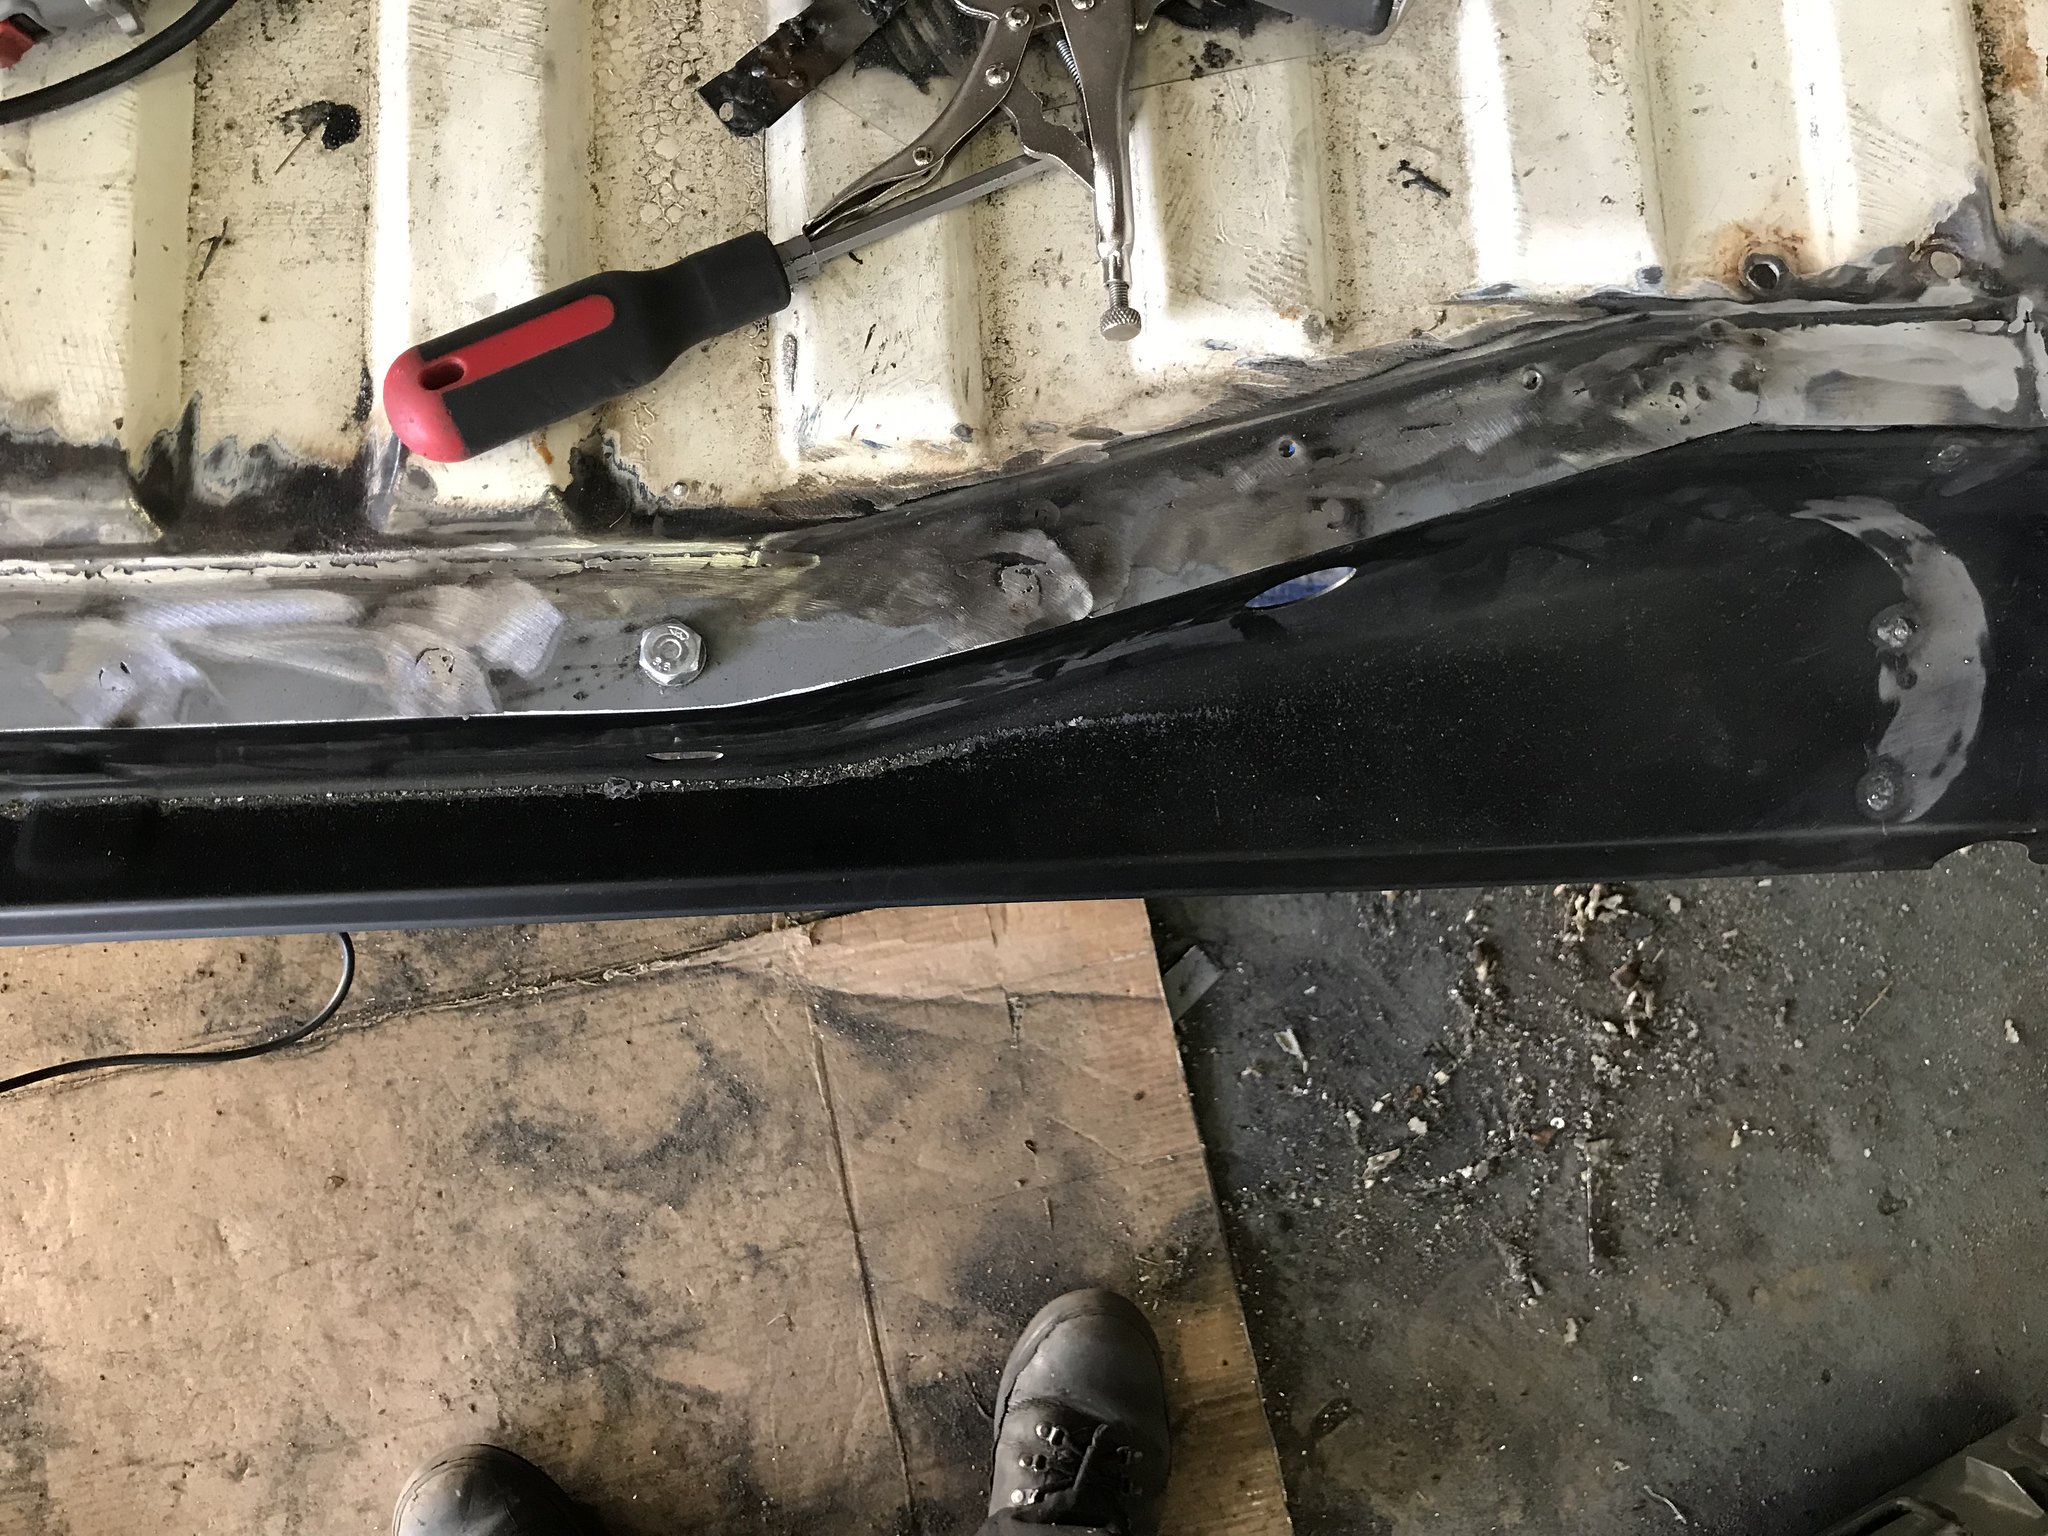
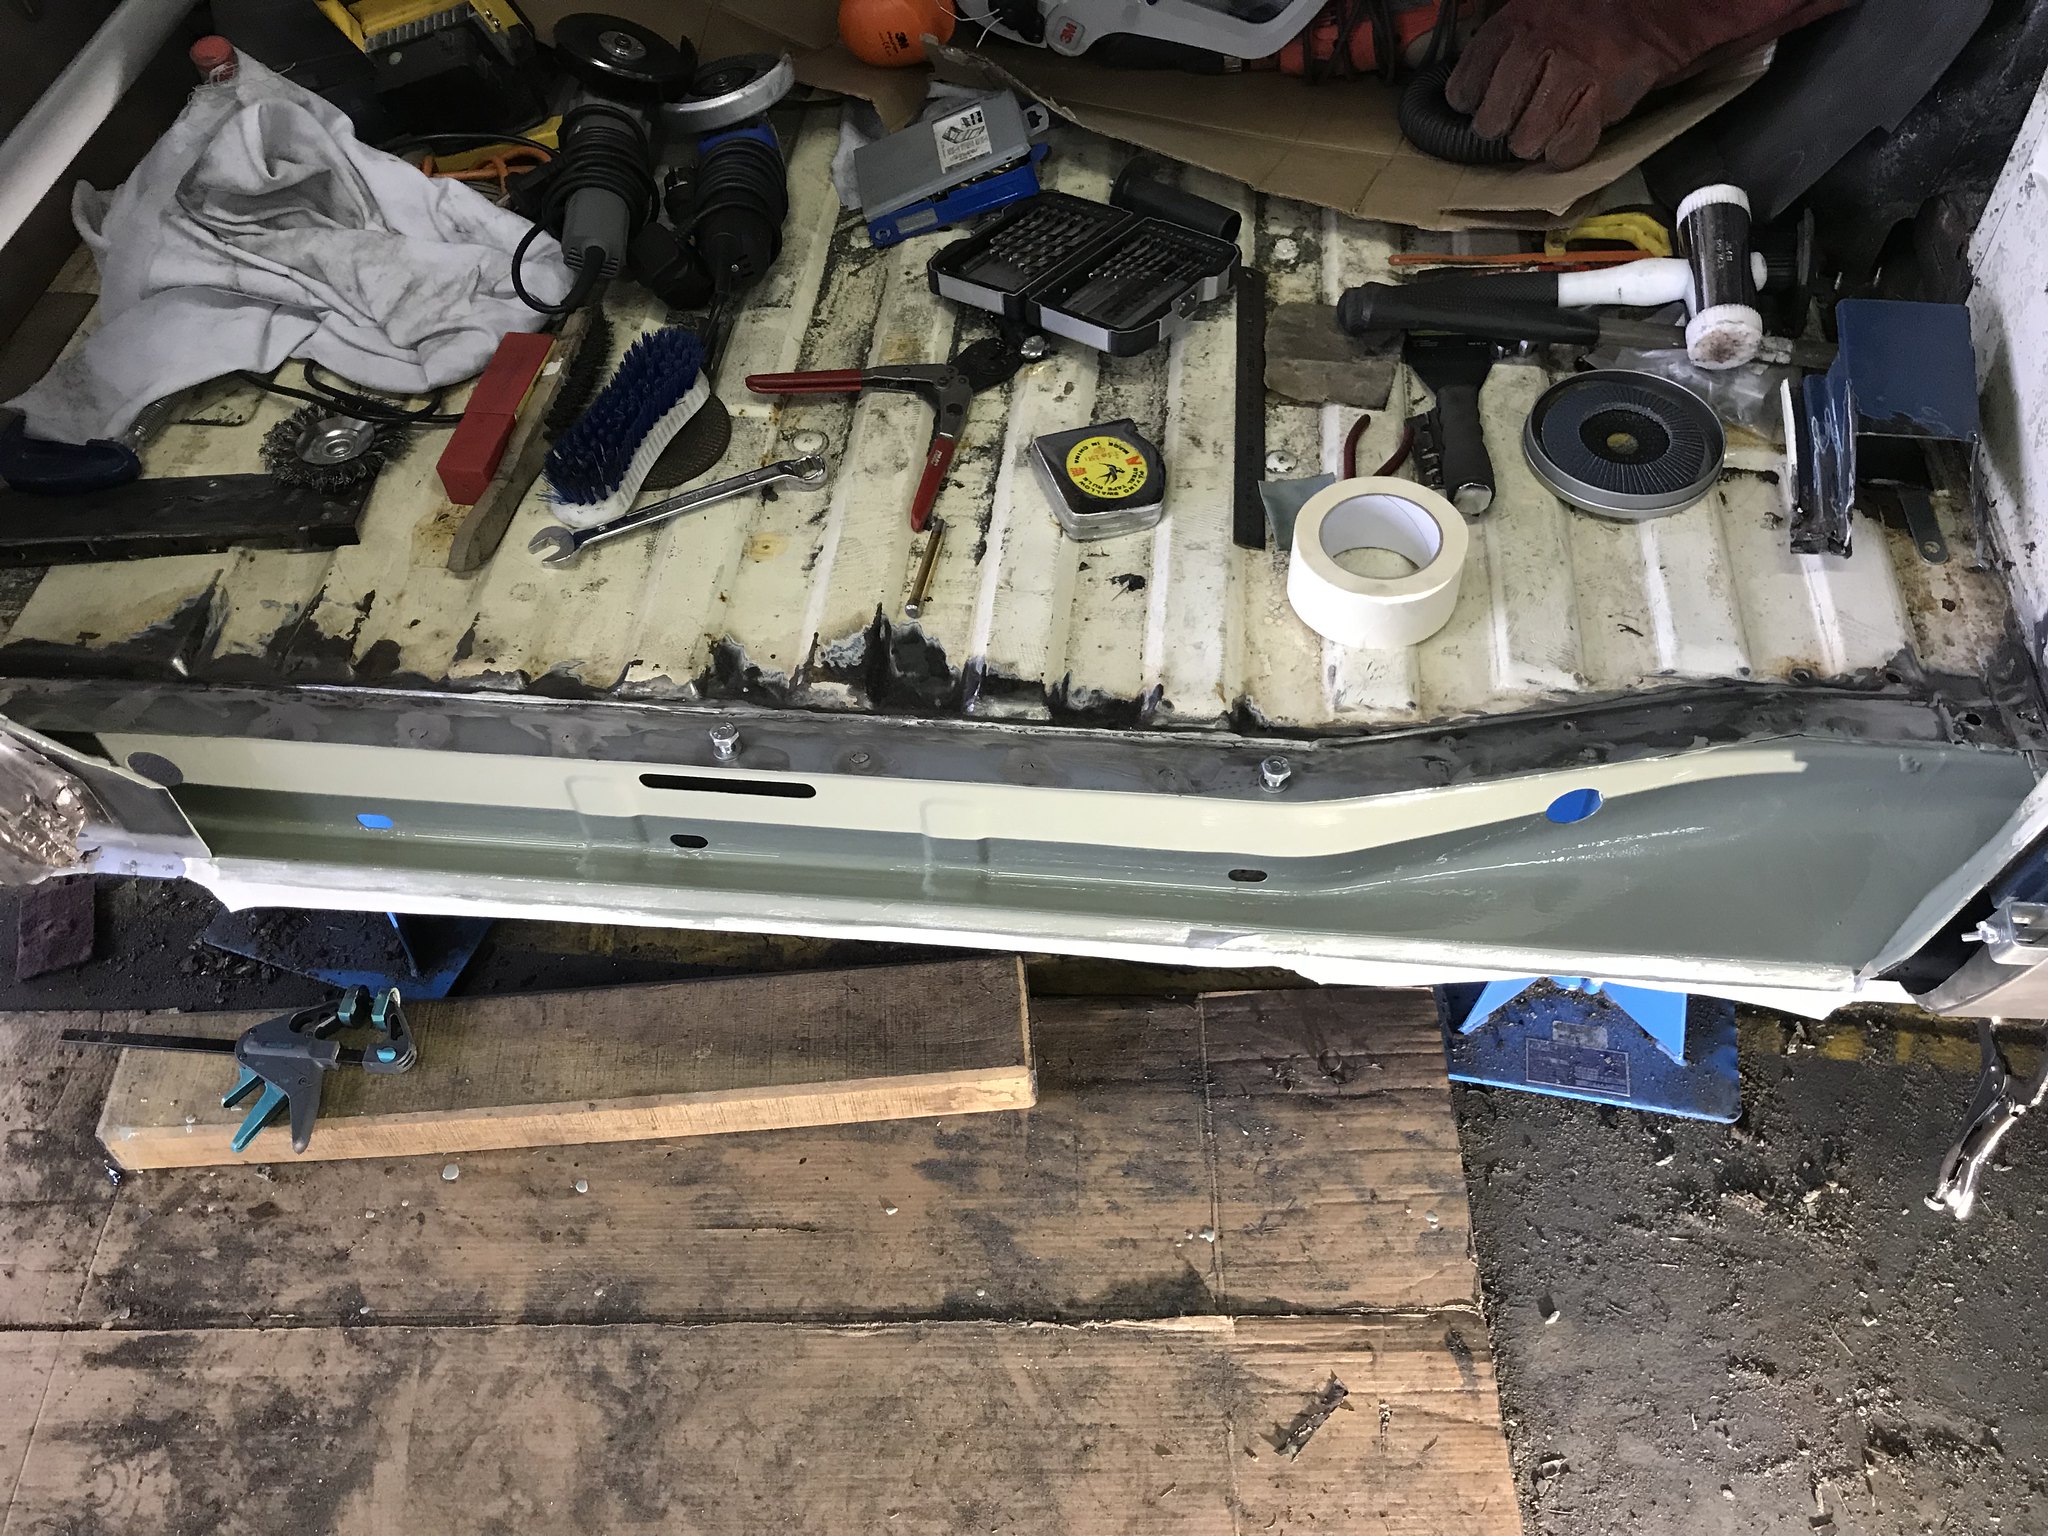
So firstly I forgot to show the chassis panels dressed after welding, you can jus5 see where the panel bond has oozed out and sealed the edge. It will get PU sealer and stonechip before paint.
So my sill and rear arch turned up from BW today, can’t fault the service and parts so a comparison of the sill I bought and the replica from BW
Underside rear
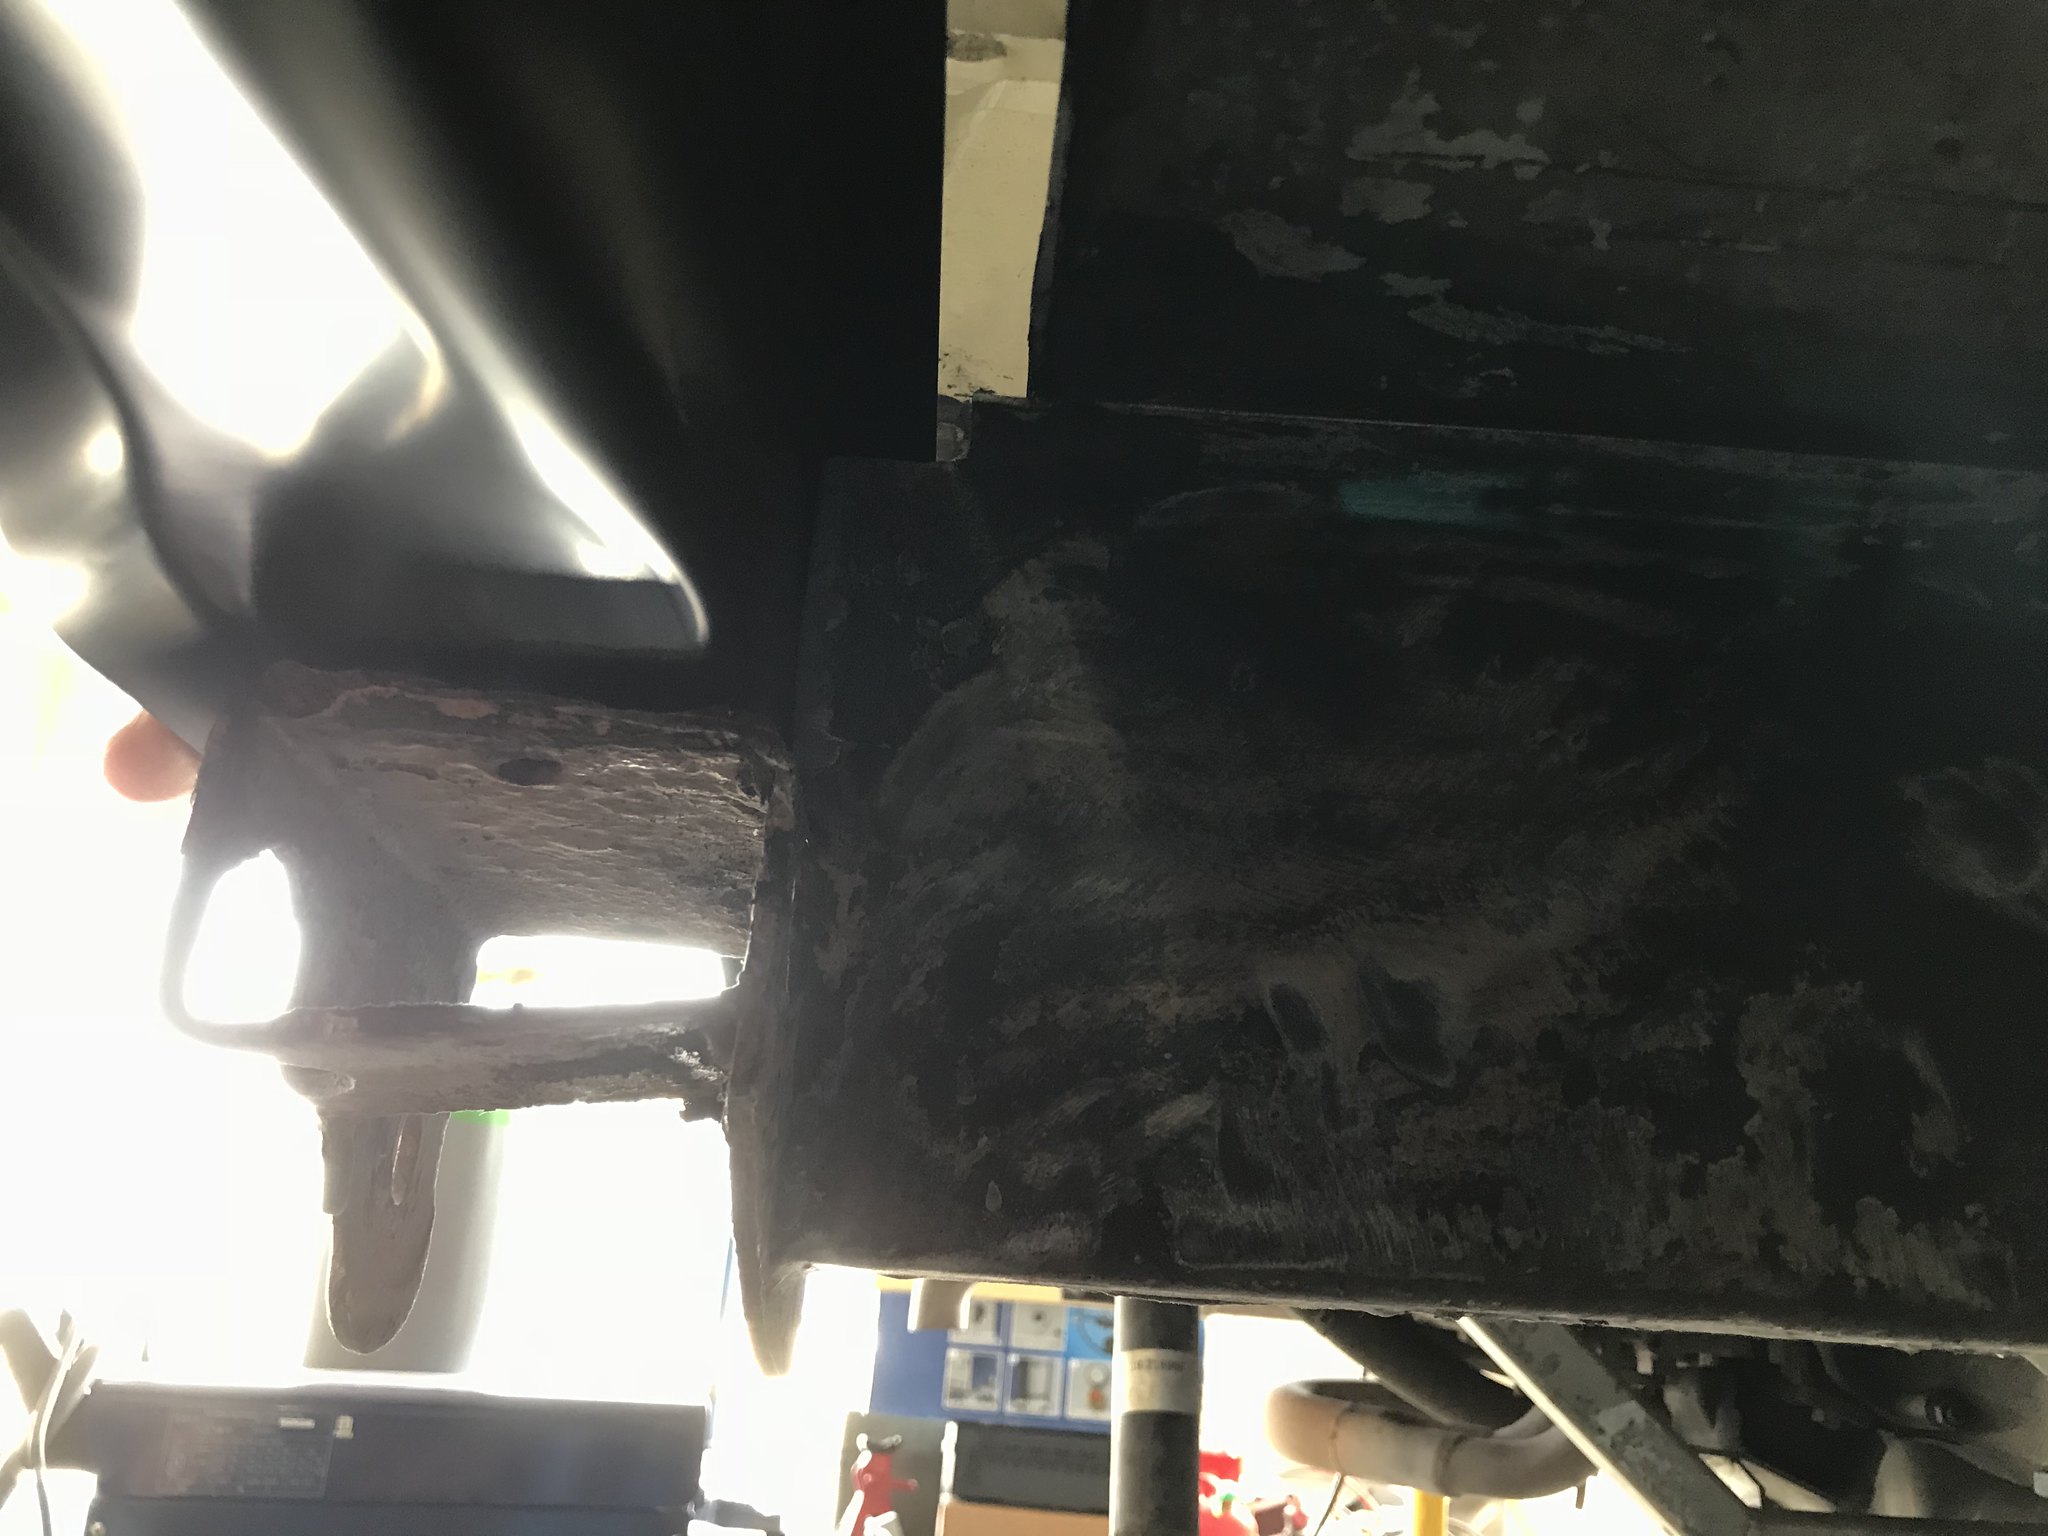
Gap is much larger on the nonBW sill
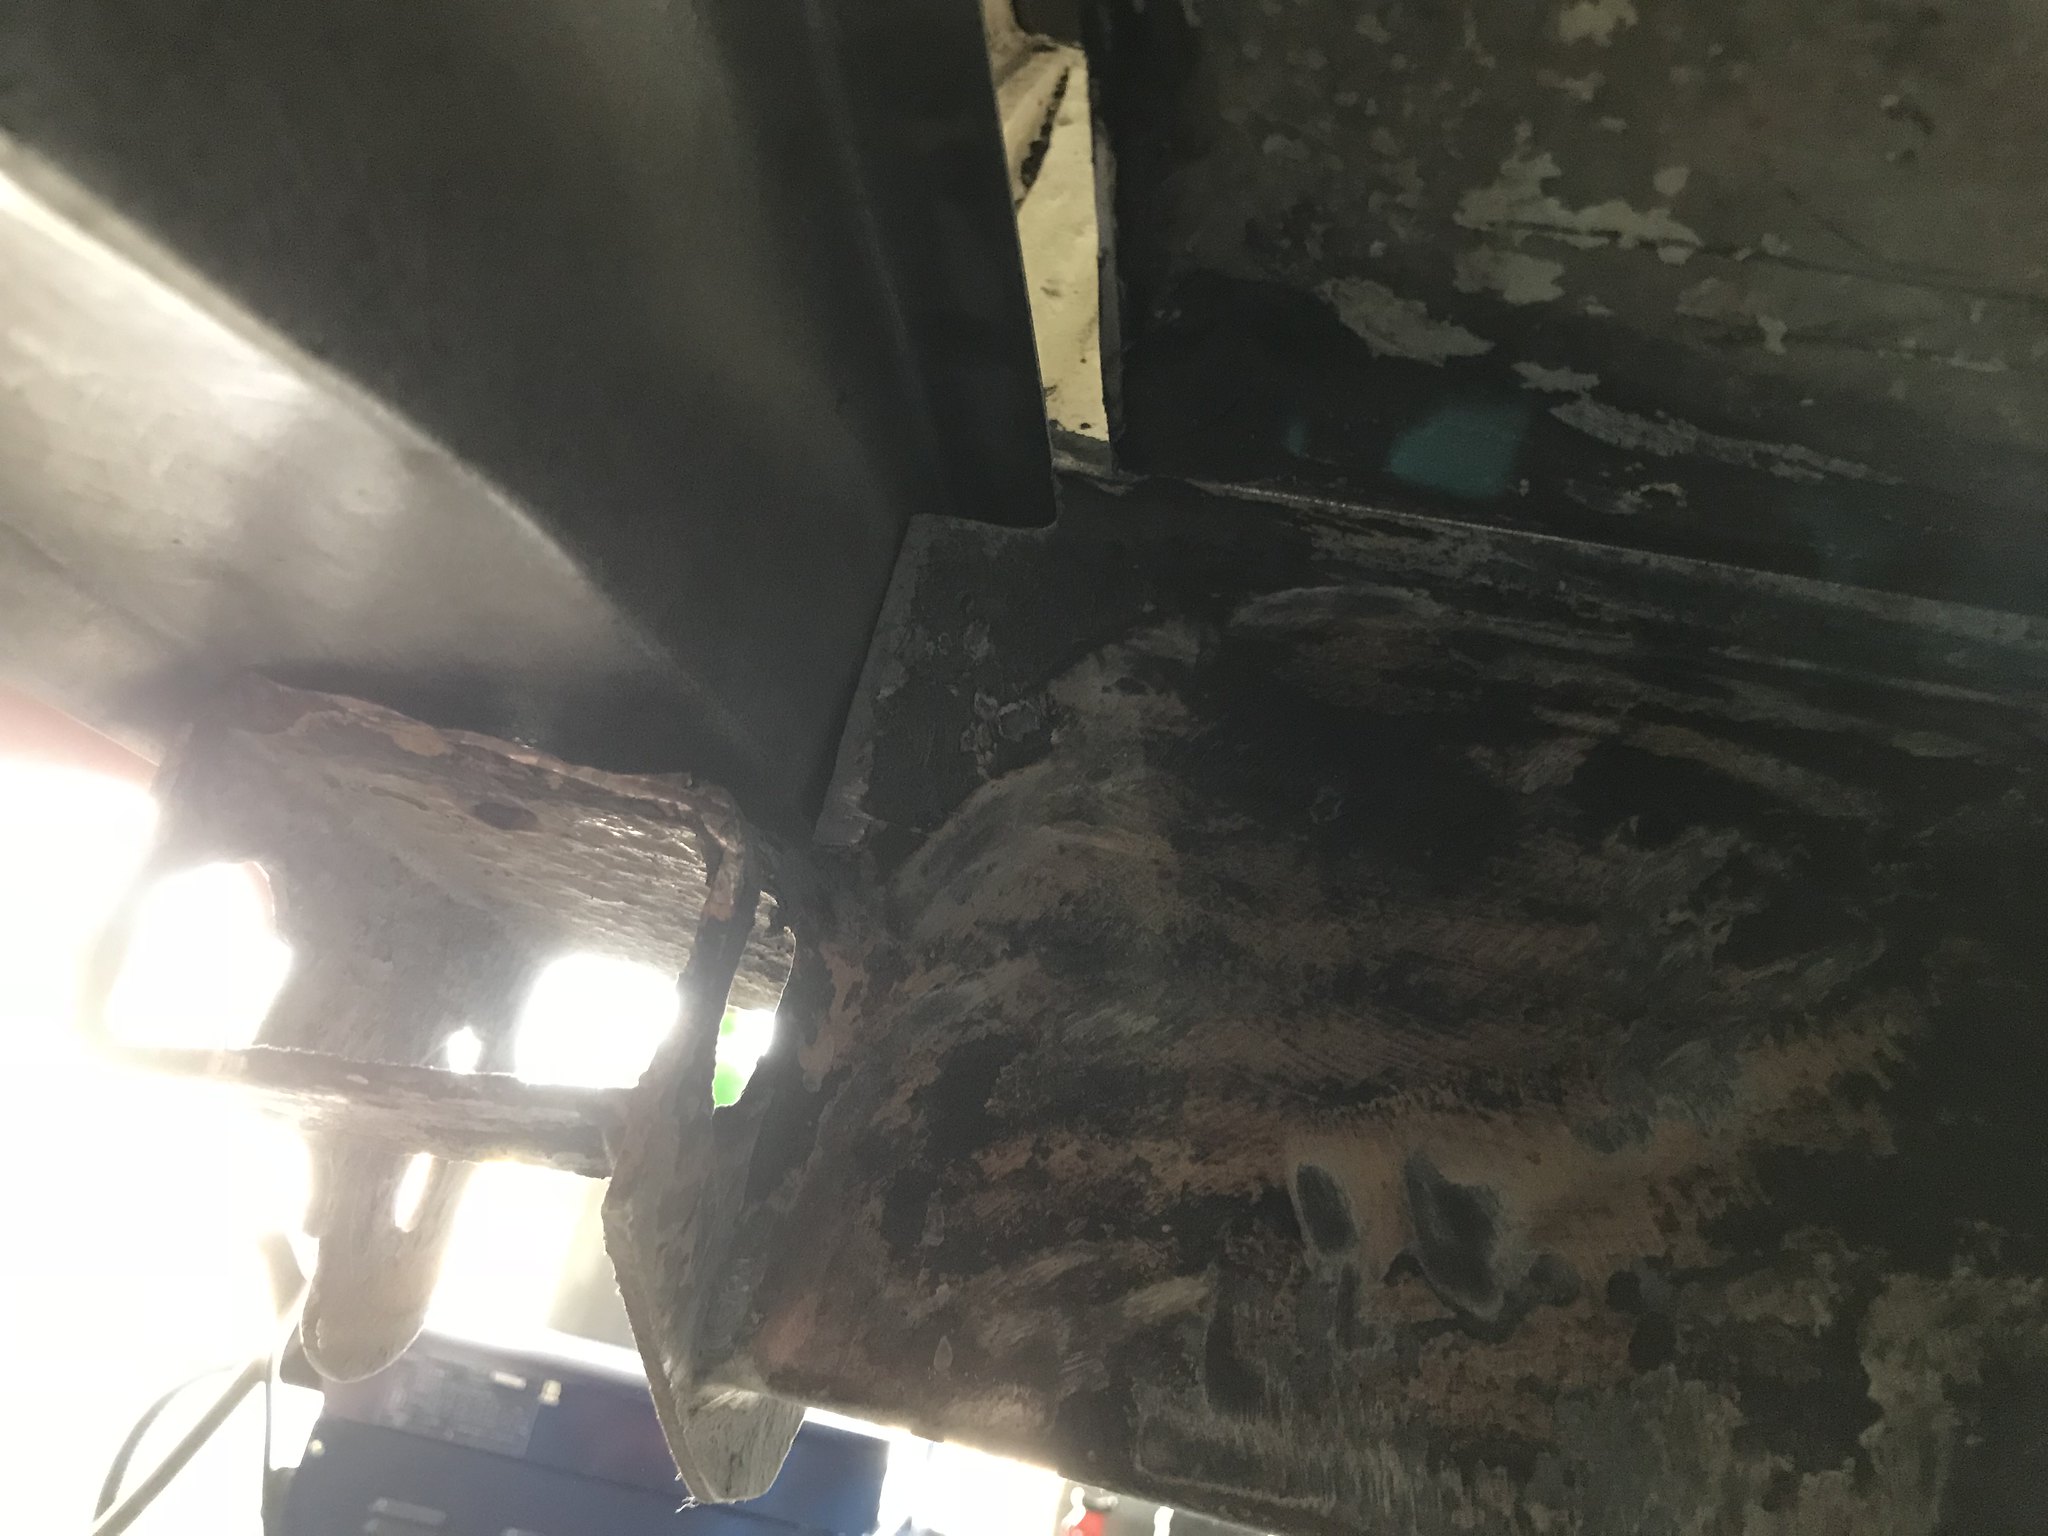
Front of inner sill
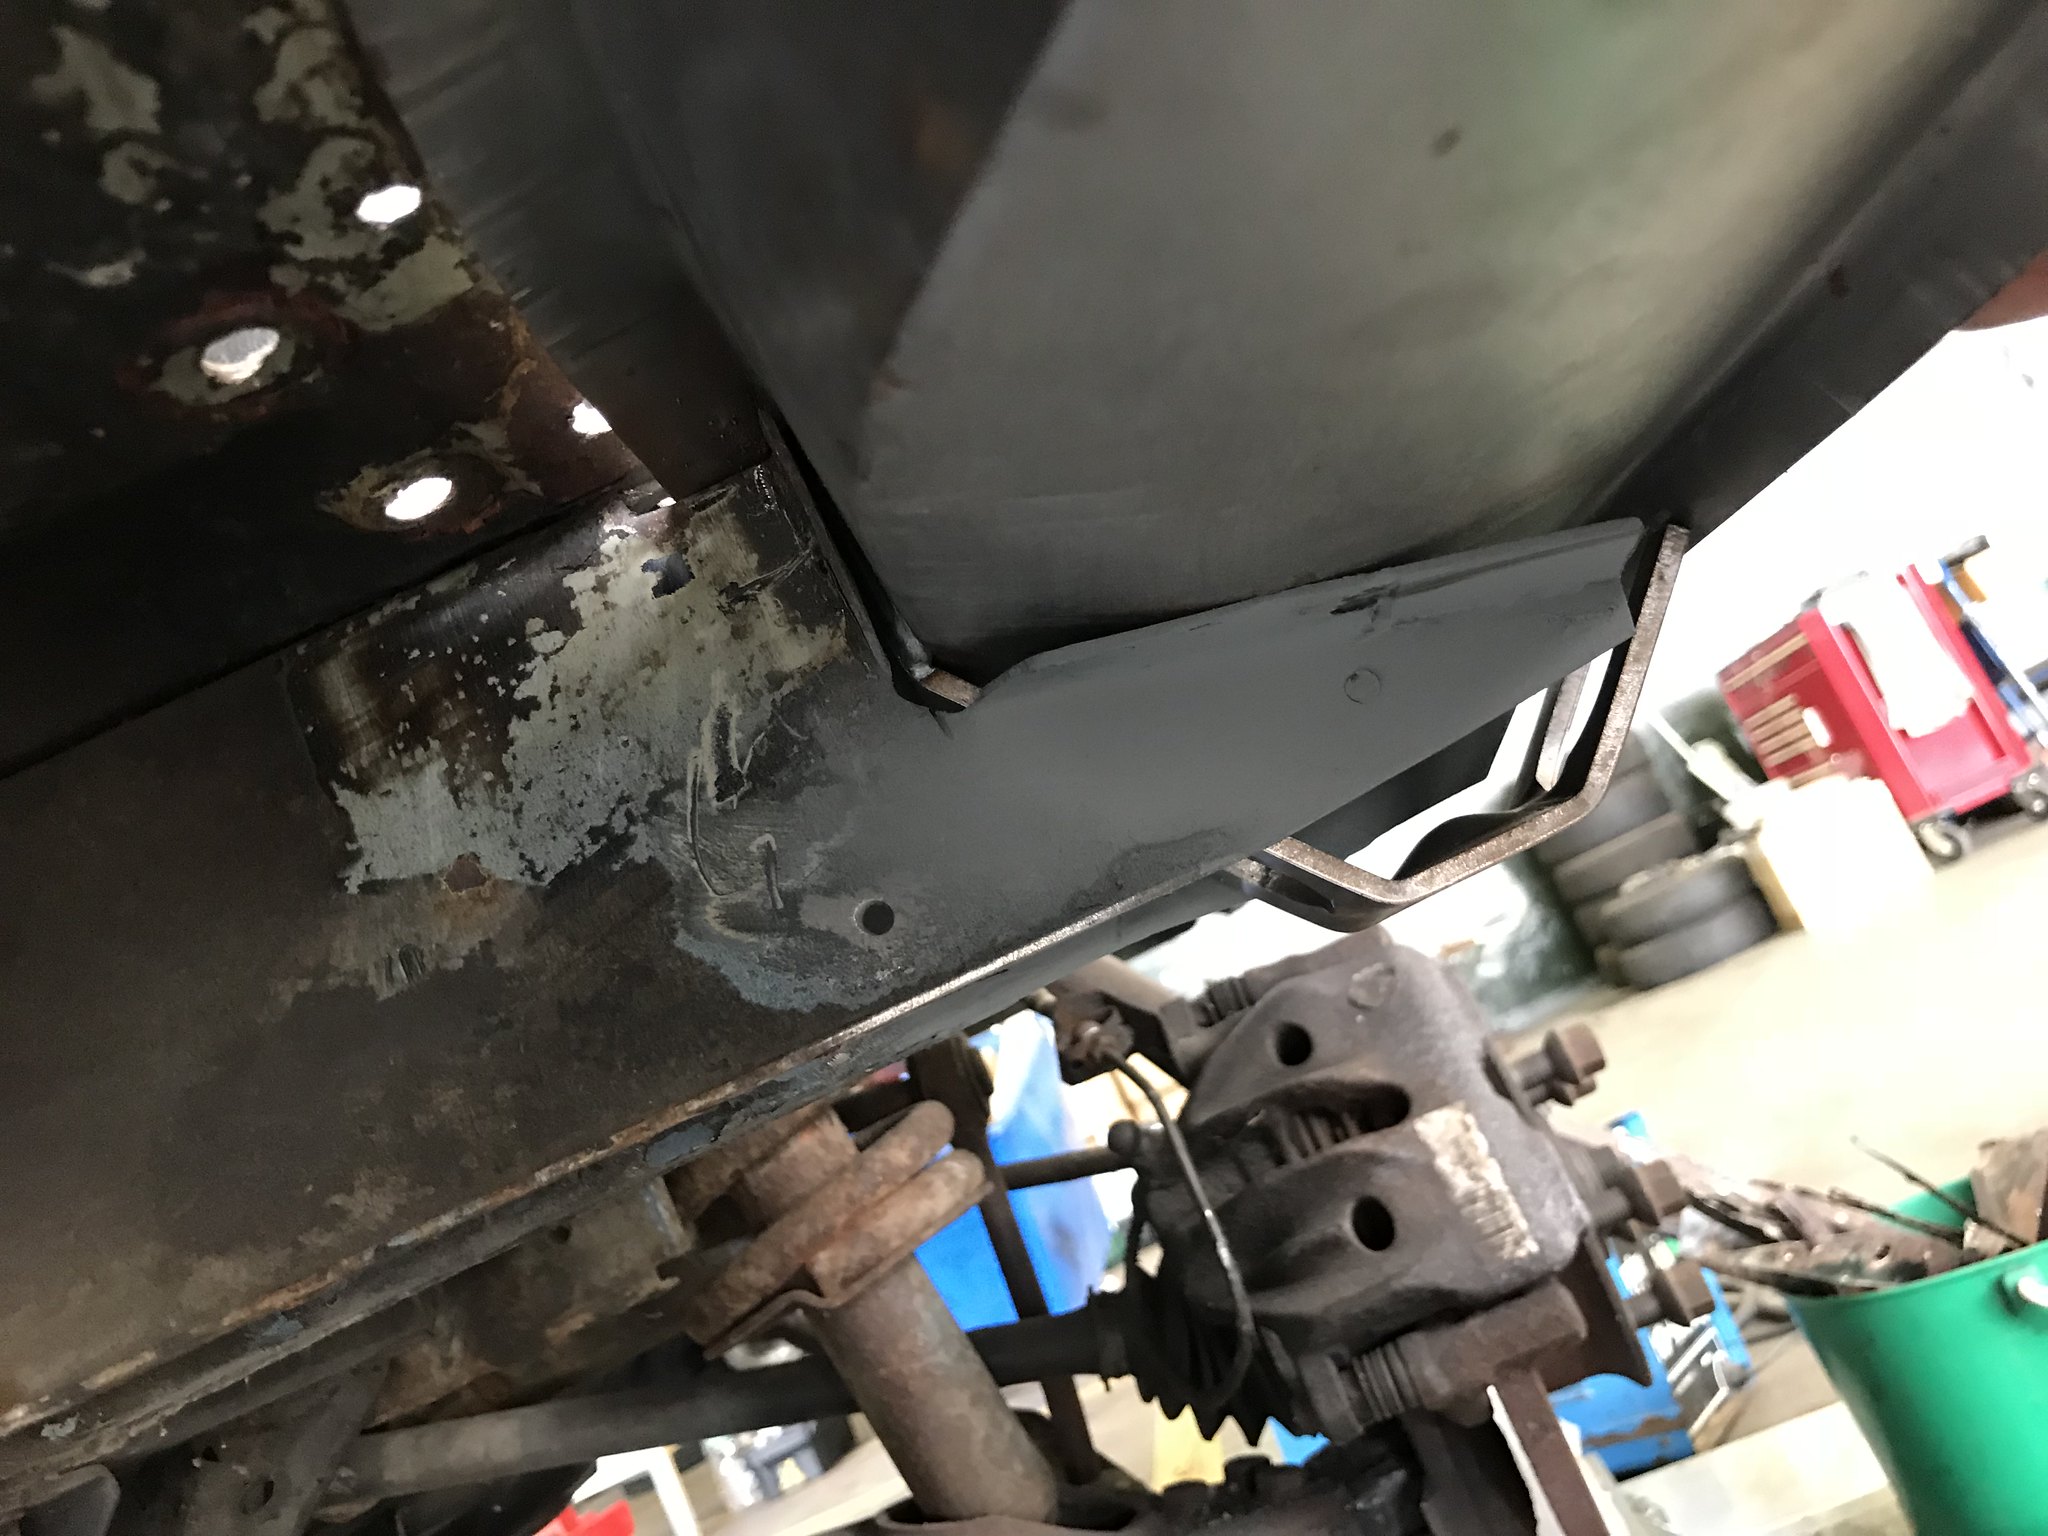
Much better fit from BW part
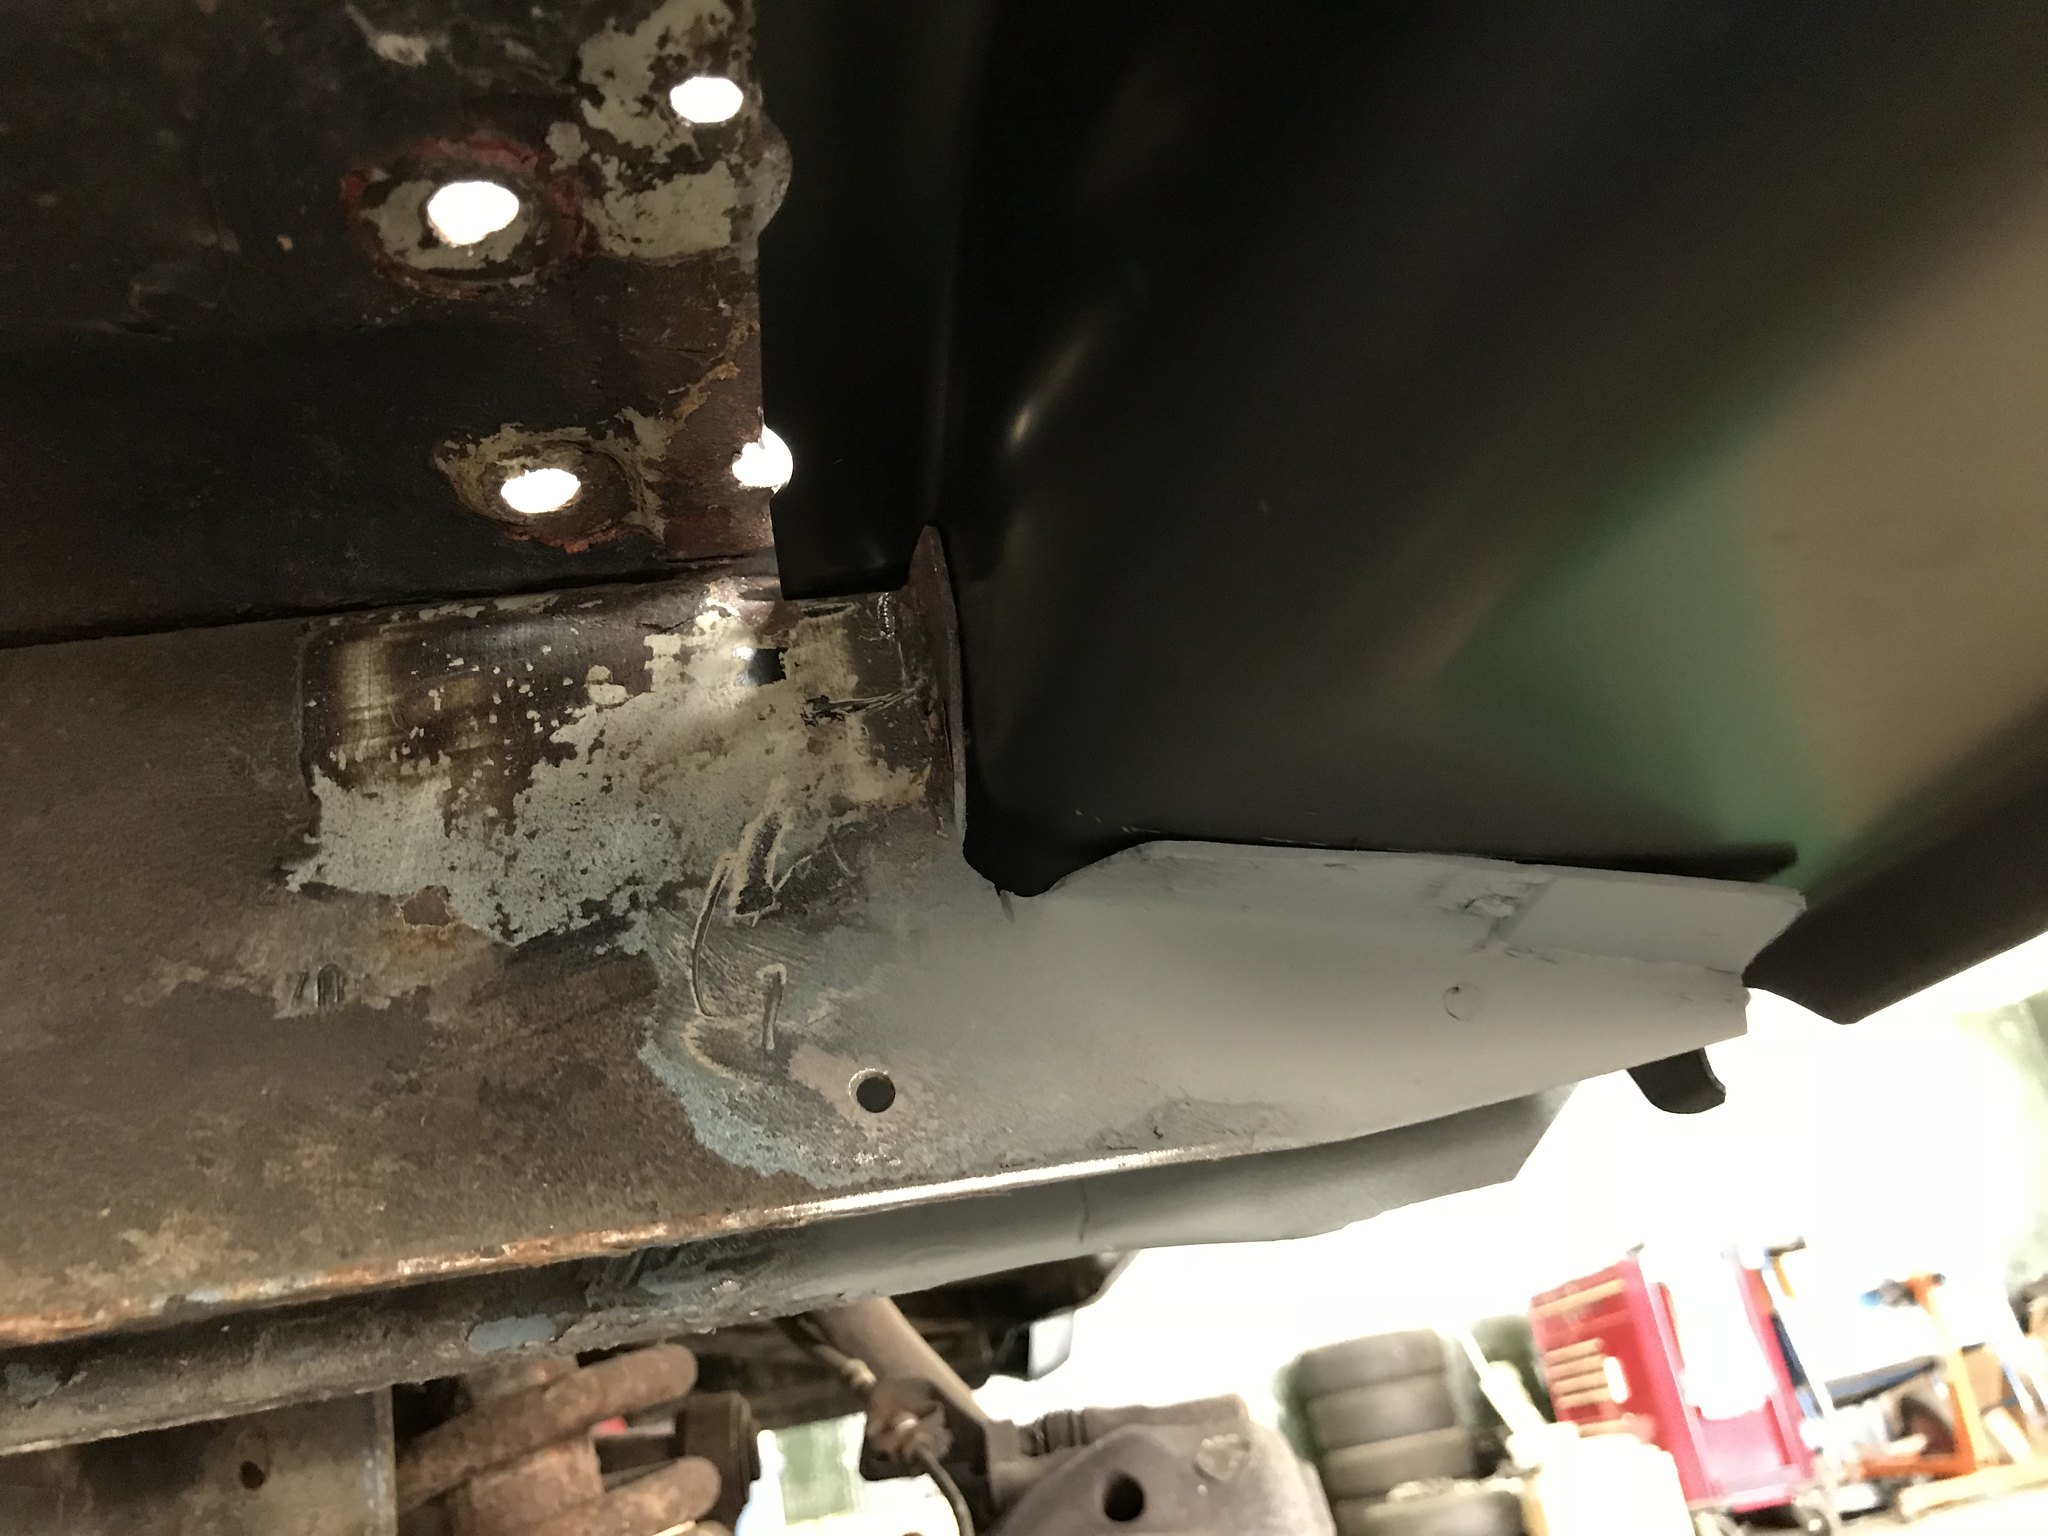
Especially as it has all the drain holes etc, this was a test fit before repairing the floor edge
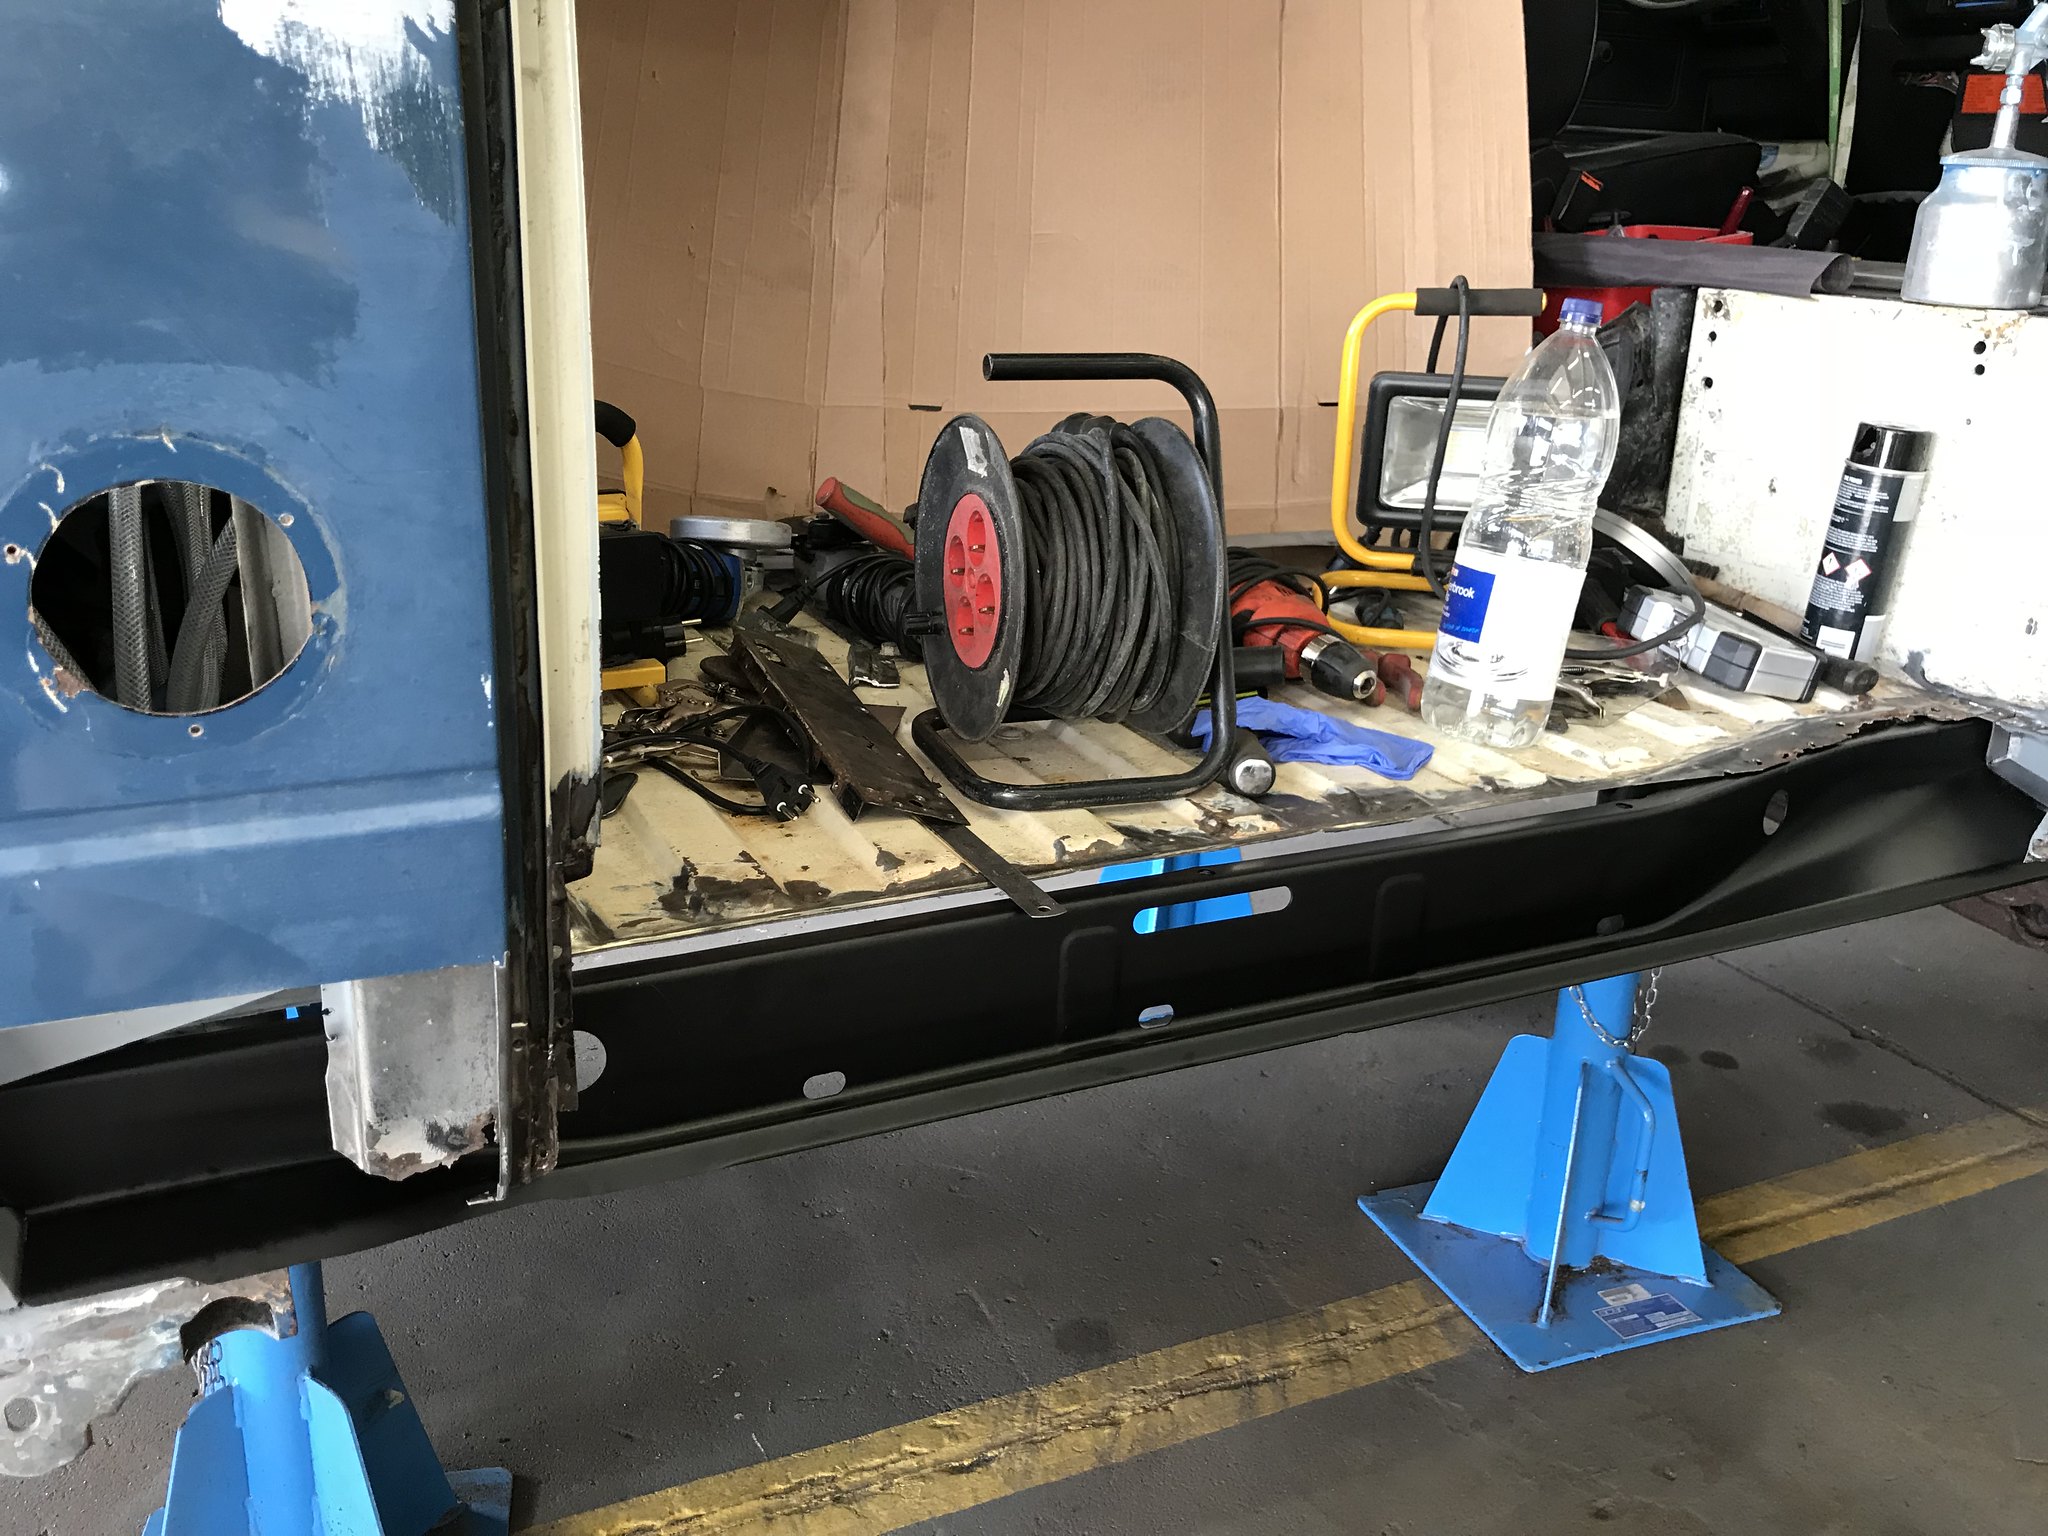
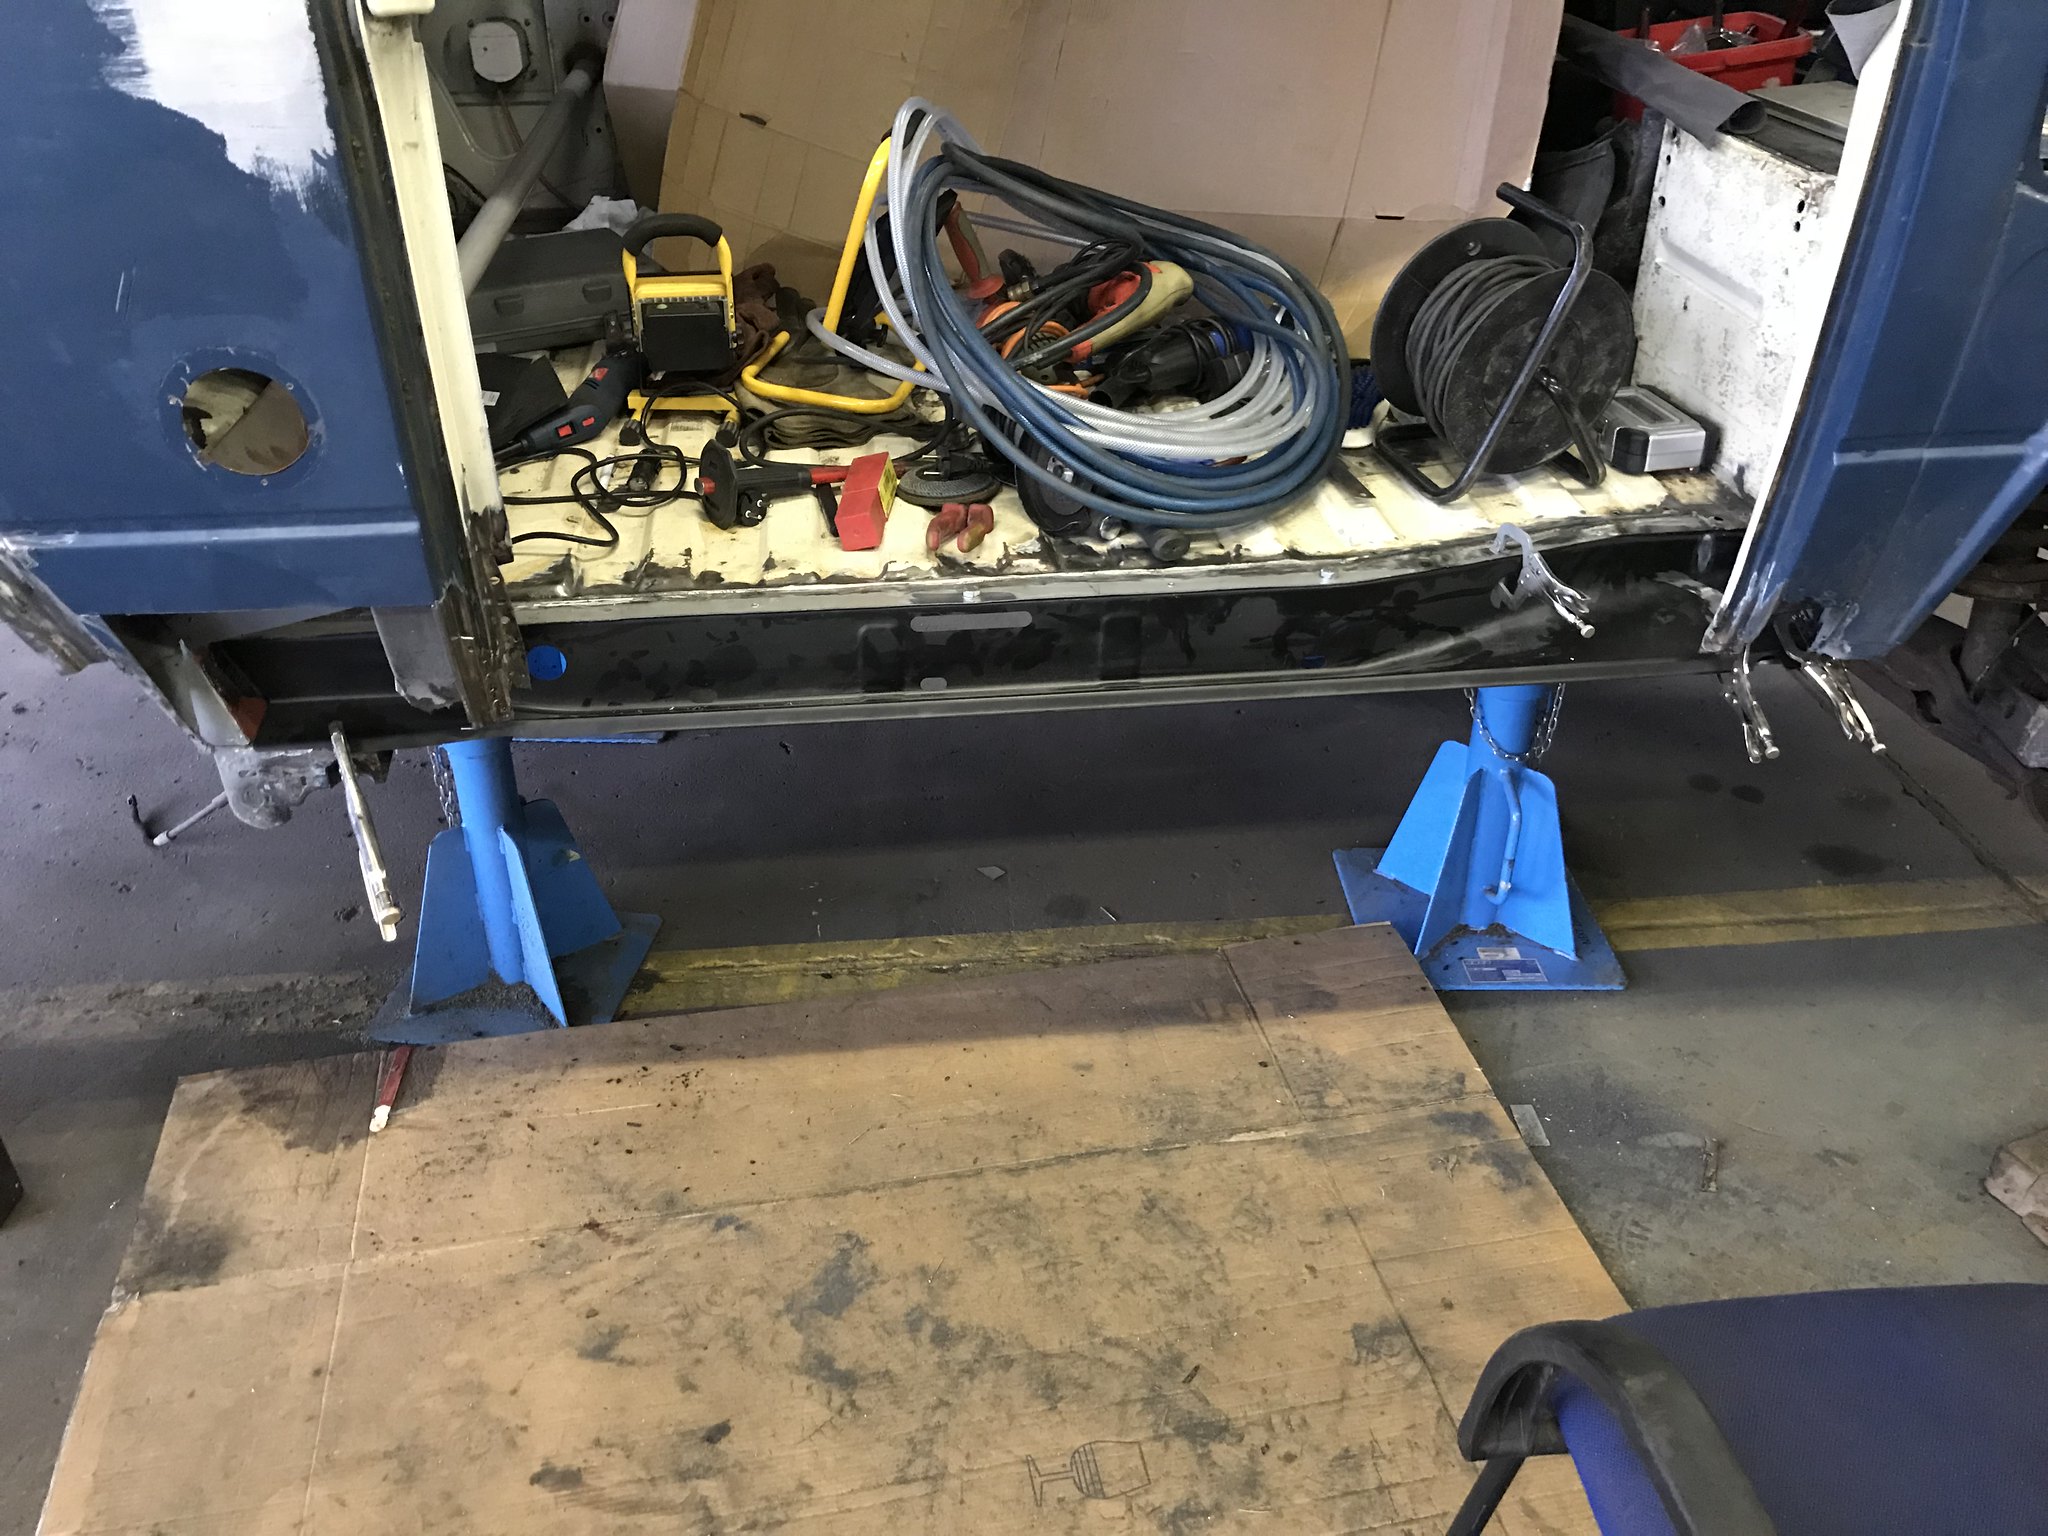
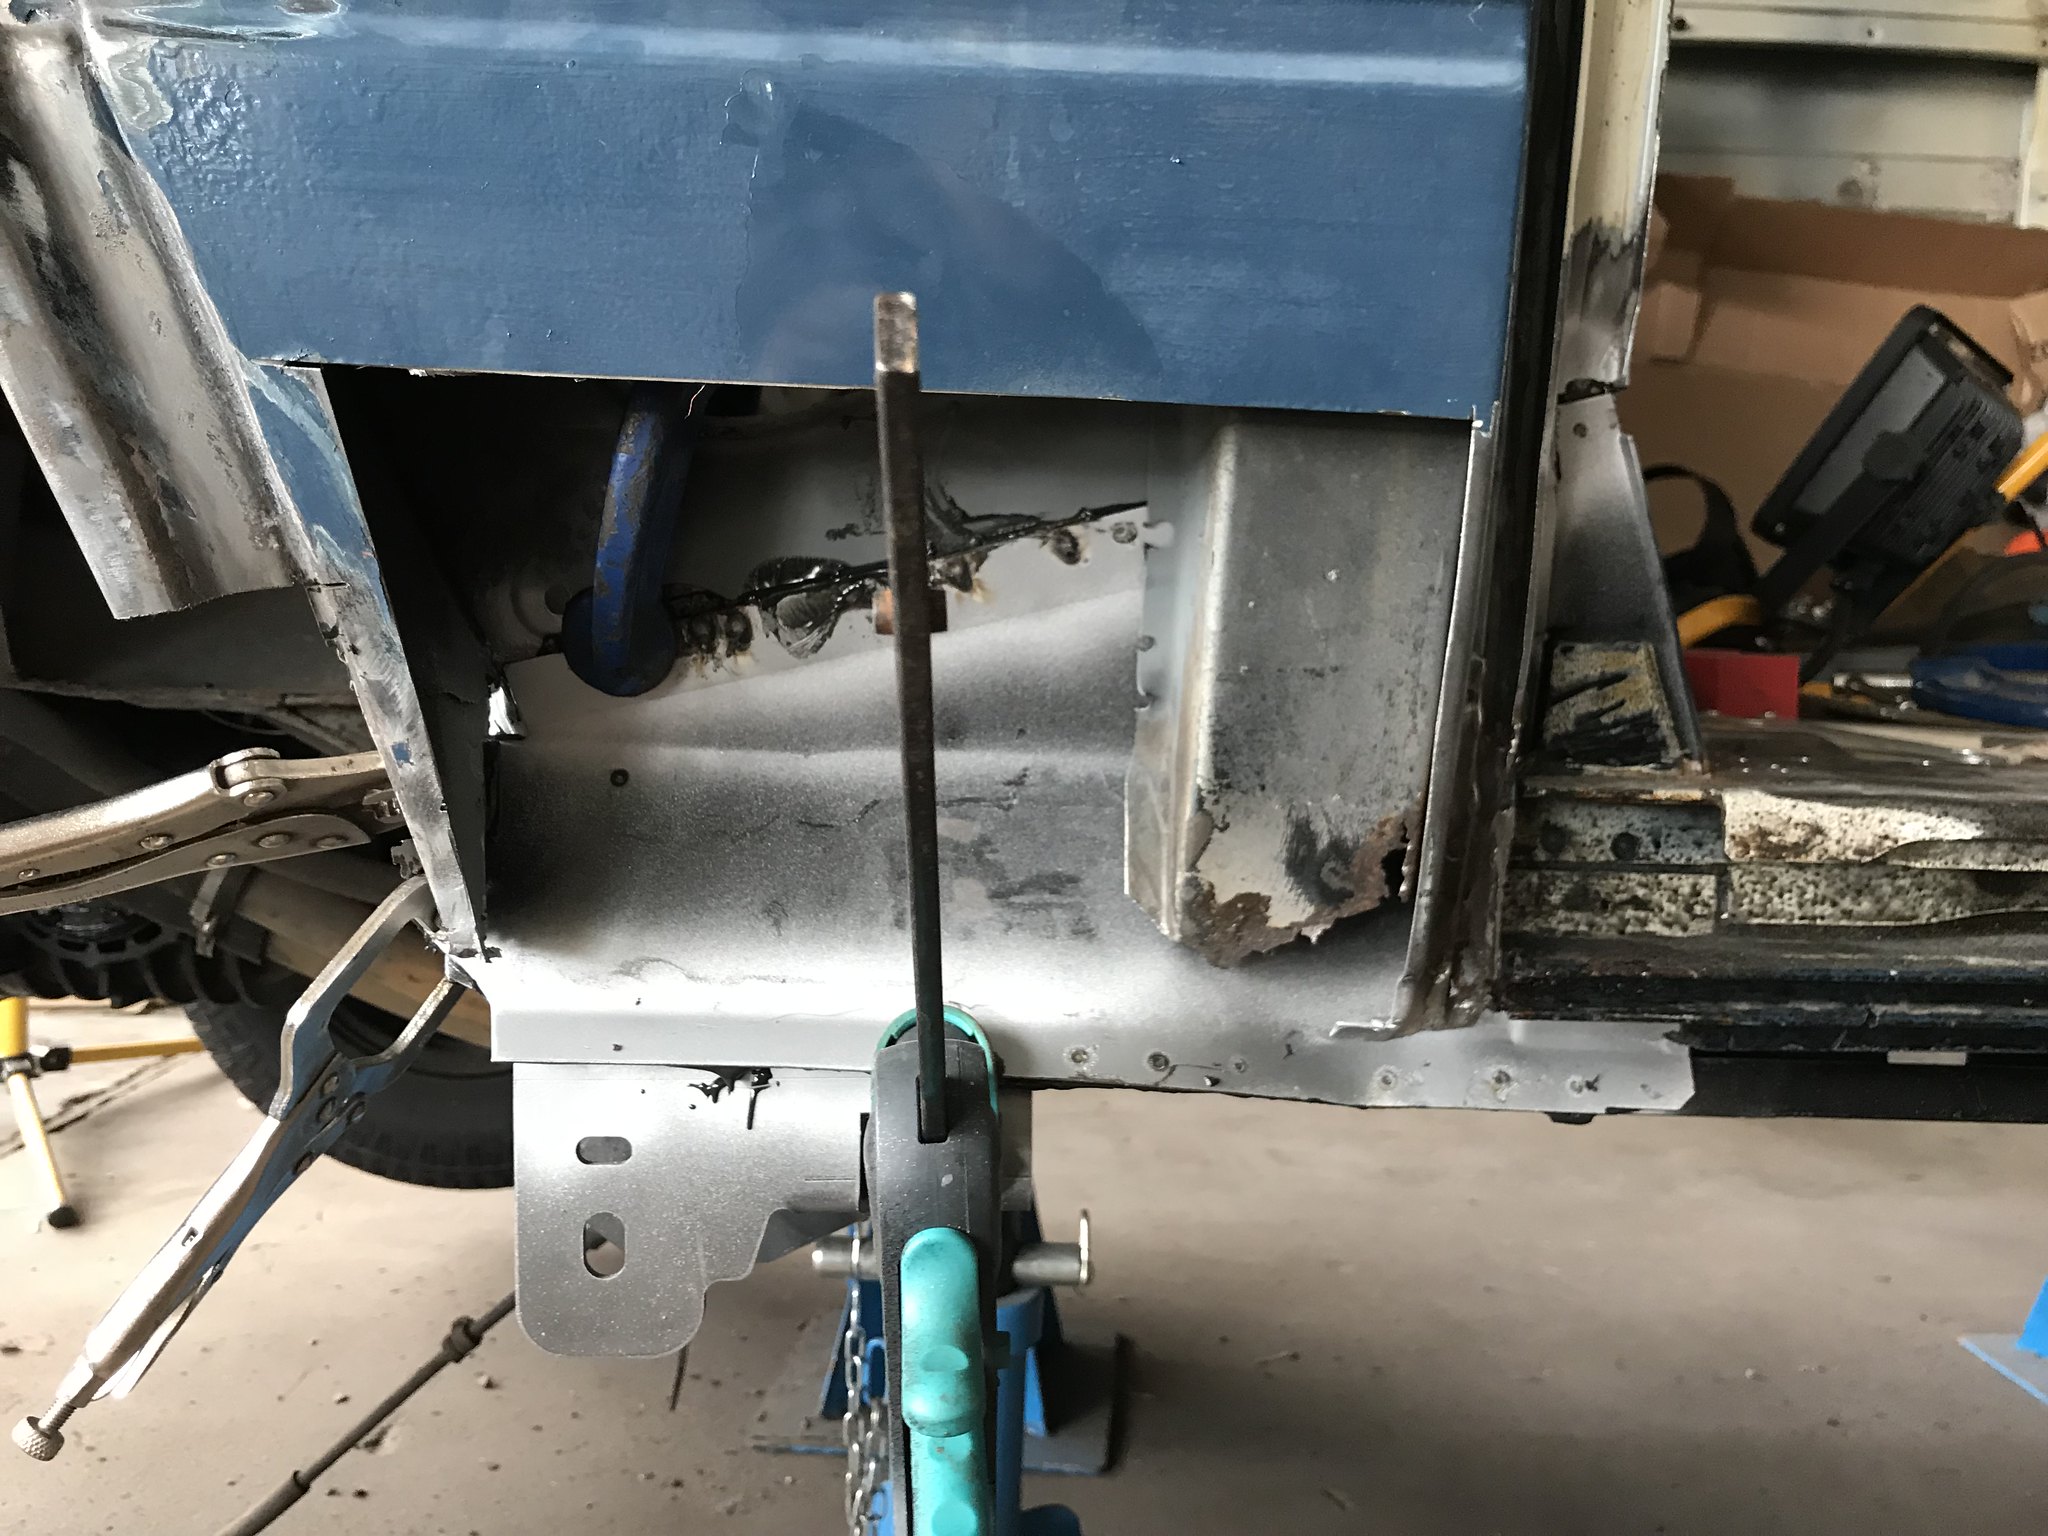
So good progress now, edge of the floor repaired and in the nick of time I remembered to weld the jacking point onto the sill. Panel bond applied before spot welding in place, except I forgot to prep the sill with zinc primer so the spot welder didn’t work. So I’ll wait for the bond to go off while it’s held in with clamps and a few pot rivets for temporary fit. Ill drill out and plug weld the flanges and seam weld the jacking point tomorrow.
Even with the primer mistake it still feels like a big leap forward, I will brush on CV primer tomorrow and get the b and c pillar started.
So my sill and rear arch turned up from BW today, can’t fault the service and parts so a comparison of the sill I bought and the replica from BW
Underside rear
Gap is much larger on the nonBW sill
Front of inner sill
Much better fit from BW part
Especially as it has all the drain holes etc, this was a test fit before repairing the floor edge
So good progress now, edge of the floor repaired and in the nick of time I remembered to weld the jacking point onto the sill. Panel bond applied before spot welding in place, except I forgot to prep the sill with zinc primer so the spot welder didn’t work. So I’ll wait for the bond to go off while it’s held in with clamps and a few pot rivets for temporary fit. Ill drill out and plug weld the flanges and seam weld the jacking point tomorrow.
Even with the primer mistake it still feels like a big leap forward, I will brush on CV primer tomorrow and get the b and c pillar started.
Last edited by adie89 on 24 Aug 2018, 19:24, edited 1 time in total.
Greta: 85’ LHD 2.5L Subaru 14in Syncro
http://forum.club8090.co.uk/viewtopic.php?t=165773
http://forum.club8090.co.uk/viewtopic.php?t=165773
-
RogerT
- Registered user
- Posts: 1815
- Joined: 10 May 2013, 11:59
- 80-90 Mem No: 13706
- Location: Central Scotland
Re: Procrastinating never got anyone anywhere
That ropey inner sill looks way off, and nothing like the schofields product I have (or the product in their web shop). What on earth did you get sent? The black, pressed item from BW looks identical to my schofields item.
Coming together nicely tho wish my rear swing arm mount was still in place...
Are you going to clamp the sill down on top of your mount to close the gap?
Coming together nicely tho
Are you going to clamp the sill down on top of your mount to close the gap?
Have you ever seen an unhappy fool?
88 Transporter with hitop camper conversion, 1.6td.
88 Transporter with hitop camper conversion, 1.6td.
-
adie89
- Registered user
- Posts: 293
- Joined: 04 Sep 2012, 21:25
- 80-90 Mem No: 11532
- Location: Wiltshire
Re: Procrastinating never got anyone anywhere
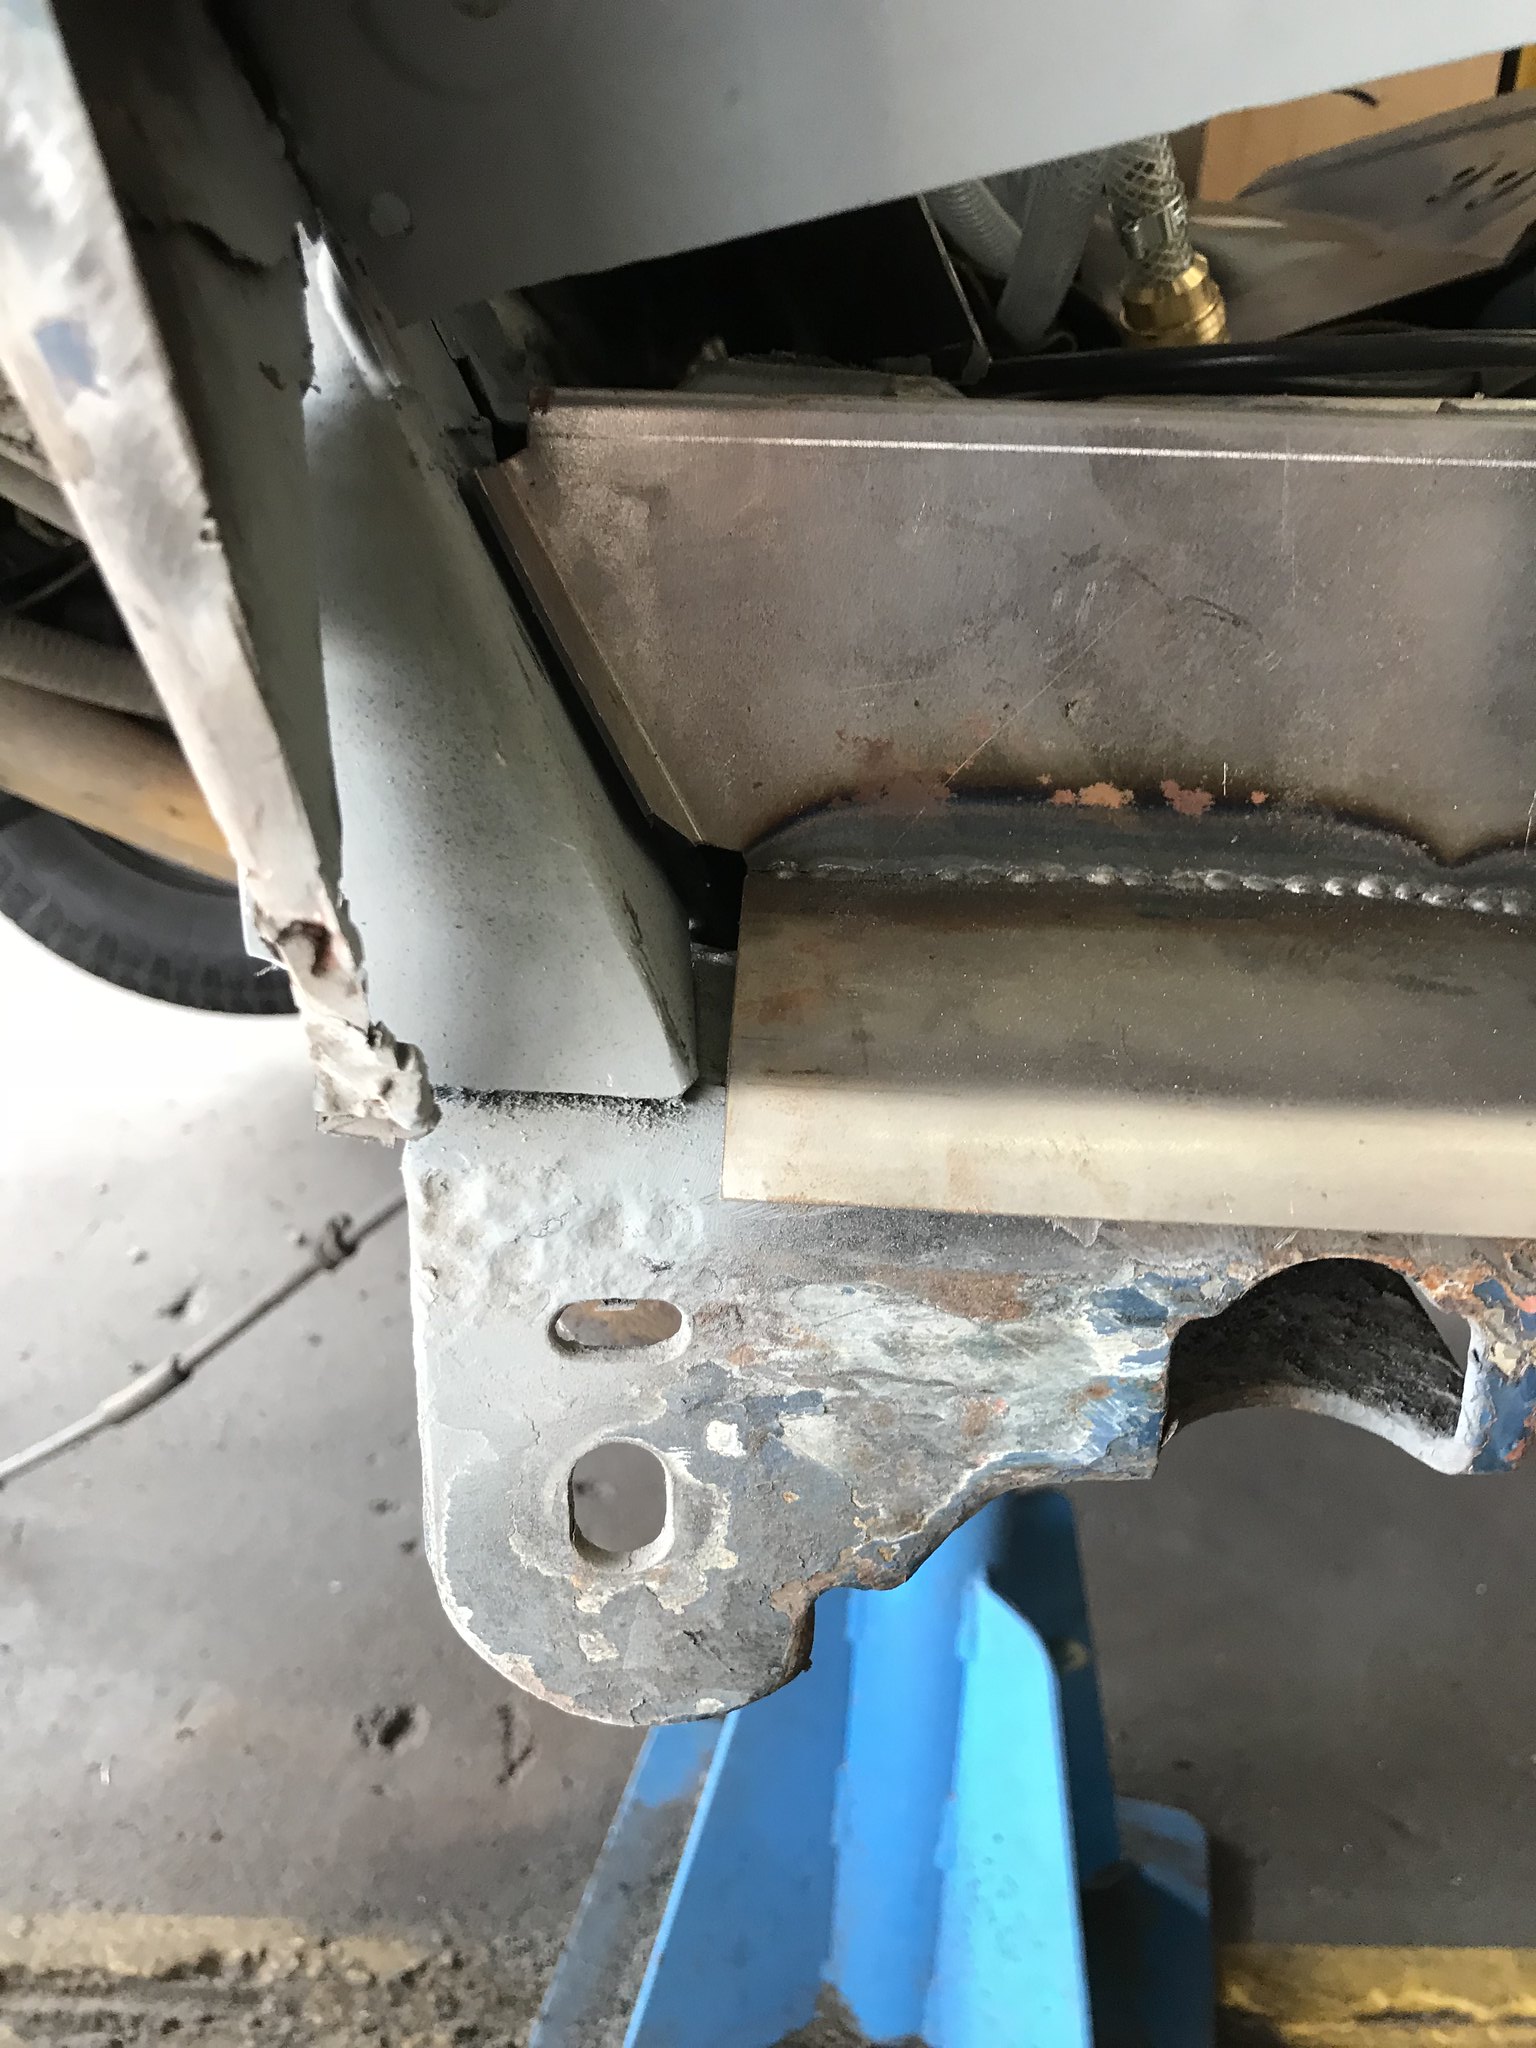
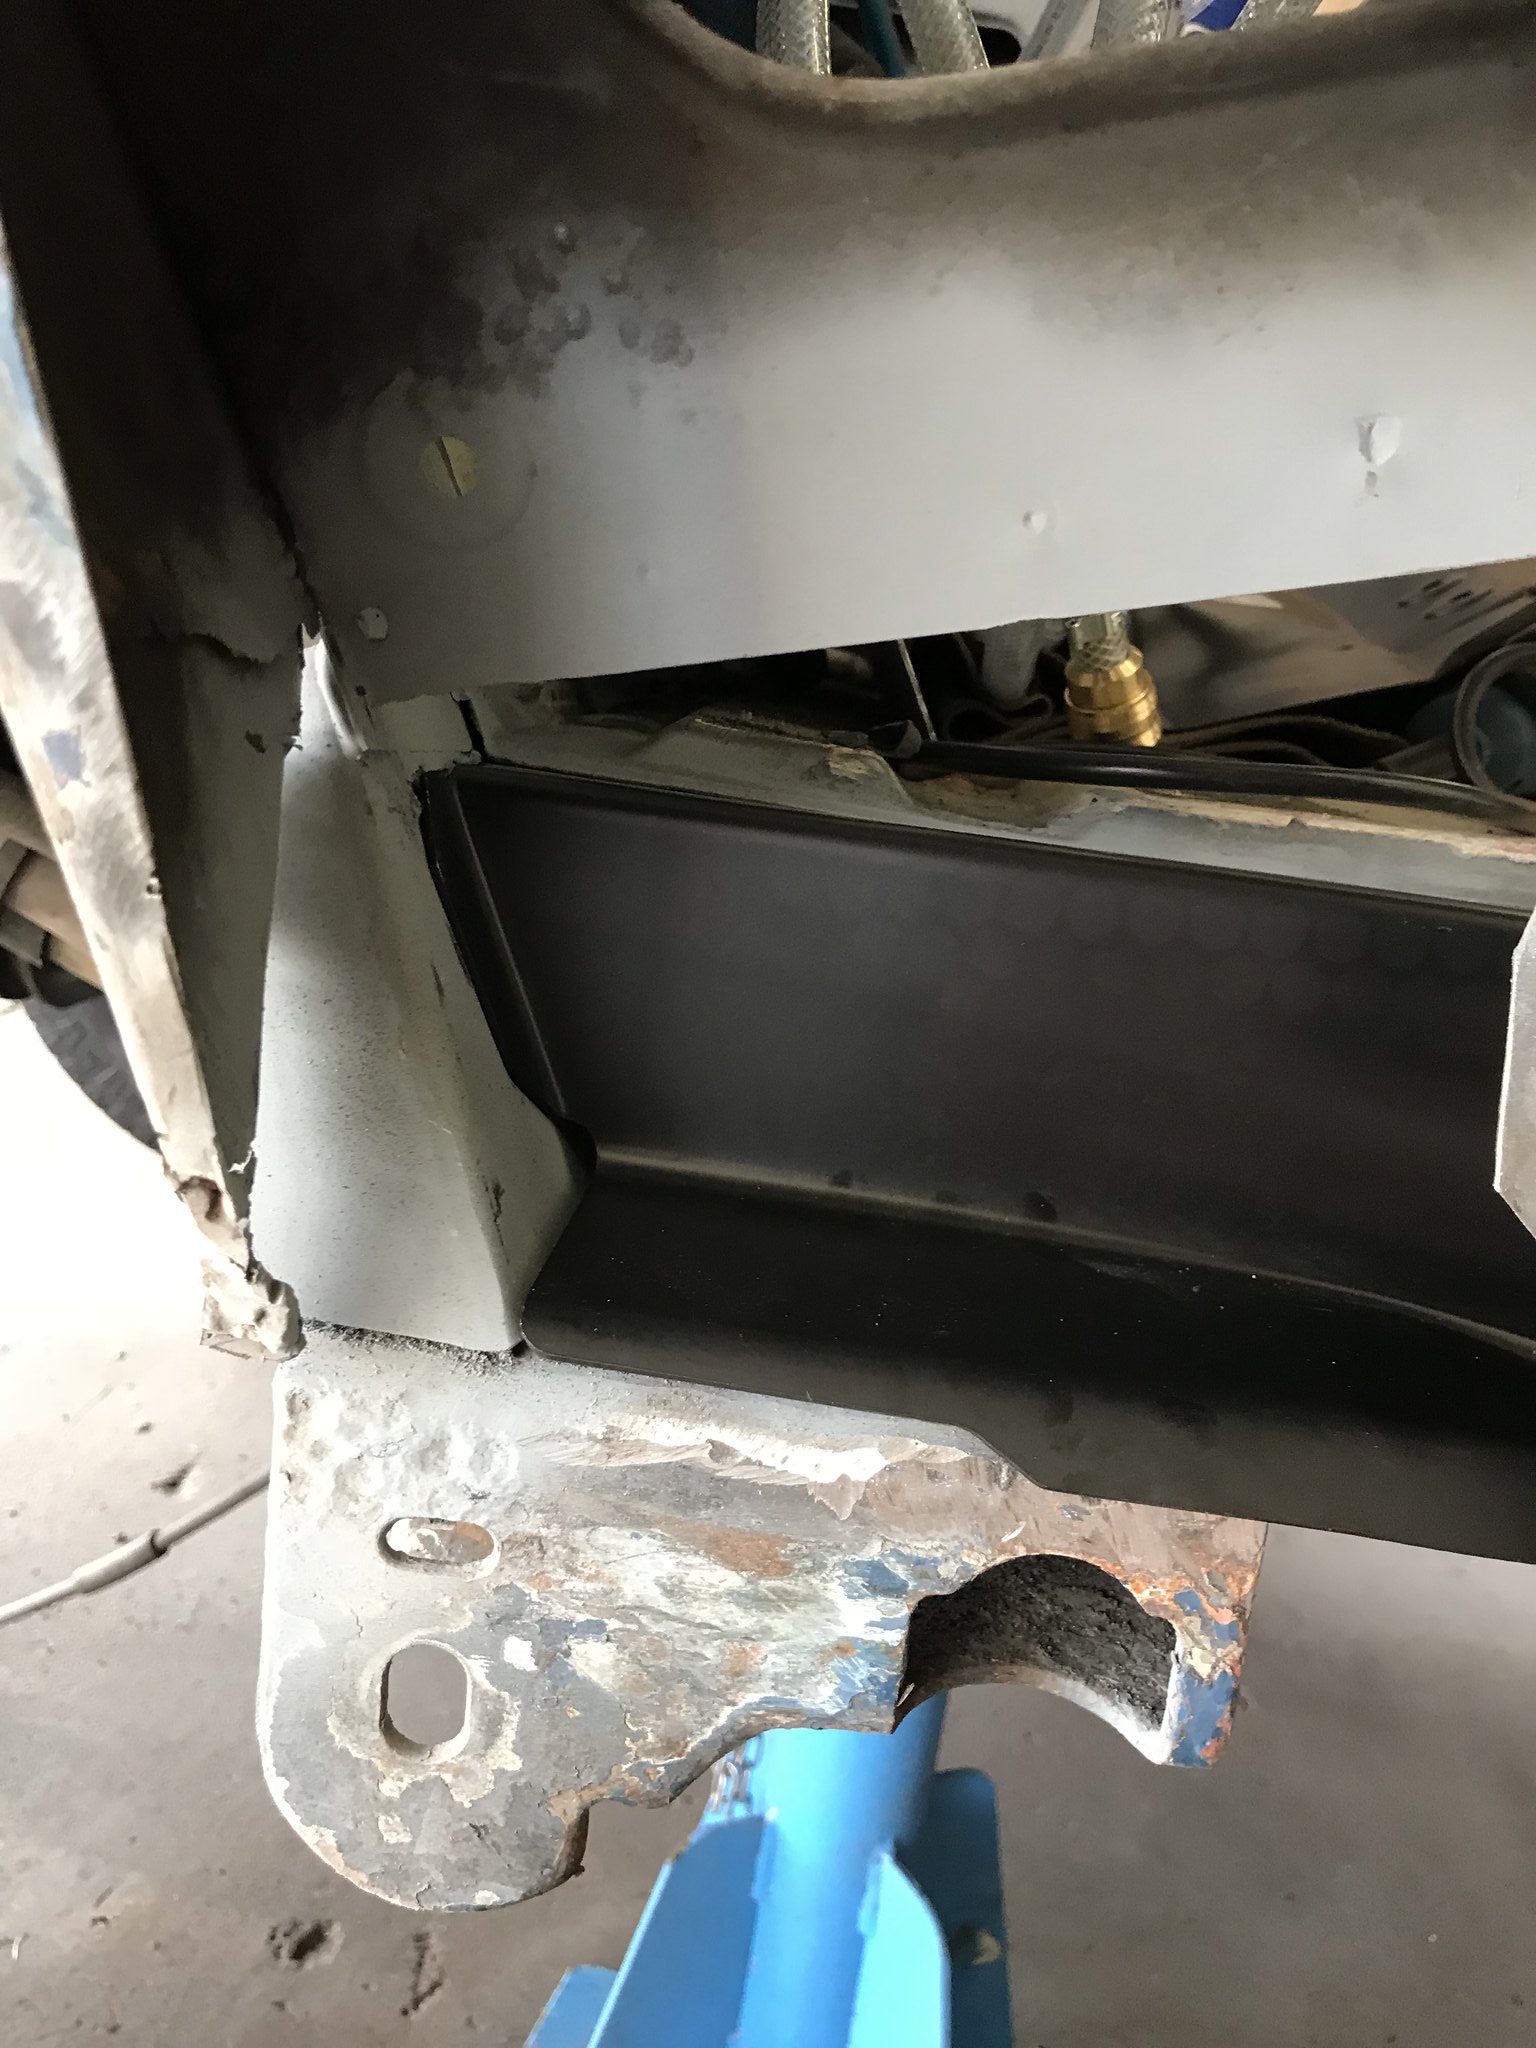
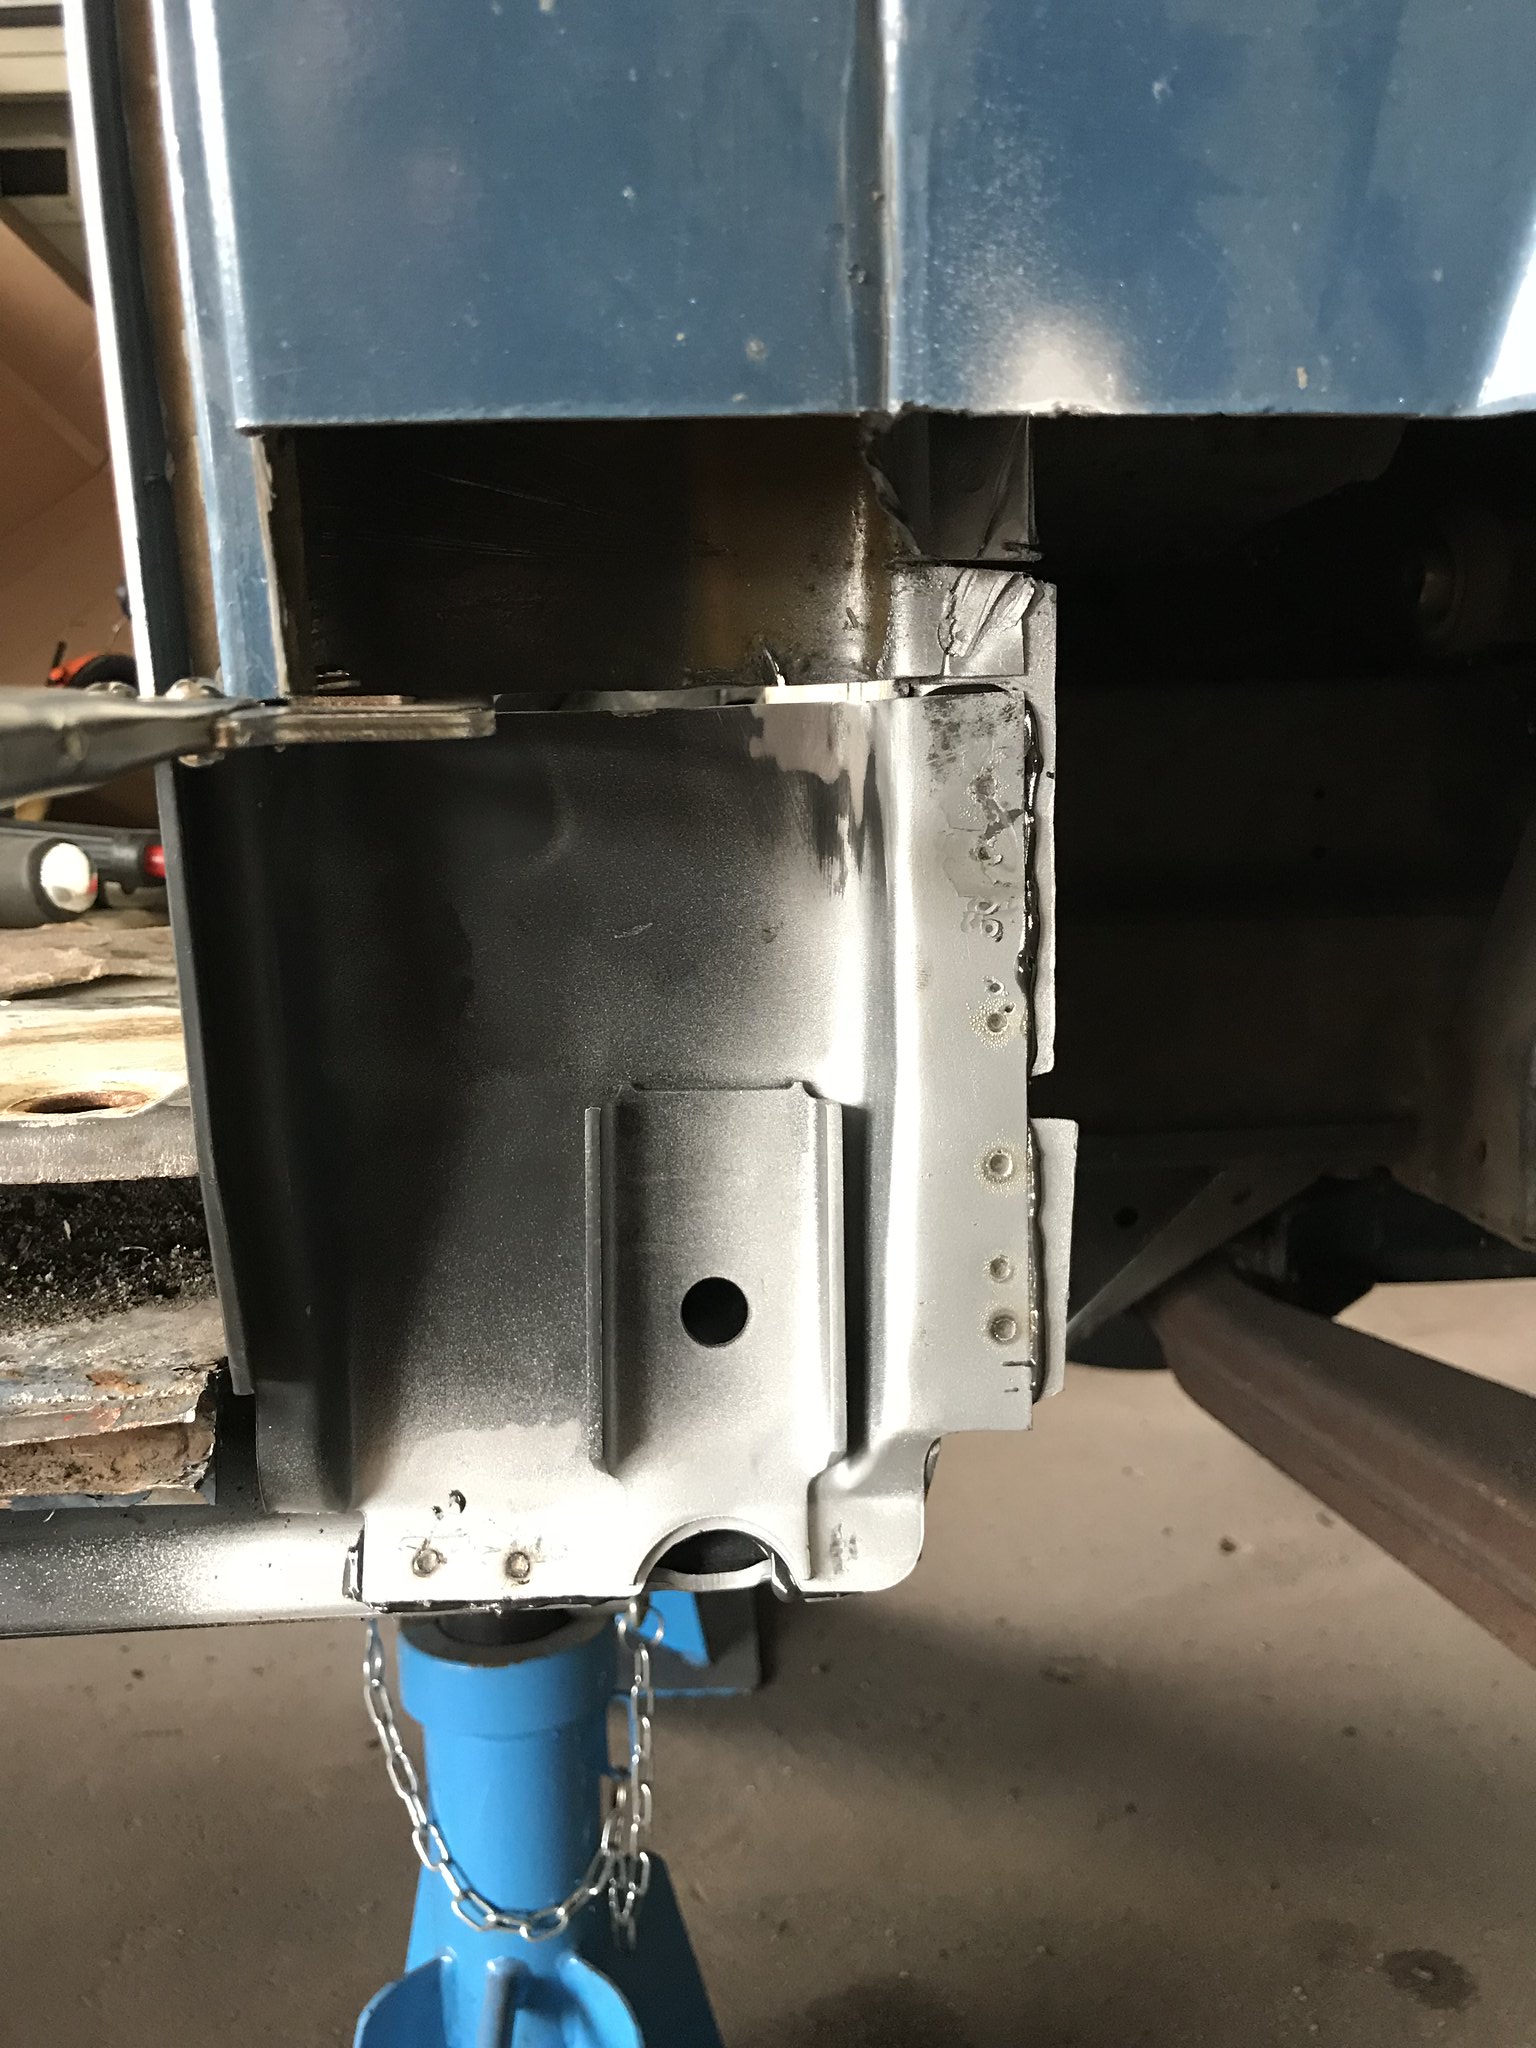
So I started the day plug welding the sill because of my mistake with the weld thru primer for spot welding.

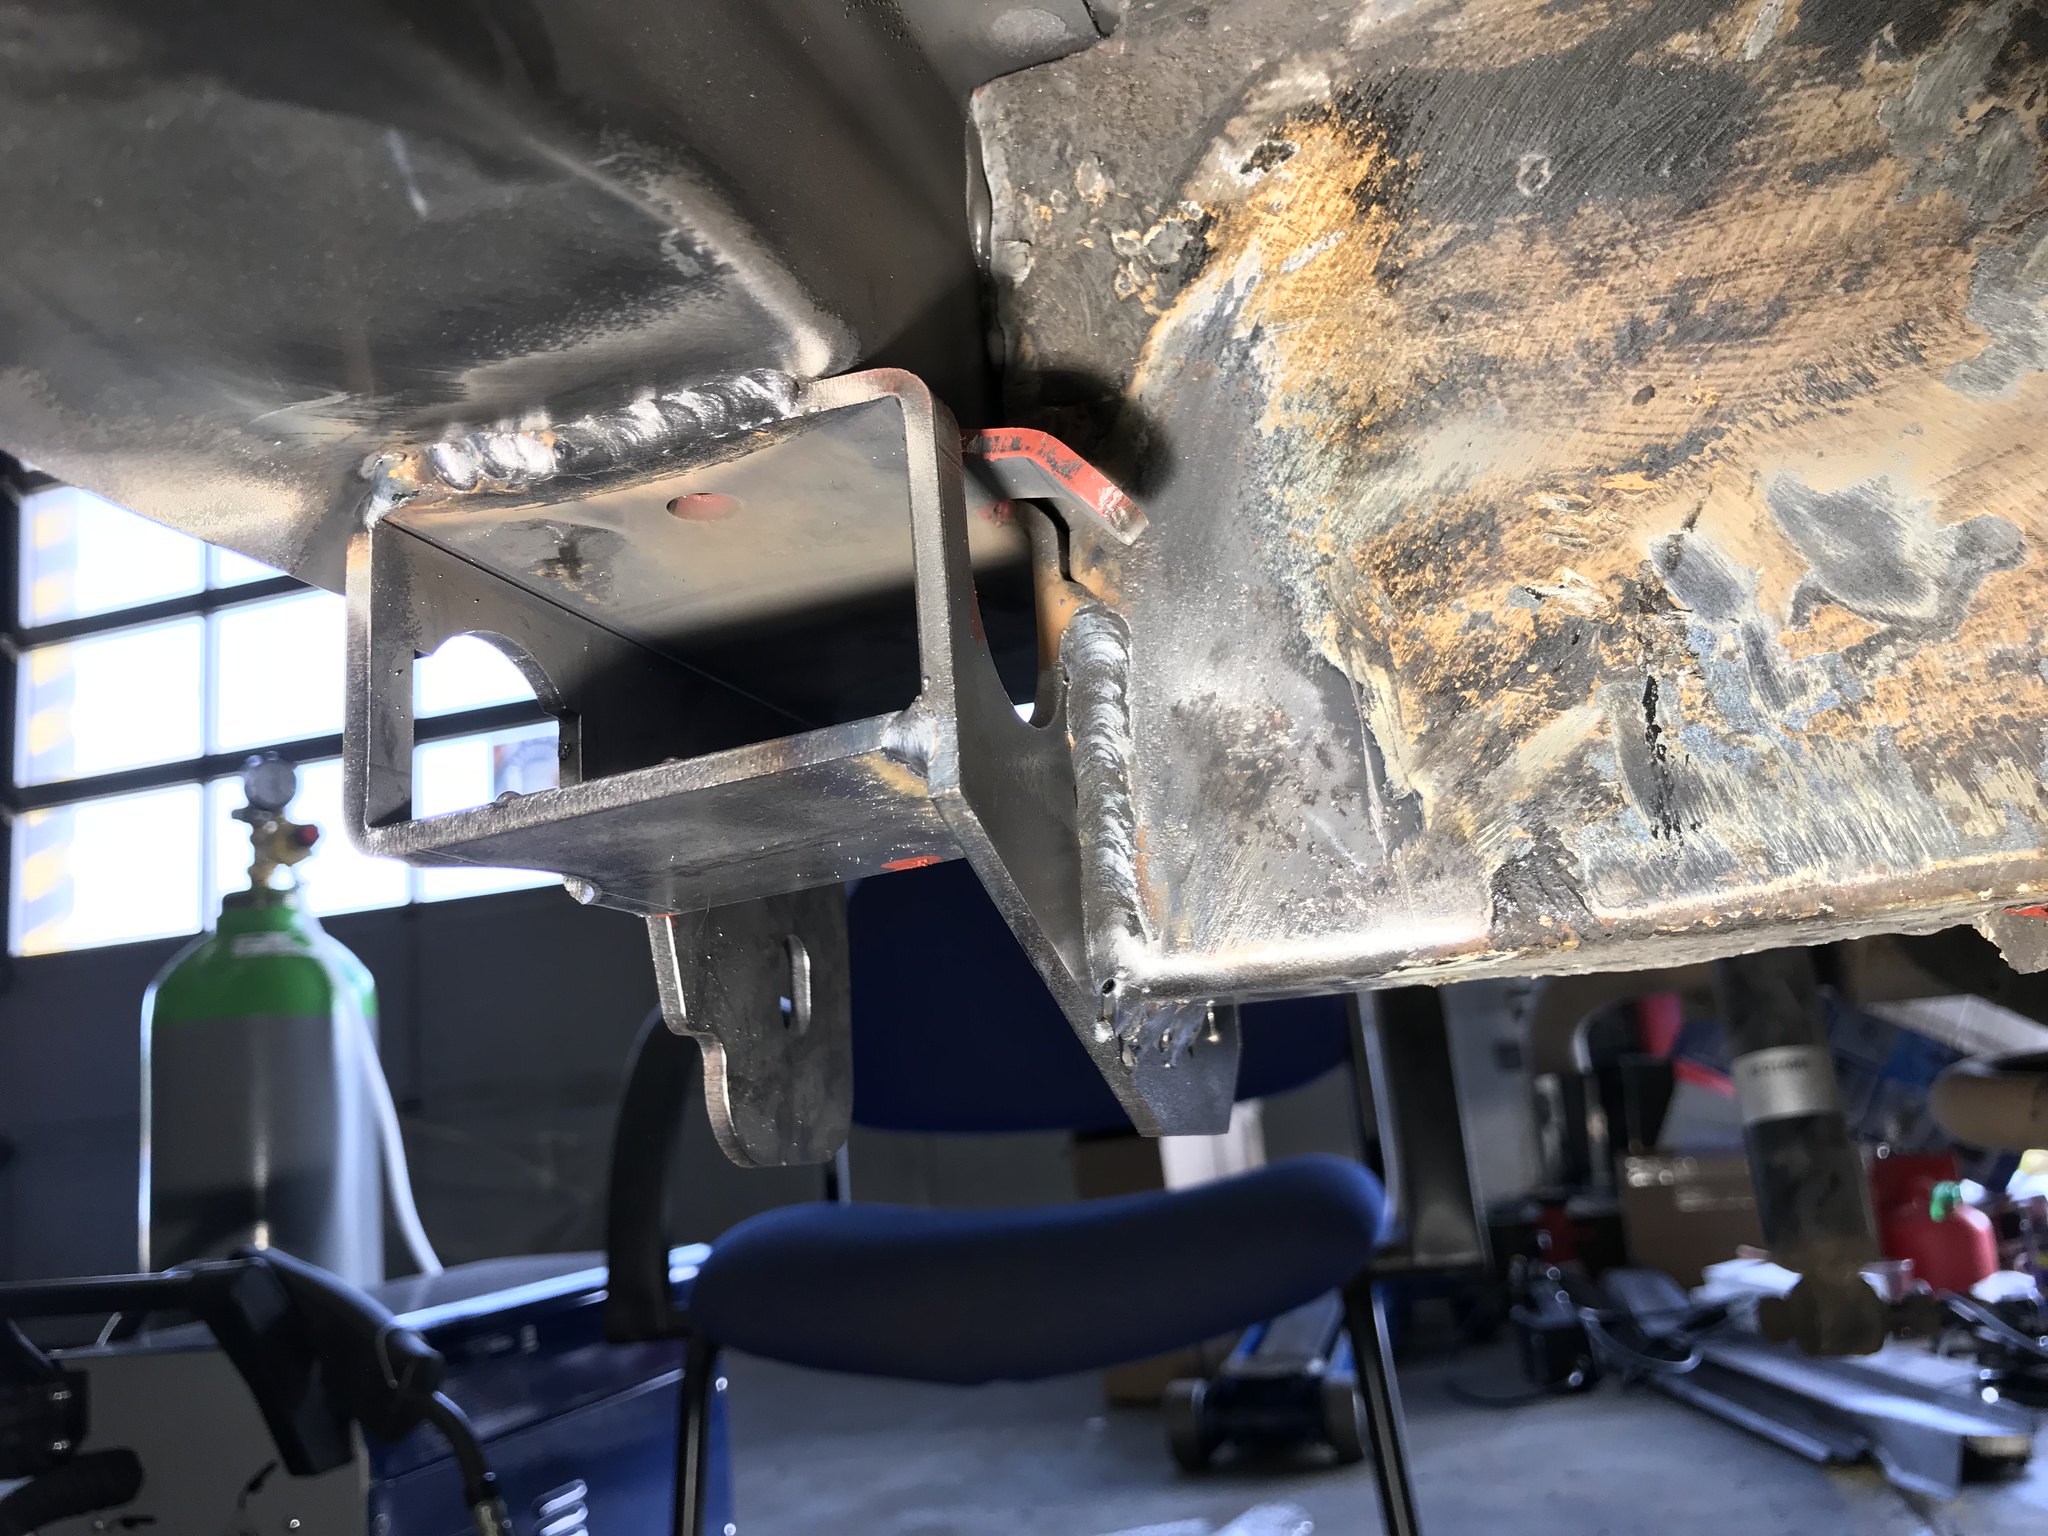
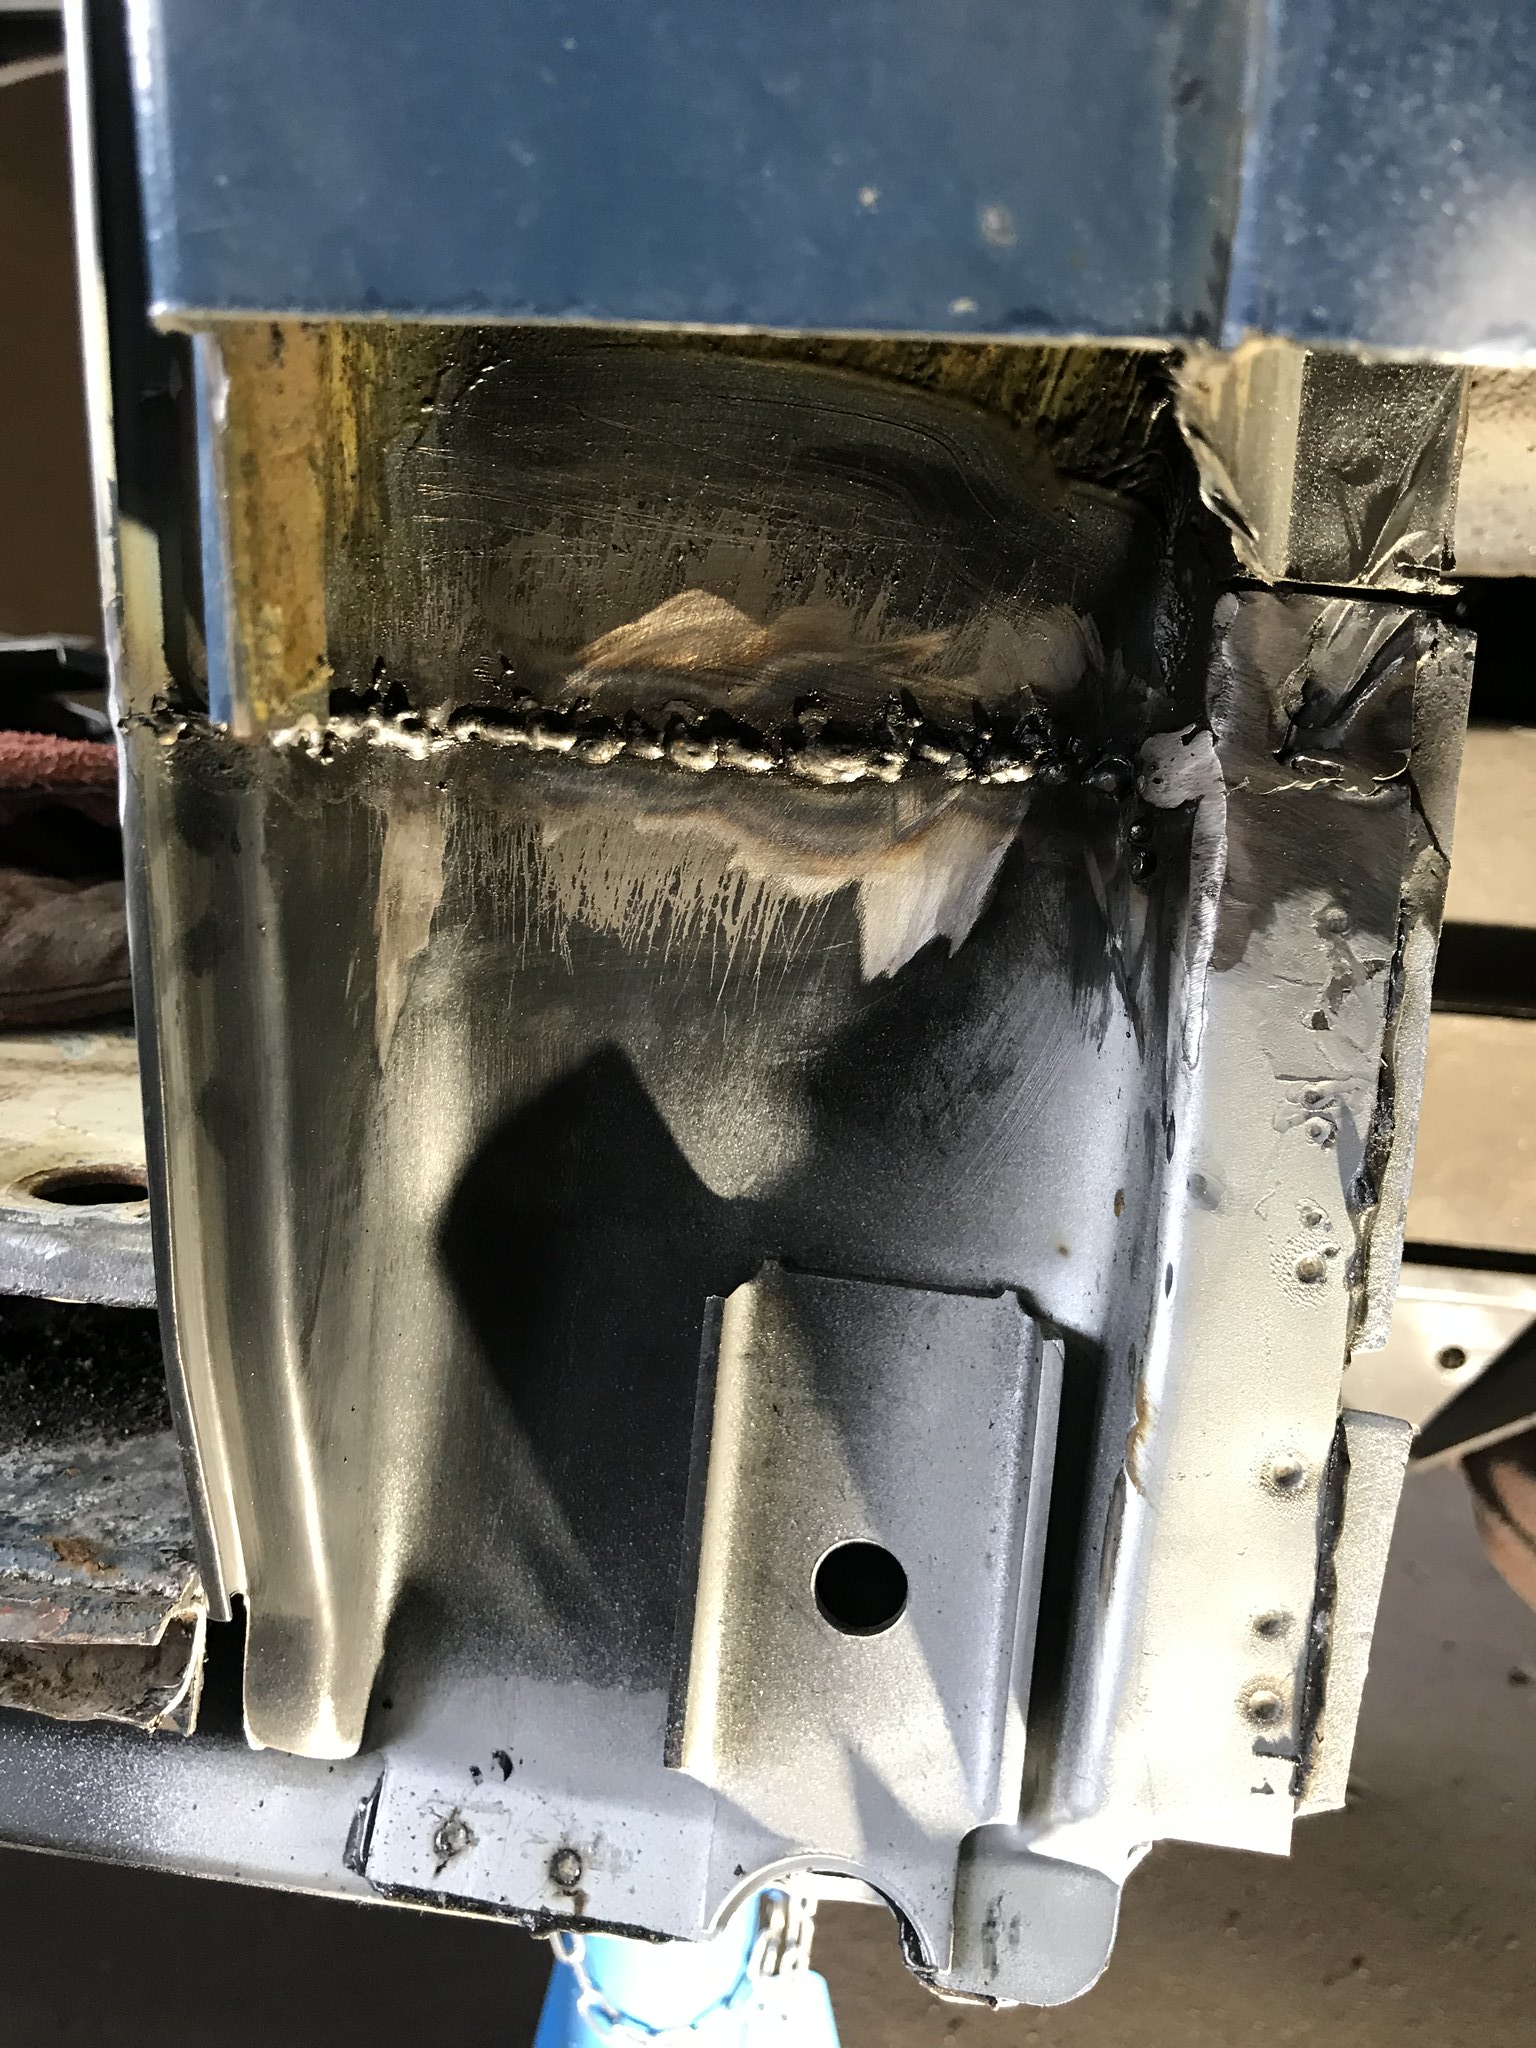
After a lot of photos with a ruler, I carefully cut away the rear mount by cutting the mount and then trimming the 2-3mm from the chassis member so that I minimised the risk of cutting the chassis short and loosing my reference points.
It’s worth pointing out that because the chassis, mount and inner sill are different thicknesses it requires careful welding. Crank the welder right up to go through the mount, the thickest part. Start on the mount and draw the weld puddle to the thinner pieces to avoid blowing holes in the thinner bits. I found a C pattern pausing on the mount was most effective at getting enough heat and wire into the weld.

I welded the mount to the sill because the original had been patched and I didn’t know if it was supposed to be welded to the sill, but I figured it could only be stronger. I painted the top of the mount with red oxide on the bits that will be in the chassis or between the sill to try and prolong its life.
I’ve also cut away the bottom b pillar ready to stitch the genuine panel section in tomorrow. I will also fit the inner c pillar panel ready to build the outer pillar shell before the outer skin.
After a lot of photos with a ruler, I carefully cut away the rear mount by cutting the mount and then trimming the 2-3mm from the chassis member so that I minimised the risk of cutting the chassis short and loosing my reference points.
It’s worth pointing out that because the chassis, mount and inner sill are different thicknesses it requires careful welding. Crank the welder right up to go through the mount, the thickest part. Start on the mount and draw the weld puddle to the thinner pieces to avoid blowing holes in the thinner bits. I found a C pattern pausing on the mount was most effective at getting enough heat and wire into the weld.
I welded the mount to the sill because the original had been patched and I didn’t know if it was supposed to be welded to the sill, but I figured it could only be stronger. I painted the top of the mount with red oxide on the bits that will be in the chassis or between the sill to try and prolong its life.
I’ve also cut away the bottom b pillar ready to stitch the genuine panel section in tomorrow. I will also fit the inner c pillar panel ready to build the outer pillar shell before the outer skin.
Greta: 85’ LHD 2.5L Subaru 14in Syncro
http://forum.club8090.co.uk/viewtopic.php?t=165773
http://forum.club8090.co.uk/viewtopic.php?t=165773
-
adie89
- Registered user
- Posts: 293
- Joined: 04 Sep 2012, 21:25
- 80-90 Mem No: 11532
- Location: Wiltshire
Re: Procrastinating never got anyone anywhere
RogerT wrote:That ropey inner sill looks way off, and nothing like the schofields product I have (or the product in their web shop). What on earth did you get sent? The black, pressed item from BW looks identical to my schofields item.
Coming together nicely tho
Are you going to clamp the sill down on top of your mount to close the gap?
Sorry I didn’t answer your question directly, yes it is way off. At least it gave up the front jacking point for the BW sill.
Yes I clamped the jacking point to the sill gently, to hold it as I measured it. I could then push it up before tacking it, checking the measurements again then welding in.
Even if yours is missing I figured even if I was a mm out there was that much play in the bolt adjustment. Do you want my measurement pictures? They’re from the chassis rail to the edge of the mount.
Greta: 85’ LHD 2.5L Subaru 14in Syncro
http://forum.club8090.co.uk/viewtopic.php?t=165773
http://forum.club8090.co.uk/viewtopic.php?t=165773
-
RogerT
- Registered user
- Posts: 1815
- Joined: 10 May 2013, 11:59
- 80-90 Mem No: 13706
- Location: Central Scotland
Re: Procrastinating never got anyone anywhere
I’ve got the end of the crossmember intact at the top of the crossmember, but not the bottom. Measurements will be handy, but I’m planning to make a jig to hold the new swing arm in position, I’ll then adjust its position to make the hub mating surface vertical and parallel horizontally with the fore and aft chassis rails (i.e. setting up my rear alignment as much as possible) and then take the mount position off that. Not particularly simple but it’s the best idea I’ve come up with... After the collapse of the swing arm mount my alignment is way way off.
Have you ever seen an unhappy fool?
88 Transporter with hitop camper conversion, 1.6td.
88 Transporter with hitop camper conversion, 1.6td.
-
adie89
- Registered user
- Posts: 293
- Joined: 04 Sep 2012, 21:25
- 80-90 Mem No: 11532
- Location: Wiltshire
Re: Procrastinating never got anyone anywhere
I managed to get 3-4 hrs on the bus today. First I keyed the inside of the inner sill with scotchbrite, then remembered to prep the spot weld edges with zinc primer this time. So in went the c pillar inner plate, panel bond and spot welded.
Then I measured twice and cut once the inner b pillar, and still cut it too short. So lined it up and bonded and spotted it in.
Then I got to practice my gapping welding, I had to start at the bottom, pull the puddle up to the top piece in a c motion. Then let it go from orange to black and do it again one c at a time.
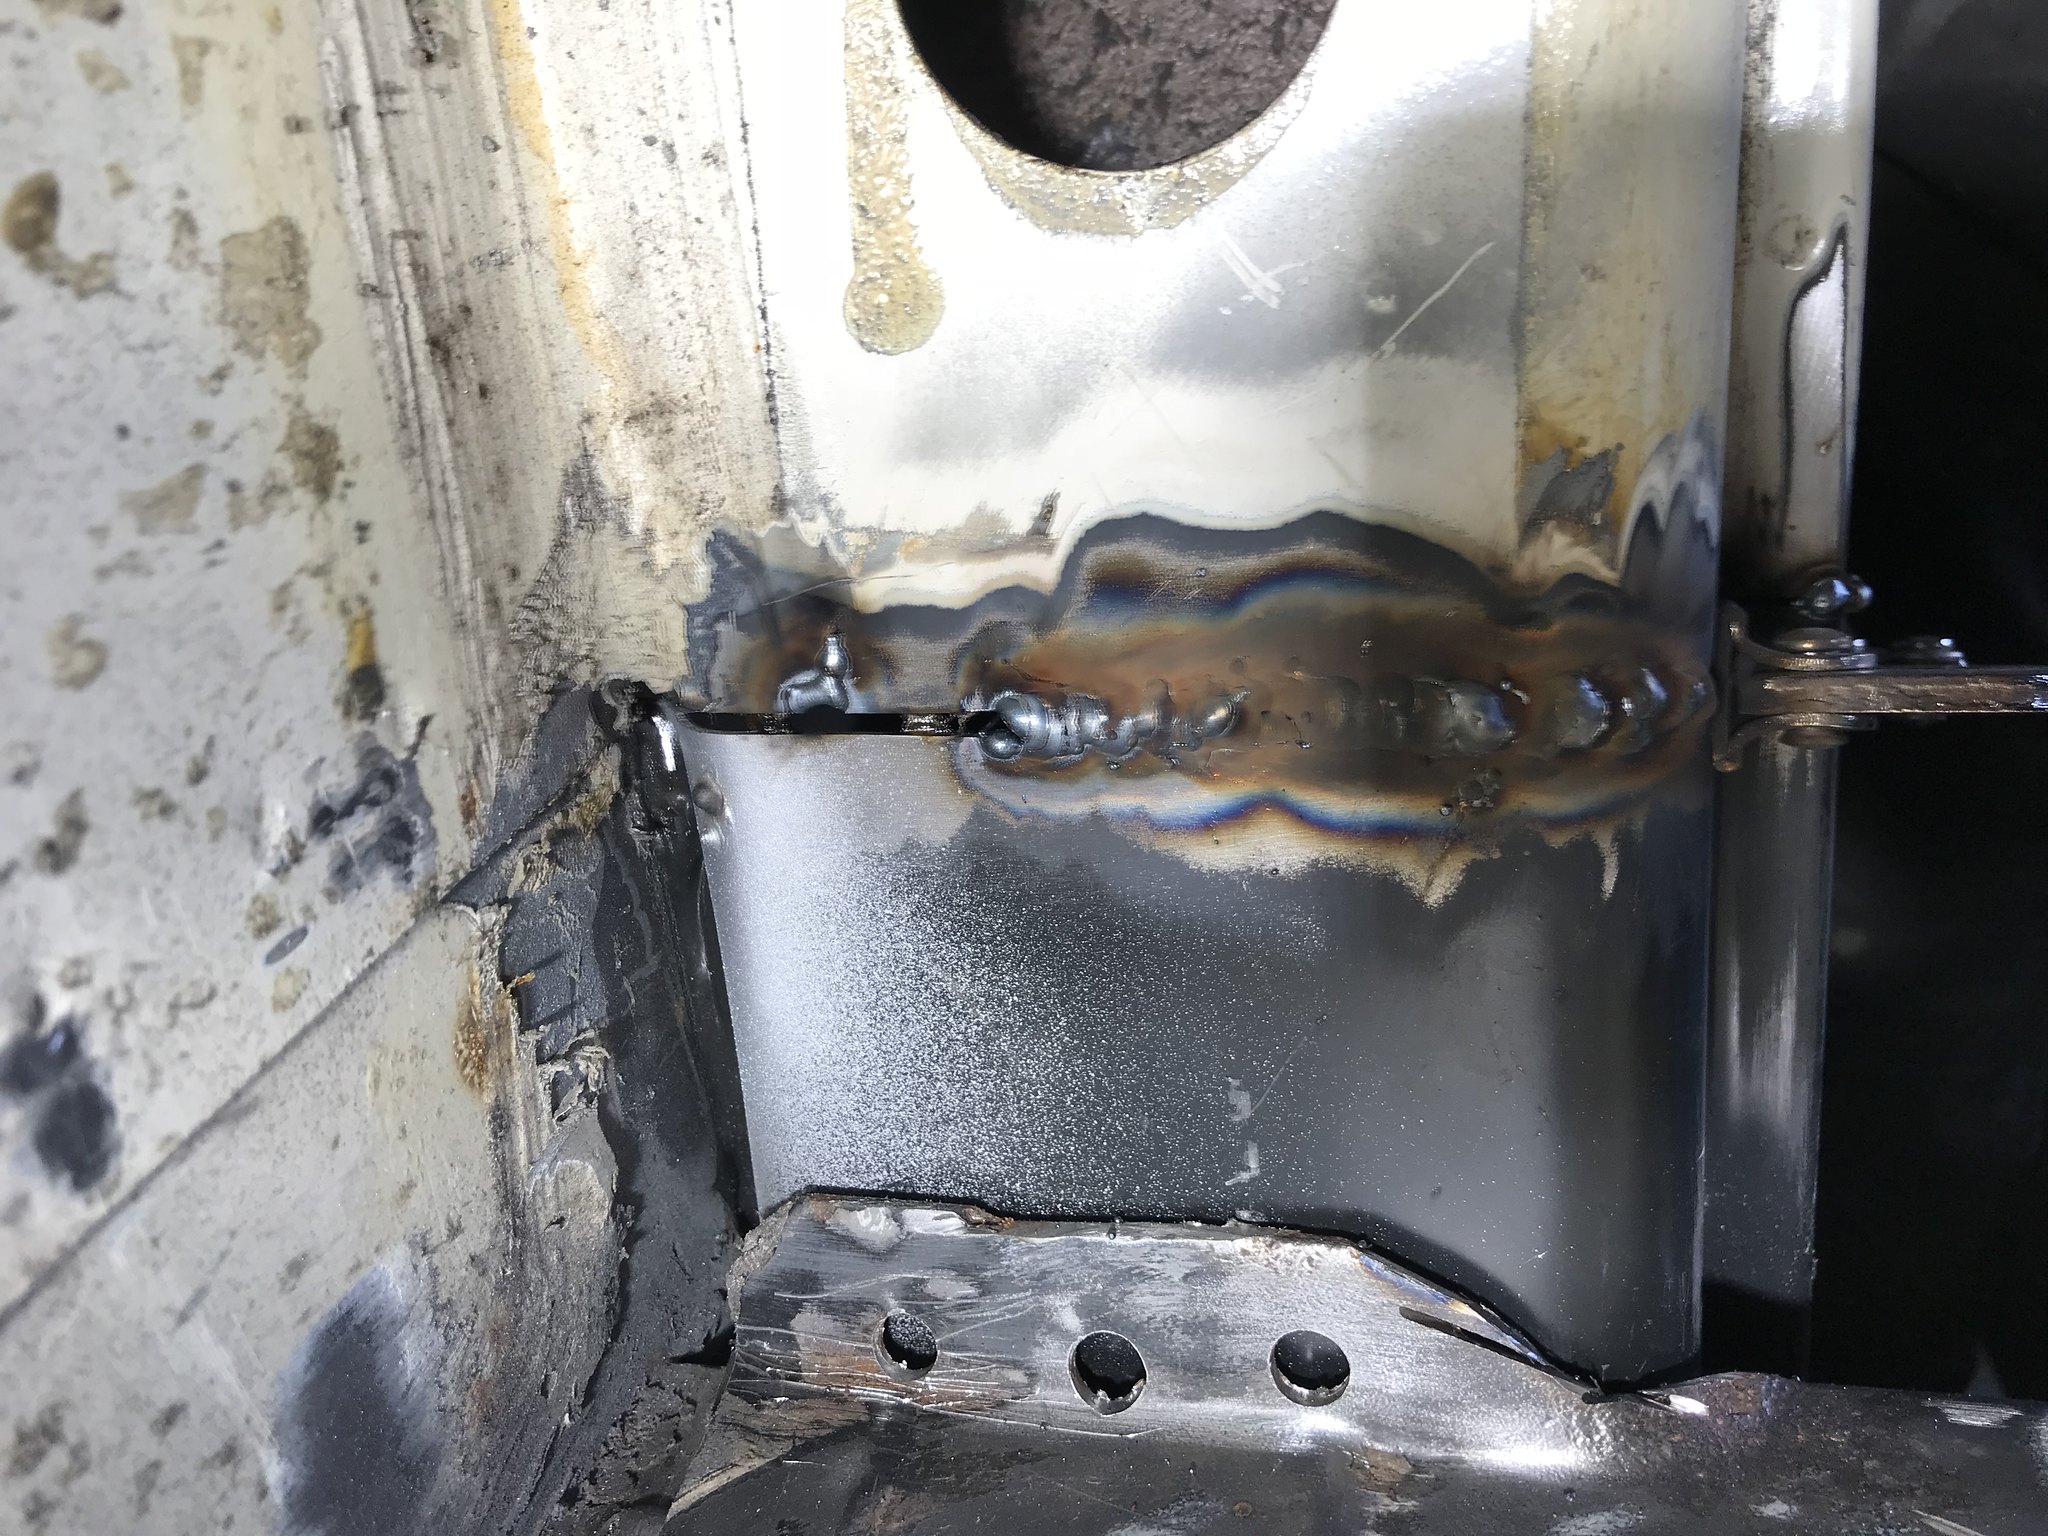
Once I dressed it back I cranked up the welder a setting and ran a solid line from the back. Not my neatest work but good penetration and it’ll be strong.
Then I test fit the old top plate and door channel and it lines up pretty well with only a few mm out so I’m feeling good about continuing.
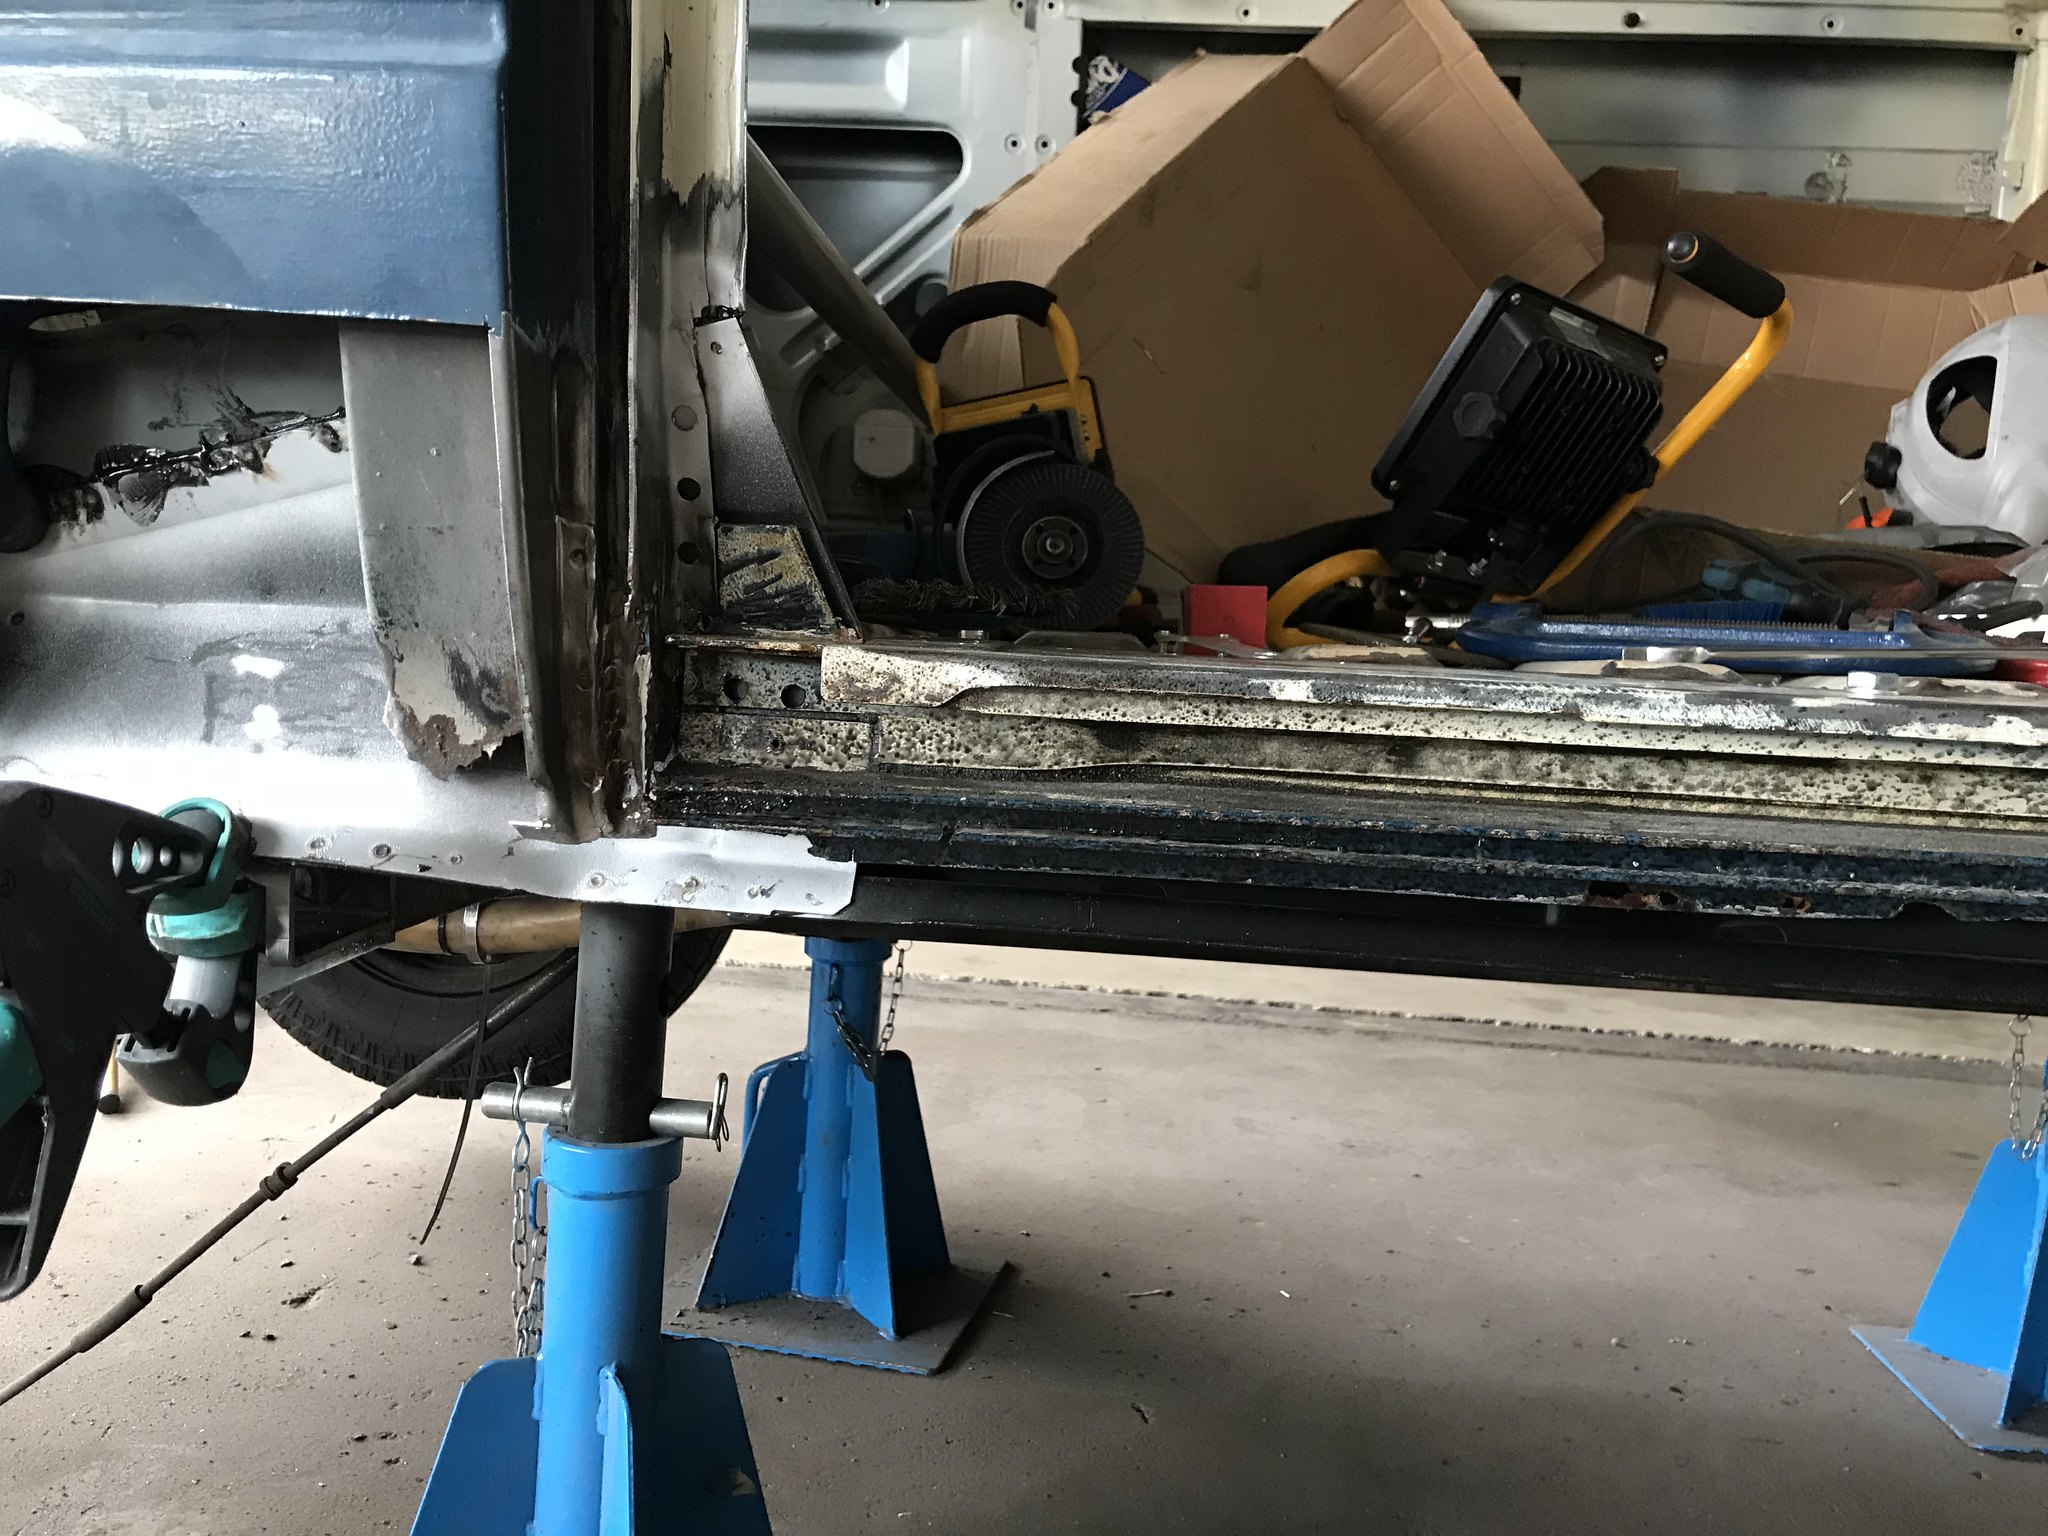
Then to finish the day off I mixed up a batch of cv primer and brushed the inner sill with a couple of nice thick coats and the rear jacking point.
Then I measured twice and cut once the inner b pillar, and still cut it too short. So lined it up and bonded and spotted it in.
Then I got to practice my gapping welding, I had to start at the bottom, pull the puddle up to the top piece in a c motion. Then let it go from orange to black and do it again one c at a time.
Once I dressed it back I cranked up the welder a setting and ran a solid line from the back. Not my neatest work but good penetration and it’ll be strong.
Then I test fit the old top plate and door channel and it lines up pretty well with only a few mm out so I’m feeling good about continuing.
Then to finish the day off I mixed up a batch of cv primer and brushed the inner sill with a couple of nice thick coats and the rear jacking point.
Greta: 85’ LHD 2.5L Subaru 14in Syncro
http://forum.club8090.co.uk/viewtopic.php?t=165773
http://forum.club8090.co.uk/viewtopic.php?t=165773