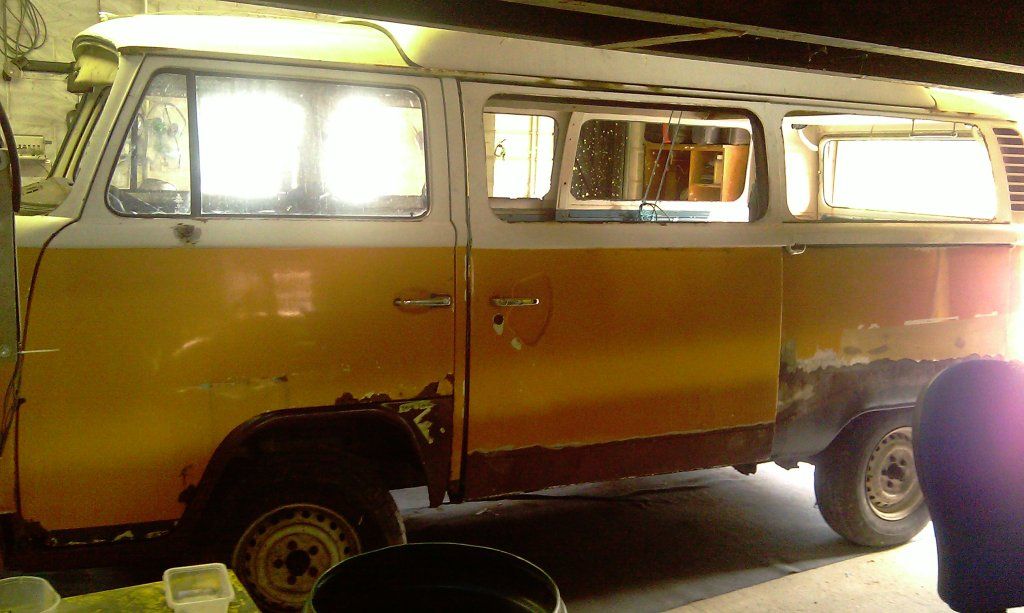
Kevtherevagon

Thin bits of metal and bright blue light.

Moderators: User administrators, Moderators

Locked
Plasticman
Trader
Posts: 8072
Joined: 12 Oct 2005, 20:55
80-90 Mem No: 1948
Location: lincolnshire

Re: Kevtherevagon

Post by Plasticman »

well back,
for securing the top down and also for say fixing wood to stuff to then screw panal boards on as in lining the hitop (did mine with battens then space foil stuff/ then woodgrain furniture boards stuff as used in the towed white sheds) never any problem keeping bedding in the top cuboard now.
I use this
Image
the fc40 is very simmilar to sikaflex but a 1/3rd the price and I think a better product, if you use thisd to secure the tops and stuff you wont go far wrong, you dont need nor want to put loads in, just a continous bead,
the CV is a seant, it will never set nor skin over so you dont want to use it where it will be exposed but its good for sealing up the inside edge of the tops and also stuff like fridge vents and that , as you can always remove and refit the item at will.
I buy of my mate at Olearies as its also quicker than going to hull for hodgesons stuff
http://www.hodgsonsealants.com/productp ... -Sealants/" onclick="window.open(this.href);return false;
their P40 is the near enough the same thing.but the tubes are long and dont alweays fit std guns.
mm

mm289
Registered user
Posts: 314
Joined: 31 Dec 2010, 22:00
80-90 Mem No: 9111
Location: Dover, Kent

Re: Kevtherevagon

Post by mm289 »

Great read as always Mike, thanks for posting up the sealants, this is now noted for Gunther :)

You never know what is underneath nice looking paint on older vehicles, so I now tend to go down the route of "buy an aboslute shed for not a lot, then at least I know I won't be dissapointed" :D (just need to find a shed of a syncro to add to the list as well :roll: )

Thats the approach I have taken on Rusty, the late bay I am restoring as well
Image

Kev, bet you can't wait to get it back all nice and solid - are you sticking with the original colour scheme?

MM
'89 Autosleeper Trident
2.1 DJ
Member 9111

User avatar
kevtherev
Registered user
Posts: 18832
Joined: 23 Oct 2005, 20:13
80-90 Mem No: 2264
Location: Country estate Wolverhampton Actually

Re: Kevtherevagon

Post by kevtherev »

yes although I may have to wait a while before it's back in the full rev livery
AGG 2.0L 8V. (Golf GTi MkIII)

Plasticman
Trader
Posts: 8072
Joined: 12 Oct 2005, 20:55
80-90 Mem No: 1948
Location: lincolnshire

Re: Kevtherevagon

Post by Plasticman »

Well I can skip doing some of it if your not fussed :twisted:
thought a few picks of the inner construction might be usefull for AS owners....
Image
and NS
Image
Image
this is the donor bit of roof, I have decided where to make the cut and stuck a couple of rows of masking on, the gap is appx 1mm
Image
the thin flexi cutters are very quick ,literaly like a knife through butter, the tape isnt eeven scortched,its also bad news if you go off line as if your a bit slow you got a problem
Image
the ns corner with the old stuff removed, the brazing gets heat till its too hot and splutters and with the other hand a pair of nippers to peel it away.
Image
OS first trial fit
Image
take as long as is needed, its easy to cut but a pain if you try to make good later
this shows the donor over the top of the van roof and clamped in place and marked ready to measure and cut same
Image
this shows the underside, the reason for cutting this far back becomes apparent as It is easier to use visegrips when both side are available.I do have fasteners that will work from one side but why make life hard
Image
this is the van roof marked ready to make the cut, I have taken into account the fact that the donor is going to be shortened by about 1-2mm with joddling and I wish a 2-3mm gap between the old roof and the up ramp of the joddled part, reason for this is that I want the weld in the base of the join ,if I butted up too close then the weld would be effectivly be on the top(finnished) surface and after grinding flat would leave it a bit of a thin weld..
Image
more will become apparent when its welded up tommorow
Image
trial fit on OS with joddle done
Image
and about where I want it now, you should always leave a small gap as when welding the heat will expand the metal and if no gap then it will warp more,I intend to gas this on both sides and re-braze to pillars as per original.
Image
heres a picky of a bit of donor van
Image
Ive got the dies to make the lower swage but this way will be better, loads of unpicking though
Image
Finaly my old mig got sick,
Image
trigger on the torch unhappy so went and treated myself to a new one and serviced the feed rollers and reset everthing so a happy day
mm :D

scottbott
Registered user
Posts: 2497
Joined: 07 Jan 2009, 20:36
80-90 Mem No: 6085
Location: Old Somerby,Grantham

Re: Kevtherevagon

Post by scottbott »

you are a clever bugger,very instructive to see how the hightop fits to the van,great post :ok
Nil carborundum illegitimi

User avatar
GBA 88 WEST LA
Registered user
Posts: 3
Joined: 06 Oct 2009, 13:51
80-90 Mem No: 7489
Location: Exeter New Hampshire United States

Re: Kevtherevagon

Post by GBA 88 WEST LA »

:ok BRAVO BRAVO
thanks for sharing all this, man shes gonna shine when this is done
something to be said for doing it proper :pimp

Plasticman
Trader
Posts: 8072
Joined: 12 Oct 2005, 20:55
80-90 Mem No: 1948
Location: lincolnshire

Re: Kevtherevagon

Post by Plasticman »

Well, I can confirm its had front end accident damage, nothing earth shattering but enough for all the tell tasles to add up, I'll come to them as we get to those parts.
This is the N/S welded and re brazed, you will see a small area of what looks like fused glass on the left of the brazed bit, this is caused by excessive flux and isnt a problem ,But, if your going to do any brazing yourself then dont use flux coated rods as there is too much flux and they are a pig to use. you can buy plain rods in small numbers and then buy the flux powder, or second best are rods with flux impregnated into indentations in the rod, if you want or need to run the braze uphill or fill a hole then the problem with continual flux is that the brass will travell wherever the flux is, so you cant control it, anyhow back to the van
Image
this is the raw state and looks awful but at least the flexpad makes it presentable
Image
this is the inside of the cab roof, I will treat it and apply a run of brush on seam sealer
Image
the welding is the easy bit, its this mess thats the headache everytime I do it
Image
earth crowns are good, usefull picky for showing whats in/under here
Image
Now I stated that there had been an accident and that thehitop was swopped and the wood bed frame broken at the front etc well kev said the upper front panal had also been changed, well I know that they didnt remove the dash to do it, they did it the bodgy way,
I had a poke at the seams a bit ago and thought they had been welded externaly and covered in bodge, (new panal) heres the pick
Image
ive marked where the migging tacks are, its the same ont other side.
Image
the 2 arrows show the rust trail from the water that has leaked in and run down behind the front frame and into the footwells, same both sides, crowns are very good, while its easy I will remove and clean and refit as its a 5 minute job now...
Image
the following picks are just for info showing the layout behind, sorry if its a repeat.
Image
the washer tube should have been in the platic clip but wasnt and on the N/S it was the wronng side of the wiper drive arm so not a good idea.
Image
Image
and
Image
and the bit I chopped out was genuine,
Image
will do the other half in 5 minutes
mm

Plasticman
Trader
Posts: 8072
Joined: 12 Oct 2005, 20:55
80-90 Mem No: 1948
Location: lincolnshire

Re: Kevtherevagon

Post by Plasticman »

this is damaged where ive marked it
Image
so something happened to the upper front panal that was almost right in the middle and the damage was confined to this air inlet area and the front panal, cant tell if screen had been out or not, and also the hitop but not the roof under and infront, so if a lamp post then it could I suppose have done the bumper and folded into the front panal then smacked the roof, its certainly consistant with that,also the ns rear wing , maybe a hit from another vehicle, lost control then into a post etc, a lot of the newer stuff is meant to colapse as opposed to real good old telegraph poles,, ?
anyhow trial fit
Image
wish it was as simple :cry:
Image
not a lot of options here, but there again I like this type of repair as its sort of theraputic and steady away.so first the rear screen rubber lip
Image
next the small fillet for the corner
Image
now this and the next bit have to be fairly good as they form the visible seam and I dont want to fill it with pod
Image
first part of it gassed in
Image
next is a very small bit that also forms the seam
Image
now all welded in place
Image
Image
now after a touch with the disc
Image
fairly happy with the line
Image
just a little tweaking when the panal goes on and the curve in the corner to refine a tiny bit
Image
That Im afraid is that as bliddy xmas has got in the way, always happens when your having fun and on a roll, so the other side to repaeat but its not as bad, quite... and then the genuine front panal can go on. then its lower front panal and roof and gutters...
mm
and happy xmas to you too ! :ok

User avatar
kevtherev
Registered user
Posts: 18832
Joined: 23 Oct 2005, 20:13
80-90 Mem No: 2264
Location: Country estate Wolverhampton Actually

Re: Kevtherevagon

Post by kevtherev »

Image

I can't decide if that's art or porn :D
Awesome work.
thanks for the extra pics too for the AS owners

Merry Christmas Mke..
AGG 2.0L 8V. (Golf GTi MkIII)

User avatar
axeman
Registered user
Posts: 1246
Joined: 07 Feb 2009, 19:50
80-90 Mem No: 6410
Location: Smeeth kent country side

Re: Kevtherevagon

Post by axeman »

grate thread, nice to see work like this.

keep it up neil
Back in the game with an uncut 2wd panel van

jed the spread
Trader
Posts: 9020
Joined: 09 Oct 2005, 17:31
80-90 Mem No: 1967
Location: Sutton in'it Syncronaut: 123
Contact:

Re: Kevtherevagon

Post by jed the spread »

Holy cow this is amazing :mrgreen: I love this thread :ok

jed
CAMPERVANCULTURE.COM

VW T25 Van Spares, Westfalia Parts, Quality Camping Gear & More

User avatar
lloydy
Registered user
Posts: 8015
Joined: 24 Nov 2009, 17:54
80-90 Mem No: 5262
Location: cheam surrey

Re: Kevtherevagon

Post by lloydy »

Think I just did something in my pants.........
Time is a drug. Too much of it kills you

User avatar
pocolow
Registered user
Posts: 3654
Joined: 09 Jan 2009, 19:38
80-90 Mem No: 6300
Location: Macclesfield, Cheshire

Re: Kevtherevagon

Post by pocolow »

What Mike can do with metal is amazing :shock: :shock: ...I am in awe at your skill mate 8) ...Carols in good hands.

Mark :ok
thecampervanman.blogspot.co.uk/

http://twitter.com/#!/Pocolow" onclick="window.open(this.href);return false;

User avatar
cygnak
Registered user
Posts: 195
Joined: 10 May 2009, 21:55
80-90 Mem No: 6770
Location: huddersfield

Re: Kevtherevagon

Post by cygnak »

Definitely got me twitching. Fantastic :ok
Simon and Nicola
Syncro Westfalia 1.9 DG LPG converted

mm289
Registered user
Posts: 314
Joined: 31 Dec 2010, 22:00
80-90 Mem No: 9111
Location: Dover, Kent

Re: Kevtherevagon

Post by mm289 »

Looking good,and as another AS owner the pics are really helpful :)

Out of interest, when would you braze rather than weld or lead?

Happy Christmas m8

MM
'89 Autosleeper Trident
2.1 DJ
Member 9111

Locked