Bit of an update...
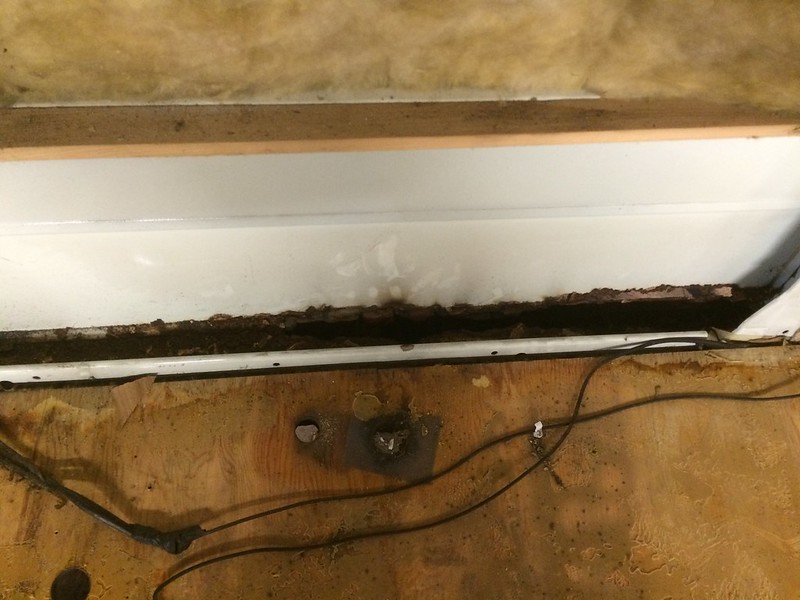
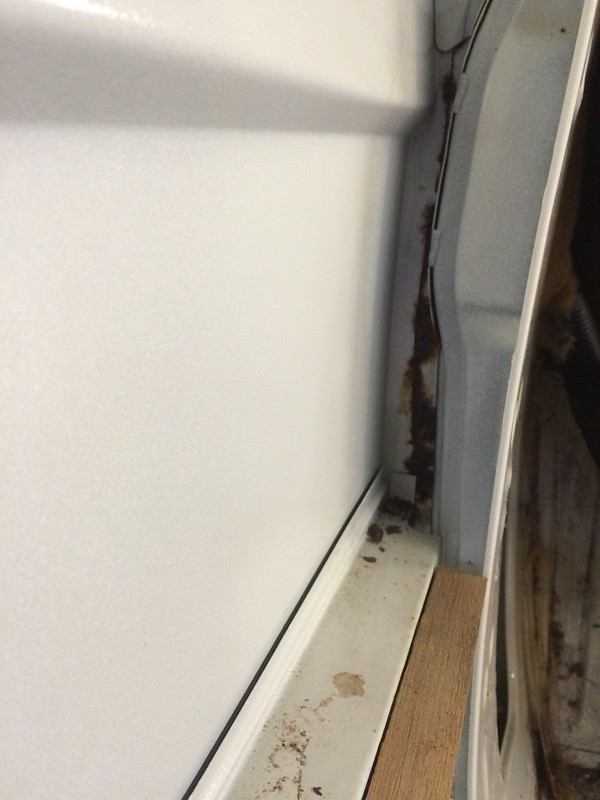
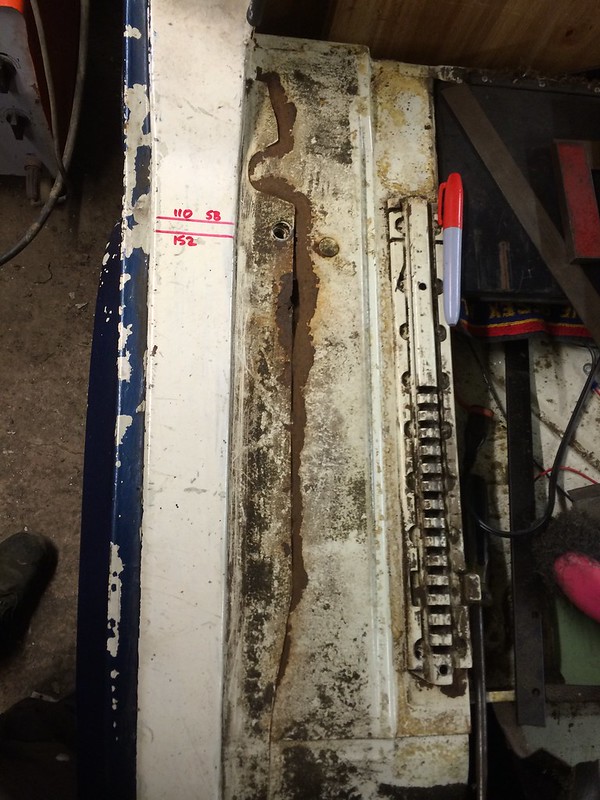
Finished off the Step on the drivers side. There were still a couple of holes and rusty seams at the back of the step, so they got the chop:
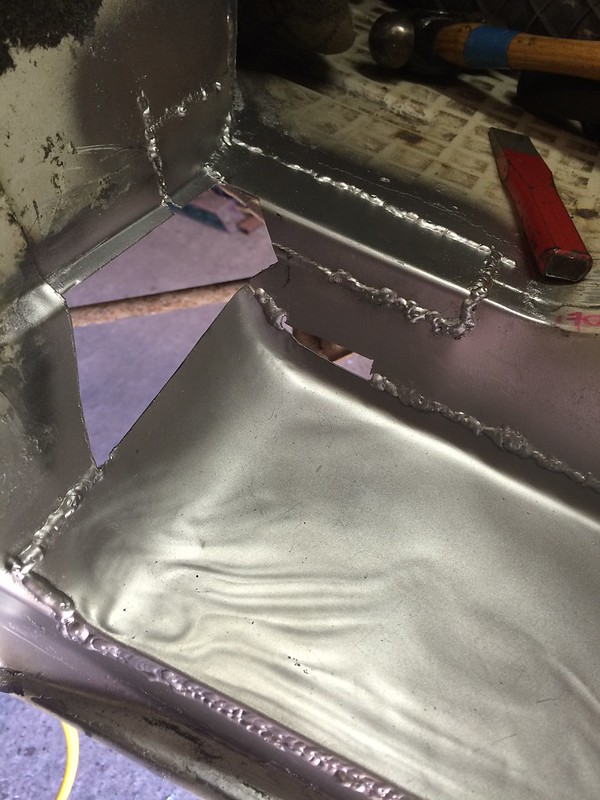
Made some another interestingly curved section and let that in, along with a small infill. Stuck it in, and ground the welds down a bit:
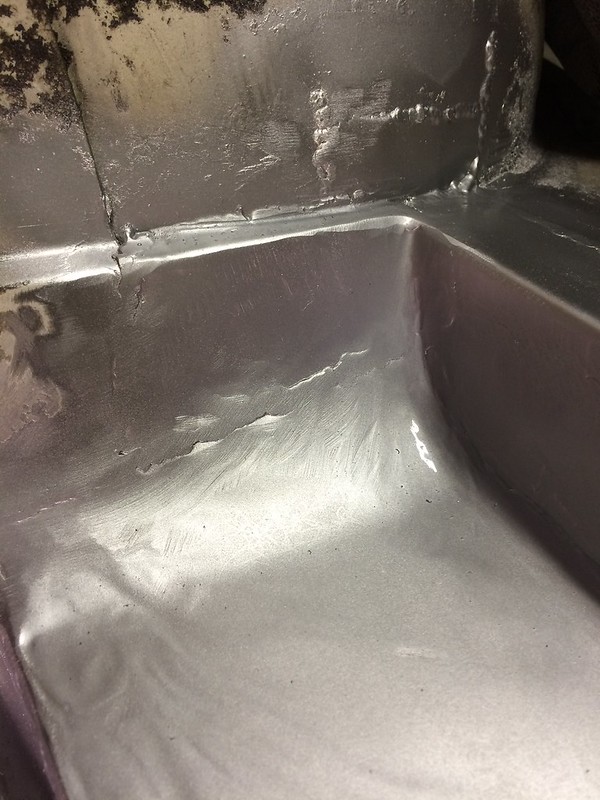
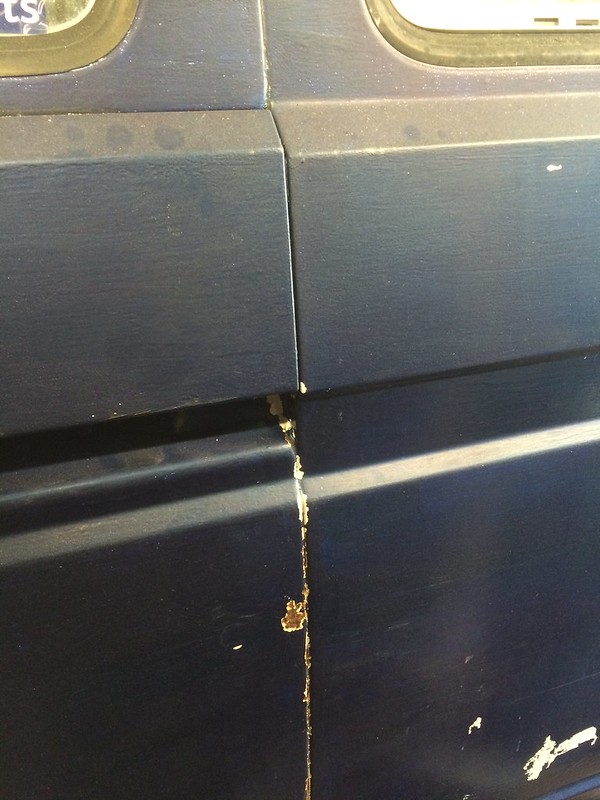
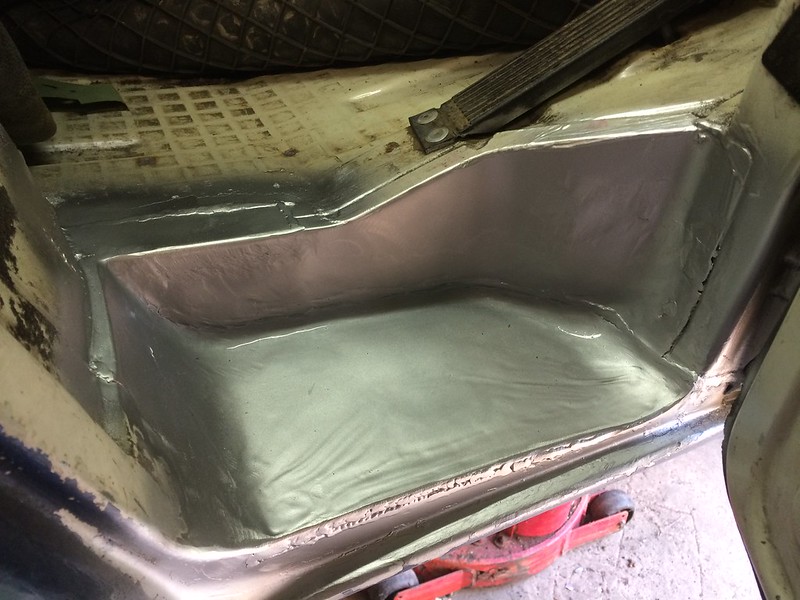
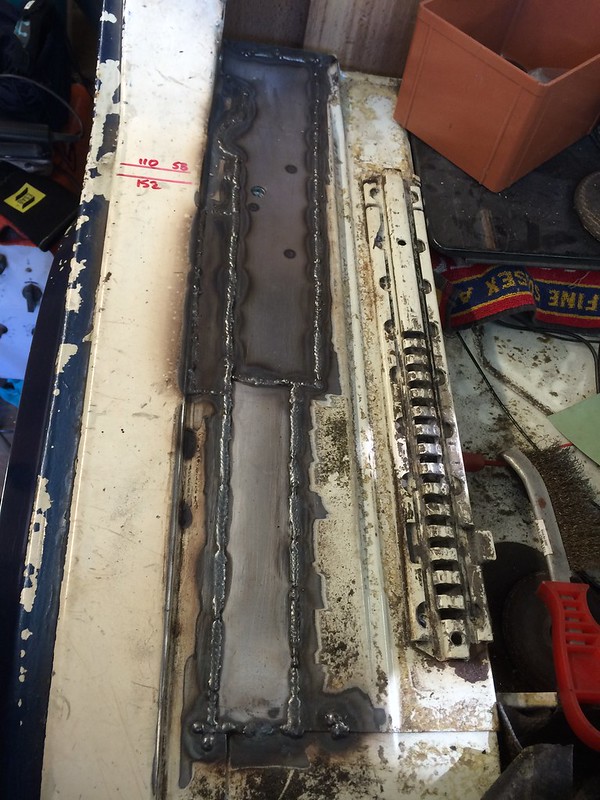
So, after a fair bit of dressing back, the front step is pretty much done. It's not the prettiest, but is pretty solid. I think i might need to do a little more dressing on the front edge, but we are a way off paint yet, so I sprayed it to stop the flash rust:
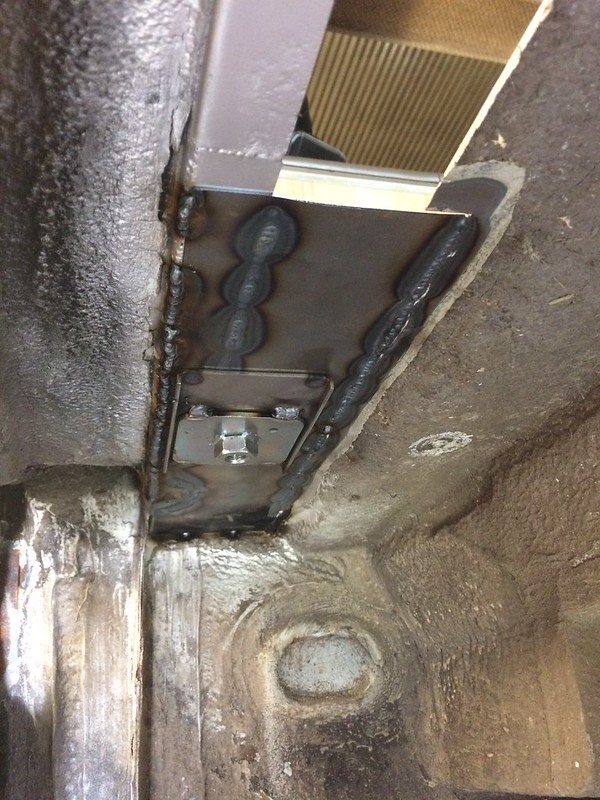
Next up, the top of the arch, and the seatbelt mount.
On this side on a 2WD van there is also the fuel filler to contend with. The filler cap and tube were removed, and then given as now I had an open tank of explosive very close to the hot sparky action, I decided that was best out of the way too.
Removing the tank not only gained access to previously unseen bits (the heater control box for the rear of the van - this needs some attention apparently) but also some very rusty and porous brake pipes. Guess I will be doing brakes before putting the tank back in.
The tank itself seems ok, so it will get a coat of paint, new grommets and new fuel pipes for the expansion tanks before it goes back on.
After waiting a few days for the spilled petrol to disperse.... I got on with the wheel arch top.
Removing the rubber, and all the bits of foam still attached, and a load of flaky nastyness, we are left with this:
I am using a Scofileds repair panel and as with the other side I ended up cutting off the complicated bit close to the seat and just used the flat bit and the new seatbelt mount. I chopped a section of the wheel arch lip off to get to good metal, as I did on the other side, but also had to had to add a section in where the metal had thinned right down. The repair section is butt welded on the inside edge, and overlapped on the outside, as per the factory. I seamed it rather than spot welded it though:
As ever, the repair panel didn't quite deal with the whole hole, so the rest is filled with some more 1mm steel:
This will get the welds dressed back a bit before a coat of primer.
Then I will crack on with the Sill. :S
Incidentally, I bought a genuine outer sill at the weekend, which along with the Scofields inner, and rear swing-arm mount should make for a good job. If anyone needs one of the combined outer sill/lower panel/b-post repair panels, I now have one spare...
Cheers
Mark
Rust repairs on our van - all the usual places!
Moderators: User administrators, Moderators
- volks_womble
- Registered user
- Posts: 326
- Joined: 12 Aug 2014, 14:46
- 80-90 Mem No: 13821
- Location: West Sussex
Re: Rust repairs on our van - all the usual places!
1989 1.9TDI (AFN) California
1990 2.1MV Syncro Atlantic
- volks_womble
- Registered user
- Posts: 326
- Joined: 12 Aug 2014, 14:46
- 80-90 Mem No: 13821
- Location: West Sussex
Re: Rust repairs on our van - all the usual places!
This weekend I haven't actually managed to cut any metal, mostly just prepared for sills.
the campervan interior went from this:
to this:
so, just a van now then...
Anyway, this revealed how much sill needs to be done... it looks like this at the moment:
However, removing the insulation also showed the state of the seam at the C-post. From the outside it doesn't look too bad:
but inside, there is definitely some developing issues:
So the sill issues don't go as far up into the panel above as I had feared, but I think I will need to do something with the seam while I have this apart. My current thoughts are to blast the seam with some form of media, treat the rust and repaint. I suspect some of it is a bit too far gone for that though so will need to have the panel off to fix
Hopefully my next update will actually show some sort progress with the sill...
Cheers
Mark
1989 1.9TDI (AFN) California
1990 2.1MV Syncro Atlantic
-
- Registered user
- Posts: 293
- Joined: 04 Sep 2012, 21:25
- 80-90 Mem No: 11532
- Location: Wiltshire
Re: Rust repairs on our van - all the usual places!
How'd did you get on with this?
I've just finished mine if you need pics of it done. My b pillar was missing the bottom 2 inches which I had to repair with sheet metal, no repair panels.
Greta: 85’ LHD 2.5L Subaru 14in Syncro
http://forum.club8090.co.uk/viewtopic.php?t=165773