Right, well I am not familiar with the Holdsworth conversion but it can't be a million miles away from how mine was done. Look in the cupboards either side of the fridge, on mine there is a screw in the side of each cupboard that goes into the side of the fridge outer skin to fix it.
IF you have external vents next to the gas exhaust flue, remove the top one as this gives you access to the flexible flue pipe to the exhaust plate on the body of the camper, mine just pulls off.
https://postimg.cc/w3R2qBB1]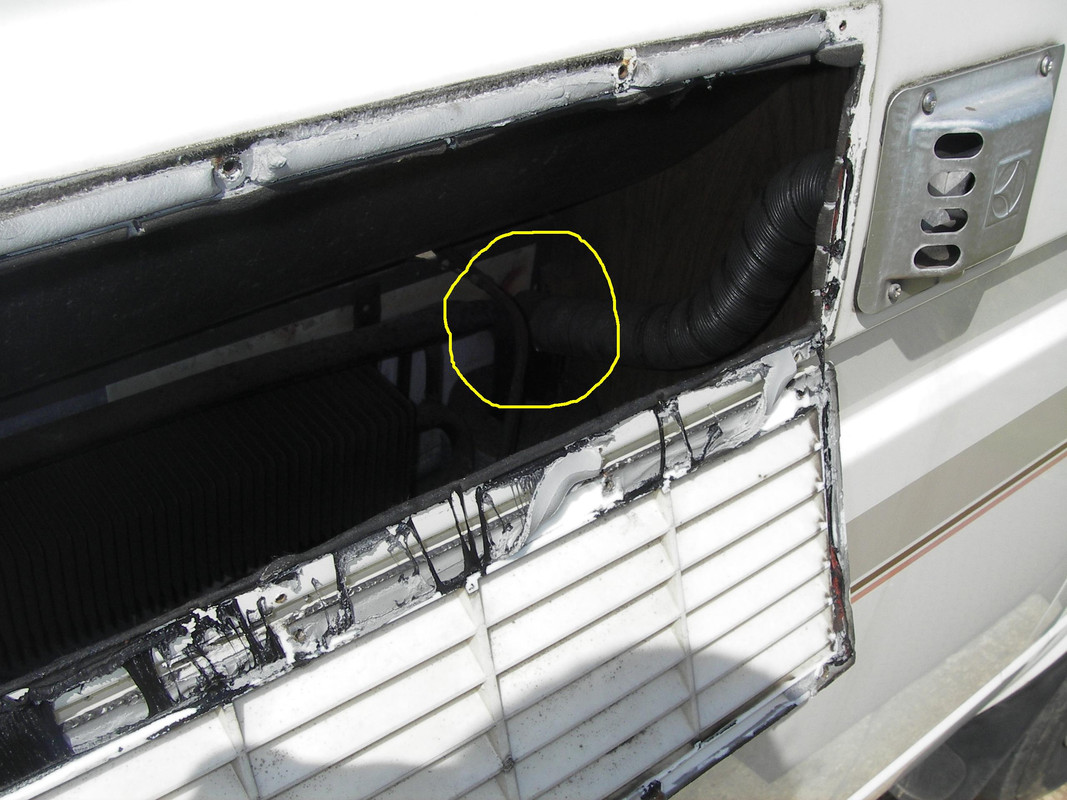 [/url
[/url]
https://postimg.cc/Hj0zKksX]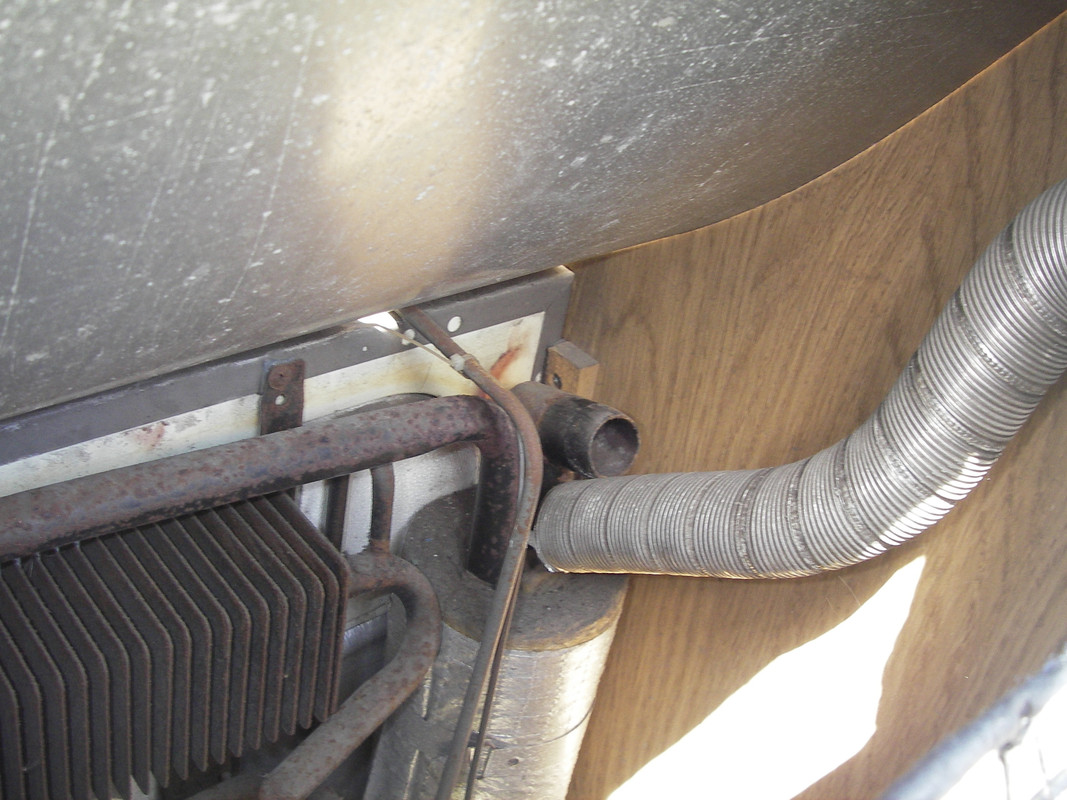 [/url
[/url]
This is where yours and mine may differ, I have a section of wood I can remove below the sink which enables me to access the top of the fridge while it is still in situ, this is incrediably handy as it means I don't have to remove the sink above it to gain access, it's a bit like trying to decorate your hall with your hand pushed through the letter box but can be done. You will have to split the gas connection the the fridge as that will in all likelyhood be a solid piece of pipe and the fridge ain't going anywhere with that still attached and if you force it you will damage the pipe. I had best mention that obviously the gas needs to be turned off or better still totally disconnected. This is the top of my fridge as seen with the top of the furniture removed as I was stripping the interior out for a refurb.
https://postimg.cc/RWhj4HNj]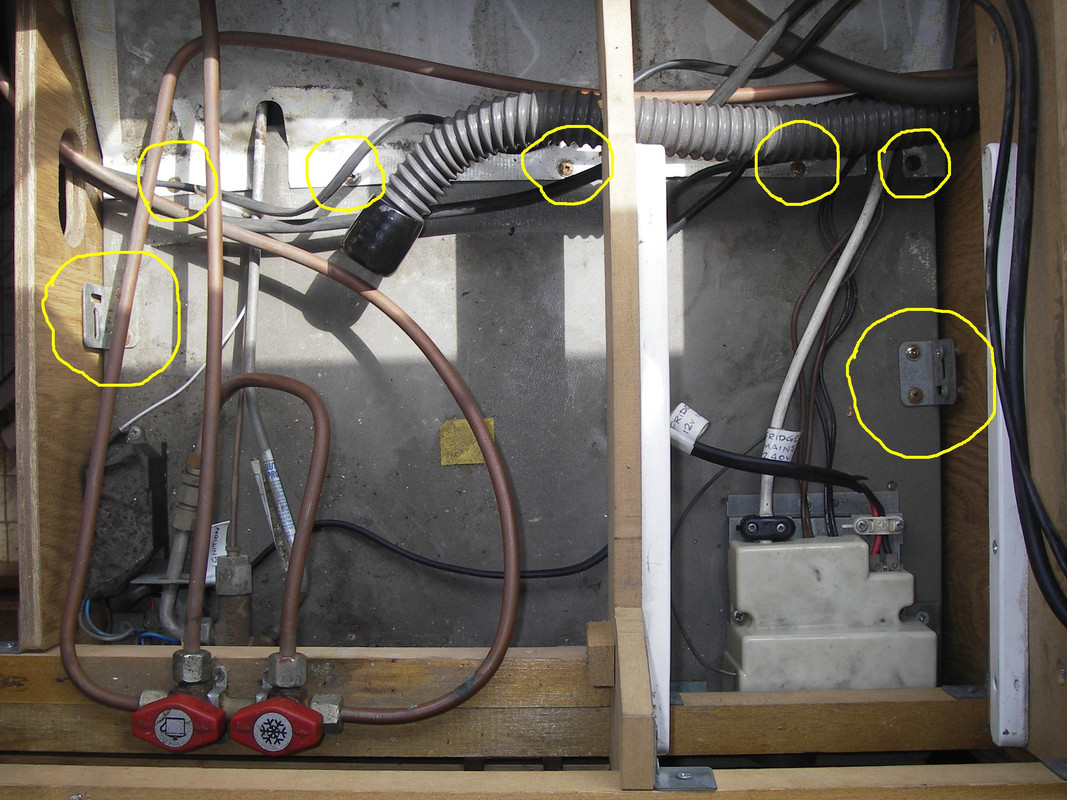 [/url
[/url]
The two larger circles are brackets fixing the fridge to the furniture, the five smaller circles above the m a screw that fix a thin metal plate to the top of the fridge which stops draughts coming in visa the external vents to the outside. There may be gaffer tape over the screws too as Added draught protection. These all have to be removed aswell. The gas pipe is the short U shaped piece just to the on the left hand side and you can see where I disconnected it in the next picture.Then all you have to do is disconnect the 12v suppy to the ignition switch, and the 240v to the mains connector under the safety cover as shown here. The 12v supply to run the fridge while driving is also under this cover. The yellow rings on the left are the ignition switch connections, the yellow rings on the right are the screws holding the 240v mains connections and 12v fridge connections, the red arrows are little tabs that need to be levered outwards to remove the cover once the screws have been removed.
https://postimg.cc/6yXvkr1p]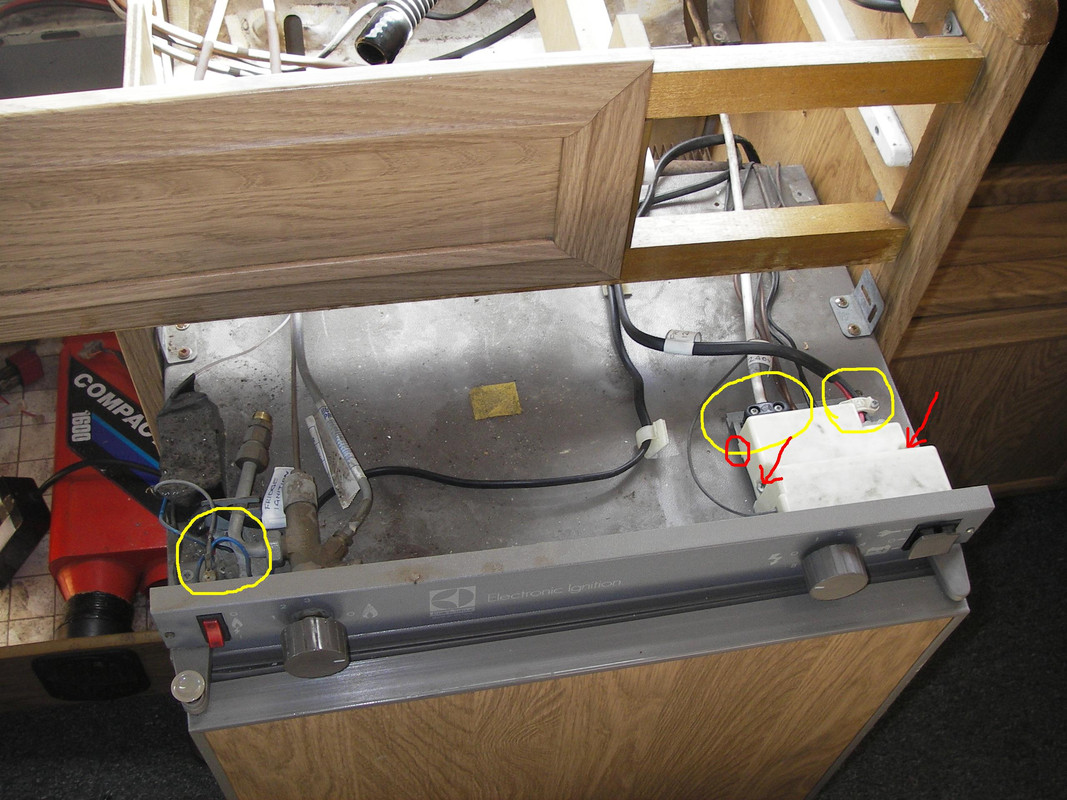 [/url
[/url]
And finally the connections with the covers removed.
https://postimg.cc/S24nBqDt]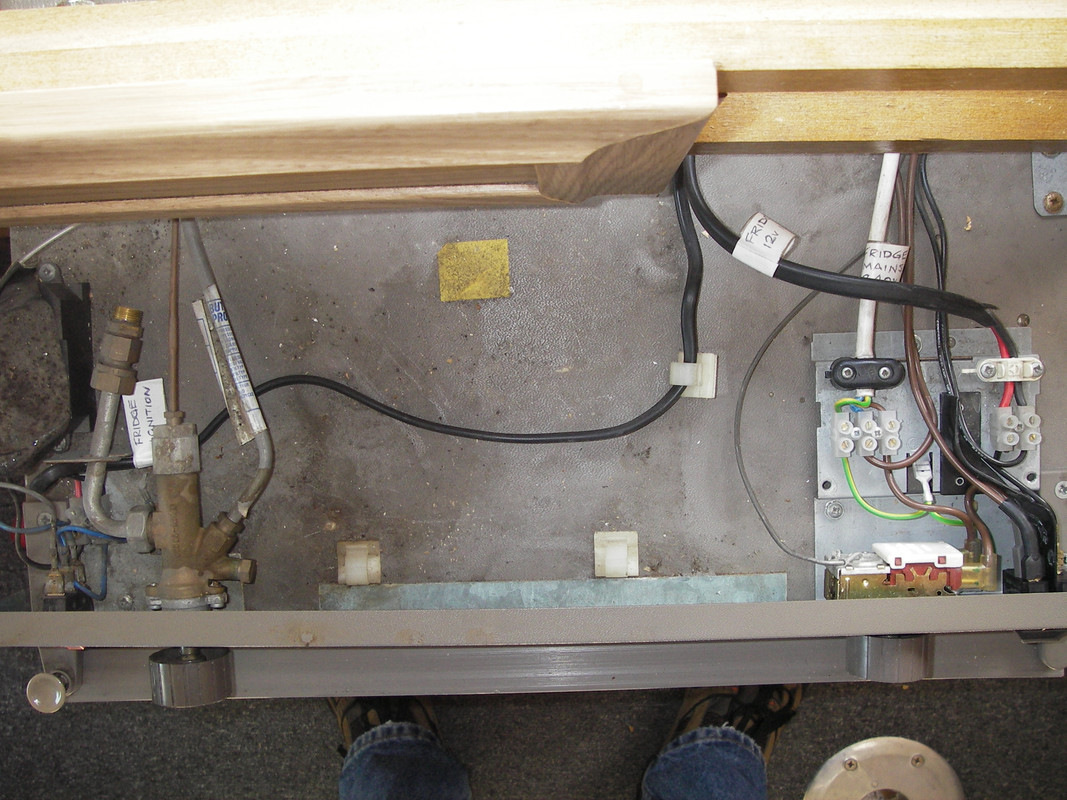 [/url
[/url]
The frisge should now pull completely out. If it doesn't then there might be another fixing screw in a cupboard you missed. The gas pipe is what I forgot once and that held it quite firmly. Happily I didn't force it and knacker the copper pipe.
It is a time consuming job when you do it for the first time but it's better to be careful that bugger it up or break something.
To be honest your igniter problem sounds more of an electrical bad connection or battery related issue than the actual ignition unit, if the igniter works after you have been on mains hook up for a while (and the mains charges the battery) then the battery might not be that good. Ripping out the fridge is a lot of hassle only to find your battery is on the way out. A bad cnnection on the other hand could be just about anywhere between the battery and the ignition unit.

 [/url
[/url [/url
[/url [/url
[/url [/url
[/url [/url
[/url