Overhauling 5 speed gearbox linkage

Big lumps of metals and spanners. Including servicing and fluids.

Moderators: User administrators, Moderators

Post Reply
mm289
Registered user
Posts: 314
Joined: 31 Dec 2010, 22:00
80-90 Mem No: 9111
Location: Dover, Kent

Overhauling 5 speed gearbox linkage

Post by mm289 »

Hiya,

So Myrtle's gearchange is worse than stirring a bowl of spagetti, stick will move about 6 inches laterally and 4+ inches vertically :shock:

And just for fun the whole stick will pull up out of the socket :roll:

So I have read the wiki's etc and seen about Silverbullets parts. Planning on putting an order in with Brickwerks and just want to check I am getting the right parts.

Myrtle is an AAZ conversion with a 5 speed 3H box.

Gear lever end looks like this:
Image

There is a lot of movement in the shaft where it goes through the floor which coupled with the fact that stick will lift out I presume means I need one of the 14mm repair kits?

Seems to be rather a lot of gap between the fork bushes and guides
Image

and this is how far it will move :shock:
Image

Boot is split as well - is their a replacement for this?

Both onions are knackered, are these 251 711 207 D & 251 711 207 E?

And then the selector ball joint has lateral and vertical movement
Image

Not sure what parts are available to repair this?

So, any thoughts?

Thanks, :ok

MM
'89 Autosleeper Trident
2.1 DJ
Member 9111

User avatar
Aidan
Trader
Posts: 6556
Joined: 11 Oct 2005, 19:21
80-90 Mem No: 742
Location: Llanfyllin, mid Wales : )
Contact:

Re: Overhauling 5 speed gearbox linkage

Post by Aidan »

boot for cup and ball join is 251 711 167 E available from Brickwerks
seal on box under selector shaft boot looks like it's weeping often a sign that the bearing cup at the other end of the selector shaft is damaged
strip it all out and then you can take a proper look at the bits, really hard to see what's worn where externally
do you not have Etka/Etos ?
I can supply the ball on it's own if the metal part is ok, my preferred solution as the made in china balls metal bit are a very poor fit on the shaft, but if splines on shaft are mullered then I have good preloved shafts

billy739
Trader
Posts: 2373
Joined: 20 Oct 2005, 10:00
80-90 Mem No: 1541
Location: gloucester

Re: Overhauling 5 speed gearbox linkage

Post by billy739 »

the left hand fork on the stick definatly has splayed open a little!

User avatar
Hacksawbob
Registered user
Posts: 4443
Joined: 11 Oct 2005, 07:11
80-90 Mem No: 1168
Location: Lancs UK member 1168

Re: Overhauling 5 speed gearbox linkage

Post by Hacksawbob »

metal bit are a very poor fit on the shaft
I couldn't get the Brickwerks supplied gear selector on in situ and the ammount of twating it would require was not really possible given the space available. Aidan came to the rescue (yet again) with one his "preloved shafts" *snigger* If you buy the Brickwerks one it may need the spline star shape opening up with an angle file or something, or maybe I was unlucky and there is variation in production and some fit...just be prepared for some extra fettling given that I think they are no longer available from VW AFAIK, unless classic do them? just my 2d's
member 1168

mm289
Registered user
Posts: 314
Joined: 31 Dec 2010, 22:00
80-90 Mem No: 9111
Location: Dover, Kent

Re: Overhauling 5 speed gearbox linkage

Post by mm289 »

OK, got ETOS working (can't do the German translation in ETKA :roll: )

On the onion bushes, there are 2 listed for the rear bush 251 711 207 "D" & "E" - what is the difference?

I presume it was a model year change or something?

Thanks,

MM
'89 Autosleeper Trident
2.1 DJ
Member 9111

User avatar
CovKid
Trader
Posts: 8409
Joined: 30 Apr 2006, 13:19
80-90 Mem No: 3529
Location: Ralph - Coventry (Retired)
Contact:

Re: Overhauling 5 speed gearbox linkage

Post by CovKid »

Keep this one going mm289. Mine is a right mess too. As for ball linkage, my 5-speed one has been held together with plastic ties and a lunch bag for two years. Haven't dared look under the lever :rofl
Roller paint your camper at home: http://roller.epizy.com/55554/" onclick="window.open(this.href);return false; for MP4 download.

User avatar
Hacksawbob
Registered user
Posts: 4443
Joined: 11 Oct 2005, 07:11
80-90 Mem No: 1168
Location: Lancs UK member 1168

Re: Overhauling 5 speed gearbox linkage

Post by Hacksawbob »

On the onion bushes, there are 2 listed for the rear bush 251 711 207 "D" & "E" - what is the difference?
from brickwerks
Fits all 5 speed models and all but the earliest 4speed
Possibly the early 4sp variant?
member 1168

mm289
Registered user
Posts: 314
Joined: 31 Dec 2010, 22:00
80-90 Mem No: 9111
Location: Dover, Kent

Re: Overhauling 5 speed gearbox linkage

Post by mm289 »

Sorted, got through on the phone this morning. The "E" number is for later vans including my '86, the "D" number is for earlier vans, so an early van has 2 x 251 711 207 D, a later van has a "D" for the front and an "E" for the rear. :|

Parts ordered so should be here in the next couple of days then I will strip out and rebuild.

So CovKid, did you fancy a photo journal of this then? :D

MM
'89 Autosleeper Trident
2.1 DJ
Member 9111

User avatar
CovKid
Trader
Posts: 8409
Joined: 30 Apr 2006, 13:19
80-90 Mem No: 3529
Location: Ralph - Coventry (Retired)
Contact:

Re: Overhauling 5 speed gearbox linkage

Post by CovKid »

Absolutely! :D Will WIKI it.
Roller paint your camper at home: http://roller.epizy.com/55554/" onclick="window.open(this.href);return false; for MP4 download.

mm289
Registered user
Posts: 314
Joined: 31 Dec 2010, 22:00
80-90 Mem No: 9111
Location: Dover, Kent

Re: Overhauling 5 speed gearbox linkage

Post by mm289 »

So, just to keep CovKid happy, here is chapter and verse on overhauling the gear linkage.

Just for the record, this is a five speed, the shift mechanism housing is slightly different on a four speed.

So we can do a before and after, lateral movement is 8"s
Image Image

Vertical movement is 7"s

Image Image

Oh, and the lever pulls up out of the floor. :shock: Be interesting to see what improvement is made.

So, first off comes the gear knob (unscrews) then lift the cab mat and gear lever gaiter (ooh, what nice cab floors :D )

Image
Image

This is what the gear lever bearing assembly look like from above. You should already be able to spot a major problem here - prizes will be awarded :rollin

Image

So back underneath, drop the spare wheel carrier for access then you can start removing the shift mechanism housing.

Image

Undo bolts “1”, 13mm, also hold the shift guides in place so don’t lose them! Next bolts “2”, 4 off 10mm and then remove the carrier. Finally bolts “3” and the housing is free.

Image

Finally undo the bolt securing the lever fork to the shift rod and the whole assembly will drop down through the floor.

Image

Cheers,
MM
'89 Autosleeper Trident
2.1 DJ
Member 9111

mm289
Registered user
Posts: 314
Joined: 31 Dec 2010, 22:00
80-90 Mem No: 9111
Location: Dover, Kent

Re: Overhauling 5 speed gearbox linkage

Post by mm289 »

So, now we can get the mechanism on the bench and have a proper look.
But first, it’s a relatively mild -1 outside, just finished watching Wales destroy Scotland (why can’t England play as well as either of these teams?) so I feel the need for some “tunes”. 8)

Hmmm, what would be good for a cold Sunday night – bit of Rockabilly with a hint of country I think – that’ll be Imelda May then. :pimp

Image

This is what the linkage looks like complete with odd bits of debris found

Image Image
Image

Undo the two bolts (10mm) on the top of the bearing housing and push out the rubber guide. In my case this pretty much fell apart. Also undo the grub screw in the bushing on the gear lever holding the top spring in place.Now the whole assembly will slide off up the gear lever.

Image

Off to the parts washer with this little lot I think! That’s better …. :ok

Image Image

Now to disassemble the spring and pin that creates the “detent” you push against to get 1st & reverse on a 5 speed (dog leg 1st on these puppies – just like a Ferrari) :wink:

Remove the rubber gaiter and you will see a spring over the guide pin held in place by a c-clip. Remove the c-clip (it will spring off so be careful not to lose it) and spring.

Image

The pin will only push out one way i.e. away from the c-clip, but stopping in coming out is a circlip, so remove this also.

Image

Now PROCEED CAREFULLY, because the detent is created by a ball bearing under pressure from a spring which pushes against a collar on the pin, if you just shove the pin out the ball bearing will pop out and run away – go on ask me how I know. :roll:

Image

You can also inspect the shift guides/blocks and the bushes on the lever fork that move on these.

Image Image

Mine aren’t great (and as noted by Billy earlier the forks look a bit bent) but we will see how we go. Silverbullet on here has started making these and they are available through Brickwerks if you need to replace yours.

So that is the gear lever shift mechanism completely disassembled. Next we can start re-assembling with new parts.

MM
'89 Autosleeper Trident
2.1 DJ
Member 9111

User avatar
CovKid
Trader
Posts: 8409
Joined: 30 Apr 2006, 13:19
80-90 Mem No: 3529
Location: Ralph - Coventry (Retired)
Contact:

Re: Overhauling 5 speed gearbox linkage

Post by CovKid »

Excellent pics and explanation so far! By the way, you can either replace the blocks or just get someone who can weld ally to build them up and grind them back to shape although they won't actually stop you engaging gears. You can in fact find them without any blocks at all.

Silverbullet makes replacements: http://forum.club8090.co.uk/viewtopic.p ... e#p7625943" onclick="window.open(this.href);return false; - just short of £30.
Roller paint your camper at home: http://roller.epizy.com/55554/" onclick="window.open(this.href);return false; for MP4 download.

mm289
Registered user
Posts: 314
Joined: 31 Dec 2010, 22:00
80-90 Mem No: 9111
Location: Dover, Kent

Re: Overhauling 5 speed gearbox linkage

Post by mm289 »

This is what the new parts look like,

Image Image

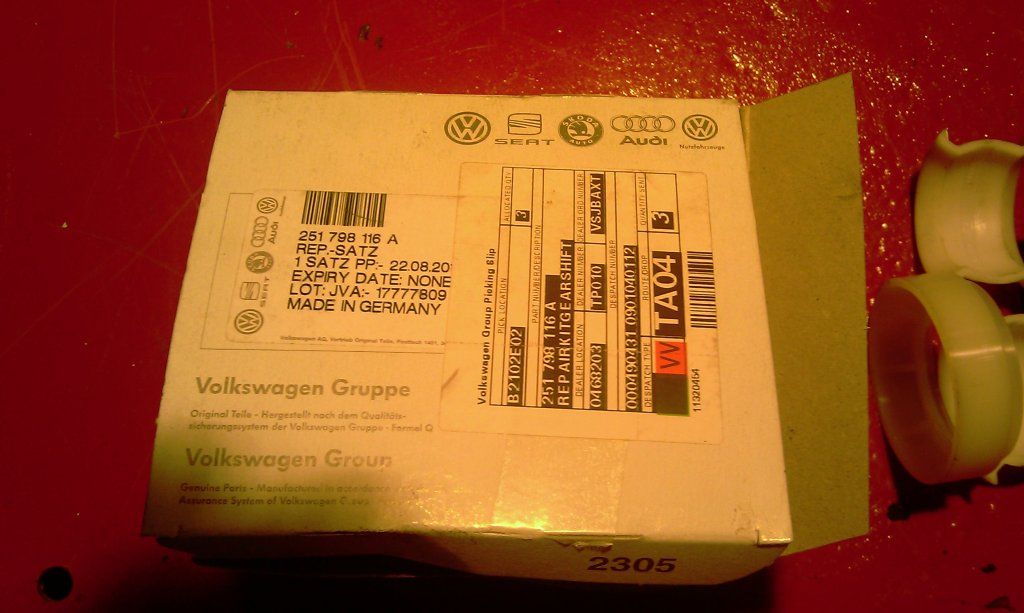
Genuine VW rebuild kit from Brickwerks.

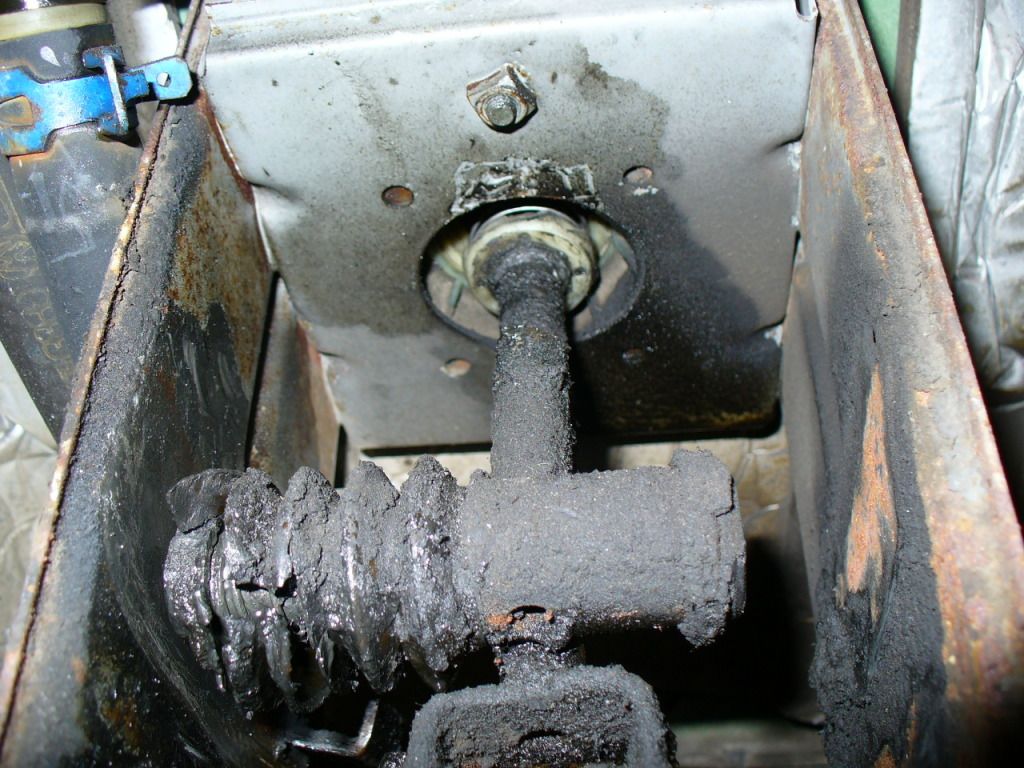
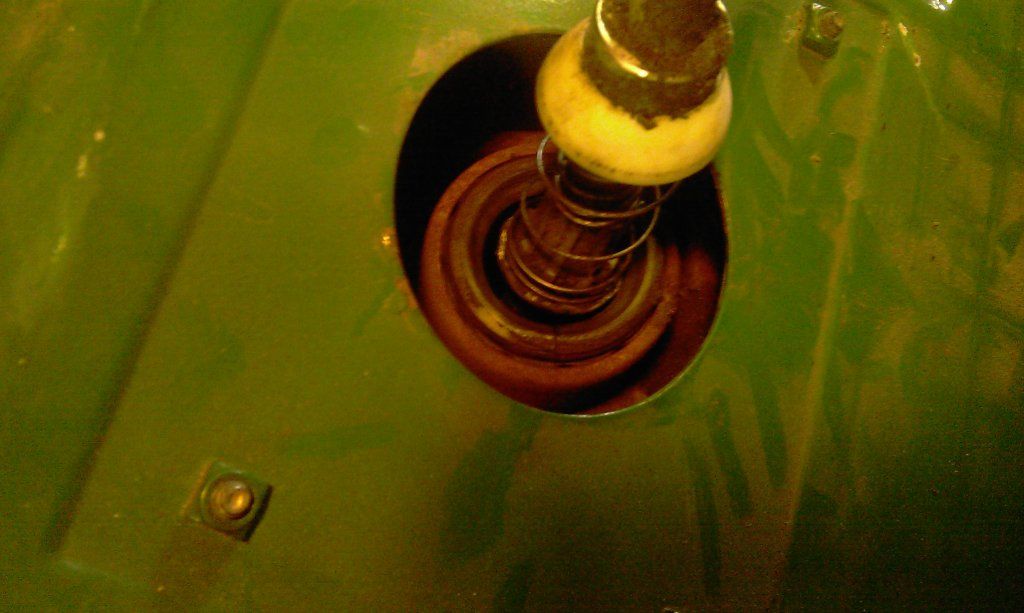
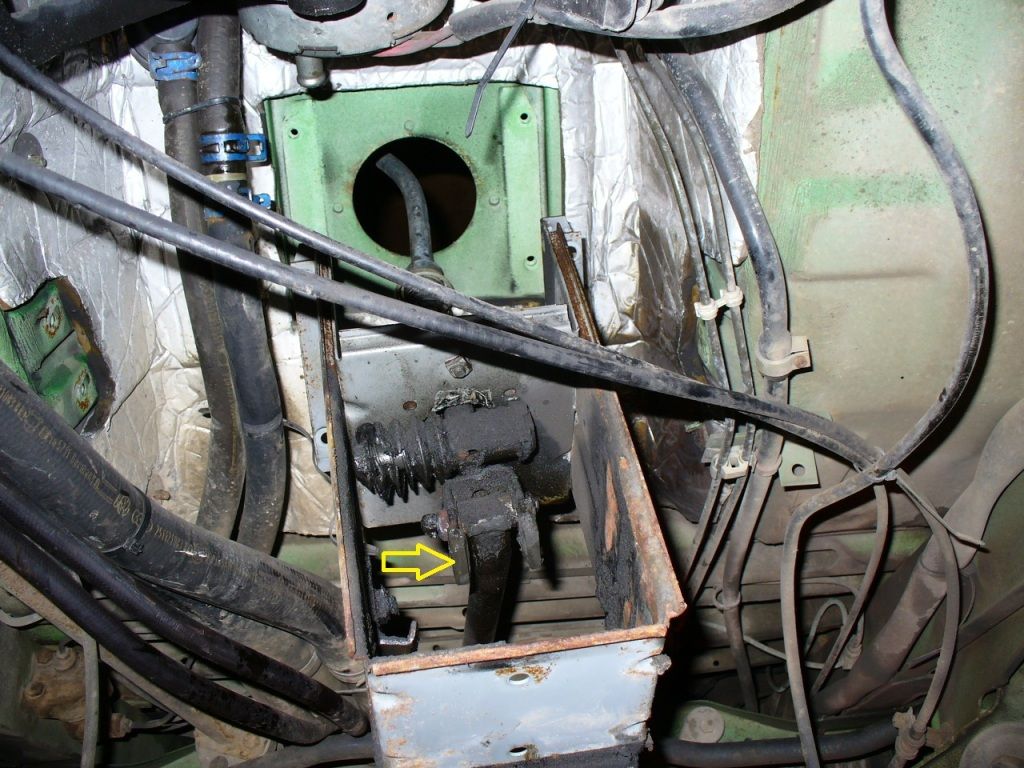
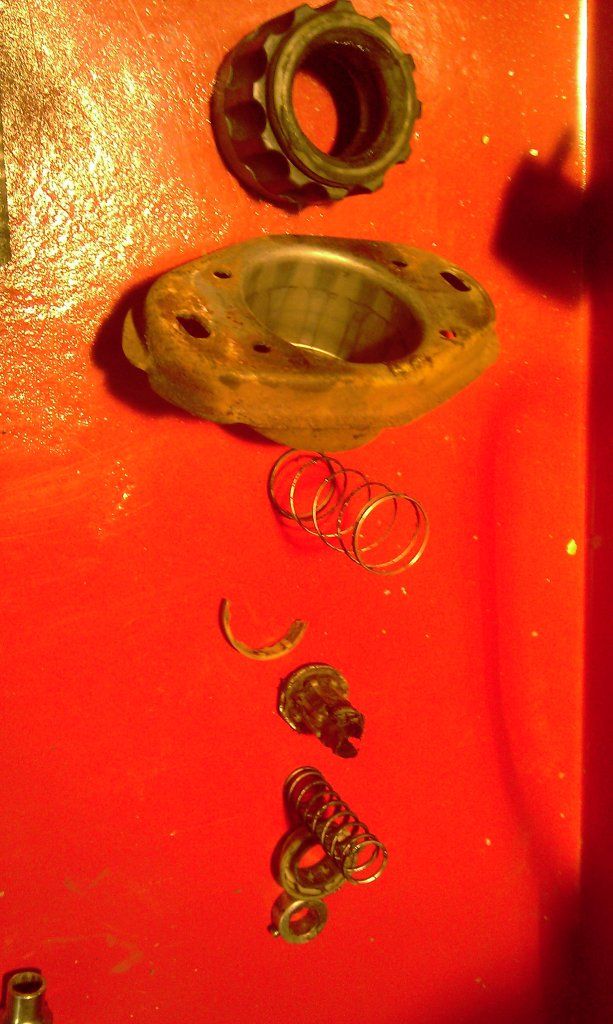
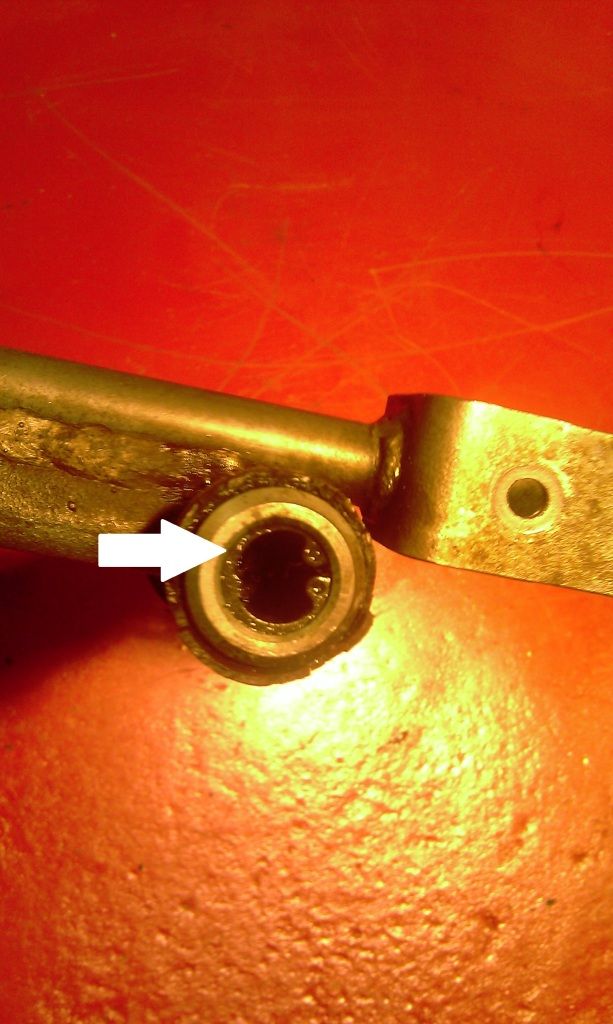
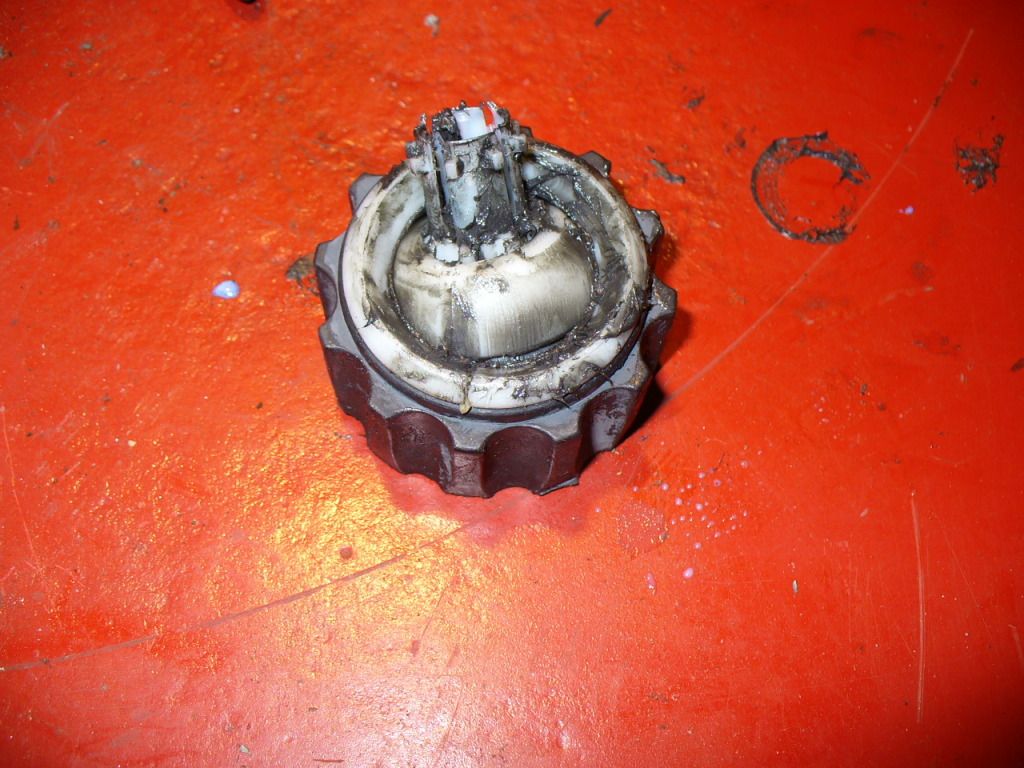
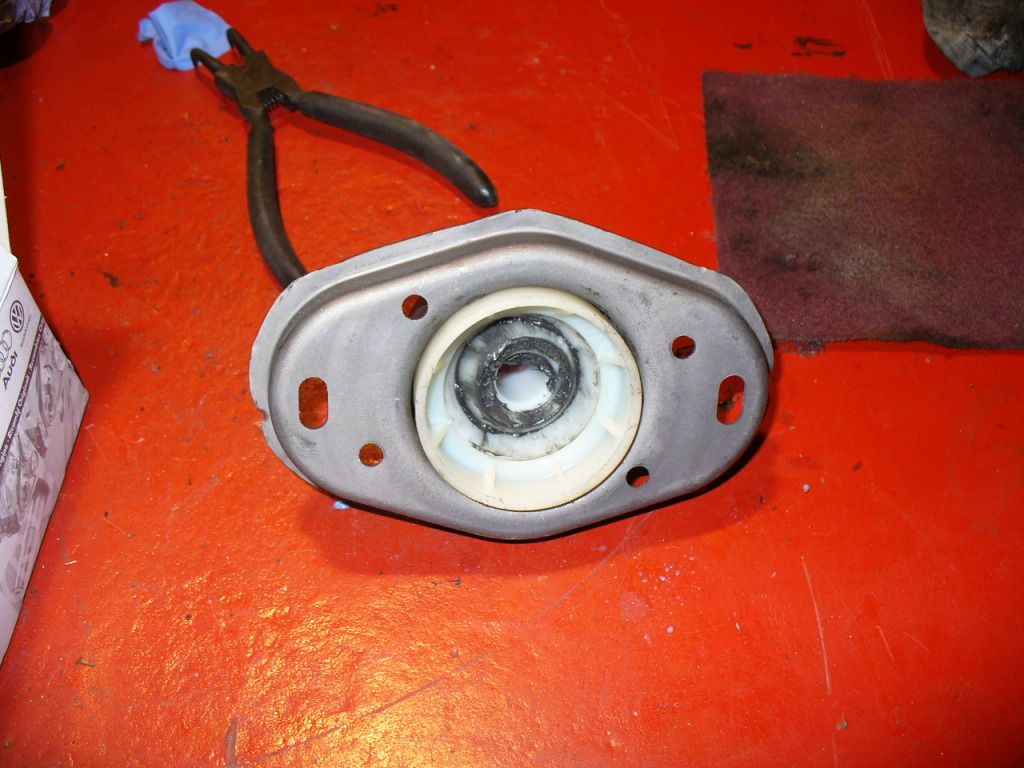
So to answer my question from earlier – what was immediately obvious when looking at the old gear lever bearing assembly is that the upper and lower ball halfs have popped out of the bearing shells and the lower ball half is partially disintegrated. :shock:

Image

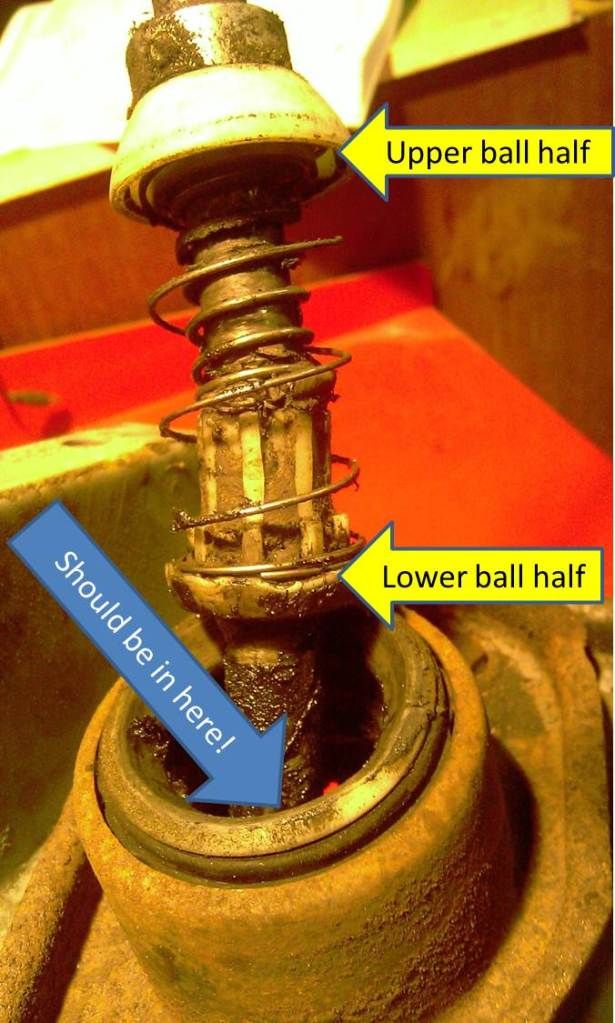
So in effect, the gear lever wasn’t running in the bearing at all, just connected to the shift lever. No wonder it moved around so much, and probably also exacerbated the wear on other components. :roll:

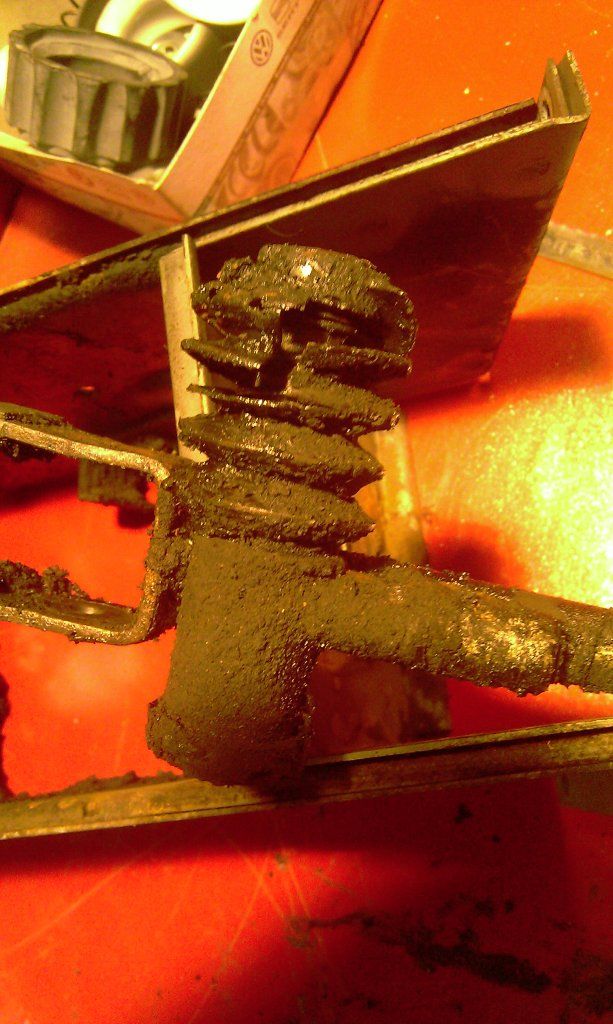
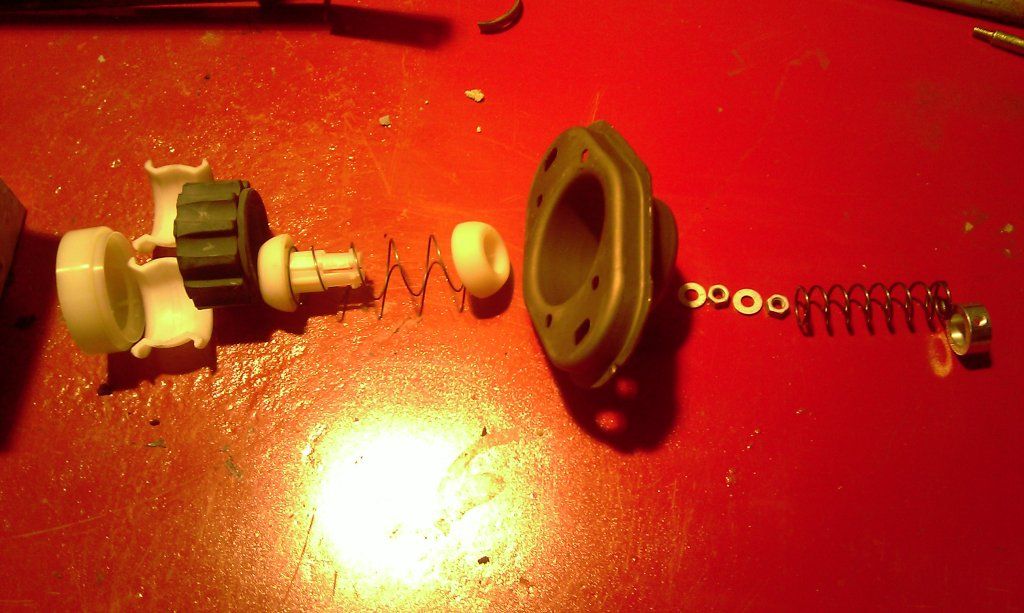
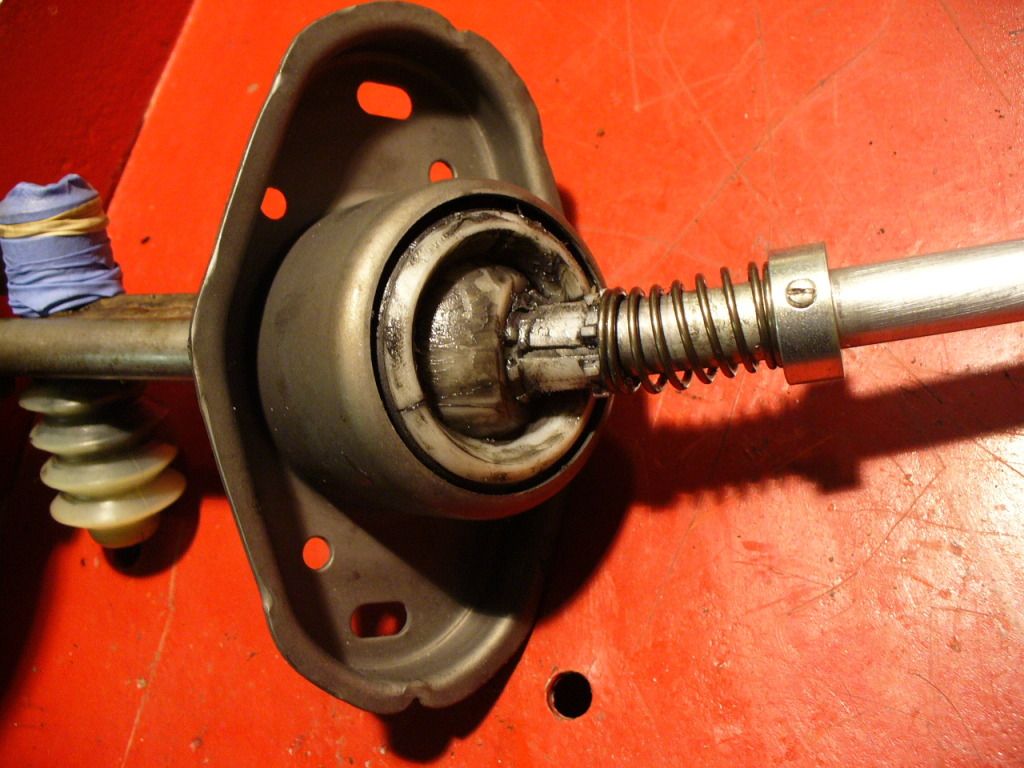
Now started assembling the new bearing. The two plastic shells are pushed into the rubber guide (looks like a big cog!). The lower ball half is then pushed into the shells, the spring fitted and the upper ball half pushed in as well. Lots of moly grease applied and the assembled bearing looks like this.

Image

The whole bearing can then be pressed into the new metal housing, doesn’t need a lot of pressure, just tapped in.

Image

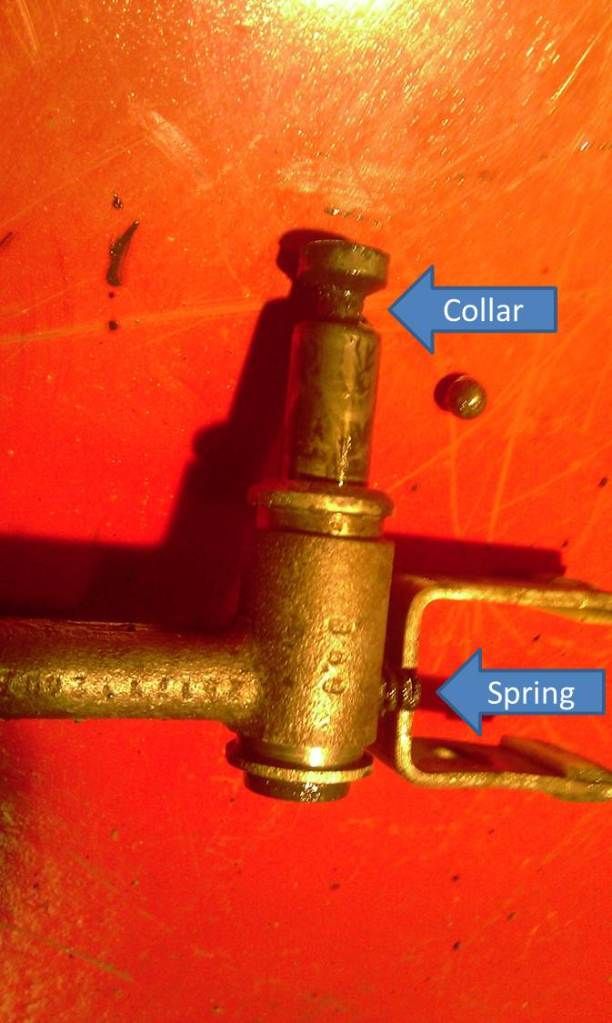
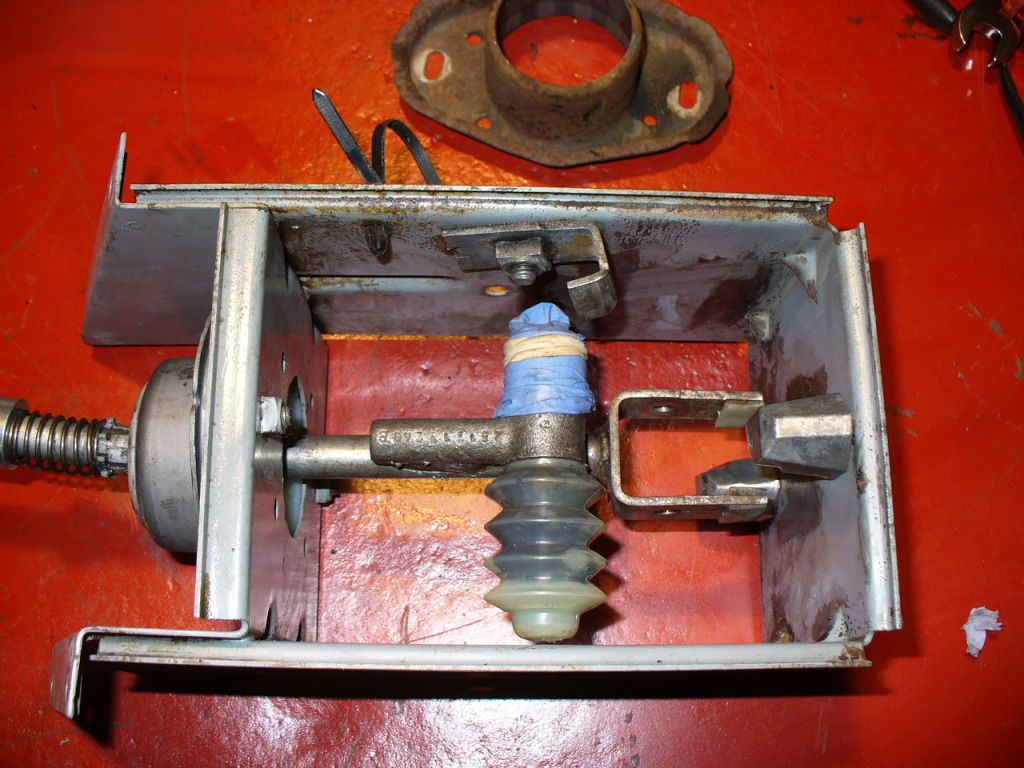
At this stage you could slide the bearing and housing onto the gear lever, put the final spring on and then lock in place with the bushing and grub screw (which screws into a recess on the gear lever so can only go in one place.)
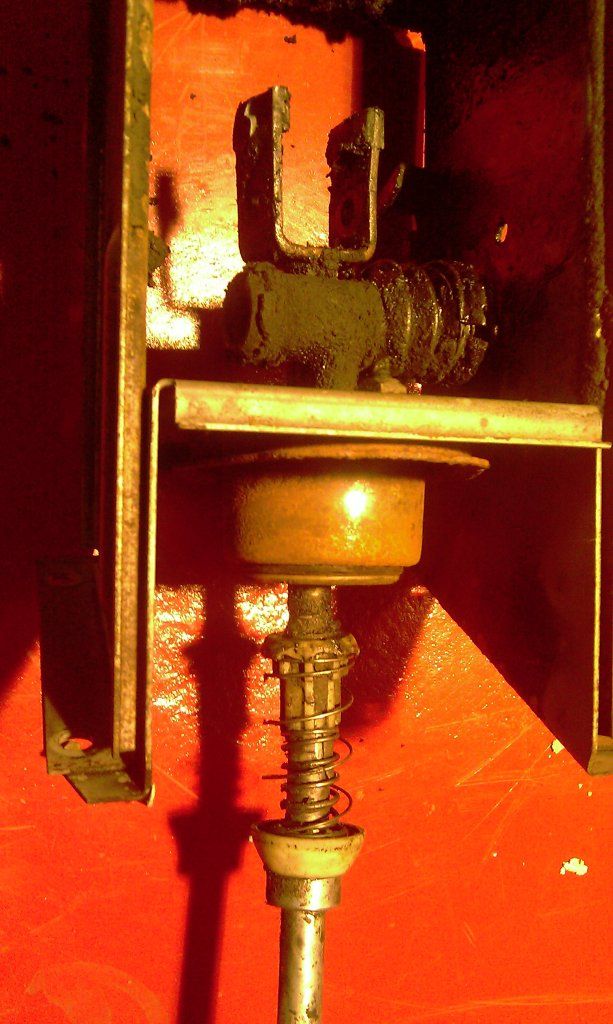
If you did this your assembled unit would look like this.

Image

Good job eh? Apart from the fact I can’t now fit it into the shift mechanism housing. :( 
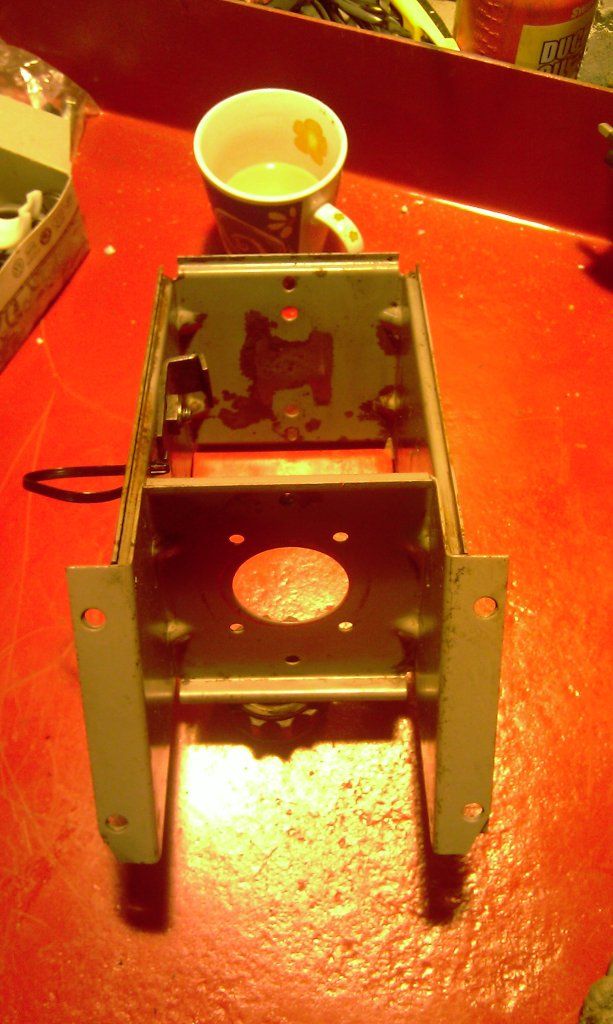
You need to put the gear lever through the housing first and then put on the bearing housing etc.

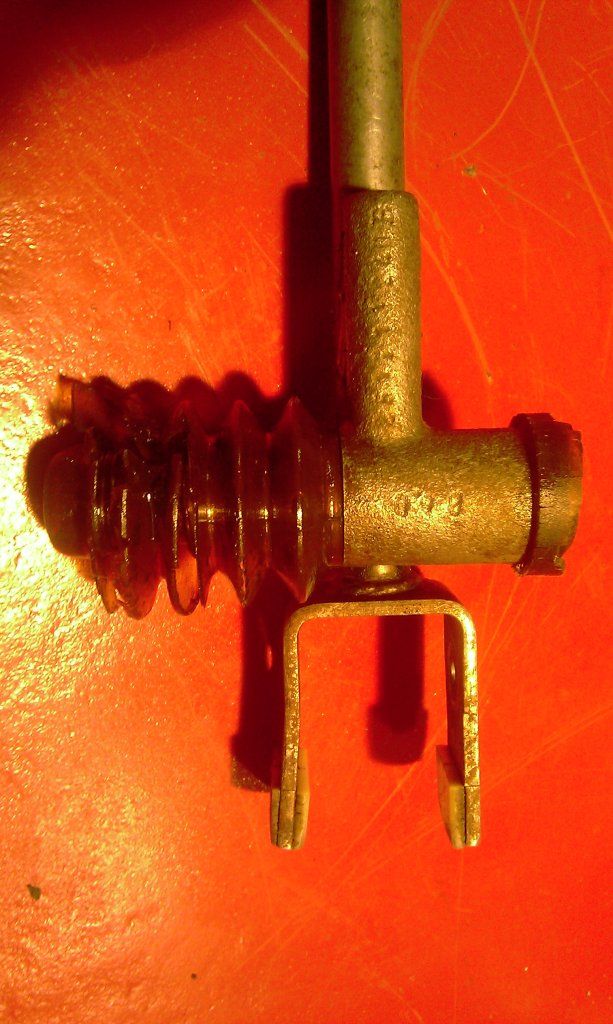
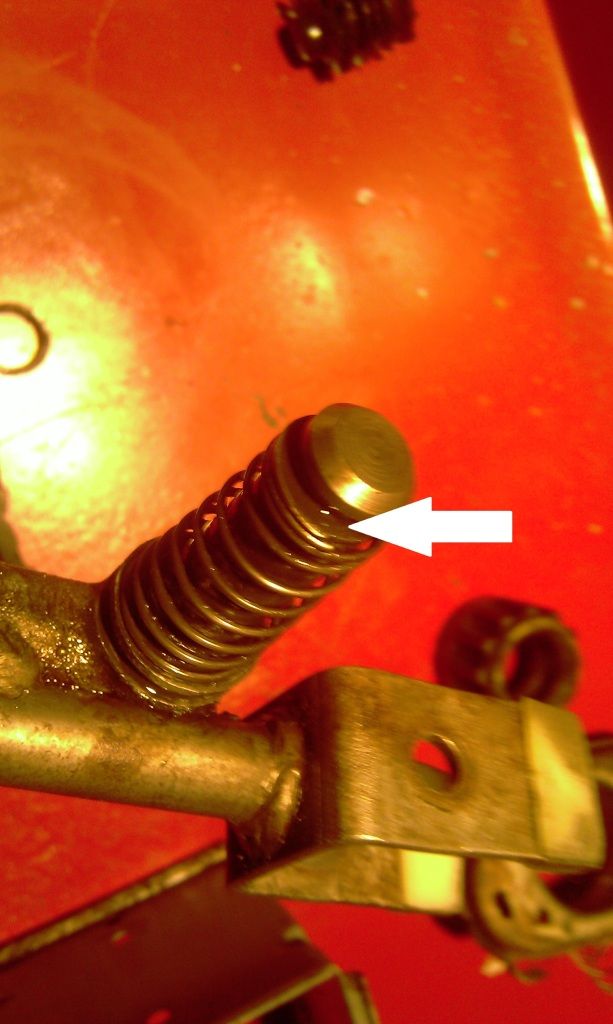
Now moving to the end of the gear lever and the guide pin and spring. This was cleaned and re-assembled. The only tricky bit is depressing the spring and ball bearing whilst you push in the pin – not too difficult really though.

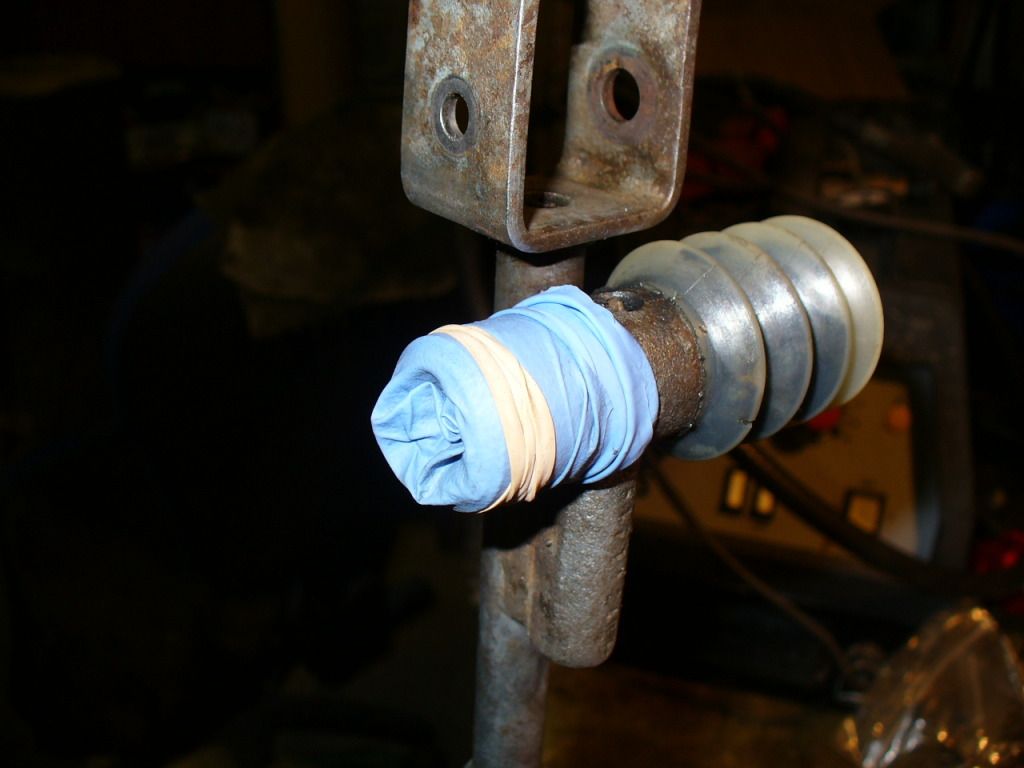
The original boot was split so a new on was filled with moly grease and then refitted.

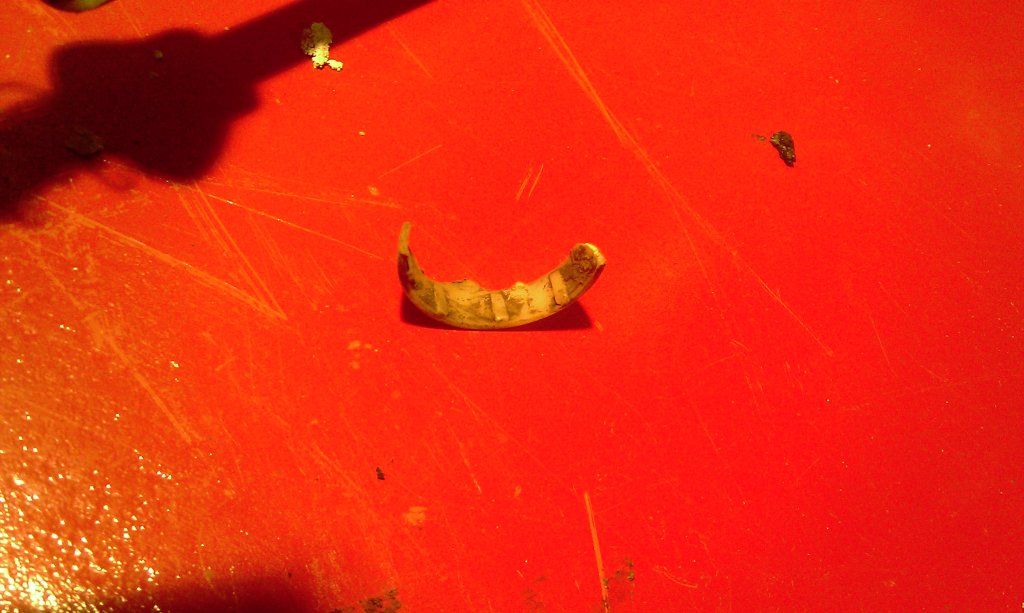
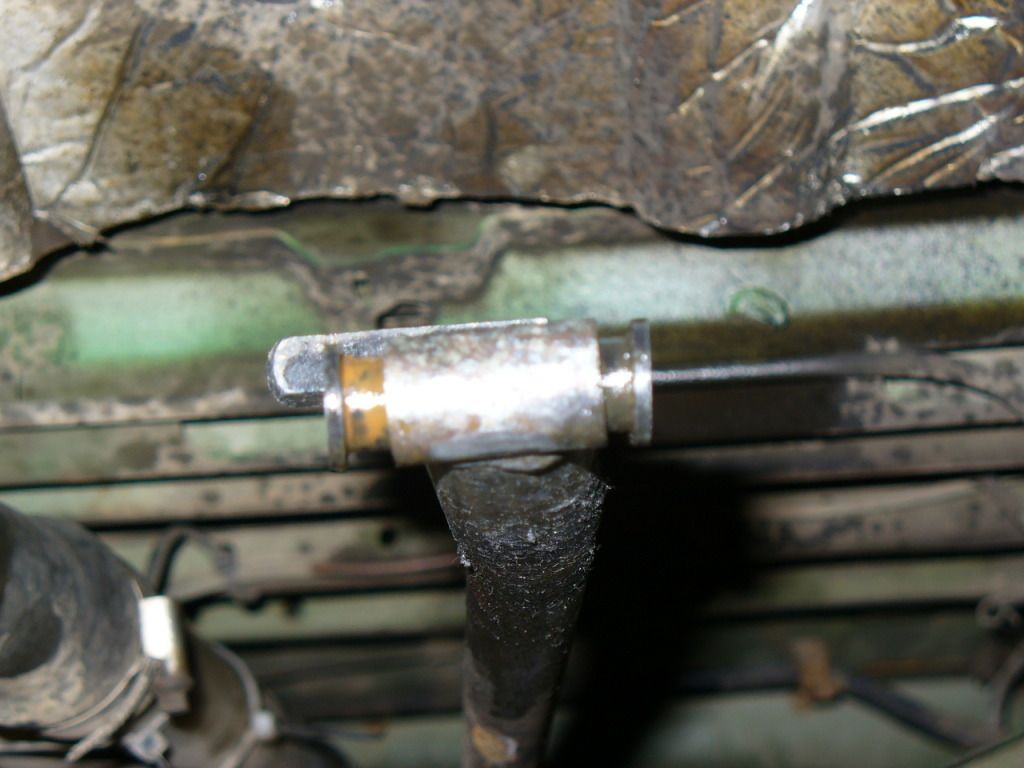
On the other end of the guide pin assembly is a plastic cap that stops dirt entering the bushing and also acts as a buffer to protect the end of the assembly hitting the housing when rocking the gear lever from left to right in neutral. (if you move the stick from left to right as you would when checking you are in neutral and get a metallic clunk, then likely this cap is broken/missing like it was on mine).

Image

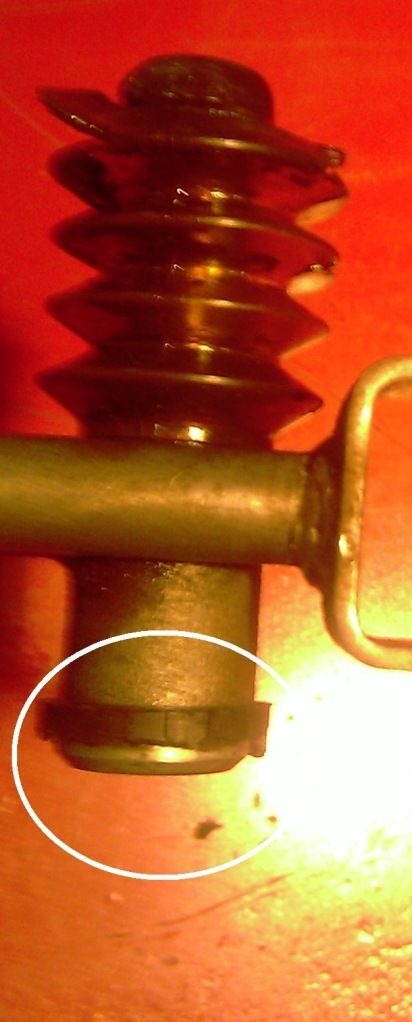
Now the problem is, this cap isn’t even listed as a part on ETOS and I can’t find one anywhere on the web! Anyone got any ideas? :?: :?: :?: :?: :?:

For the moment I have improvised a cover to stop dirt getting in (couple of fingers from used gloves), but will have to make something more robust if can’t find the right part!

Image

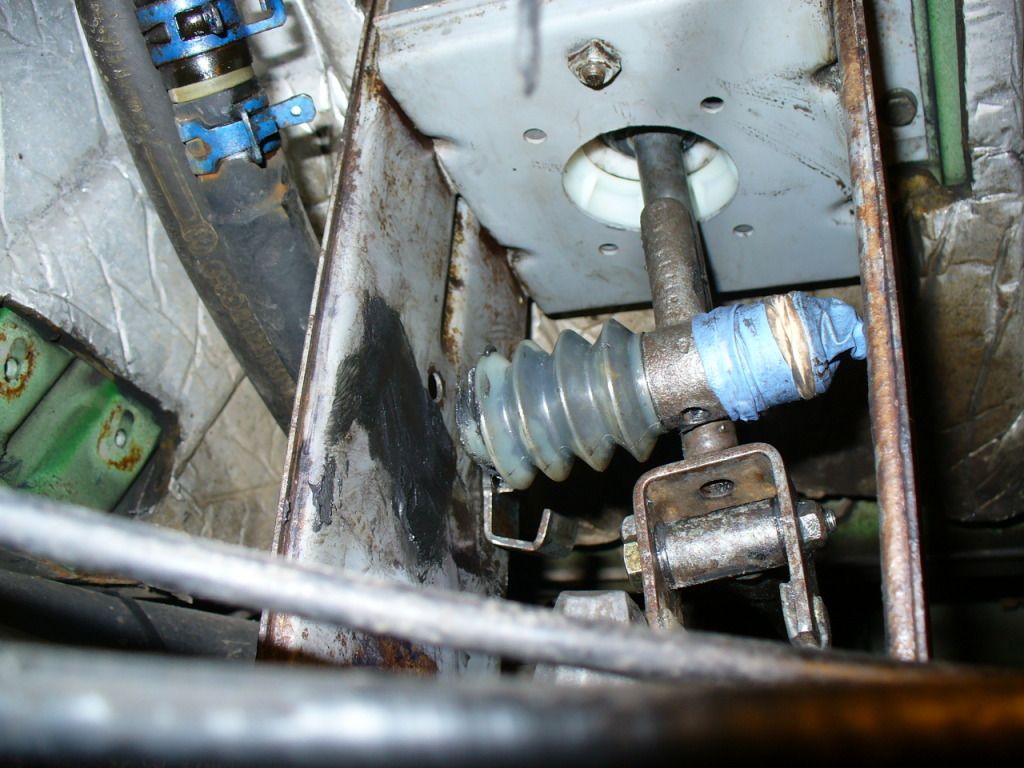
And then the whole unit assembled.

Image

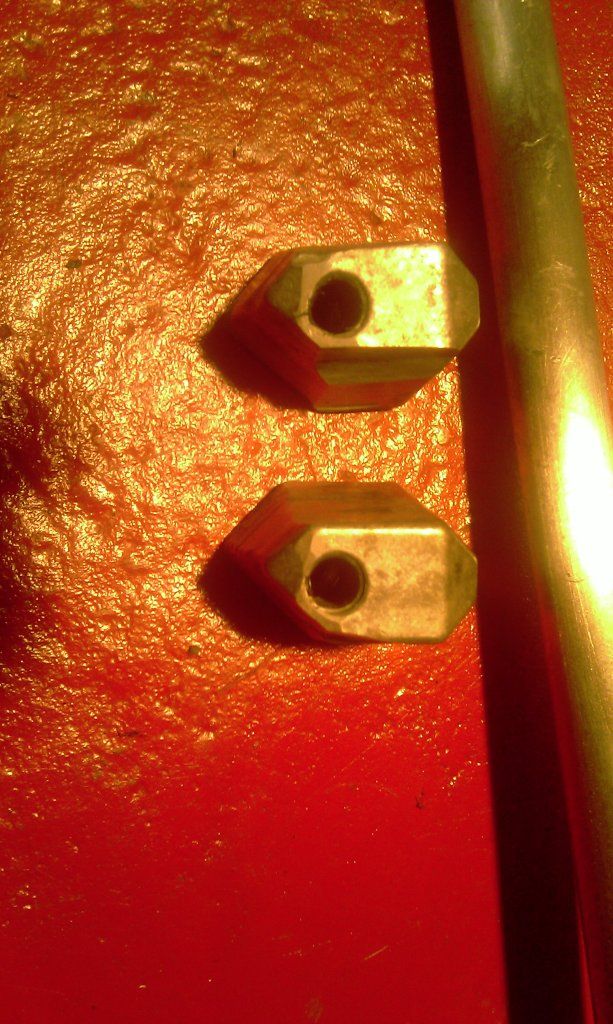
Next to replace the 2 bushes in the end of the shift rod. NOTE: these are included in the overhaul kit, I didn’t realise so ordered them separately as well. Old bushed can just be pryed out with a sharp screwdriver and then replaced.

Image

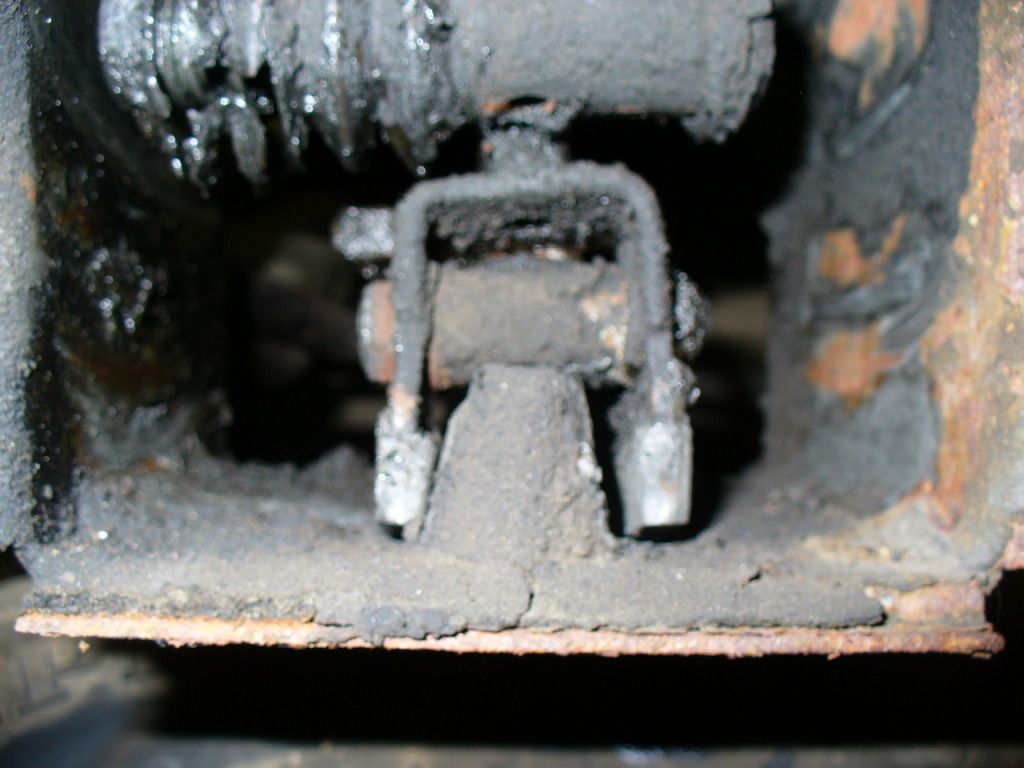
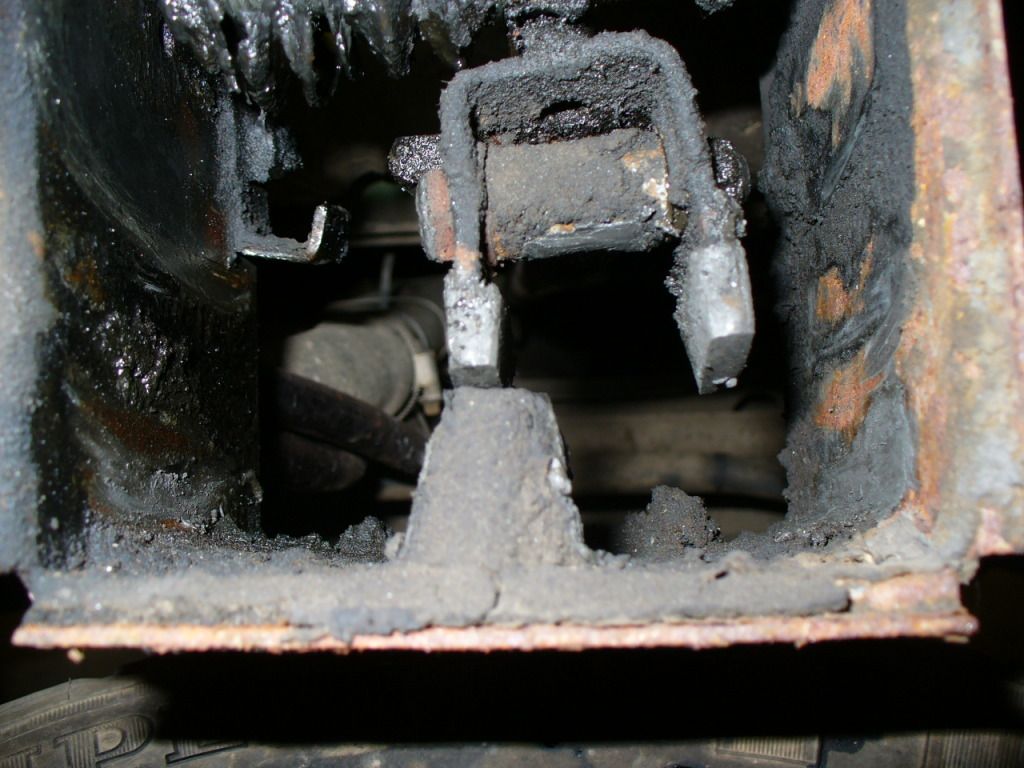
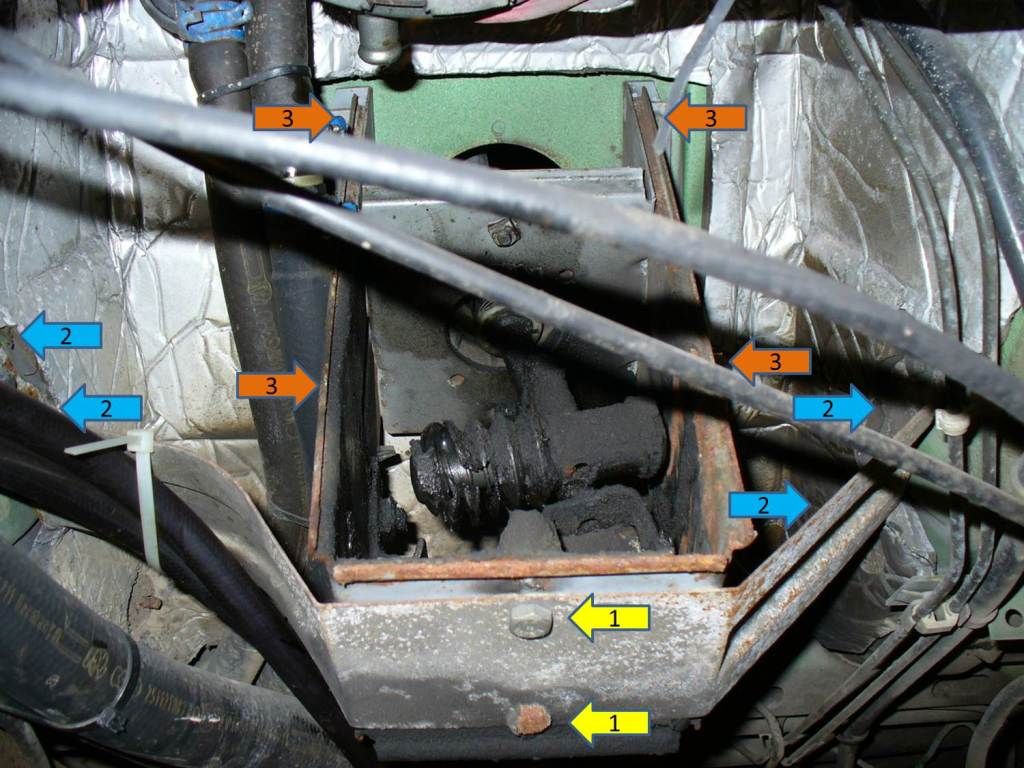
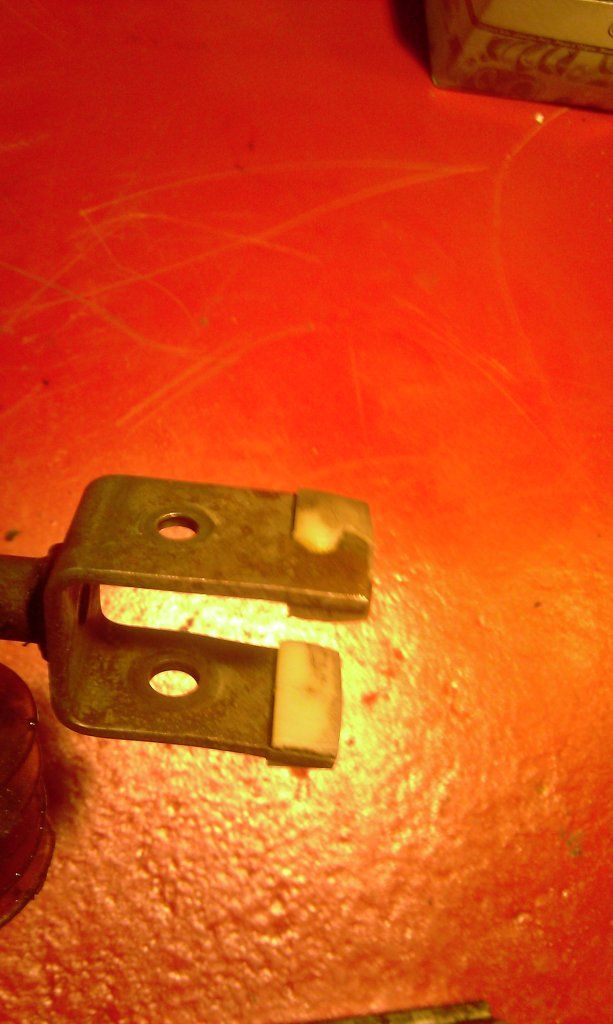
This is the reverse gear lock, bolts to the inside of the mechanism housing and stops you shifting straight into reverse.

Image

When you go for reverse the left movement pushes against the guide pin/spring and then you press the gear lever down, which pushes the square lug on the back of the shift lever underneath the reverse gear lock. Hence reverse can only be selected with a left AND down movement.

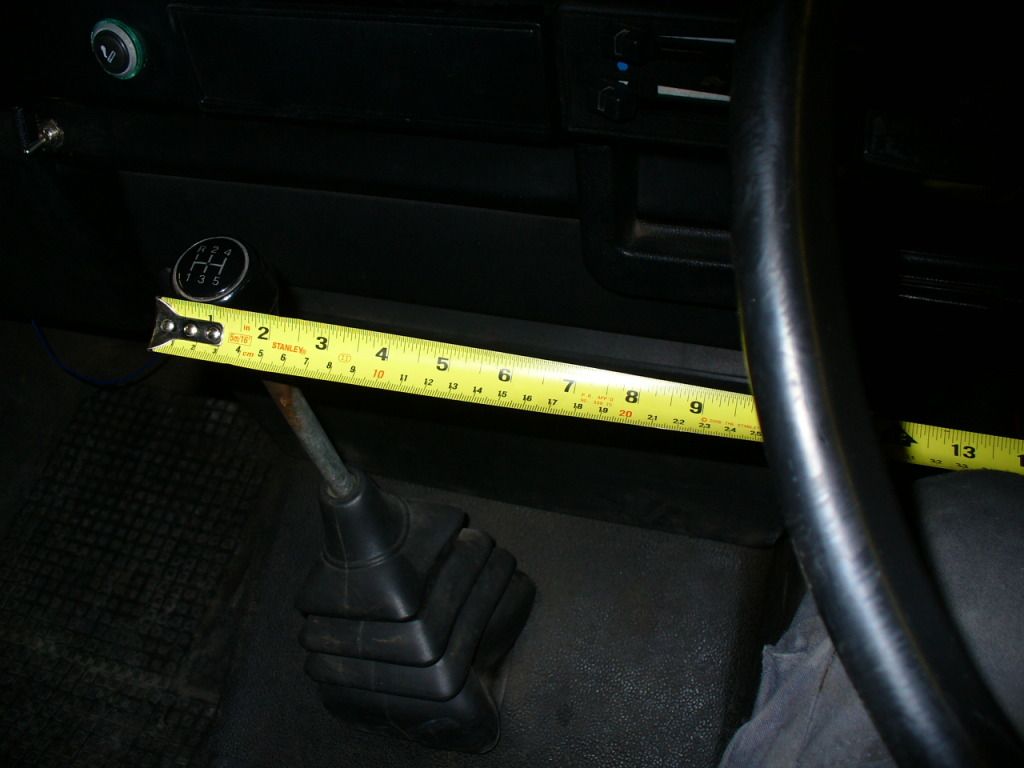
Before moving onto replacing the bushes in the rest of the shift mechanism I wanted to see what difference just overhauling the bearing and shift mechanism had made, so reassembled the housing,

Image

And then got in and tried it out.
WOW, no more spaghetti stirring. :ok

Change is positive, you can tell where the gears are and I even get a satisfying “snick” when it comes out of reverse. 1st to 2nd changes are suddenly achievable.
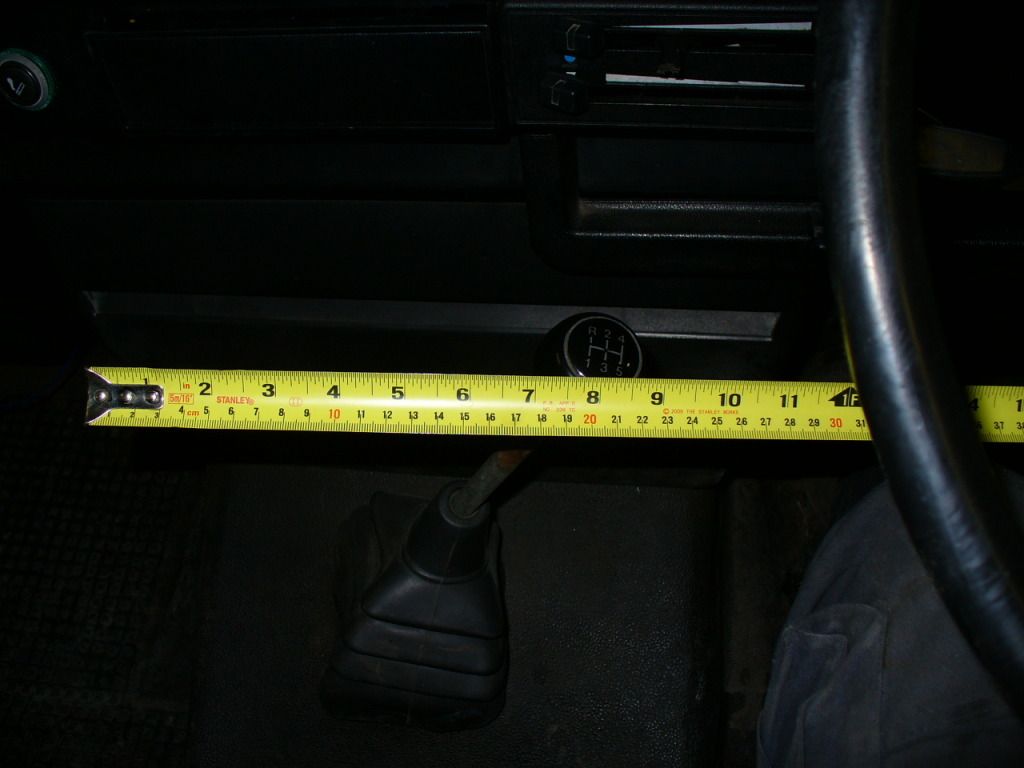
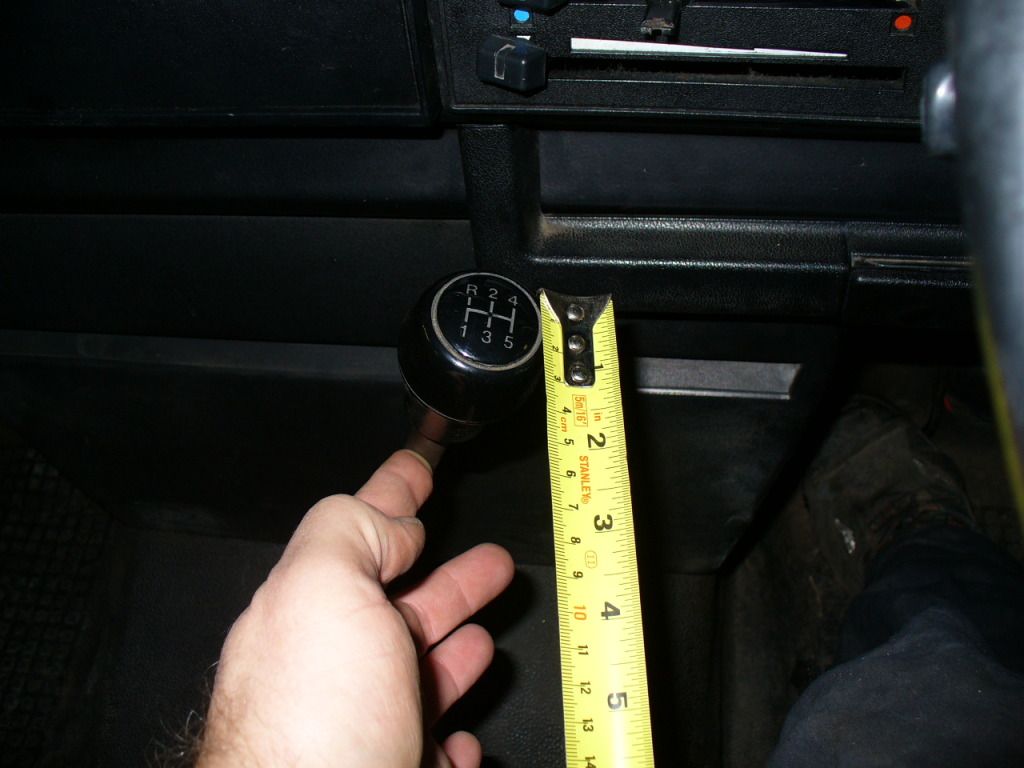
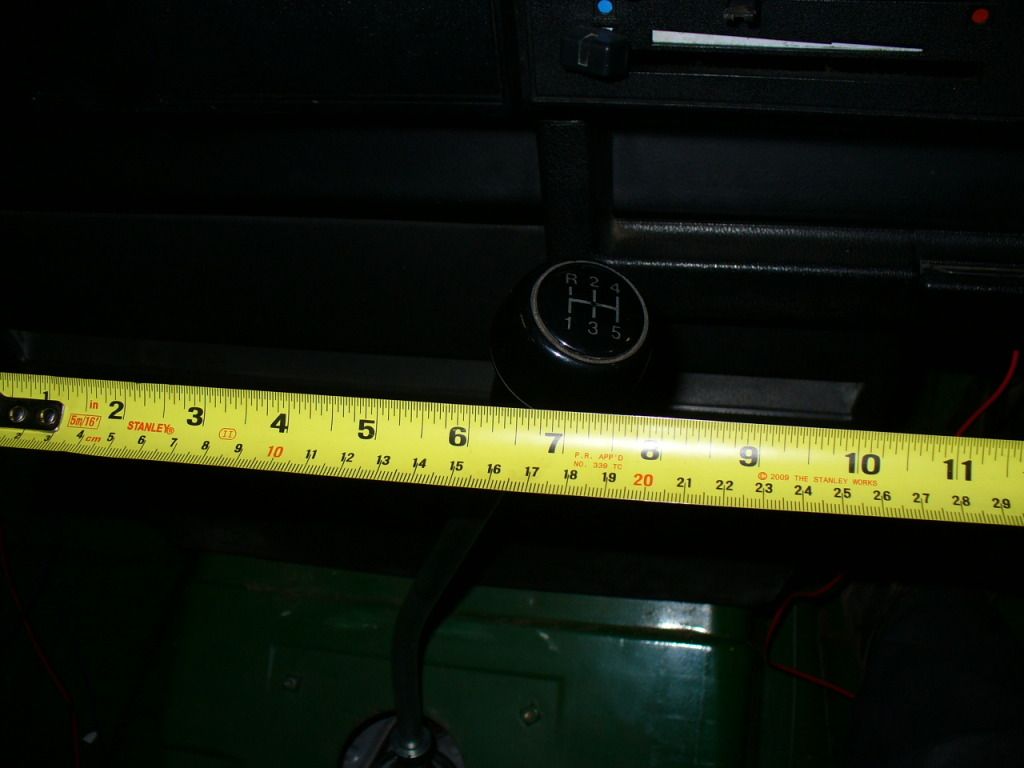
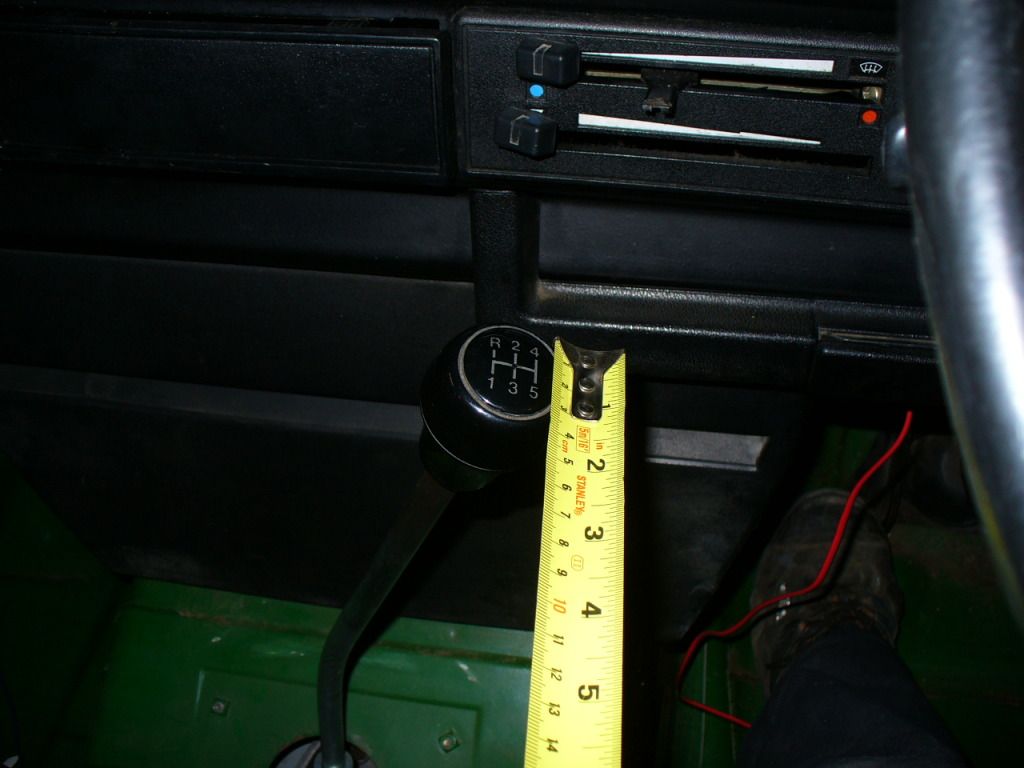
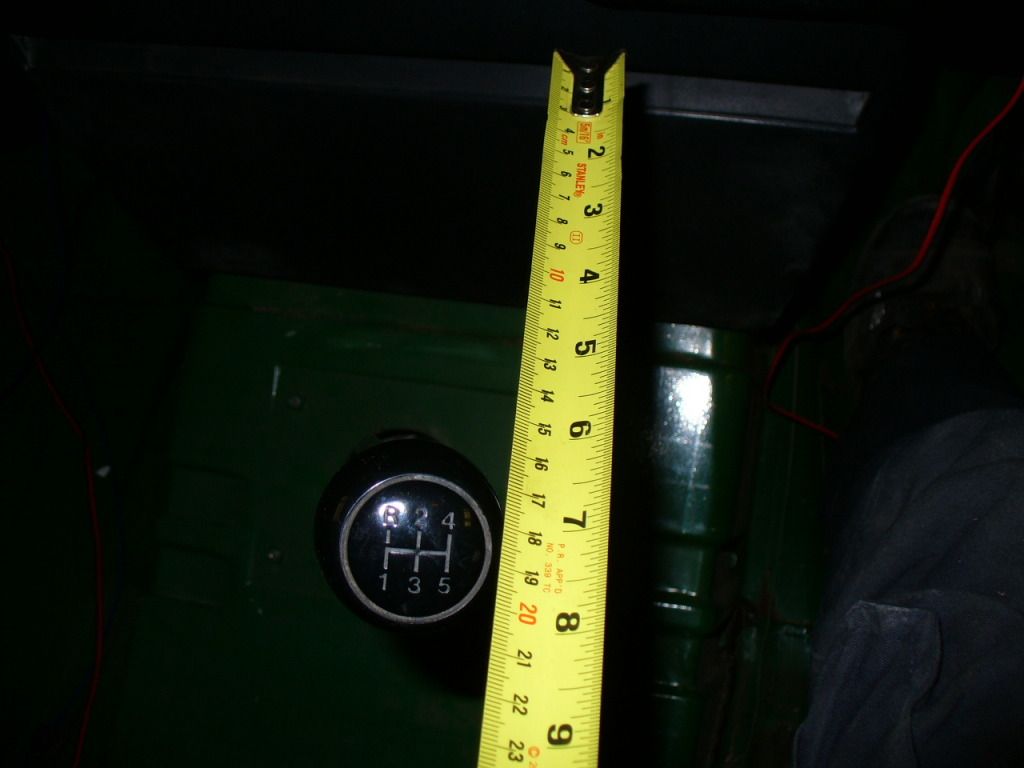
And the quantitative measure: Lateral movement is reduced from 8” to 6.5” :shock:

Image Image

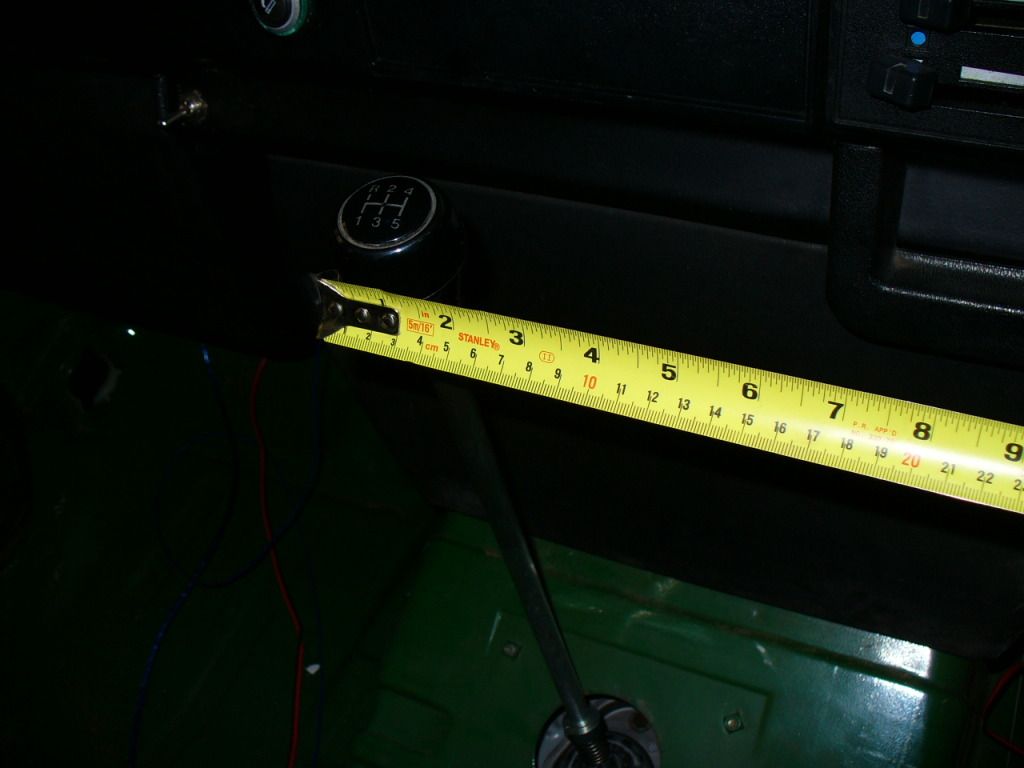
Vertical movement is pretty much the same, maybe ½” less, but that is understandable as I reckon this is controlled more by the selector shaft in the ‘box.

Image Image

So, result really. I know I have lots of movement in the shift rod bushes still to sort out, but replacing the shift bearing has made a HUGE difference.

The van is driveable now, the gearshift is positive even though there is still a long throw – but this is a van not a sports car.

Next up is the rest of the shift rods etc.

MM
'89 Autosleeper Trident
2.1 DJ
Member 9111

User avatar
edoh
Registered user
Posts: 240
Joined: 12 Aug 2007, 08:42
80-90 Mem No: 3974
Location: epping essex

Re: Overhauling 5 speed gearbox linkage

Post by edoh »

hope you continue the photo journal for these too....
incredibly useful and informative for those of us new to the mysteries of the gearbox...
sod eastenders - this is gripping stuff! :)
Owner of a red T25 fixed hi top campervan - colour - spikey red - petrol - water cooled - 1.9 dg engine rhd - 1990 g reg n still going strong!-

mm289
Registered user
Posts: 314
Joined: 31 Dec 2010, 22:00
80-90 Mem No: 9111
Location: Dover, Kent

Re: Overhauling 5 speed gearbox linkage

Post by mm289 »

Will do edoh, all photos taken and van now back together, just when you do the write ups in this much details it take ages :roll:

Next one tomorrow night hopefully :D

MM
'89 Autosleeper Trident
2.1 DJ
Member 9111

Post Reply