Edd and Leo's camper project - Buzzer of dooom. HELP!

The Tardis factor (interiors , awnings, roofs etc)

Moderators: User administrators, Moderators

eddbmxdude
Registered user
Posts: 53
Joined: 12 Nov 2007, 15:42
80-90 Mem No: 4428
Location: Dunstable, Bedfordshire

Edd and Leo's camper project - Buzzer of dooom. HELP!

Post by eddbmxdude »

Hey guys,

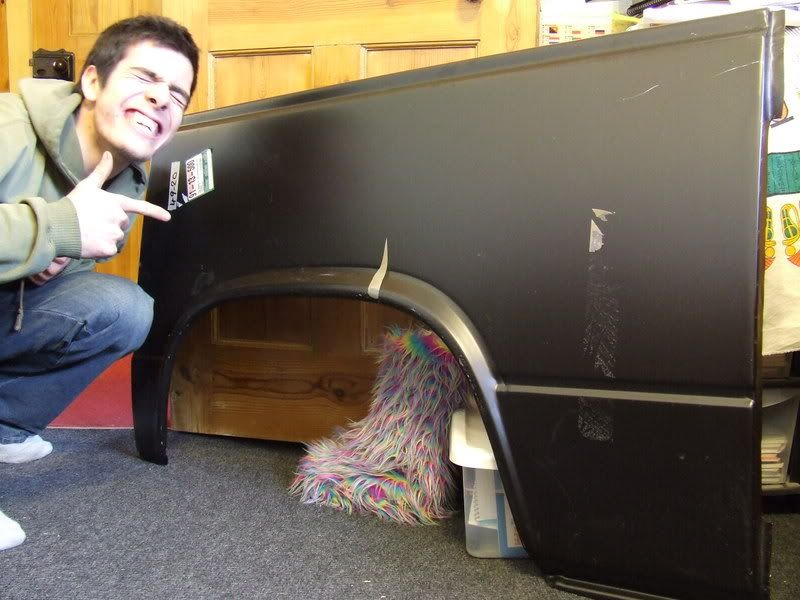
My brother and I are cutting out and replacing a rusty wheel arch on our van. We thought we would keep a diary of our progress on here so that hopefully it might help someone else who needs to do something similar.

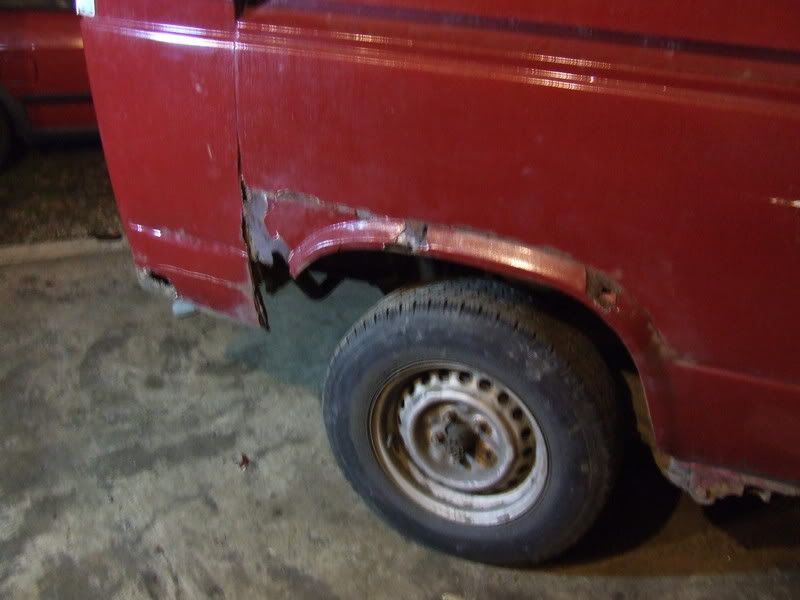
This is how it started off looking. We knew its was pretty far gone because you could see whacking great holes in it.
Image
Image

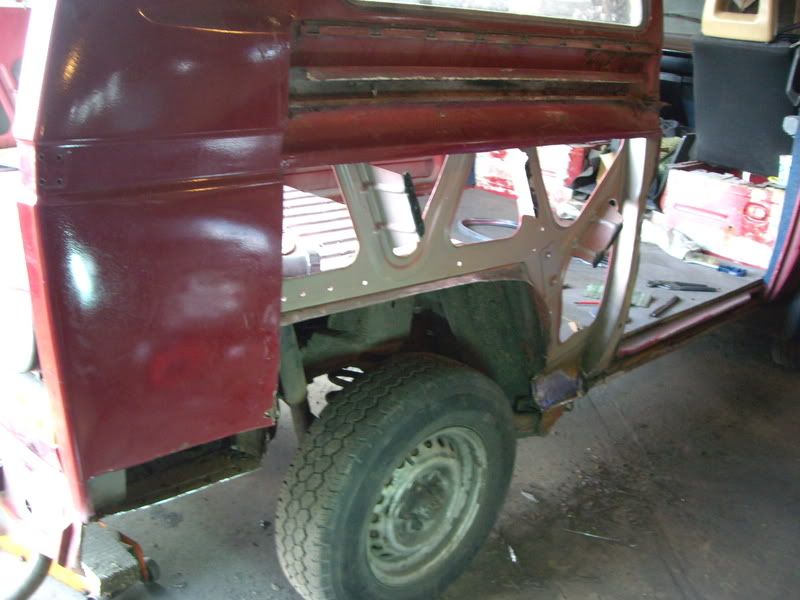
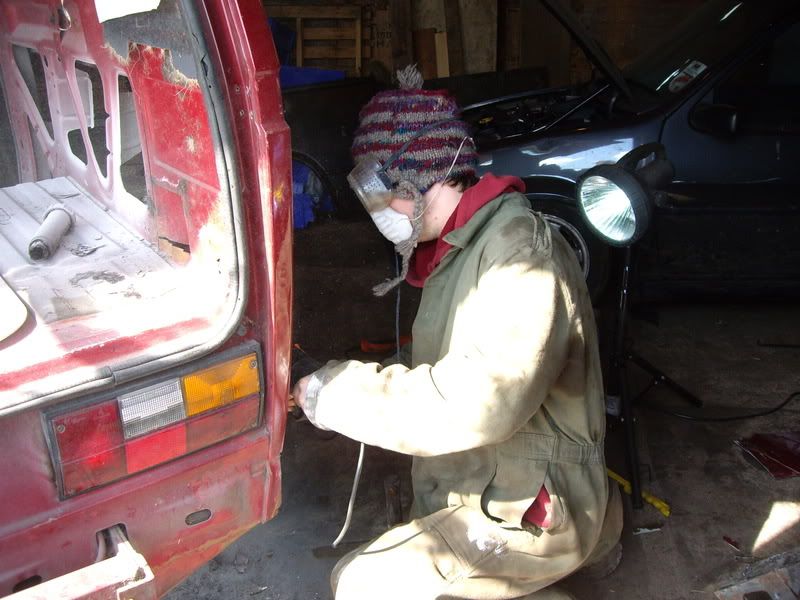
We started by cutting off the arch, we knew it was FUBAR so we chopped it right off.
Image
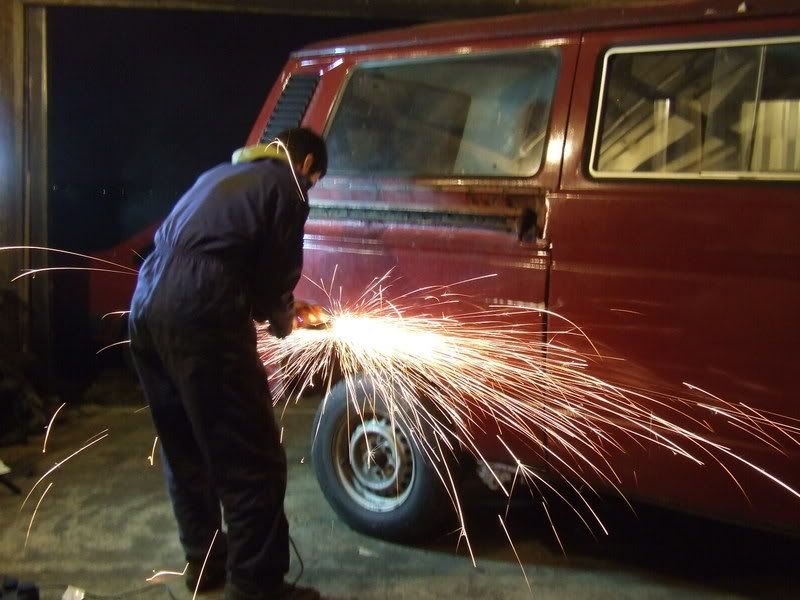
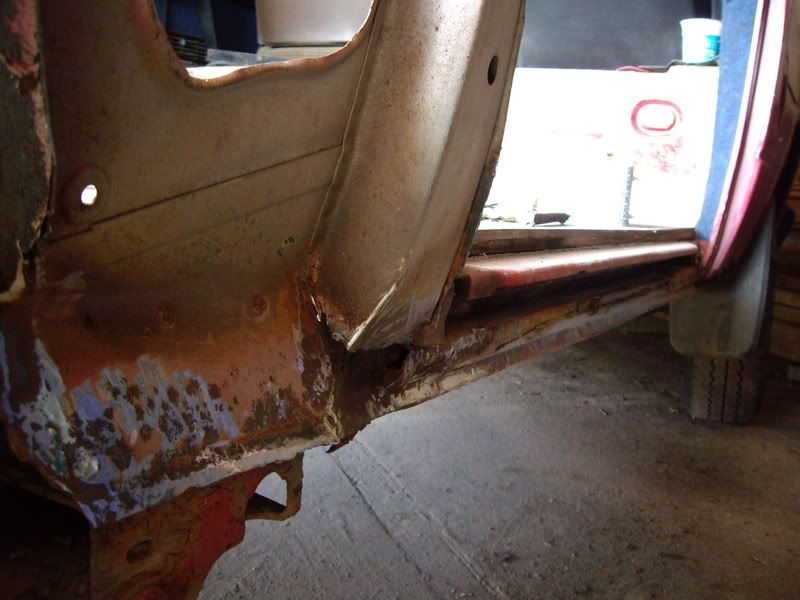
The inner arch has also disintegrated, so we are going to fabricate a new one. We also knew that there was quite a bit of filler in the panel, but nothing had prepared us for what we found next. The angle grinder sudden sliced through the panel like a hot knife through butter. The filler was at least 10mm thick!!!! We gave it a tap with a hammer and a crack appeared, so we prised it up with a screwdriver and out came a chunk of filler about 30mm think!
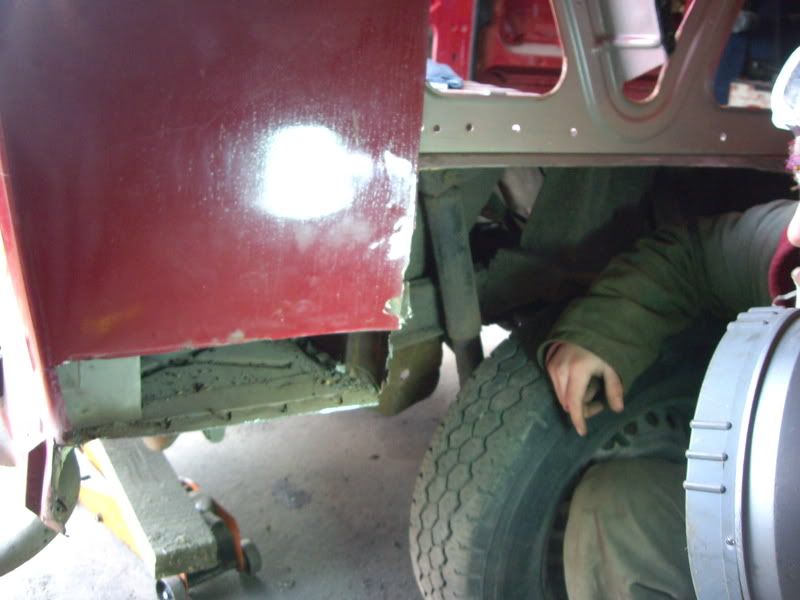
Heres how we left it for the night.
Image

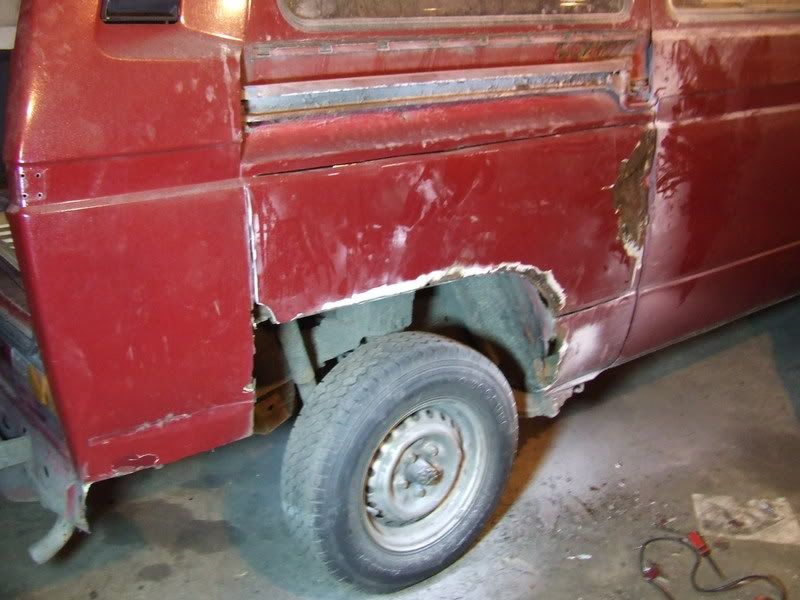
That brown blob near the door is where the massive chunk of filler came from. Theres a big dent in the panel that someone has just shoved filler into :shock:

Bodywork is something that we are completely new to, so we are learning all the while. Any tips and advice is welcomed.

Thanks,
Edd
Last edited by eddbmxdude on 17 Apr 2010, 09:11, edited 6 times in total.
1989 1.9 DG

User avatar
ghost123uk
Registered user
Posts: 6855
Joined: 10 Mar 2006, 10:15
80-90 Mem No: 2585
Location: John in Malpas, in the very S. W. part of Cheshire.
Contact:

Post by ghost123uk »

I do know there are 2 makes of rear arches commonly available.

1 is good, the other is not so good.

Trouble is I cannot remember which is which ( tho I know you can tell them apart because one is in grey primer and one is in black )

Someone will come along with more info on this.

iirc I got mine from JK and I got the less good ones ( I think they were grey but not sure. I believe JK do both types).

I also know I wouldn't go back to the guy who did it for me, mentioning no names but it was a VW "restorer" near the Chester / N. Wales Border ( and it was certainly NOT Steve at Gasure, who is just ace).
Got a new van, but it's a 165bhp T4 [shock horror] Accurate LPG Station map here

User avatar
R0B
Moderator
Posts: 19402
Joined: 07 Oct 2005, 17:33
80-90 Mem No: 864
Location: Cheshire

Post by R0B »

dont bother with jk panels they are made from tinfoil.go to http://www.ahschofield.co.uk/contents/v ... ntents.asp..they are tons better quality
2.1 LPG/Petrol Auto Caravelle

"The difference between genius and stupidity is that genius has its limits"

PEET
Registered user
Posts: 644
Joined: 02 Jan 2006, 16:09
80-90 Mem No: 2528
Location: WEST SUSSEX

Post by PEET »

I can reccomend the Schofield panels as good quality if the Vw ones aren't available.
But if I were in the position you are there I would contact Vw commercial (SMG are my local) )and check to see if the complete panel is still available as it's surprising how many are (from S.Africa & Germany). It would fit straight in and you could bead blast the seams on all sides (in & out!) before resealing and have no rust issues for years.

The panel would be expensive BUT it would save you money! In time to fit, adapt, look, quality etc and the longevity would make a huge difference - do it once properly or keep re-doing it every few years.
I'm no expert but done it both ways and failed many times over the years... :lol:
Thats PEET as in FEET!!!

eddbmxdude
Registered user
Posts: 53
Joined: 12 Nov 2007, 15:42
80-90 Mem No: 4428
Location: Dunstable, Bedfordshire

Post by eddbmxdude »

Thanks for the advice guys. :)
The panel we've bought is from http://www.beeversautopanels.co.uk" onclick="window.open(this.href);return false;.
This is it:
Image

So im not sure if its one that any of you lot have mentioned :?:

Edd
Last edited by eddbmxdude on 01 Jun 2009, 10:33, edited 1 time in total.
1989 1.9 DG

ding-dang-dhu
Registered user
Posts: 698
Joined: 12 Jul 2007, 20:02
80-90 Mem No: 3927
Location: Aberdeen, Scotland

Post by ding-dang-dhu »

The ones I had put on were much smaller than that. :shock:

Mini arches if you like but not fit for a mini.........if you know what I mean.
Pete (Half man, half horse)


_______________________________________

As cunning as a fox, that's just graduated from Oxford with a degree in cunning

PEET
Registered user
Posts: 644
Joined: 02 Jan 2006, 16:09
80-90 Mem No: 2528
Location: WEST SUSSEX

Post by PEET »

That don't look bad ow much were it? Good to see ya doing the whole panel too - enjoy n seal it all up nicely!!!! :lol:
Thats PEET as in FEET!!!

eddbmxdude
Registered user
Posts: 53
Joined: 12 Nov 2007, 15:42
80-90 Mem No: 4428
Location: Dunstable, Bedfordshire

Post by eddbmxdude »

That was £35 from beevers. Going up the unit tonight, so there will be another update soon :)

Edd
1989 1.9 DG

eddbmxdude
Registered user
Posts: 53
Joined: 12 Nov 2007, 15:42
80-90 Mem No: 4428
Location: Dunstable, Bedfordshire

Post by eddbmxdude »

Update time!

We got all the rot cut out today.
Image

The bottom of this panel was like swiss cheese, so that went too.
Image

The channel that the door seal sits in was almost non existant :x
Image

We started to clean all the edges up ready to start the weldathon soon, but havent finished yet.
Image

We are going to have to fabricate some patches from sheet steel to patch some of the holes.
Heres a pic of the van out in the open.
Image

And here's one of Leo in all his rave gear :roll:
Image

Getting there!
Edd
Last edited by eddbmxdude on 01 Jun 2009, 10:37, edited 2 times in total.
1989 1.9 DG

Gal

Post by Gal »

looking good! :D

User avatar
Zimbok
Registered user
Posts: 47
Joined: 29 Dec 2006, 10:55
80-90 Mem No: 3432
Location: Aberdare

Post by Zimbok »

Edd, just come across the thread. Very helpful to have photos as well. Any more photos re. progress.

I need to start treating some rust in same area.

Cheers.
Membership number 3432

jaylo264
Registered user
Posts: 202
Joined: 15 Feb 2008, 15:58
80-90 Mem No: 4769
Location: Near INVERNESS , Scotland

Replacing a rusty arch

Post by jaylo264 »

me , too , i`m trying to do the same thing to mine , feeling a bit lonely and up against it , so your pics really help ( i think yours is a tiny bit worse ! ) did you see my thread ? jaylo264

eddbmxdude
Registered user
Posts: 53
Joined: 12 Nov 2007, 15:42
80-90 Mem No: 4428
Location: Dunstable, Bedfordshire

Post by eddbmxdude »

Wow, its been a long time since I have posted here.
Sorry guys, no more progress since the last photos. I was looking at the van at the weekend and have loads of fresh enthusiasm for it again. I have made up a cardboard template and checked it for fit. The next step is to make a metal patch that matches the template and bend it to shape.

I have to do the headgasket on my MK2 polo but as soon as that is on the road again I shall get cracking on the van again. :D

Edd
1989 1.9 DG

Chrissyt
Registered user
Posts: 116
Joined: 06 Jun 2008, 22:30
80-90 Mem No: 5738
Location: Plymouth- Get on ya Janner!

Post by Chrissyt »

WOW! Good effort, i'm only doing a lower arch so not much use

Good luck guys, be very rewarding when all finished!

Chris

eddbmxdude
Registered user
Posts: 53
Joined: 12 Nov 2007, 15:42
80-90 Mem No: 4428
Location: Dunstable, Bedfordshire

Post by eddbmxdude »

At last, we are sticking metal back on! :D
I spent the day up the unit yesterday and had my first proper crack at welding bodywork. Its really frustrating! It took me ages to prep the area I was going to weld and holding the patch in place while I tack it on is a nightmare.
I found some MORE rust while I was preping an area for welding so I had to make up another patch and weld that in place first, then get back to the original patch.

So, here is what it looks like now.
Image

Image

You can just see the other patch in the last photo. Its to the right of the big patch, on the underside of the tray. The welding on that one is much better and im really proud of it, shame no-one will see it :roll:
Last edited by eddbmxdude on 01 Jun 2009, 10:35, edited 1 time in total.
1989 1.9 DG

Locked