Syncro prop shaft bush replacement
Syncro Propshaft Poly Bush fitting (to cure propshaft ringing at low speed/low revs clutch take up combination.)
Aidan Talbot:
September 2005
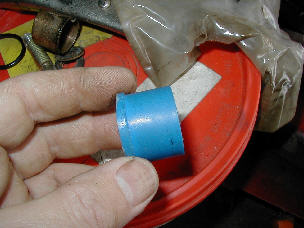
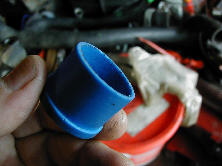
This is the new replacement Poly bush as supplied by Gordon Craig in South Africa.
Note the flanged end on the left needs slightly profiling in order to fit the space vacated by the O ring - I lightly sanded the edges off to give a better profile and facilitate fitting.
I found I needed to hold the whole donut in a vice in order to undo the four Allen headed bolts holding the UJ and donut to the propshaft.
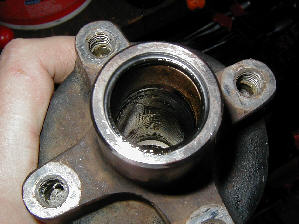
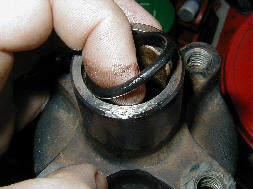
Once the bolts are undone and removed recover the four washers from between the donut and the propshaft and gently withdraw the whole assembly to leave you looking at the o ring and the two bronze bushes inside the prop
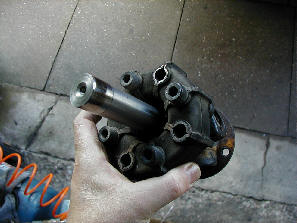
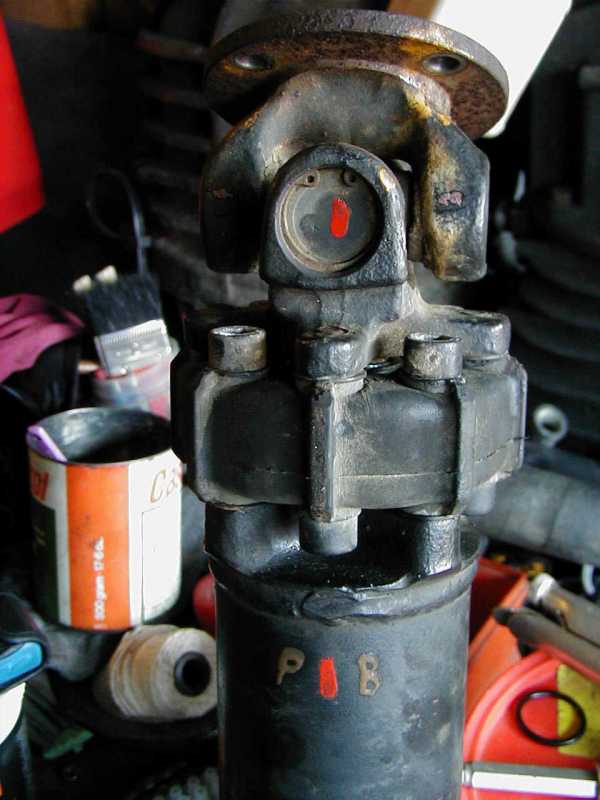
This is the UJ, donut and shaft assembly that you have withdrawn from the prop.
I marked the prop and the UJ with paint marks before disassembly so I could put it all back together in the same orientation.
I didn’t remove the donut from the UJ as no need - it only meant that I couldn’t take a close look at the wear marks on the shaft bearing surface at it’s outer end. But I could feel the play when the bolts were undone before withdrawing the shaft from the prop.
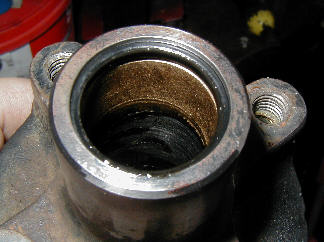
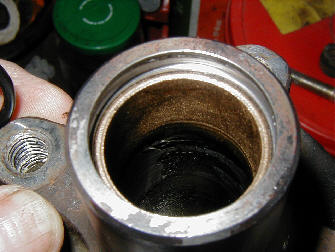
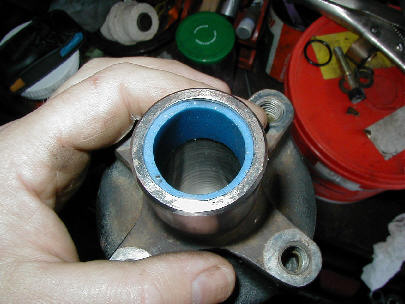
Close inspection shows the wear on the bronze bush - there’s a swarf edge on the lower edge and the top edge has taken the shape of the o ring , being removed below
So you can see clearly the extent of the top bush which is to be removed.
I cleaned out most of the old grease then stuffed a clean tissue into the tube below the bush to catch the waste that will be created
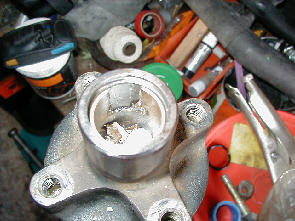
Using an old chisel I cut two parallel score marks down the inside of the bush about 10 mm apart
Then carefully tapped a small bradawl between the bush and the shaft between the scored marks and broke out this section of the bush in stages
Once the section was removed the remains of the bush were easily removed, a very little light filing required to remove the slight burr caused by the back of the bradawl. Turning the prop upside down and pulling out the tissue removed most of the waste, a blast from the airline and more careful cleaning ensured that the remaining lower bearing was free from debris and ready for some clean moly grease.
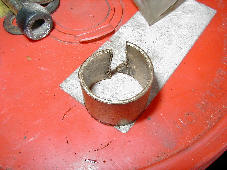
The remains of the old bush and the new one - I checked to see that it fitted over the shaft ok before I removed the old one..hence the spots of grease on it
With a little gentle persuasion the new bush is in.
A bit more time spent profiling the top lipped edge would have resulted in a better fit on the left hand side but rather than damage the bush trying to remove it I applied a little more thumb pressure which evened it up to the point where I felt it was acceptable and I was able to ease the shaft in without deforming the edge.
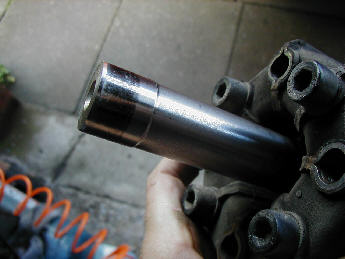 The wear pattern on the machined bearing surface of the shaft can be clearly seen....its very even and fairly minimal, hopefully the new top bush and some fresh lubrication will ensure that this contact point doesn’t become problematic. This shaft has about 112,000 miles on it and I expect that it’s the first time that it has seen daylight since 1989.
I had no data for the torque setting for these bolts as this isn’t a normal procedure so I went with 33 ft/lbs which felt right and is the same as used for the drive shaft flange bolts which are a similar size and application. I didn’t use thread lock though there were clear signs that it was used originally. I’ll keep a close eye on the bolts tightness.
The Finished Prop ready for refitting I didn’t have the prop rebalanced as the bushes weighed within a few grams of each other and are fitted close to the centre of the prop so I guessed the effect of the change to be negligible and I rebuilt the prop in exactly the same alignment as it was originally. I have marked it PB for poly bush. The red marks are the alignment marks I made at the beginning.
The newly bushed propshaft was carefully refitted to the van, checking the alignment of the gearbox, prop and front diff with a stringline...and the result is vibe free motoring and no more ringing prop at low speed/low revs clutch take up combination.
