Gearbox Clutch CVs - Renovating 5 speed change mechanism
UNDER CONSTRUCTION - article by mm289
Introduction
Intro by Covkid:
After 20 odd years and probably millions of gear changes, the gear change assembly wears out. It can reach a point where some gears are very difficult to get into indeed and the whole thing starts to feel like you're driving the earlier bay window with the gear stick like a wooden spoon in a mixing bowl. Combined wear in all these components adds up to magnified problems at the gear stick. Whilst all the new parts combined are not cheap, you may only need some of them. Replacing broken or worn parts can transform the whole gear change train (it goes front to back remember). Most are available via Brickwerks and a few other outlets. If you're reading this you have probably already reached a point of no return anyway and now, thoroughly demoralised, need to sort the assembly out for good. Help is at hand.
This page, presently under construction and penned and illustrated by member mm289, shows the component parts, common wear points and how to restore a five gear change assembly to original state. Clearly broken or severely damaged metal parts may need welding or fabricating etc but usually the wear is in the nylon parts which are readily available. Some previously obsolete parts are becoming available too as owners begin to start fabricating their own in small batches. This trend, encouragingly, is likely to continue with the T25 already having reached cult status - hoorah for that.
There may be very minor differences between years, and certainly between petrol and diesel versions but the layout is still very similar. Wear points can be worse in some areas than others and its as well to remember that none of this will put right a worn out gearbox but as a starting point to improve gear changes, this is often all that is needed. This article is specifically about the highly-prized 5-speed but much shown here will apply to the 4-speed mechanism too albeit with variations.
Now its over to mm289....
The Wear Factor
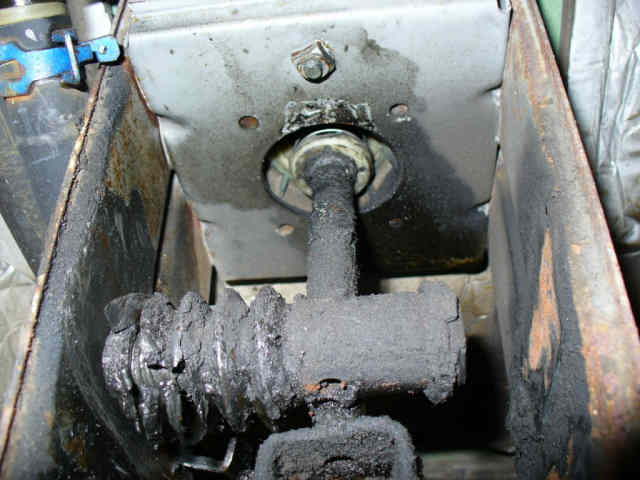
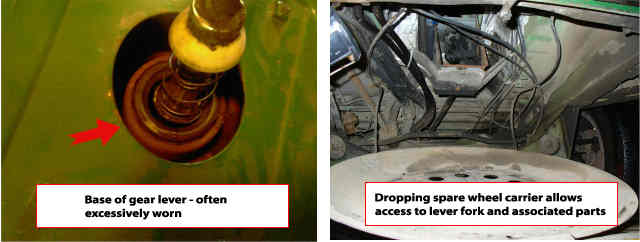
The gear lever end looks like this underneath. In my case, there is a lot of movement. Movement in the shaft where it goes through the floor, the fact that stick will actually lift out (see photos) and a lot of gap between the fork bushes and guides. This section alone makes for a badly worn and less-certain gear change and we haven't even got to the rest yet!
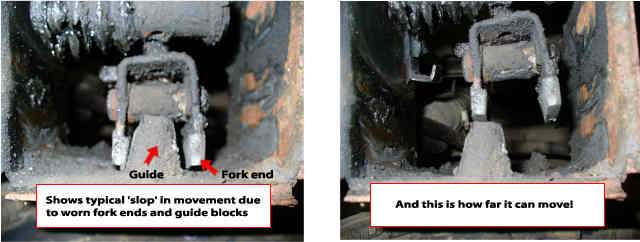
Below: At the actual gear lever, component wear here contributes to excessive travel for the gear stick and vague gear changes. Worn aluminium guide blocks, fork ends and other missing or worn parts demonstrate the amount of play that can develop.
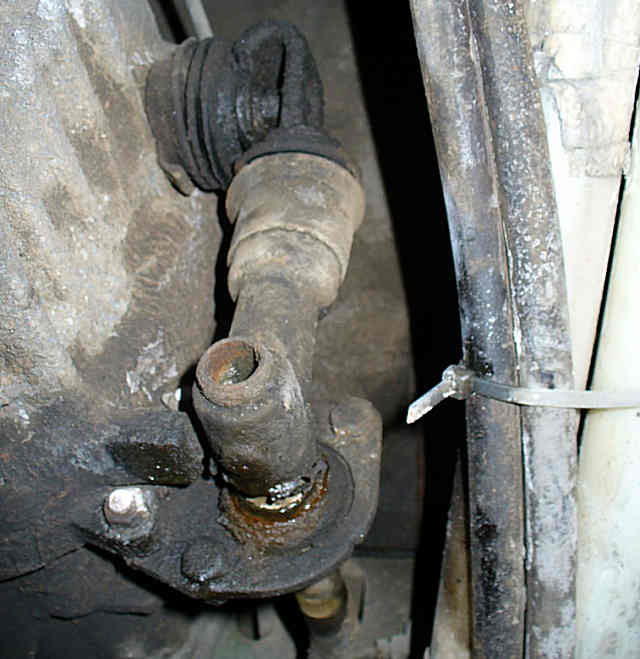
Turning to the rear end where the mechanism meets with the side of the gearbox, the selector ball joint can also have noticeable lateral and vertical movement
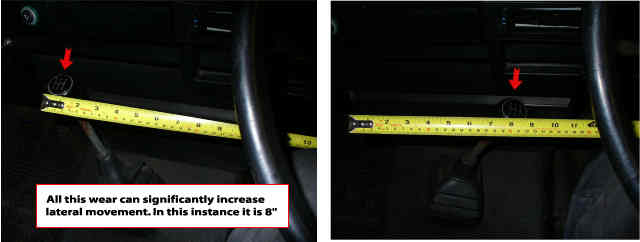
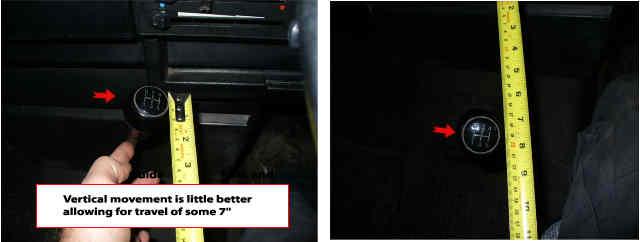
To give you some idea of the effects of all this wear, we can see just how much movement is created at the gearstick.
First lateral:
And vertical:
Tentative First Steps
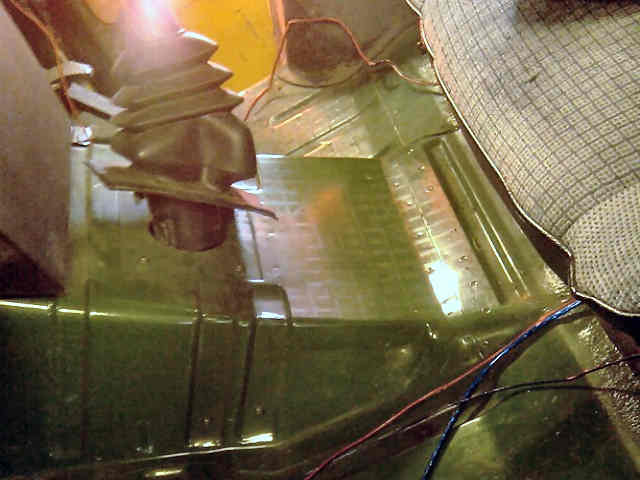
The first job is to remove the gear knob (unscrews) then lift the cab mat and gear lever gaiter.
Covkid: On the Caravelle, this is slightly different as some have a section of wide flat plastic trunking designed to push heat to the rear passenger department. You will need to remove this trunking section if you have one. First remove the plastic cowling just behind the gear lever by pulling it towards you evenly (on the extreme left in photo below). To remove trunking, there are usually four screws/bolts which fasten it to the floor, a line of screws at the rear and you may need to remove a seat belt fastener to get the room needed to lift it out - generally the passenger one.
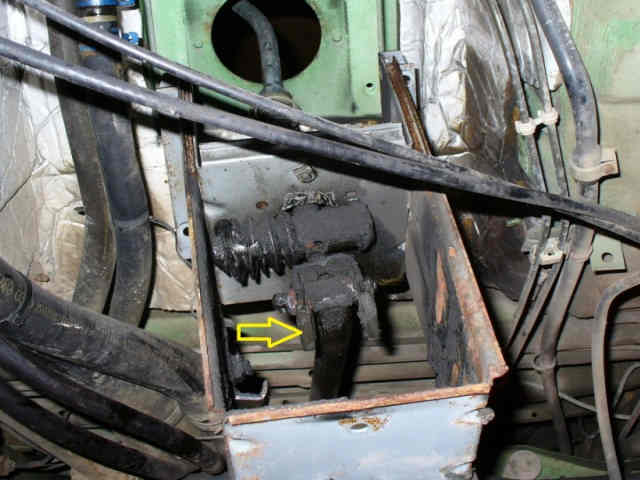
Pictured below, the base of the gear lever often exhibits a great deal of wear. Access to the lever fork and guides is gained from underneath once the spare wheel carrier is dropped down:
Strip Down - Front End
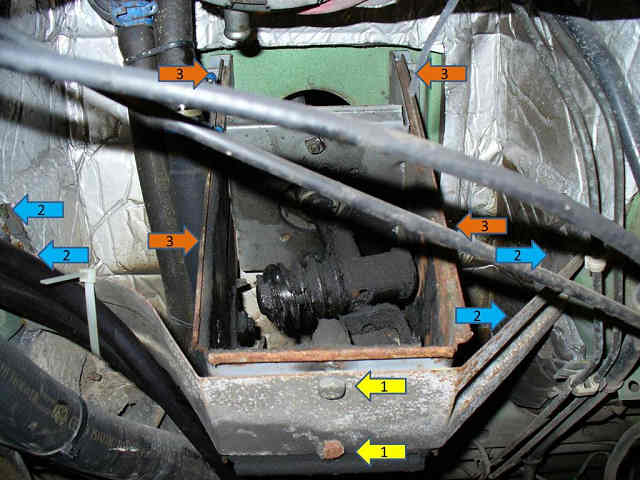
At this point, you'll need to begin work underneath. Get some gloves on - this will be dirty work until you've cleaned everything. Undo bolts “1”, 13mm, also hold the shift guides (lumps of aluminium at the base of this box) in place so don’t lose them! Next bolts “2”, 4 off 10mm and then remove the carrier. Finally bolts “3” and the housing is free.
Finally undo the bolt securing the lever fork to the shift rod and the whole assembly will drop down through the floor.
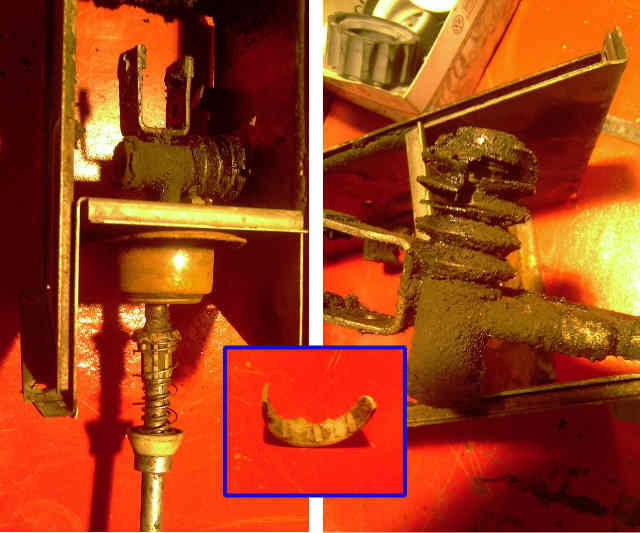
This is what the linkage looks like complete with odd bits of debris (inset) found
Undo the two bolts (10mm) on the top of the bearing housing and push out the rubber guide. In my case this pretty much fell apart. Also undo the grub screw in the bushing on the gear lever holding the top spring in place.Now the whole assembly will slide off up the gear lever.
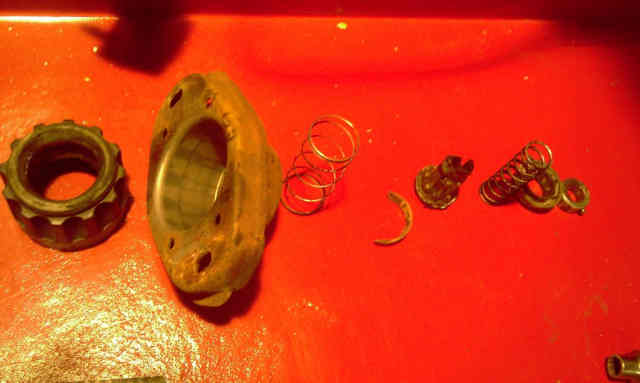
Below: Disassembled 'upper' parts from gear lever assembly:
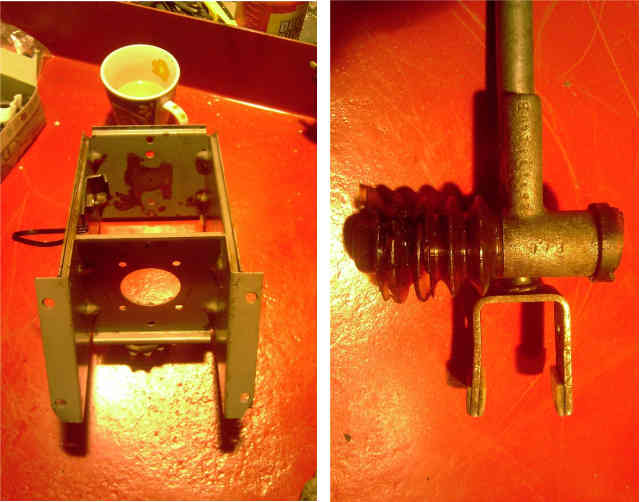
Below: After an initial clean up of lower assembly components
Examining Front Components
Now to disassemble the spring and pin that creates the “detent” you push against to get 1st & reverse on a 5 speed (dog leg 1st on these puppies – just like a Ferrari) :wink:
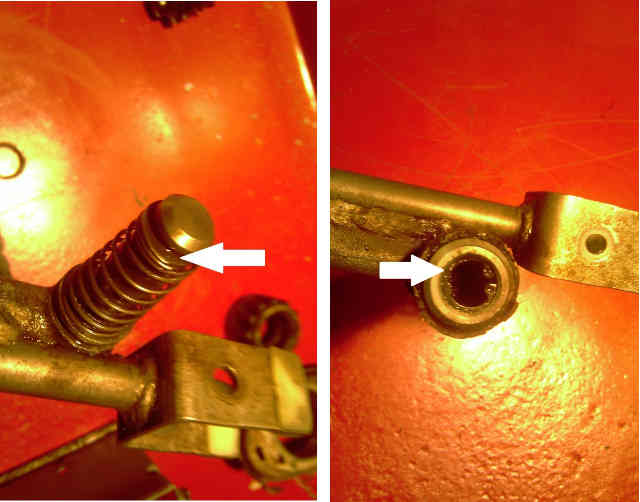
Remove the rubber gaiter (above right) and you will see a spring over the guide pin held in place by a c-clip as shown below (left). Remove the c-clip (it will spring off so be careful not to lose it) and spring.
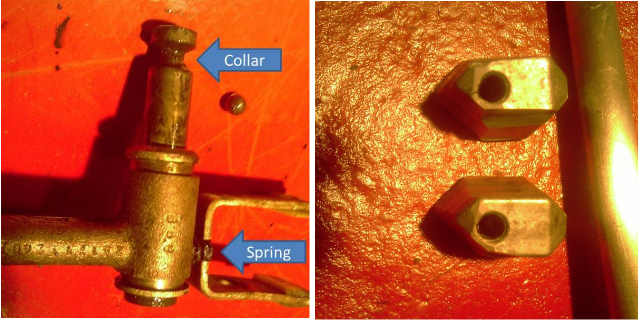
Now PROCEED CAREFULLY, because the detent is created by a ball bearing under pressure from a spring which pushes against a collar on the pin, if you just shove the pin out the ball bearing will pop out and run away – go on ask me how I know.
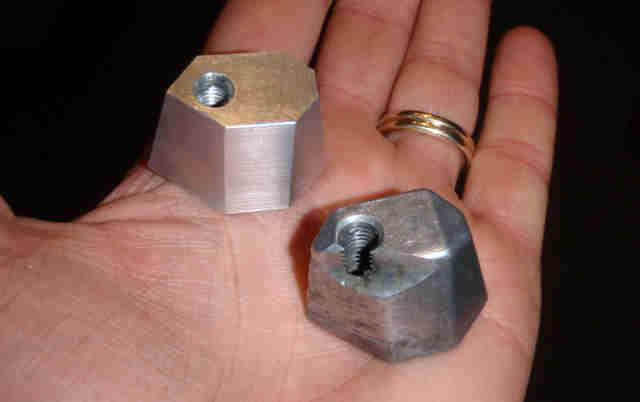
Photo on the right shows the aluminium guide blocks. Although obsolete from VW now, member Silverbullet makes new ones! Alternatively you could build up the worn shoulder with ally weld and grind back. Your choice but Silverbullet's are superior quality to originals - see below for comparison. Link: http://forum.club8090.co.uk/viewtopic.php?f=37&t=85849&hilit=aluminium+blocks
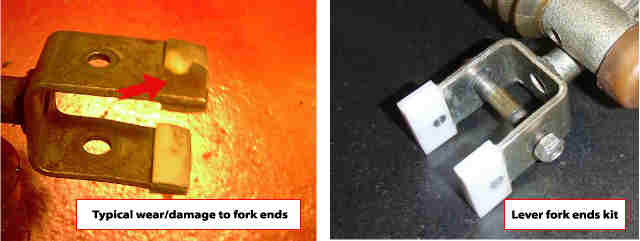
Below: Heres a comparison shot of worn fork ends and one fitted with new ones. New fork ends and new guide blocks not only make gear selection more of an exact science, they help reduce lateral play at the gear stick.
Replacing Front Components
This is what the new parts look like. Genuine VW rebuild kit from Brickwerks.
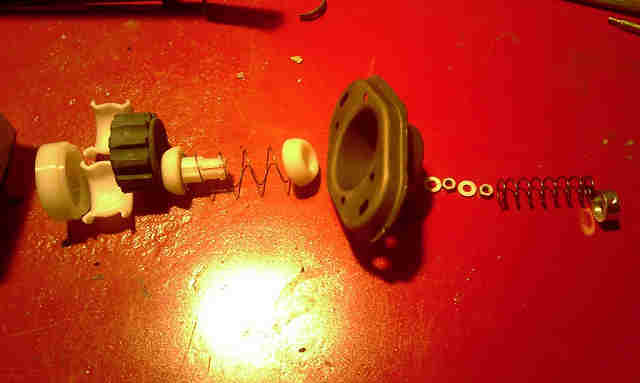
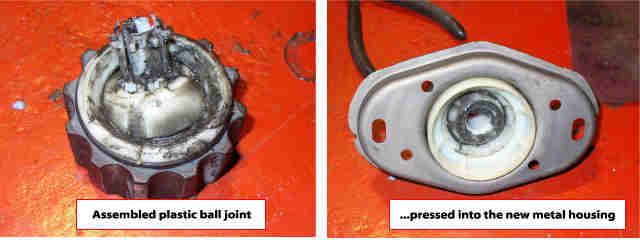
Now assemble the new bearing (plastic ball joint). The two plastic shells are pushed into the rubber guide (looks like a big cog!). The lower ball half is then pushed into the shells, the spring fitted and the upper ball half pushed in as well. Lots of moly grease applied and the assembled bearing looks like this (below left). The next stage is to press the whole thing into the new housing supplied in kit (below right).
