Fuel system - Pierburg
Useful links
Carburettor 2e3 refurb kit Part No ZE511 and £33.09 inc delivery or £13 from VW (if you can get it)
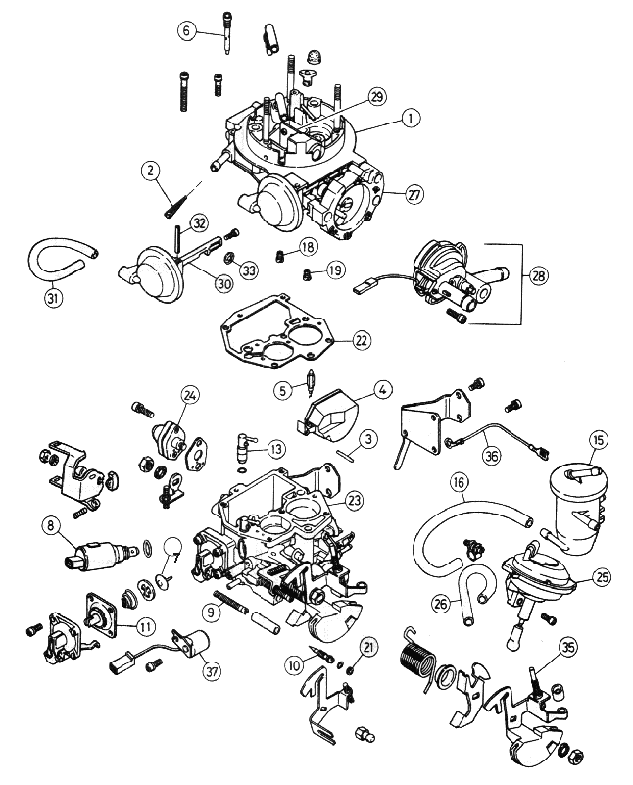
Diagrams/exploded views
| Item | Description | Item | Description |
|---|---|---|---|
| 1 | Upper body | 21 | Tamperproof cap |
| 2 | Fuel inlet filter | 22 | Float chamber gasket |
| 3 | Float pin | 23 | Main body |
| 4 | Float | 24 | Part load enrichment valve |
| 5 | Needle valve | 25 | Secondary throttle diaphragm |
| 6 | Idle jet (primary) | 26 | Secondary throttle diaphragm pipe |
| 7 | Accelerator pump valve | 27 | Choke housing |
| 8 | Idle cut-off solenoid | 28 | Bi-metal choke assembly |
| 9 | Idle speed control screw | 29 | Choke flap |
| 10 | Mixture screw | 30 | Choke pull-down diaphragm |
| 11 | Accelerator pump diaphragm | 31 | Choke pull-down diaphragm pipe |
| 13 | Float chamber gasket | 32 | Roll pin |
| 15 | Vapour canister | 33 | Star clip |
| 16 | Fuel hose feed from pump | 35 | Fast idle adjustment screw |
| 18 | Main jet (primary) | 36 | Earth strap |
| 19 | Main jet (secondary) | 37 | Throttle body heater |
Table borrowed from Gower and Lee [1] who can supply most of the parts
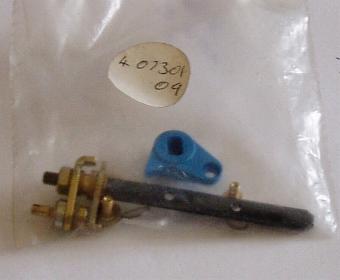
Note: If you require the 'choke flap repair unit' (van choke not working, no power at all until it warms up) then the Pierburg part number you need is 4-07301-13 (or possible 4-07301-10 might do). Gower and Lee don't have this in stock but they did have (May 09) 4.07301.09 2EE kits, the spindle is incorrect but I'm sure the plastic cam would fit. Image from Gower & Lee of this part number.
Other cars that use the Pierburg 2e3
Jetting carbs
Aircooled.net (Carbs 102: Basic Jetting Theory and Procedure)
toomanytoys: Using a 1.9DG pierbug on a 2.1 DJ engine
If the truth be known.. it possibly would benefit from running some smaller jets. as the engine should give a bigger vacuum.. in reality the standard jets in a 2E3 work very well and give the same or better than DG mpg (I used to get same mpg but travelling faster) as the cam timing is longer so allows for the charge to get into the engine.
One thing with the DJ is you will have to consider what timing and fuel to use.. UL95 use 5 deg BTDC, or with UL98 you could go a bit higher maybe 8 deg BTDC but I would be a little wary of runnng 10 deg on UL98.. the Fuel Injection has better control over fueling than a carb.. unless anyone has put a lot of miles on a "DJ'd" DG.. I have, but on LPG which is a different kettle of fish..
Air filter.. if an early square type then dont worry, same as in Audi 5 cyl turbo's so flow plenty of air.. but I would make sure you rebiuld the carb before using it and set it up properly. If you can stretch to a rolling road session with someone that knows carbs, then you could fine tune the timing and carb settings/jets, but it will cost you.. but you would know whats going on..
Its a great conversion, lots of usefull torque, without compromising the mpg.. Oh and think about using the oil cooler from the DJ as the extra heat needs to go somewhere, plumb it in to the coolant return from the carb heating.. make sure the cooling system is in good nick and fit a new genuine thermostat (been some problems with some aftermarket ones.)
Footnote:
Don't Forget - There Are TWO filters
- (CovKid)
I'm posting this, peppered with relevant keywords in the hope that should anyone experience the same problem, they may just find a solution here.
Some months ago I ran entirely out of petrol at a busy junction in the pouring rain with my five year old son onboard. Fortunately a sympathetic bay owner going the other way saw the situation I was in and towed me off. I returned to the car park I'd left it in the next morning and it started with little problem with a gallon of petrol poured in, plus a dash down the inlet bore for good measure.
However, I had noticed a definate drop-off in power, mild hesitation on acceleration and what appeared to be a speed governer at around 65mph (mine will normally do 80mph fairly effortlessly). Last week I replaced the main fuel filter near the tank but this made little difference, neither did new plugs and a non rev-limiting rotor arm.
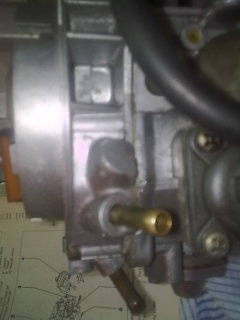
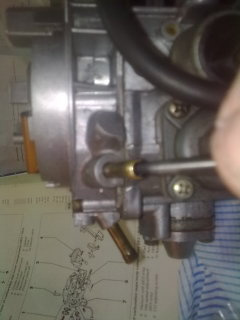
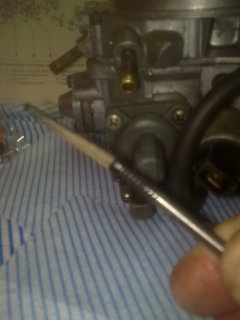
Its worth pointing out that the Pierburg carb in fact has its OWN filter (part 2 in above diagram), almost unseen as its fitted right inside the brass fuel inlet pipe - cone shaped, and only removable with a screw around the same diameter.
Heres the inlet pipe (photo courtesy of member 'Edoh'):
Using a screw extractor or self tapping screw to grip the inside of the plastic filter (photo courtesy of member 'Edoh'):
Filter removed (photo courtesy of member 'Edoh'):
Today I removed this and discovered it was totally crudded up with limescale/rust and with a careful and repeated wash in detergent and rolled between finger and thumb, it was finally clean once again. Refitted, power restored, smooth acceleration and no top speed limit. So, worth remembering if you have the same carb, don't forget to clean out this filter as well as replacing the one near the tank. You need something like a self-tapping screw to grip it and pull it out. Easy job though.
If you tend to run low on fuel or run out altogether, you could well find your bus runs like a box of loose spanners because of this with it dying at junctions, holding back at speed etc. For reference, the float bowl was free of any muck.
Pierburg overhaul kit and adjustments
Two excellent videos produced by Jamesakers on using a rebuild kit and checking carburetttor adjustments.
https://www.youtube.com/watch?v=VKD6ci8o06w
https://www.youtube.com/watch?v=U8qZwRgHX4A
Electrical plugs/connectors
We recently found fairly good substitutes for the original male/female spade connectors that join the carb choke etc to the wiring harness. They can be purchased from:
https://www.altecautomotive.co.uk/1-way-connector-including-terminals-1898-p.asp
