Coolant and Heating System overhaul 2
Ermie571: Changing water pump, metal water pipe and thermostat housing 2.1 carb
Introduction
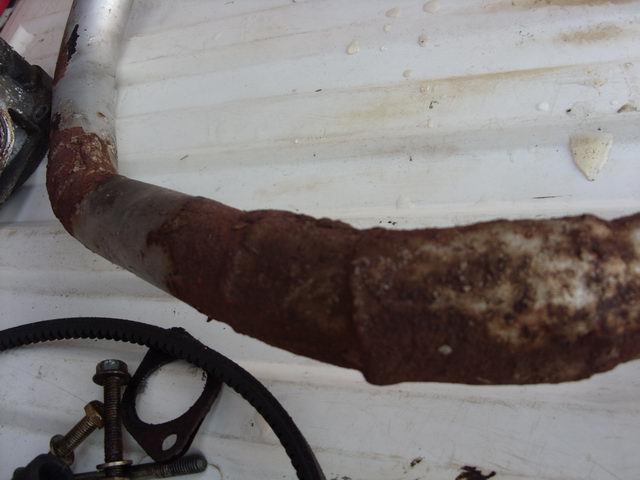
The work was done due to a small water leak from a rubber hose (looked like spring clip had worn the pipe), and having the parts to replace bits that were currently working, but of an age where replacement was preventative. NB 2.1 thermostat housings are no obselete from VW and JustKampers. 1.9 housings do not have connections for the oil cooler. My metal water pipe had been repaired many times, and looked very rusty. The water pump was fine, and will be boxed up as a spare. Again, the 2.1 water pump has additional connection for the oil cooler that isn't present on 1.9 - but Mocki suggested that there may be an optional spigot...best to ring supplier and check! The thermostat housing has four bolts - on mine one just turned, so a replacement was useful. The old one will be repaired if possible and kept as a spare.
Started by reading Haynes for some guidance
We didn’t go under the van at all! There may have been some bits where it would have been easier, but the road was soaking from the rain and the coolant water from the engine. Had emptied much coolant day before.
Tools used
a) Rachet spanner with 13mm socket. Short extension bar for same. Just a note – We had a rachet spanner, but Mark had one with a smaller movement on the handle necessary to make the bolt move. This worked better than ours on the water pump bolts as the access isn’t exactly easy!
b) 13mm ring spanner, and open ended spanner
c) 6mm allen key, and a 6mm allen key hex socket
d) Long nose pliers, blunt nose pliers and circlip pliers (for removing spring clips)
e) Selection of flat head screwdrivers for removing jubilee clips. Can also use a 7mm socket on some jubilee clips instead of screwdriver – this down to personal preference.
The way we did it
1. Start by loosening the three bolts on the water pump pulley. We left the fan belt on (against the advice of Haynes) as I held the belt while John undid the bolts – 13mm ring spanner (used one with flexi head). Me holding the belt stopped the pulley turning!
2. Once all the bolts are loosened, go round and remove each one. Pulley comes off in two pieces and is held on with 3 bolts and spring washers. Once pulley is off, remove the fan belt. Best practice is to replace with a new one, and keep the old one for spare.(We didn’t take off the big pulley on the engine)
3. As we were doing all the watery bits on the left hand side of the engine, we went round and loosened all the jubilee clips etc we could get to.
4. There is a metal water pipe that runs off from the bottom of the front of the water pump as you are looking at it to the right hand side of the engine. We did have a new pipe for this as well…..so we undid the bolts at the end of the pipe as they were easier than the bolts on the water pump to get to…..but we needn’t have bothered cos that pipe wont come out while still attached to the water pump anyway!
5. Getting the allen key bolts off was difficult. There are several dotted round the cooling system. You need a 6mm allen key. We did some with a 6mm allen socket attachment where we could get access (made life much easier). But the ones on the metal pipe on the front of the water pump were done with a standard allen key. The standard key gave enough leverage, and the bolts came out without too much bother. The most annoying thing was the small movement on each turn…….it took quite a while to keep removing and replacing the allen key!
6. We had a mixture of jubilee clips and the VW spring clips. Do yourself a favour, and get a GOOD set of circlip pliers. The set we got from halfwits gave up the ghost on the first clip….. However, they will come off with pliers – Mark found that the long nose pliers worked best.
7. We found that all our bolts were pretty rusty….so if you are able to plan this repair….get new bolts ready to replace. Our replacements had the bolts with them (nice shiny new ones!). For those not so lucky, here are the part numbers:
N 014 709 1 M8x22 (hex head) 2 off
N 090 709 1 M8x25Z3 (hex head(combi)) 2 off (pipe to thermostat)
8. Also useful to have new gaskets. There is a O ring in the waterpump that should also be renewed.
9. Putting it all back was pretty much the opposite of removal, with the only difference being that we put the pulley back on (Haynes has the torque settings for the bolts), then put the fan belt on.
To do this, you have to loosen two bolts on the alternator, one at the top on the slider bracket, and the one on the bottom right, to allow it to swing. Again, 13mm spanner (you may need two, as the bottom bolt has a 13mm nut at the back). Loosen bolts and push alternator towards water pump. Place fan belt over the pulleys, pull alternator back until belt tension is achieved, then tighten bolt on slidey bracket. NB – useful to have someone to help here – one holds the alternator and one does up the bolt. But it is do-able on your own). Then tighten other alternator belt.
Emma
