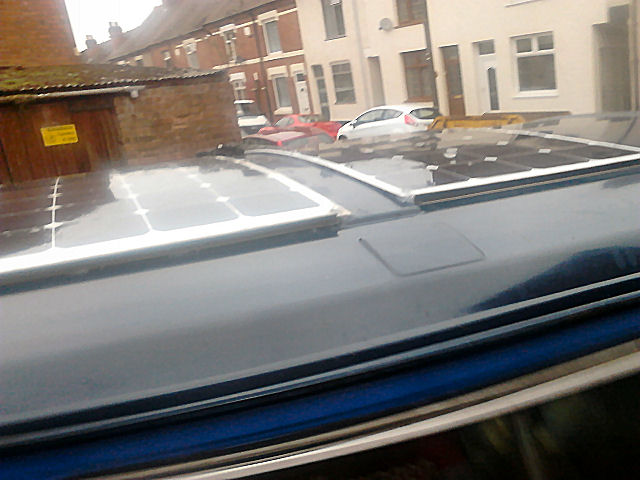
Camping interior Solar panel fitted to a tintop
Solar panel on a tintop
(Covkid)
In my view, 150 watt should be the absolute minimum on a camper OR tintop. Heres why.
In the winter months where direct sunlight becomes somewhat scarce, the output from a small panel can sink to an almost insignificant level and that matters when you need to keep your batteries trickle charged. I now run two panels (200 watts total) which is overkill in Summer but perfect over winter as the greater wattage helps build in a degree of redundancy (fit and forget).
My batteries remain FULLY charged regardless of weather, all year round. 150 watt would also be fine. 100 watts or less and you'll be ok in Summer (just) but there will be little if any real output in Winter. I'm not talking about the science involved, this is just purely my experience of running solar. Fit more than you think you'll need unless you want to be chasing the sun all day. Don't consider something like a 20 watt or 50 watt if you want to get into solar - the money saved is soon overtaken by frustration and disappointment!
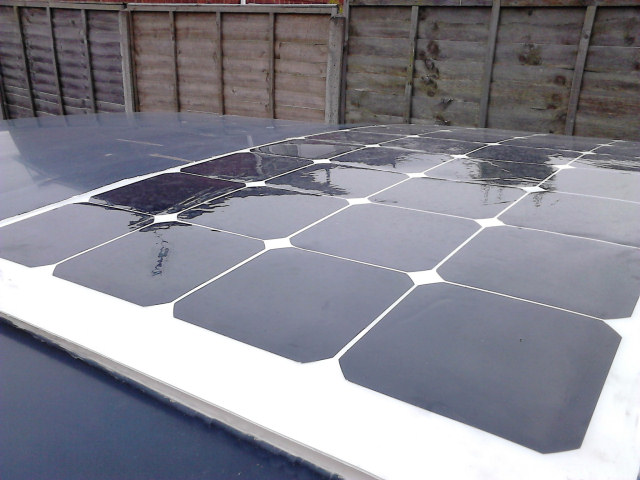
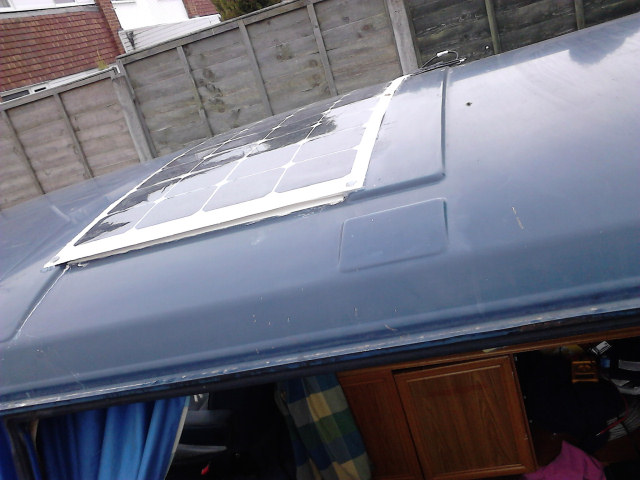
The reduced height of a tintop is good on most car parks, but they do pose their own problems when it comes to attaching solar panels as the roof is far from flat. A rigid panel with a frame is one possibility although if mounted flat they do tend to pool with water, which needs to be cleared, and it requires far more thought (though possible) in terms of fixing - ie drilling holes or buying extra material and gutter clamps. Flexible solar panels however, offer a quick and easy way to add solar power but the roof ribs do prevent you from fixing the panel down directly so you'll need to bridge the gap with stand-offs. This is no bad thing as it also stops the panels overheating on a hot tin roof with a convenient air gap.
This is what you'll need:
Materials:
100 watt flexible solar kit (around the £140 mark). Mine had the connections on the underside which made it easier to hide wiring.
Builders exterior grade silicone sealant (clear) - about £3 (Silkoflex etc is way too messy for this and the silicone is strong stuff).
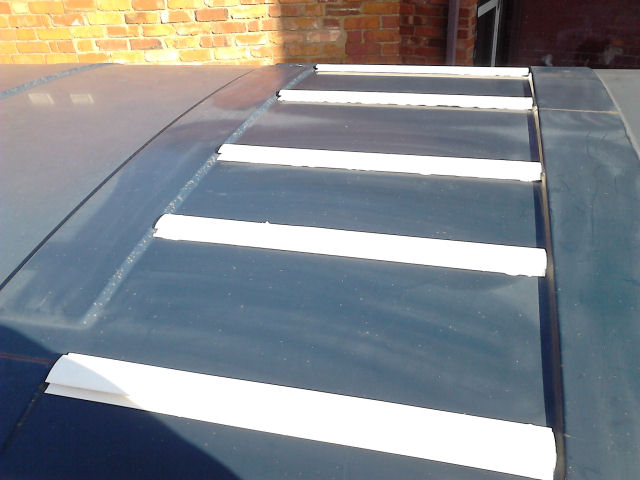
Wickes PVCU white cladding joint bead (2500m length) - £2.99 (Perfect for the stand-offs). Its a sort of girder-shaped form factor.
Planning:
You must plan ahead. Measure the panel carefully. Compare it to spacing between roof ribs and think it through. Decide where you're going to run the cable first. I can't advise on this since its your vehicle. I drilled into roof just above B pillar and fed it down and out through the interior at the bottom, but you may want to route another way.
Make sure you TEST everything works before you begin fixing down the panel. You won't get your money back if its faulty and stuck down! Read the instructions carefully.
Creating Stand-offs:
Cut the joint bead to fit the gap between roof ribs (5 lengths) as pictured above. They sit slightly higher than roof ribs but the curve of the panel makes these perfect. Measure panel length and stick stand-offs down with blobs of sealant leaving sufficient gap for any moisture to escape in the future. Outside standoffs should fit flush with panel for a neat job (see pics). These outside edges can be made even tidier if you stick upvc strips to partially close them off. I didn't bother.
Allow to dry for 36 hours.
Fixing panel:
Fix panel with sealant, using bricks if needed to flatten edges of panel down. Clean off excess and use some kind of adhesive cable clips to tidy wires. Again, allow to dry for 36 hours.
Cables:
Inside, connect battery to charge controller then connect panel. Follow the instructions carefully.
The only thing I would add is that inside the B-pillar theres an inner and outer skin and as I discovered (after faffing for an age trying to get the cable down there), you can easily end up going down the narrow gap between them rather than straight down the pillar and theres a partial obstruction about two foot down. It'll go down there ok but does need some fettling to get past obstruction before it does. If you look inside the B-pillar via the fresh air vent hole near seat belt mount, you can see/feel the end of this outer skin towards the outside. It won't assist with getting past obstruction but will give you an idea where cable might appear. I could give the dimensions for drilling if you get to that point but basically you follow the slight curve upwards of the B-pillar and drill right above it straight down through the roof. I didn't use a rubber grommet due to the two thicknesses of steel so just sealed it with silicone. It did the job and is watertight.
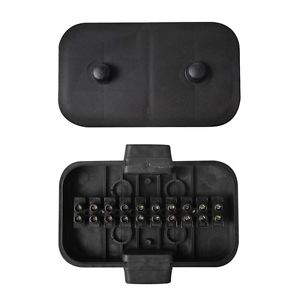
I did originally consider drilling beneath the solar panel so the cable vanished completely, and along an inner roof rib, but apart from having to remove headlining, that could prove to be a problem if you needed access in the future. Originally, the panel cable connectors loop outside the panel (again for access) facing rearwards and were held there with a couple of self adhesive cable clips (available in black or white), to stop them moving around. However, this looked incredibly untidy so I dispensed with the standard connectors and instead fed the cables into a caravan junction box. I used extra silicone sealant to the lid to ensure a watertigh fit. See photo below:
The side edges of the panel (ie part visible when standing next to camper) were capped off with two short lengths of narrow cable conduit. I made sure that should any moisture work its way under panel, it can escape beneath the small gaps I left under standoffs I stuck down to support panel.
'Upgrades:
I subsequently added an additional panel to make it 200watts. In Summer this is excessive and I find they will charge both batteries before 9am. In Winter this will take longer but with 200 watts, it does help things along.
Time-wise it took over four days as the standoffs needed to set (36 hours) and you'll need some weight on edges of panel when you silicone that down, plus any filling you might need. I used bricks to hold edges down to be honest. Weekend perfect time to do that. You can use ducktape (duct tape I know, but best to hold ducks down in my view) to hold some fiddly bits in place while silicone sets, but it does leave the adhesive behind when you remove it so expect some cleaning up. WD40 and a rag will remove adhesive residue including odd bits of silicone - eventually.
One tube of builders silicone is enough to do the whole job. Mind you, thats how I did it but there are other ways I should think.
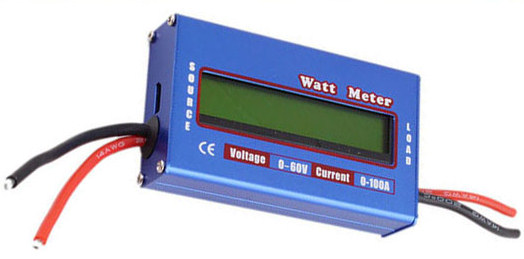
These kits come with a very simple controller using LEDs to indicate state of charge but if you want to monitor whats going on (ie volts, amps & wattage from panel or from controller), these are cheap enough (wattmeter) on ebay and are useful thing in a camper anyway to see what any item (stereo, propex etc etc is drawing). They are accurate to about 3%.
