Areas that rust - Rear cross-member
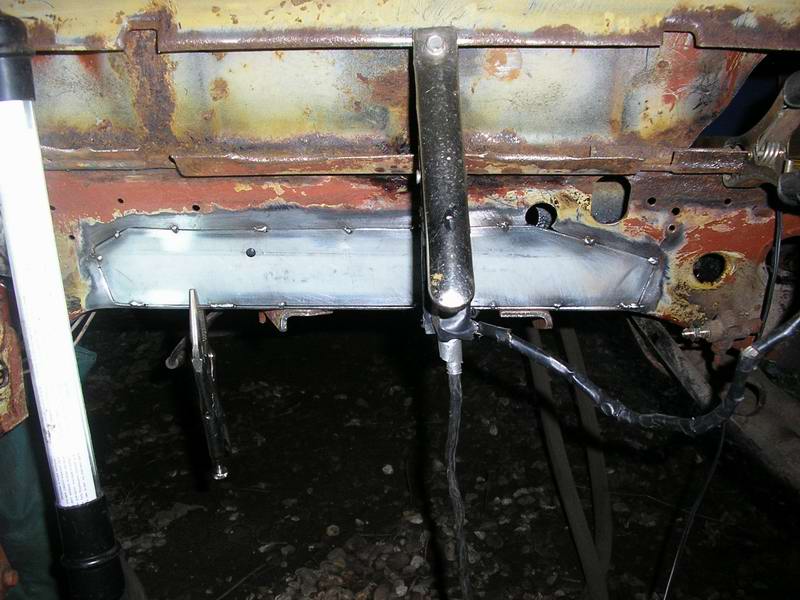
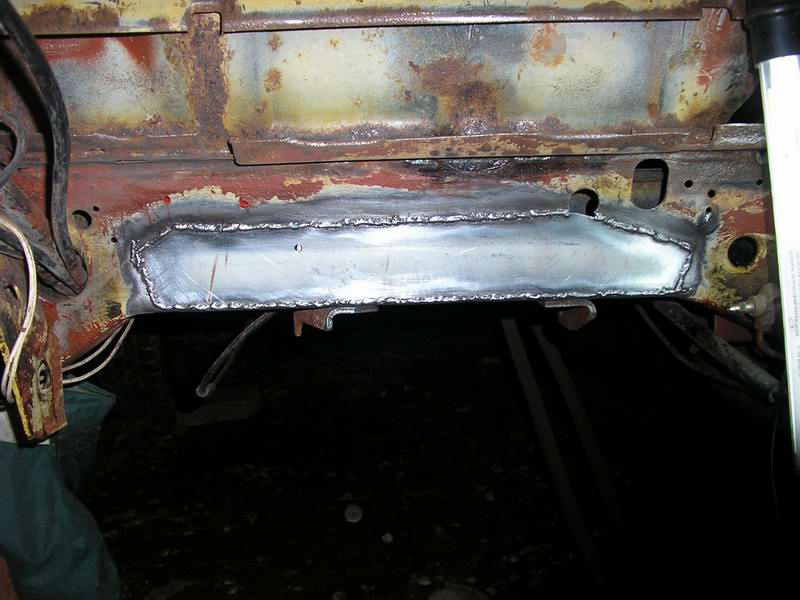
Syncro rear cross-member (behind fuel tank)
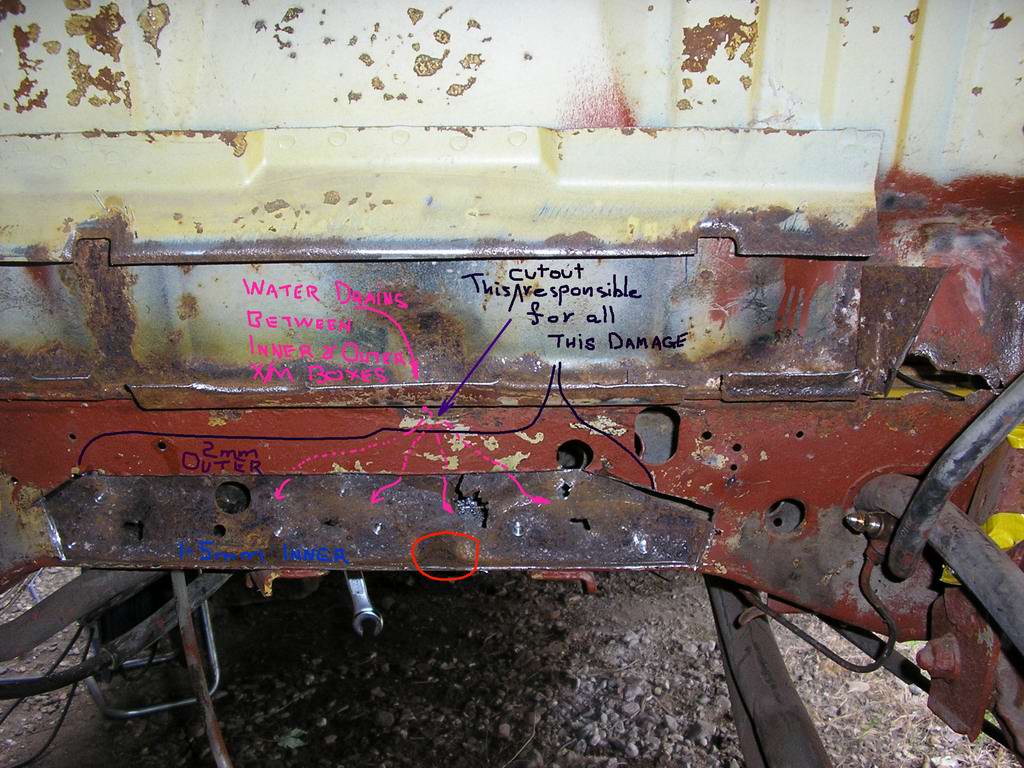
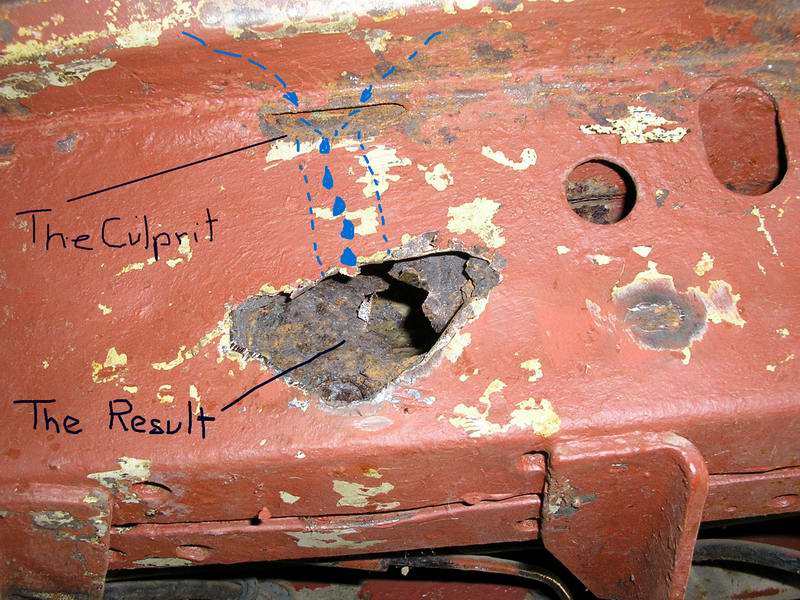
HM: Quite why that 'arc' was put in there like that, allowing water from the tank stand-off frame to collect and dribble down, I've no idea, but that's VW or Steyr's bad design there IMHO, unless I've misread it.
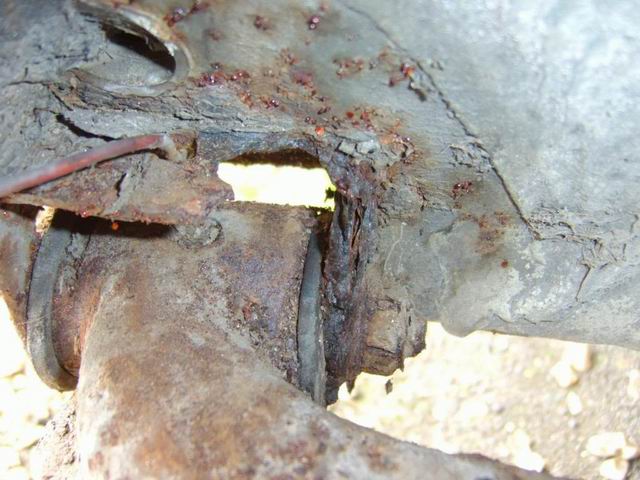
There's no doubt that water gets between the two members, inner doubler holding the anchor nuts for g/box mounts etc and the heavy 2mm outer rear face of the deep cross-member - and it can't get away and dry out.
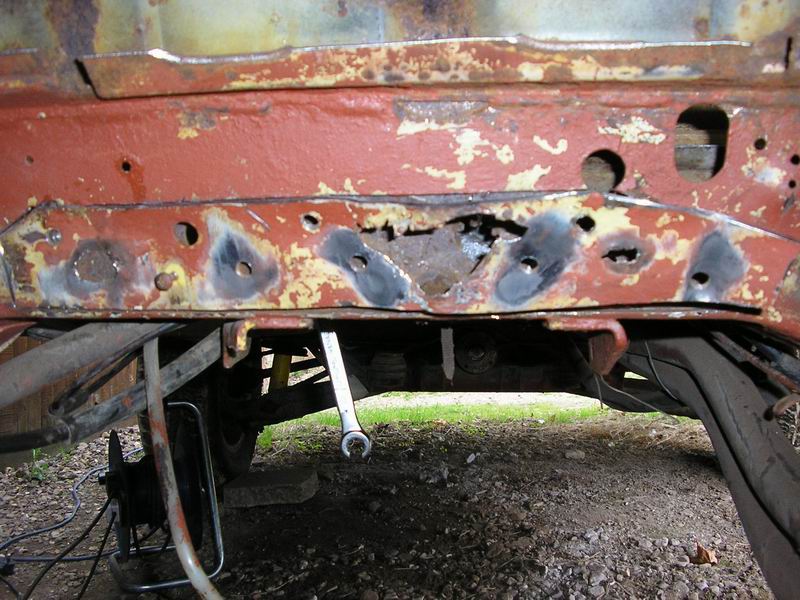
Prior to the grinder work, this was after a few minutes with a twist-knot brush
Ok, its bad enough, lets do it!
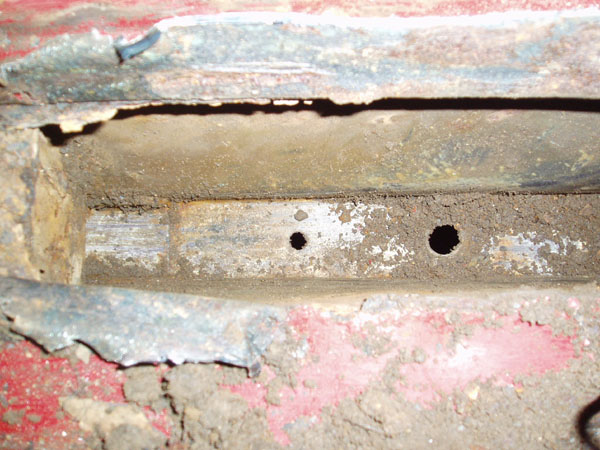
If you have the tank out I'd recommend blocking that hole with seam-sealer and drilling the bottom of the standoff in a few places to allow drainage straight down outside rear face of cross-member. A lot of the 2mm was down to 0 > 0.5mm once the shale was removed, and the inner box doubler down to nothing as can be seen.
This was not an easy repair! With two layers effectively layed up so close and spotted together. But by very careful use of the 1mm grinder, time spent filing a good edge, the inner doubler cut down in height to good metal and repaired first; then the 2mm outer plate butt-welded in - it is possible to restore the strength of the whole area.
After all, not only the gearbox hangs off it, but the underrun bars meet and mount under there!
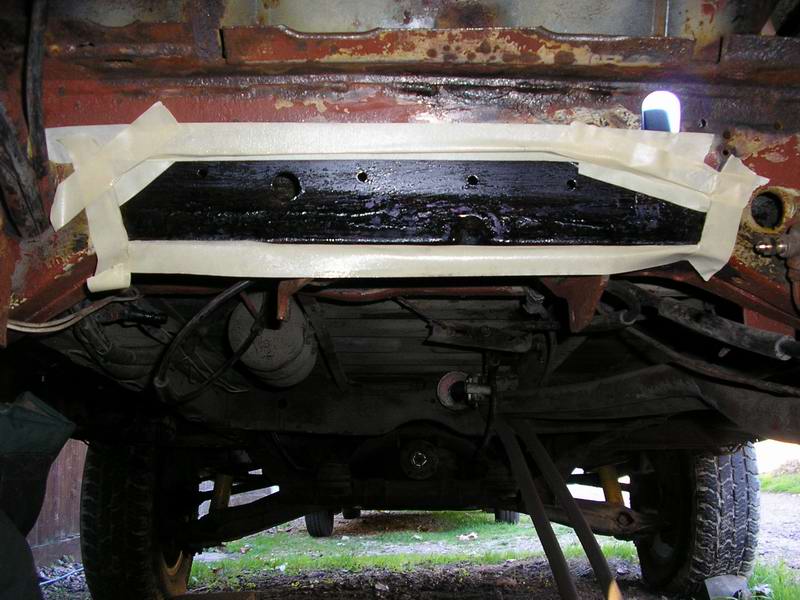
Inner doubler repaired, edges for outer weld protected, Dinitrol Converust applied, and floated into join area at bottom
Final fitting clearances established, carefully tacked into place to position and avoid distortion
Prior to grinding back weld
Viewed from inside, judged to have penetrated adequately, although where accessible was also welded from inside too.
Syncro rear cross-member (floor capping plate)
Diamond Hell: A while ago I spent a lot of time with a screwdriver and a wire brush searching out corrosion on the latest thing to occupy garage space at that time.
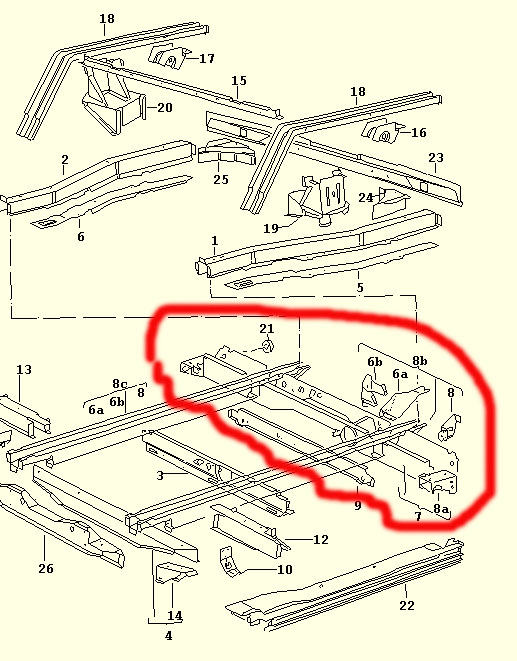
Now the T25 I have has obviously been used off road for some of it's life, but I was turned on to this corrosion trap back awhile when I visited Mercus and found him giving the cross-member in question in his yellow post van a good seeing to with a screwdriver. This is the cross-member in question, from ETKA:
For those of you with diagram allergies it's the one where the rear jacking points are. This is one of the main structural members of the van and HAS to be sound for the rest of the van to be sound!
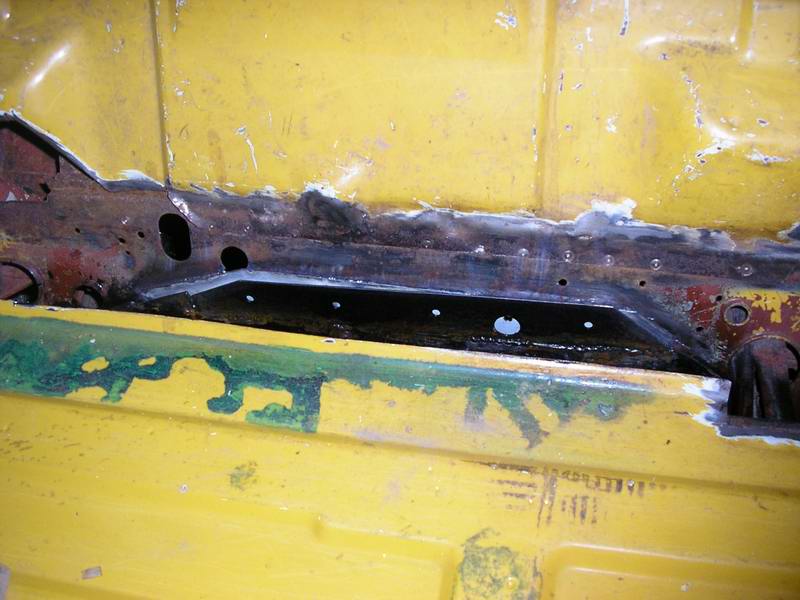
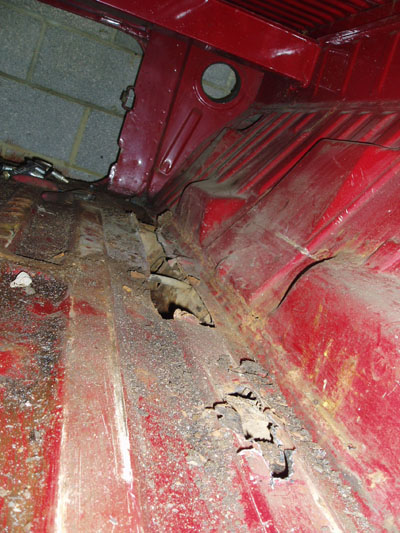
So, here's what I was looking at, after I'd attacked one of the outriggers:
That doesn't look TOO bad - I mean it looks like I've just hacked out the steel over the cross member for no reason.... errr no actually. I ran a wire brush over what appeared to be a perfectly good panel and it FELL IN on itself!
That's right - this is an invisible killer - it will rot your bus from the inside out and you ain't gonna know owt about it until one day you tread on the floor and your foot goes right through! If you've got a camper you might not even notice until the stuff under your bed starts getting wet, cos this is the bit under your bed.
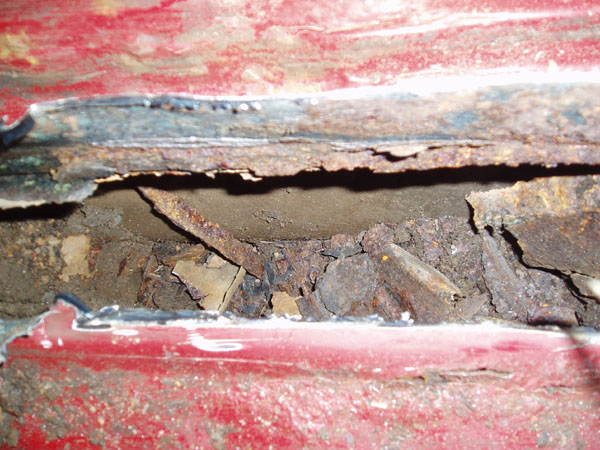
Having had this happen on one side I unzipped the other side. Here's what I found:
M'mmmmmmmmm, looks tasty, doesn't it, kids? I might add that when I unzipped this panel with the angle grinder I found that although the top of the corrugation was sound the sides were wafer thin.
So, having opened Pandora's box it's rude not to see what's inside, isn't it? Let's get digging with something that fits in there, so as not to lacerate ourselves on the nasty, sharp edges, eh?
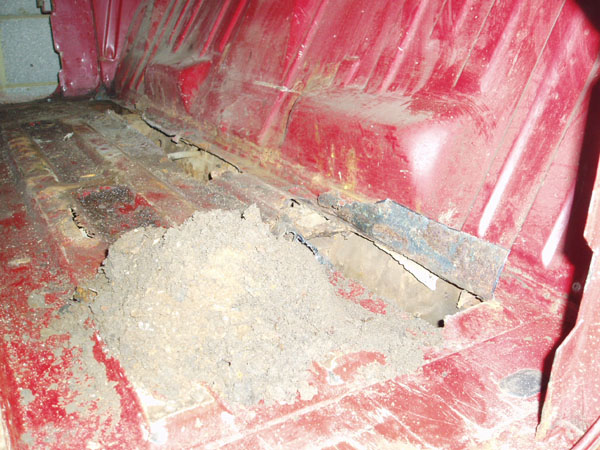
Here's what came out. when looking at this bear in mind that the mud is just from the outrigger on one side! There's a whole load more on the other side of the vehicle on the floor and more to come out where the loom passes through the cross member:
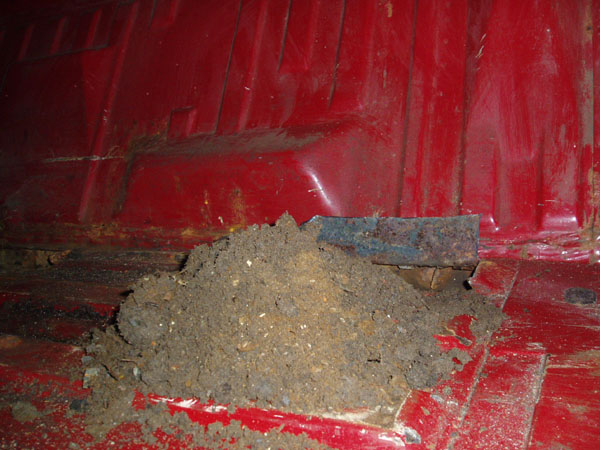
Here's a better view of that pile of filth - LOOK at the size of it!
Here's what it looks like with most of the filth removed:
The holes at the bottom of that are drain holes. Unfortunately they are also 'fill' holes. Every time you immerse your Syncro in water God kills a kitten..... no, no sorry, wrong forum. Every time you give it a dunking silt will come in. Think of what water you drive through is normally like - all churned up with muck in it. When the water gets forced up into the cross member it comes in with filth. The filth then sinks to the bottom and the water drains out. Repeat this over and over and 'oh look' your cross member is full of silt! Silt holds water, which when it warms up causes water vapour, which condenses on the floor of the van.... not to mention the horrible things that the nasty stuff is doing at the bottom of the cross member, where cold, salty water is being pressed against the cross member on a permanent basis.
So, how do we stop this happening, without all cutting the floor open and clearing it out? By my reckoning it'll be best to wait until summer and get a garden hose and force it into the drain holes in your cross member and give the thing a right royal enema. You'll need to do it both sides and once you've done it you need to get some heat in there to dry it out - this is gonna take some time so it'd best be a nice gentle heat.
Once you're convinced it's reasonably dry (the dryer the better though!) then you want to get some waxoyl in there and quick - really give it a good hosing through all of the drain holes
For those who don't bother and use their van off road I'd give you four or five years, tops.
You have been warned.
Cleaning/ Getting access
HarryMann If you don't want to completely unzip the cross-member capping panel like DH, then it'll be a powerful vacuum jobbie with lengths of rubber vac hose attached, and hours prodding with bent bits of fencing wire (loop the end right round round to avoid getting it jammed and round-off the edge. (to avoid scratching everything inside). A screwdriver doesn't quite cut it! Dry summer weather is best, and doing this over a few days helps as you uncover more and more damp stuff, let it dry overnight and go again, you'll be amazed! Or get the hot-air gun in there, but on alow setting for setting.
It's also not difficult to attach a length of heater rubber hose to the 'crevice attachment' on your vacuum, taper off the end of the hose and slide it right into any sections. Occasional large flakes will block, but again, you'll be amazed how much you can suck out... and it is of course this detritus that holds the moisture and so prevents drying out that accelerates corrosion ?
Others favour a running hose or jet wash in there - your choice (but not mine :-)
If you do find corrosion where the rear floor meets the engine bay upstand (Common area), then you might as well remove that whole floor panel, usually cutting at the midpoint of the cross-member's flange.
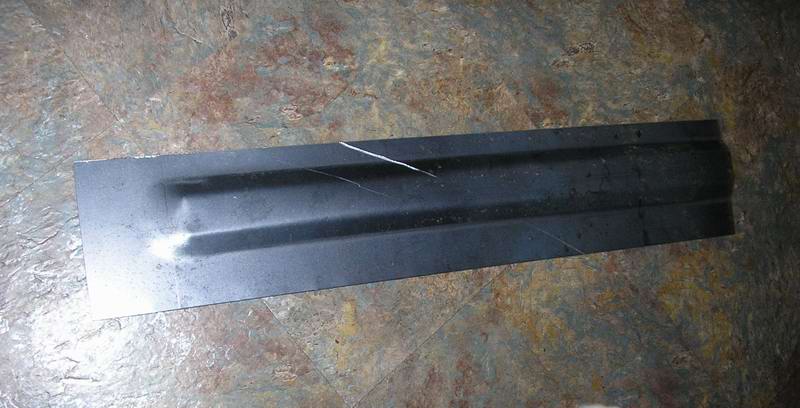
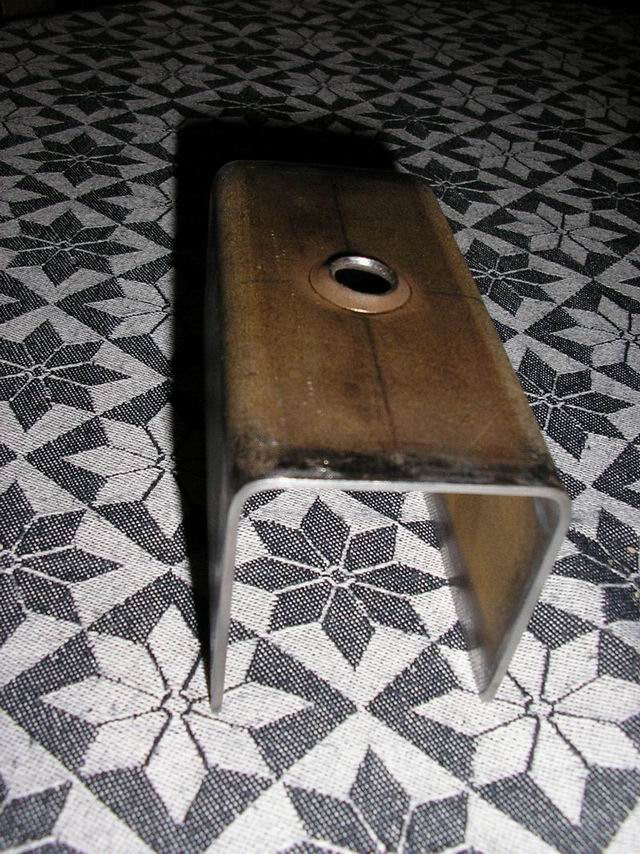
Here is a section I made up to re-cap the rear cross-member, using an oak female former, a steel box section for the male press-tool and several assorted G-clamps to do the forming. I used 1.5mm nominal steel sheet and started with a 5" wide strip, long enough to lip between inner sill and load-plate across to the half-way point.. to make a full width (double-ended) section by hand, would be a task many times harder! The finger-pressing is offset widthwise to allow enough material for a further folded lip to join against the rear upstand.
Repair section
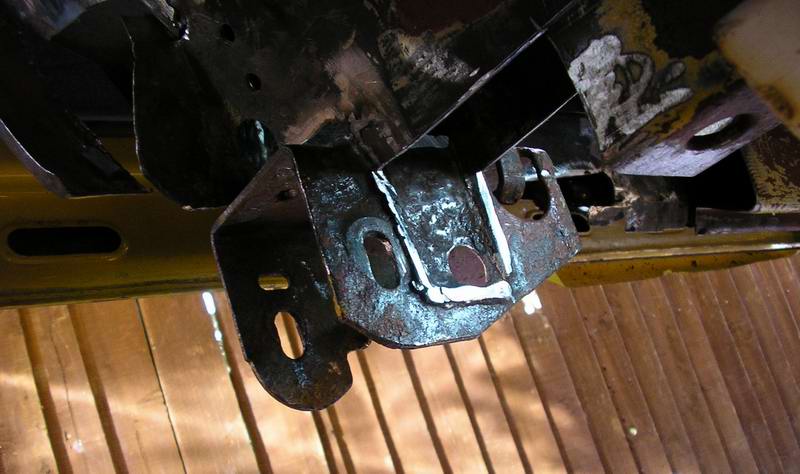
HarryMann: Due to bad drainage, the outer sections (adjacent to the jacking points) of the cross-members can (eventually) rust enough to seriously reduce it's thickness. Ditto the thick metal of the jacking point/trailing arm attachment frame too. (NB. DH's above example shows the x-member itelf to have a good bottom section, yet the floor capping has rusted, you never know... unless you look)
The rear cross member box-section is made of 2mm thick steel and is 50mm outside dimension.
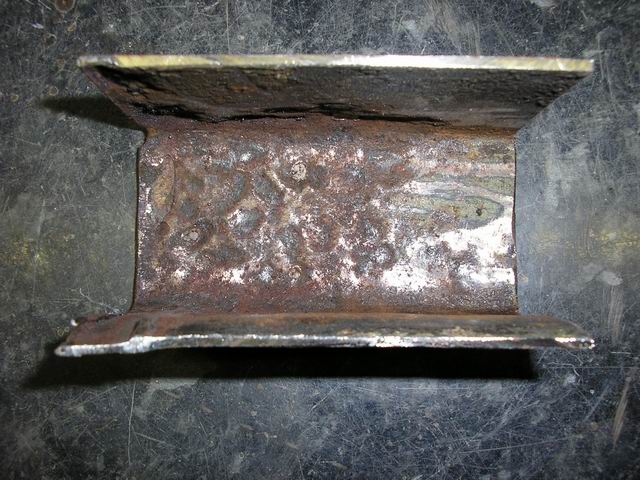
Here is a section I made up to cut-out the rust and weld in at the outermost end of one, just over 4" long with sides about 2 1/2" deep. By careful setting out and bending, with a bit of adjustment and trueing up, I managed to get a good match, slotting in and lining up on width nicely.
Also, note that I've swaged-in a drain hole, and that this is the correct way around, unlike VW's effort they put in about 5" from the outside edge, which allows water in but stops it draining out !!
Notice the severe thinning in places, even of the 5mm thick jacking point structure...
Clarke TE 150 MIG, almost flat out (3 Min) penetrated enough on these thick sections
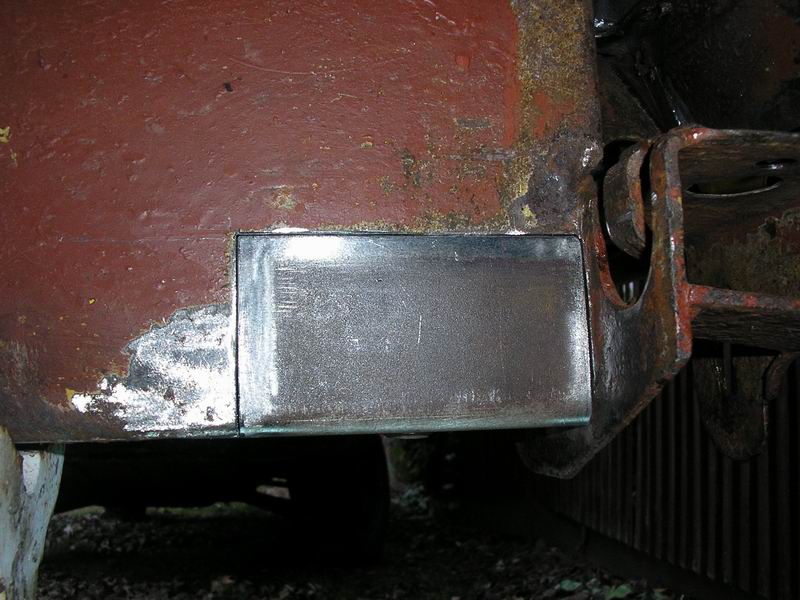
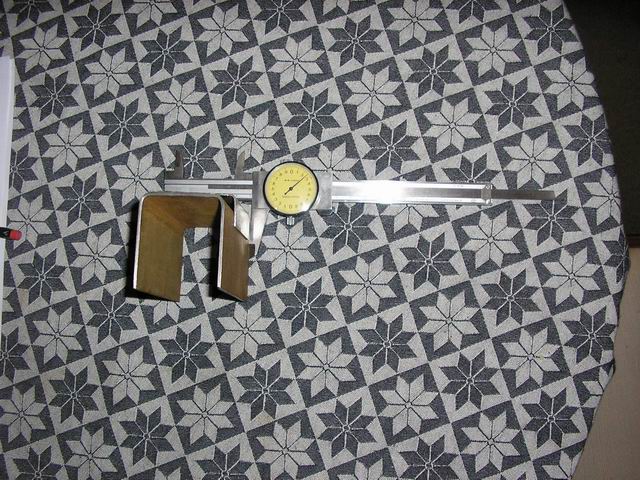
See also a typical repair wrap-around section (50mm inside width, 2mm gauge, about 2.5" deep x 4.5" long) - should the box not be rusted over more than just the bottom
NB. Until you have thoroughly wire brushed and cleaned out the box section, having unzipped the floor panel, and inspected with a torch inside, it is very easy to underestimate how badly these box sections can rust, and thin down to nothing from a good 2mm (ditto the 5mm jacking points, halving in thickness)...
Other pictures and repairs
This one is very bad, would require cross-member outer section, whole rear sill, outer sill, new jacking frame and no doubt outer body panel (removed at least to gain access).
The jacking frame/ rear trailng arm pickup is nominally a 5mm thick steel fabrication, often reduced to 2mm or less in places.
PS. VW Classic Parts - might be now supplying complete new rear jacking points...
PS2. Brickwerks are now supplying rear jacking point and trailaing arm pick=up fork repair sections
