Fuel System tank removal
Hacksawbob:
Petrol tank removal 1.9 DG
- disconnect earth(s) from batterie(s)
- You CAN do this without jacking the van up but it makes refitting much harder. Jack the front both sides and support on axel stands (actually you could jack the nearside then drain the tank as it will help get all the fuel to one side).
- Empty fuel from main tank,
- disconect fuel supply to engine (drivers side with the filter), and drain fuel into petrol can or similar (this can take quite a while even for a small ammount of fuel
- disconnect return fuel line from engine, on the other left hand side (didn't know that was there did you!)
- disconnect fuel expansion tank (wheel arches) BOTTOM connectors These need to be disconnected to allow the tank to drop eneogh to get at the grommets on top of the tank. Dont disconnect the top ones as these will probaly snap (mine did), and basically they just go from one wheel arch tank to the other , so do not need to be removed. when you refit it may be an idea to replace the hoses to the main tank with slightly longer hoses so you can refit easier just make sure they dont kink when it all goes back!
- prop the tank with a trolley jack, I used a borrowed "diamond" shaped emergency jack wich worked better in the confined space under the van (I didn't jack the vehicle up).
- undo the 13m bolts holding the metal tank straps
- remove the tank straps you may need to bend up the inner corners from the "hooks" at the rear of the straps if you dont have the van jacked, as they wont come off other wise, slowly lower the tank.
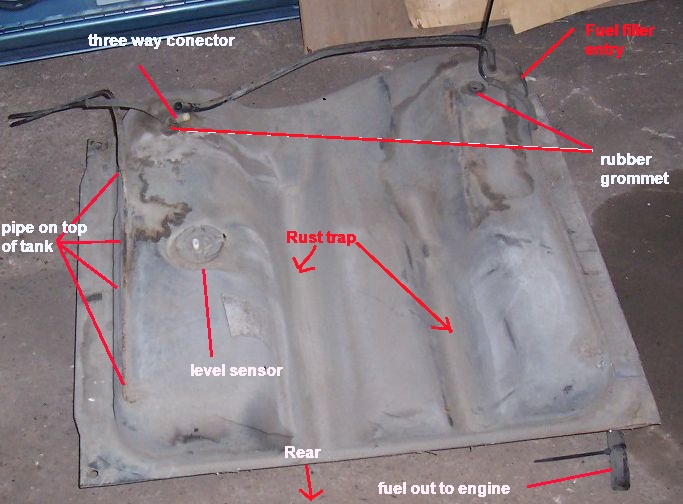
half way down take a look above the tank and try and help out the connecting grommets that are on the the front/top of the tanks, remove the rubber from the tank and leave it conected to the white plastic hose connectors if possible. There are three pipes to remove. In retrospect if you are going to replace the hoses anyway it would be quicker just to cat them all!
- Ease out the main filler pipe from the tank, its only held in there with pressure from a rubber seal. (interference fit)
- Drop the tank to the ground slowly checking for snags.
try remove any other connectors you can see, the ones from the expansion tanks should have pulled through the the chassis leaving the tanks in place in the wheel arch.
- there is an electrical connector to the fuel tank sender (fuel level sensor) but this had enough slack to reach the ground for me. Remove this too once the tank is down, the wire just pulls off
remove the tank from under the van
Do what ever you wanted to do with the tank out. (i.e. change the hand brake cable, patch the hole treat thre rust....)
Your tank will be rusty, if you want to treat it be aware that it is still full of petrol fumes so power tools may not be a good idea. | this product may be of use, POR petrol tank sealant
Sand down the outside rot by hand and treat with | Eastwoods rust encapsulator or similar,
re-fitting is quite awkward
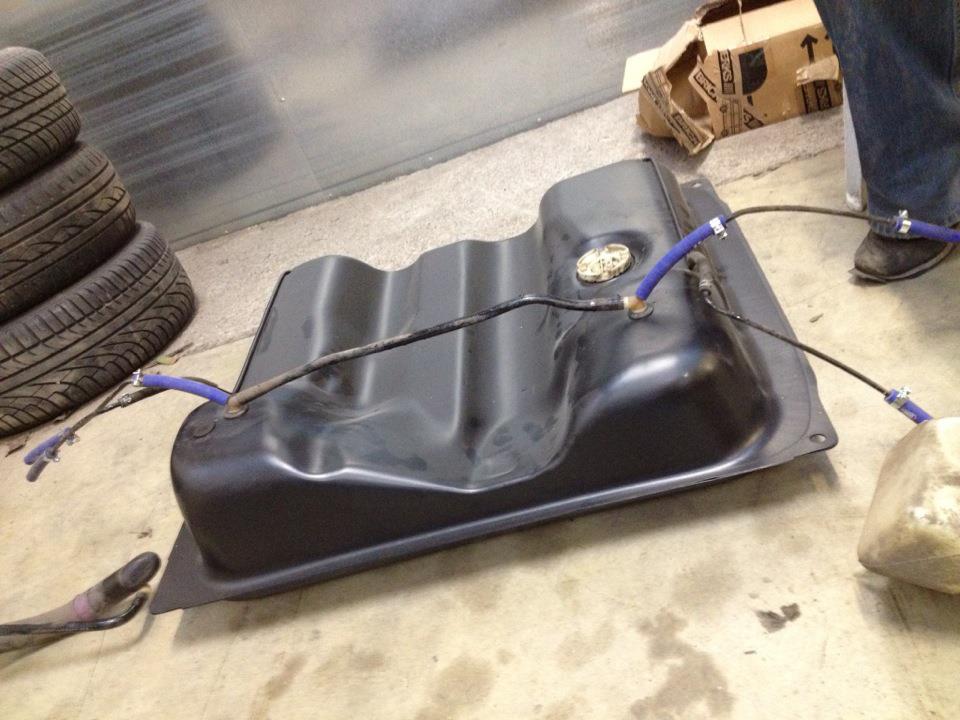
I attached the breather tubes to the rubber grommets on top of the main tank but not to the expansion tanks. You need to do this after the rear end on the tank is up and engaged and the the tank straps are in you may wish that you had jacked the van up at this point to give you some room. Also you will need to get that filler pipe back in I put in the tank end first and then forced the top end back into the petrol cap rubber , not ideal but I couldn't see how else to do it. The tubes have an internal diameter of 6mm. the ones that go to the top of the tank from the breather tanks could do with being a shade longer than they were.
tank schematic all dashes are pipes as seen from the front
_____________ < floor of van
0-----------0 < breather tanks in wheel arch
 \\        // <  2 pipes to grommets and 2 to metal pipes on top of tank
 |*-------*|  < three way connectors
 ||       ||   <rubber gromets into top of tank and metal pipes
 ============
 |++++++++++|  <main tank
 ============
Skell:
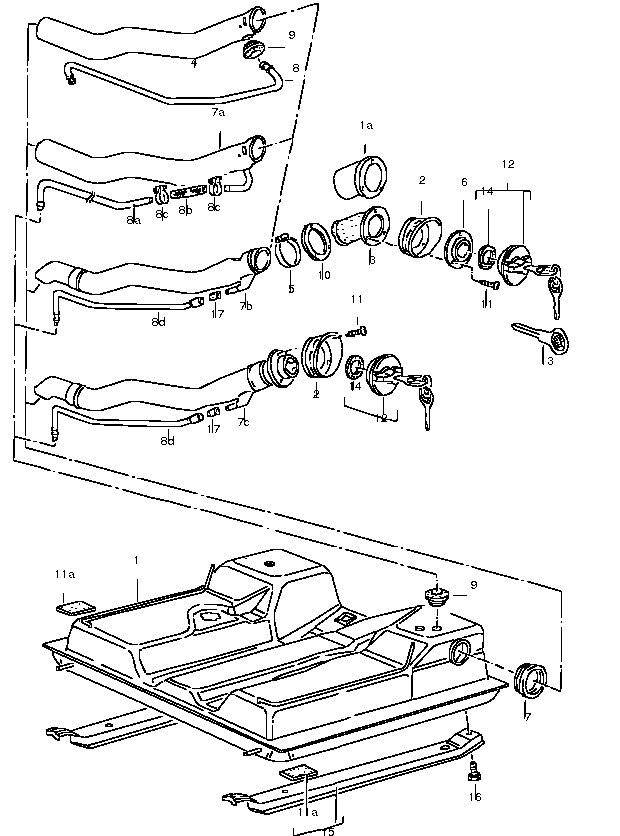
The top end of the filler pipe can be done as follows [ if parts aren't too rusty ]
- 1) remove filler cap
- 2) undo three screws
- 3) take filler cap bits apart (bit cap fits to, rubber neck that fits to filler pipe and metal collar for rubber neck.
- 4) put metal collar over plastic filler pipe
- 5) put rubber filler neck onto plastic filler pipe
- 6) align filler neck with hole in body panel
- 7) put external part on, and replace screws (screws fit through rubber filler neck and locate in metal collar.
The bit you dont want to see! Tank removed from above.


