Bodywork and Glass Footwell leaks
Introduction
This article penned by Covkid, explains where the water comes from and the unseen damage occuring underneath windscreen seal. Its worth noting that if left, the rot will ultimately undermine the strength of the front since the windscreen contributes (to some extent) to the rigidity of the front and the spreading rot also impacts on the strength of the 'A' pillars
Cause And Remedy
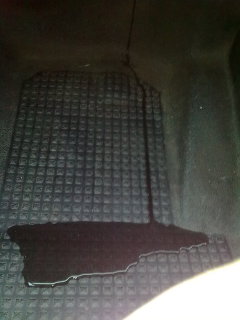
Generally, the first sign of trouble with a leaking windscreen is this puddle (above) either appearing on top or underneath from mats/carpets. Other tell-tale signs are rust along your dash where it meets windscreen.
I spent a very long time indeed (2 years) trying to work out exactly how it was getting in. I tried silicon (aquatic) sealant in corners, tried sealing between rubber and glass along whole bottom edge, and still water came in if it had been stood out in the rain. Invariably its the moment you pull off the next day that it trickles down. Whats happening is the seal is effectively doing the absolute opposite of what its meant to do and diverting any water directly by capillary action to where you don't want it.
Simple pumping the area with sealant is not addressing the problem and given the importance of strength up front, it is better to deal with this sooner rather than later. Essentially you need a mig welder, a new windscreen seal, some suitable sheet steel offcuts and relevant paints.
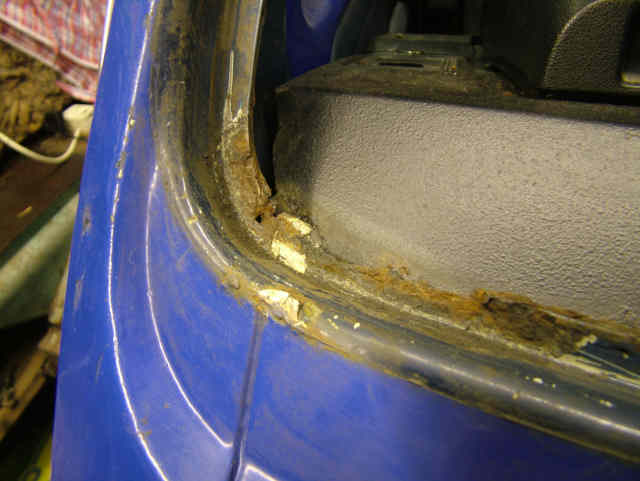
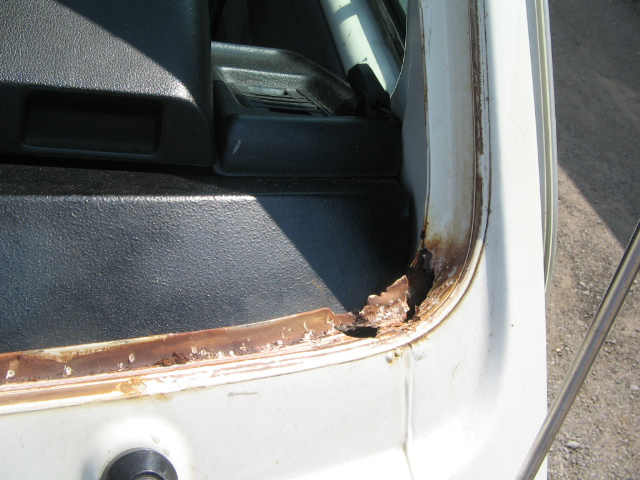
Contrary to popular belief, water doesn't force its way into the corners but through any hairline breaks in the seal from further up the windscreen. It works its way under (often right at the very top of the windscreen) and runs, completely unseen, actually underneath the rubber seal and down into the corners where it has nowhere to go whatsoever until it finally rots the metal (see photo below) and has a route to the inside. If you get several days of rain, it will really build up in there, trickling down on to cab floor. In some cases it goes under carpets so you don't always see it.
You can verify this. If it rains overnight, wipe down A pillars so they're dry. Then carefully lift seal with a knife (vertical part on pillars) and see if its wet under there....
Repairing
Firstly, you need to remove windscreen and rubber. This is easily accomplished by cutting out old rubber (carefully) with a stanley knife - you WILL be fitting a new rubber, won't you:)
Ideally, its better to do this job with the dash out, but on the basis that may scare some readers to death, this is how I attacked the job with dash still in. You MUST make some efforts to protect and reduce the chance of fire. Hot sparks from a grinder will embed themselves in synthetic materials including plastic mouldings and seats so protect the interior with boards or metal sheets to stop hot metal from entering the interior or even causing a fire. The corners of the windscreen are directly above the footwells so pull back or remove carpet and ideally have an assistant to keep an eye on interior and move sheilds to suit.
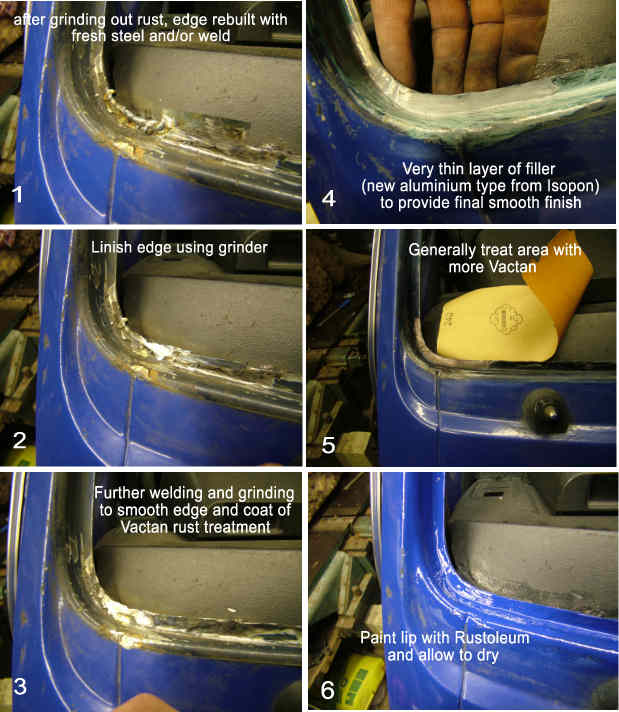
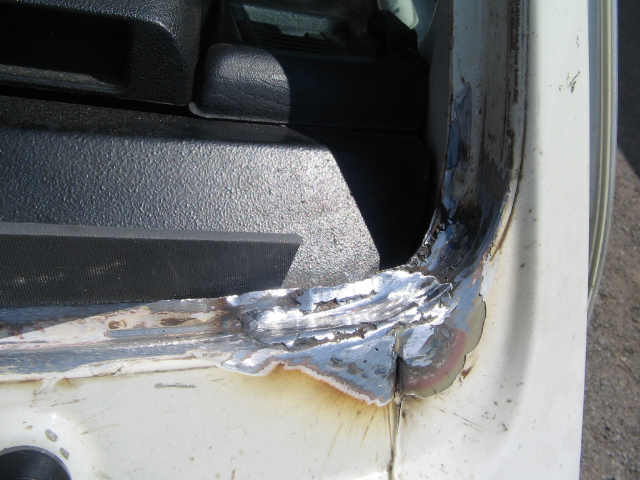
The photo sequence below maps the processes involved, but understand that some vehicles have a greater or lesser degree of damage so you may not complete this in one day - depends how much patching/repairing is required. I had to rework some areas on the horizontal/flat plane as the steel was thin in places so built it up with weld then ground flat. Take all the time you need to rework the lip. Its easy to blow holes in it, but you can soon rebuild affected areas until the strength is restored.
I used thicker steel when butting in new pieces simply because the lip is a seam and therefore double thickness. Those areas that only had marginal corrosion were simply ground down as much as was needed to actually reach shiney steel and then built up bit by bit with weld then ground back again to achieve desired depth and thickness. The trouble with weld is that its always harder than mild steel so takes an age to get flat again, but certainly a stronger piece of metal in those corners now and almost as good as new.
Once screen was back in - and I did this single handed using nylon platted washinmg line from local pound shop (about 1/4" thick), I also ran a bead of cheap gutter sealant under the rubber lip them wiped off excess with white spirit. It is now fixed and absolutely watertight.
Once screen was back in - and I did this single handed using nylon platted washing line from my local pound shop (about 1/4" thick), I also ran a bead of cheap gutter sealant (under £3) under the rubber lip them wiped off excess with white spirit. It is now fixed and absolutely watertight. Arguably it is now better sealed than it was from new.
Additional photos
This was the state of Chickenkoop's camper once windscreen had been removed. In this instance the metal had so many holes we had to cut new pieces shaped to fit and then linish smooth (ish). We did however remove the old screen and rubber, repair, paint hidden areas and fit new screen and rubber in about four hours.
Photo below illustrates very well how much we had to build up the corner. Once welded (photo), it took some considerable time to grind back to shape and paint.
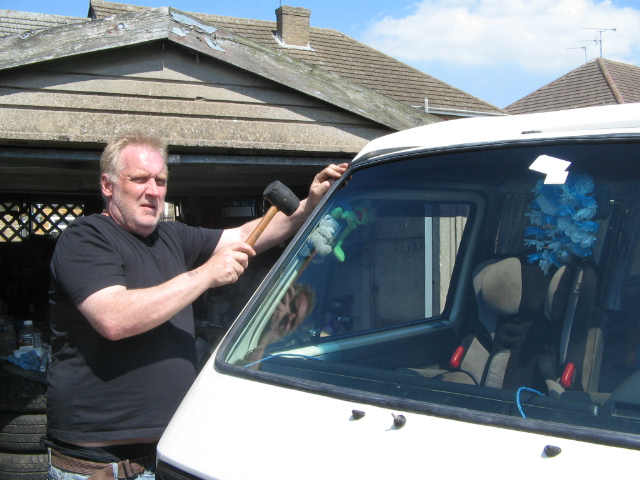
Covkid helps the new screen and rubber bed in as Chickenkoop pulls the blue cord from inside vehicle.
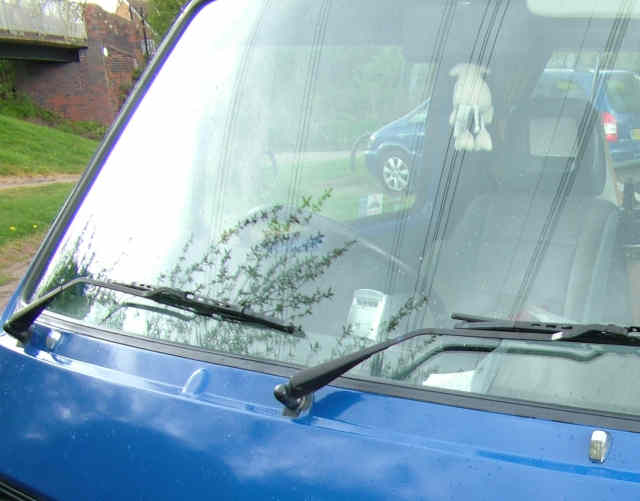
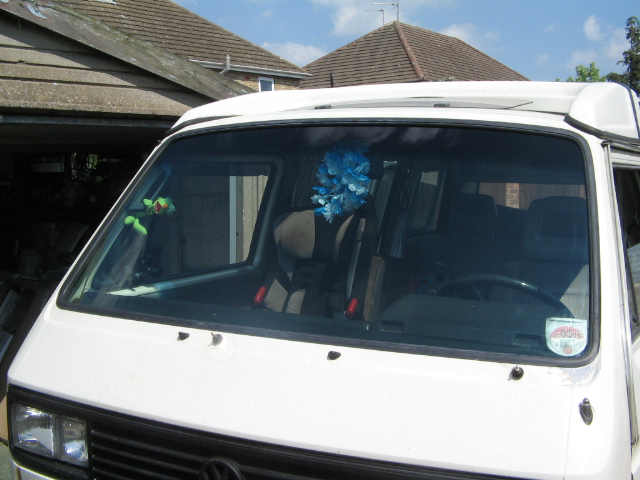
New screen and rubber fitted and job done.
