C-strut update post
Posted: 23 Dec 2011, 12:47
Hi Guys,
Thanks to all your advice and help we've managed to get Betty back as she should be. I had intended to do an update when she was fully restored but it seems there'll always be another job to do so I'll do it now otherwise I'll never do it
So to recap. We bought Betty in April as a 2 berth and decided we'd like to restore her to her original 4 berth configuration. Little did we know the conversion was a bit suspect to say the least. Kev the Rev delivered the bad news.... you're missing a C-strut. A C-strut? What's a C-strut?
Well here's the story so in pictures....
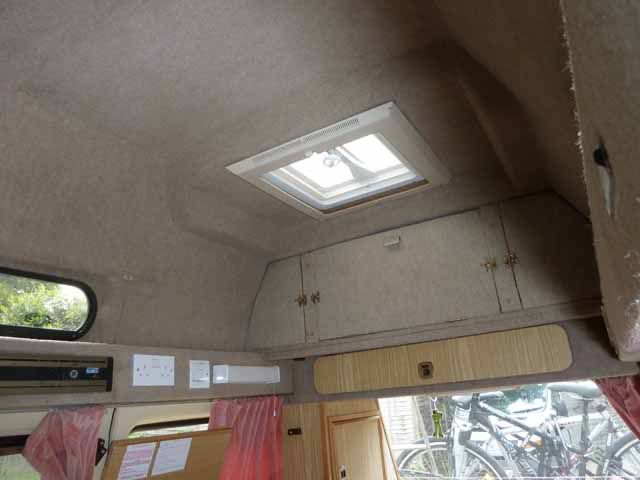
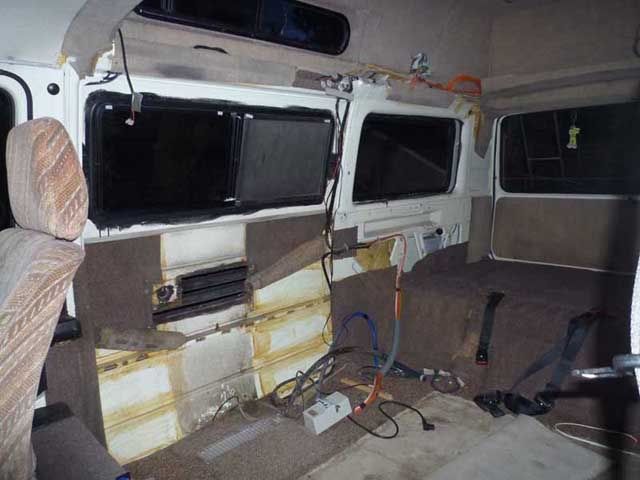
Below is how Betty was when we got her. Notice there is no bunk bed just some cupboards at the rear of the van. We thought they'd just removed the board that made up the bunk bed. No big deal. Actually it was quite nice and spacious but we thought it was a bit of a waste of a decent hightop so we wanted to put the bunk bed back in place.
Blissfully unaware we posted asking for advice on how to replace the bunk bed. Just some pictures to point me in the right direction should be all that's needed... or so I thought.
So here's how it should have looked courtesy of Kev the Rev's fine example.

Notice the cross beam under the ladder? Well that's a C-strut. It's part of the structure of the van and should not have been removed.
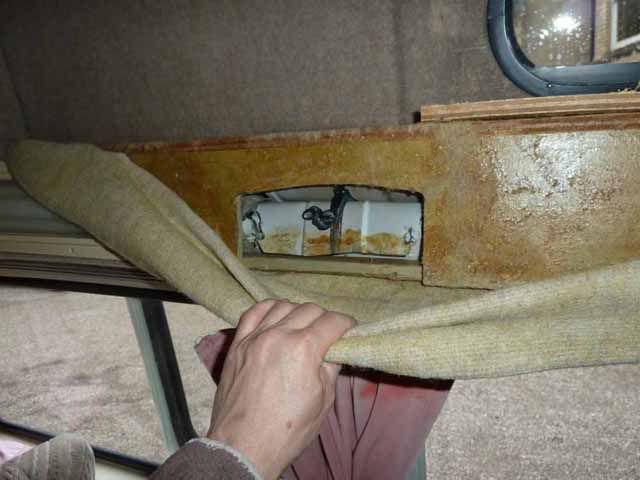
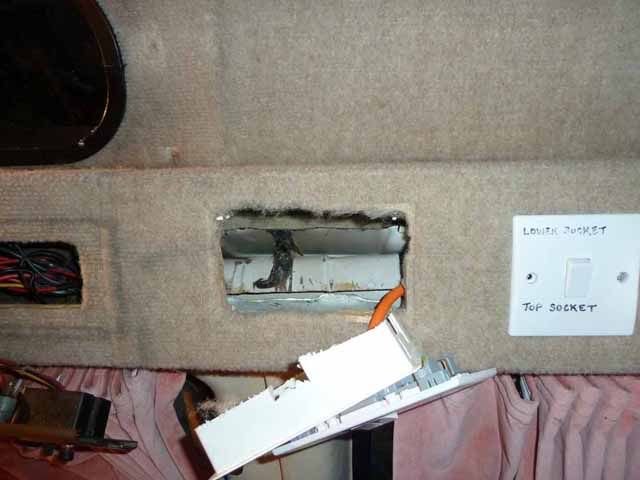
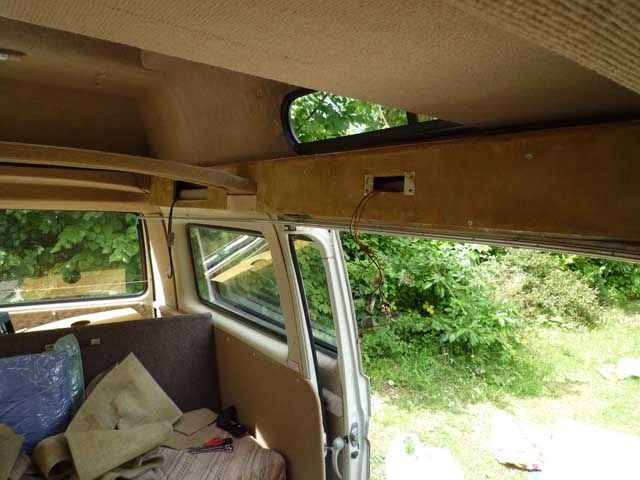
So let's see what happened to ours? Oopps. They seem to have just cut it out.
OK so what to do? Apparently welding one back in should be an easy job and we should be able to get one from a breaker. Here's what we need.
Managed to get a C-strut within days for £20 from a local breaker. Found a local welder and took Betty to get an assessment. The good news? Yes, it's easy to weld the strut back in. Bad news. We'll need to remove anything that might be flammable from around the area... which in the end meant everything!! Even though he had fire blankets to cover the cupboards, the fibre glass around the windows needed to come out and that drops down behind the cupboards. Even the windows had to come out as the rubber seals lapped the fibre glass.
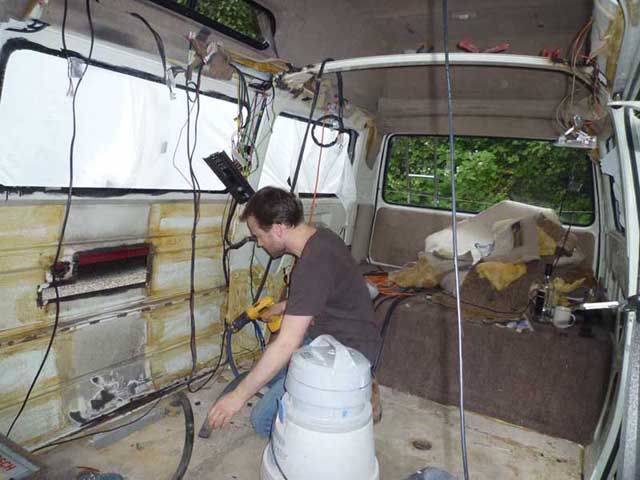
So everything out...
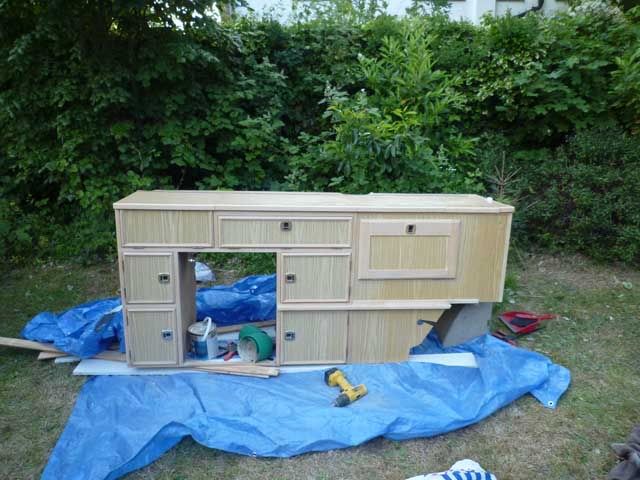
Getting the cupboards out was a nightmare. It's one big lump. I'll do a separate post with some lessons learned in case anyone else has to do that. It's not easy without knowing where the hidden snags are. Fortunately some helpful tips on here and some perseverance helped me figure it out. Took the opportunity to sand down the wooden detail whilst it was out.
Before.
After.
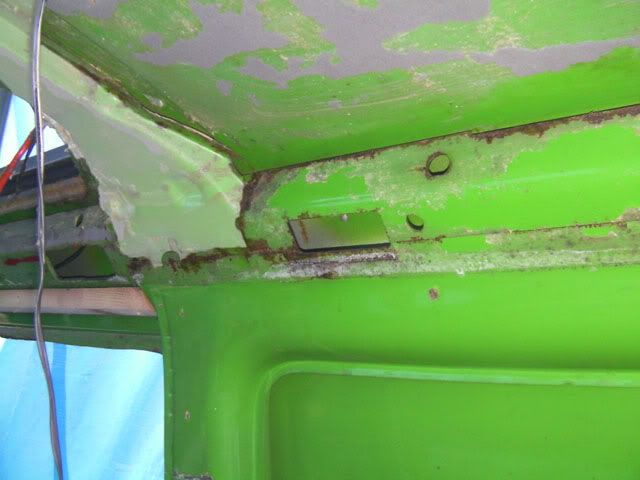
I took the opportunity to treat some mild rust behind the fridge area. Fortunately there were no nasty surprises in that area just a little surface rust. You can see the C-strut has been welded back in place here too.
I labelled everything that I had to remove and took pictures and videos for reference. Proved to be invaluable when putting everything back (cupboards, curtain rails, plumbing, gas works, electrics etc., etc.). I have to admit it's a bonus having an electrician for a brother who can lend and hand and test it all I also found a local caravan technician who did a pressure test and verified everything had been put back correctly. In fact, he found the fridge connection was leaking where it is connected to the gas and put that right. £35. Money well spent!

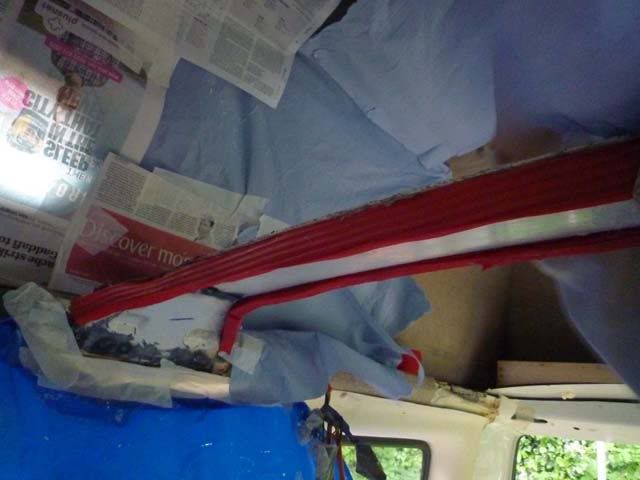
As we had to remove all the electrics around the C-strut that meant having to remove the wooden boxing that runs along both sides of the van just below the hightop and that meant destroying the carpet lining. So we got some new carpet from ebay and did a crash course in re-carpeting (or whatever it is your supposed to call it.) So we started with the infamous C-strut. Here it is masked and ready to be sprayed with contact adhesive. We added some rubber foam along either side to help soften the blow when you hit your head on it and help give it the fluted look that you can see in Kev's earlier in the post.
Next up was the wooden side boxes. You can see the C-strut is covered now. The new carpet was a good match for the original so we didn't recover the roof of the hightop. The contours of the roof are too complex for our carpeting skills and it was in fairly good nick anyway.
The plan was to put everything back in when the carpeting had been finished. Fortunately I noticed before we carpeted them that with the hightop bed area being 4'X4', it would be impossible to get the bed in place once both side boxes were back in. I had to remove one side of the wooden boxing and slide it up through the tailgate and up over the C-strut to get it into place. Cutting the board in half wasn't really an option as it would have been too unstable in the middle and we'd already carpeted the board by this stage. Thankfully I realised before we had carpeted the side boxes otherwise we'd have had to redo one side. That was a close shave!
So once we got everything back in we started using the van over the summer. I've been doing little jobs ever since and there's still some things to finish off but it's more or less there.... well as far as the interior is concerned


Thanks again to all those who helped in the original posts.
https://club8090.co.uk/forum/viewtopic.php?f=40&t=85551" onclick="window.open(this.href);return false;
https://club8090.co.uk/forum/viewtopic.php?f=38&t=85714" onclick="window.open(this.href);return false;
Tim.
Thanks to all your advice and help we've managed to get Betty back as she should be. I had intended to do an update when she was fully restored but it seems there'll always be another job to do so I'll do it now otherwise I'll never do it
So to recap. We bought Betty in April as a 2 berth and decided we'd like to restore her to her original 4 berth configuration. Little did we know the conversion was a bit suspect to say the least. Kev the Rev delivered the bad news.... you're missing a C-strut. A C-strut? What's a C-strut?
Well here's the story so in pictures....
Below is how Betty was when we got her. Notice there is no bunk bed just some cupboards at the rear of the van. We thought they'd just removed the board that made up the bunk bed. No big deal. Actually it was quite nice and spacious but we thought it was a bit of a waste of a decent hightop so we wanted to put the bunk bed back in place.
Blissfully unaware we posted asking for advice on how to replace the bunk bed. Just some pictures to point me in the right direction should be all that's needed... or so I thought.
So here's how it should have looked courtesy of Kev the Rev's fine example.
Notice the cross beam under the ladder? Well that's a C-strut. It's part of the structure of the van and should not have been removed.
So let's see what happened to ours? Oopps. They seem to have just cut it out.
OK so what to do? Apparently welding one back in should be an easy job and we should be able to get one from a breaker. Here's what we need.
Managed to get a C-strut within days for £20 from a local breaker. Found a local welder and took Betty to get an assessment. The good news? Yes, it's easy to weld the strut back in. Bad news. We'll need to remove anything that might be flammable from around the area... which in the end meant everything!! Even though he had fire blankets to cover the cupboards, the fibre glass around the windows needed to come out and that drops down behind the cupboards. Even the windows had to come out as the rubber seals lapped the fibre glass.
So everything out...
Getting the cupboards out was a nightmare. It's one big lump. I'll do a separate post with some lessons learned in case anyone else has to do that. It's not easy without knowing where the hidden snags are. Fortunately some helpful tips on here and some perseverance helped me figure it out. Took the opportunity to sand down the wooden detail whilst it was out.
Before.
After.
I took the opportunity to treat some mild rust behind the fridge area. Fortunately there were no nasty surprises in that area just a little surface rust. You can see the C-strut has been welded back in place here too.
I labelled everything that I had to remove and took pictures and videos for reference. Proved to be invaluable when putting everything back (cupboards, curtain rails, plumbing, gas works, electrics etc., etc.). I have to admit it's a bonus having an electrician for a brother who can lend and hand and test it all
As we had to remove all the electrics around the C-strut that meant having to remove the wooden boxing that runs along both sides of the van just below the hightop and that meant destroying the carpet lining. So we got some new carpet from ebay and did a crash course in re-carpeting (or whatever it is your supposed to call it.) So we started with the infamous C-strut. Here it is masked and ready to be sprayed with contact adhesive. We added some rubber foam along either side to help soften the blow when you hit your head on it and help give it the fluted look that you can see in Kev's earlier in the post.
Next up was the wooden side boxes. You can see the C-strut is covered now. The new carpet was a good match for the original so we didn't recover the roof of the hightop. The contours of the roof are too complex for our carpeting skills and it was in fairly good nick anyway.
The plan was to put everything back in when the carpeting had been finished. Fortunately I noticed before we carpeted them that with the hightop bed area being 4'X4', it would be impossible to get the bed in place once both side boxes were back in. I had to remove one side of the wooden boxing and slide it up through the tailgate and up over the C-strut to get it into place. Cutting the board in half wasn't really an option as it would have been too unstable in the middle and we'd already carpeted the board by this stage. Thankfully I realised before we had carpeted the side boxes otherwise we'd have had to redo one side. That was a close shave!
So once we got everything back in we started using the van over the summer. I've been doing little jobs ever since and there's still some things to finish off but it's more or less there.... well as far as the interior is concerned
Thanks again to all those who helped in the original posts.
https://club8090.co.uk/forum/viewtopic.php?f=40&t=85551" onclick="window.open(this.href);return false;
https://club8090.co.uk/forum/viewtopic.php?f=38&t=85714" onclick="window.open(this.href);return false;
Tim.
