Captain Seat Armrest Useful Information with Pics
Posted: 29 Nov 2008, 23:31
Hi Folks,
After asking in an earlier thread how I go about fixing the armrests on my Captains Seats, I thought I'd investigate further and thought I'd share my findings.
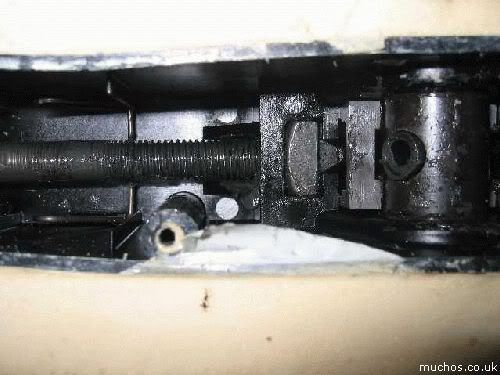
If you're having problems with drooping arm rests, viagra isn't the answer! There is a nut at the rear of the inner workings of the armrest which can easily come out of its casing if the adjuster is turned too far. This is what happened to me, hence me having to cut my arm rests up like a bus seat.
If you're having the same problems, I hope the following info will be of some help.
You will need to remove the armrest by tapping out the circular pin at the back of the armrest with some form of punch (not with your fist) this will result in an amount of swearing and a very sore hand.
The armrest will come away with a bit of jiggling.
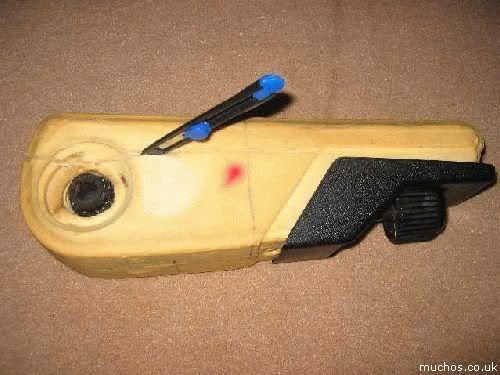
The next step is to remove the two screws that hold the plastic end cap on the end of the armrest. You will need to completely remove the adjuster in order to get to the screw under it.
Once the plastic end cap is removed, you will be able to get to the staples which secure the upholstery in place. In my case, the current material is being scrapped, so no need to be careful. If you are keeping the current material on your seats, then care must be taken as not to cause damage if re-fitting after your done fixing.
To remove the top of the armrest, you will need to remove the four 1" No. 2 Screws which hold it in place. First of all, a cut needs to be made in the sides of the the armrest in order to seperate the foam. This cut needs to made, starting 37mm from the top of the armrest inline with the pivot. Once your craft knife is inserted here, you can follow the top of the plastic casing inside as a guide.
The dimensions to locate the screws, working from the back of the armrest and 25mm from the sides of the armrest, are: 20mm 102mm 154mm and 203mm.
Once the top is removed, all will become much clearer.
The pics I've taken are of a L/H armrest. I've not taken a R/H apart yet, but I'd guess the screws are a mirror image of the L/H

edited by rob to show pictures
After asking in an earlier thread how I go about fixing the armrests on my Captains Seats, I thought I'd investigate further and thought I'd share my findings.
If you're having problems with drooping arm rests, viagra isn't the answer! There is a nut at the rear of the inner workings of the armrest which can easily come out of its casing if the adjuster is turned too far. This is what happened to me, hence me having to cut my arm rests up like a bus seat.
If you're having the same problems, I hope the following info will be of some help.
You will need to remove the armrest by tapping out the circular pin at the back of the armrest with some form of punch (not with your fist) this will result in an amount of swearing and a very sore hand.
The armrest will come away with a bit of jiggling.
The next step is to remove the two screws that hold the plastic end cap on the end of the armrest. You will need to completely remove the adjuster in order to get to the screw under it.
Once the plastic end cap is removed, you will be able to get to the staples which secure the upholstery in place. In my case, the current material is being scrapped, so no need to be careful. If you are keeping the current material on your seats, then care must be taken as not to cause damage if re-fitting after your done fixing.
To remove the top of the armrest, you will need to remove the four 1" No. 2 Screws which hold it in place. First of all, a cut needs to be made in the sides of the the armrest in order to seperate the foam. This cut needs to made, starting 37mm from the top of the armrest inline with the pivot. Once your craft knife is inserted here, you can follow the top of the plastic casing inside as a guide.
The dimensions to locate the screws, working from the back of the armrest and 25mm from the sides of the armrest, are: 20mm 102mm 154mm and 203mm.
Once the top is removed, all will become much clearer.
The pics I've taken are of a L/H armrest. I've not taken a R/H apart yet, but I'd guess the screws are a mirror image of the L/H
edited by rob to show pictures