Page 1 of 1
rear inner wheel arch
Posted: 16 Apr 2023, 15:53
by ZsZ
The body guy who replaced my rear arch 15 years ago used seam sealer at the old inner - new outer arch joint as the weld spots were 1.5-2 inches apart.
It seems like it was not a good idea, the remains of the old inner arch rusted away under the seam sealer. It seems like the sealer was not adhered to the metal or dunno.
Any advices other than captain obvious using mr angle grinder to cut out the rusted part and welding in a new strip?
Is it possible to do what the body guy did just in a better way?


Re: rear inner wheel arch
Posted: 16 Apr 2023, 16:14
by davidoft1
its lasted 15 years so was a pretty good idea, to completely remove the rust it needs cutting out, new outer arch, perhaps rear 1/4 too
Re: rear inner wheel arch
Posted: 16 Apr 2023, 16:25
by ZsZ
The outer skin is fine now I do not really want to touch it.
I think it would be a whole new can of worms to put a complete arch in.
Tomorrow I will attack it with a grinder with brush to see what is left
Is there any tips to make that seam more resistant to water ingress?
Re: rear inner wheel arch
Posted: 16 Apr 2023, 19:14
by davidoft1
ZsZ wrote: ↑16 Apr 2023, 16:25
The outer skin is fine now I do not really want to touch it.
I think it would be a whole new can of worms to put a complete arch in.
Tomorrow I will attack it with a grinder with brush to see what is left
Is there any tips to make that seam more resistant to water ingress?
the seam sealer is resistant to water ingress, the sealer peels off because if the rust creeping under it , you can just put a thicker bead of sealer on
Re: rear inner wheel arch
Posted: 17 Apr 2023, 16:28
by ZsZ
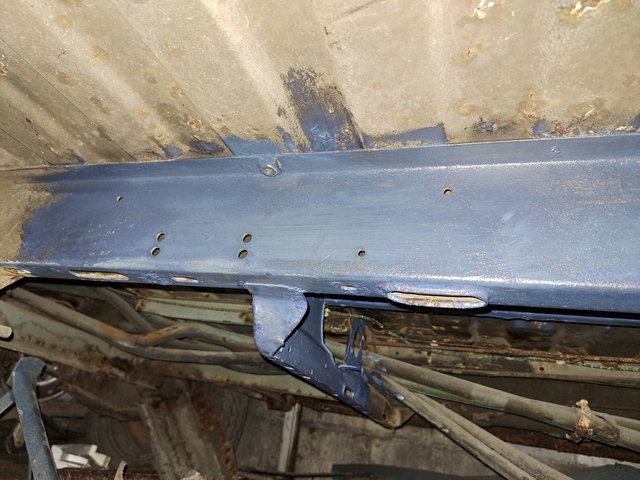
it was a long day today. I have gutted the van, removed the remains of the sealer and attacked the rusty area with an angry brush disk and needle scaler.
It was definitively some material incompatibility as the remaining seam sealer peeled off in big chunks leaving some kind of paint layers behind.
The outer skin is fine. Only minor surface rust. Tomorrow I will cut the rusted edge and prepare the surfaces.
It seems like I will be able to weld in two sections of sheet metal strips and re-try with other (hopefully better) materials.


Re: rear inner wheel arch
Posted: 18 Apr 2023, 10:30
by shepster
Could do with a drain hole in the 'battery tray' area too.
Re: rear inner wheel arch
Posted: 18 Apr 2023, 16:25
by ZsZ
shepster wrote: ↑18 Apr 2023, 10:30
Could do with a drain hole in the 'battery tray' area too.
I don't know why only late vans have the drain hole there. Probably VW was afraid mud getting onto the lamp asseblies - A rubber drip plug would solve that.
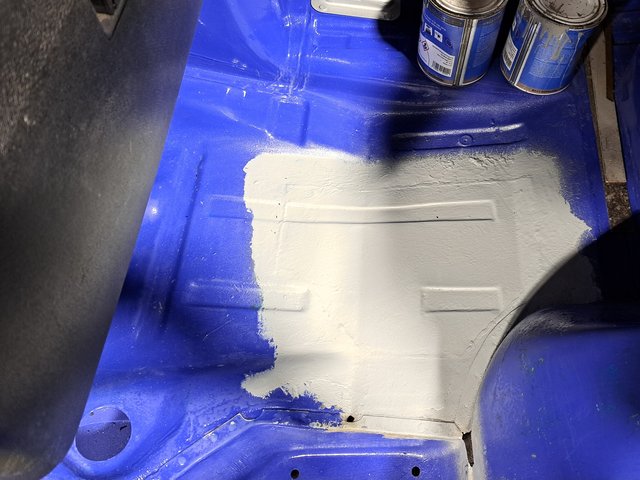
BTW slow progress: have cut the rusted sections, and tried to wire brush all the remaining surface rust. Now rust converter again.
The patch will be made from 3 sections: one 4.5cm wide on the horizontal part, a narrow 2.5cm on the top curved part above the panel indent, and one below it.
The other smaller patches are simple squares.


Re: rear inner wheel arch
Posted: 19 Apr 2023, 05:28
by ZsZ
Thinking about the incompatibility issue.
It seems only the seam sealer caulk was not adhering, however layers under it did allow rust to start up. Other places where I made spot repairs, under the spray-on stone chip, metal was fine. It is sad, that I do not remember what did I use in which order

This paint thing is a mystery for me. And the industry not make it easy either for non professionals like me.
I made an inventory of my paints and checked some TDS's
I have:
- alkyd based 1K primer - it is not advised to paint on rust converters it is mentioned. Too bad I already sokaed everything in rust converter containkng phosphoric acid and bromine
- Owatrol oil - TDS say it can be mixed with alkyd paints or use it on bare rust
- 1K epoxy (Brunox) - never used before, german restorers seem to love it. It says paint on rusted surfaces.
- 1K etch primer - automotive stuff, spray can, label says for aluminium or galvanised surfaces. No TDS yet.
- 1K high build primer - automotive stuff, did not find the TDS yet
- different 1K stone chips - automotive stuff, no TDS yet
- 1K colour - automotive, no TDS yet.
- some old 2K stuff, not sure what they are, some might dried in their containers
I was wondering which primer and layer build to use to avoid the new metal rusting away quickly.
Any suggestions welcome.
Re: rear inner wheel arch
Posted: 19 Apr 2023, 12:19
by multisi
I have used smooth Hamerite on top of dry rust converter then prime and top coat over it.
Re: rear inner wheel arch
Posted: 23 Apr 2023, 10:54
by ZsZ
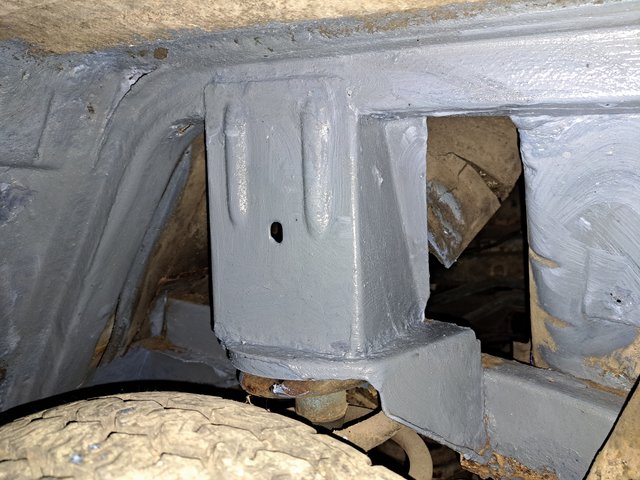
Yes hammerite seems to be a good candidate.
This Brunox epoxy is like a hammerite, but it isbclear and turns black.
Now painted the underside waiting to dry. Later will take pics
Re: rear inner wheel arch
Posted: 23 Apr 2023, 16:51
by Robsey
Just for good measure I have been doing it in three stages.
Either phosphoric acid or Vactan rust converter,
There was a bit of a query whether the coating in Vactan was better for the parent metal or not.
(Sealing in the acid).
Hence why I often brushed on straight acid.
And allowed it to dry.
I can definitely feel the difference if you accidentally get it on your skin. Acid tingles a lot more...until you wash it off with water and bicarbonate of soda.
Followed by an epoxy primer,
Followed by smooth hammerite.
For the interior, I used..
Rust converter,
Epoxy primer,
And Rustoleum CombiColor in my planned final colour.
Re: rear inner wheel arch
Posted: 23 Apr 2023, 18:24
by ZsZ
Thanks for the input guys!
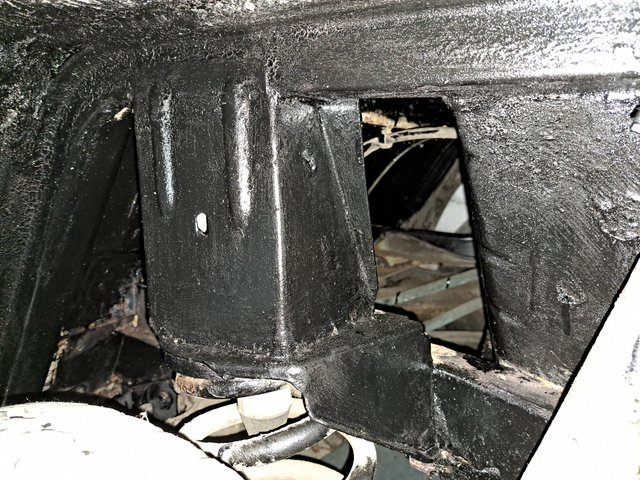
On the end I went on with the Brunox and other stuff I have.
Two coats of the Brunox 1K epoxy - it has to be let curing for 12 hrs. It hardened really well overnight.
Then one coat of 1K I think alkyd based corrosion inhibitor primer - I used it before on ther places and it held up well even painted on rusty surfaces. it has a consistency just like Hammerite. The only disadvantage is the 8 hrs drying and 48 hrs curing time.
And tomorrow 1K spray-on stonechip, Motip branded - I used it before aswell. It hardens a bit, but really durable surface.


