ej20 shortened oil pan
Posted: 04 Jun 2018, 17:24
Thought I’d add this here as well as my ongoing restoration thread to enable the ‘search’ facility.
https://club8090.co.uk/forum/viewtopic.php?f=50&t=128706" onclick="window.open(this.href);return false;
As I’m going to install an ej20 into my van, one of the jobs to do was to shorten the oil pan.
Searching the internet, the best information I could find came from “The Samba”
https://www.thesamba.com/vw/forum/viewt ... p?t=685557" onclick="window.open(this.href);return false;
I mainly followed this technique and found it worked well.
I’m going to remove 1.5 inches which seems to be the standard amount to do and weld a 4mm thick steel sheet across.
Simple pencil gauge to draw a line at the correct height.
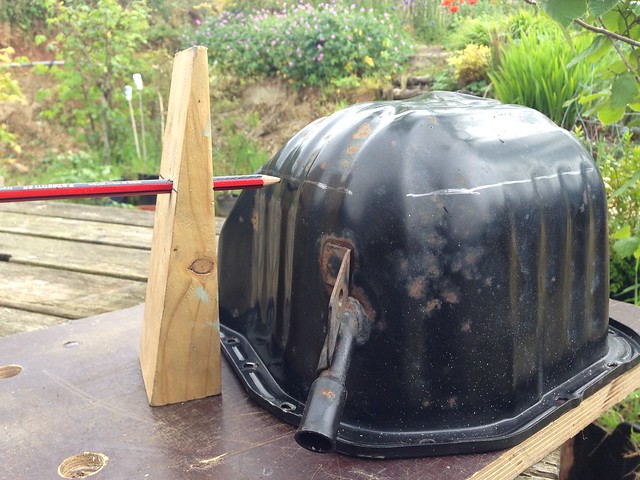 IMG_1594 by Grandpawoody, on Flickr
Then confirm with masking tape.
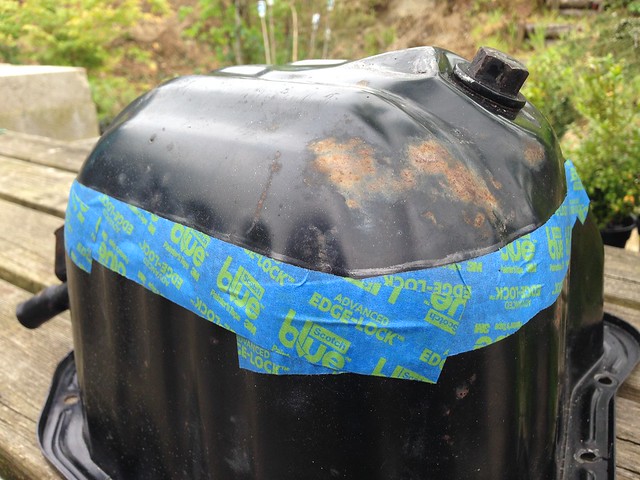 IMG_1597 by Grandpawoody, on Flickr
Looks a bit wonky but thats just the camera angle. Next stage to cut off with angle grinder.
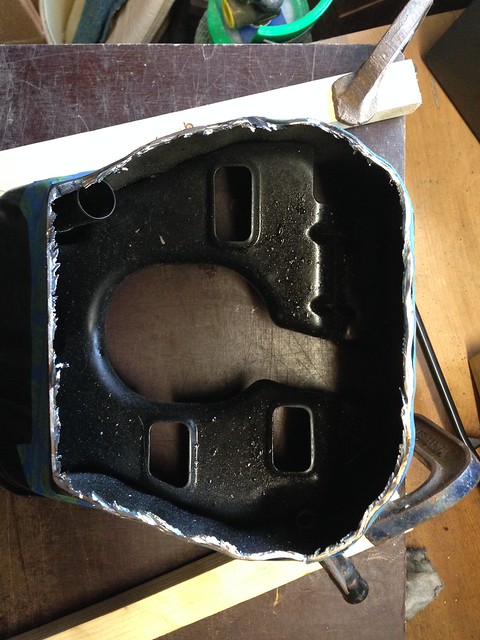
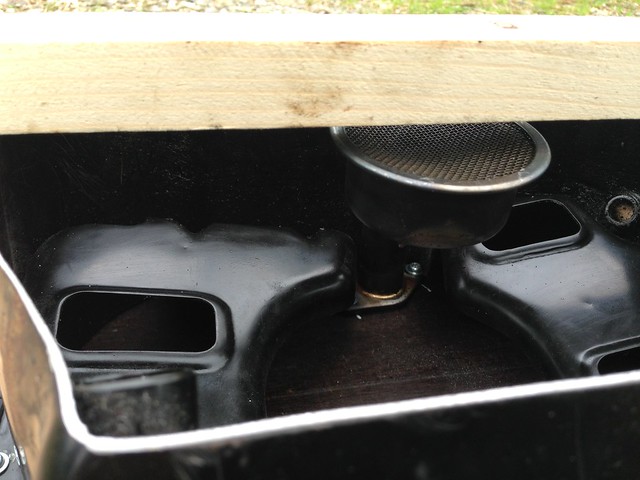
Looks like a previous owner of the Impreza managed to ding the sump!
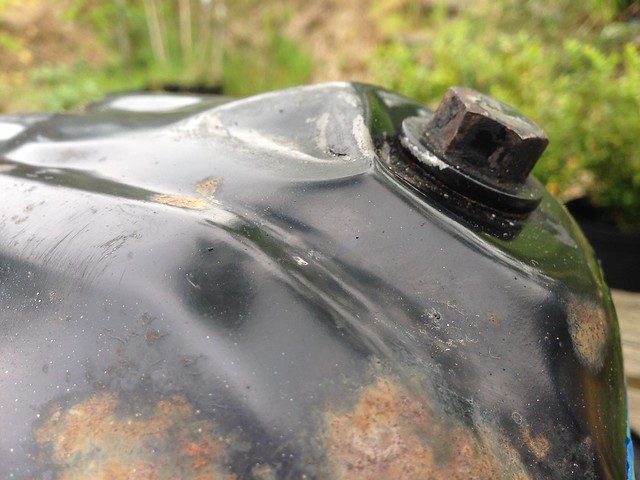 IMG_1598 by Grandpawoody, on Flickr
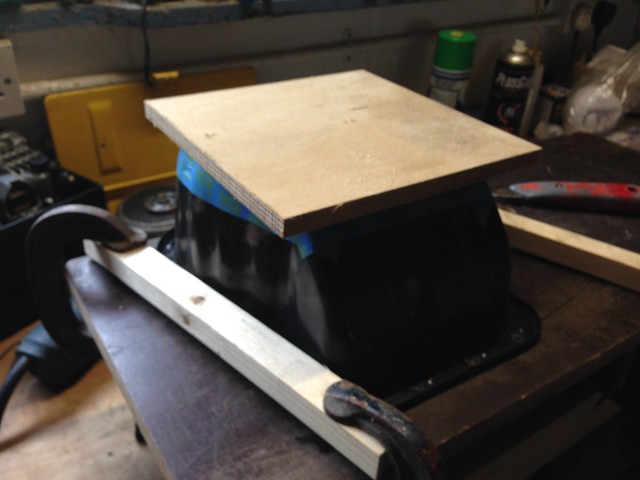
I clamped the pan to a board so I could hold it securely in the vice, then cut round with an angle grinder
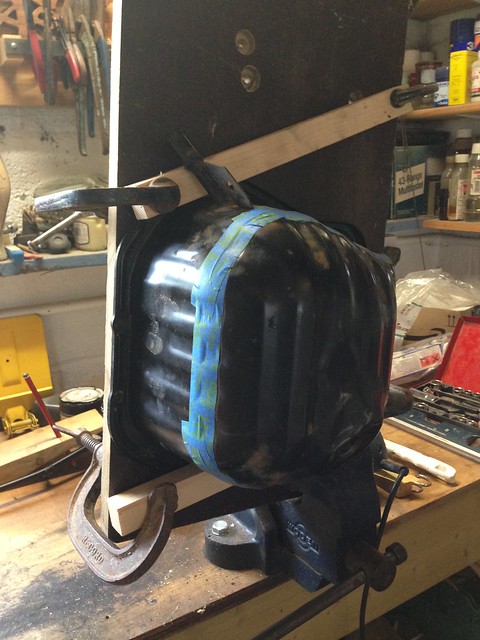 IMG_1599 by Grandpawoody, on Flickr
The cut was quite easy to do
 IMG_1600 by Grandpawoody, on Flickr
 IMG_1602 by Grandpawoody, on Flickr
Then I checked for a good flat surface, needed a little tidying up but not too bad.
 IMG_1603 by Grandpawoody, on Flickr
 IMG_1605 by Grandpawoody, on Flickr
Simple ‘bucket chemistry’ gives a loss of 500 ml, so not too bad at all.
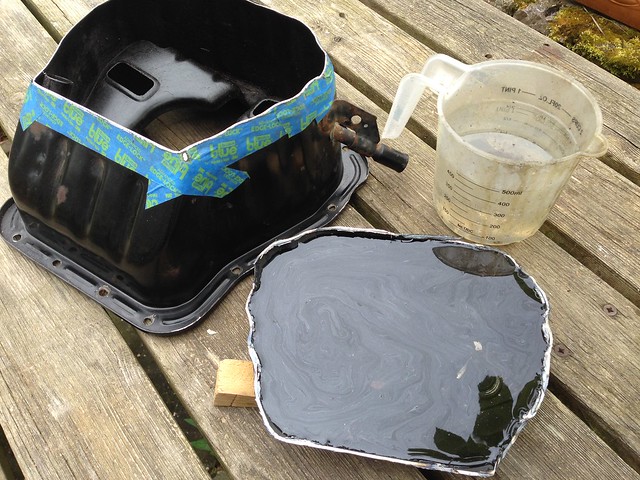 IMG_1606 by Grandpawoody, on Flickr
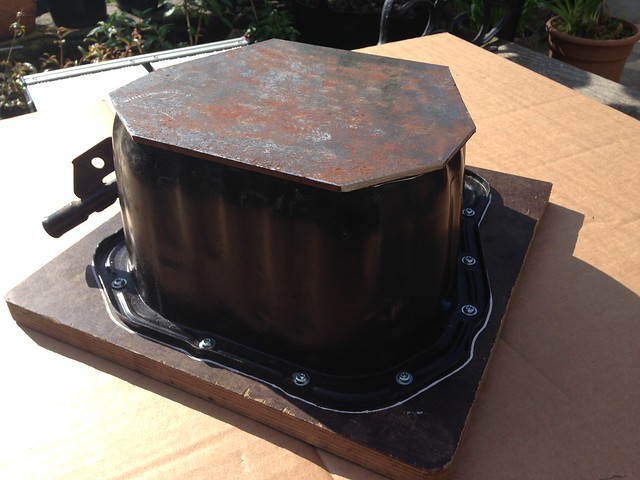
This shows the temporary base board I used. Two main holes for oil pickup pipe and return oil pipe.
 IMG_1609 by Grandpawoody, on Flickr
Prior to welding the base, I did a final check that the oil pick up pipe was the correct length, and didn’t reach the bottom. I have about 6mm of clearance, the same as original.
 IMG_1612 by Grandpawoody, on Flickr
By screwing the oil pan down to this board I was able to easily hold it in the vice whilst welding the base, also I think it helped prevent the pan from warping from the welding heat.
 IMG_1617 by Grandpawoody, on Flickr
I welded the seam in stages, spacing the welds apart to prevent overheating in one area to eliminate stresses and warping.
 IMG_1620 by Grandpawoody, on Flickr
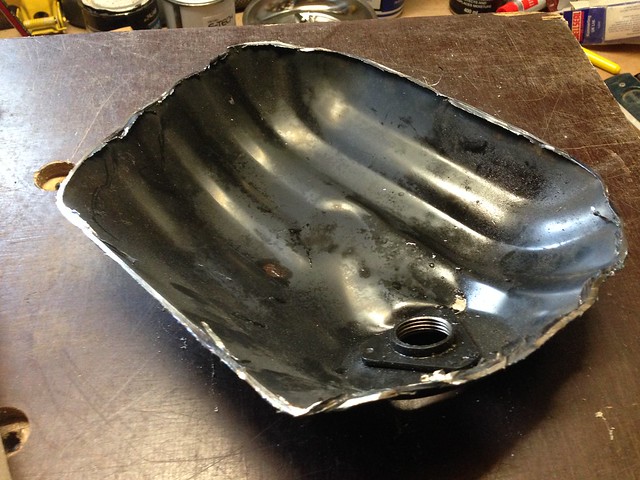
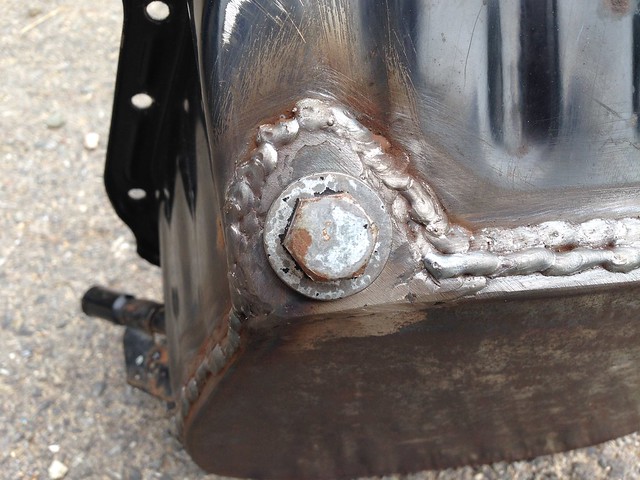
The oil drain thread was removed from the cut off oil pan and welded back into a suitable area.
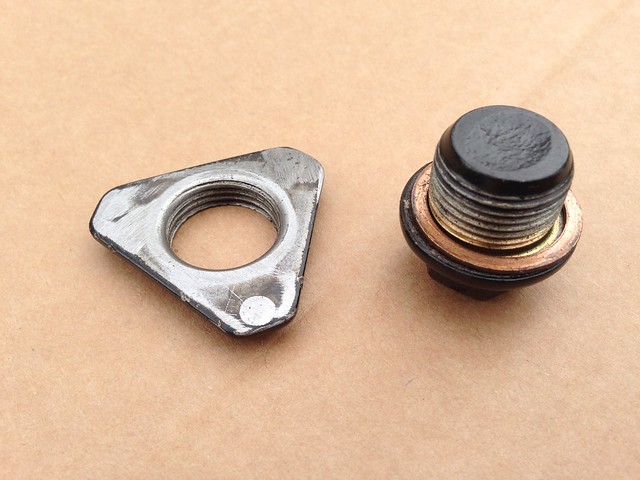 IMG_1613 by Grandpawoody, on Flickr
 IMG_1619 by Grandpawoody, on Flickr
The final test was to fill it with white spirits to check for pin holes, yes I found 2 but easy to re weld. Rather find them now rather that after installation!
The oil pickup pipe was shortened by 40mm. The tube was 20 OD so I was able to sleeve it with a short length of 22mm copper water pipe - 20mm internal - then silver soldered it into place.
 IMG_1610 by Grandpawoody, on Flickr
Again by using he base board I was able to align the filter head parallel to it whist soldering it.
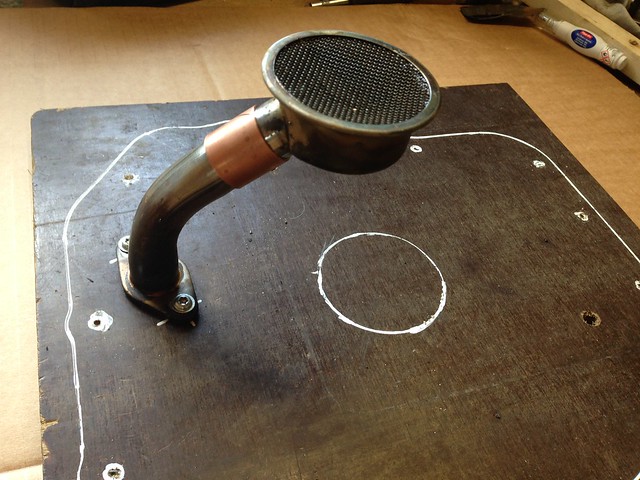 IMG_1614 by Grandpawoody, on Flickr
The finished oil pickup, painted with engine enamel.
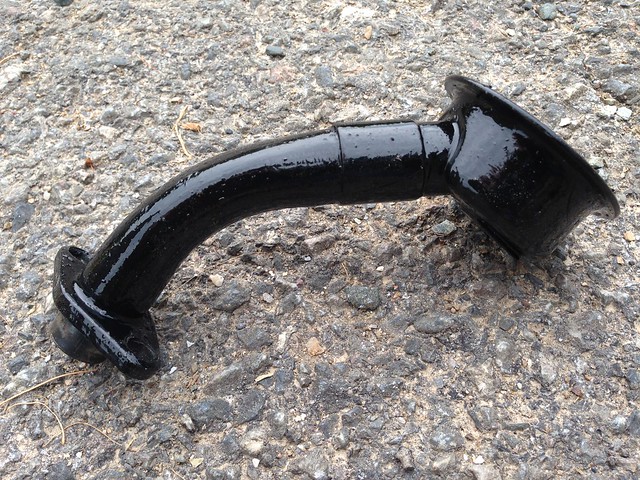 IMG_1621 by Grandpawoody, on Flickr
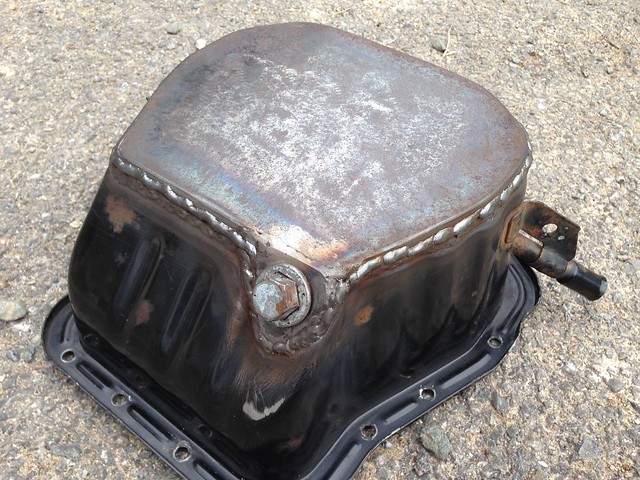
All done, very pleased with finished pan.
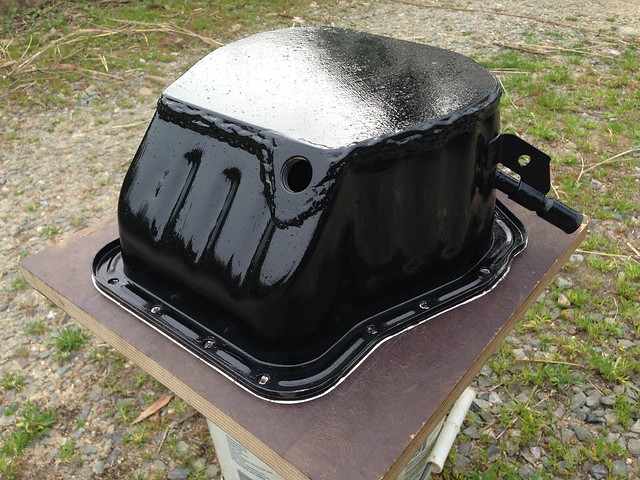 IMG_1626 by Grandpawoody, on Flickr
https://club8090.co.uk/forum/viewtopic.php?f=50&t=128706" onclick="window.open(this.href);return false;
As I’m going to install an ej20 into my van, one of the jobs to do was to shorten the oil pan.
Searching the internet, the best information I could find came from “The Samba”
https://www.thesamba.com/vw/forum/viewt ... p?t=685557" onclick="window.open(this.href);return false;
I mainly followed this technique and found it worked well.
I’m going to remove 1.5 inches which seems to be the standard amount to do and weld a 4mm thick steel sheet across.
Simple pencil gauge to draw a line at the correct height.
IMG_1594 by Grandpawoody, on FlickrThen confirm with masking tape.
IMG_1597 by Grandpawoody, on FlickrLooks a bit wonky but thats just the camera angle. Next stage to cut off with angle grinder.
Looks like a previous owner of the Impreza managed to ding the sump!
IMG_1598 by Grandpawoody, on FlickrI clamped the pan to a board so I could hold it securely in the vice, then cut round with an angle grinder
IMG_1599 by Grandpawoody, on FlickrThe cut was quite easy to do
IMG_1600 by Grandpawoody, on FlickrIMG_1602 by Grandpawoody, on FlickrThen I checked for a good flat surface, needed a little tidying up but not too bad.
IMG_1603 by Grandpawoody, on FlickrIMG_1605 by Grandpawoody, on FlickrSimple ‘bucket chemistry’ gives a loss of 500 ml, so not too bad at all.
IMG_1606 by Grandpawoody, on FlickrThis shows the temporary base board I used. Two main holes for oil pickup pipe and return oil pipe.
IMG_1609 by Grandpawoody, on FlickrPrior to welding the base, I did a final check that the oil pick up pipe was the correct length, and didn’t reach the bottom. I have about 6mm of clearance, the same as original.
IMG_1612 by Grandpawoody, on FlickrBy screwing the oil pan down to this board I was able to easily hold it in the vice whilst welding the base, also I think it helped prevent the pan from warping from the welding heat.
IMG_1617 by Grandpawoody, on FlickrI welded the seam in stages, spacing the welds apart to prevent overheating in one area to eliminate stresses and warping.
IMG_1620 by Grandpawoody, on FlickrThe oil drain thread was removed from the cut off oil pan and welded back into a suitable area.
IMG_1613 by Grandpawoody, on FlickrIMG_1619 by Grandpawoody, on FlickrThe final test was to fill it with white spirits to check for pin holes, yes I found 2 but easy to re weld. Rather find them now rather that after installation!
The oil pickup pipe was shortened by 40mm. The tube was 20 OD so I was able to sleeve it with a short length of 22mm copper water pipe - 20mm internal - then silver soldered it into place.
IMG_1610 by Grandpawoody, on FlickrAgain by using he base board I was able to align the filter head parallel to it whist soldering it.
IMG_1614 by Grandpawoody, on FlickrThe finished oil pickup, painted with engine enamel.
IMG_1621 by Grandpawoody, on FlickrAll done, very pleased with finished pan.
IMG_1626 by Grandpawoody, on Flickr