Page 1 of 1
Cut the red wire!
Posted: 20 Apr 2017, 06:35
by MRinaldi
Hi folks, first post here and I need your help!
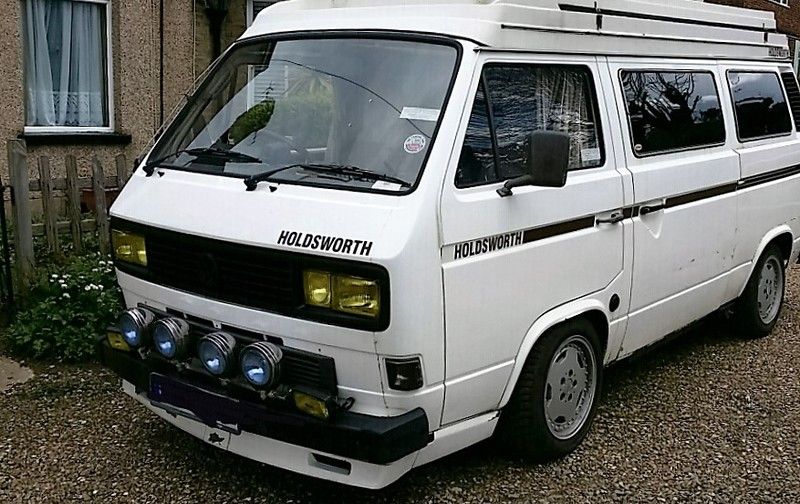
I got the SA front grill upgrade. I'm looking to piggyback the second headlights off the original set's high beams, but don't know which wire to cut. There are three, a brown on the left and a central and right-hand wire. Any ideas? The wiring diagrams are so confusing!
Also, is there a way of wiring it up so that it also comes on with the dipped lights? It's really the dipped lights that are too dim on Hoolahan, we're still relying on full beams at night if we have to drive much to the dismay of other road users
Matt
Re: Cut the red wire!
Posted: 20 Apr 2017, 06:38
by itchyfeet
Not a good idea, there are no relays as standard and the lighting switch is already a weak point not no mention so much voltdrop you will end up with poor lights and a fried switch, you need relays, its in the wiki
https://club8090.co.uk/wiki/VW ... headlights" onclick="window.open(this.href);return false;
Re: Cut the red wire!
Posted: 20 Apr 2017, 12:23
by CovKid
The piggybacking we could talk you through but as Itchy says, you'll be asking for trouble if you do, so for that reason its a no-go. Relays a MUST.
I suspect your're suffering from what most of us do/have due to the loss of voltage up front and that is predominantly why your lights are so poor. Its common to see little more than 10v at the headlights on a stock wiring harness. VW were far from generous on cable capacity, and adding more lights or increasing bulb wattage makes things even worse.
Firstly you'll need to beef up the supply line to the dash:
https://club8090.co.uk/wiki/VW ... ry_to_dash" onclick="window.open(this.href);return false;
Then fit relays and you'll scare a rabbit a mile away.

Re: Cut the red wire!
Posted: 20 Apr 2017, 16:24
by Tinium
I've used the Paddock upgraded headlamp loom from the thread below (admittedly for single headlamps, but it'll provide enough juice for twins I'd have thought), and it's worked a treat for the last couple of years since I've installed it. May be worth looking at if you'd rather not do too much DIY

The only addition I made to it was an additional fuse near the battery connection, rather than just the one at the headlight/relay end, just in case the cable got damaged somewhere between the two. (Also, If you don't already have a crimp tool, it's worth the small investment for doing jobs like this properly!)
http://www.paddockspares.com/boomslang- ... -loom.html
https://club8090.co.uk/forum/viewtopic.php?f=39&t=137678
Re: Cut the red wire!
Posted: 21 Apr 2017, 11:56
by CovKid
Just bear in mind that theres only a 6mm cable supplying everything up front. If you add more load to it (even with an uprated headlight harness), you'll rapidly exceed the limitations of the existing supply line and things will get warm if not hot. I'd say that a stock wiring loom 'just' copes with a stock vehicle and that doesn't include additions like a modern stereo, extra lights etc that we now regard as standard. All T25s benefit greatly from an uprated supply cable from battery. To get some idea, switch everything on and see what voltage you get at the headlights

A reading of say 10v doesn't sound like much of a drop but at that voltage, headlight bulbs are already producing less than half of what they should be.
Re: Cut the red wire!
Posted: 22 Apr 2017, 12:17
by MRinaldi
Oh wow this is so useful folks thank you! The wiki is great and the wiring diagrams actually make sense. Might make do for now and seek out the relays etc before adding second high beam lamps. Thicker cables + relays = can use van at night I hope
Re: Cut the red wire!
Posted: 22 Apr 2017, 16:42
by slowcoach
The paddock one mentioned above (Boomslang i think its called) goes right back to the battery positive so takes the load away from the fusebox completely. It's very well made i thought and is a good price
Re: Cut the red wire!
Posted: 12 May 2017, 23:15
by nesty
I see everything!