Page 1 of 3
How do you separate the front lower lip to replace it
Posted: 30 Mar 2016, 18:11
by thecyrusvirus
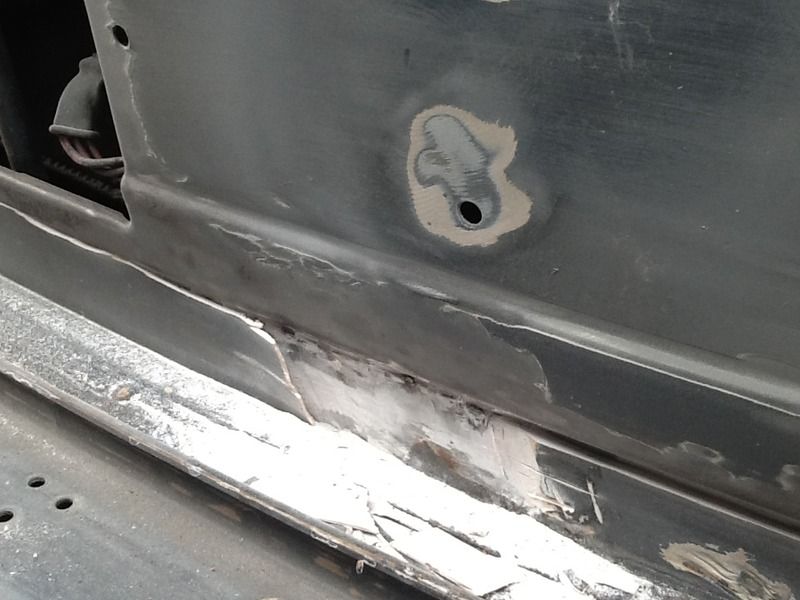
As per the title. I need to replaced the very rusty front lower lip (the bit behind the bumper)
I have the schofield part here ready to go in but I cant get my drill in close enough to the body to drill out the spot welds, my angle grinder wont get in there because of the bumper lip and I have a feeling that the additional angle section behind is also spot welded.
Some pics in the pbucket album here:
http://s1167.photobucket.com/user/i_am_ ... 25%20front
I have looked at the other threads I could find that reference this repair but still none the wiser. Any tips on how to get this section out?
Cheers
Cyrus
Re: How do you separate the front lower lip to replace it
Posted: 30 Mar 2016, 20:13
by boatbuilder
I don't think the angled backing piece is spot welded to the front... just drill out the spot welds along the bottom lip...I managed to get a drill in there.
Then you'll need a big angle grinder to get in and clean up the remains of the old spot welds. I actually bought a big one for the purpose from Aldi or Lidl, can't remember which. I then grit blasted mine and used lots of weld through primer before fitting the new piece.
Re: How do you separate the front lower lip to replace it
Posted: 30 Mar 2016, 20:52
by boatbuilder
I take it back, looks like the angle piece is somehow attached but hopefully it will be so rusty that it will come off easily enough...
Here is the page on my resto thread...
https://club8090.co.uk/forum/viewtopic.p ... &start=143" onclick="window.open(this.href);return false;
Re: How do you separate the front lower lip to replace it
Posted: 30 Mar 2016, 21:02
by thecyrusvirus
Excellent, cheers boatbuilder. Will take a look at your thread.
Cheers
cyrus
Re: How do you separate the front lower lip to replace it
Posted: 30 Mar 2016, 21:10
by CovKid
I have same problem. I rather like Metalmickeys solution to literally cut your way through and remove part of front deformation panel (even if sound) with a 9" anglegrinder as you can get to everything easily after that, then welding that section back in, on the way out. It does make perfect sense even if it sounds horrific. I think sometimes with welding you have to get good out of the way to get to the bad.
In my experience, the rot there is actually far worse than it looks and inaccessible with deformation section in the way.
Re: How do you separate the front lower lip to replace it
Posted: 31 Mar 2016, 09:31
by thecyrusvirus
Hi CovKid, sounds like a major pain in the backside whichever way it has to be done. Thanks everyone for the input, hoping to tackle it this weekend.
Re: How do you separate the front lower lip to replace it
Posted: 31 Mar 2016, 17:47
by pandp38
Please let us know how you get on as I will be tackling same job in near future. Was wondering whether the radiator needs to come out to give better access with angle grinder.
Paul
Re: How do you separate the front lower lip to replace it
Posted: 31 Mar 2016, 18:07
by boatbuilder
I did mine without removing the rad.
Be careful when cutting as there are wires behind the front panel that you can easily cut by mistake.
Re: How do you separate the front lower lip to replace it
Posted: 31 Mar 2016, 21:49
by Plasticman
you will find that "as built"the lower lip is spotted where you see it and the lip on the reverse is also welded down along the center section then the 2 separate bits at either end are also spotted down , think a tack as well and they often hang in there

mm
Re: How do you separate the front lower lip to replace it
Posted: 31 Mar 2016, 21:59
by Plasticman
i dont usually repair them as i prefer to fit a complete lower as oftewn the rot creeps up the sides etc, though in some cases as in the following it is a rare van and so repair retaining as much of original as poss, again i make the panel as im not satisfied with the commercially available item
http://archive.club8090.co.uk/viewtopic ... 38&t=83225" onclick="window.open(this.href);return false;
note i have drilled out the spots and also the spots through to the inner lip ,
mm
Re: How do you separate the front lower lip to replace it
Posted: 01 Apr 2016, 10:55
by what2do
Mine needs doing too...
Re: How do you separate the front lower lip to replace it
Posted: 01 Apr 2016, 10:59
by what2do
One quick question to those in the know, how are you achieving the curvature once the metal is angled?
Re: How do you separate the front lower lip to replace it
Posted: 02 Apr 2016, 16:37
by bootie3367
Following this as I will need to do mine at some point.
Re: How do you separate the front lower lip to replace it
Posted: 03 Apr 2016, 16:53
by what2do
Anybody care to answer the query regarding the curvature? Or is it more modern to type 'bump'?
Re: How do you separate the front lower lip to replace it
Posted: 03 Apr 2016, 17:35
by silverbullet
A shrinker/stretcher is the tool to use, I believe?
