Page 1 of 1

Fixing my Square headlight

Posted: 14 Feb 2016, 14:27
by tforturton
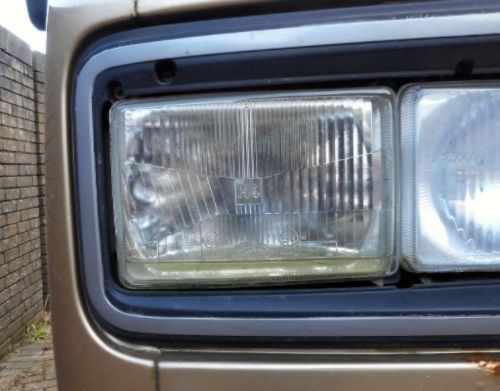
Some of you might have seen my thread titled "How did that get in there?", which showed how water ingress had spoilt one of my square headlights. Well, this is sort of a follow-up, showing how I managed to remedy the situation.
As you probably know, square headlights are easy enough to find - as long as it's not a RHD one you're after. They're no longer made new, and were not fitted to any other vehicle, so finding a good one can be a difficult and ultimately expensive task. After being quoted £150 for a single light, or £350 for a whole set (what would I need a whole set for?), I decided to try to fix the one I had. Unlike modern cars, these old headlights direct the beam using patterns on the glass - the bowl behind it is just a big reflector. So I figured I could use a bowl from a broken RHD light, to replace the spoilt one on mine. As it was, I ended up using a LHD bowl instead, but more on that later. Anyway, here's what I was up against....
Image
Image
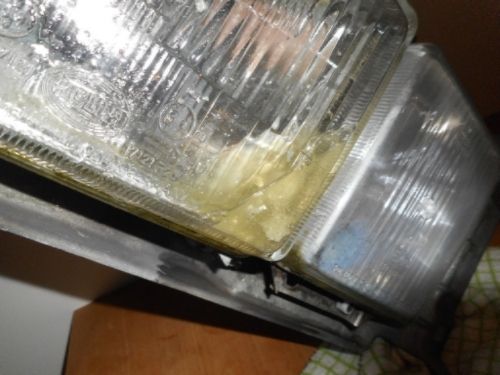
As you can see, the water ingress had made a poor reflector even worse - half the silvering was floating around in the water.
So first things first, you have to remove the light unit from the vehicle. There are five plastic tabs along the top of the main grille - use a flat screwdriver to turn these from horizontal to vertical, and the whole thing then hinges forward. Lift it clear of the tabs on the bottom edge, and it's clear. Undo four screws holding the light unit in place (careful now), disconnect the connections at the back, and light the unit clear.
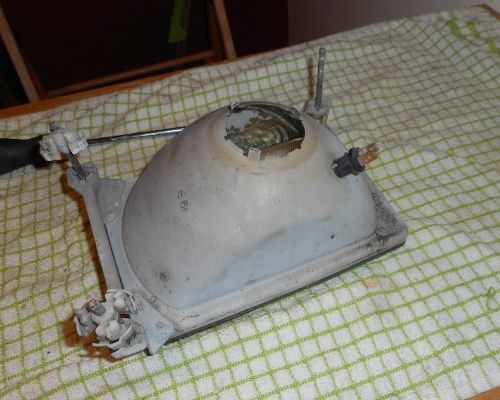
Back indoors, I took the bulb holder off, and let the water drain out. Then I took the bowl out of the holder - twist those funny shaped plastics clips to remove the light from the unit. Be careful, these things break easily, especially the smaller end. Once you have the light out from the unit, it should look a bit like this.
Image
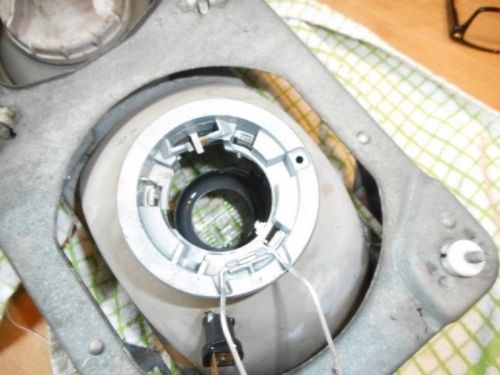
As I said, I've already removed the lamp holder (see below), but here's how it works. There will be a rubber cover on the back. Take this off, then undo the clips and remove the bulb. Then you need to bend up the three tabs that holds the bulb holder to the bowl. There are three of them, at one, four and nine o'clock, in the picture below. Use a screwdriver to lift the tabs slightly, so you can remove the bulb holder.
Image
You also need to remove anything that might melt, so the sidelight will need to come out (just twist and pull), and you're also going to have to remove those white mounting clips. Be careful, they break easily. Rather than un-screwing them, it's easier to push the top (small) tab back through the holder. Once they're all off, you're ready to go cooking.

Re: Fixing my Square headlight

Posted: 14 Feb 2016, 14:46
by tforturton
I read up a bit about this cooking business online, before I started, and the general consensus was to start at about 125*c for about ten minutes, then give it a try. I found they needed to stay in a fair bit longer than that. Bearing in mind I had to split two of them, I ended up putting them each in for two or even three sessions at that temperature.
My quest to find a RHD unit had ended in failure, as anyone who had one wanted to keep it. So I ended up using a LHD light - as I was only using the bowl, I didn't think it would make any difference, and I was right. The bowls are identical, as you can see...
Image
But I've skipped a bit here... You need to place the unit in a hot oven, preferably glass upwards. At this point, a warning - when you come to take it out, it will be VERY HOT. I used a pair of leather builders gloves, but still found I had to put it down every now and then. And that's the hard bit, because you need to move while the thing is still hot, and the seal is at it's least sticky - as soon as it starts to cool down, it goes back to it's original state. You won't get it open while it's cold.
I tried to get a blade down the side of the lens, but as there is a lip all the way around, this was all a bit pointless, and was achieving nothing. The only way in is at the corners. I used a blade to remove as much sealant as I could, then attacked it with a small electrical screwdriver (flat type). You need to get in and down, working under the glass. Obviously, you don't want to break it, so if there's any grating noise, or you're not getting anywhere, put it back in the oven, or maybe try one of the other corners. Like I said, it took three 'bakes' before the seal broke. I would say DON'T lever upwards - just get under the glass, then slide the screwdriver inwards. The seal will give way, and the two halves will come apart. Here we have old and new - can you guess which is which?
Image

Re: Fixing my Square headlight

Posted: 14 Feb 2016, 15:02
by tforturton
So now we have two lenses, and two reflectors. Make sure you're working with the right ones - you don't want to put the wrong glass on. Actually, RHD glass has a small arrow ->, pointing to the right (as you look at it), so they can be told apart, if you know where to look. Anyway, get hold of the glass and the bowl, and clear all the old seal off them. The easiest way to do this is to put them back in the oven, then use a selection of blades and screwdrivers to scrape the stuff off. It's not easy to remove - like a particularly hard sort of tiling grout. You'll know when the bowls are 'done' as you will see a pale green strip appear, under the old seal.
Image
Image
See the pale green bit underneath? That's what you're aiming for. You need to get as much of the grey sealant off as you can, so you can see that green stripe all the way around. Sealant doesn't like sticking to itself very much, and you'll be using the same stuff to stick it back together, so the cleaner it is, the better the re-fit. And the bits get everywhere, so when you're happy you've removed as much as you safely can, clean both parts thoroughly. Get rid of all the bits and all the dust. You also need to make sure that the reflector is spotless, as you don't want to be opening it up again to clean out some stray bit of sealant that you missed.

Re: Fixing my Square headlight

Posted: 14 Feb 2016, 15:22
by tforturton
Now you need to stick the two parts together. On the advice of silverbullet, I used "Ultimate Grey" RTV silicone sealant, made by JB Weld. I got it off ebay for about £7, and it's very sticky. Don't get it on your clothes. It also needs to be hi-temp, as the lights do get hot. This stuff is good up to 500*C. Now, before you start laying down the sticky stuff, make sure you're putting the glass back in the right way around. It is so easy to get this wrong, and you'll end up with an upside-down lens, so do a dry run first, using all the major parts. I rested the bowl in the light holder, then put the glass in the bowl, made sure it was all where it should be, before I started gluing. Then, when you're sure you know which way it goes, take the bowl, and lay a bead of sealant all the way around, more or less in the same place you've just scraped clean. Make sure there's enough so that it oozes out a bit - you want to be able to see the seal is complete.
Put the glass in place, then press it down, firmly but gently. Clean up any surplus sealant, but also make sure that there are no gaps. I used a couple of bootlaces to tie the whole thing together, then left it overnight.
Image
Then you just need to re-assemble it all. Put the bulb holder back on, fit the bulb and the rubber cover. Re-fit the sidelight holder. Mine had a rubber seal missing (maybe this is how the water got in in the first place), so I made one up. Then put the bowl/glass back in the light holder - the white mounting clips are a bit fiddly, and they do break (Campervanculture sell them loose if you need a couple). I managed to break two out of three, and even broke one of the new ones. These are used to adjust the headlamp angle, so you need these to be in place and moving - you might need to use them come MOT time.
Image
If you unscrewed them to take the whole thing apart, you may be lucky, and be able to see on the thread where they were before you took them apart. Just clip everything back together, and screw in the adjusters until they're back where they were to start with. Then put the light back in the holder, and it's ready to go back on the van. Mind you, once I'd finished, I almost took the high beam apart to give that a clean - it looked terrible next to the new one.
Image
All you have to do then is mount the whole thing back on the van. Hinge the grill at the bottom, and turn the five tabs to lock it in place. I then shone the lights against a wall, to make sure the lights weren't out of alignment. Job done. Yes, I know it's rusty...
Image

Re: Fixing my Square headlight

Posted: 14 Feb 2016, 16:24
by nicq
Very helpfully.
While you had it off you could mave cleaned the inner light.
Take it off and wash it out with washing up liquid then dry it out in the airing cupboard, it will come up like new.

Re: Fixing my Square headlight

Posted: 14 Feb 2016, 16:30
by marcus_asparagus
Yes thanks, very helpful.

But now go and buy some of those clear headlight protectors to protect them from damage in the future. :ok

Re: Fixing my Square headlight

Posted: 14 Feb 2016, 16:42
by tforturton
nicq wrote:Very helpfully.
While you had it off you could mave cleaned the inner light.
Take it off and wash it out with washing up liquid then dry it out in the airing cupboard, it will come up like new.
I probably will do the job at some point, but the van has been off the road for a while (only one light!) so I was keen to get it rolling again. To be honest, I'd advise anyone to be very careful washing out a reflector bowl - it is very easy to lose some silvering, especially if it's already on it's way out.

Re: Fixing my Square headlight

Posted: 14 Feb 2016, 16:51
by lloydy
Good job :ok

Re: Fixing my Square headlight

Posted: 14 Feb 2016, 16:55
by nicq
tforturton wrote:
nicq wrote:Very helpfully.
While you had it off you could mave cleaned the inner light.
Take it off and wash it out with washing up liquid then dry it out in the airing cupboard, it will come up like new.
I probably will do the job at some point, but the van has been off the road for a while (only one light!) so I was keen to get it rolling again. To be honest, I'd advise anyone to be very careful washing out a reflector bowl - it is very easy to lose some silvering, especially if it's already on it's way out.
I agree that's why I said use washing up liquid. Don't try using anything to scrub them, just the liquid and swill them round. Most of the fog is on the back of the glass.

Re: Fixing my Square headlight

Posted: 14 Feb 2016, 17:00
by lloydy
i washed mine like niq says, just a brief swill out. They come up very clean.

Re: Fixing my Square headlight

Posted: 14 Feb 2016, 20:34
by Mocki
I just aimed the garage hairdryer in my inner ones for a few mins on a medium heat ..... No fog for a few weeks !

Re: Fixing my Square headlight

Posted: 14 Feb 2016, 21:43
by clift_d

Re: Fixing my Square headlight

Posted: 14 Feb 2016, 23:10
by scottbott
well done,another thing to put on the list,makes a hell of a difference by the look of it