Page 1 of 1
Type 4 engine rebuild - another! :)
Posted: 14 Apr 2015, 12:36
by paulandchez
Here's another type 4 engine build thread. Thought I'd put this on in case anyone else finds it useful, and to also get the benefit of some of your experiences and any advice you would care to share whilst I'm building.
Basically this engine is a type 4 AP 1800 bottom end including b&p's, with the heads from a CU 2000. I started off thinking I'd just change the bearings and give it a good service becasue I had no history of its' life, but this rapidly turned into emptying my wallet and deciding to replace more than I ever envisaged! The crank has been reground due to wear found after removal, the case has already been line bored to +0.5 so I've left that as is. Once finished it will have new bearings throughout, new cam, lifters (hyds), b&p's, oil cooler, oil pump and reconditioned heads (although these didn't need much work, just seats re-cut and new valves fitted).
I'll keep this thread updated and would appreciate any pointers etc from any of you as I go along.
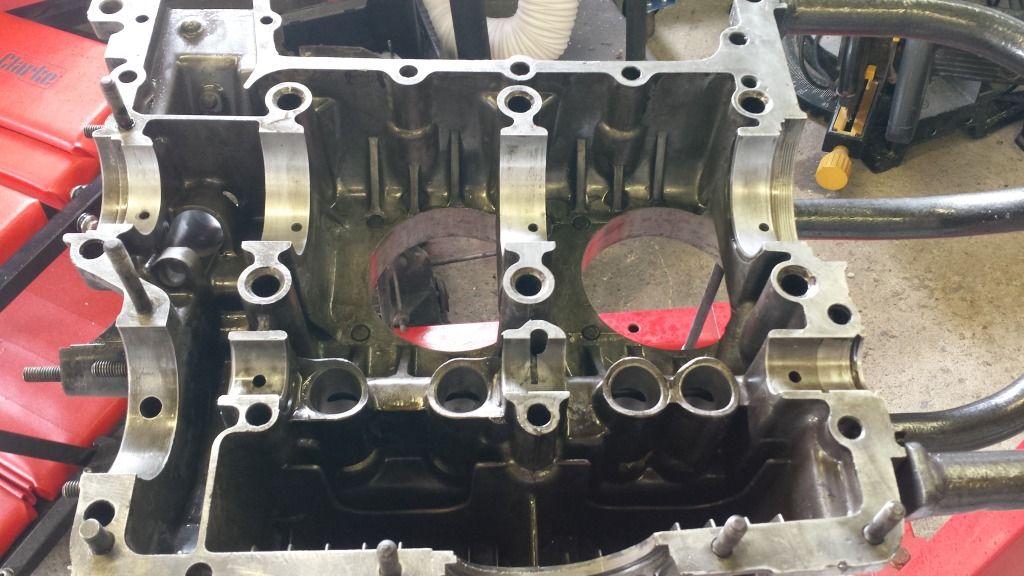
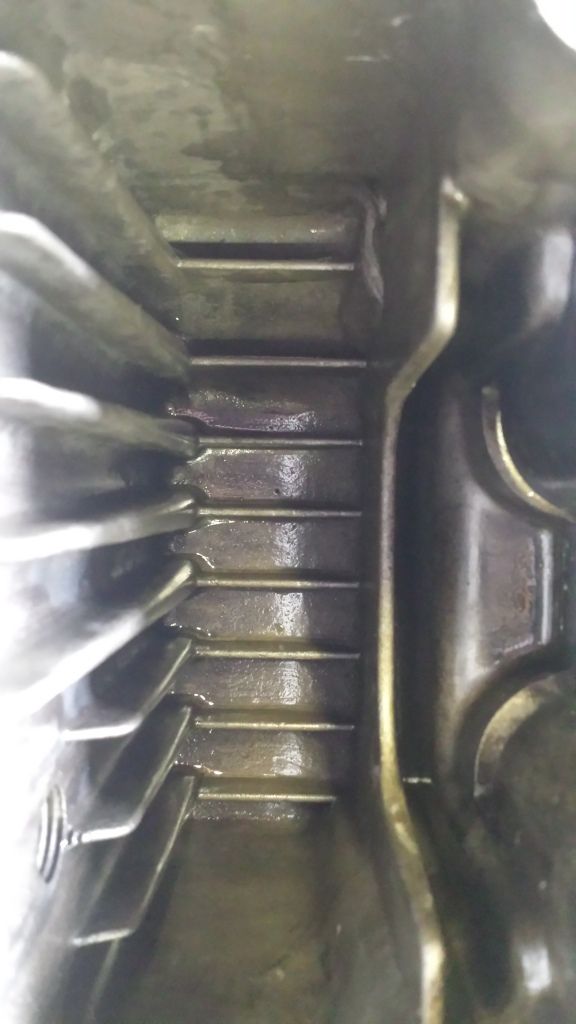
First off was to clean the case half again for one final time. I'd already cleaned in paraffin to get all the gunk off, so this was just to remove any residual stuff. I used carb cleaner and brushes and then rinsed it all off very thoroughly. I also used 800 grit wet and dry to remove bits of varnish from a few areas (before rinsing!). I then used my air line to completely dry it, paying particular attention to the oil ways. Once dry I used cotton buds to clean out the oil ways until I could put one in and it came out clean. This was the result:
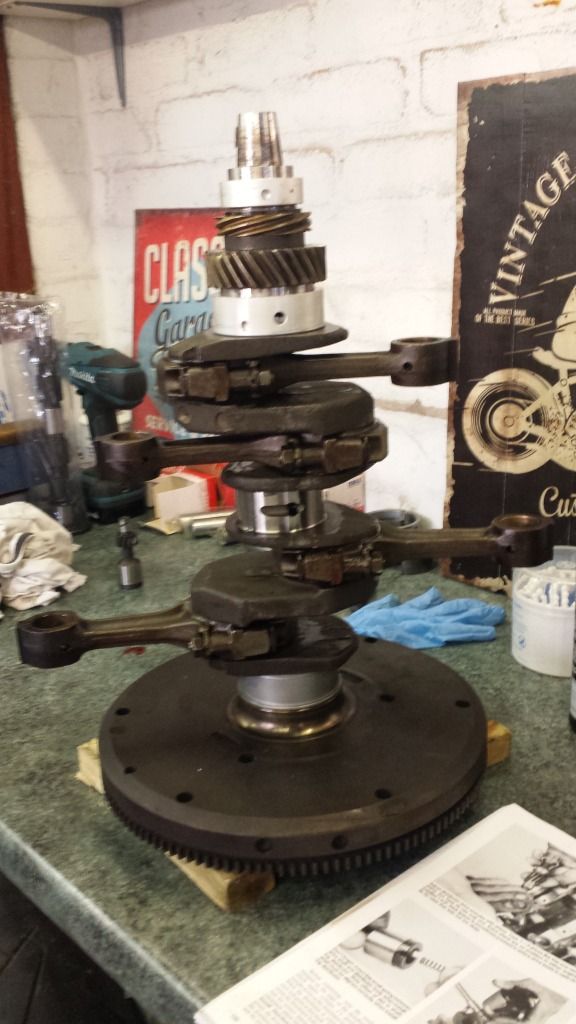
I then started on the crank. First job was to install the bearing, timing gear, dizzy drive etc. I used assembly lube on the bearing. My crank is ground +0.5 on all surfaces, and my case is bored out +0.5 too so my bearing set is 0.5/0.5/std. I used Mahle bearings from Heritage and stood the crank in a flywheel to help stability:

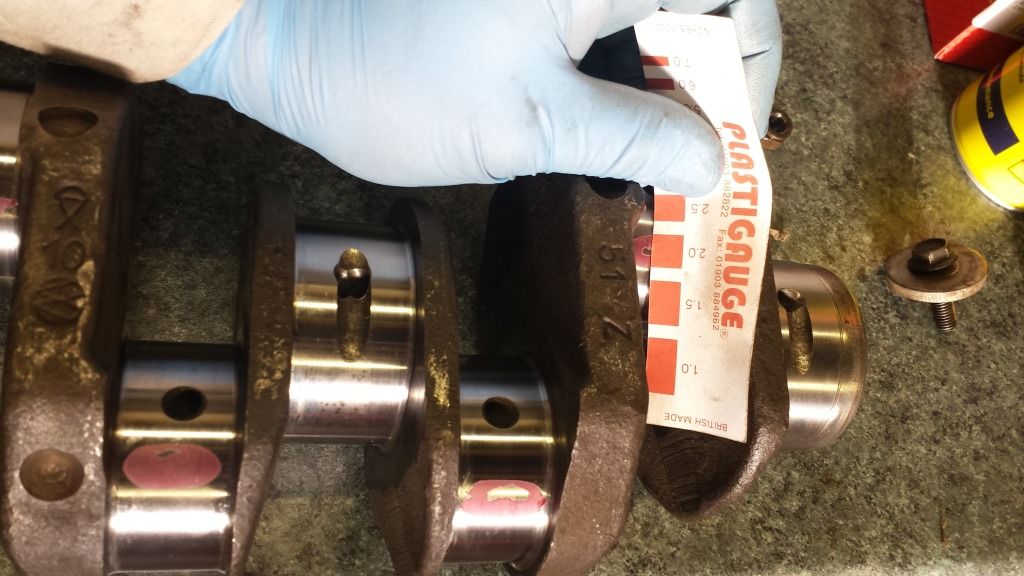
Next I installed the big end bearings, again Mahle but from Stateside this time, after ensuring the conrods we're clean. These are just dry fit with no lube behind them. The next step some may say is over kill, but this is my first one and don't want to leave anything to chance. So I Plastigauged all 4 big ends. Took a while to get used to it, but managed in the end. All four came out at just under 0.002"
Re: Type 4 engine rebuild - another! :)
Posted: 14 Apr 2015, 12:39
by paulandchez
Re: Type 4 engine rebuild - another! :)
Posted: 14 Apr 2015, 20:58
by dandan1234
Your doing a cracking job! will be following your thread as i do mine too.
Where did you get your cam and oil pump from?
I've found cams from heritage for about £160 but not found an oil pump yet.
Thanks Dan
Re: Type 4 engine rebuild - another! :)
Posted: 14 Apr 2015, 22:33
by paulandchez
Got both from coolair. The pump is a cb maxi 1 and not an original vw, but I believe they're ok. Make sure you get the right cam for your lifters, ie solid or hyds as they're different

Re: Type 4 engine rebuild - another! :)
Posted: 27 Apr 2015, 12:28
by paulandchez
Right, got plenty done this weekend
First off, finished the crank assembly. Again, plenty of lube here between the crank and bearings. I also made sure the rod half's all had matching numbers, and made sure the bearing tangs all pointed downwards when installed. Once completed I did a simple noddy test just to see if there was anything obviously wrong, by holding the crank horizontal and seeing if all 4 rods dropped to vertical at the same rate. I think that one came from Tom Wilson's book.
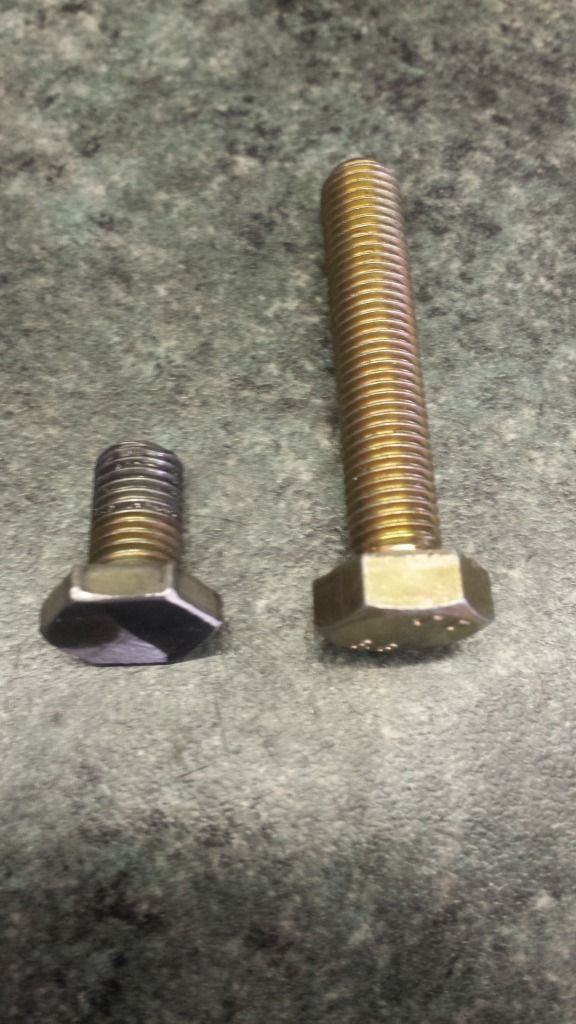
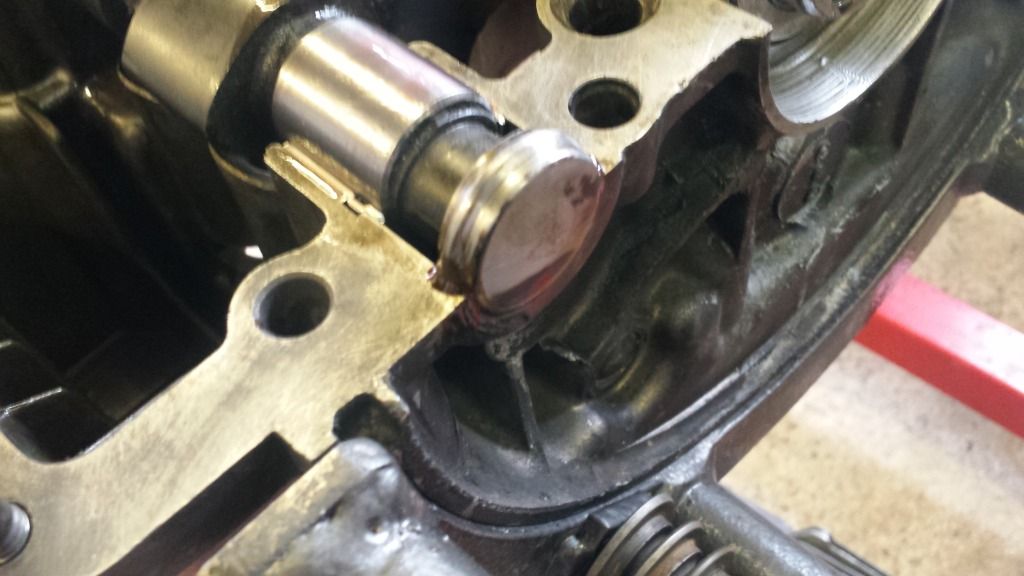
I took the gear off the old cam, and had the face cleaned up to get rid of the counterbores. I then trial fitted it with the bolts I got and the new oil pump fitted to check for clearance. Good job I did as there was a massive clash! So, off with the new bolts (quick call to Paul Weeding confirmed these bolts were for a type 1) and got some new ones. The new ones still needed modding as the heads were still too big, but I just ground them down on my bench grinder. This was the result
Re: Type 4 engine rebuild - another! :)
Posted: 27 Apr 2015, 12:31
by paulandchez
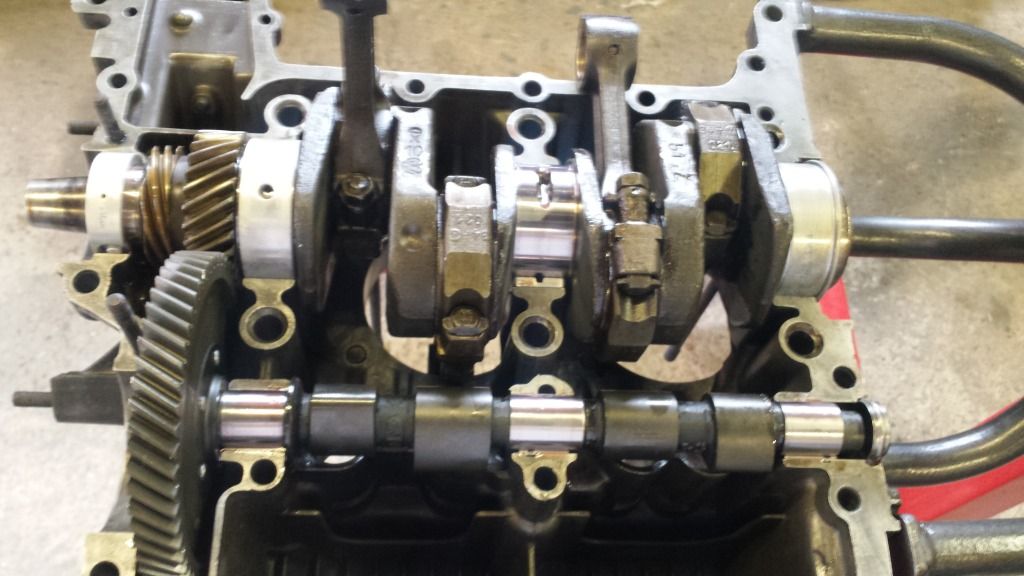
I spent a while worrying over the installation of the dizzy drive. I kept thinking I'd got it wrong, but in the end I found the best way was to put the drive as per instructions (about 12 degrees off the case line) and then purposely move it whilst pushing it onto the crank so I knew what 1 tooth wrong each way looked like. This then confirmed it was obvious when it was in the right place. I installed the crank first and lined up the two dots before putting the drive in as I found this easier for me. Again.....LUBE!!
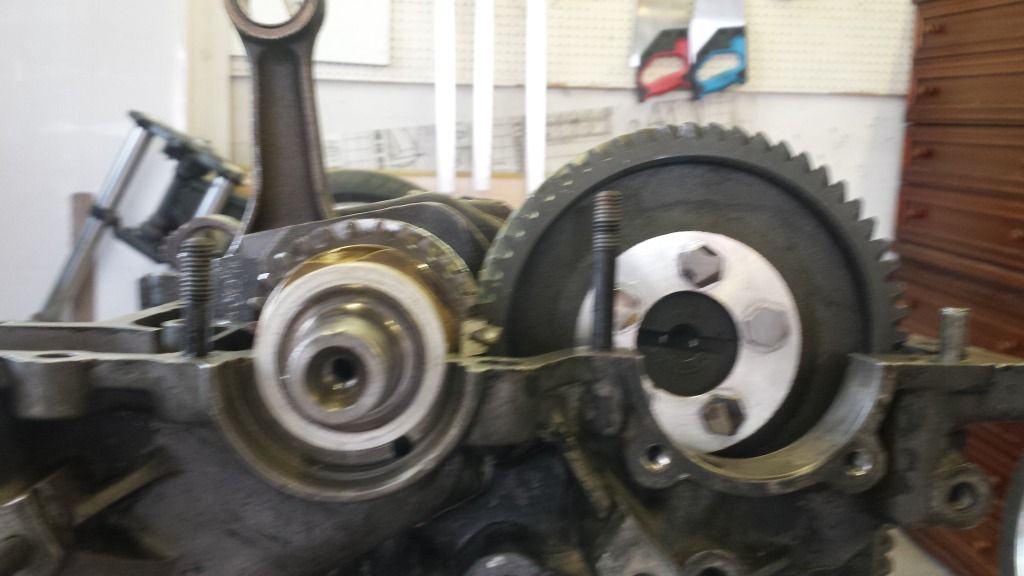
Not a great pic but you can see the crank and cam timing dots (I painted mine with tipex to make it easier to see)
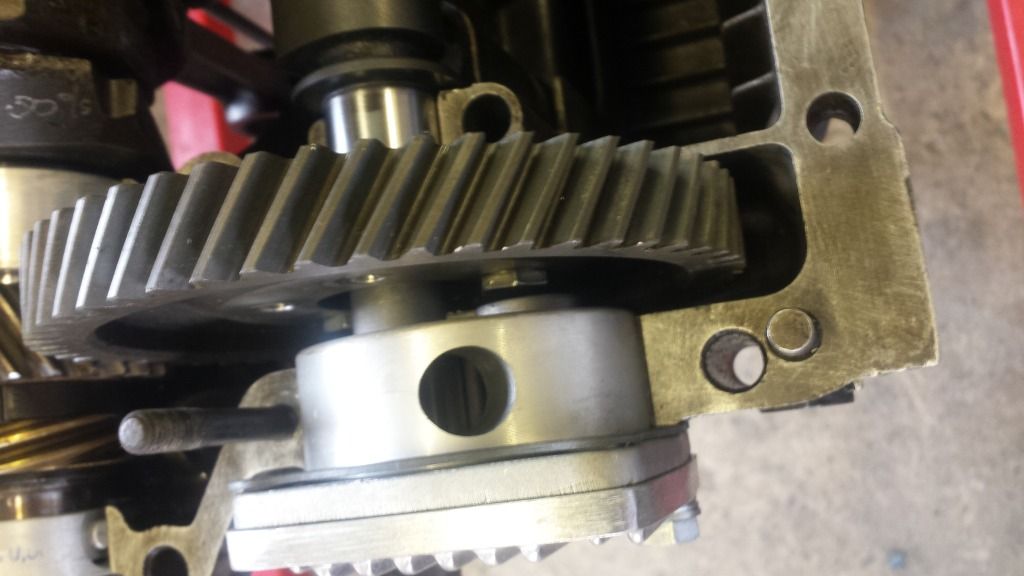
Here you can see my new bolts just sticking out of the cam gear, which I used loctite 248 on as well as torquing up
And sealer on the cam cap
Then I cleaned up the oil pickup and put a new o ring on it, then put it into the other case half ready. I then went over everything twice to make sure I hadn't missed anything, and when finally satisfied, I put the sealer on the right hand case half.

This is where I now have some doubts I've done it right. I carried on and fitted the case, but going back through my pics I'm now wondering if I've messed up. Should I have put sealer around the main bolt holes next to the bearings? I'm worried I've got this wrong, but I've stopped going any further jut in case I need to re-open and clean up again. Like I said I carried on and fitted the halves together, putting sealer under the heads and washers, and nuts and washers of all the through bolts, and gradually torquing them all up in a crisscross pattern.
So.......am I going to have to open it up again due to the sealer?
Thanks
Re: Type 4 engine rebuild - another! :)
Posted: 06 May 2015, 11:14
by paulandchez
Following confirmation I sealed the cases right, I moved onto measuring the end float. With 3 shims fitted, total movement was 0.11mm so bang on in my eyes
Flywheel and shims were then removed and cleaned again. I made sure the crank end and surrounding area were clean, and then applied a thin smear of sealer to the case halves where the oil seal slides in
Then I carefully knocked the seal in trying not to get it skew whiff
Oh....before putting the seal in, I lubed the shims and installed them!
Then I put a little lube on the sealing lip to help installation of the flywheel.
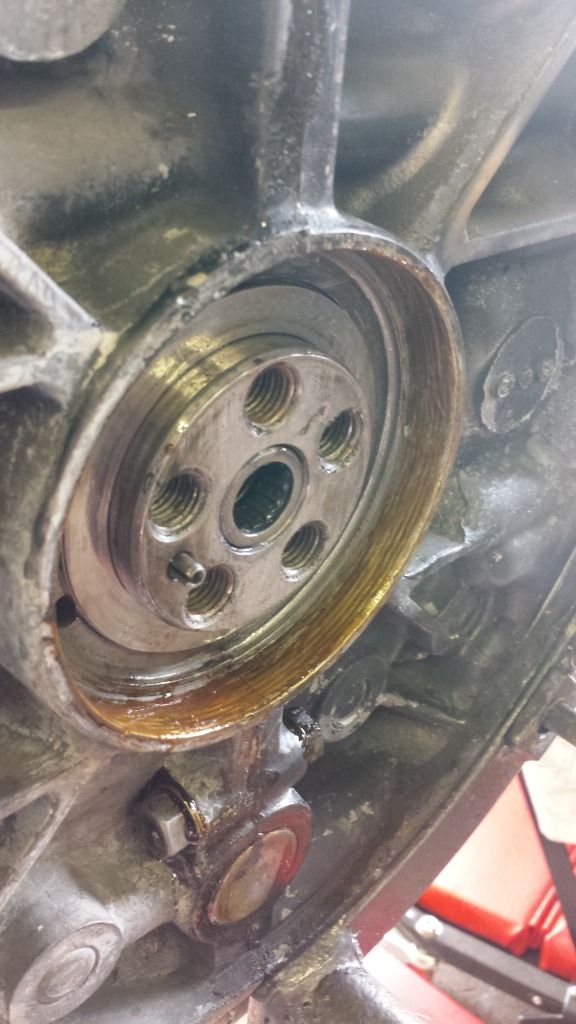
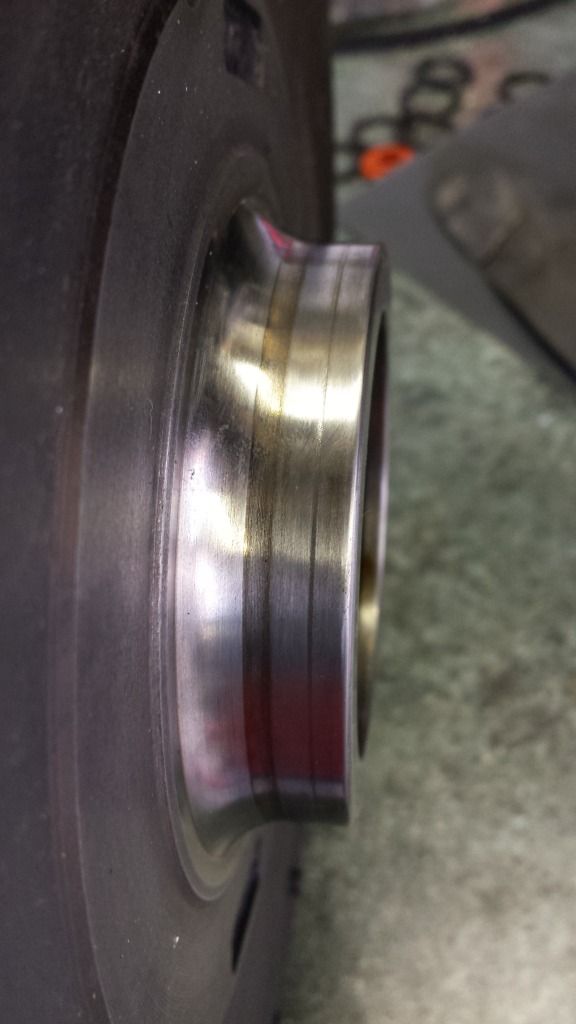
Next I sorted the flywheel. Started by cleaning the outer seal shaft with wet and dry till it was all shiney
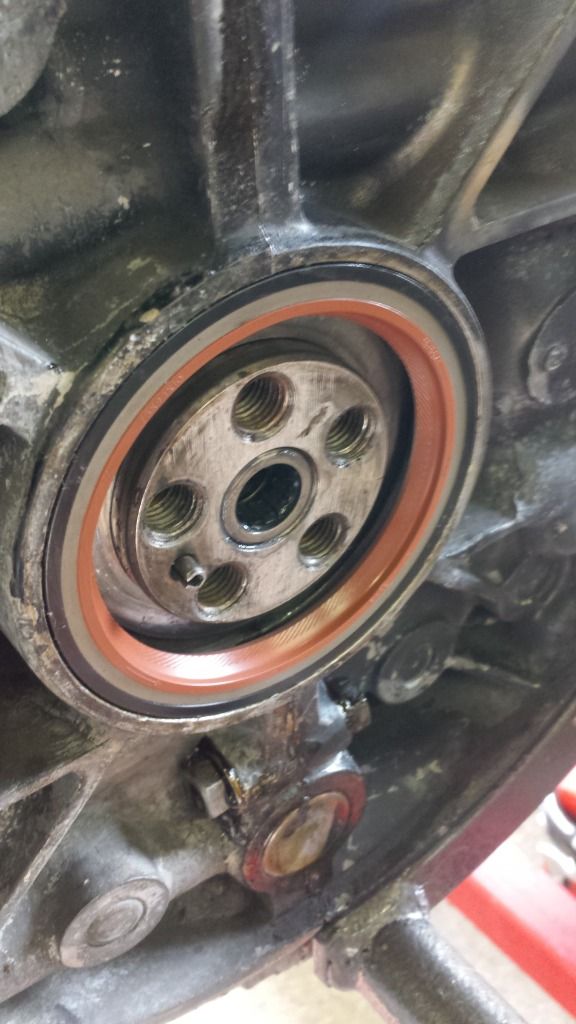
then after making sure it was clean, I put a little sealer in the groove and then installed the o ring

Re: Type 4 engine rebuild - another! :)
Posted: 06 May 2015, 11:16
by paulandchez
Then I carefully lined the flywheel up and pushed it into position. Then installed the load spreading washer and 5 bolts trying not to move the flywheel. Had a little trouble with the engine yoke which led to removal and slight modification of it....but soon got back to this point, and then torqued the bolts up gradually, locking the flywheel using a couple of bolts and a massive screw driver!
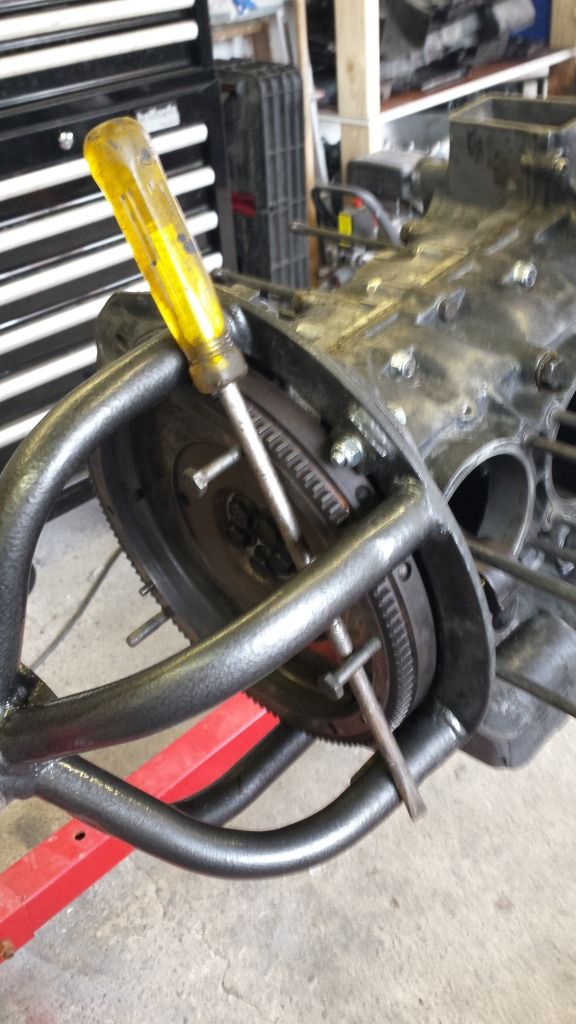
Then I checked out my clutch, was has only done a few thousand miles so was expecting it to be ok
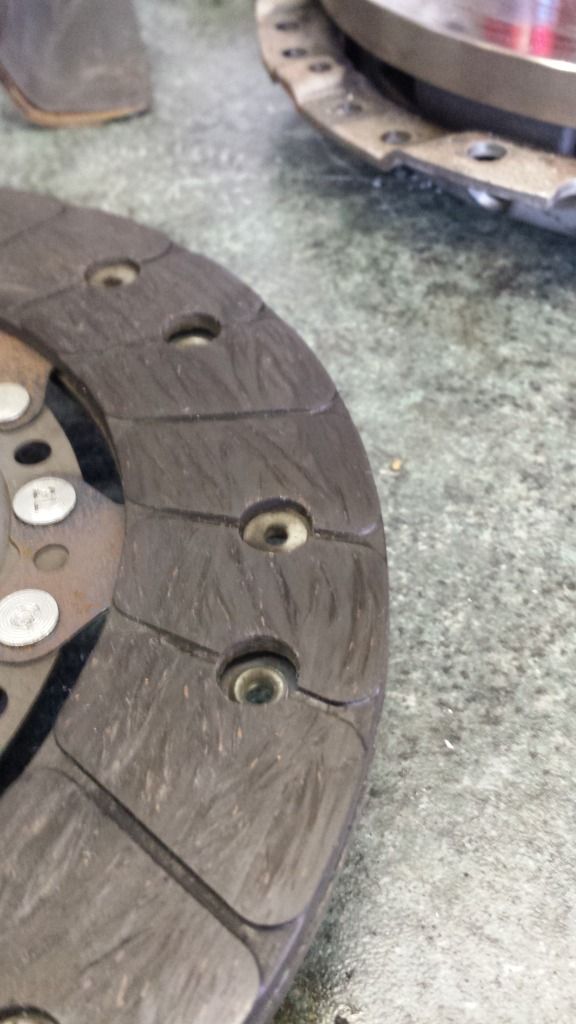
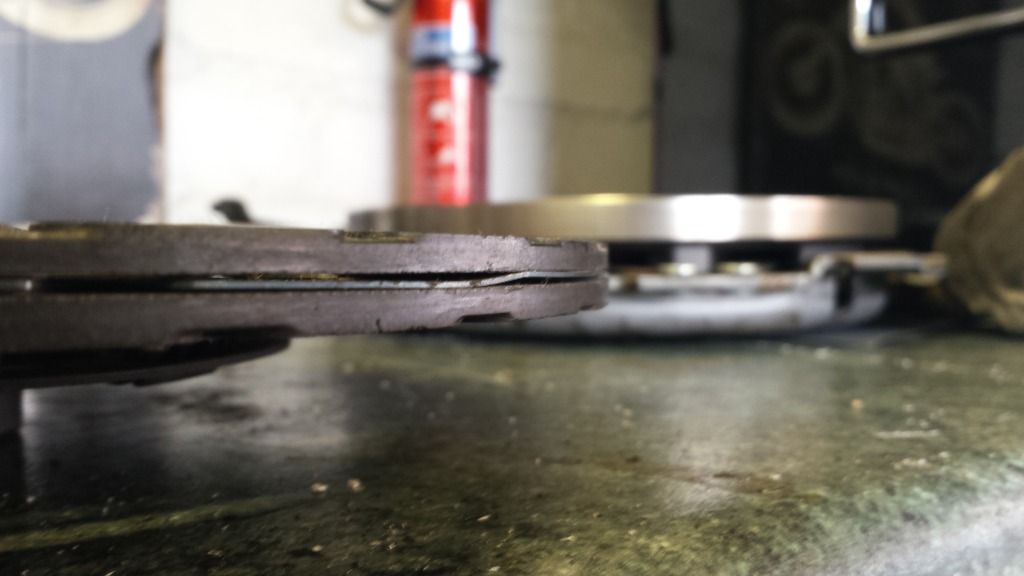
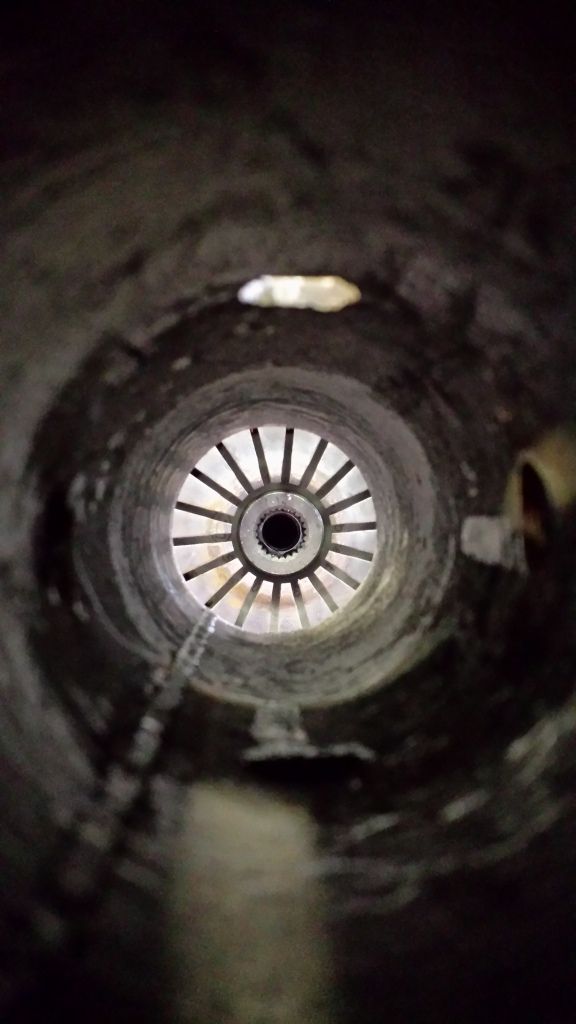
Loads left, so cleaned it with thinners and left to dry. I checked the pressure plate for worn fingers etc, but again this was new when I installed the clutch. So I installed them, using my eye to line up the clutch plate, looking through the engine stand
I also installed the new strainer with new gaskets....but couldn't find my sump plug!!!!
Re: Type 4 engine rebuild - another! :)
Posted: 06 May 2015, 11:19
by paulandchez
Bank holiday Monday meant more engine work for me

So I turned my attention to the oil pump. I'm fitting a CB Maxi 1 pump, which is designed to be a straight swap for the original ones. I made sure the hole in the case was clean and free of excess sealer, then I dry fitted the pump to ensure it went it! Then before installing I applied sealant to the outer diameter

I then dry fitted the gears and noticed that the drive gear looked like it stuck out slightly. Turned out the key was bottoming in the cam slot, but the gear wasn't pushed far enough down the shaft. I wasn't best please as they aren't exactly cheap, but it didn't take much to press the gear slightly further down the keyed shaft
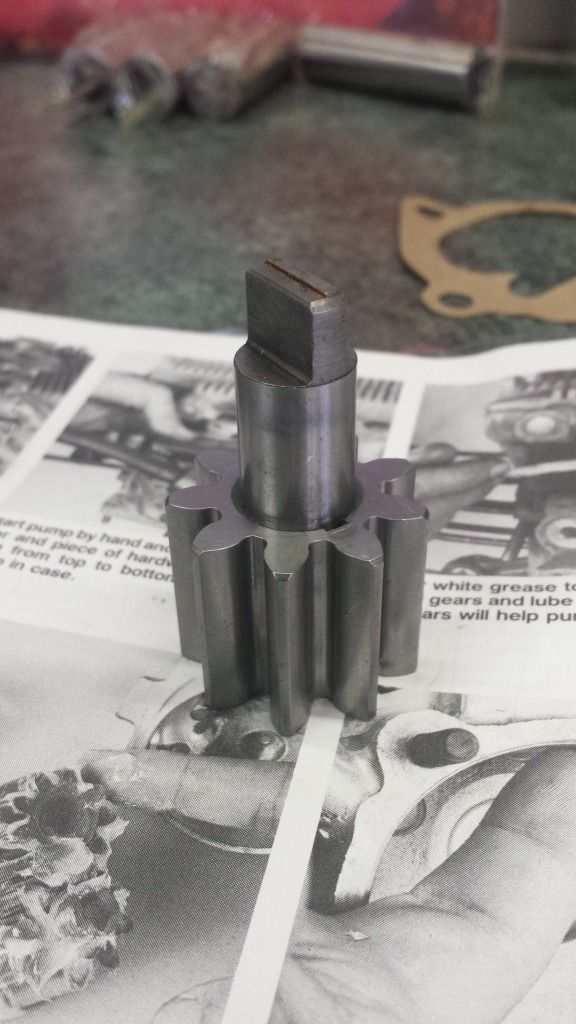
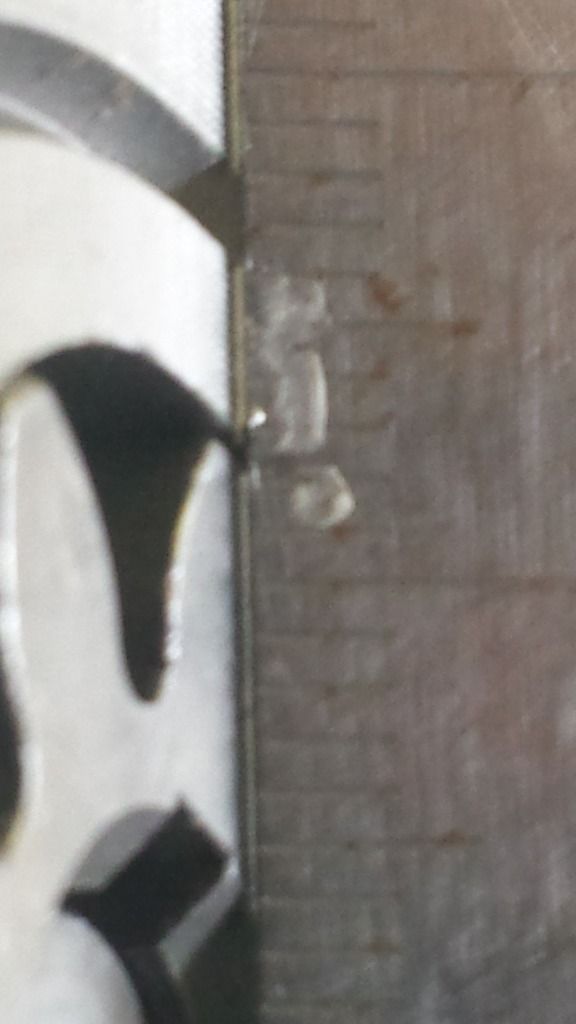
And then I checked the clearance with a straight edge
Before coating the gears in lots of lube, fitting the paper gasket under the cover and bolting it all up
BTW, the bolts provided in the kit are too long for these cases (you need to remove the original studs....I used the double nut method) so you need to either cut them down or get shorter ones
Re: Type 4 engine rebuild - another! :)
Posted: 06 May 2015, 11:21
by paulandchez
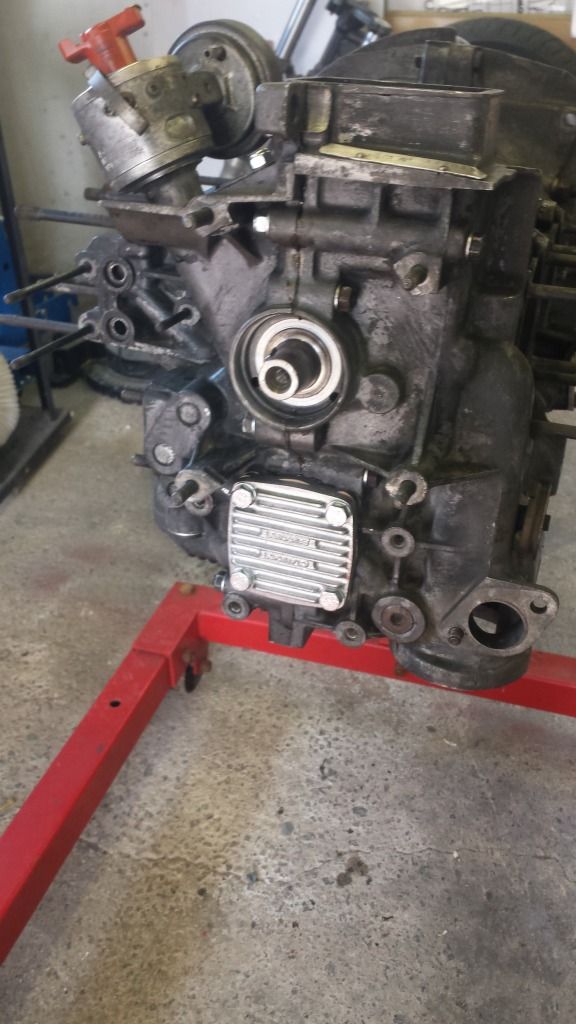
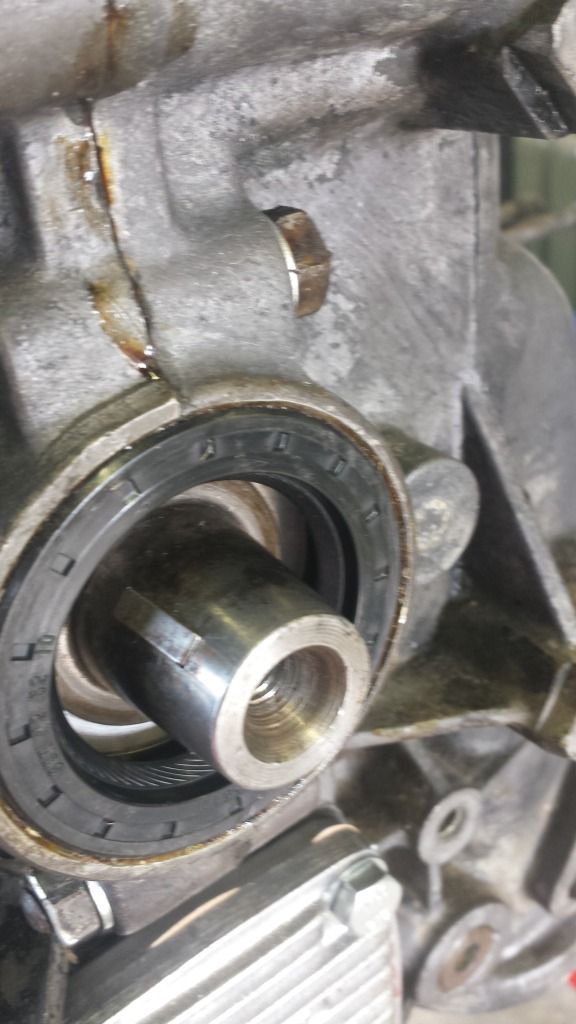
Next I fitted the fan end crank case seal, again using a smear of sealer on the outer surface and knocking it home nice and square
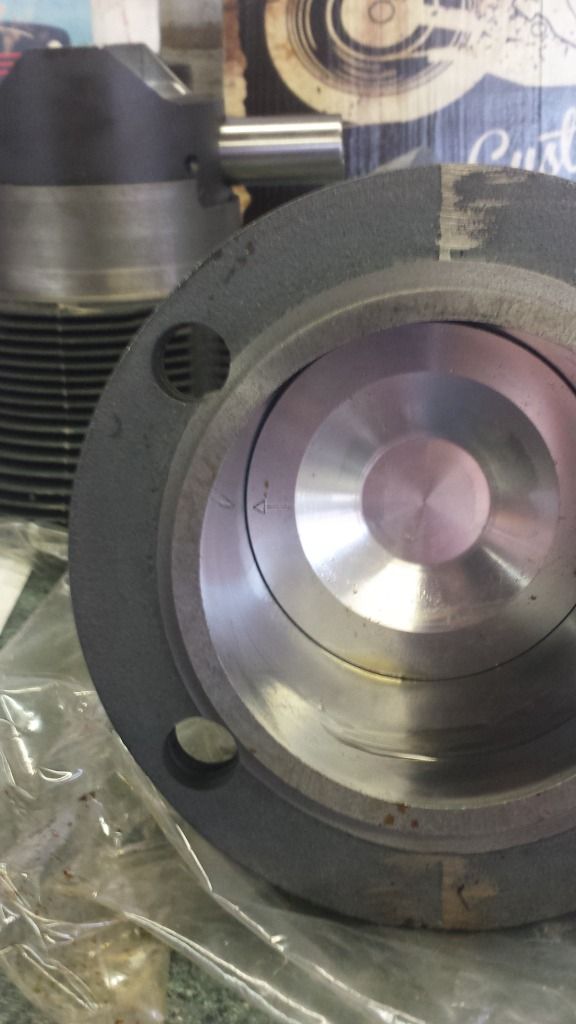
Next I moved onto the new B&P's I bought. no issues fitting rings or getting the pistons into the barrels are they come already complete
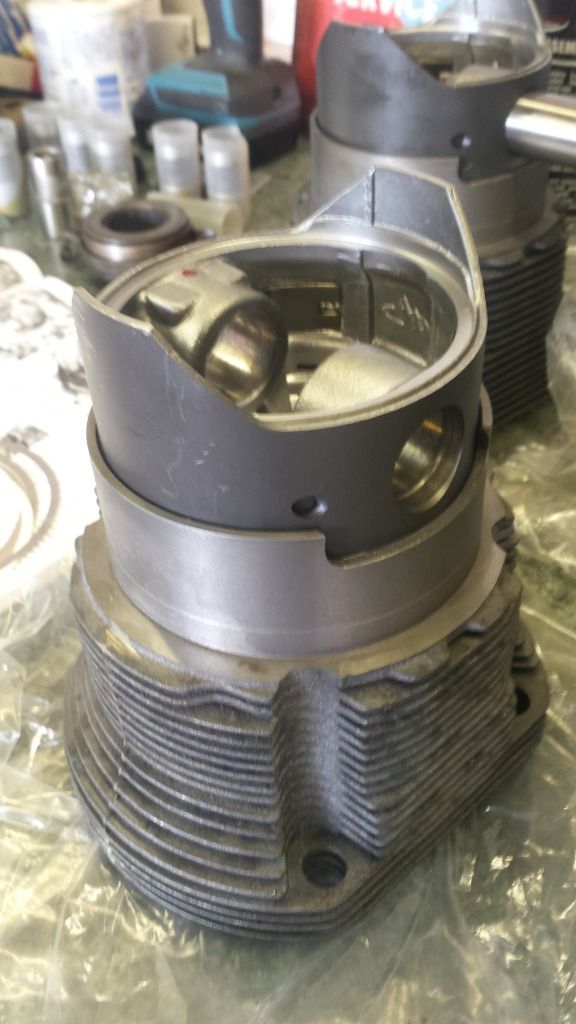
They also have arrows stamped onto the piston crowns which point towards the flywheel, so make sure you get the right ones in the right place
I decided to measure the deck height, by using an old shim under the barrel, clamping it in place on the case bolts using spacers and then using various measuring tools to give me a few readings that I could convince myself were correct
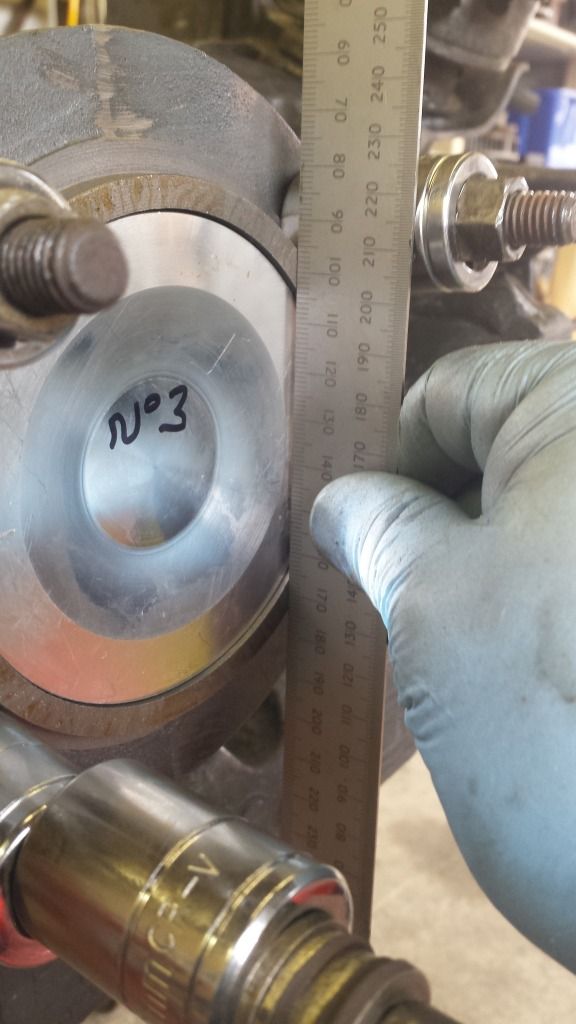
I used straight edge and feeler guages as above, digital calipers used backwards as a depth guage, and also an actual depth gauge with a better base for stability. I wrote on each piston which cylinder they were fitted to and repeated the process on all 4. I'm not sure why I decided to do that, but I'm glad I did as the results showed quite a variation between them. I wrote on each piston the deck height too.
My next step after asking a question obout the differences, is to measure each barrel to see what the manufacturing tolerances are like, and then buy shims to suit each barrel to minimise the variation so the compression is about the same in each cylinder.
Re: Type 4 engine rebuild - another! :)
Posted: 06 May 2015, 11:24
by paulandchez
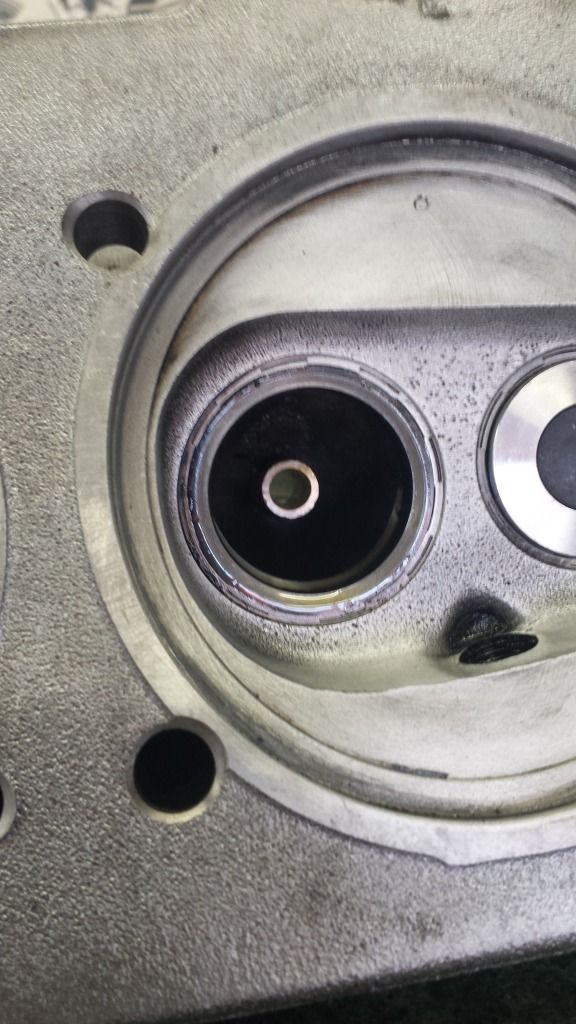
I then started to assemble the heads. I've had the seats machined and guides checked, and the shop lapped each new valve in for me and marked each one so they didn't get mixted up. Firstly I cleaned the guides using paper towel (shop had already cleaned them, but I wanted to be sure)
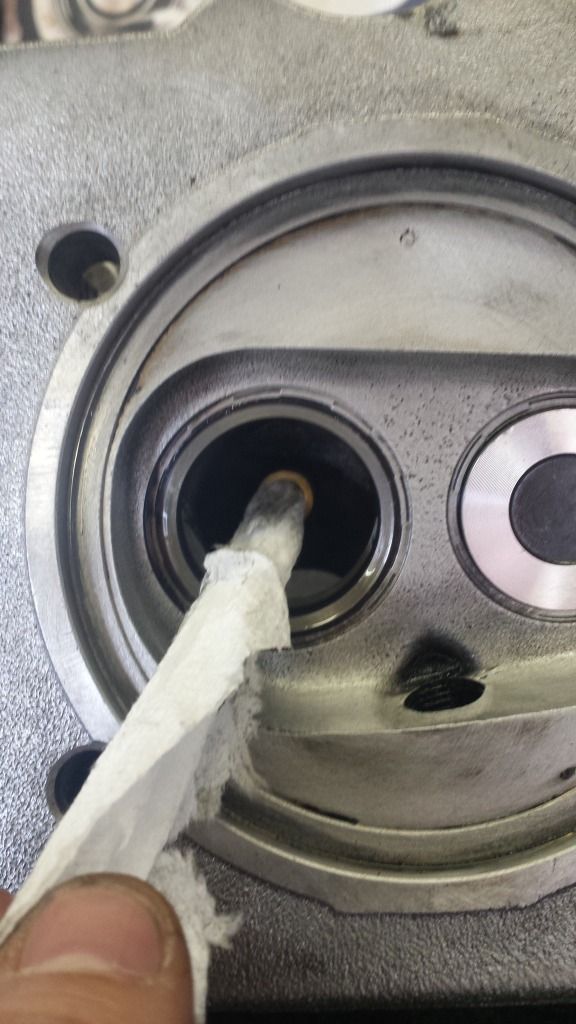
Making sure no deposits were left
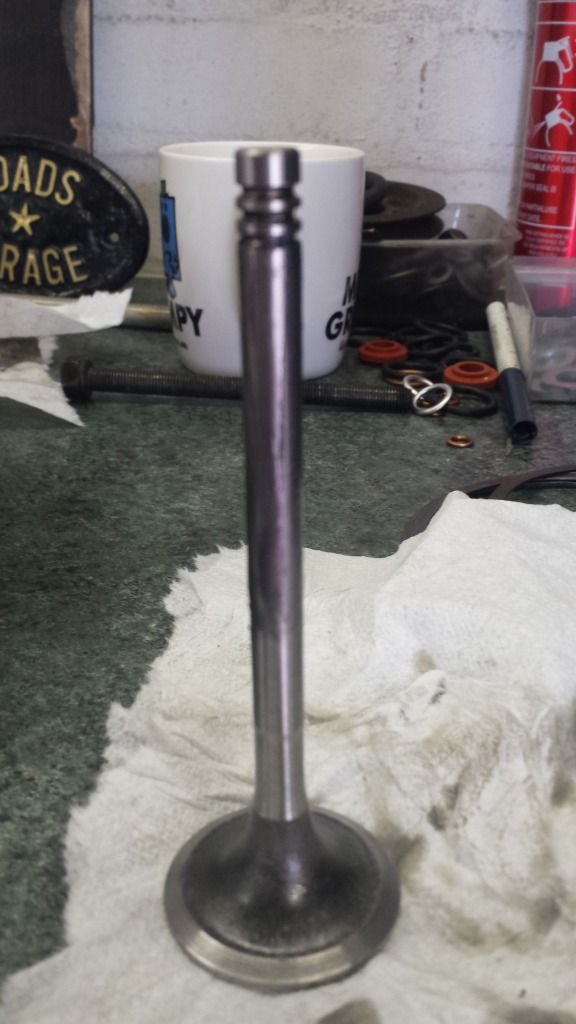
Then I put a light smear of CV grease on the stem before sliding them in
I then checked the springs. All of these were brand new so I had no reason to doubt they were ok, but you never know. Unfortunately I don't have the kit to check the spring rate, so I'll have to trust them on that. All of the unloaded heights were within 0.1mm so I was happy with that. I then cut a piece of material 1.5" long and checked the distance between where the spring sits in the head and the under side of the retainer when it was installed with the collets (pulled it up by hand). This was a bit fiddly and I'm sure it could be done more accurately, but I'm not building a race engine here. One head measured up ok and no shims needed, so I installed the springs etc (making sure the narrower end was against the head) until I got to the 3rd one....and then I broke my spring commpressor!!!!!

I was trying to get away with the one I use for my bike and it wasn't stable enough really....so picking a new one up this week
Re: Type 4 engine rebuild - another! :)
Posted: 06 May 2015, 12:37
by ghost123uk
Watching with interest
paulandchez wrote:using my eye to line up the clutch plate, looking through the engine stand
Hope you got that close enough, but without a tool or a spare input shaft I see why you went that route.
Re: Type 4 engine rebuild - another! :)
Posted: 06 May 2015, 12:48
by paulandchez
ghost123uk wrote:Watching with interest
paulandchez wrote:using my eye to line up the clutch plate, looking through the engine stand
Hope you got that close enough, but without a tool or a spare input shaft I see why you went that route.
I'll be checking it again before it goes in, when I have more room without the stand in the way. But this is how I fitted it last time, and it worked. I don't just throw it in and cross my fingers though, I take time to line it up, spin the flywheel and make sure it looks the same all the way round
Re: Type 4 engine rebuild - another! :)
Posted: 11 May 2015, 16:43
by dandan1234
Your getting on a lot better than I am, well done.
Did you have any problems with the end play on your distributor drive shaft?
I have measured mine according to Tom Wilsons book and I have around 3mm of play without the spring in! he recommends max 1.27mm.
Re: Type 4 engine rebuild - another! :)
Posted: 11 May 2015, 21:22
by paulandchez
Mine was fine mate luckily. I've got one washer in there and it's within the 1.27mm tolerance


