Page 1 of 2

1980 Aircooled Camper Restoration

Posted: 13 Jul 2012, 21:01
by Wookster
Hi Folks,

Just found the forum today and looking at other members work has given me encouragement for my own project. Working on these old vans is like peeling an onion, it might not look too bad on the outside but each layer is more rotten.

Learn't a lot today about how these vans are put together, I've only done simple stuff so far and have included a few pics below. Will add more as my project proceeds.

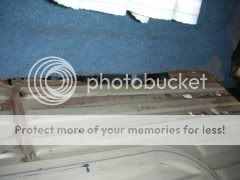
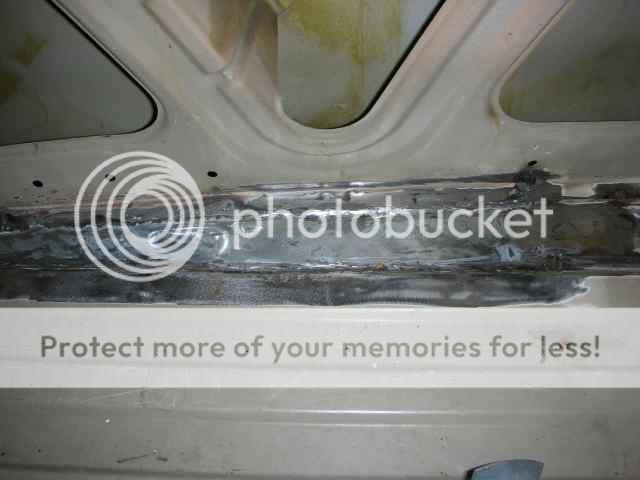
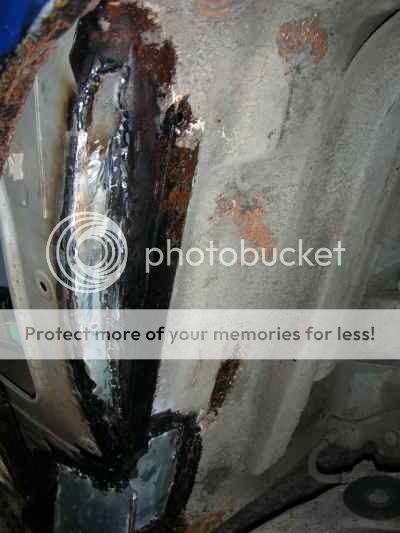
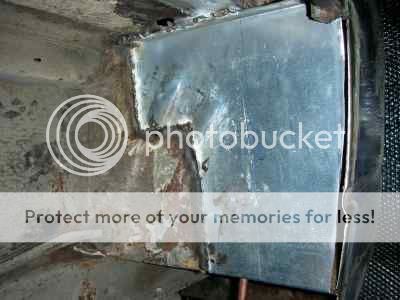
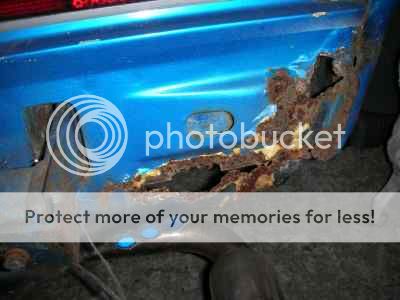
This is the pillar behind the passenger door before
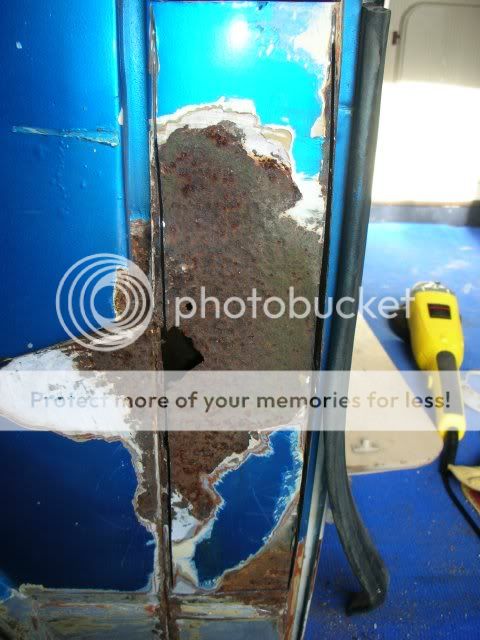
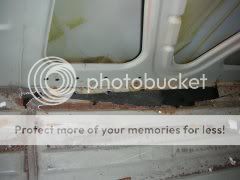
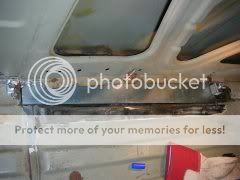
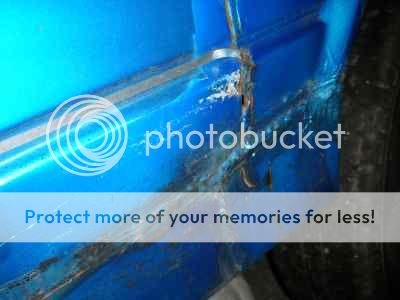
Image

And after

Image

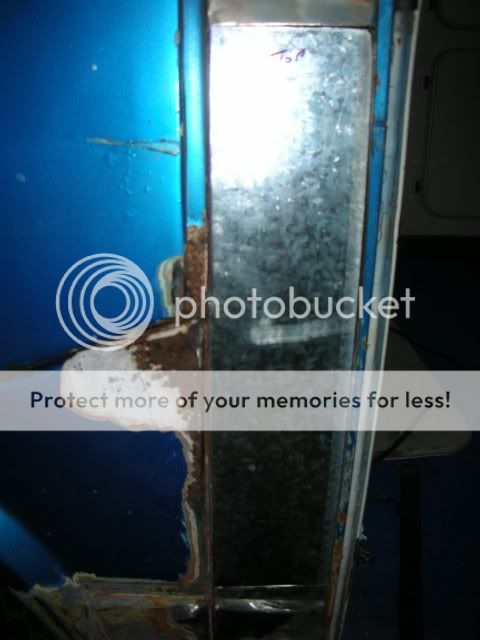
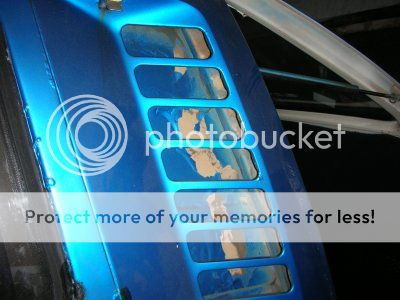
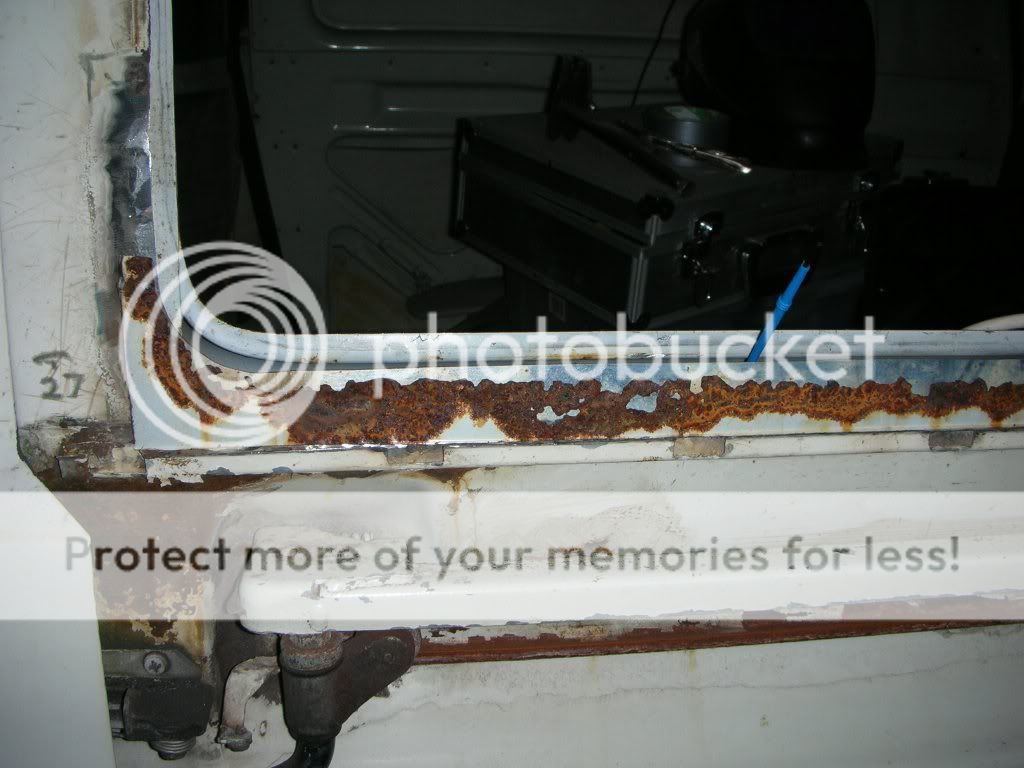
Another van I did some work on a while ago, passenger side rear window in this case.

Image

Image

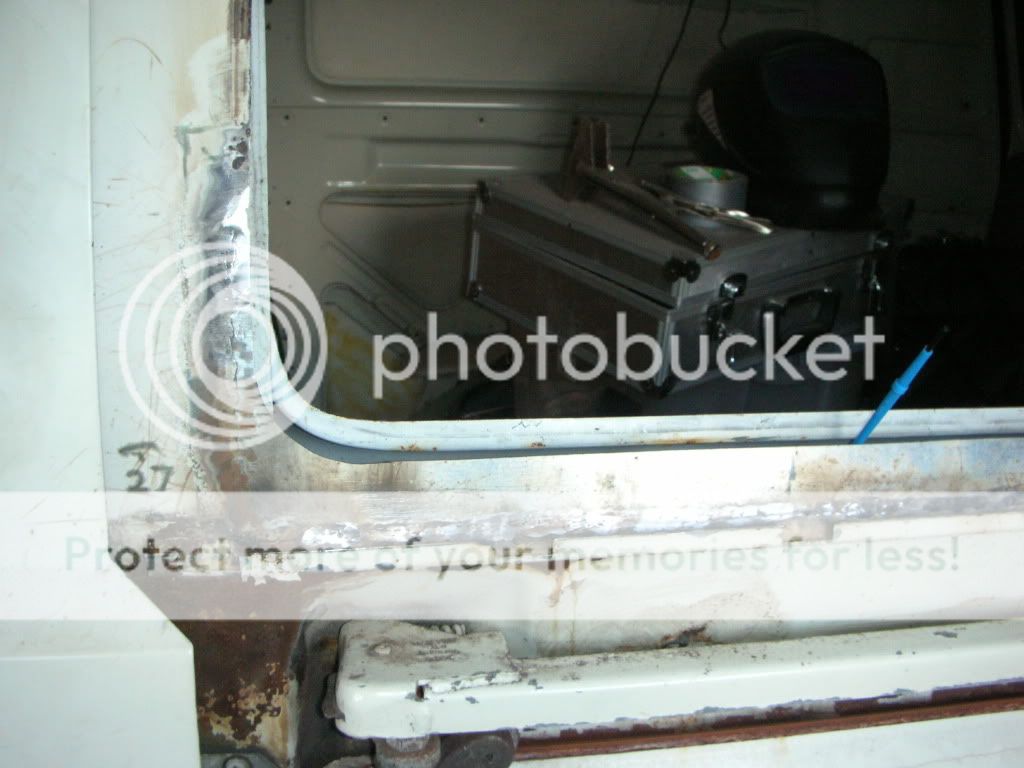
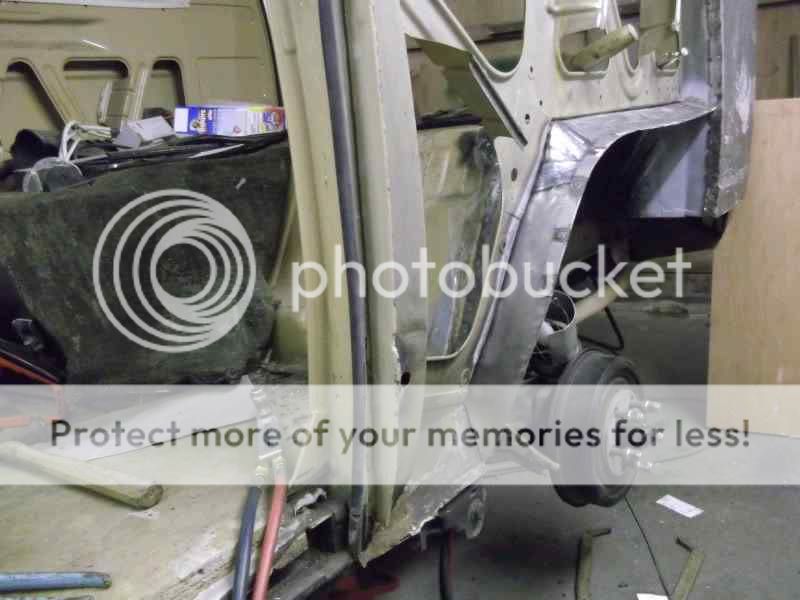
Back to my van and what I'm working on

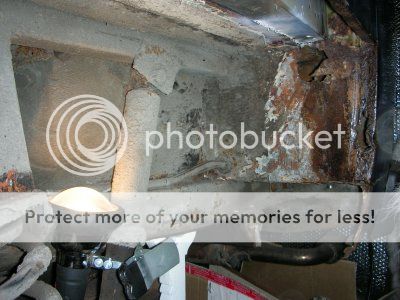
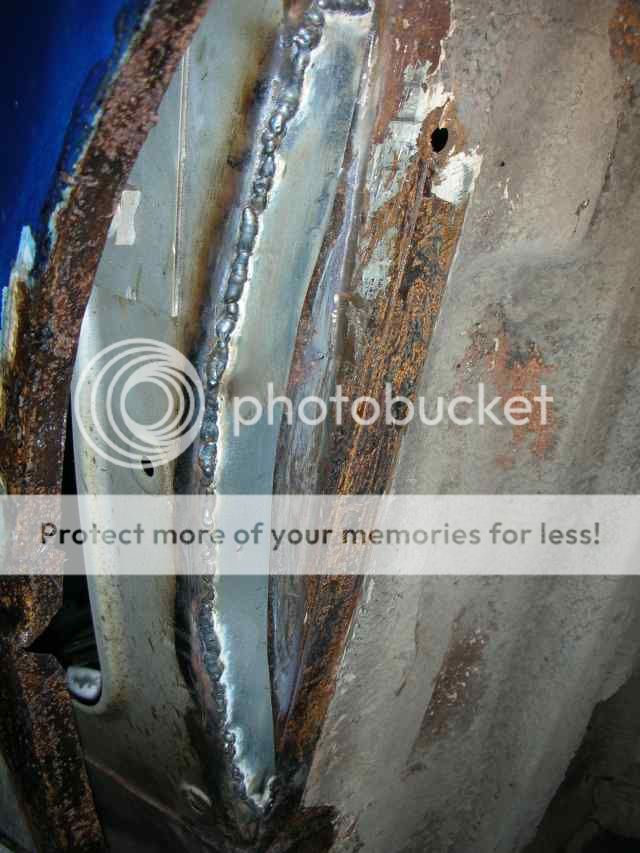
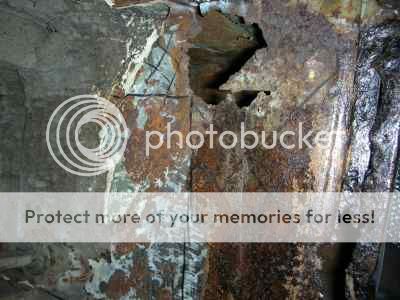
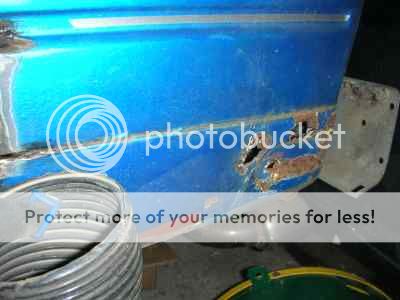
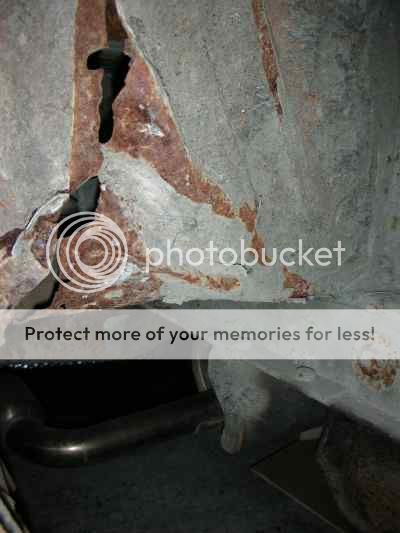
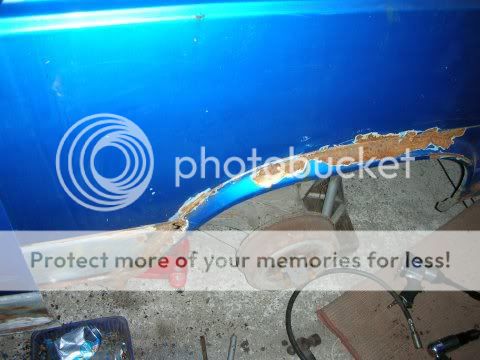
Rear wheel arch looks very bad once I'd removed the filler, you could literally crumble it in your hands

Image

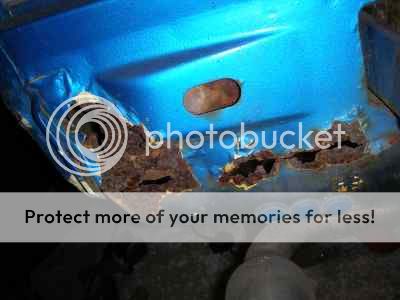
And gets worse once it was cut out and all the underseal etc removed

Image

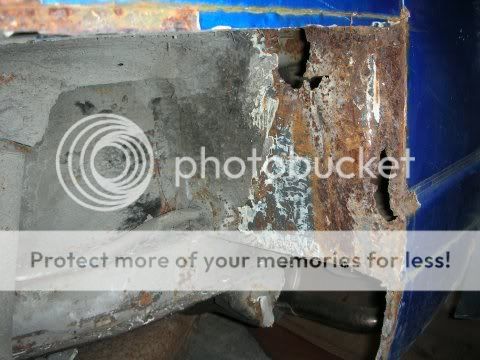
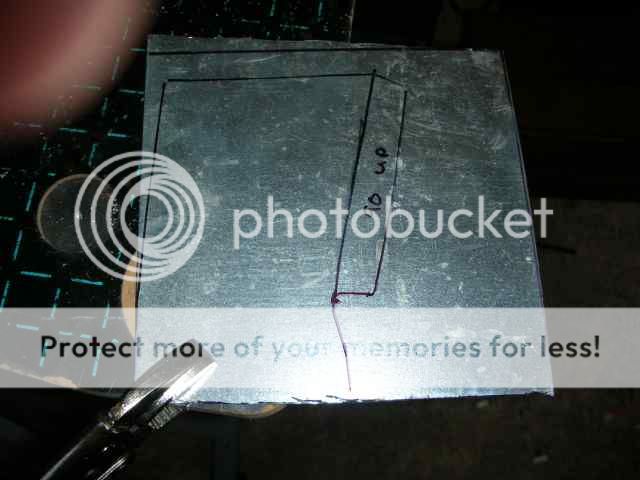
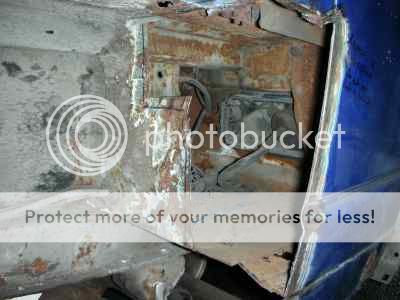
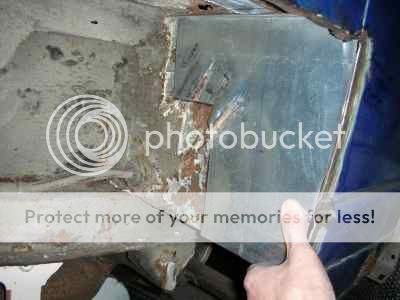
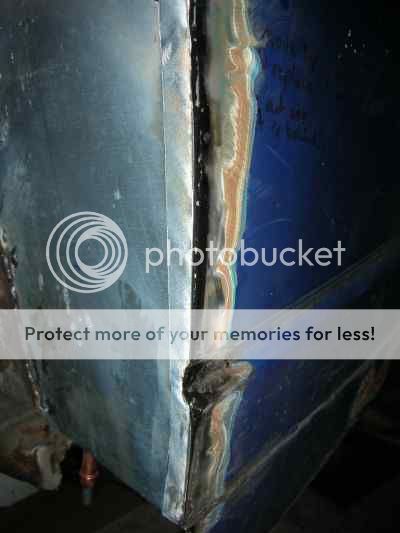
I've cut a new section to weld in but there isn't anything to weld to!!, water has obviously got through around the window and just collected above the inner wheel arch. Loads to do before I can fit the new sections.

Re: 1980 Aircooled Camper Restoration

Posted: 14 Jul 2012, 20:43
by Wookster
Done some more work this afternoon, removed the R&R bed and interior panels to see what the state of play was above the wheel arch.

Image

Absolutely no insulation whatsoever, never seen that before.
Quite please with what I found though, rust hadn't eaten into the frames at all.

Image

Also had a poke at the window :( , amazing what finger power can do and yes the windows really are covered in purple film. Some careful peeling me thinks.

Image

Cut out the rust and made a new plate to weld in tomorrow, since it's visible from the inside it's going to be butt welded all around. Took a lot longer than expected cos a second of lost concentration, and the twist knot brush I was using in the grinder got stuck and mangled the edges.
Absolutely hate the seam sealer and underseal VW used years ago, cos if you don't get rid of every bit you spend more time with the fire extinguisher than welding.

Image

So instead of being simple it's going to be a case of tack, tap, tack, tap to get it back to where it was.
If anyone is interested will be using 0.6mm wire and a 5% Argon mix.
Gas is set using the formula wire diameter * 10 + 2 so 8 on the guage.

Re: 1980 Aircooled Camper Restoration

Posted: 14 Jul 2012, 21:12
by Bilson
I don't really know anything about bodywork, so this might be a daft question, but what do you do to prevent the fresh metal rusting in sections that are hard to reach?

I'd imagine you can access behind the bit above you've replaced, but in areas that are harder to get to, like if you'd repaired the top of the pillar, how can you prevent the fresh metal just rusting up straight away?

Re: 1980 Aircooled Camper Restoration

Posted: 14 Jul 2012, 21:46
by Wookster
If you remove the interior trim there are often holes near repairs so you can spray your chosen rust converter in there, leave it a while to dry and then spray waxoyl etc into the cavity. If not create one.
Waxoyl etc are flamable so you only do this after all welding is complete.

If I am welding a pillar as above and there is a potential problem with fire, I can run an extra feed from the gas bottle into the cavity and basically fill it with CO2. You can hear the waxoyl etc fizz but nothing more.

I also have a large CO2 extinguisher, and keep a fire watch for a while afterwards ready to squirt through the access hole.

Re: 1980 Aircooled Camper Restoration

Posted: 16 Jul 2012, 20:37
by Wookster
Spent few more hours this evening on the repair, started off by using a hot air gun to remove the underseal around the area I was welding. About 30 secs is enough to soften it then a bit of scraping.

Found that I could straighten about 75mm of the edge at a time, so I welded that section and then sat underneath to do the next bit until it was done.

Image

Of course it always helps or not!! to have a welding inspector.

Image

Finished the welding but too late to grind down now, so will do that tomorrow.

Open to ideas as to how to clean this section up though, it's a job for the future but the only idea I can think of is to spray paint stripper.

Image

1980 Aircooled Camper Restoration

Posted: 16 Jul 2012, 21:06
by Kelvyn
I read elsewhere that a pencil grit blaster or dremel could get in there, or someone with small hands.

Re: 1980 Aircooled Camper Restoration

Posted: 17 Jul 2012, 07:32
by Wookster
Thanks for the ideas, my hands are fairly small but don't fit to any practical purpose.
I've got a flexible shaft for the dremel, so that might be an option. Found it very useful for cutting out but haven't found an attachment that's much use for grinding. Will try a HD cutting disk as a grinder, might work.
Can probably make an attachment for the grit blaster as suggested but it's incredibly messy, kind of like setting off a flour bomb when used indoors. If I use that option it will be outdoors, just prior to the new paint job.
Got to do all the seams anyway so worth a try.

Re: 1980 Aircooled Camper Restoration

Posted: 17 Jul 2012, 11:13
by Kelvyn
Let me know what works for you, as this is a job I need to do on mine - and vice versa, though it's not on my list of priorities..

Re: 1980 Aircooled Camper Restoration

Posted: 19 Jul 2012, 19:41
by Wookster
Will do mate, always willing to share anything useful.

Finished the welding today, not as neat as I had hoped as it has a slight kink but solid.
May redo this later if I can find a donor section of the floor, or learn how to make ribs.

Image

Also made a plate for under the wheel arch to repair where the spot welds were removed/rusted.

Image

It needs another plate welded into the curve, as the metal is a bit thin.
Would very much like to have made it in one piece but it would have to curve in 2 directions, and I don't have a clue how to do this or if it is even possible with basic tools.

Would also like to make this, but need to read a lot more before I even attempt it.
There is nothing left of this on my mine, and I don't have the same access as the upper panel is in very good condition and I'm loath to remove it having read about the quality of some panels.

Will have to figure something out though as it's next on the list once I've repaired the rear of the inner wing.

Image

Got to admit MOT stuff is a damn site easier than bodywork welding, the skill of some members is amazing.

Re: 1980 Aircooled Camper Restoration

Posted: 20 Jul 2012, 18:25
by Wookster
Nothing exciting today, finished off the welding started yesterday and started patching other holes under the wheel arch.

Image

Annoyed with myself cos I couldn't be bothered changing the disk on the grinder and started to cut out with the jigsaw - broke the blade!!.
Changed the disk and cut out the template which needed a small fold.
This is a metal bashing widget I made a while ago, cost £15 buying new steel (3m*50mm*5mm), nowt if you have some old stuff. Idea came from another genius on Retrorides, not from me.
Find it very useful and if anyone would like the plans I can upload them to Mediafire.

Image

Main advantage as that opposed to a vice you can feed decent lengths of steel through, especially if you turn it on it's side.

Hopefully tomorrow will see the underside of the sheel arch repaired, and then I can start making the panel I asked about above and attach the wheel arch itself.

After that its the window out......
Width is limited to around 600mm though unless you massivly brace the structure.

Re: 1980 Aircooled Camper Restoration

Posted: 05 Aug 2012, 18:53
by Wookster
About time for an update.

Progress has been delayed cos I was getting very low on gas, refill was going to be £85 for a 10 litre bottle, which I thought was way too much.

Did some ringing around and nobody else was going to fill it, rental stuff was expensive in the order of £100+ rent plus £50 a refill for anything bigger. Plus handling or delivery charges.

Finally got a sniff of a better deal and followed it up. Now have a BOC 'Y' bottle for £35 rental and £25 a refill.
Roughly 2.5 times as much gas and loads cheaper :lol: . Don't get a spanner, and you do need to buy more gas hose though.

Image

Well happy now so-

Built myself a welding cart cos the bottle is bloody heavy, and made it so the cabinet is dismountable but the bottle is still balanced. Can now have the welder either on the cart for welding windows, or on the floor with a long gas hose.

Image

Took a while to source the hose and a few other bits I needed so have made a couple of plates ready for welding.
Need to do more cutting out too before I can start the assembly process, bottom corner is beyond repair so need to order a new one. At the same time I can weld in another patch....

More pics later.

Re: 1980 Aircooled Camper Restoration

Posted: 07 Aug 2012, 00:20
by Wookster
Bit more done today, finished off the front of the wheel arch. Ended up using 2 plates as I couldn't figure out how to curve the plate in 2 directions. Happy enough though with the repair.

Image

Started on the rear of the wheel arch which was in a very porous condition.

Image

Cut out the rust. Bit of a pain cost of the various layers which were spot welded together, and access very awkward with the grinder. Used air cut off tool for some areas but even that couldn't get to everything. Hammer & chisel did.

Image

Finally made a plate out of 1mm steel, looks simple in the pic but it curves in various directions and had ribs.
Creating the ribs distorted the rest of the plate, flattening the rest distorted the rib section.
Took ages cos I could only hammer for a few mins at a time, and my only flat surface is the back of the vice.
Definitely need to come up with some other method for plates which aren't flat.

Image

Tomorrow I'll clean up and treat the surface rust and brush dinitrol everywhere I can reach inside the cavity.
Apart from a small 50mm wide strip butting up to the rear wing which need cutting out the rest is surface rust.
Eventually all box sections will be sprayed internally with primer, chassis black and then waxoyl.

Another job for tomorrow is to remove the rear bumper as both lower corners look rough, not too bad though £13.50 each from Just Kampers. Once the bumper is off can have a good look at the rear valance.
Can't find this listed anywhere so will assess the rust and take it from there.

Re: 1980 Aircooled Camper Restoration

Posted: 07 Aug 2012, 07:09
by Kelvyn
Nice to see it coming along well

Re: 1980 Aircooled Camper Restoration

Posted: 07 Aug 2012, 19:35
by Wookster
Smothered the inside of the rear corner with dinitrol and then removed the rear bumber and plastic trim.
As I thought both lower corners need replacing but for different reasons.
On the passenger side where I am currently working it's rust.

Image

Thought about how to proceed and decided to weld the plate in first, then remove the lower corner followed by replacing the 50mm wide section underneath. Soon find out if I made the correct decision.
The black plastic tube is my Record dust extractor. I try to aim dust from the grinder in it's direction for collection, good for 0.5 microns so pulls a fair bit out of the air. Leave it running afterwards for a while as well.

Never been much good welding with one hand especially my left so will grind down the welds and check for voids, patching up as necessary. I could have plug welded the panel but then you are relying on seam sealer etc to keep the water out, and this panel obviously gets soaked.

Image

Onto the rear valance. Apart from both ends it is in very good condition so will be repaired.
If someone could point me in the direction of a pic of the valance in good order it would be very much appreciated.
I know it's hidden by the bumper but I'd still like a tidy repair.

Nearside rear corner.

Image

The offside is a mess as you will see below and will be addressed much later.
I can only guess that some idiot has tried to jack the vehicle up and missed anything structural, the whole rear wing is pulled in and the box section underneath crushed. Fortunately the seams have separated so once they have been completely cut the wing may spring out. If not I have a spare which came with the vehicle.

Offside rear valance

Image

Offside lower corner

Image

The distortion isn't obvious from the pic, but with the naked eye the panel has been pulled in at the bottom.

Offside wheel arch front

Image
Image

Tomorrow I'll weld the new lip onto the rear wing, and weld this onto the new plate to keep the whole area watertight.
Once that's done the wing should be rigid so I can replace the section underneath, and whilst it's cut out spray weld through primer inside ontop of the dinitrol. Should keep things stable for a while.

When the repair is complete I'm stuck as far as replacing the outer wheel arch as I need the lower corner to make sure they both line up.

Plenty of other repairs to do though on the roof which I suspect have been ignored ever since the pop top was installed 30+ years ago. More metal bashing, idea being to form the curved sections around a scaffold pole.
Soon find out if that's a good idea!!.

Ta for reading, hope yours is less work even if I am learning loads about T25 construction.
Once the rear corner is finished going to paint with rustoleum to keep it rust free, bought the dvd last night so hopefully in the near future will be able to report my first experiences.

Anyone know of a cheap source for foam brushes?.

Re: 1980 Aircooled Camper Restoration

Posted: 10 Aug 2012, 11:04
by Wookster
New lip welded in and ground down, just one small void on the edge of the groove which isn't bad considering

Image