Page 1 of 4
1Z Tdi install photo diary
Posted: 07 Apr 2012, 07:58
by futbus
We are asked quite a bit what parts and how to install a Tdi into a van. We will assume that the donor van is a diesel and is water cooled. This is for the earlier 1Z or AHU engine from a golf or similar. There are various differences with other engines but plenty of info on that else where on here.
So what do you get once the engine is removed from the vehicle? We bought this engine with about 150K and no wiring loom or any other ancillaries and just landed at the shop.


This engine will be stripped to check condition to confirm that it was running ok as per sellers info.
All ancillaries will be stripped off and cleaned or replaced as required and original diesel parts from the van will be used in the rebuild, and hope this will be useful for others thinking of doing the same conversion.
Re: 1Z Tdi install photo diary
Posted: 07 Apr 2012, 20:07
by futbus
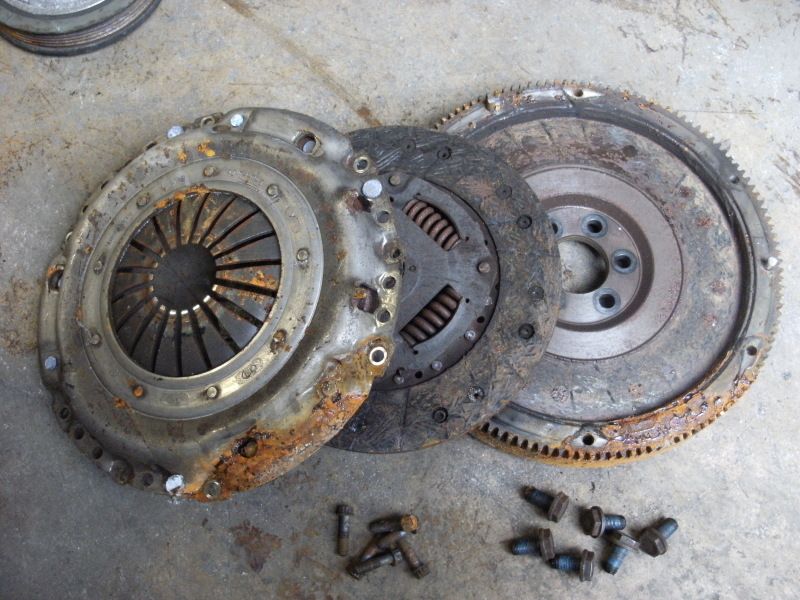
Start to remove a few bits from the donor engine. Flywheel and clutch off and the flywheel will need some machining and balancing with a new tdi pressure plate. "pooh" plate goes in the bin as no longer required.

Offside of the engine, remove the power steering pump and bracket, alternator and bracket to reveal the water pump which is the same as the JX pump but the thermostat cover outlet will need changing.

Front of engine remove the front power steering V belt pulley and alternator belt.


The work is being done on a cheap engine stand from Machine Mart which makes things alot easier and worth the £60 not to work on the floor, and can be rotated when working around the engine.

Re: 1Z Tdi install photo diary
Posted: 12 Apr 2012, 20:19
by futbus
The stripdown of the 1Z continued this evening and now have a very different looking engine and a pile of bits.
EGR and air inlet side pipework removed

Turbo, inlet and exhaust manifold all removed
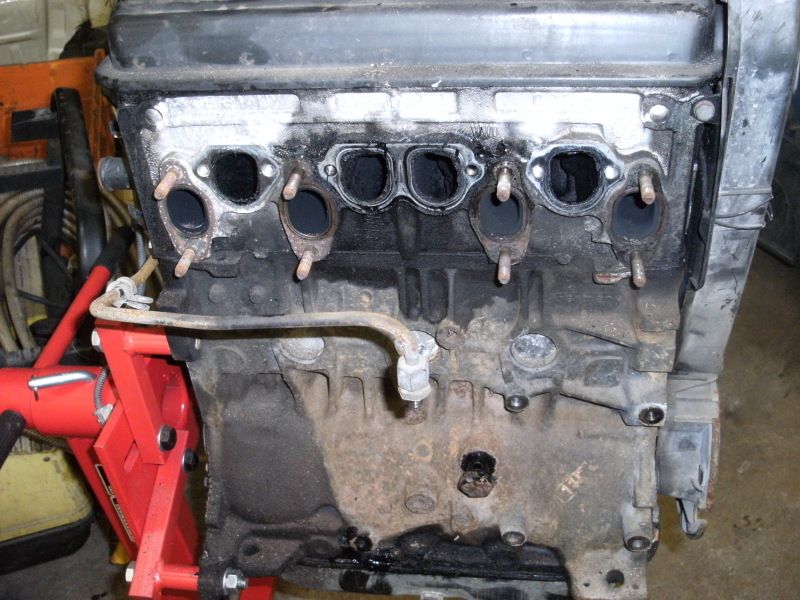
A fair amount of carbon and sludge build up on the inlet ports due to the EGR. This will all need to be cleaned up.

Cam cover off and see the pulleys and original cam belt and tensioner.

Aluminium corrosion on some of the pulleys and a fair amount of gunk after many years of laying in a golf.

Bottom pulley on tdi`s have a flat spot and not keyway as earlier diesel versions and not likely to shear off, and bolt has `nipple` which is a stronger bolt.

Everything removed including vac pump, diesel pump, breather.
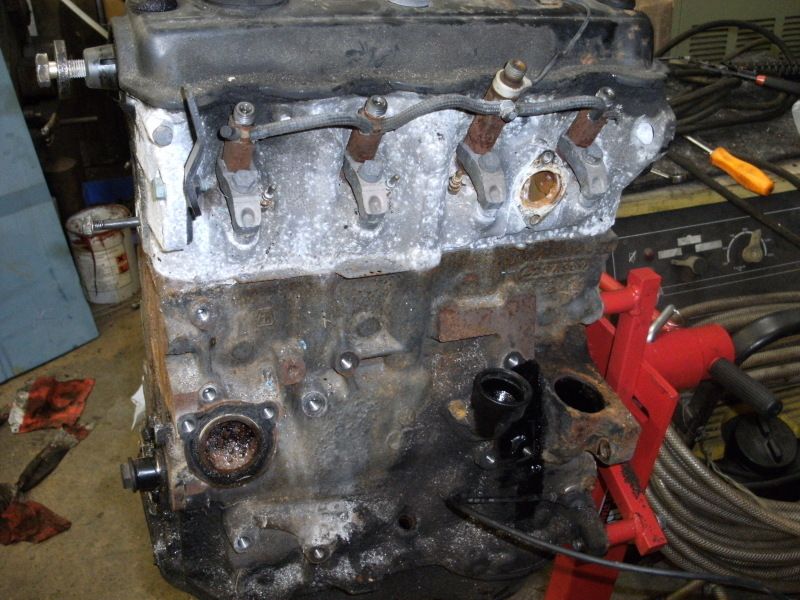
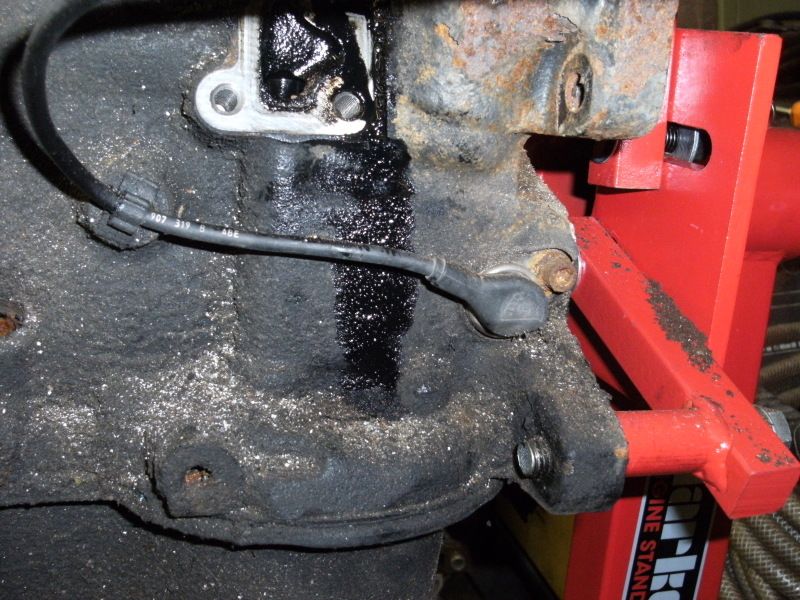
Crank sensor needs removing to clean block, but needs to be handled carefully.
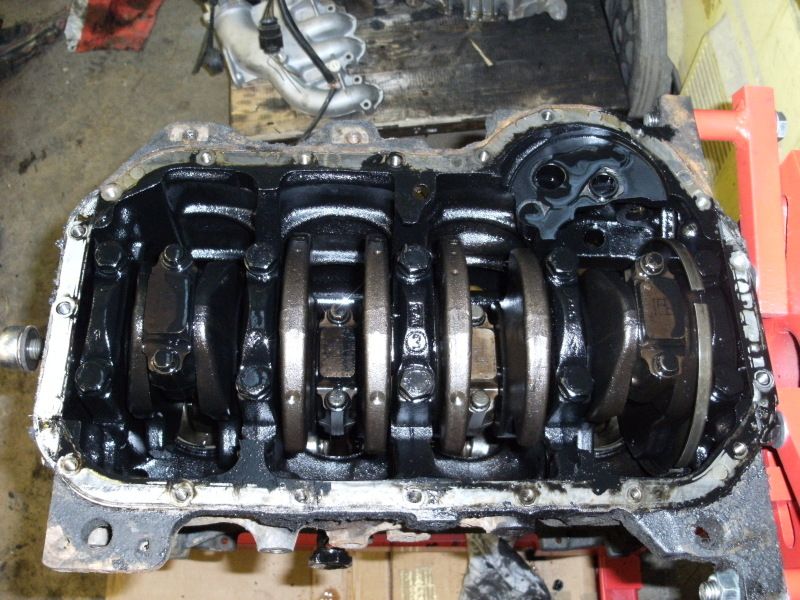
Headbolts removed and head taken off.

After about 150k the honing still on the liners

Pistons all looking good

Head looking good with no cracks or damage, but closer inspection once cleaned up.

Block all stripped externally ready for cleaning

Sump and oil pump off
block, head and everything else to be steam cleaned and then further inspection.
More to come and details to follow .......
Re: 1Z Tdi install photo diary
Posted: 12 Apr 2012, 20:56
by keith
Great stuff.........
Re: 1Z Tdi install photo diary
Posted: 12 Apr 2012, 21:08
by racebiz
V Good write up - please keep the info coming.
Re: 1Z Tdi install photo diary
Posted: 12 Apr 2012, 23:40
by Iceworx
Looking forward to reading more on this one

Re: 1Z Tdi install photo diary
Posted: 13 Apr 2012, 18:31
by futbus
Spent a little time before coming home tonight doing a bit more to the 1Z.
Dug out the flywheel from the box and looks like it was dug up, and ticked it with the lathe.
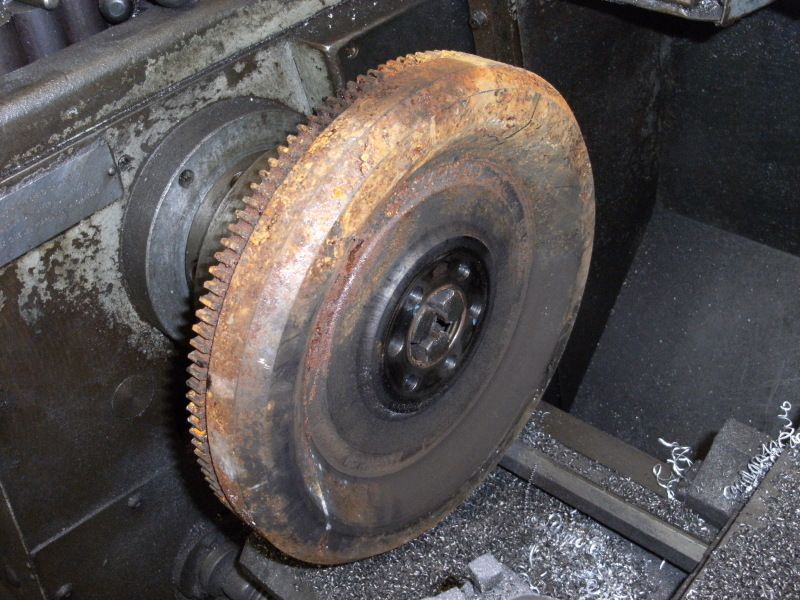
There is some material that needs to be removed from the outer edge so that it clears the support on the starter motor.

Taking material off the back is optional depending on what style of "pooh" plate being used. The only reason we take a little off the back is that our local engine builder (Phil Speed) is that there balancer will not take a standard flywheel.
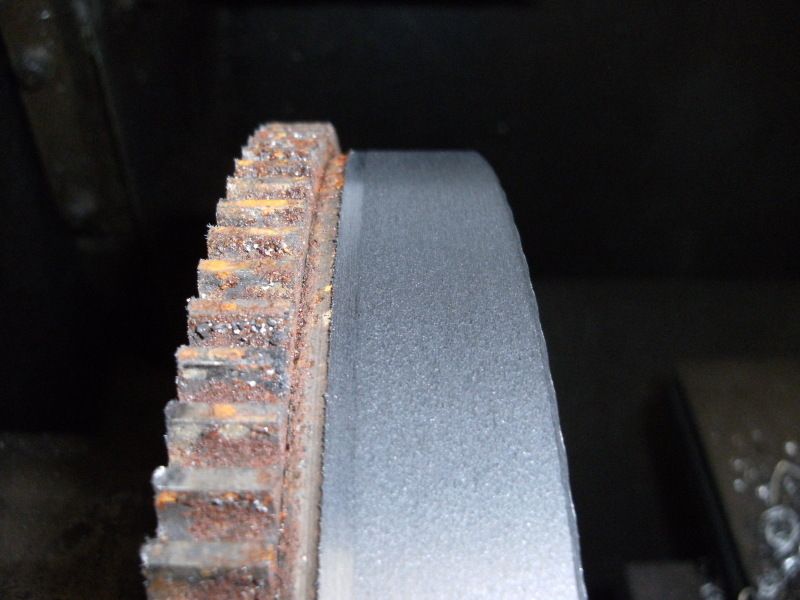
front face cleaned and now ready for balancing,

Bought a standard golf mk3 clutch and comes as a 3 piece kit. The friction plate will be used but a new input shaft will be required for the gearbox, but more on this later.
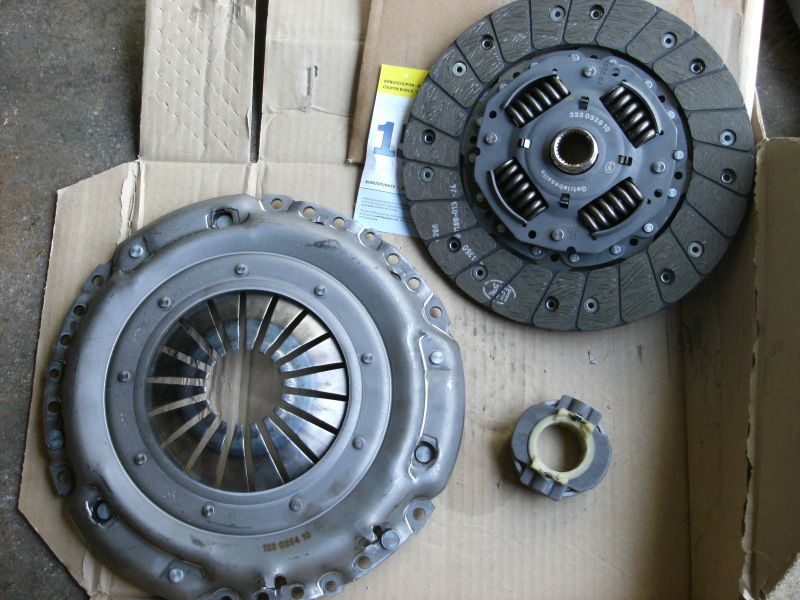
The pressure plate needs to be modded slightly as the timing marks normally used on the Golf interfere with the bell housing and require cutting off, then the flywheel and pressure plate will go off for balancing next week.


No more progress till next week...
Re: 1Z Tdi install photo diary
Posted: 14 Apr 2012, 08:03
by scottbott
very interesting article,was talking to a guy a couple of months ago about the passat TDi I run around in having 207000 miles on it,he said new rings and big end bearings fitted and off you go( was wondering about using the engine out of passat and changing my DG motor)if and when I had engine problems,father in law said it is not worth spending much money on passat if anything expensive goes on it,is it still worth money to someone as a scrapper to someone with that mileage on it?,still gives 50 mpg no problem,there again it might run ok for years yet
Re: 1Z Tdi install photo diary
Posted: 17 Apr 2012, 19:08
by futbus
Little more done as time allows.
Cleaned the block with a needle gun to get the worst of the crap off.


Then out with the red oxide paint to use as a primer. We used to use this stuff when installing gas pipework and had some left, so needs to be used up.
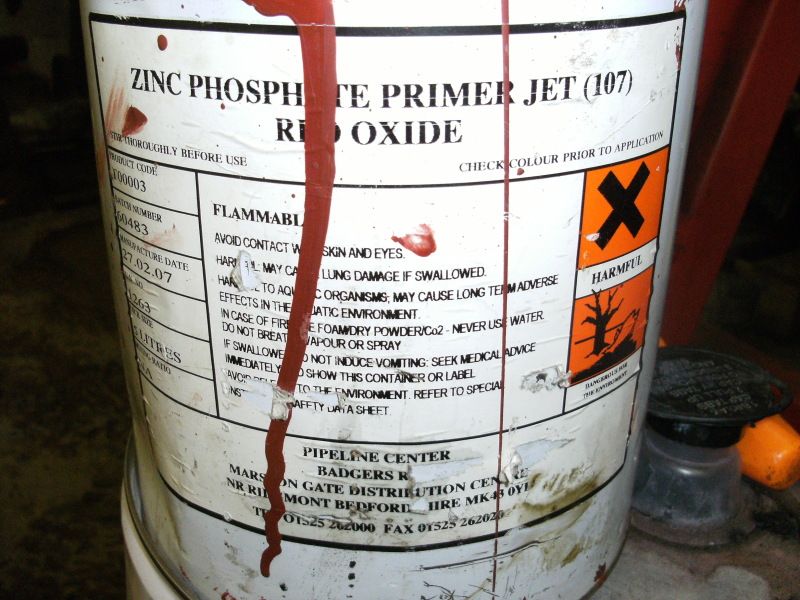
Basically covered almost everything and the threads will all be tapped out once painted and the machined surfaces will get scrapped once the top coat is on, just need to decide on a colour.

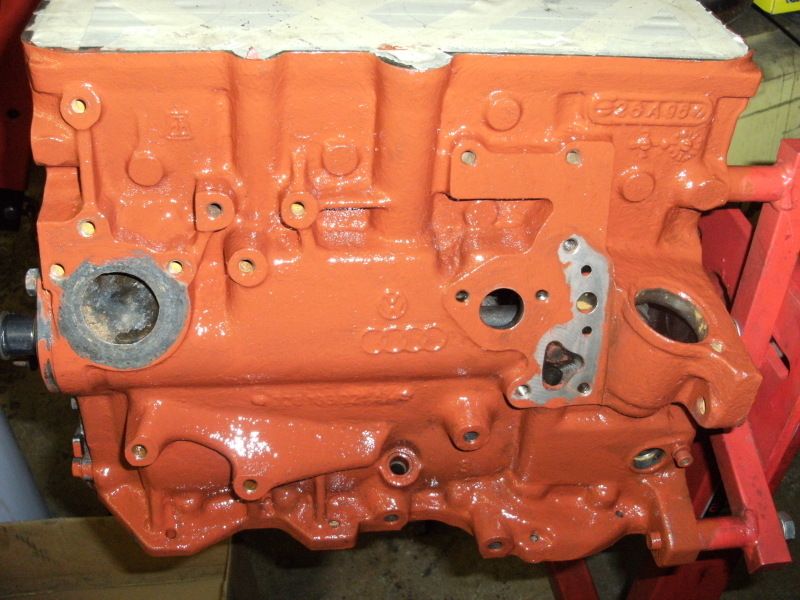
So wait for the paint to dry and decide on a colour for the top coat which will not be black as it dont show the oil leaks when you get them.
Re: 1Z Tdi install photo diary
Posted: 18 Apr 2012, 20:32
by max and caddy
Once youve had black you dont go back?.....pink?
Re: 1Z Tdi install photo diary
Posted: 21 Apr 2012, 11:14
by shaka1976
Are the old power steering bits for sale? I need to get the power steering working on my 1Y(X) conversion.
Re: 1Z Tdi install photo diary
Posted: 21 Apr 2012, 14:34
by bootie3367
Excellent so far, keep it coming.

jon
Re: 1Z Tdi install photo diary
Posted: 21 Apr 2012, 22:04
by Plasticman
Really nice to see mech folk taking the trouble to post the detail work up , it takes time and effort but good to read
mm
Re: 1Z Tdi install photo diary
Posted: 21 Apr 2012, 22:11
by lloydy
My engine is getting the same lovely treatment at the moment

Re: 1Z Tdi install photo diary
Posted: 21 Apr 2012, 22:15
by futbus
This engine is to use as most of the original parts as possible, including the turbo. The turbo flange on the 1Z has a 3 bolt fixing, but the JX has a 4 bolt fixing, so an adapter plate is required. We already make some of these for the AAZ and VNT so had most of the plans required.
These will be machined and plated next week.

Machined to bolt onto the 1Z turbo

Then bolt the 1Z turbo and adapter to the JX manifold. These plates are 20mm to compensate for the 18mm longer block of the tdi over the JX.

The turbo exhaust outlet also has to be changed and we produced a plate to accept the JX down pipe. The plan is to use off the shelf parts and use as few modified parts so most people will be able to do this for themselves.
