Page 6 of 43

Re: The GASWAGON (act III)

Posted: 14 Jan 2014, 22:57
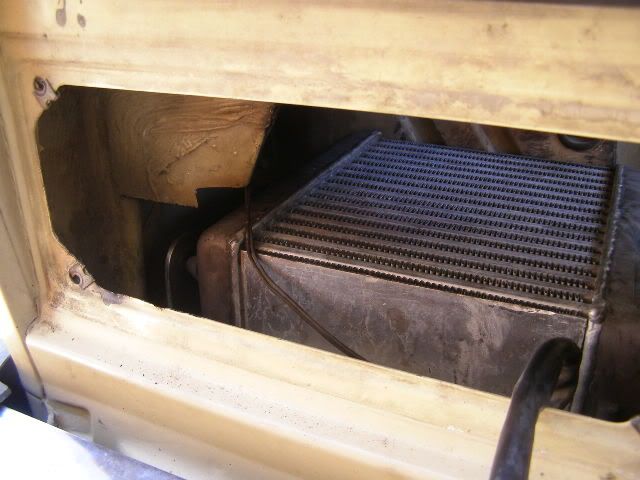
by Plasticman
ok this is rays bay
Image
loads of room on the turbo side and elsewhere
Image
i note it only has the one exp tank, xriss only has one on the tdi westy also ??
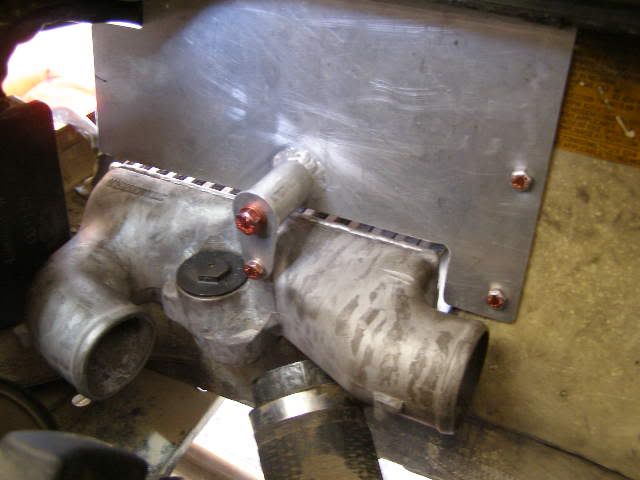
as you say ,if the cooler and clutter can be removed from yours we start getting back to a simple efficient bay, i know the syncro has different problems regarding space underneath , but i note rays cooler is fitted where you cant and the outlets are either side of the engine straight down and out, i think Tim at ue did this one ??
mm

Re: The GASWAGON (act III)

Posted: 14 Jan 2014, 23:17
by lloydy
i'm just getting carried away :lol: A factory intercooler would the best i reckon, as they are normally designed better. And if the plastic ends can be taken off and something tigged on to get better positioned connections, great.

Re: The GASWAGON (act III)

Posted: 14 Jan 2014, 23:29
by Plasticman
No, not carried away, just exploring what can and cannot be done and there are folk out there that know tons more than i do about this so with enough input we will come to a solution that is practical and cost effective
mm

Re: The GASWAGON (act III)

Posted: 15 Jan 2014, 00:25
by ELVIS
Always loving your build threads chap.

Lloydy, I bet this time last year you didn't think the van would ever come this good? :ok

Re: The GASWAGON (act III)

Posted: 15 Jan 2014, 07:47
by Cableguy
Mike, my engine was put in upright. Does leave more space in the engine bay.
:ok

Re: The GASWAGON (act III)

Posted: 15 Jan 2014, 08:37
by Plasticman
I knows but the point I was trying (badly) to make,lol was that there are very few extraneous bots in there
mm

Re: The GASWAGON (act III)

Posted: 15 Jan 2014, 09:19
by Cableguy
There's heaps of room. Incidentally mine was done by the same specialist that did lloyds :lol:

Re: The GASWAGON (act III)

Posted: 15 Jan 2014, 09:35
by lloydy
I've seen ray's in the flesh as such, his intercooler set up works well. The reason he has only one exp tank, is he his using all the tdi donor coolant pipes. So its a slightly different layout

few pics of the start of a saab 900version being installed
Image[/quote]
Image
Image[/quote]

This guy went a step further and adapted some of the metalwork
Image

Image
Image

Image

Image

Re: The GASWAGON (act III)

Posted: 15 Jan 2014, 09:37
by lloydy
southernsparky wrote:There's heaps of room. Incidentally mine was done by the same specialist that did lloyds :lol:
law of averages meant he had to do one thing right! :lol: (but he did copy the idea off of that guy at ultimate engineering)

Re: The GASWAGON (act III)

Posted: 15 Jan 2014, 09:45
by Cableguy
Funnily enough Lloyd, I am going to change it to the same as above. Saw that thread before and thought it looked fantastic. Like the idea of a fan too :ok

Re: The GASWAGON (act III)

Posted: 15 Jan 2014, 09:58
by lloydy
How come? i though your set up worked well?
The one above with the fan on it.. i think if the intercooler was sealed off from the engine bay it would not need the fan, i can just see all that air rushing down the D pillar and going straight into the engine bay, can't see why it would go through the intercooler. D pillar would need to be sealed so the air had no choice but to go through the intercooler, and maybe that trunking underneath continued to the rear panel so it vented through it
I'm going to start a thread on thesamba where they seem to fit a lot of these and see if i can get more pics of set ups

Re: The GASWAGON (act III)

Posted: 15 Jan 2014, 10:23
by Cableguy
Yes it works fine, but looks gash I think. Also the pipes rub on the chassis.
Would like to make it look a bit more pro. That set up should work nicely with some tweaks. :ok

Re: The GASWAGON (act III)

Posted: 15 Jan 2014, 10:33
by Plasticman
thats kind of what i was thinking but a bit neater more refined, would also wish to seal the area off with a removable plate(obviously lol) this way you have the cooler close to the turbo etc and then have to just consider placement of the air filter
we shall await your scouring of the samba ,as its good to have other versions to compare and adapt to your specific needs
mm

Re: The GASWAGON (act III)

Posted: 15 Jan 2014, 14:52
by lloydy
Starting to get a little collection together to post up....
Image
i'll get the window rubbers and send it all up together

Re: The GASWAGON (act III)

Posted: 15 Jan 2014, 19:17
by Plasticman
well never mind the shiny stuff and hey whats with the pink? the alt has a pink laggy band round it, :wink:
So heres the donor less your bit :lol:
Image
it scrubs up well
Image
these picks are of no real value but i know you like documenting everything so thats what we'll do,,,,,,
Image
end caps mint, dont know what happened to the van but the other bits ive had have been as new,
the important bits
Image
as new really , when i have all the unwanted stuff off it then we may blast it as well...
Image
this is a good picky to show the beginnings of the rot at the rear, note it has not yet got to the defo panel itself
Image
right ,enough of that, someone has been very lucky when they have been playing in here
Image
closer look
Image
anyway its off asnd in good order, i reckon if it had been an old rad it would have been holed
were now getting a hole
Image
did you struggle to cram that cooler in there with the rad as well as it was tight to remove and thats with the front cut away
this is purely to show folks the layout in here
Image
nice use of connector blocks hehe
Image
now i can confirm that they fitted a new outrigger as this shows the weld and it is not blue underneath as the other side one is
Image
looking up through it you can see the weld marks from where it was done from above
Image
strangely there is sound deadning on the drivers(n/s) floor only, wonder why.....
this gives a better idea of the area if your not fammiliar with it,
Image
note also that there is an area missing from the A post bottom ,this was removed to aid repair etc , not replaced, it would be a bit of a pig to do , but doable, it doesnt effect the strenght etc in my opinion but is another pointer to the extent of the damage
these show the missing area
Image
Image
Image
floor of course, its not a bad repair but think i will remake it correctly
Image
this is the main leg asnd as you can see,blue ppaint and no sign of repair, i will check more when the wheel and stuff are out the way but it looks good for now
Image
theres something missing here :lol:
Image
ahhhhhhhhhh first meeting , :oops: here it is, now for the enjoyable bit
mm