Page 6 of 10
Re: Prrdys Thread, Restoration of a slightly rusty '81 A/C
Posted: 25 May 2013, 20:43
by benlawlor85
Hi,
Well i got the metal. not got around to ordering the snips yet tho. Also have a new Auto darkening welding helmet, some nice colbolt drill bits, a ski mask style mask for grinding, and also the flow meter. Have done a little work but its been so windy! not outdoor welding weather

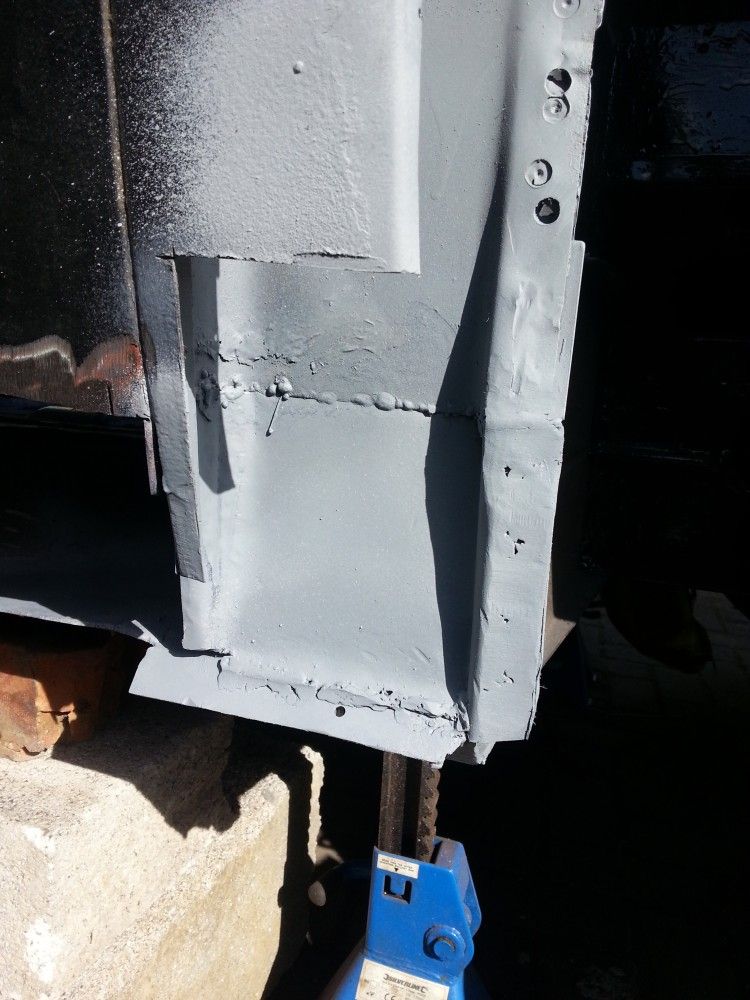
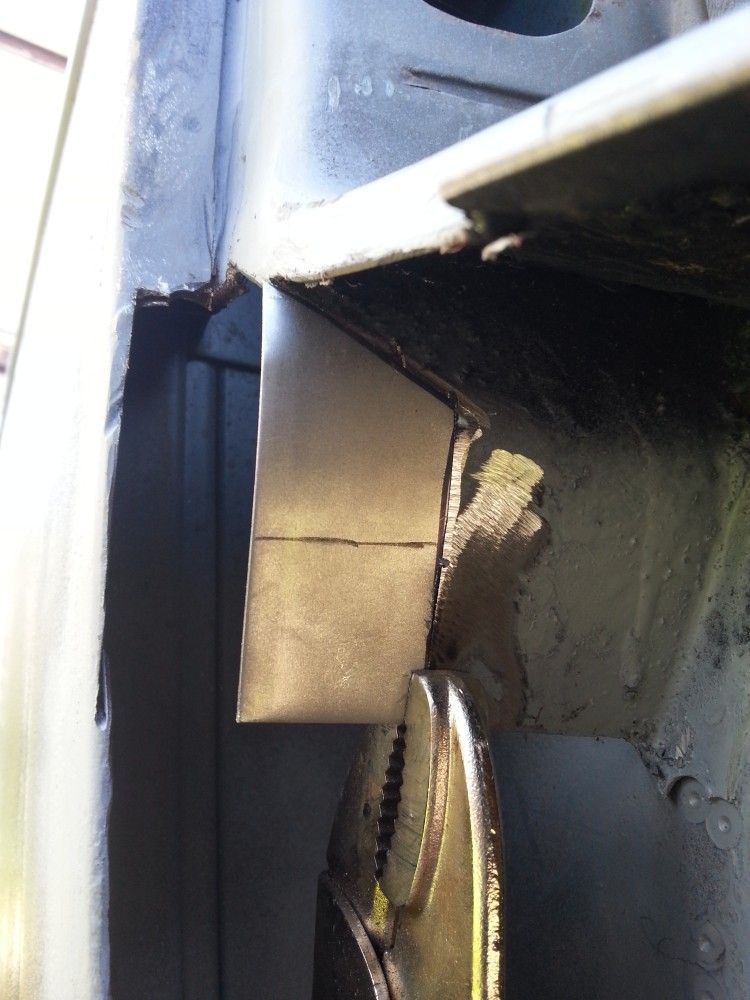
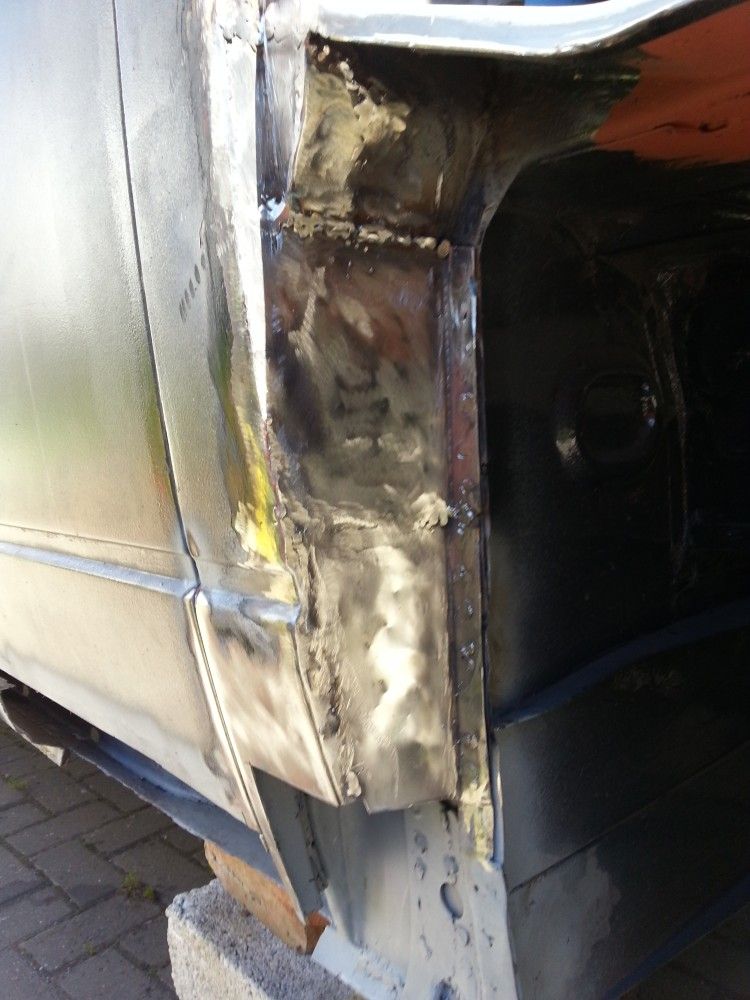
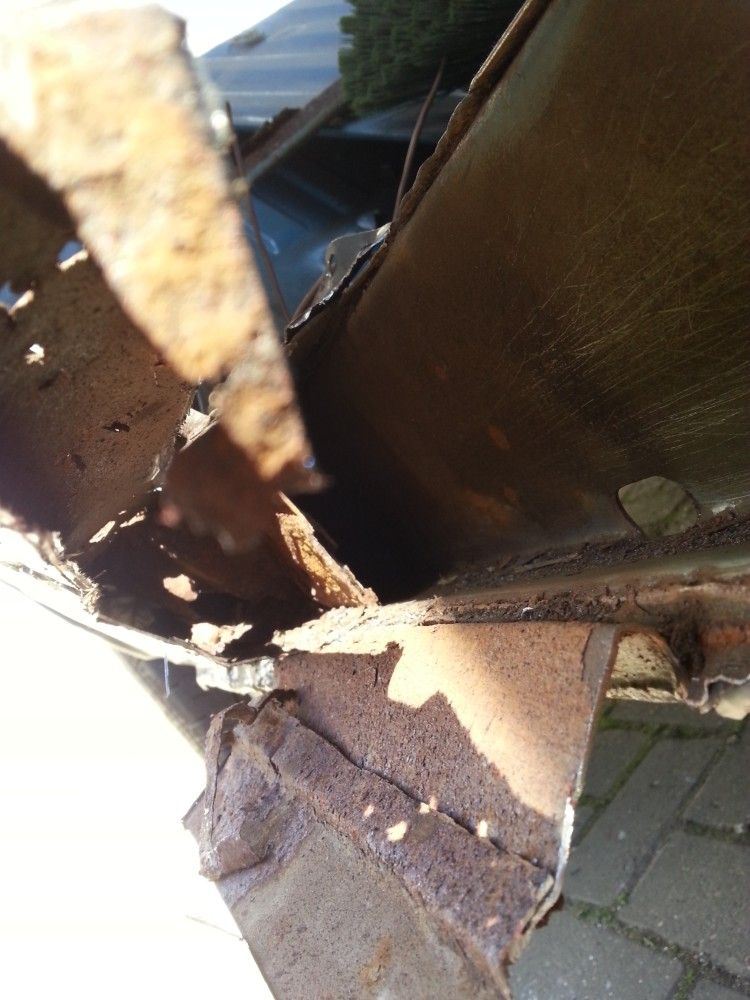
Very bad attempt of the JP strengthener plate. from about 3mm plate
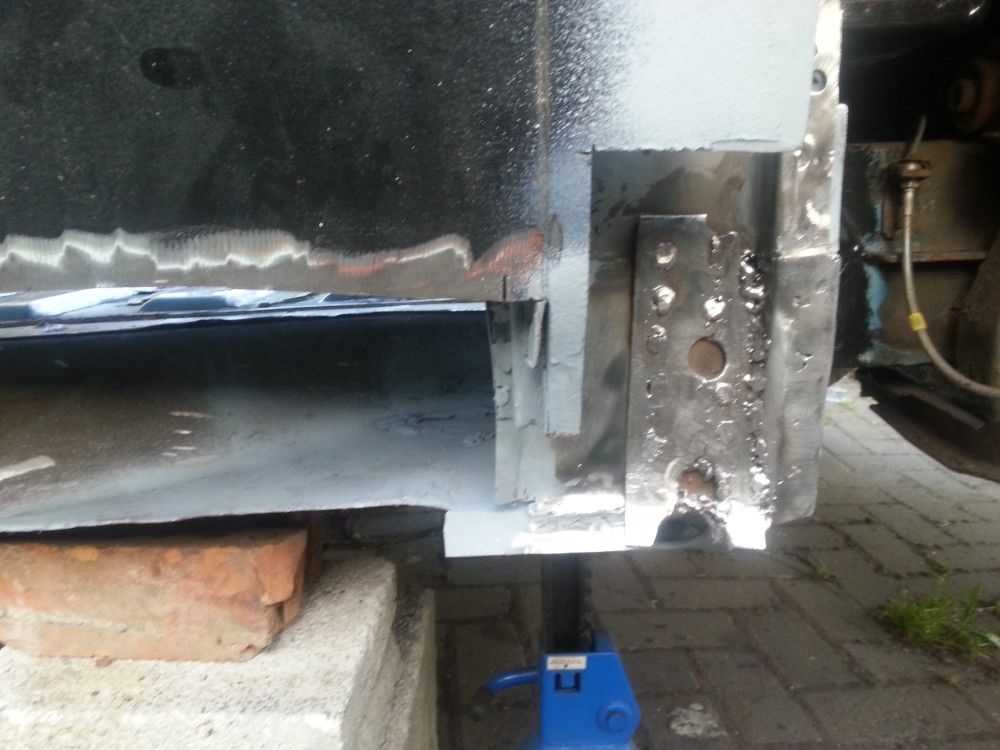
tried to make a patch for this top area but cudnt get the angles right. and generally got really pissed off. im so crap at bending metal etc to make the patches.

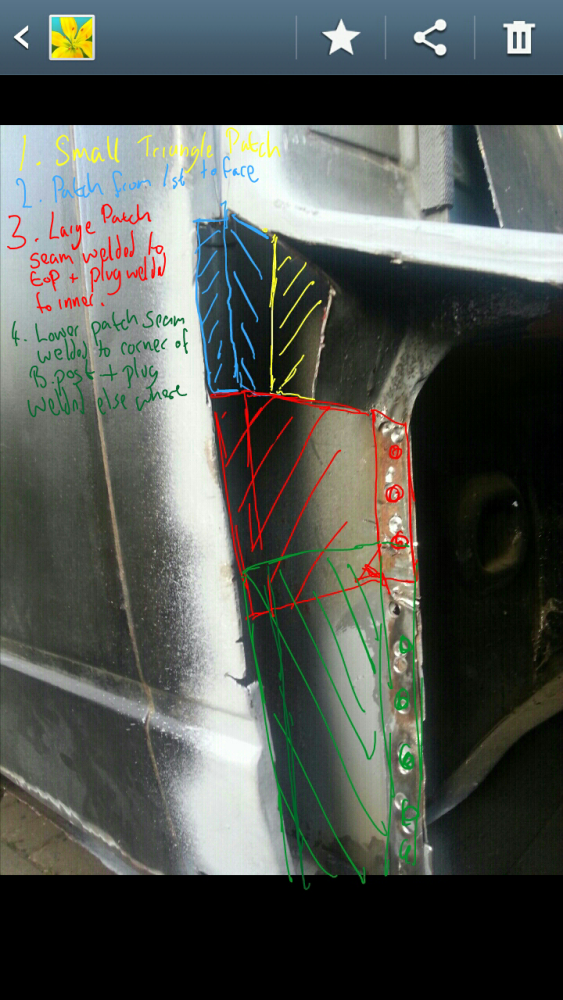
This is my plan tho. Diagram drawn on my phone so excuse quality.
Fingers crossed i can get all that done tomorrow. But i think im almost out of gas. its gone down soo fast but i know it isnt leaking as the ball in the flow meter is at the bottom untill i press the trigger on the MIG gun.
One last thing i was getting a brown dust around my welds today. any idea what that is and why? is it a problem?
Cheers
Ben
Re: Prrdys Thread, Restoration of a slightly rusty '81 A/C
Posted: 25 May 2013, 20:46
by benlawlor85
ah brown stuff is not enough sheilding gas. was using 6lpm today will up that to 8-10lpm tomorrow hope that will help. Am still almost wishing i has a gasless welder as i could weld whatever the weather(wind)
Re: Prrdys Thread, Restoration of a slightly rusty '81 A/C
Posted: 25 May 2013, 21:33
by Plasticman
your doing fine,
the 4 piece bit. you dont have to follow it exactly as it was built, as long as you have metal from the lip of the B post to the vertical seam that is all thgat matters. i enjoy replicating it but you dont have to in this case so do it in the easiest way. ref the jp strengthning bit..oh dear, look ast the original .... it has the sides folded 90', this is what gives it much of its strength. leave that one on and grind it smoothe and make another to fit on top, puddle weld through and finnish it so its just above the B post outer,
Oh as for gas, some torches and migs need different ammount and it also depends on the settings , i use a very small tapered shroud so can weld with about 3lpm on clean stuff . more if its mucky.
outside then general windbreak and secondary one on the job itself
mm
Re: Prrdys Thread, Restoration of a slightly rusty '81 A/C
Posted: 26 May 2013, 08:19
by boatbuilder
You probably know this already, but the easiest way to make patches fit is to make it out of cardboard first (i.e. cereal box cardboad), then fold it out flat and use it as a template to mark your metal.
Re: Prrdys Thread, Restoration of a slightly rusty '81 A/C
Posted: 26 May 2013, 09:15
by benlawlor85
Hi,
thanks for the help guys.
Boatbuilder i always make it out of cardboard first but never seems to fit in the end. i will try again. Im still struggling with just bending anything but a simple fold in the metal. 6" metal working vice with the small anvil behind i what i have for forming.
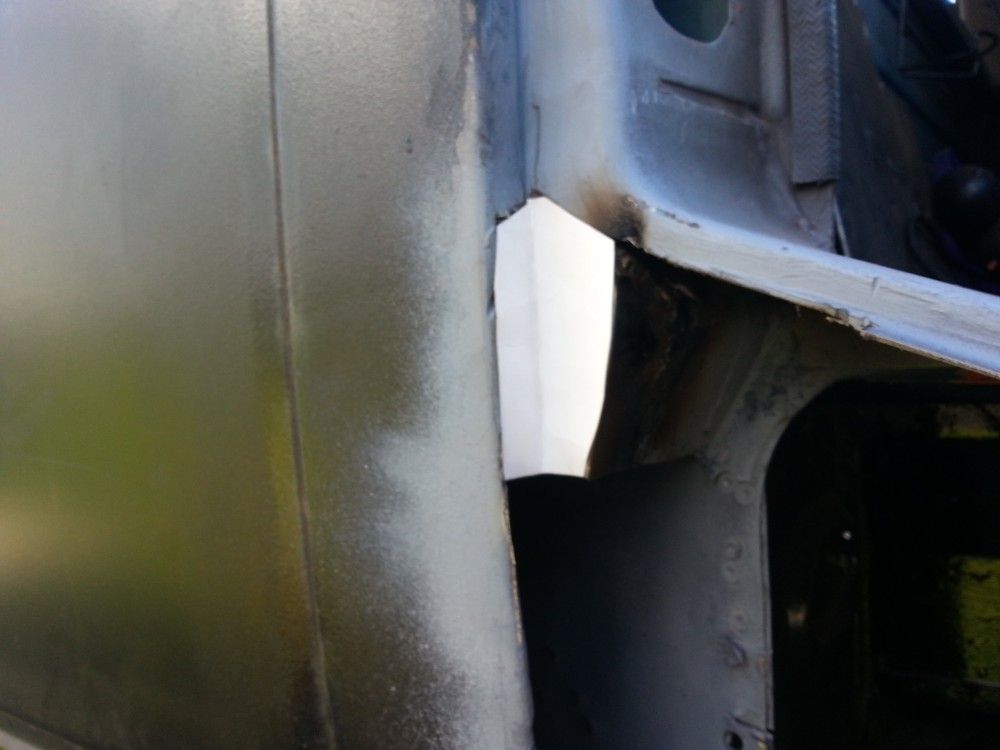
As for the JP i have no more thicker metal left and couldnt get the stuff to bend that i did have. so ill either have to leave it as it is. I dont have an original jack and tend to jack direct from chassis with either bottle or trolley jack, not ideal i know.
First thing today it those couple of small top patches think gas will run out after that anyway.
Will update later.
Ben
Re: Prrdys Thread, Restoration of a slightly rusty '81 A/C
Posted: 26 May 2013, 09:49
by Plasticman
hey a 6"vice is fine and get a couple of bits of angle and you can make mosy things.
you can cut some 2-3mm plate with a disc and stick it in the vice and t.w.a.* the end over with a hammer, instant folds
mm
Re: Prrdys Thread, Restoration of a slightly rusty '81 A/C
Posted: 26 May 2013, 12:42
by benlawlor85
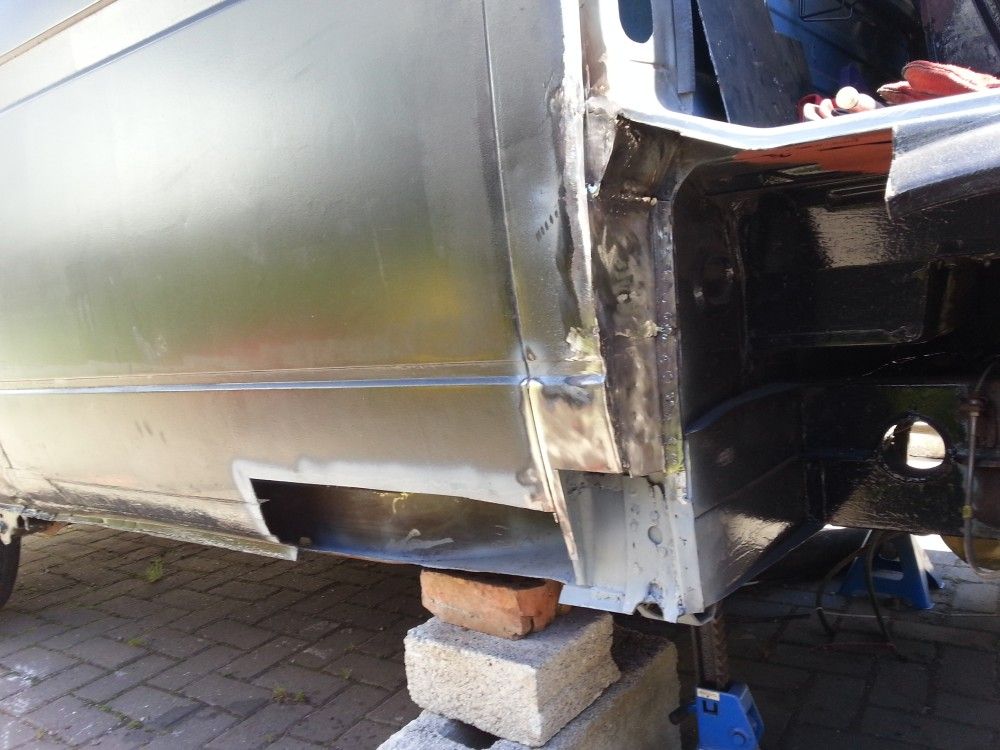
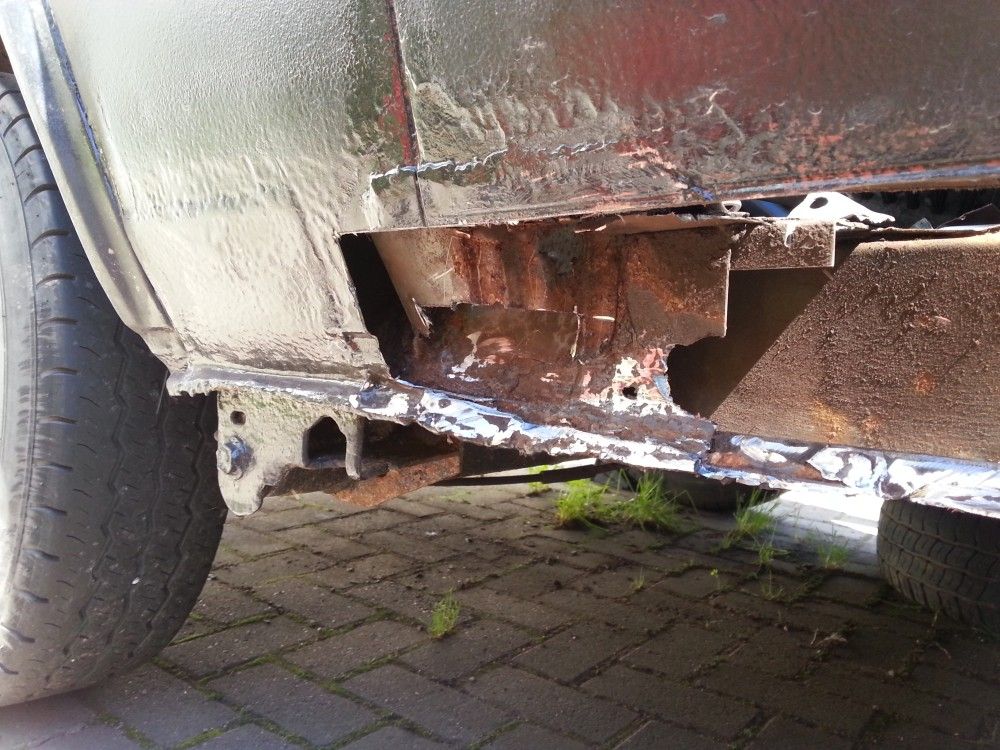
well today is going better have the top three patches from my diagram done. finally found a setting on the welder than works really nice. HIGH 1 and feed about 7 and i can stitch weld and plug weld easily. only occasionally blow through. not sure about the JP still mm part of me thinks ignore it, as i need the van off the drive park of me says do it right. one more patch today i think then that just leaves the lower b post so i can still access the JP strengthener. Will post pics later as always. Still abit brown around welds today but they seem ncie and strong.
Re: Prrdys Thread, Restoration of a slightly rusty '81 A/C
Posted: 26 May 2013, 16:06
by benlawlor85
Re: Prrdys Thread, Restoration of a slightly rusty '81 A/C
Posted: 26 May 2013, 16:50
by Plasticman
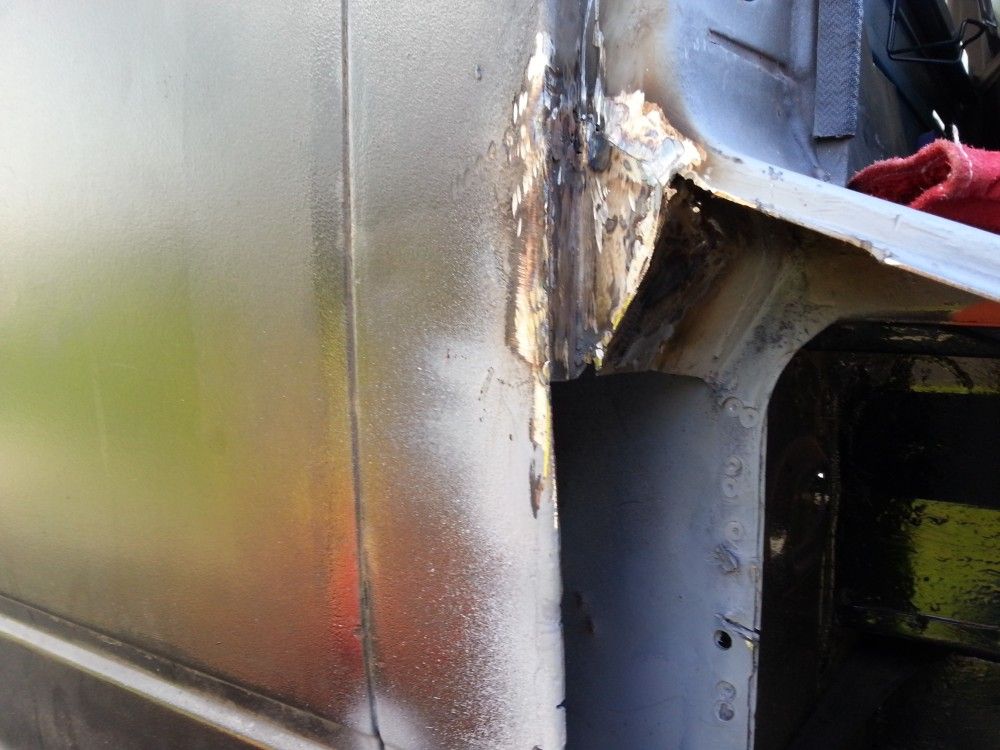
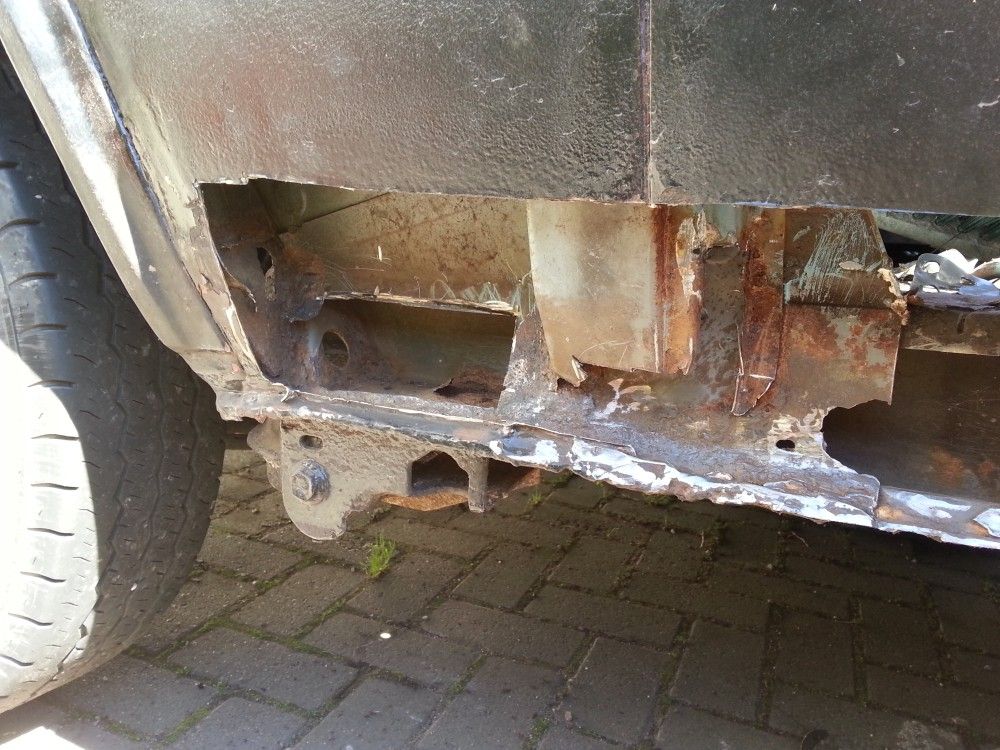
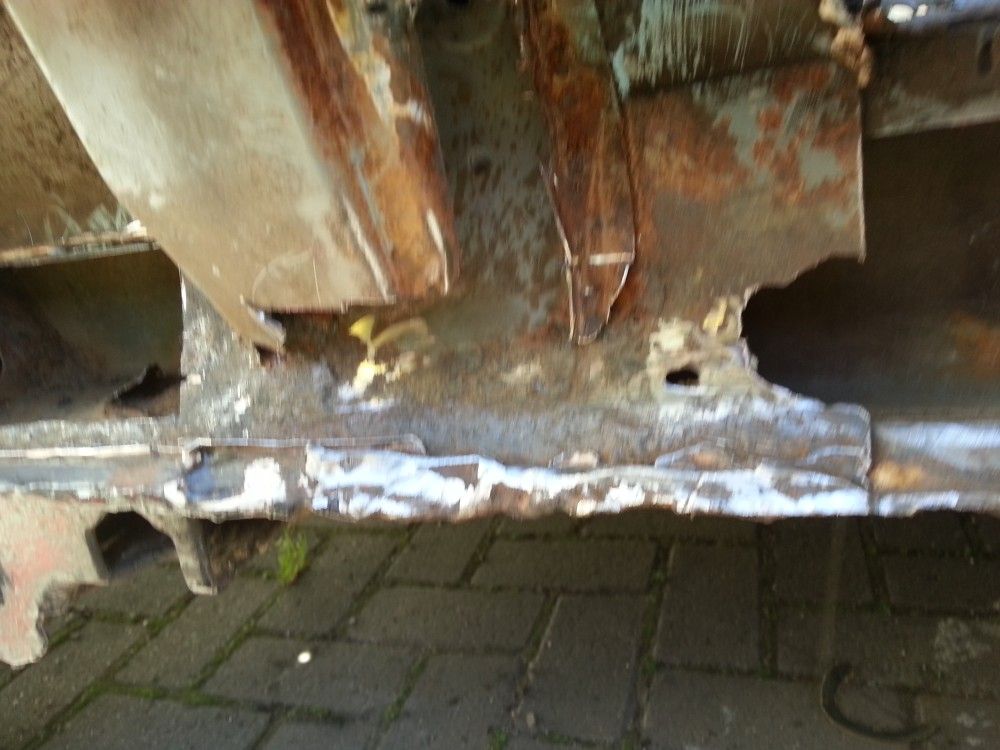
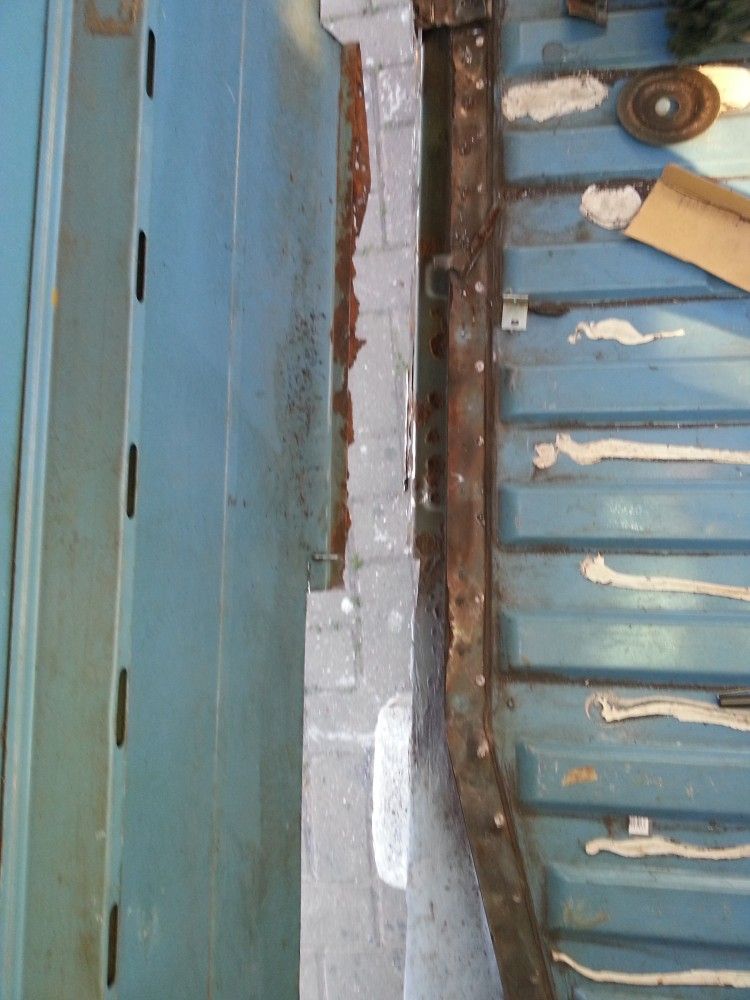
now youve chopped the sill of . good work... what is the floor like inside
mm
Re: Prrdys Thread, Restoration of a slightly rusty '81 A/C
Posted: 26 May 2013, 17:24
by benlawlor85
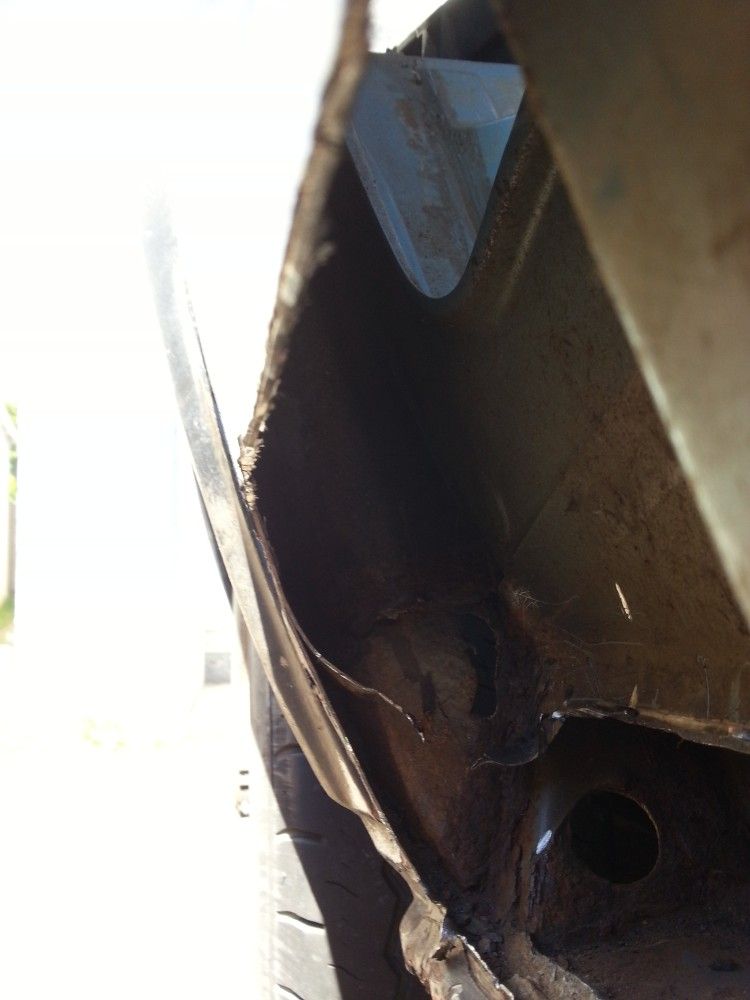
Floor is fine I removed the rotten closure plate last week.
Re: Prrdys Thread, Restoration of a slightly rusty '81 A/C
Posted: 26 May 2013, 17:33
by Plasticman
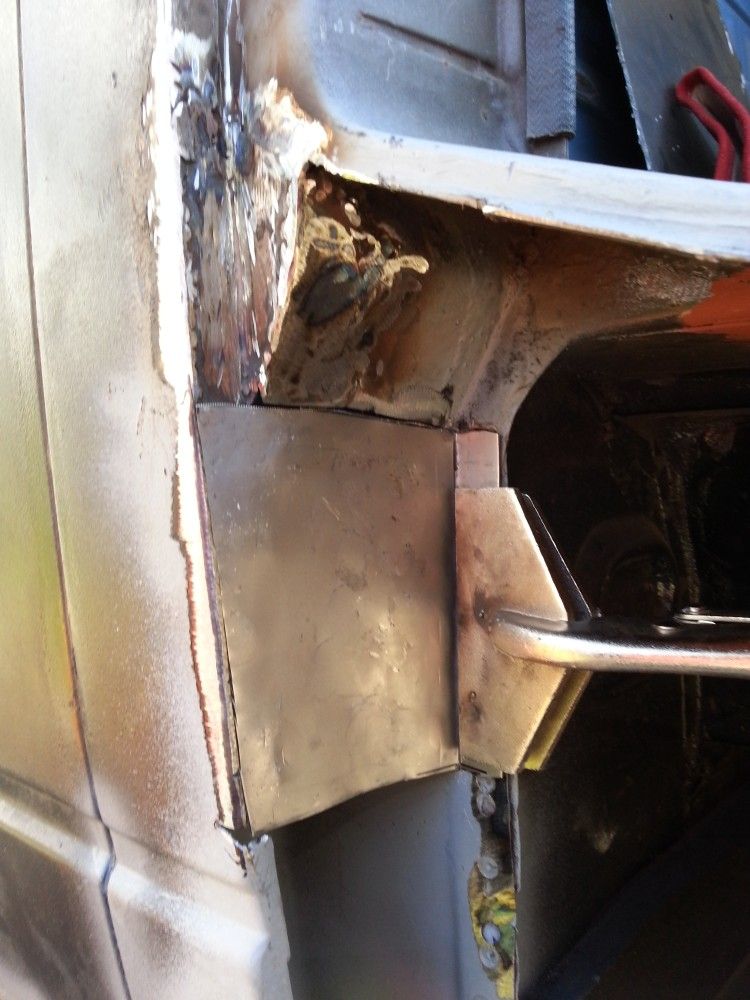
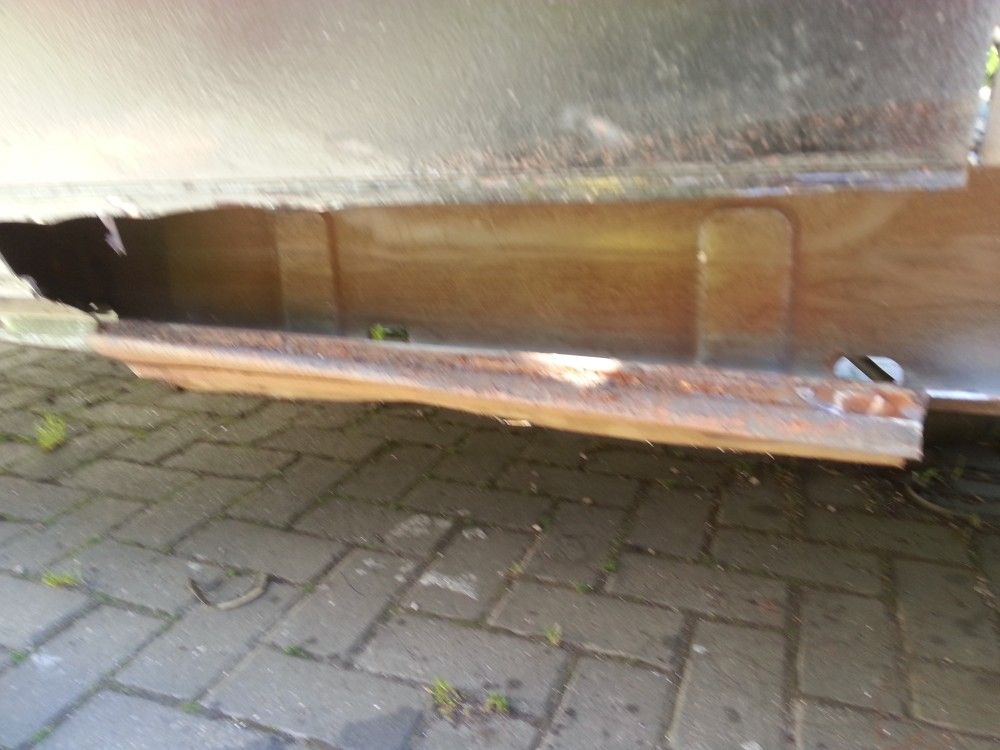
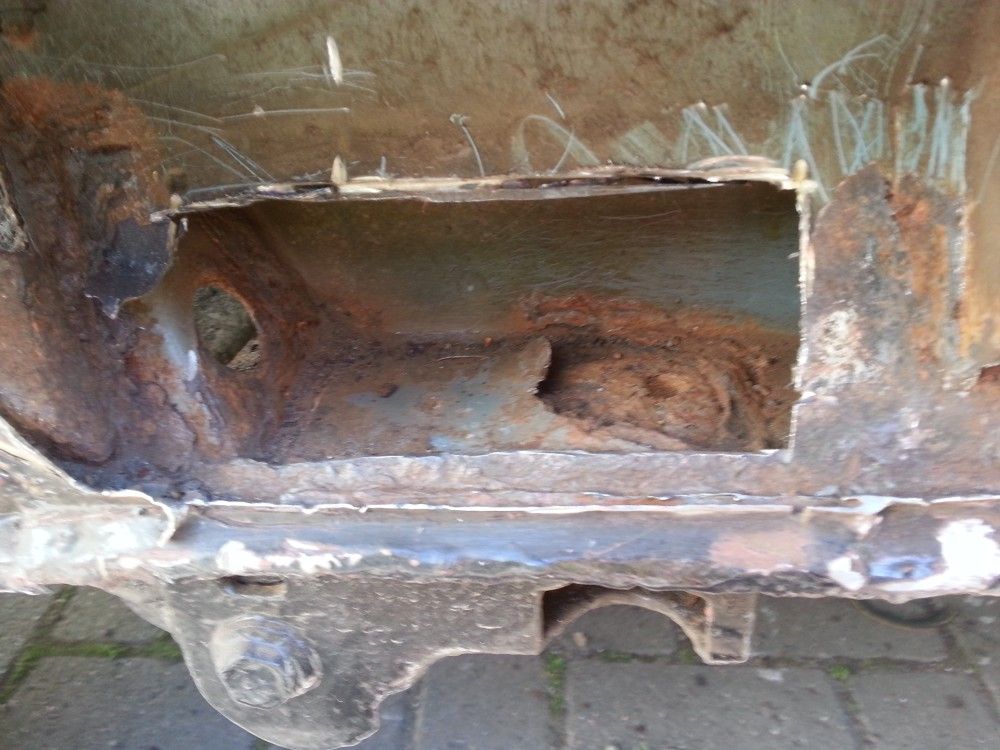
ok ,do a picky of thearea from above inside
mm
Re: Prrdys Thread, Restoration of a slightly rusty '81 A/C
Posted: 26 May 2013, 17:45
by benlawlor85
Ok have one on comp. Will upload when I get home I think I have some of the seam left from the above panel. So I was thinking lower sill panel. Plus some pieces seam welded to the main panel. But ill let u decide u are the expert. If I can achieve 10% of what u do it will be great and still loads better than all the bodges done previously.
Cheers
Ben - currently in the star inn, crowlas. having a beer
Re: Prrdys Thread, Restoration of a slightly rusty '81 A/C
Posted: 26 May 2013, 17:48
by Plasticman
hah,me on the job and enjoying a large jd asnd ice

mm
Re: Prrdys Thread, Restoration of a slightly rusty '81 A/C
Posted: 26 May 2013, 19:23
by benlawlor85
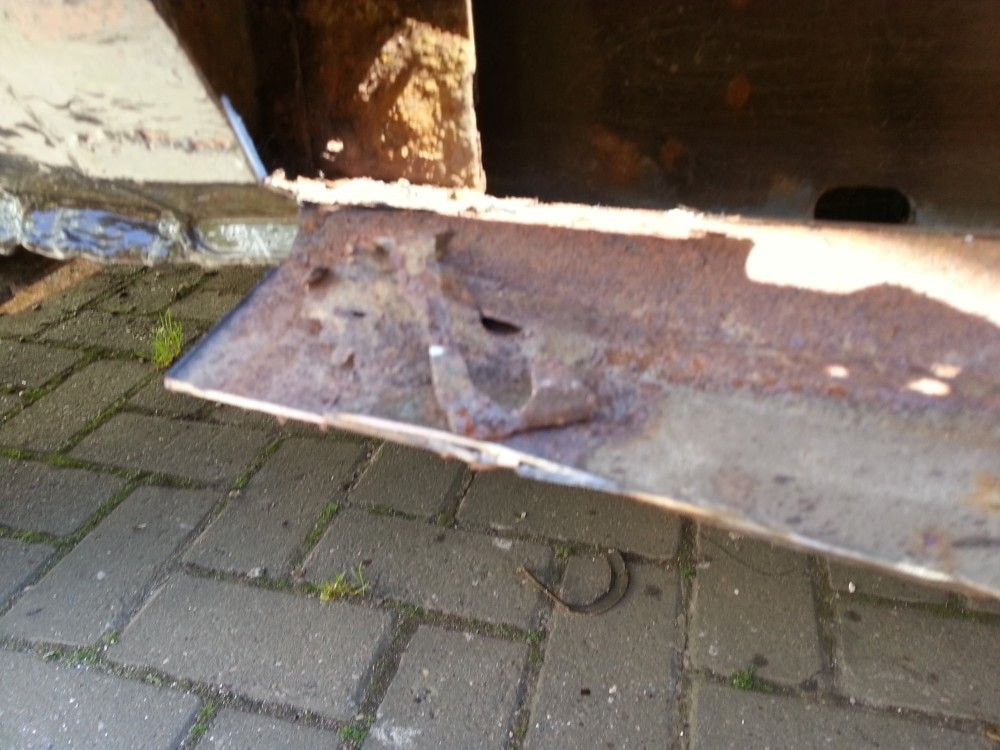
The inside.
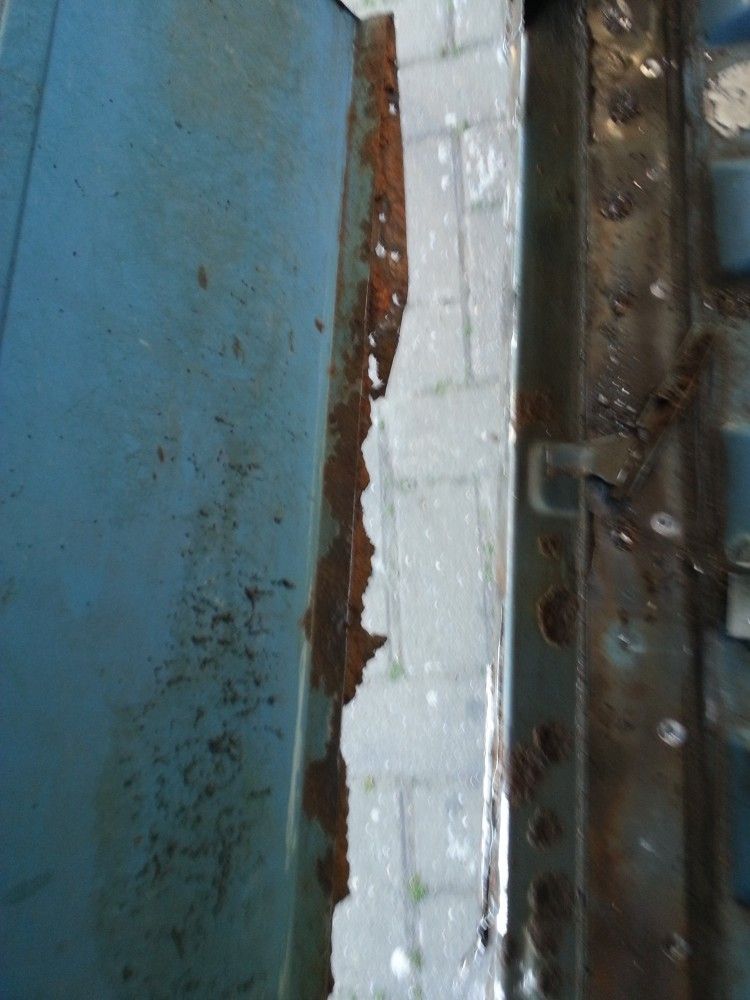
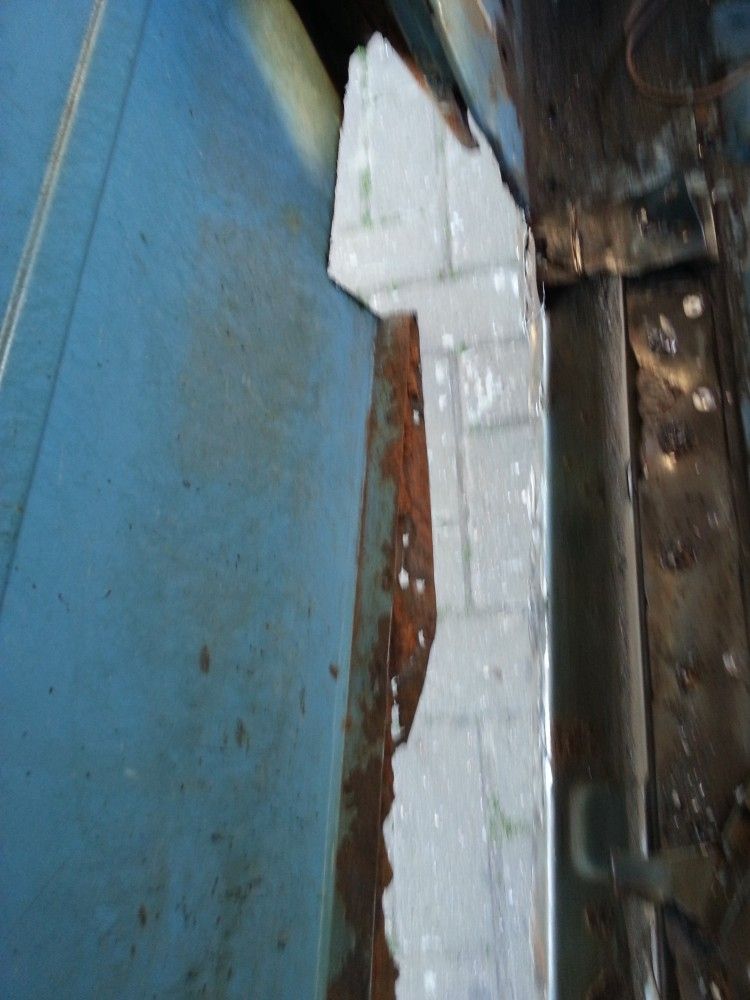
I think there is some seam left enough to not have to cut more of the upper panel away....??
Ben - now at home after loking forward to some wine! haha
Re: Prrdys Thread, Restoration of a slightly rusty '81 A/C
Posted: 26 May 2013, 21:13
by Plasticman
ah.. the lower fridge panels i make i do to fit up to the 1st swage and yours has gone past that,
so you will have to suffer the taller over panel

mm