Page 5 of 8
Re: Gunther's Body Makeover Commences
Posted: 05 Jun 2012, 13:21
by Plasticman
As expected then, me thinks you need to use a cut front as its easier neater and quicker , plus the job will be right ..you going to do away with the front and rear seals? i would never refit a roof using them ..
mm
Re: Gunther's Body Makeover Commences
Posted: 05 Jun 2012, 21:02
by mm289
So, time to decapitate Gunther

, quick call to the local chapter of the Syncronauts and up pop the rent a muscle.
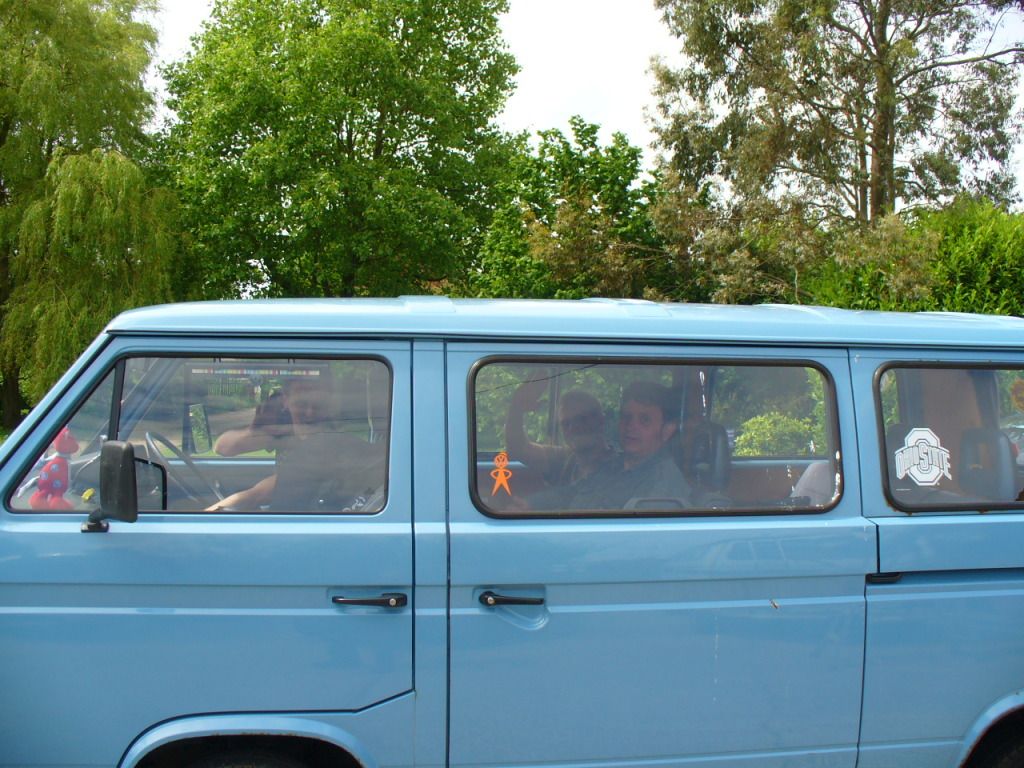
Few minutes later and I have a chop top! Thanks Jes, Ash & Nick, much appreciated

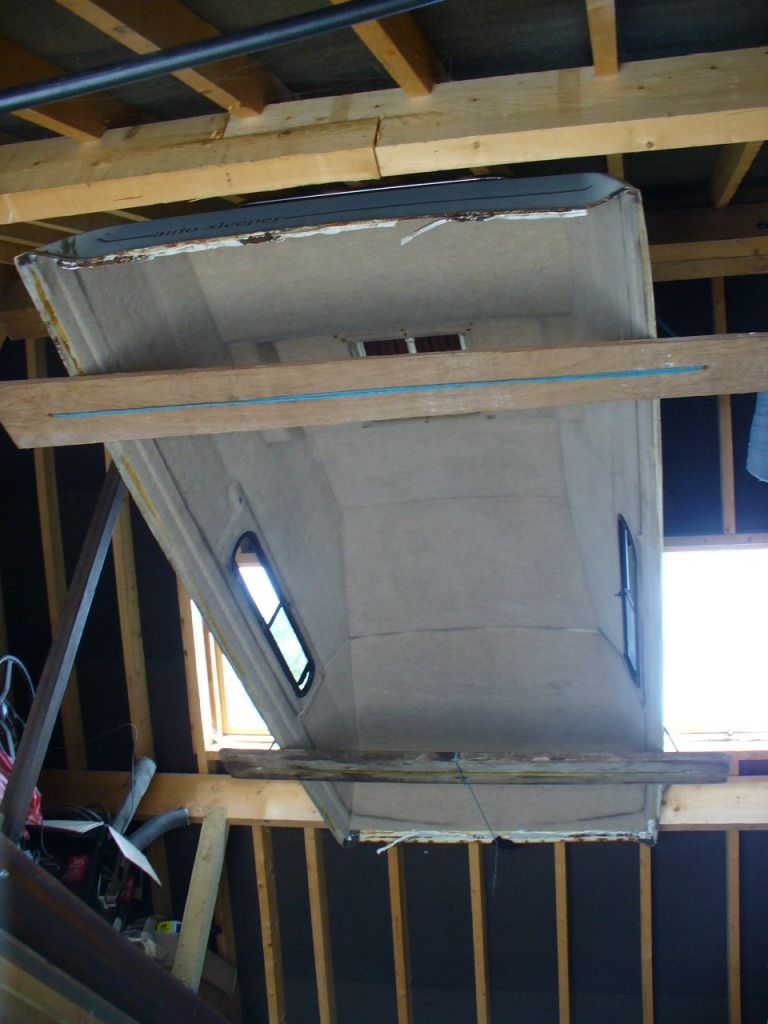
Roof now safely stashed in the workshop, now that what I call a High Top!
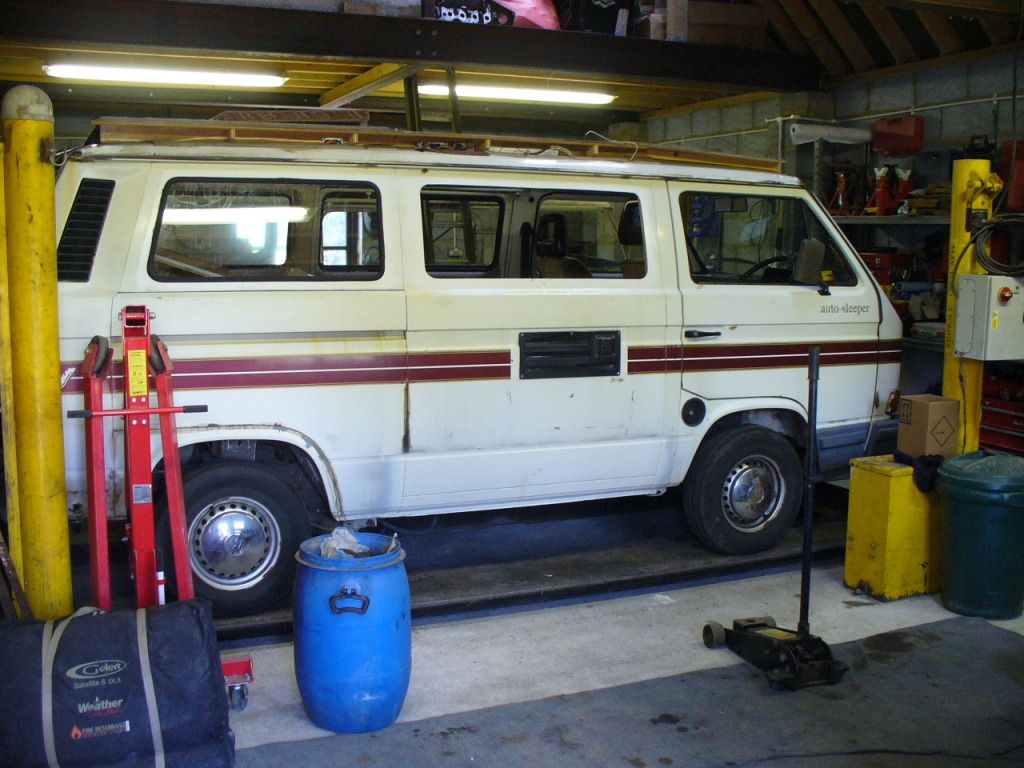
And Gunther is now happy in his new home.
Cheers,
MM
Re: Gunther's Body Makeover Commences
Posted: 05 Jun 2012, 21:24
by mm289
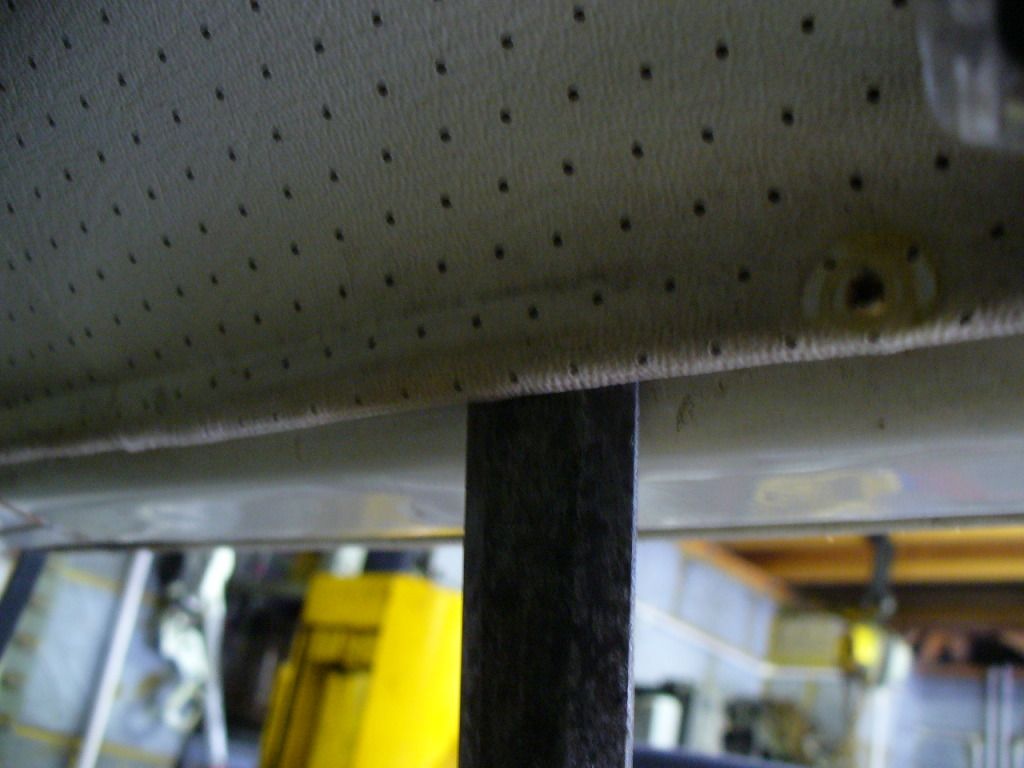
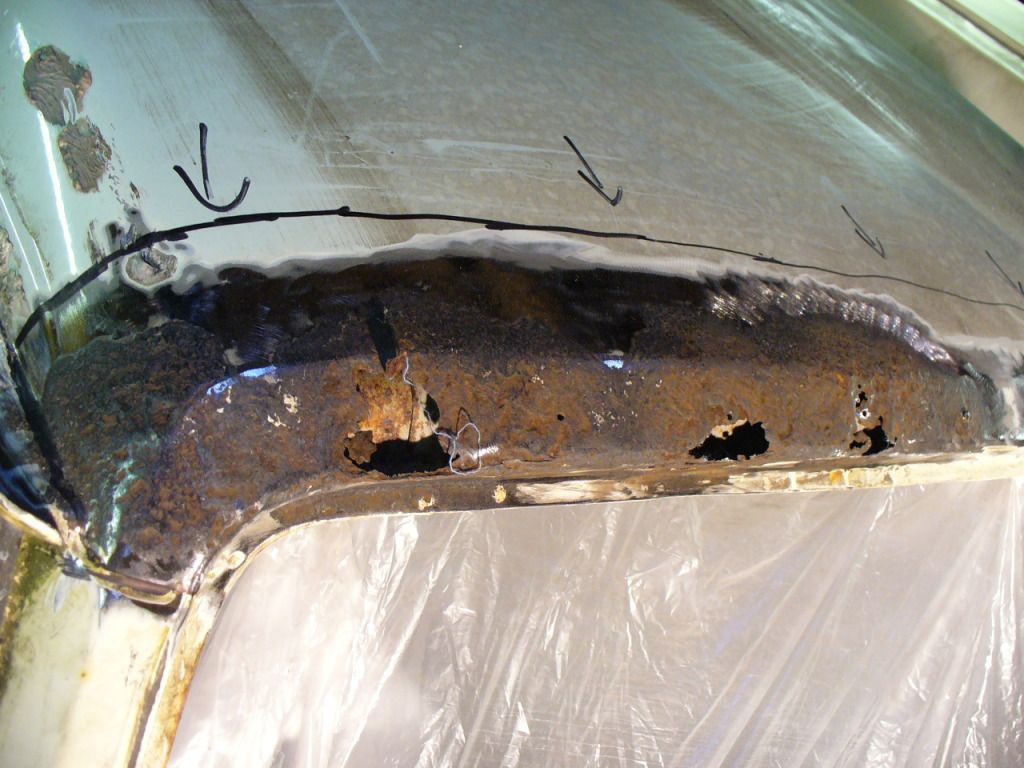
Now to proceed with investigating the rot.
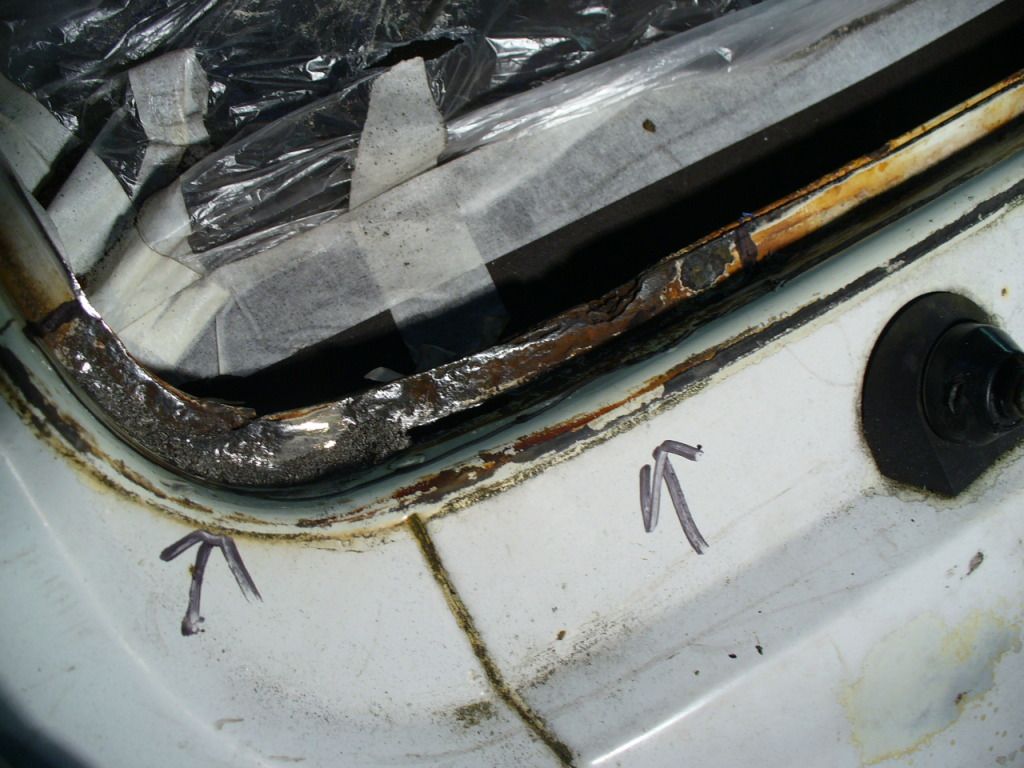
In case your interested as well as the big blobs of sealant on the corners, there is also a thick bead on the front and rear like this.
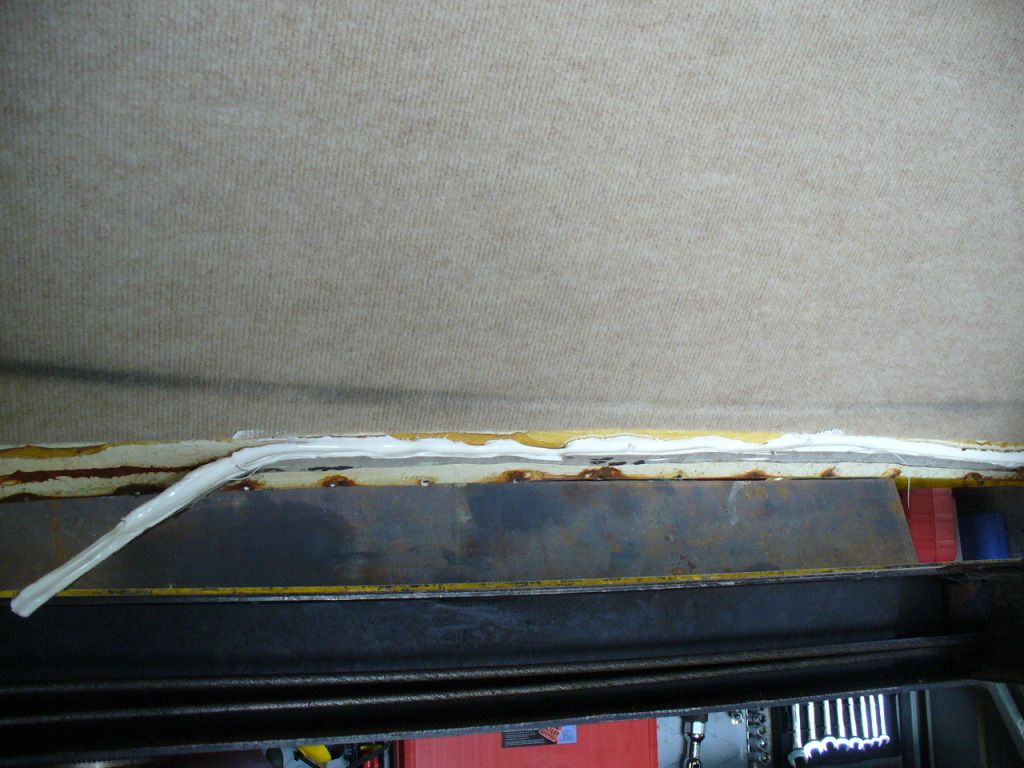
There is a thin bead on the side of the tin/van but as mentioned previously these were only still sealed on about 40% of the rim.
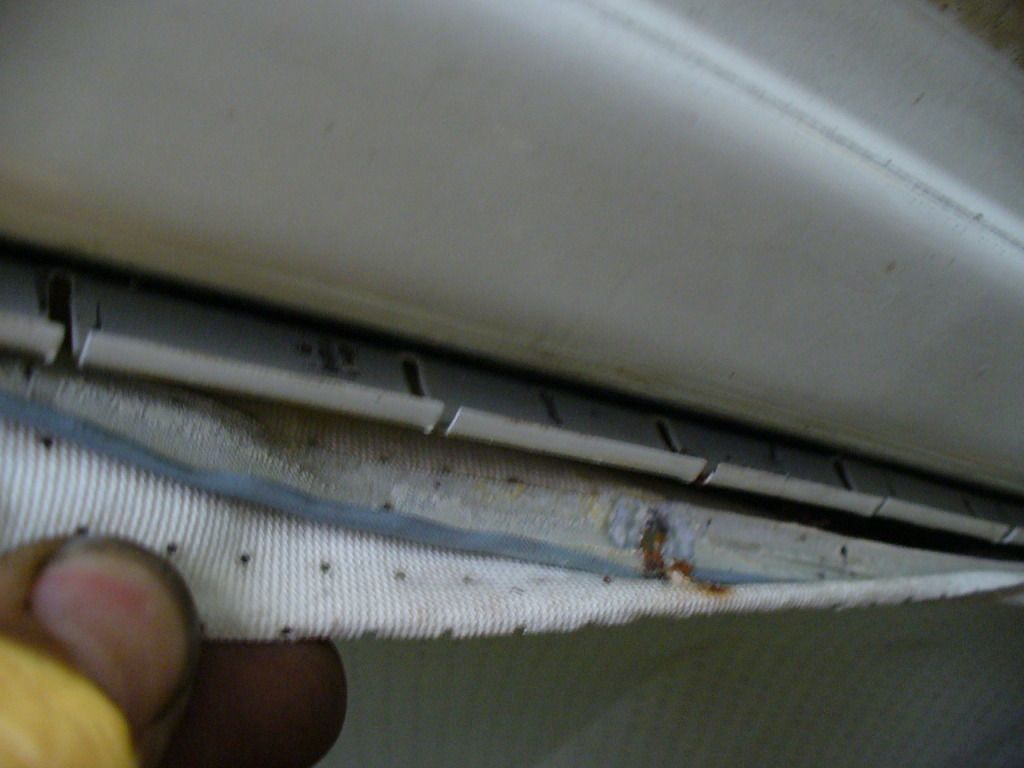
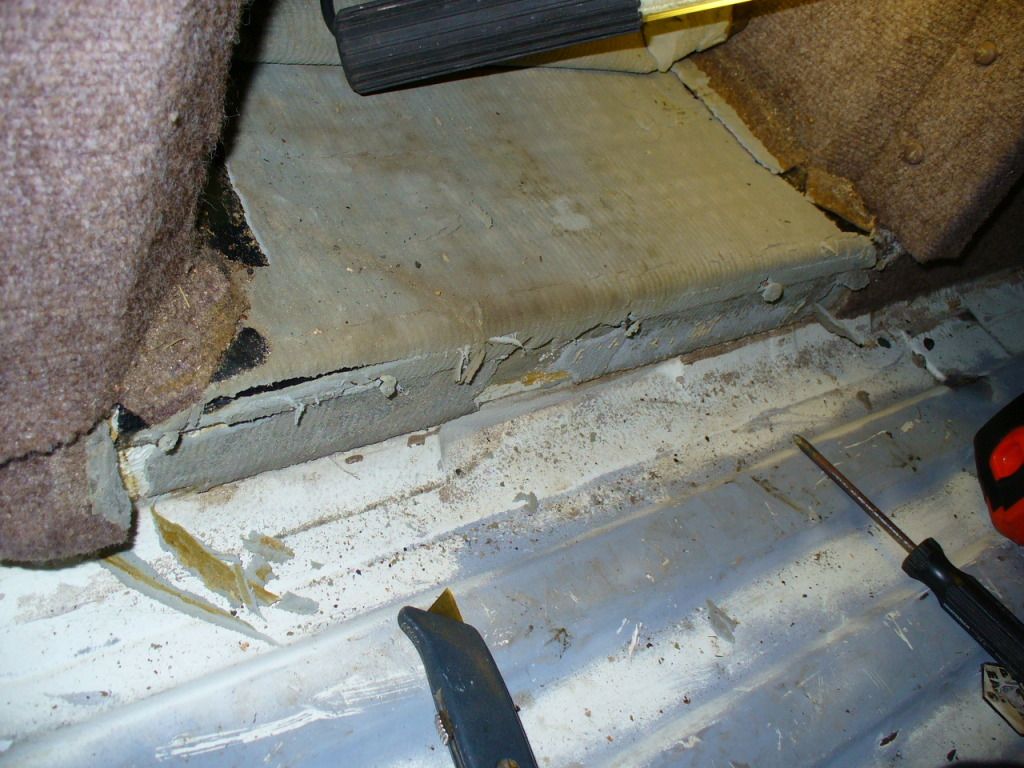
I didn't take the front cupboard base off to lift the roof but did this once in the workshop. Was kinda glad really cause it was a bit of a mare! For future reference the front of the cupboard base isn't screwed down. The back is by two short screws at either side holding the ply to the brace underneath (finding these in the carpet is really difficult.)
The board still wouldn't lift and it turns out the board is actually in 2 bits and is screwed down at each edge UNDER the carpet

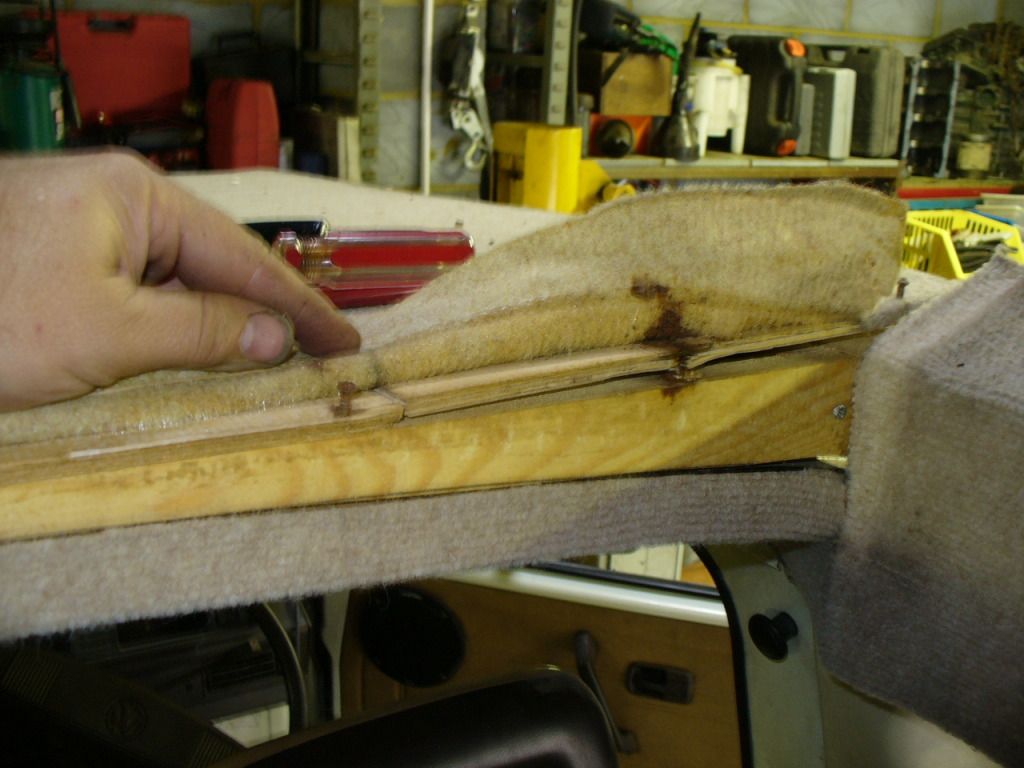
So, now you think it should be ready to lift the base? Nope, there are 3 screws going down through the B pillar cross brace and a further two screws coming up through this - these can't be seen until the carpet is removed.
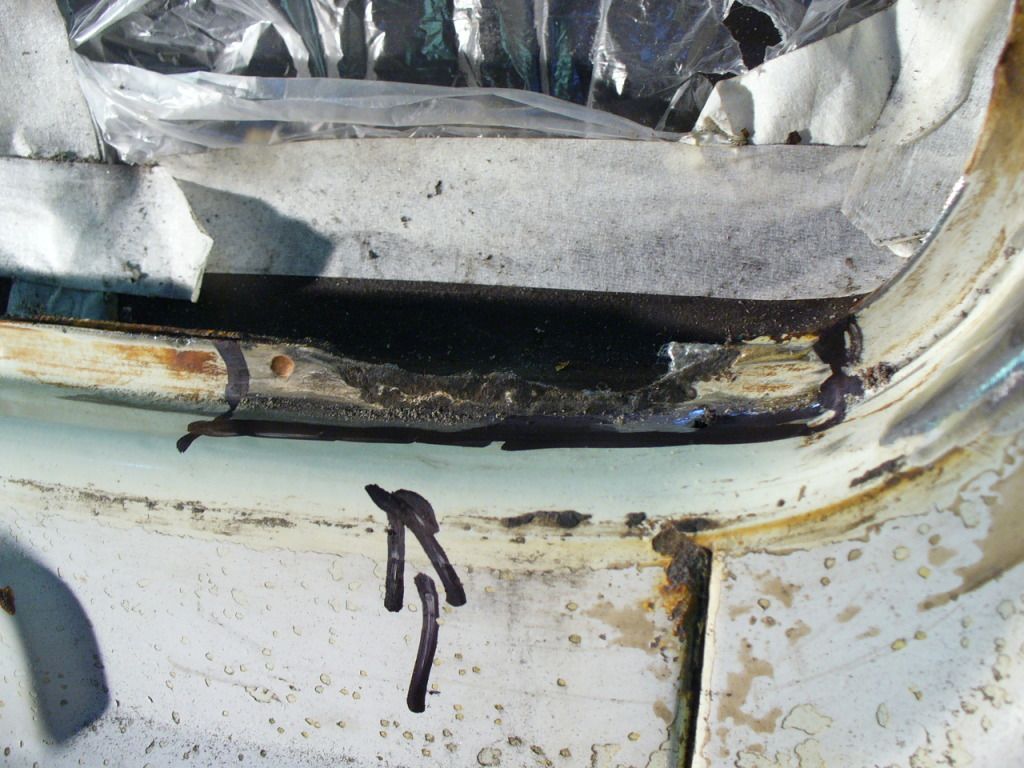
And finally you can remove the cupboard base! And find that where the drinks cabinet has been screwed in the screws were too long and have damaged the cab roof - and then rusted

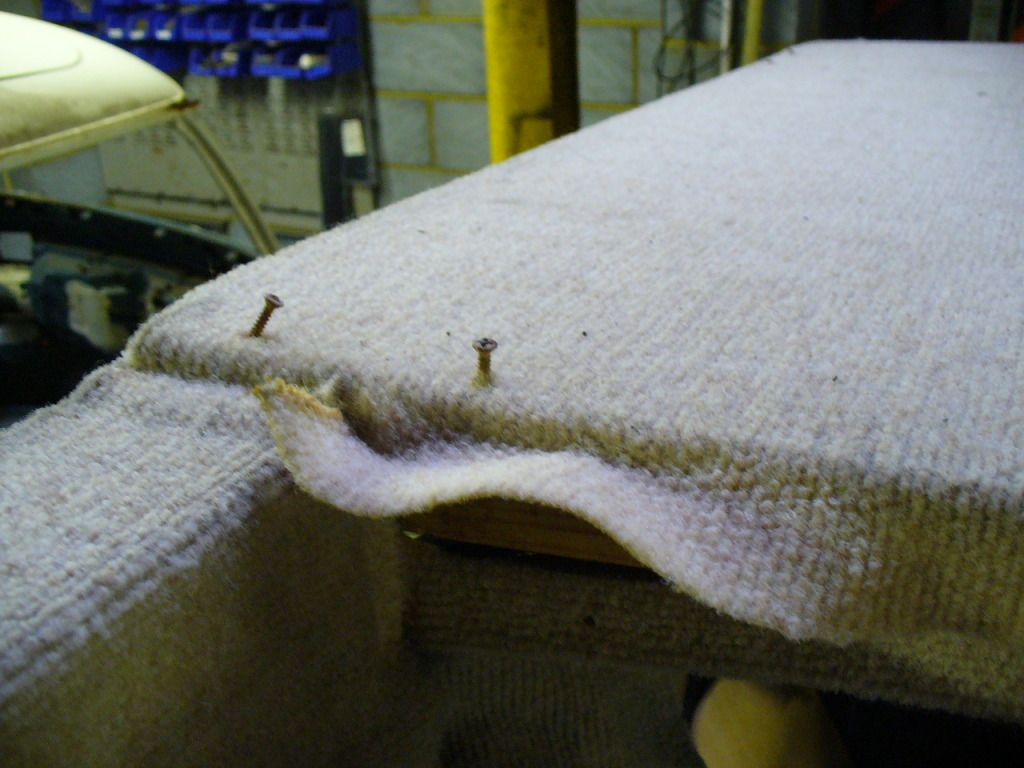
I also dropped the headlining, pretty straight forward... the headlining is held in place by being wrapped over a series of clips down each side of the van. Bend these clips out,
then you can gently peel back the headlining,
This reveals the rods that hold the lining up - easy enough to pop out
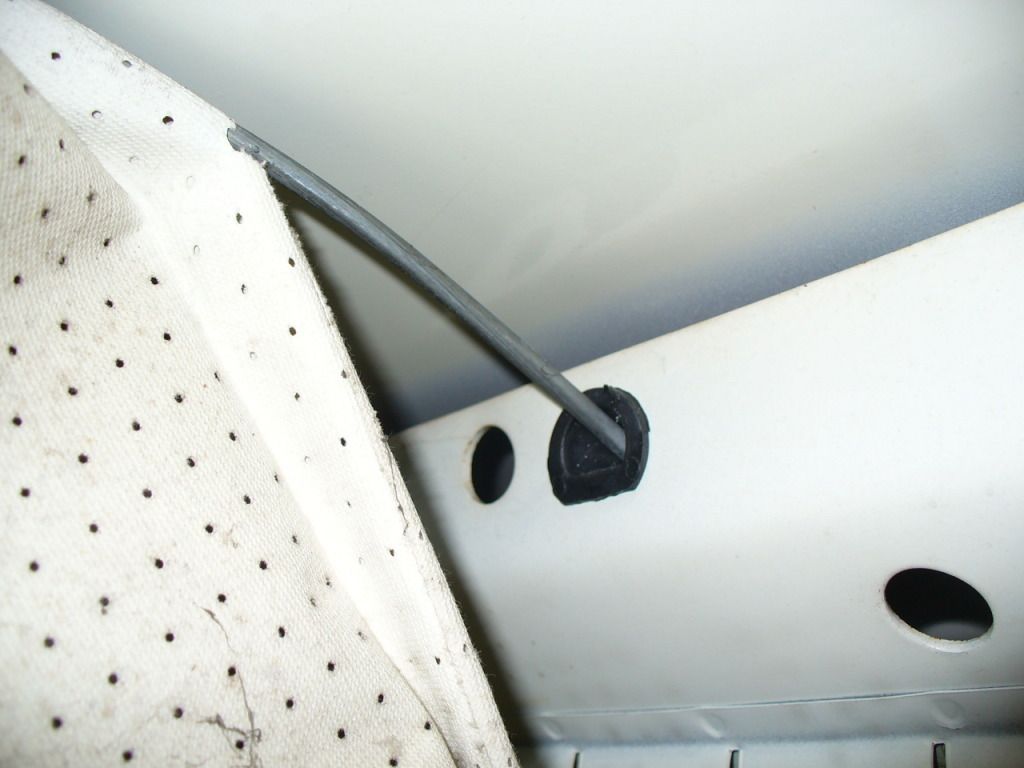
And then the headlining is also tucked under the windscreen seal at the front.
Next, we'll look at he rust - fun eh?
MM
Re: Gunther's Body Makeover Commences
Posted: 05 Jun 2012, 21:35
by mm289
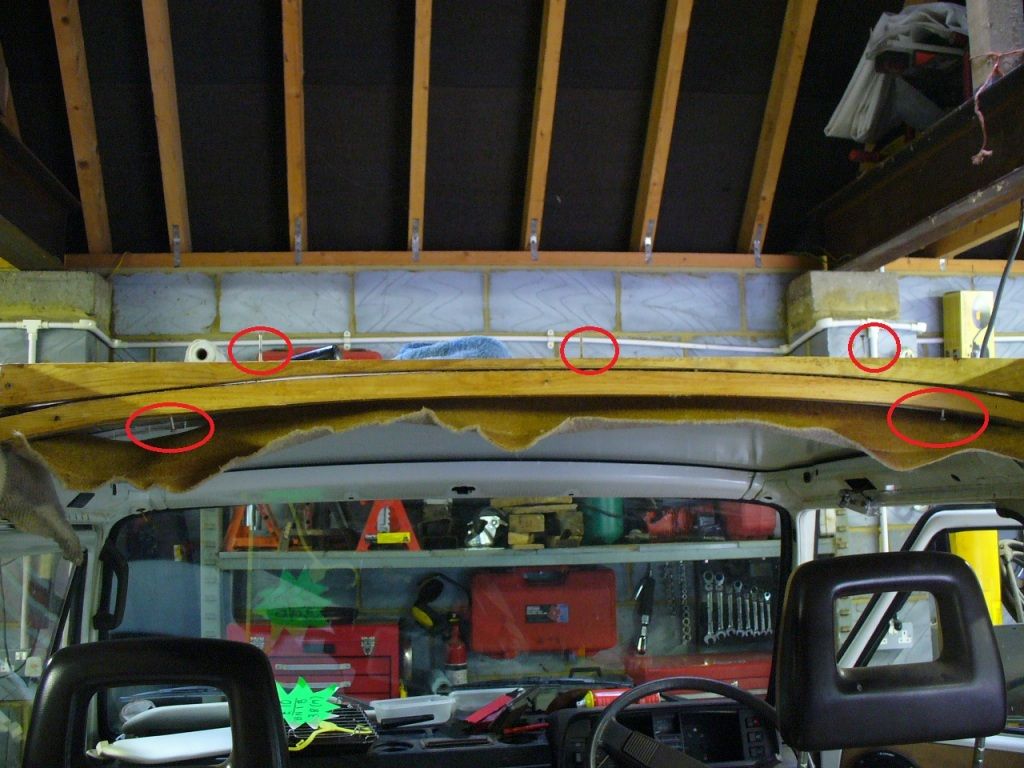
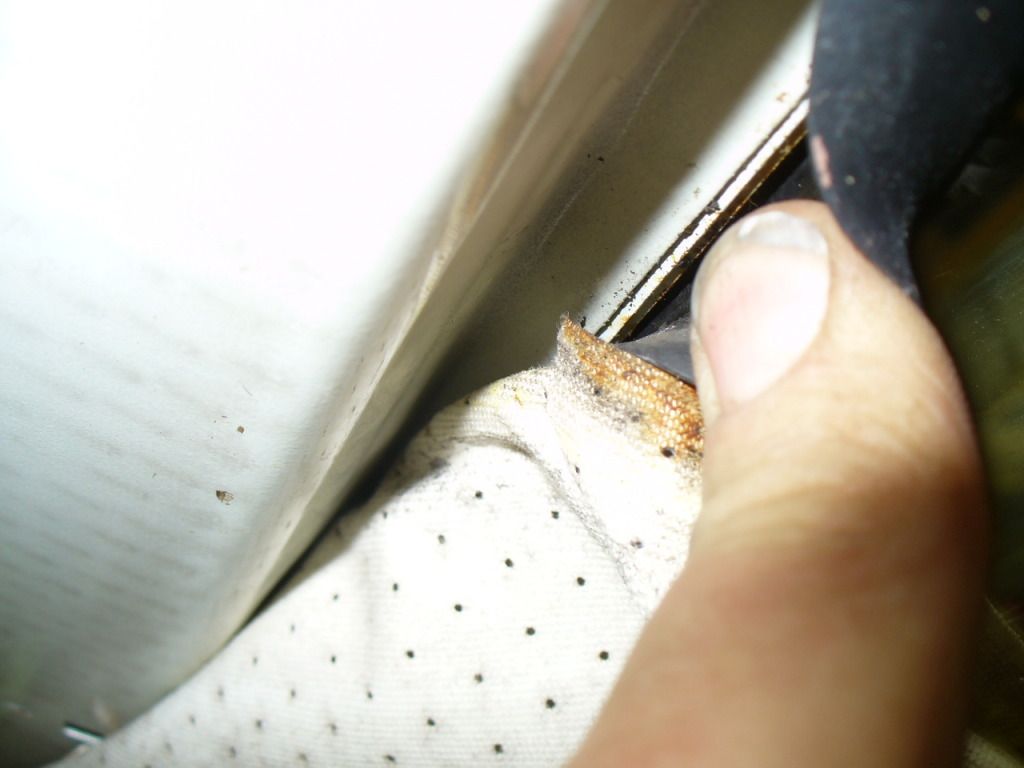
Popped out the windscreen and sealed off the inside to stop all the cr*p smothering the seats etc then attacked the roof with the grinder and this is what we are left with.
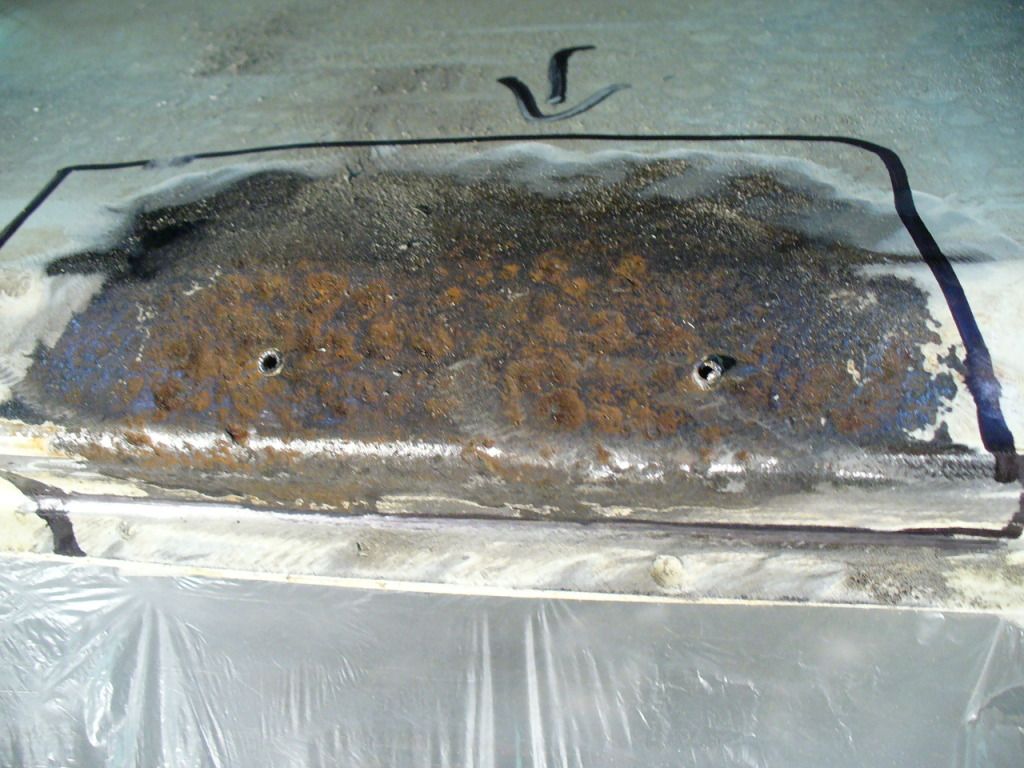
Also a couple of bits of the lower lip are gone but not as badly.
So choice is between a roof cut or letting in new pieces. Also how far back to cut.....where I have marked is roughly where the back of the windscreen brace is, if I cut here I won't be able to get to the inside of the panel to check the weld/dress - if I cut further back access is easier.
So off to re-read Mick's work on the Revagon as the repair is pretty similar - got any more roof cuts tucked away Mick?

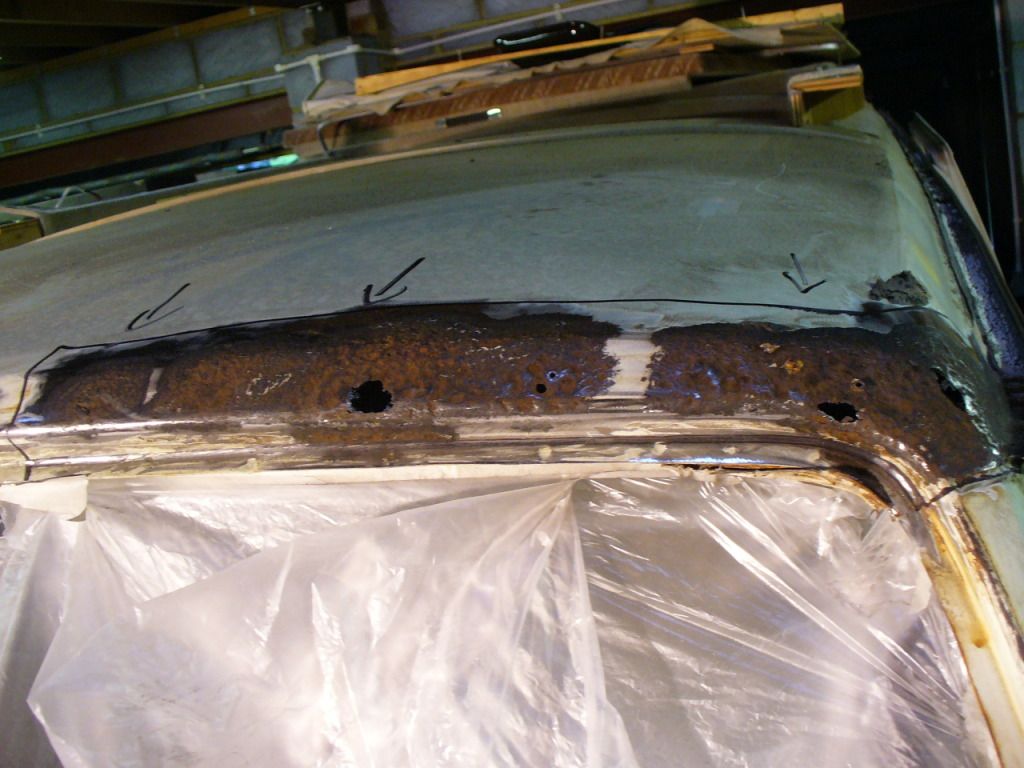
The rust has spread really badly, so anyone that has an Autosleeper or is thinking of buying one I would check this area really carefully!
Cheers,
MM
Re: Gunther's Body Makeover Commences
Posted: 05 Jun 2012, 22:08
by boatbuilder
Rust looks pretty extensive at the front there...if you hit it with a grit blaster, there wouldn't be much left.... so I'd opt for a roof cut...
I didn't have rent-a-muscle when I removed my pop top... did it on my own with ratchet straps!

Re: Gunther's Body Makeover Commences
Posted: 05 Jun 2012, 22:43
by mm289
boatbuilder wrote:Rust looks pretty extensive at the front there...if you hit it with a grit blaster, there wouldn't be much left.... so I'd opt for a roof cut...
I didn't have rent-a-muscle when I removed my pop top... did it on my own with ratchet straps!
Yep, just re-read the Revagon thread and its an almost identical thread so I need to go looking for a roof cut!
I couldn't do ratchet straps as it wouldn't fit in me workshop with the roof on so it had to come off outside! It is now winched up into the roof void in the workshop though, just have to remeber not to re-fit it BEFORE taking the van out or else I will have to knowck down the workshop
LOL
MM
Re: Gunther's Body Makeover Commences
Posted: 06 Jun 2012, 21:28
by mm289
So, tonight was about stripping out the cab area ready to start doing the tin work.
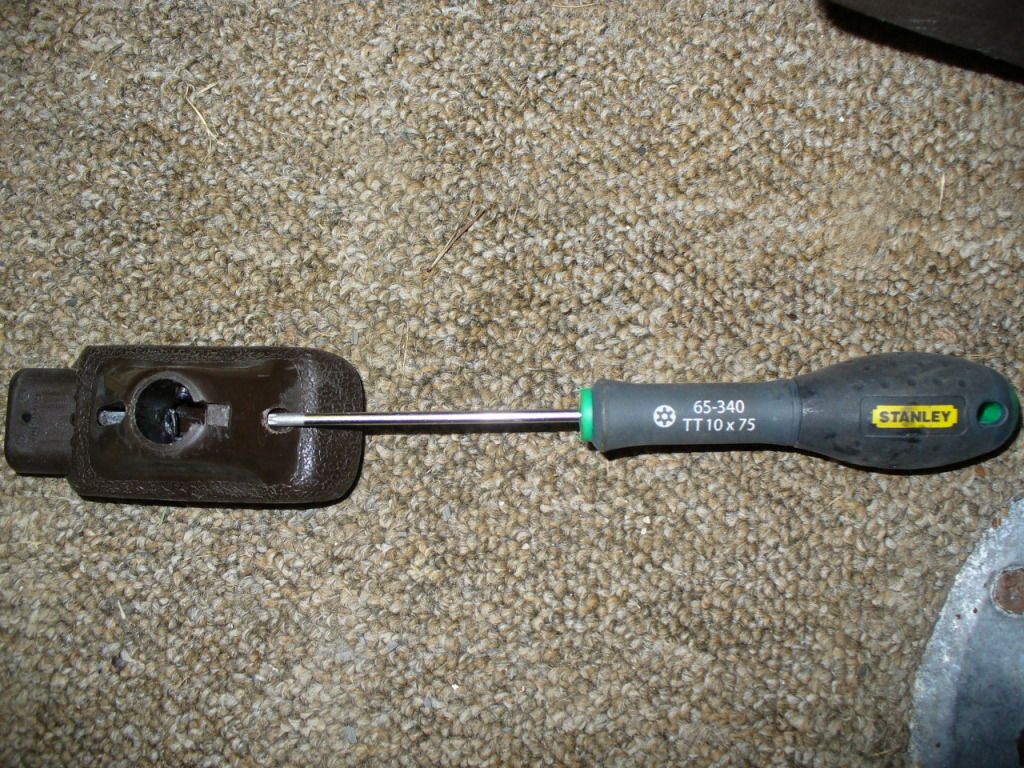
Seats out and then lifted the carpet and rubber mat. To get the auto shift surround off you have to remove the selector "t" bar. There is a grub screw in the side which after trying every tool in the box eventually found it is a Torx
Also worth noting is that the rubber mat is secured by a screwed down strip at the rear of the cab section between the seats.
Dash is then dropped, only challenge was getting the security nuts of the steering column, eventually moved them by chiselling them round.
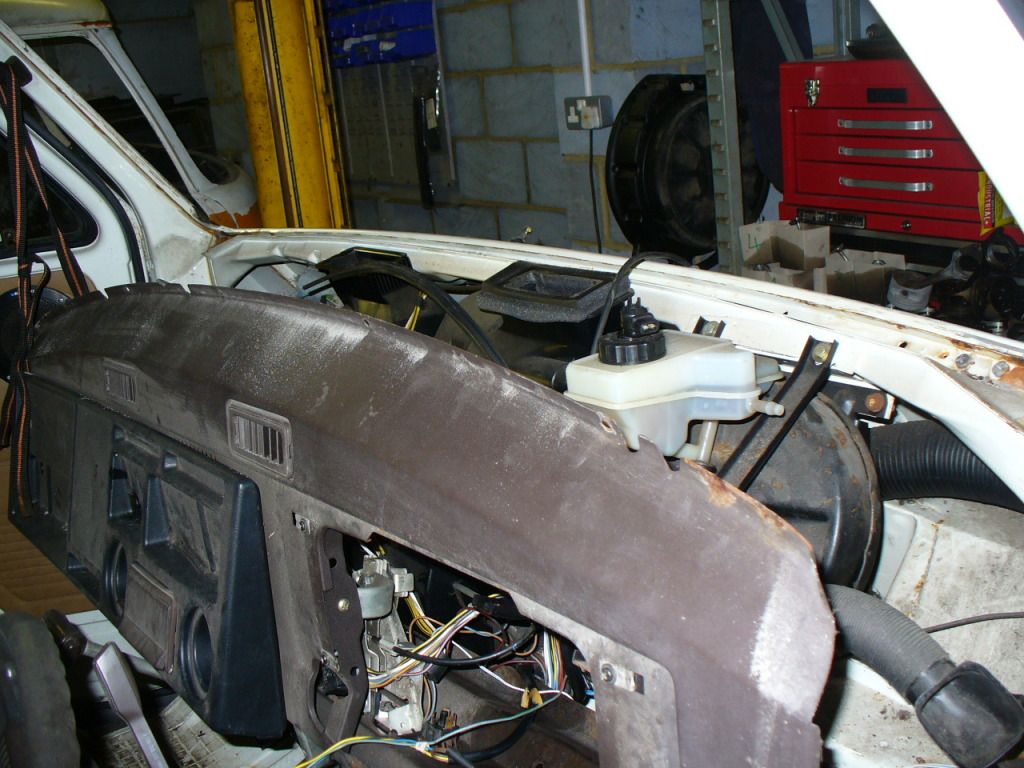
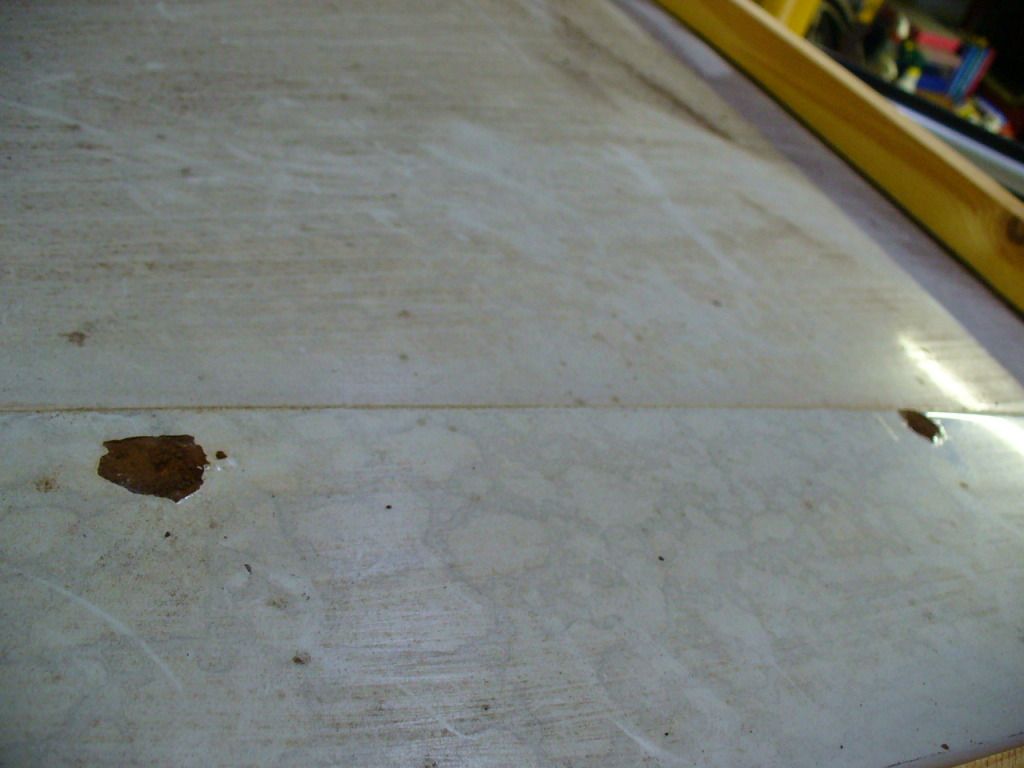
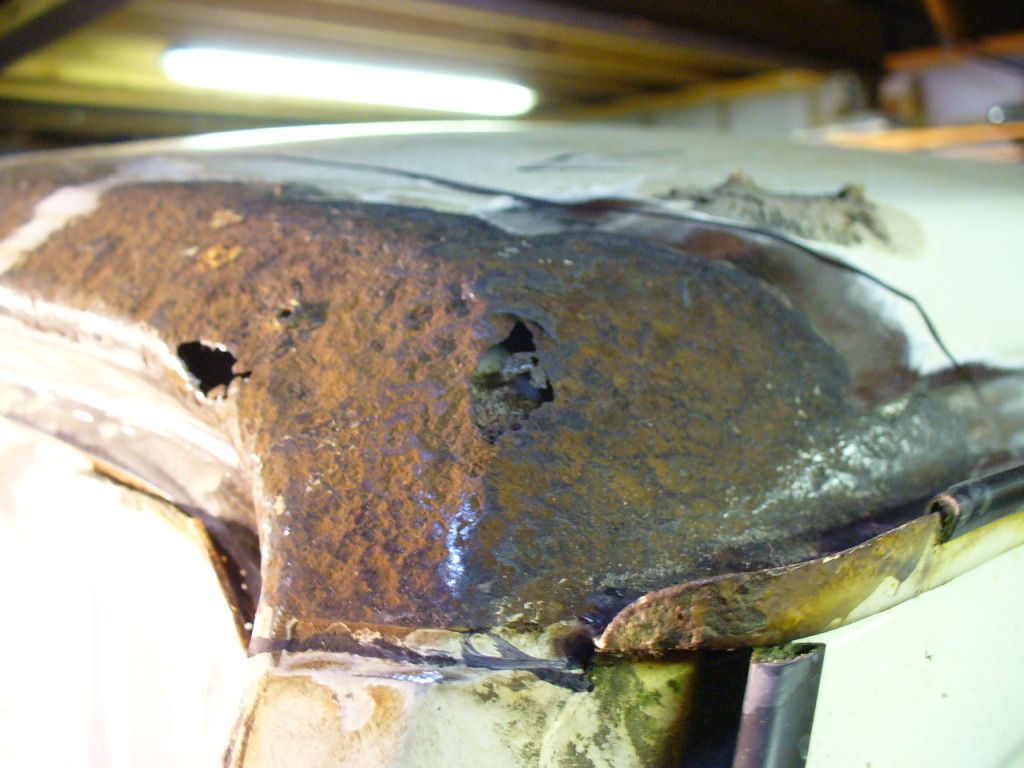
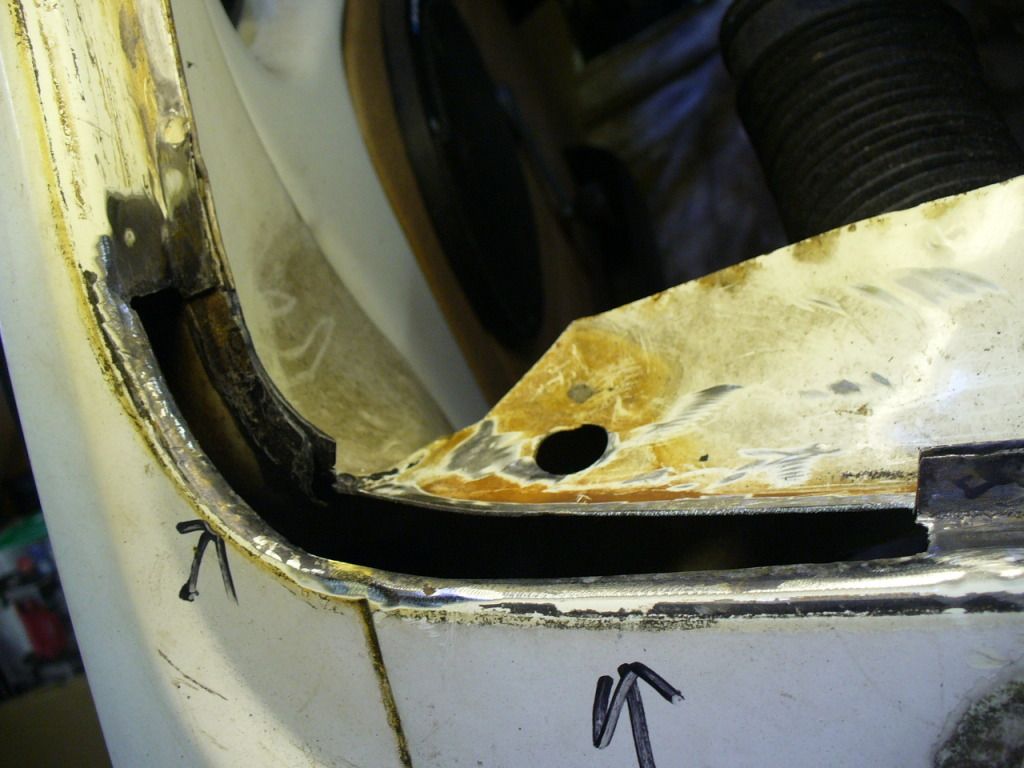
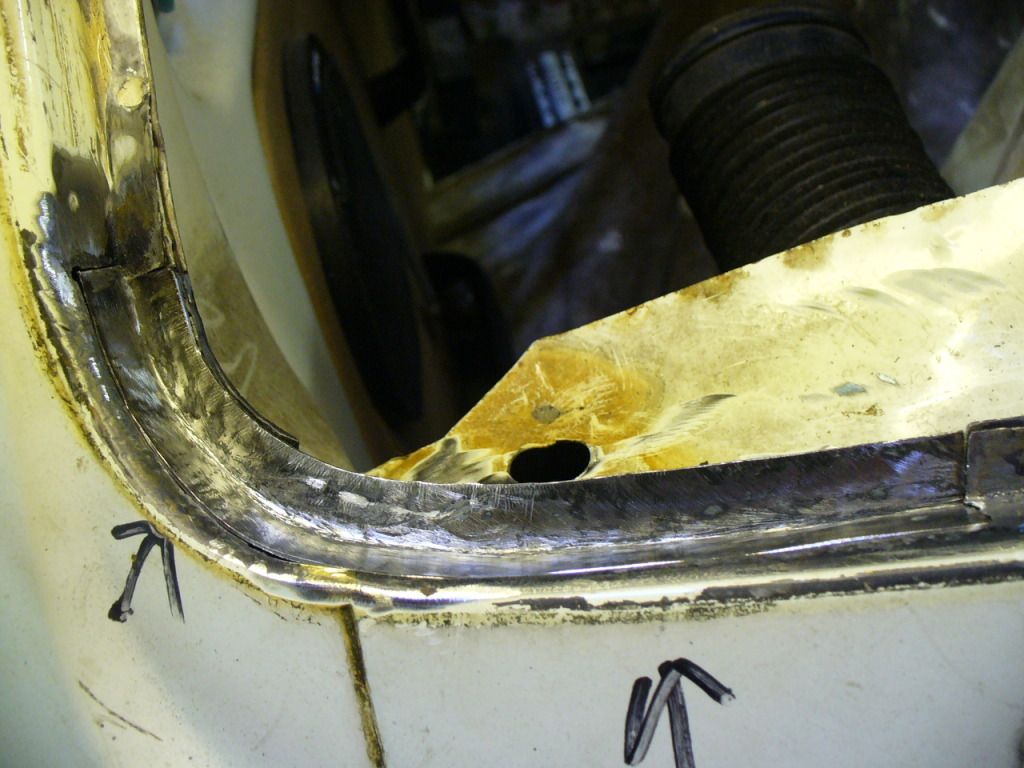
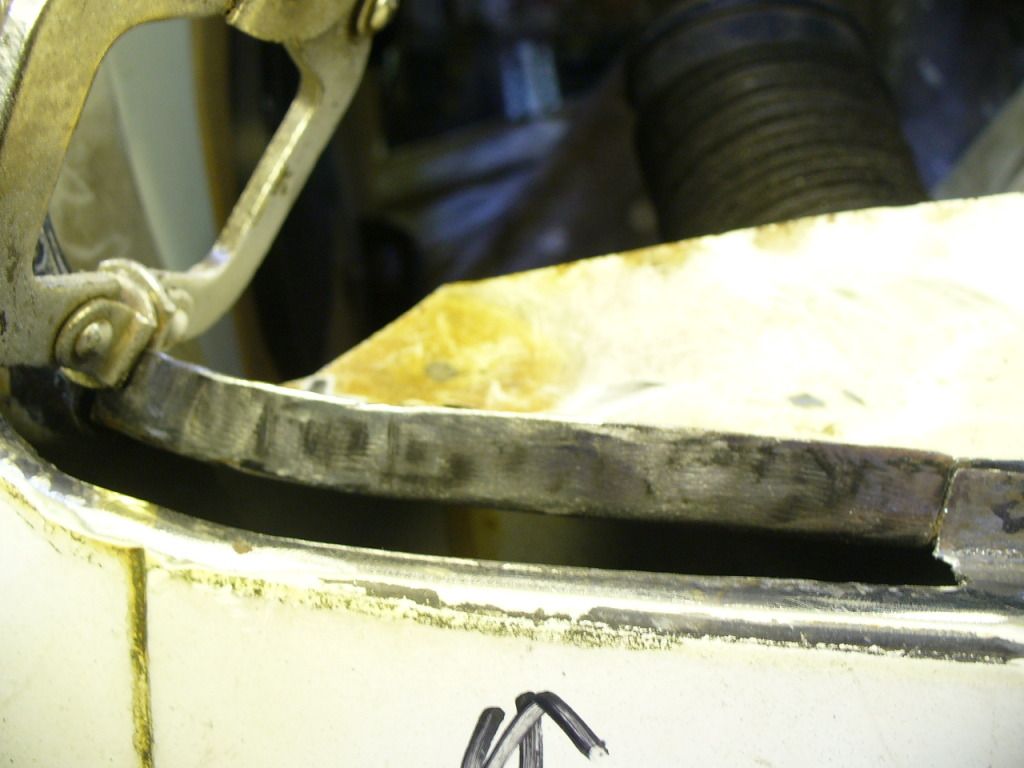
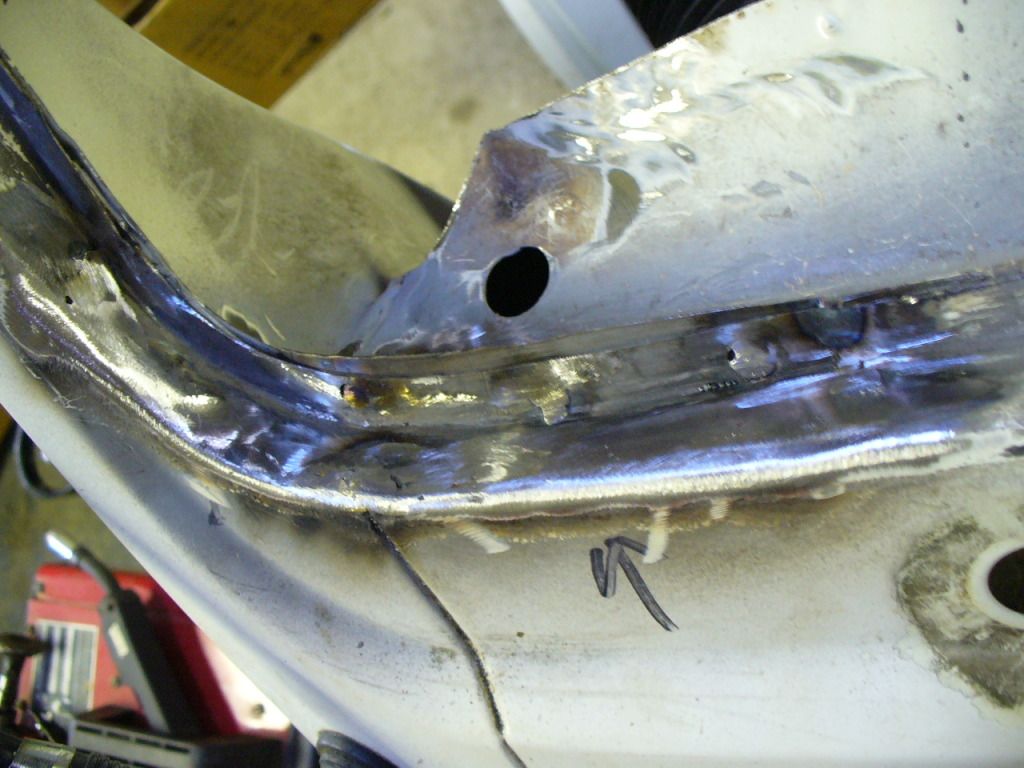
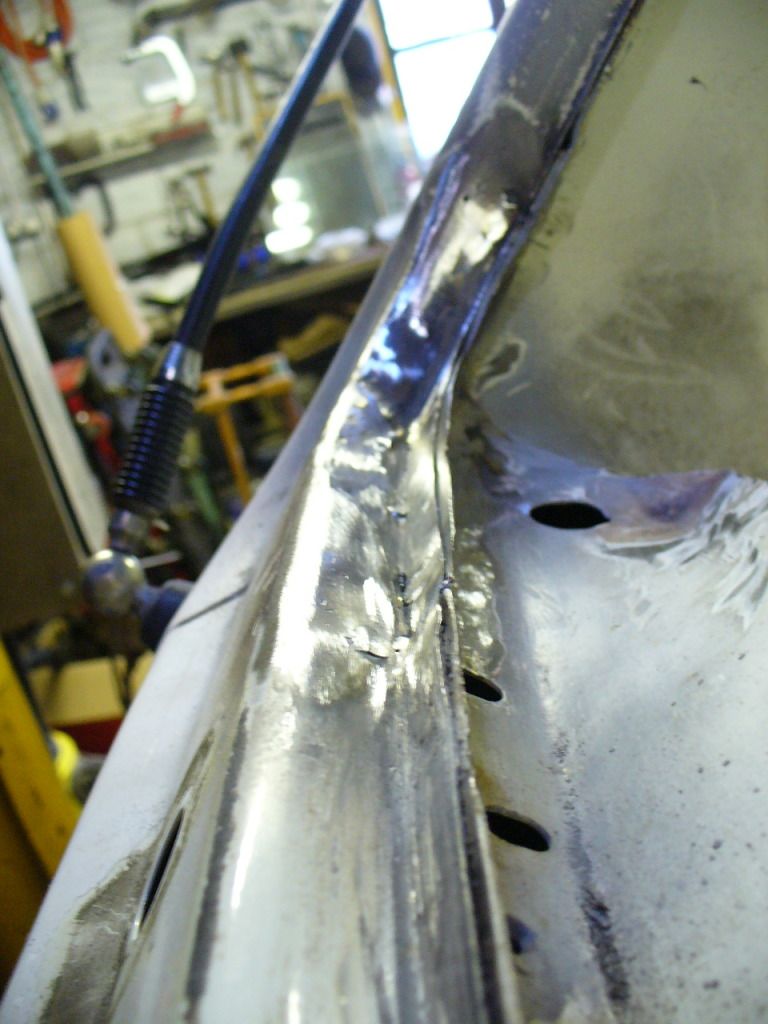
Can now get a closer look at the lower edges of the windscreen surround. Drivers side isn't too bad,
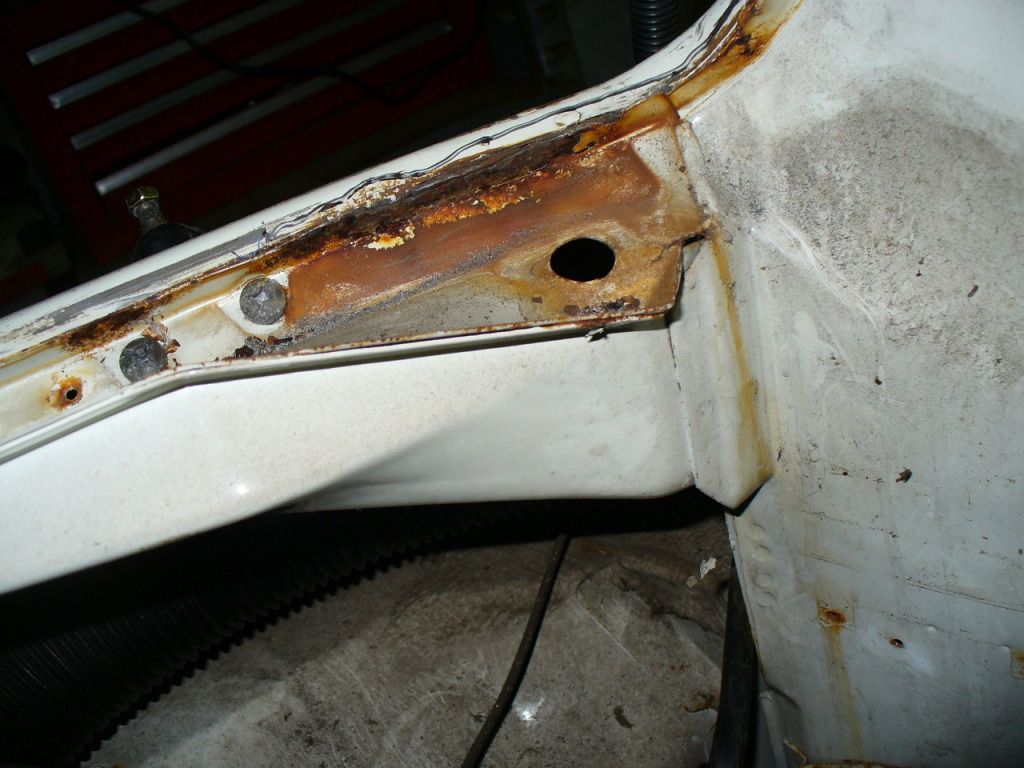
When I lifted the mat on the passenger side the floor was wet.
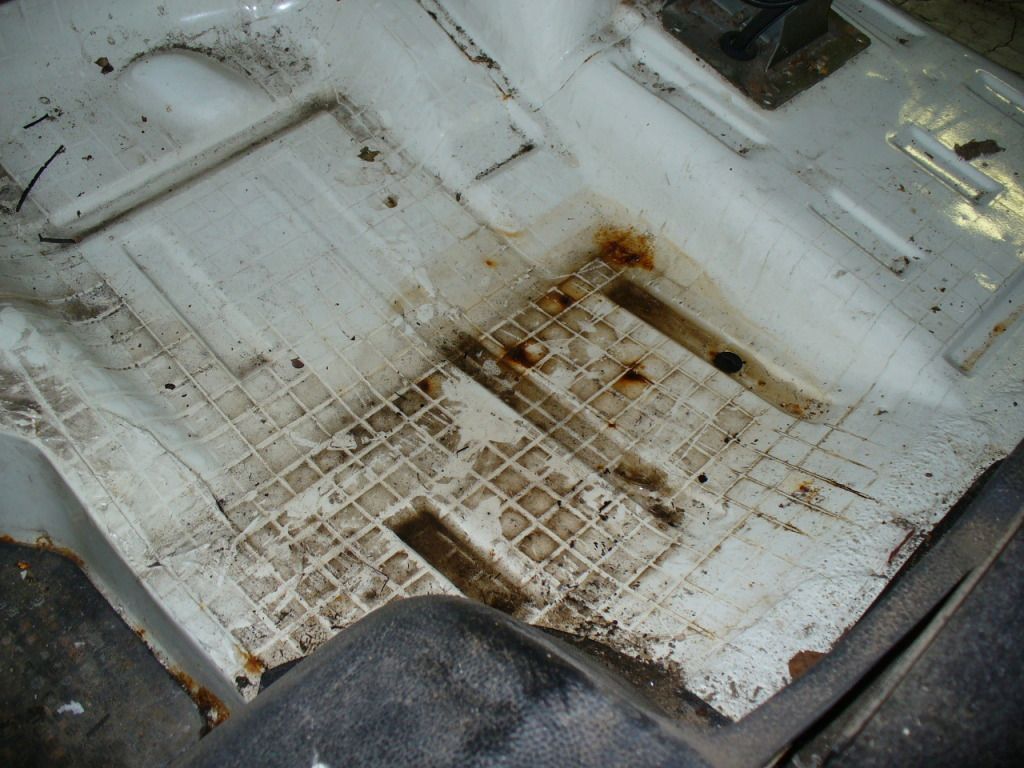
When you look at the lower screen corner you can see why,
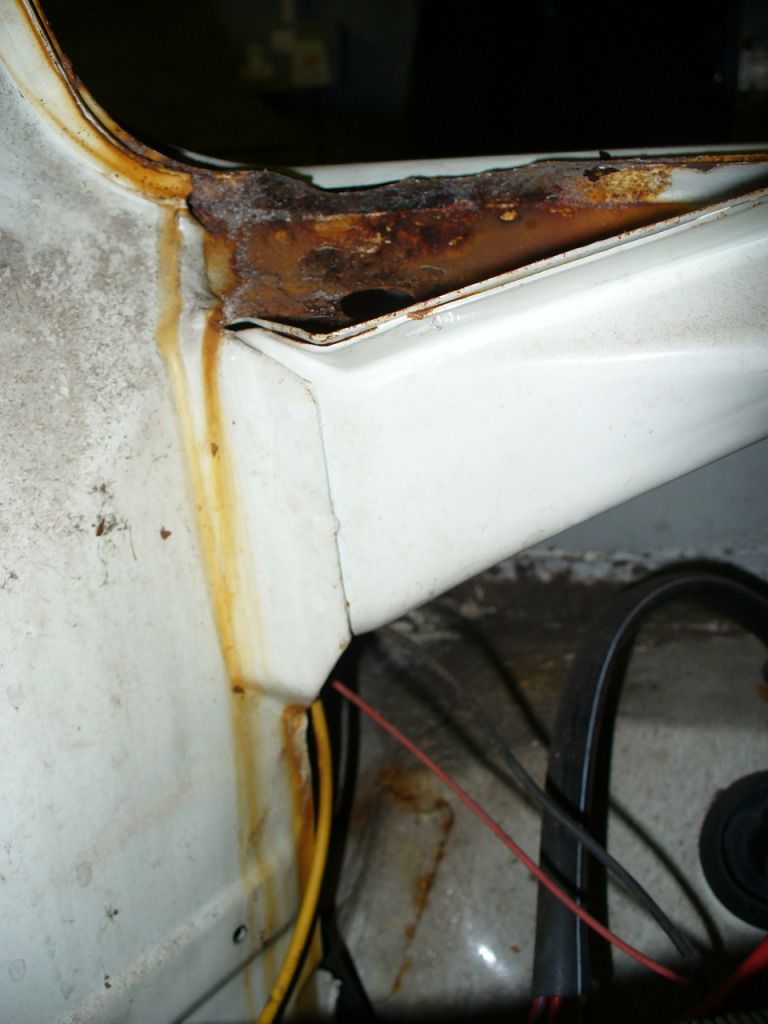
Not desperately bad but enough to let the water in.
So, need to find a roof cut now as that seems the way forward, whilst I am waiting for that to pop up I can crack on with the repairs to the window surround.
Cheers,
MM
Re: Gunther's Body Makeover Commences
Posted: 06 Jun 2012, 22:06
by jes*b
New blower whilst dash is out?
Re: Gunther's Body Makeover Commences
Posted: 06 Jun 2012, 22:42
by Plasticman
sent you an email.
yep cut it further so you csan get at both sides of the join, it doesnt even have to be that neat as it will never be seen again
cut cuit cut
mm
Re: Gunther's Body Makeover Commences
Posted: 06 Jun 2012, 22:54
by mm289
jes*b wrote:New blower whilst dash is out?
Or at least re-built as it wasn't working anyway, I would say killing 2 birds with one stone, but it feels more like a flock with all of Sandgate beach
Cut, cut, cut isn't the problem, I am the worlds best at taking things apart, its just putting them back together again that is the problem, my Dad always hated it when i did that to his watches

MM
Re: Gunther's Body Makeover Commences
Posted: 07 Jun 2012, 06:03
by jes*b
mm289 wrote:jes*b wrote:New blower whilst dash is out?
Or at least re-built as it wasn't working anyway
MM
I think we have a seized OE one on the shelf, would like to do this in tandem when you get to it ( winter job ?)
Re: Gunther's Body Makeover Commences
Posted: 07 Jun 2012, 21:01
by mm289
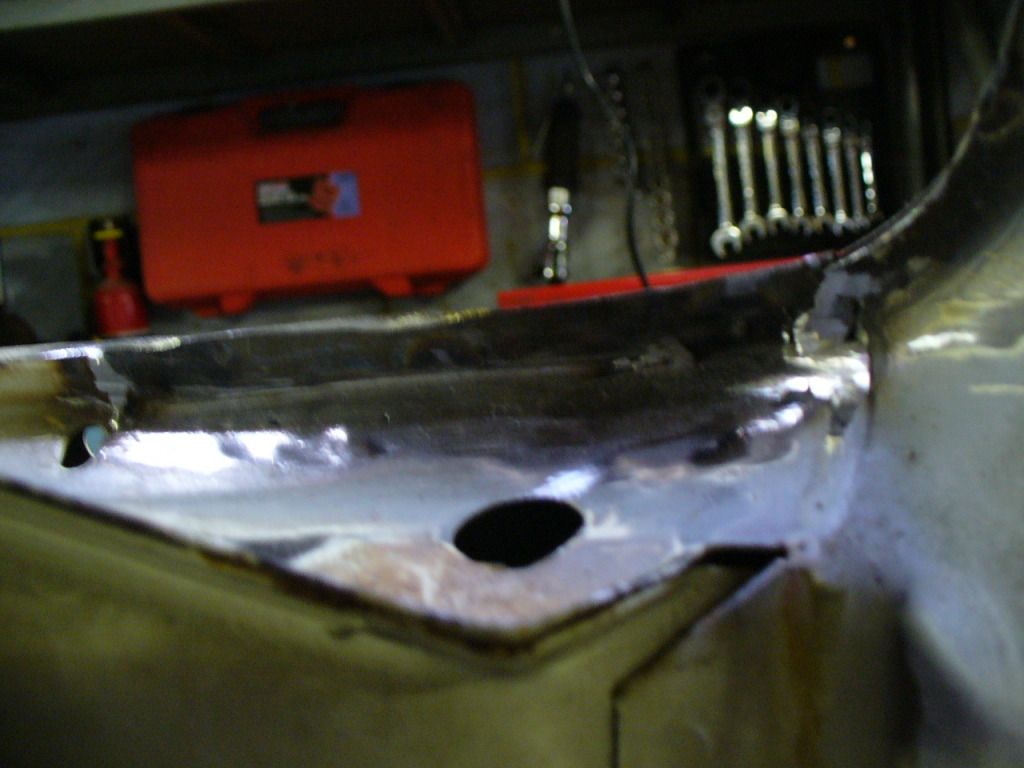
Whilst I am waiting to source a roof cut I thought i would start on the other windscreen surround repairs.
First of cleaned up the rust and cut out the offending section.
Both inner and out panels are gone so decided to make up both sections seperately, will then puddle weld together to replicate the spot welds and pop them in as a unit.
A bit of work with the shrinker, stretcher and hammers and we have this.
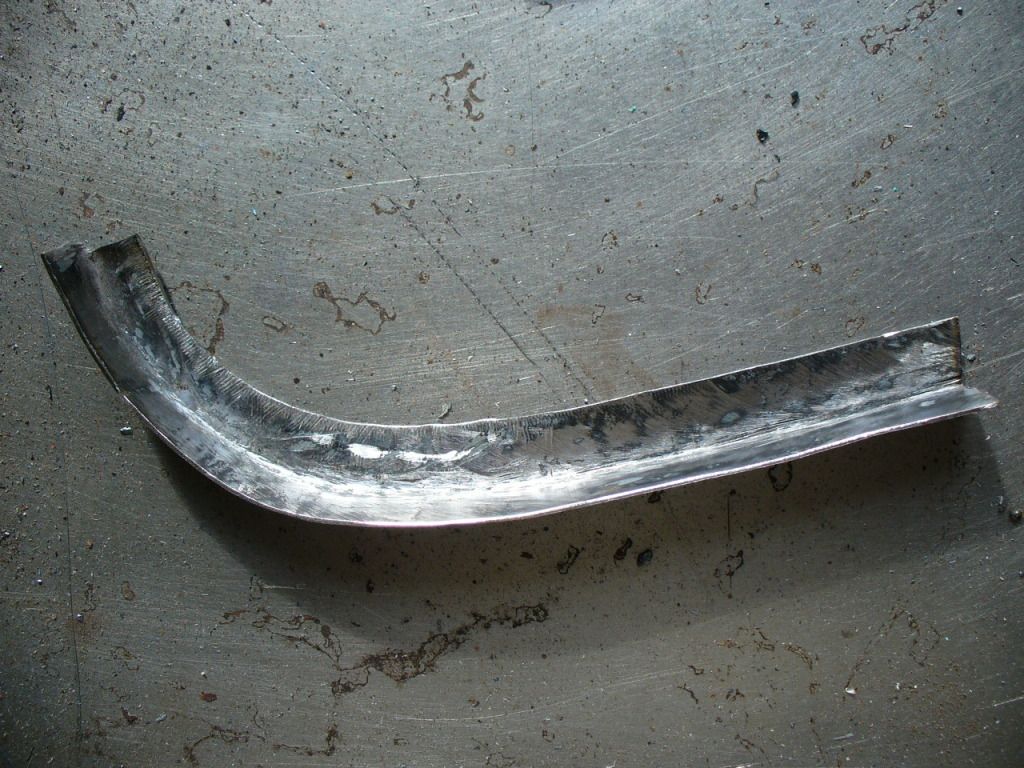
and trimmed to fit - looks quite good
Then made up the rear section
before running out of time - got a coat of weld thru on the bare metal but will have to wait to get them welded up

Cheers,
MM
Re: Gunther's Body Makeover Commences
Posted: 08 Jun 2012, 07:14
by Mickyfin
Great progress, and fabrication work there mate, and some very useful reference photos too, cheers!
Re: Gunther's Body Makeover Commences
Posted: 08 Jun 2012, 22:02
by mm289
Quick update, managed to grab a couple of hours after work.
Got the new pieces puddle welded together then welded into the corner of the screen and ground off
Then spread a bit of lead over it to finish it off.
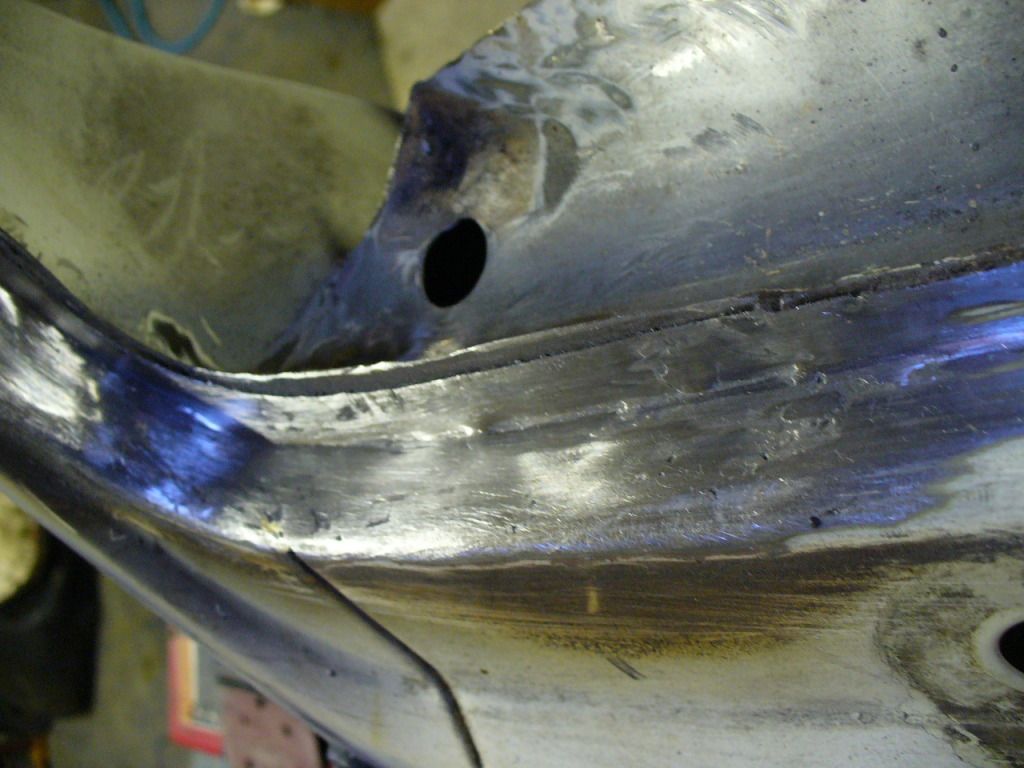

Will give the back piece a touch with the grinder just to bring the lip down a bit and get the correct profile then were done - move onto the other side
Cheers,
MM
Re: Gunther's Body Makeover Commences
Posted: 10 Jun 2012, 00:20
by boatbuilder
Looks great, what flux/lead do you use?