Page 5 of 9
Re: Green Luna Camper Project!
Posted: 05 Jul 2011, 18:28
by pmoc_2001
metalmick8y wrote:
dont ask

but it solves the problem
M
Yep! The problem of P40 spewing through the gap. I will remove them before the epoxy and then wax.
Re: Green Luna Camper Project!
Posted: 05 Jul 2011, 21:54
by pmoc_2001
double post removed
Re: Green Luna Camper Project!
Posted: 05 Jul 2011, 21:55
by pmoc_2001
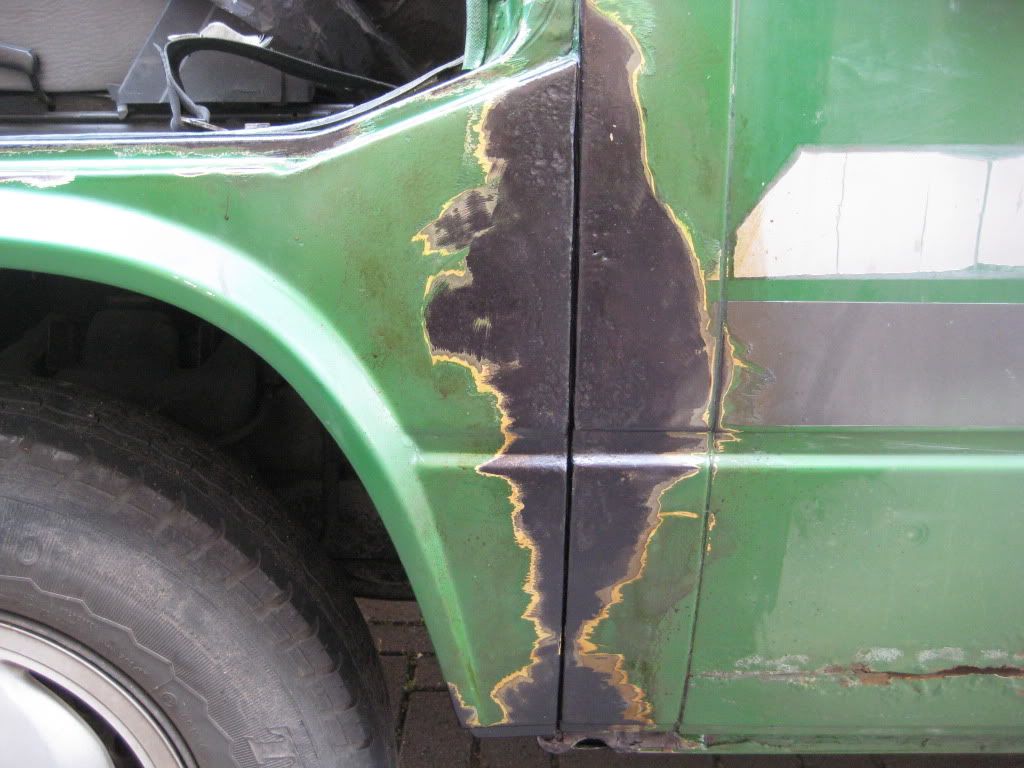
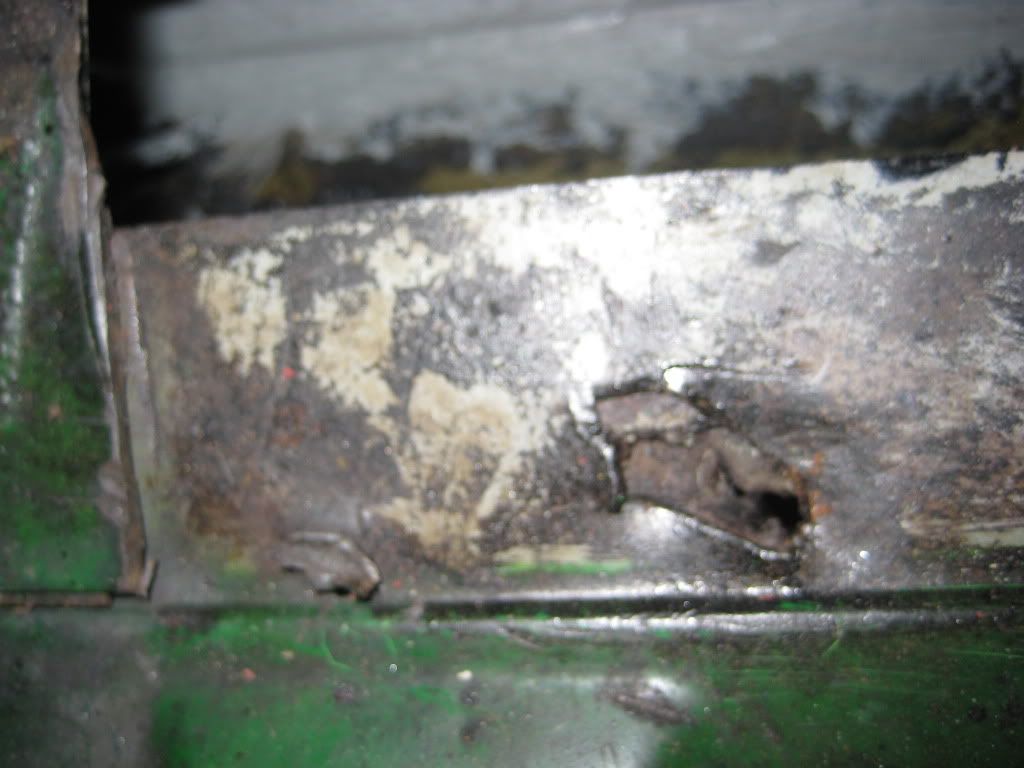
banjax34 wrote:nooooo, wanted to see if you can just weld a plate in place after cutting out the rust, not interested in filler
my problem ...
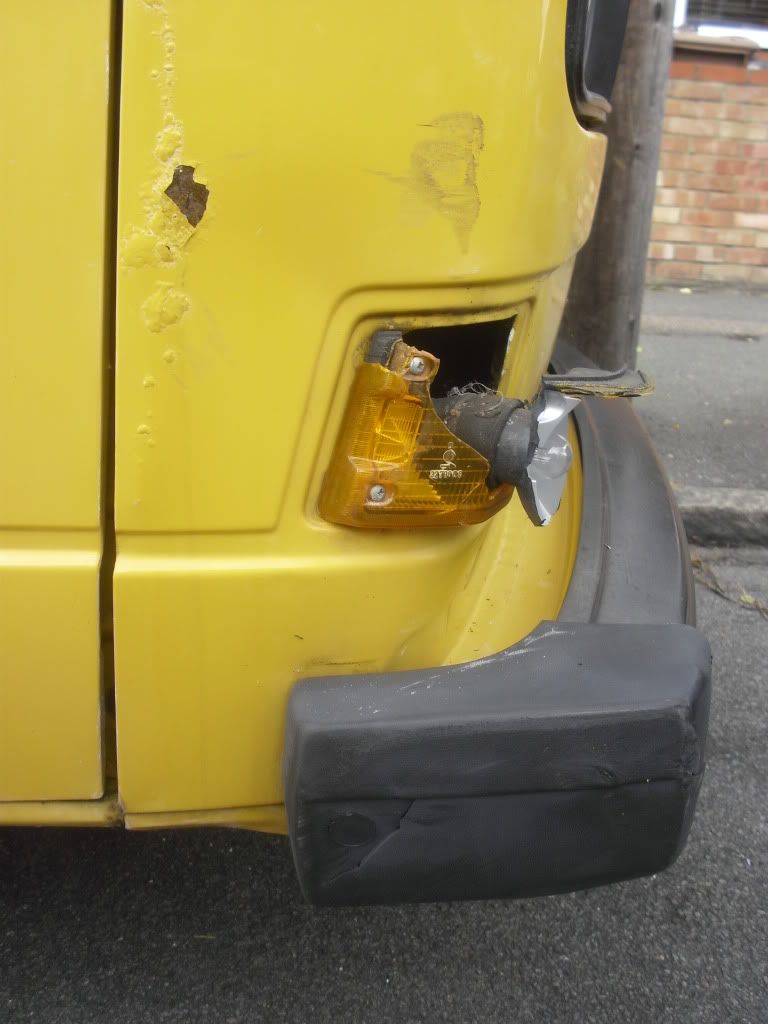
Could be wrong but in the photo it looks like the bumper / side took a knock and disturbed the sealant behind the indicator which has let water in?
Re: Green Luna Camper Project!
Posted: 05 Jul 2011, 21:58
by Plasticman
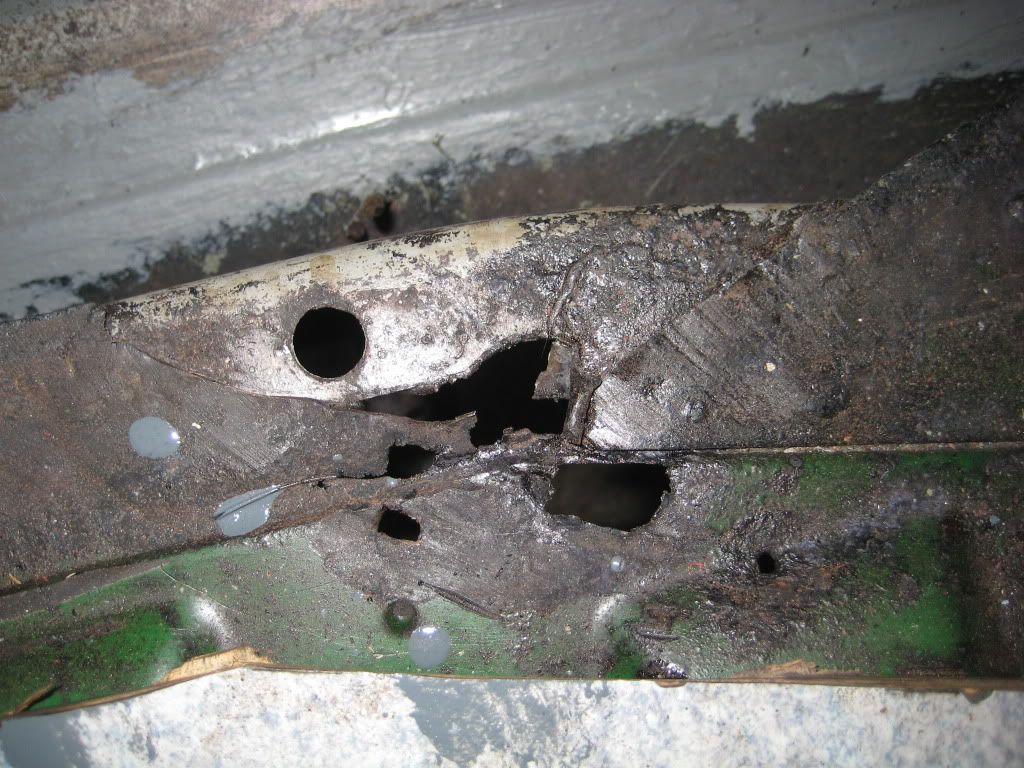
No, they all rot there it comes from inside higher up the front and thrown up from behind the indicator as its all open here. and runs into and down the fold inside and thus rots it away
mike
Re: Green Luna Camper Project!
Posted: 06 Jul 2011, 08:14
by Cyrus
metalmick8y wrote:No, they all rot there it comes from inside higher up the front and runs into and down the fold inside and thus rots it away
mike
Great more rot I'm yet to find!

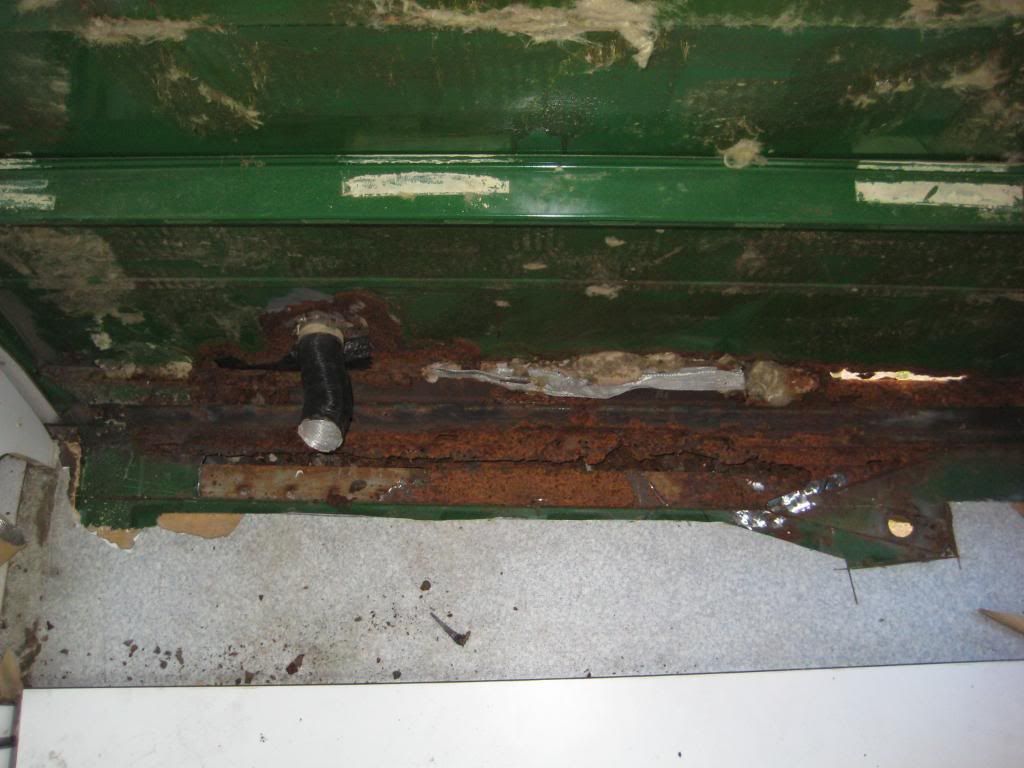
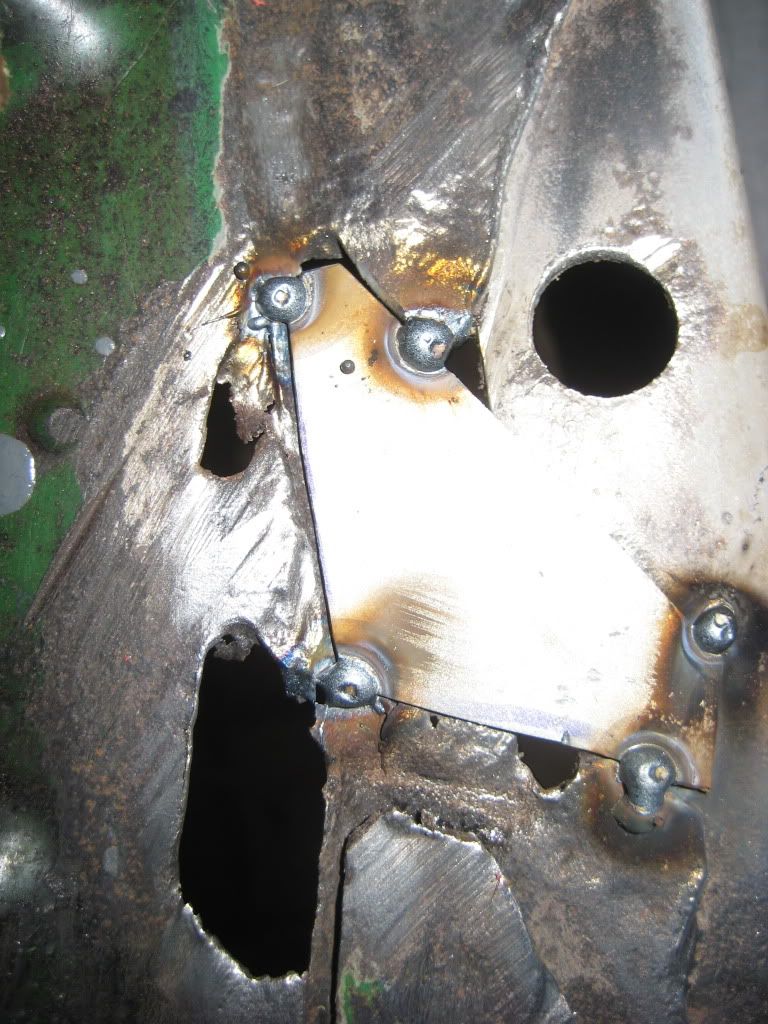
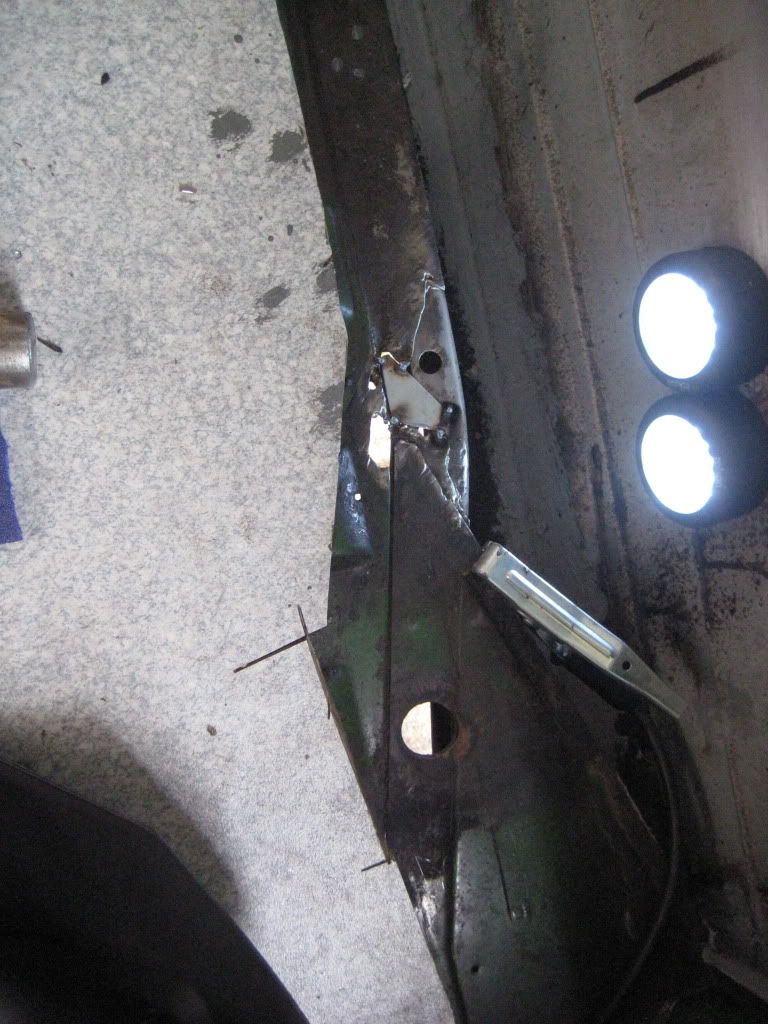
Where is the raw plug pic taken? The rear of the front o/s corner? I'll use this idea next time I'm p45ing.
Re: Green Luna Camper Project!
Posted: 06 Jul 2011, 08:30
by Plasticman
You'd be bored if the work was done , idle hands are dangerouse
mike
Re: Green Luna Camper Project!
Posted: 06 Jul 2011, 10:58
by pmoc_2001
Cyrus wrote:metalmick8y wrote:No, they all rot there it comes from inside higher up the front and runs into and down the fold inside and thus rots it away
mike
Great more rot I'm yet to find!
Where is the raw plug pic taken? The rear of the front o/s corner? I'll use this idea next time I'm p45ing.
If you stand in front of the van - it is the left side behind the indicator.
Re: Green Luna Camper Project!
Posted: 06 Jul 2011, 12:19
by Cyrus
You could start a thread of close up rust repairs and get everyone to guess where it is.

Re: Green Luna Camper Project!
Posted: 06 Jul 2011, 12:23
by DavidPallister
The problem with those A pillar seams is that the rust will have spread a lot further than the holes on the outside. Mine was looking like that, about a 6" strip of crustiness, so i started cutting it out, i've had to remove it all the way from the base of the door gutter right down to the cab step!

Dave
Re: Green Luna Camper Project!
Posted: 10 Jul 2011, 09:59
by pmoc_2001
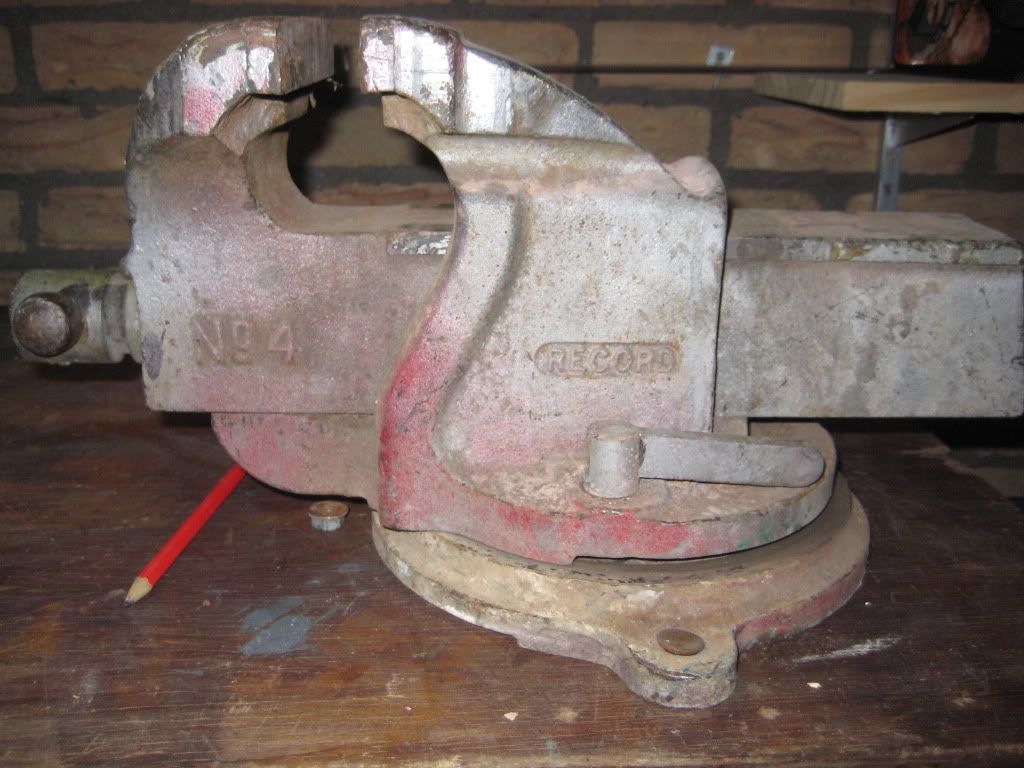
2 items that will make my job easier.
Argon / CO2 mix. 40l

Record No 4 Mechanics vice on swivel.
Re: Green Luna Camper Project!
Posted: 19 Jul 2011, 19:16
by pmoc_2001
New Update. ( Can anyone spot my rustolium test
)
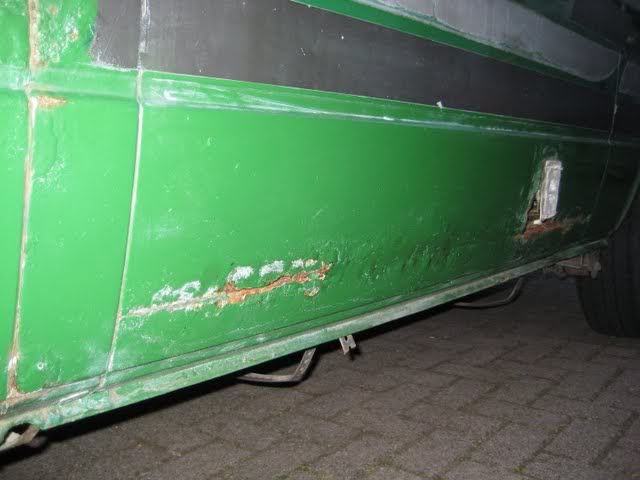
Before.
 After
After
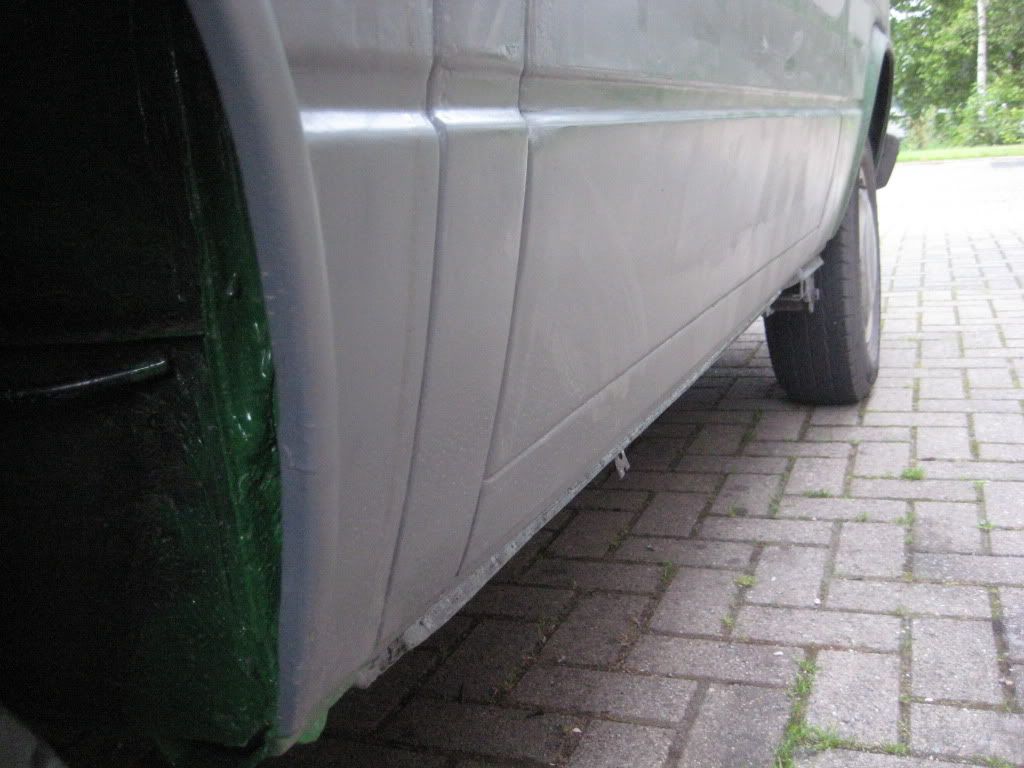
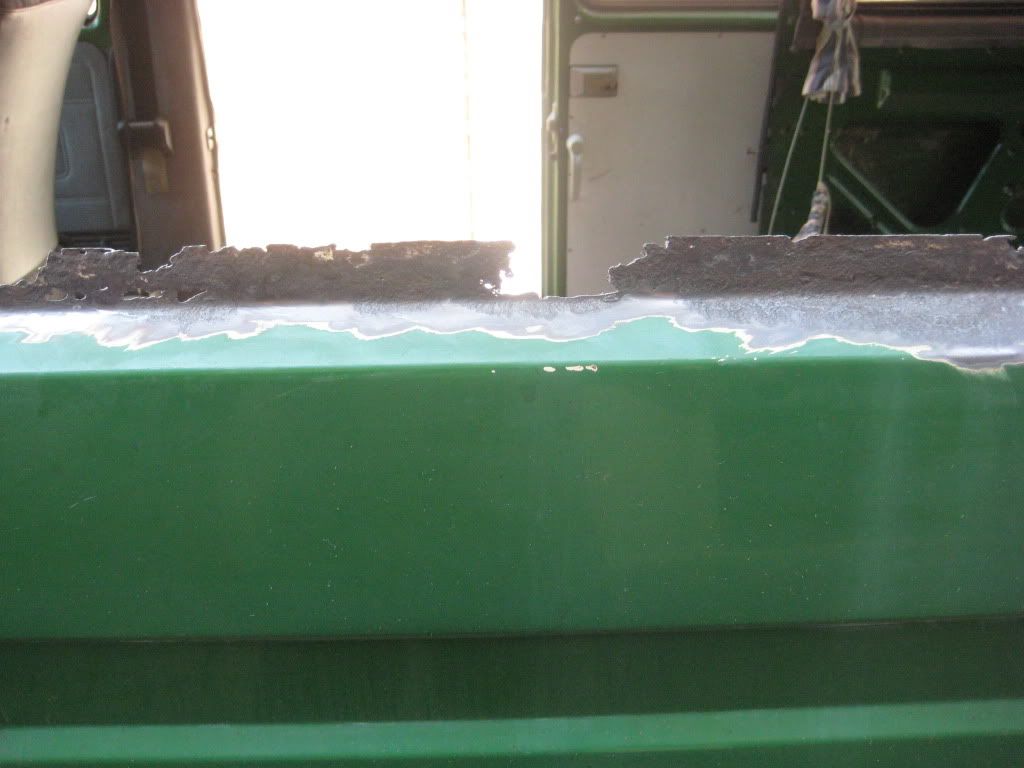
I have finished fitting in the outer sill and side panel. All that remain of this battle is:
-weld in some patches to the floor
-fill in the large gap from floor to fake seam of panel.

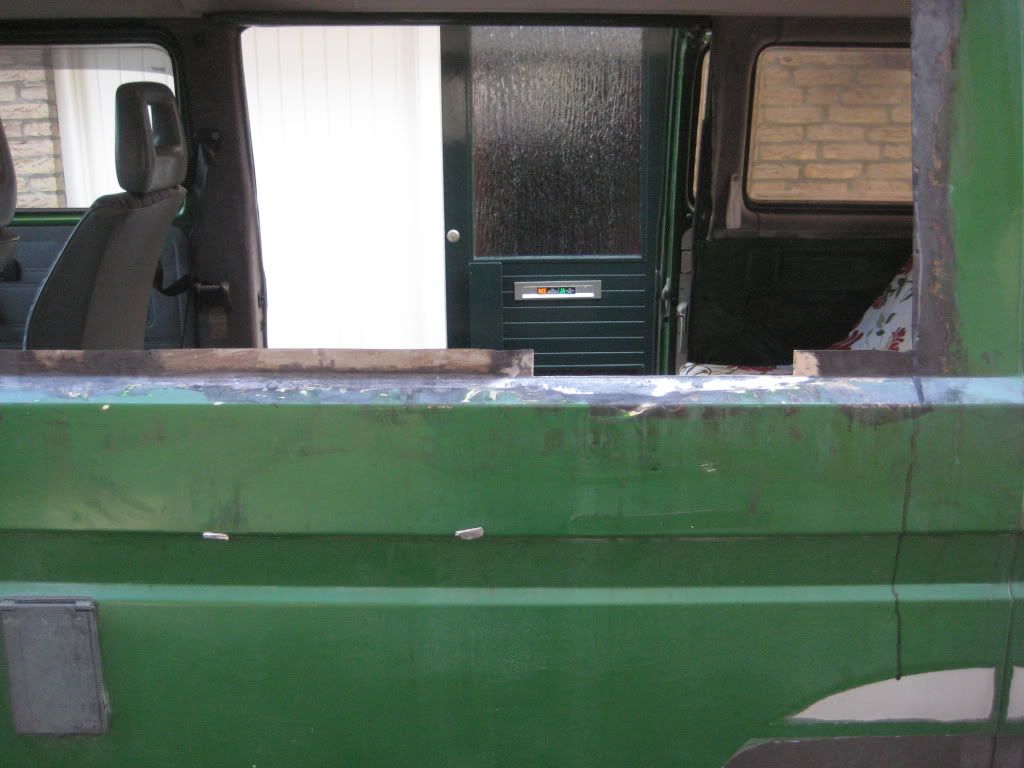
A different angle. If I can do this anyone can...
Inside.
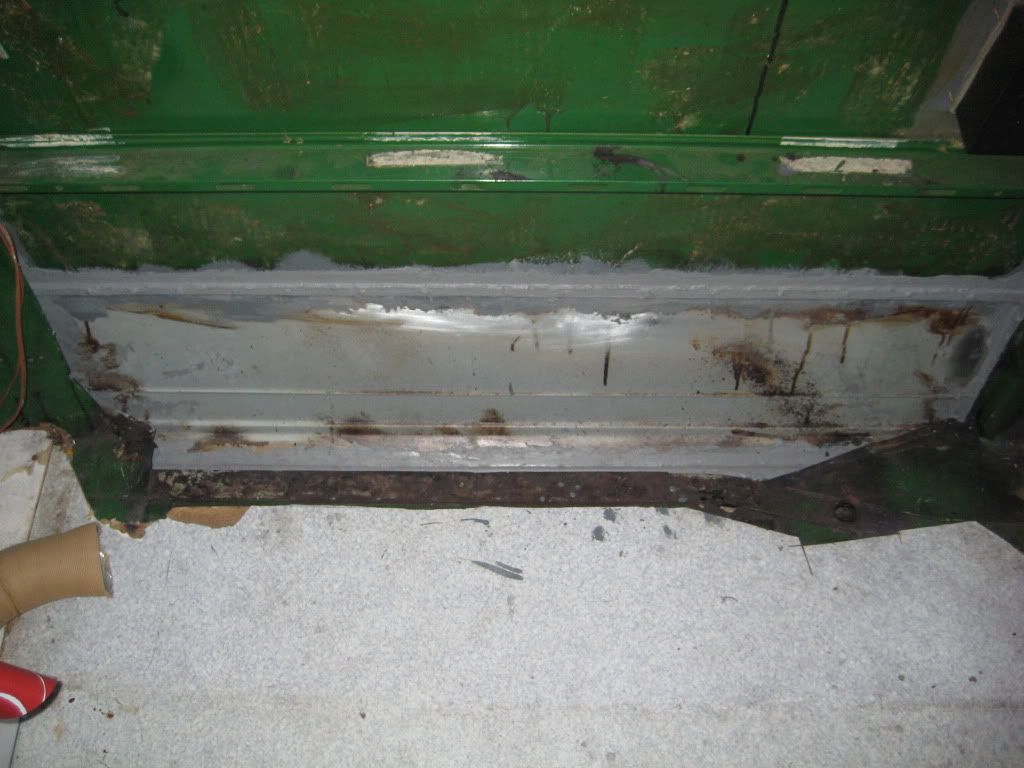
I used Fertan on the seams. then epoxy primer and then brush-able seam sealer. After this I will redo the inner and outer sill with cavity wax before welding in the floor.
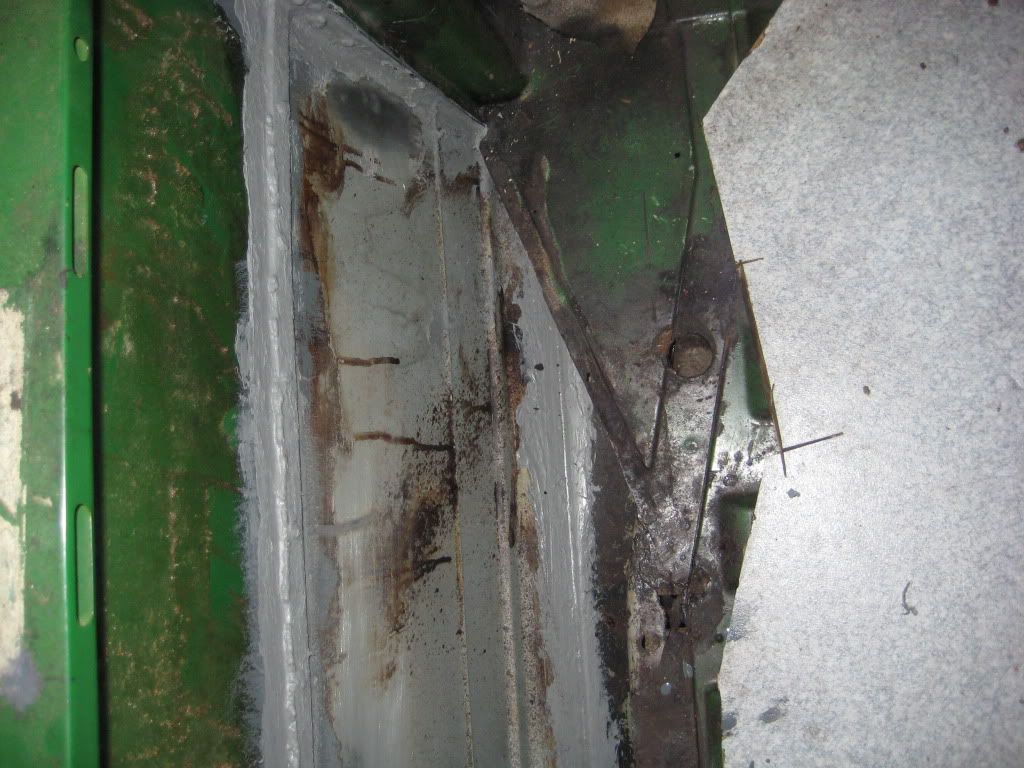
Outstanding issues before I weld the floor in.

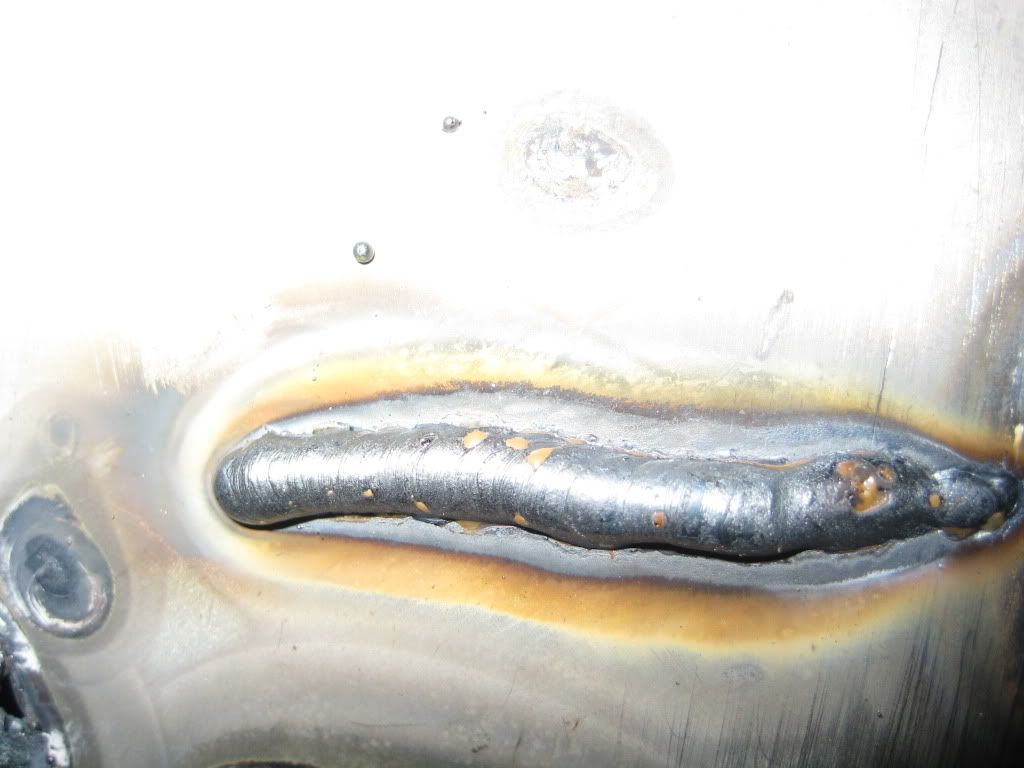
My welding is getting better. Current settings are 0.6 wire : 9l per min argon/Co2 mix : 1m of wire in 20 secs : power setting 2 (what ever that is)
Re: Green Luna Camper Project!
Posted: 03 Aug 2011, 19:03
by pmoc_2001
I've been on holiday camping again since I last updated. Now that I am back I have been working on fixing up the metal that sits on top of the inner sill in prep for covering it in. Mostly fiddly hole filling. I have also started on the window above this area and I will posts some pictures tomorrow. Does any one know if it is possible to get single panes of plastic double glazing as I would like to fix the cracks on the outside?

Simple philosophy at the moment. I work inside the van when it rains and outside when it is sunny.
More tomorrow...
Re: Green Luna Camper Project!
Posted: 04 Aug 2011, 08:17
by boatbuilder
Great work, keep it up! It really is a painstaking process isn't it?
Re: Green Luna Camper Project!
Posted: 04 Aug 2011, 18:07
by pmoc_2001
boatbuilder wrote:Great work, keep it up! It really is a painstaking process isn't it?
Thanks for the encouragement. It is especially difficult when kids and wife want equal treatment. I actually think a nice therapeutic holiday for me would be to spend a week on the van. I am also thinking of renting a larger garage in the area for the winter months so that I can continue the work.
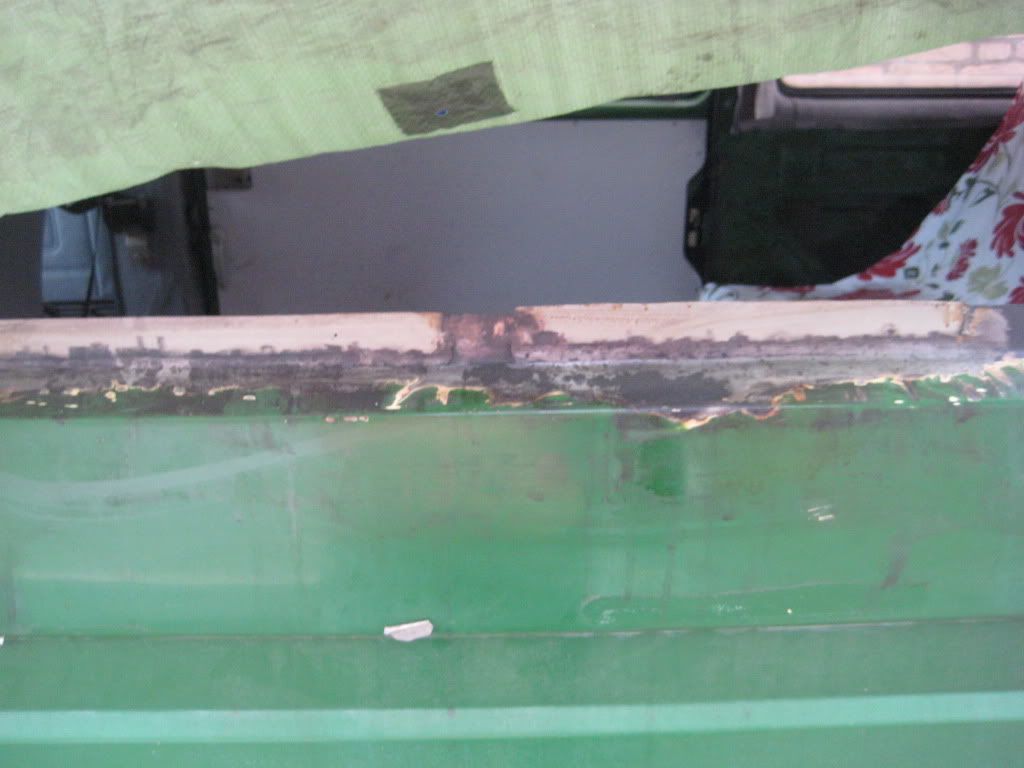
Anyhow here are some pictures of the window work I did today as promised.
Here you can see that I am attempting to replace the rusted metal from the leaky window. I found this guide in the wiki to be very useful
https://club8090.co.uk/wiki/Ar ... dow_frames" onclick="window.open(this.href);return false;. Thank you Tony!
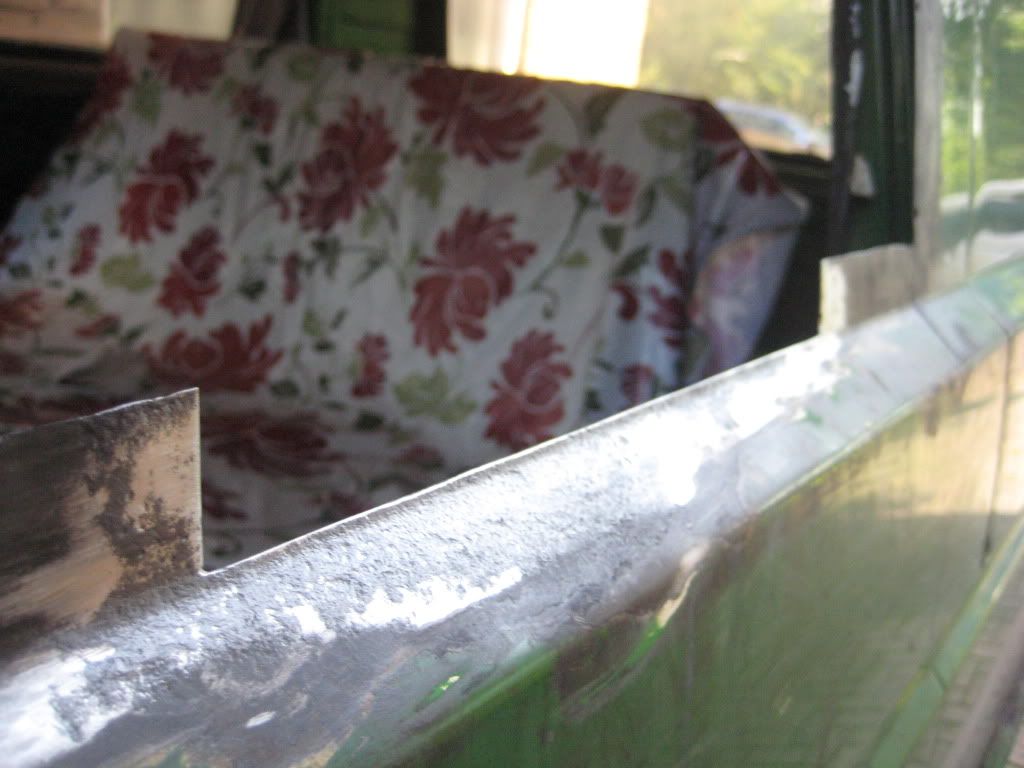
Needs a trim to the to to make flush.
Re: Green Luna Camper Project!
Posted: 06 Aug 2011, 16:19
by boatbuilder
Looks like you managed to keep it nice and straight.... I still have that area to do on my van as well.
