Page 4 of 5
Re: wiring a rev counter
Posted: 23 Feb 2014, 18:42
by 1664
MidLifeCrisis wrote:Main problem with Haynes is that it is often just plain wrong!!
Much prefer the Bentley diagrams - much more likely to be correct, their wiring colour code abbreviations make more sense, and they name the items on the diagram (so it says 'Ignition Switch' rather than Haynes saying 'F31' and you have to go search to see what F31 is!!)

I prefer the reverse, trouble with Bently is it's covers mostly american derivatives. I have yet to experience Haynes "wrong".
Each to their own......
Re: wiring a rev counter
Posted: 23 Feb 2014, 18:47
by itchyfeet
Only found one incorrect thing in haynes so far and thats the x relay out put does not connect to the x track
Re: wiring a rev counter
Posted: 23 Feb 2014, 19:01
by itchyfeet
Tufty_B wrote:itchyfeet wrote:...
30 is 12v
15 is ignition 12v
x is powered by the x relay that gets turned off during cranking to help starting
31 is ground
...
Not wanting to hijack the thread, but I'm also looking at fitting a tacho, can you explain in simple terms the difference between the rails 15 & x, I thought that 15 went dead during cranking?
Track 15 is ignition 12v that means its 12v when the ignition is in position 2 or 3 ( haynes 12.25 black 1.5mm2 makes this rail 12v when ignition switch on via connector a8 on the fusebox)
The x rail is powered from the x relay this is triggered by the black yellow from the ignition switch when in position 2 only, when in position 3 (cranking) its not triggered (haynes 12.25 black yellow from switch goes to box 90 move to page 12.33 and at track 90 you see a box numbered 9 which is the track you came from this is the same wire, it poeres lights and tge x relay coil which means your lights are also off when cranking but not because of the x relay)
so while cranking everything thats powered by the x relay is off
to see whats powered by the x relay follow the x track along, things like wipers, heater fan, fog lights
Re: wiring a rev counter
Posted: 23 Feb 2014, 19:12
by Tufty_B
"itchyfeet", Thanks for the explanation.
Re: wiring a rev counter
Posted: 23 Feb 2014, 19:32
by ScienceBoy
itchyfeet wrote:
every item has a code which you can find out what it is in the key
That's what peeves me, always referring to keys. Sounds like you've got it down pat

Anyhoo, some hole drilling later and...

Still needs a little fettling; there's not all the space behind you need, but I'm sure the trusty dremmel will help me with that!
Thanks all for the help

Re: wiring a rev counter
Posted: 23 Feb 2014, 19:43
by itchyfeet
ScienceBoy wrote:itchyfeet wrote:
every item has a code which you can find out what it is in the key
That's what peeves me, always referring to keys.
Does you mum still feed you and do your washing, man up

I only look up a code once, i then write what is is on the diagram so i know next time
Re: wiring a rev counter
Posted: 23 Feb 2014, 20:52
by ScienceBoy
itchyfeet wrote:
I only look up a code once, i then write what is is on the diagram so i know next time
good point

Re: wiring a rev counter
Posted: 23 Feb 2014, 20:57
by itchyfeet
Anyway where in new forrest are you? We go walking there most weekends
Re: wiring a rev counter
Posted: 26 Feb 2014, 14:16
by willpom
Looked at ScienceBoy's picture of wiring and see he soldered in the tacho to points on the circuit ribbon. Any one suggest a reason why not to wire direct to the loom with extensions on each wire and bullet plugs? Leave a bit of play in the wires to the tacho so dash unit can be pulled out to allow disconnection. I don't have a soldering iron and last time I borrowed one I made a hash of it.
Re: wiring a rev counter
Posted: 28 Feb 2014, 16:08
by willpom
Well my last question was a bit daft, of course I can wire it into the loom.
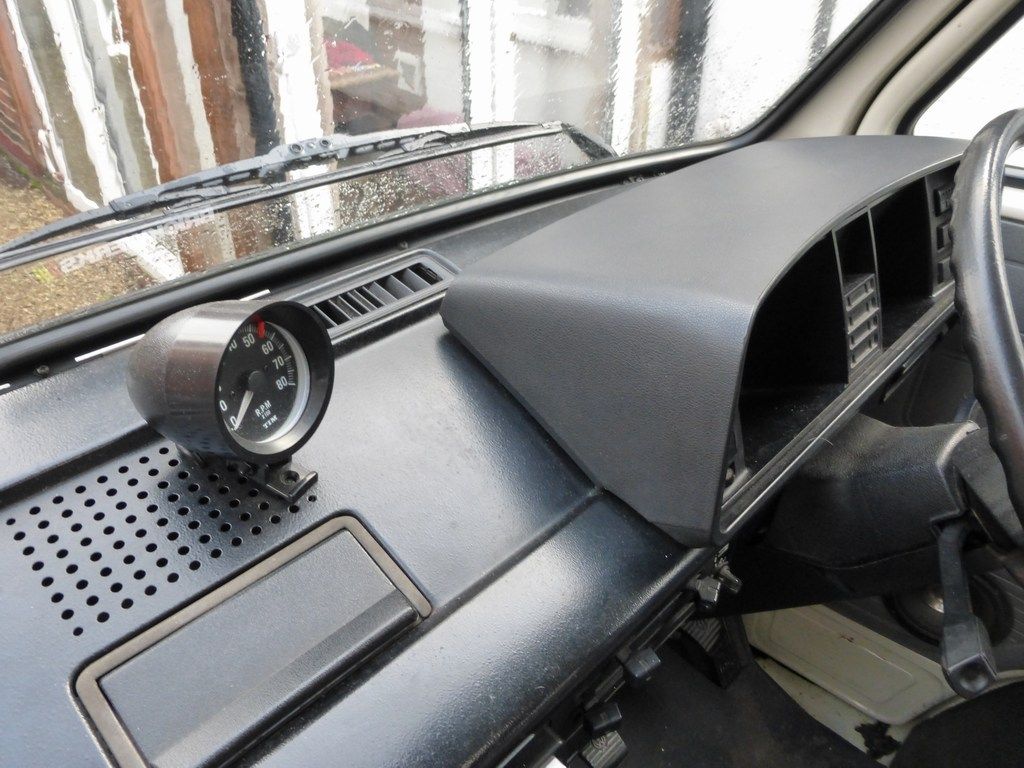
And hey presto!
1-IMAG1487-001.JPG
If I got a dremel to fettle the fascia and a bit behind I reckon I could dispense with the bezel and mount the tacho flush; either using the acrylic disc that comes with it or a larger rectangle for that whole section.
I took the whole tacho apart because as I removed the bulb to take the green cap off so the backlight has same hue as the rest of the dash I managed to snag the cap on the circuit board so it was in the unit. When it was apart I had a look to see if it could have been fitted between the temp & fuel gauge. 4mm too narrow, otherwise I could have mounted it all in the right pod

Hopefully this will help the misses to not blow the van up

Re: wiring a rev counter
Posted: 28 Feb 2014, 20:29
by itchyfeet
In my humble opinion that looks no better than in a pod but as long as you are happy thats what counts
Re: wiring a rev counter
Posted: 28 Feb 2014, 20:41
by willpom
itchyfeet wrote:In my humble opinion that looks no better than in a pod but as long as you are happy thats what counts
May be so, but my toddler would have that pod off in seconds
Re: wiring a rev counter
Posted: 28 Feb 2014, 20:47
by itchyfeet
willpom wrote:itchyfeet wrote:In my humble opinion that looks no better than in a pod but as long as you are happy thats what counts
May be so, but my toddler would have that pod off in seconds
Thats what child seats are for
Re: wiring a rev counter
Posted: 01 Mar 2014, 10:33
by willpom
Well heck, why not use these?


(I apologise unreservedly for referencing The Daily Flail)
Re: wiring a rev counter
Posted: 04 Mar 2014, 23:31
by ScienceBoy
willpom wrote:Looked at ScienceBoy's picture of wiring and see he soldered in the tacho to points on the circuit ribbon. Any one suggest a reason why not to wire direct to the loom with extensions on each wire and bullet plugs? Leave a bit of play in the wires to the tacho so dash unit can be pulled out to allow disconnection. I don't have a soldering iron and last time I borrowed one I made a hash of it.
I did that so I could just remove the pod by unclipping the main plug. No trailing wires to worry about.
