Page 3 of 11

Re: Oops!!

Posted: 01 Jul 2013, 20:01
by sarran1955
Hello,

Sunday.. Sunny... :)

Continuing with the heads..

Inspecting the valve seat to see if the lapping is sufficient....(not yet)....

Image

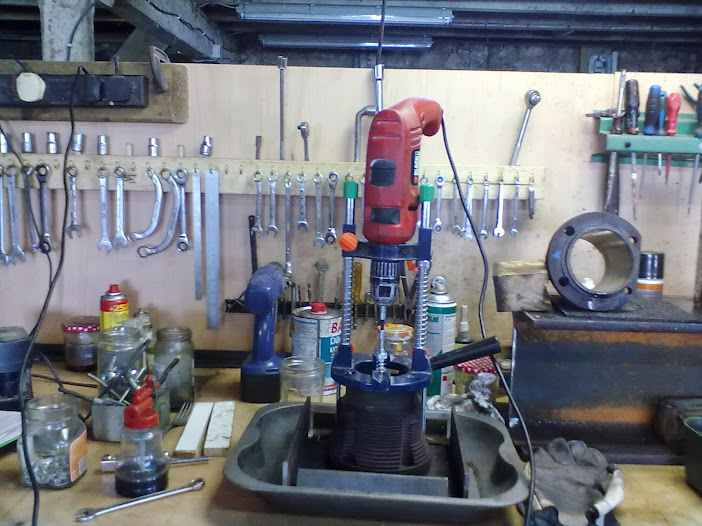
Next I tackle the damaged rim for the compression ring and cylinder:

Image

I use the cylinder as a grinding guide...

Image

Do not take off too much.. should look like this...

Image

from an angle:

Image

Do all 4 cylinders.. keep everything in balance.. 8)

Next the studs (though in good condition), are given a run up and down with a sacrificial nut and grinding paste..

Believe me, it is so much easier when you spin the nuts on later.. :wink:

Image

As you can see, the exhaust gasket had failed..

I clean off the grinding paste with thinners.. note the girolle jar ...(pfifferling?)..

For mushroom valves.. :rofl :rofl :rofl

Image

Finally over to the parts wash, drench and then air blast clean.

So that is both heads done . 6 hours work..

Image

Monday ..

Fit valves into 1 head after work..

Before you fit the valve, pass an oil soaked 'blot ' of paper down the valve guide.. be sure that there is no trace of grit..

Image

A smear of CV joint grease on the valve stems will do no harm.. :roll:

Image

Then the valves fitted as usual..

!/2 hour work....

And then another 1/2 hour mowing the top meadow in the evening sun.. 28 celcius today...

Other head tomorrow..

Then crankshaft assembly jig to make..

Cordialement..

:ok

PS.. Yes thanks MM.. do IOU?

Re: Oops!!

Posted: 01 Jul 2013, 20:13
by jeffj
Interesting thread.

Re: Oops!!

Posted: 01 Jul 2013, 21:34
by Plasticman
nope
mm

Re: Oops!!

Posted: 06 Jul 2013, 19:34
by sarran1955
Hello,

Just a quick 'run through' on fitting the valves.. :wink:

Pass a cleaning 'wad' of oil soaked tissue through the valve guides,,

Do this until the wad is clean..

Image

Moly grease the valve stems..

Image

Fit the oil seal onto the valve stem, then the spring and washer..

Image

Then compress the spring and fit the collets..

Image

Tap the spring with the mallet to check the collets are well seated,

Image


Here is the the jig I made for working on the crank...

Image

All set up..

Image

Removing the distributor and camshaft drives..

Image

Label the con rods and end caps..

Image

Here is one split apart..

Image

Only normal wear throughout.. :)

So now I re assemble the bearings and drives on the 'nose' of the crankshaft...

Image

I made up a tubular drift and put the drives on one at a time, there is no nead to use heat..

The new glaze buster arrived today, so I'm going to make a jig for that next.. :wink:

Cordialement,

:ok

Re: Oops!!

Posted: 07 Jul 2013, 19:45
by sarran1955
Hello,

Sunday sunny Sunday....

After a bit of head scratching, I made up a 'glaze busting' machine..

Photos later..

Well first thing was to really clean out the crankcases, and generally clean bolts and threads..

The crankcase has plastic dowels for the case bolts,

I made up a drift to make the job easier..

Image

Then I finished building up the crank shaft...its a good idea to mark diametrically opposite the dowel hole on the bearing with a felt pen..

Makes life easier.. :wink:

Here is the crankcase with cam and central bearing in:

Image

Discovered this bodge (epoxy) repair where someone had 'welted' the case in the past..

Image

But as its only 'bruised ' inside...

Image

I think I will leave well alone.. :roll:

Here is the case with the crank and cam shafts in.. ready for closing..

Image

And here it is all closed up..

Image

I have just 'nipped' up the bolts to let the jointing compound go off..

That is it for this week end..

Next.. hone the cylinder bores..clean the tinware under the cylinders.. set the end float..then assemble the main motor..

Followed by oil pressure and compression checks

Pictures to follow..

Cordialement,

:ok

Re: Oops!!

Posted: 08 Jul 2013, 07:33
by 81AirCooled
Brilliant John, I'm looking forward to hearing her purr :D

Re: Oops!!

Posted: 08 Jul 2013, 07:57
by 300CE
Getting there John - great thread mate :ok

Re: Oops!!

Posted: 08 Jul 2013, 19:53
by sarran1955
Hello,

Thanks for the comments...

I thought you'd all gone away and left me .. :rofl :rofl :rofl :rofl :rofl

Right, 35 degrees C at work today, at least I was only welding till 2, and then big assembly...

T shirt and electric fan.... 8)

So, in my nice cool workshop this evening..

Put my 'universal flywheel' back on with the original thrust washers..

Check the end float..... 0.8 mm... fine by me :wink:

Engine spins like a top.. :)

Image

Cleaned up the oil pump ready for strip ,clean and prime..

Image

Here is the sump plate now in position.. the cause of all the fuss.. :roll:

Note the new 13 mm plugs...

Not 1/2 inch.. not mole wrench.. :rofl :rofl :rofl :rofl :rofl

Image

I always like the point where the rachet goes to 'on'.. and my hands stay clean.. :)

Cordialement..

:ok

Re: Oops!!

Posted: 09 Jul 2013, 10:56
by 81AirCooled
I know I got her out but I'm terrified of actually putting her back in my van, luckily my old Dad will be here to help :run

Re: Oops!!

Posted: 09 Jul 2013, 19:02
by sarran1955
Hello,

Tuesday..35 Celcius at work..

Back in the cool workshop.... with big ventilator..

Fit cleaned and inspected oil pump, also turbine oil seal..

I use a big socket to drift the seal in..

Image

Then the crankcase oil seal...

Image

Note that these go in before the case bolts are torqued up...


makes life easier.. :wink:

and here is the oil seal in place....

I've also put in the oil strainer cross bolt.. trimmed and compounded for a leak free case....(( :?: :?: ))

Image

Supper time.... :)

Cordialement

:ok

Re: Oops!!

Posted: 10 Jul 2013, 18:49
by sarran1955
Hello,

Thunderstorm...much cooler..

Cleaning and preparing the pistons...

Sort of 'before and after'..

Image

Remove the piston rings , check and clean the lands (where the rings go..

Image

All 4 cleaned and ready for re- ringing..

Image

Last thing for this evening..

Torque up the crankcase..

Image

Supper time..

Cordialement,

:ok

Re: Oops!!

Posted: 10 Jul 2013, 19:14
by 81AirCooled
Coming along nicely John. Bon Appetit :ok

Re: Oops!!

Posted: 13 Jul 2013, 19:23
by sarran1955
Hello,

So first thing was to deglaze the cylinders..

Here is a 'before and after'..

Can you tell the difference.. :?:

Image

The object of the exercise is to remove the 'lacquer' in the bores, smooth out small scratches, and provide a more 'clingy' surface for the engine oil..

Here is the machine set up...

Image

view of the interior..

Image

This is the de glazing tool.. I use thread cutting oil for the stones..

Image

I was most pleased with the result..

Cleaning tinware.. :roll:

Image

Don't know what beasties lived in the hot air intake tube.... :shock: :shock:

Image

Aha..

The engine support is broken.. new pair needed..

Image

The death of the wongy flaps.... :rofl :rofl :rofl :rofl :rofl :rofl

Image

Believe me.. :wink:

Cordialement,

:ok

Re: Oops!!

Posted: 13 Jul 2013, 21:52
by 300CE
Getting there John, cheers for taking the time to post up :ok

Re: Oops!!

Posted: 14 Jul 2013, 18:32
by sarran1955
Hello,

Right.. spent a bit of time this morning making an adaptor for the engine building stand..

Image

Then on to the piston rings, these are American, and I find them excellent

... easy to mount and good oil economy..

Image

Here is an oil control ring..

Image

Clean all the cylinder head stud threads..

Image

Use circlip pliers to drive the die tool on the middle studs.. :wink:

Image

Before and after shot..

Image

Now the pistons go in...

As you can see they are a close fit..

Image

Preparing up a cylinder , note the nice metal 'deck rings'.. always better than a cheap gasket set with paper (equivalents :?: :?: :?: )

Image

First cyinder on.. note 'keeper tube' holding cylinder in place..

Image

4 cylindered bliss.. :)

Image

Can you tell what it is yet... :rofl :rofl :rofl

Thats it for this evening,

14 July. so I'm off to a fireworks party... 8)


Cordialement,

:ok