Page 2 of 8
Re: Coolant temp gauge replacement (late petrol)
Posted: 01 Aug 2018, 11:41
by itchyfeet
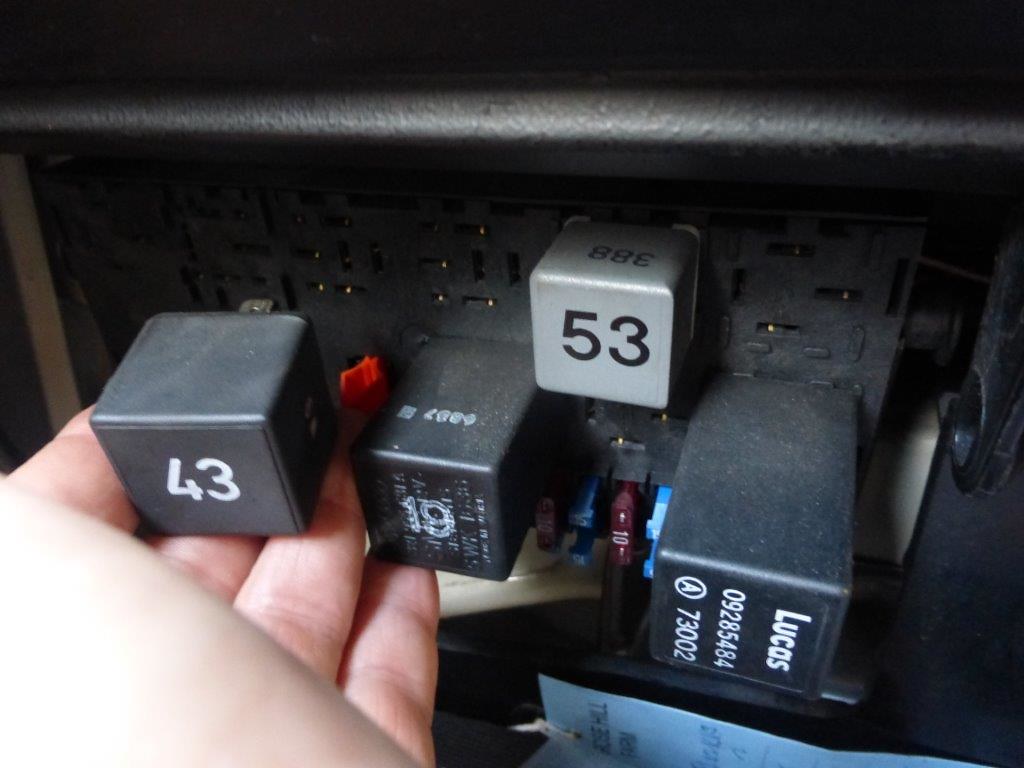
AngeloEvs wrote:The 'level' sensor or the 'temperature' sensor? You can isolate the level sensor to check if it is faulty by removing the module 43 (in the fuse box on later vans), In the event of low coolant or a wiring, sensor fault, etc, module 43 will output negative pulses that trigger the circuit in the temp gauge and then the LED flashes. Module 43 itself can become faulty and cause temp gauge problems.
The best way to check the gauge and all other functions is to remove the dash and bench test it. Like you say, isolating all the wiring and other hardware eliminates other possible causes.
Thanks I'm going to try pulling the module tonight.
Re: Coolant temp gauge replacement (late petrol)
Posted: 01 Aug 2018, 11:45
by itchyfeet
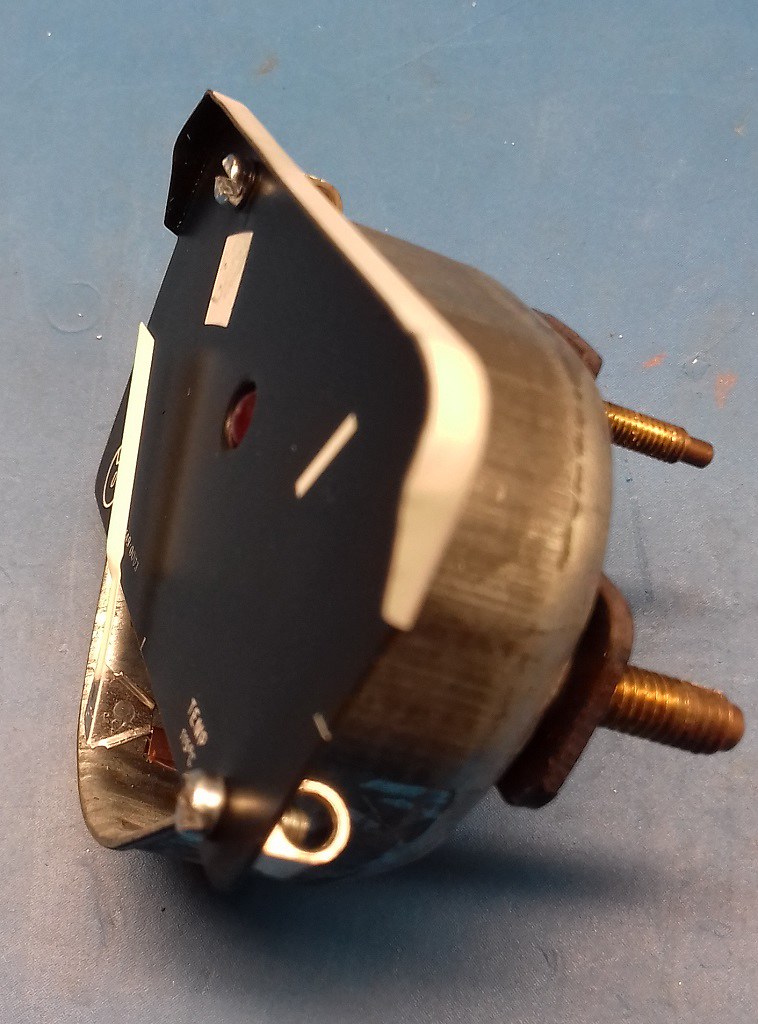
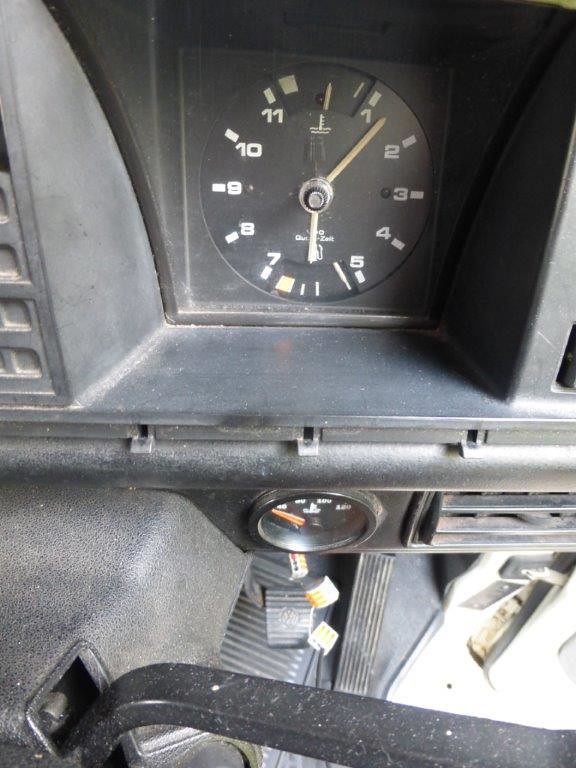
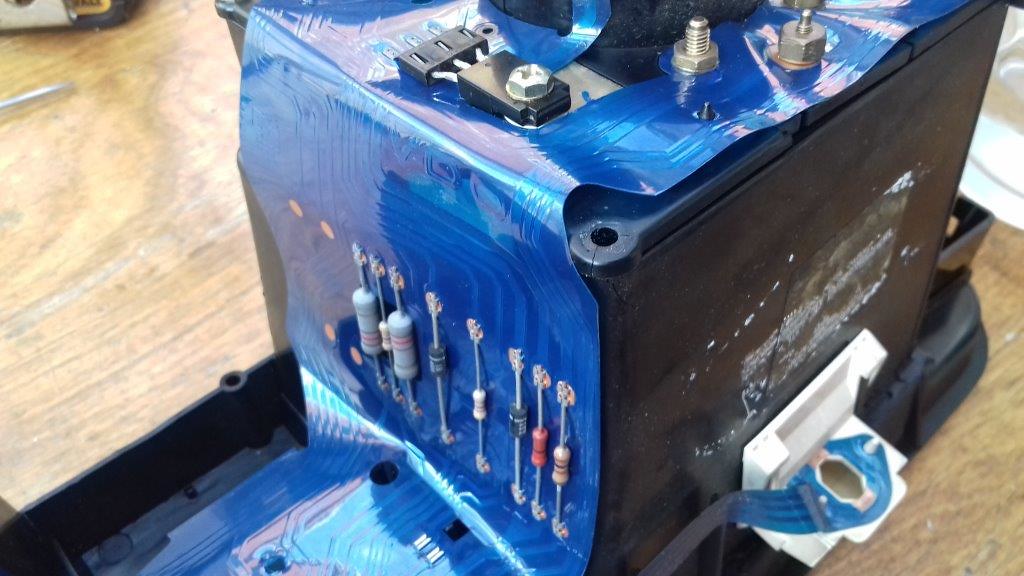
I had a closer look at the broken gauge this lunchtime and I could see this wire was touching a pin on the PCBA
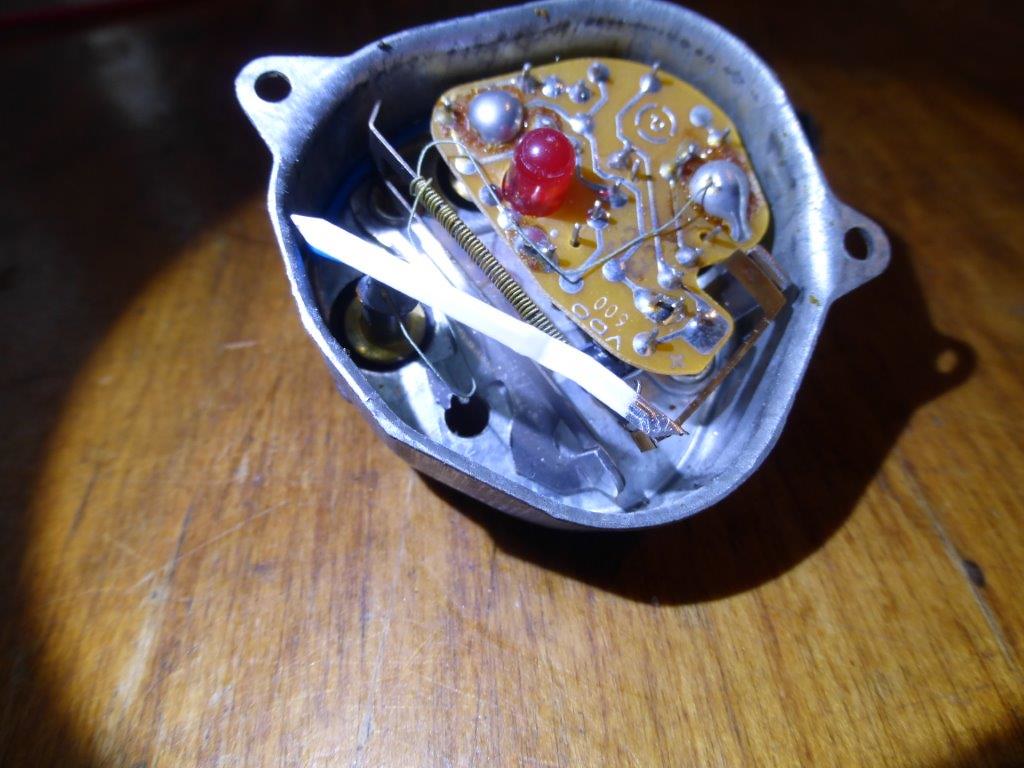 P1100544
 by
Paul_Barr, on Flickr
 20180801_121055
 by
Paul_Barr, on Flickr
AngeloEvs wrote:The gauge is adjustable. A 100 ohm resistor across the temp gauge output with a 10v supply should see the needle about a needle width left of the led. VAG test allows for plus or minus one needle width[
I bent it out the way connected it up to 10V and added 102R ( I only had 51R resistors) to the sensor input as advised and got this, easy fix, pleased with that

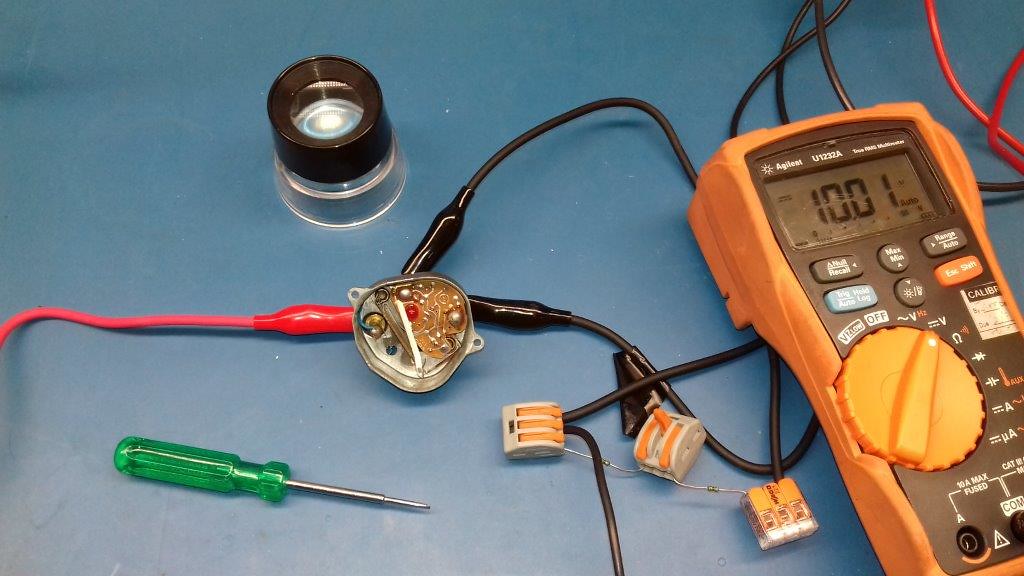 20180801_121400
 by
Paul_Barr, on Flickr
play with adjustment next
Re: Coolant temp gauge replacement (late petrol)
Posted: 01 Aug 2018, 15:14
by AngeloEvs
That looks spot on,.........
Re: Coolant temp gauge replacement (late petrol)
Posted: 01 Aug 2018, 17:35
by itchyfeet
AngeloEvs wrote:That looks spot on,.........
Yes I was please as it was broken, I check the Bentley and you have to wonder if the settings are Ohms, strange numbers if not.
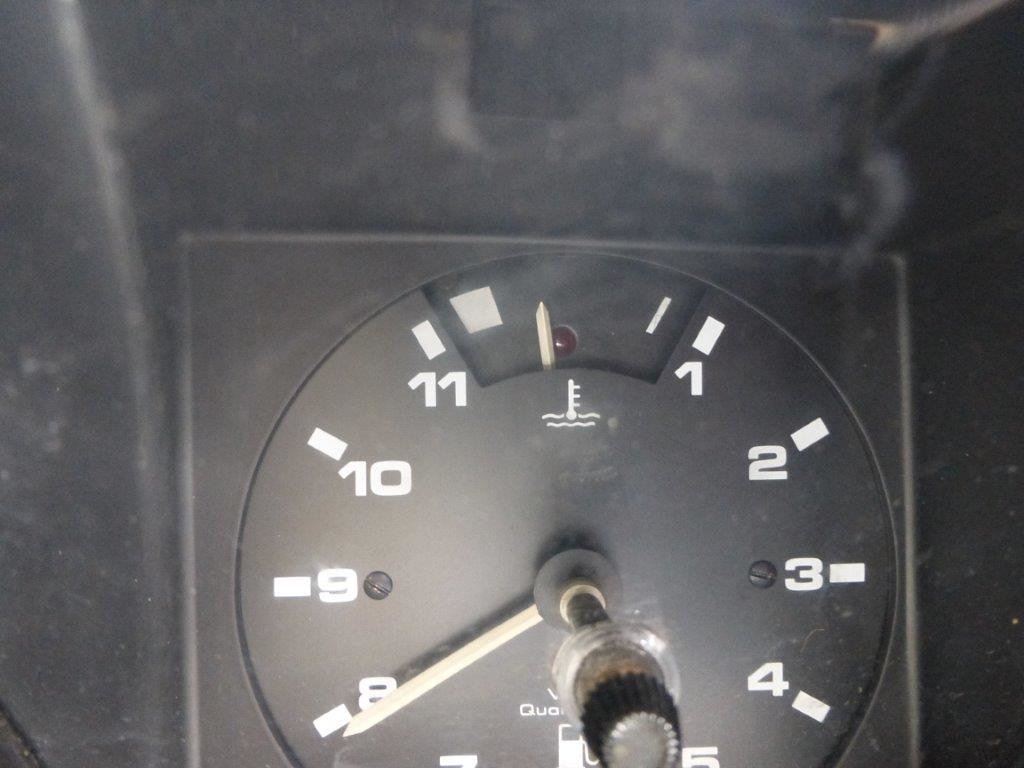
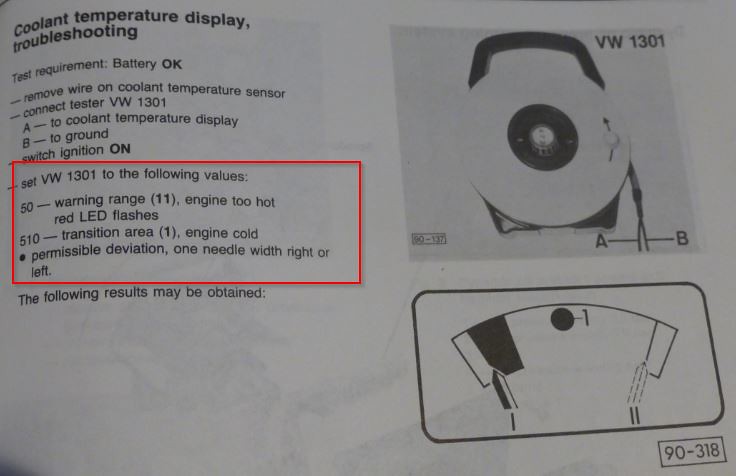 Coolant gauge VW test
 by
Paul_Barr, on Flickr
So I did some extra resistances and it doesn't look like value 50 is 50 Ohms to me but maybe a small adjustment and it would be.
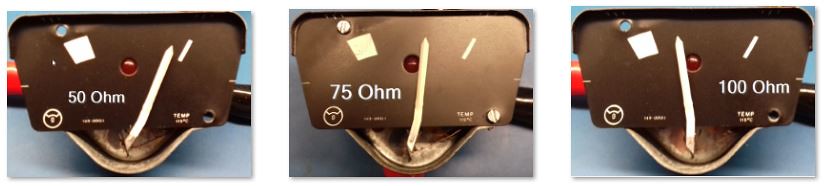 Temp Gauge Test
 by
Paul_Barr, on Flickr
Smallest screws I had was M3 and they are too bit so I improvised by cutting up a small termanal block, now I have a spare gauge:D
 20180801_133846
 by
Paul_Barr, on Flickr
Re: Coolant temp gauge replacement (late petrol)
Posted: 01 Aug 2018, 17:47
by itchyfeet
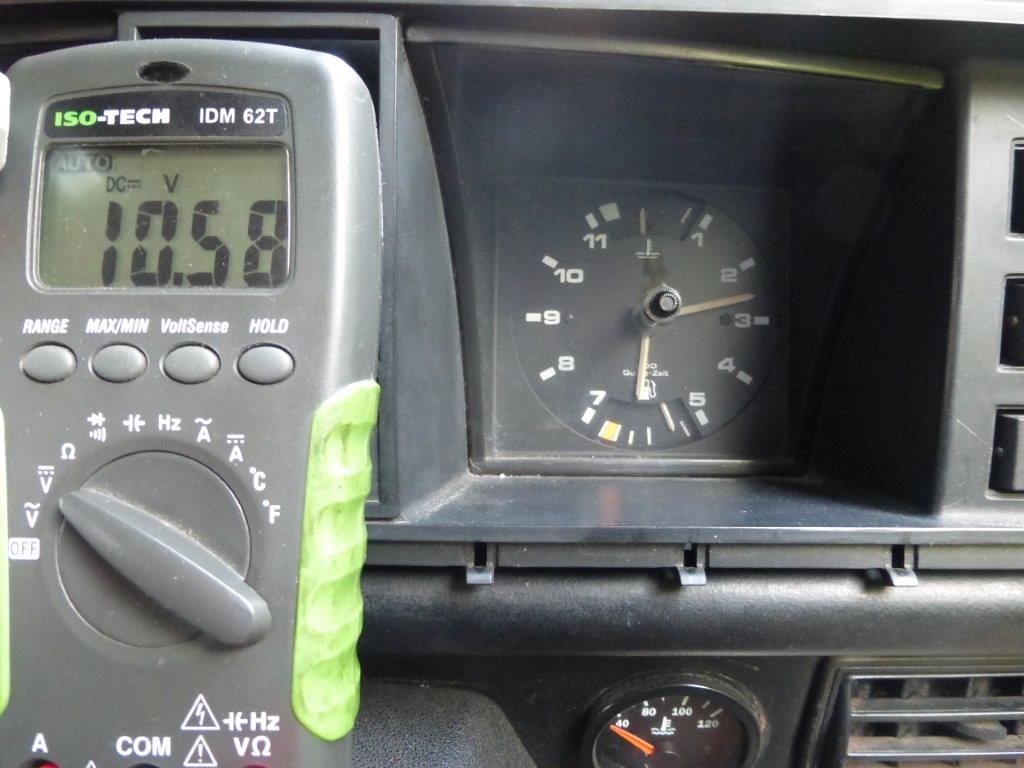
Tonight I connected the 100Ohms direct to the gauge in the van and turned ignition on and got this..
 P1100546
 by
Paul_Barr, on Flickr
Great I thought it's not the dash.
So I started it to check the same over temp would happen before pulling the relay, always best to be methodical with tests and yes it did after just 6 mins.
 P1100547
 by
Paul_Barr, on Flickr
Next I pulled the relay
 P1100548
 by
Paul_Barr, on Flickr
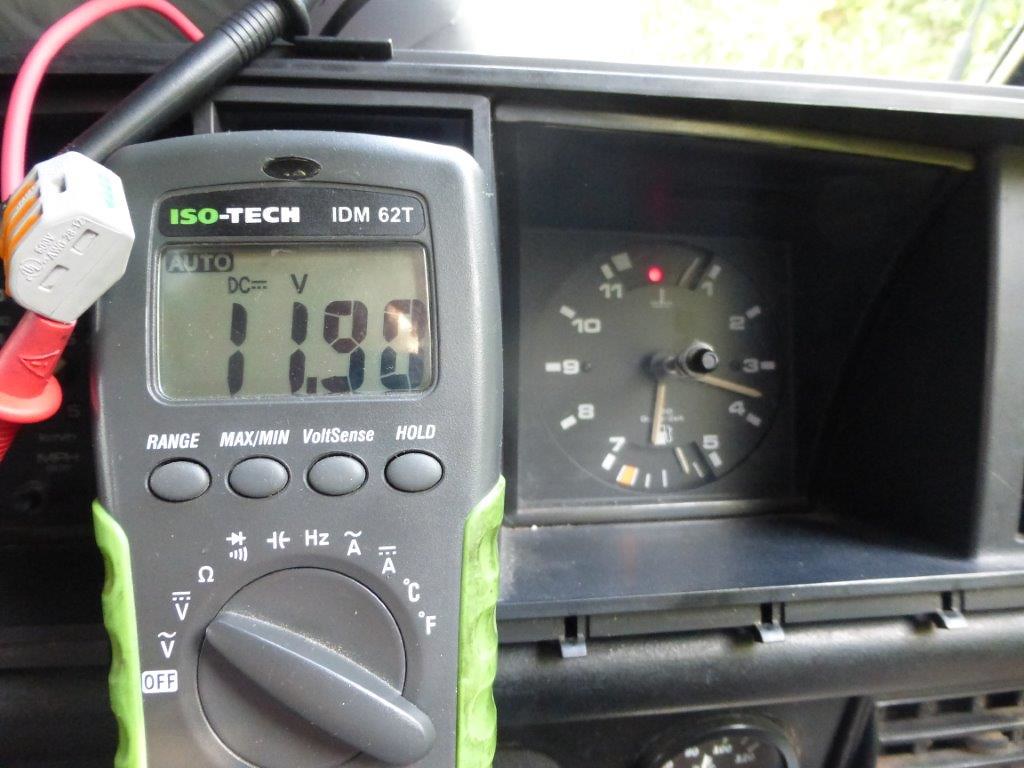
Started it up and got this with the 100 Ohms connected
 P1100549
 by
Paul_Barr, on Flickr
Then I realised that my first test was done with ignition off and then I remembered this school boy error of assumption
itchyfeet wrote:
I checked the tracks buzzed out so must be the gauge, petrol gauge works fine so I assume not regulator
 P1100553
 by
Paul_Barr, on Flickr
ignition off 100 ohms connected
 P1100554
 by
Paul_Barr, on Flickr
Ignition on sensor and level relay connected, got to be the regulator at fault
My guess is the old gauge was up at max so long the heater wire melted through as it was just touching a pin on the PCB, strange the regulator just affects the temp gauge but maybe not.
Maybe my tank is half empty and I have been blissfully unaware, becuse it smelt of fuel when I first had it I always filled to the gauge not the pump clicking off.
 P1100556
 by
Paul_Barr, on Flickr
Re: Coolant temp gauge replacement (late petrol)
Posted: 01 Aug 2018, 18:36
by AngeloEvs
The regulator should output a little over 10v and be consistent. The regulator has a 22 ohm between the earth and the regulator centre leg. Check it for signs of overheating or measure it to make sure it is indeed 22 ohms. There are also 10v regulators available that look exactly like the VAG one but, like many other alternatives, the input and output are reversed and the regulator outputs the supply voltage.
Also, there is a an electrolytic capacitor across the output of the gauge on later vans, never come across one that is faulty but worth bearing in mind that these do fail sometimes.
If you are placing the 100 ohm across the gauge whilst it is connected to the temp sender then the gauge will read much higher due to the combined effect of two resistors in parallel, particulatly if the engine has been warmed up.
I wouldn't worry too much about calibrating the gauge at the upper and lower extremes, the nominal one (normal temp = needle at around mid point) is the most important. The internal flashing LED circuit responds to the value of the senders resistance and once it gets down to the critical resistance of around 60 ohms or below that led will kick into action irrespective of where the needle sits.
If your gauge works out of the van and the fault emerges after you connect with module 43 removed then the fault is elsewhere in the temp sender circuit or the van is overheating.
Best measure the resistance on the output side of the gauge with module 43 removed when it goes into fault mode. Normal engine temp around 100 ohms and not in the critical range below 60 ohms.
Re: Coolant temp gauge replacement (late petrol)
Posted: 01 Aug 2018, 19:02
by itchyfeet
AngeloEvs wrote:
If you are placing the 100 ohm across the gauge whilst it is connected to the temp sender then the gauge will read much higher due to the combined effect of two resistors in parallel, particulatly if the engine has been warmed up.
.
No didn't do that.
Thanks for the pointers I bought a regulator from Brickwerks will check the resistor when I swap it.
Re: Coolant temp gauge replacement (late petrol)
Posted: 02 Aug 2018, 06:48
by itchyfeet
AngeloEvs wrote:
I wou The internal flashing LED circuit responds to the value of the senders resistance and once it gets down to the critical resistance of around 60 ohms or below that led will kick into action irrespective of where the needle sits.
.
Thats odd I tested the origional gauge with 50 ohms ( as you can see i the pics above) and the light didn't flash so perhaps the circuit on the origional gauge is dead due to the short althought the needle works.
It does flash at first connection but that may not be the same as flashing on low resistance.
Manybe I don't have a spare gauge after all.
Re: Coolant temp gauge replacement (late petrol)
Posted: 02 Aug 2018, 09:10
by CJH
itchyfeet wrote:
Yes I was please as it was broken, I check the Bentley and you have to wonder if the settings are Ohms, strange numbers if not.
Coolant gauge VW test by
Paul_Barr, on Flickr
Those numbers aren't Ohms, they're 'Resistance Units' on the VW1301 tool. For some reason, Ohms weren't good enough, so they came up with a new unit which is about half the size of an Ohm, and which, by extrapolation, would have a value of about -20 when the resistance is zero.
So 50 units on the VW1301 tool is 34 Ohms. Maybe your flashing LED would trigger at a lower resistance than you've tried.
http://www.bentleypublishers.com/tech/v ... esting.htm" onclick="window.open(this.href);return false;
Re: Coolant temp gauge replacement (late petrol)
Posted: 02 Aug 2018, 09:18
by Oldiebut goodie
Mr Google says: Actual_Resistance = 1/2 * 1301_Setting + 10.
Re: Coolant temp gauge replacement (late petrol)
Posted: 02 Aug 2018, 09:18
by 937carrera
I posted this a few days ago, 50 VW1301 units is 34 ohms, but now you can translate any value
937carrera wrote:
You can just do the conversion with maths:
https://www.s2forum.com/forum/technical ... e-checking
VW1301 value * 0.5013 + 9.367 = resistance in ohms, and
(Resistance in ohms - 9.367 ) / 0.5013 = VW1301 value
simplifying:
VW1301 value / 2 + 10 = ohms
Ohms * 2 - 20 = VW 1301
Re: Coolant temp gauge replacement (late petrol)
Posted: 02 Aug 2018, 09:39
by AngeloEvs
I use the value of 60 or below based on tests carried out on a number of gauges. There is some variation in the gauges possibly due to component tolerances and aging but if the Bentley conversion data says 34 as the specific test value then use that.
Re: Coolant temp gauge replacement (late petrol)
Posted: 02 Aug 2018, 12:17
by itchyfeet
Excellent thanks all for that very useful
Re: Coolant temp gauge replacement (late petrol)
Posted: 03 Aug 2018, 16:51
by itchyfeet
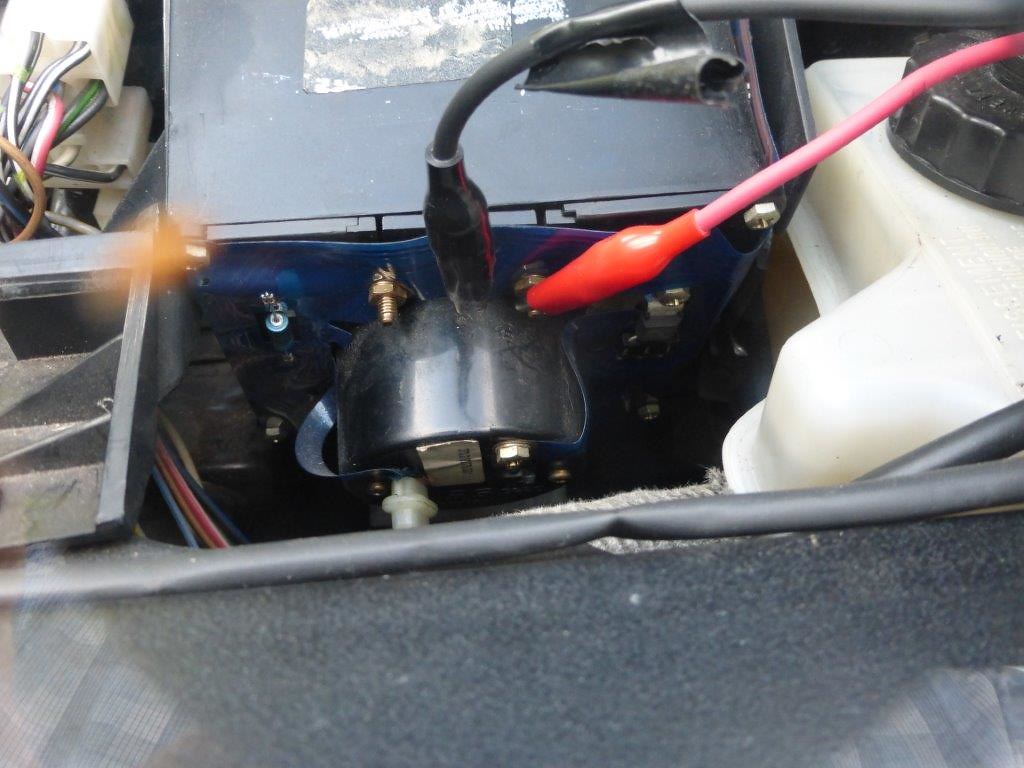
Regulator arrived today from Brickwerks
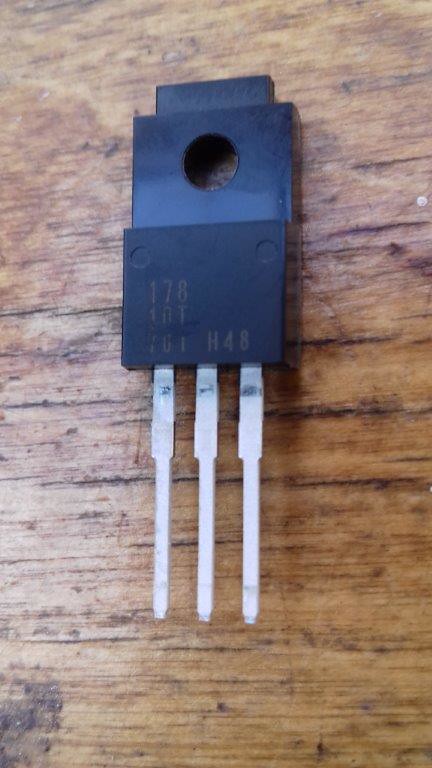 20180803_174107
 by
Paul_Barr, on Flickr
as per their website I installed it upside down
 P1100570
 by
Paul_Barr, on Flickr
and no better
ignition on engine not running
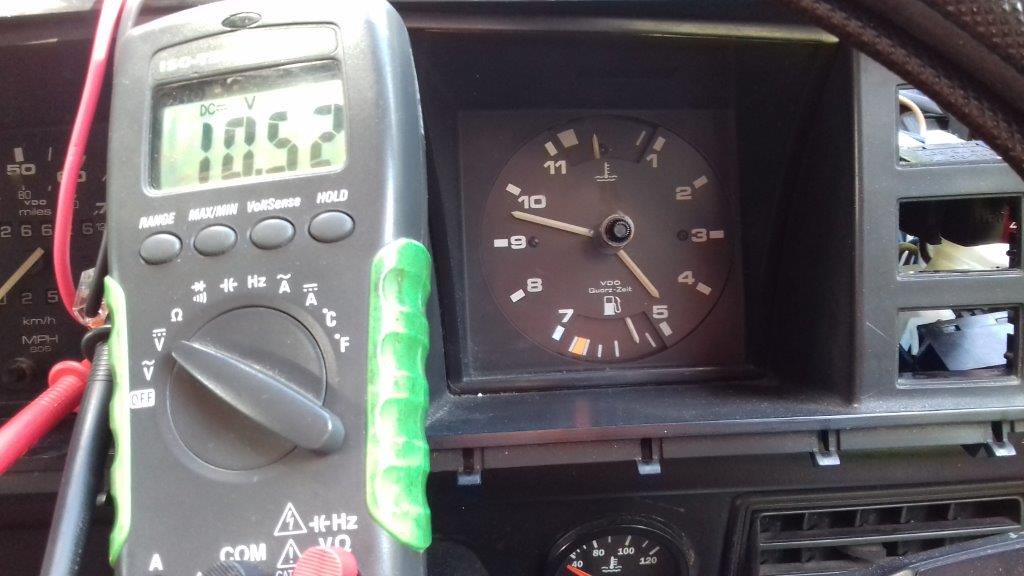 20180803_170708
 by
Paul_Barr, on Flickr
engine running
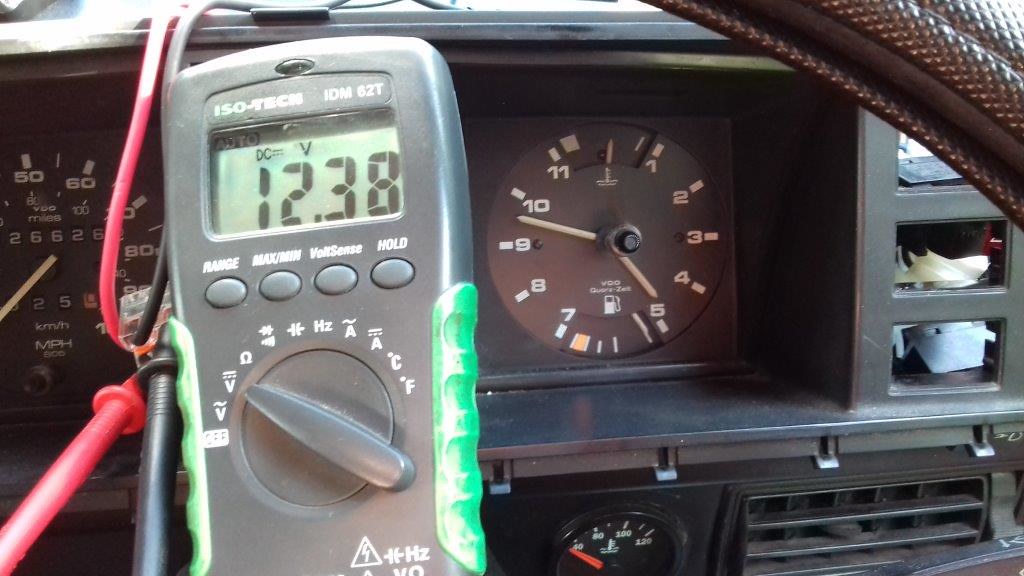 20180803_170800
 by
Paul_Barr, on Flickr
it seems the regulator is not working so why?
AngeloEvs wrote:The regulator should output a little over 10v and be consistent. The regulator has a 22 ohm between the earth and the regulator centre leg. Check it for signs of overheating or measure it to make sure it is indeed 22 ohms. There are also 10v regulators available that look exactly like the VAG one but, like many other alternatives, the input and output are reversed and the regulator outputs the supply voltage.
Also, there is a an electrolytic capacitor across the output of the gauge on later vans, never come across one that is faulty but worth bearing in mind that these do fail sometimes.
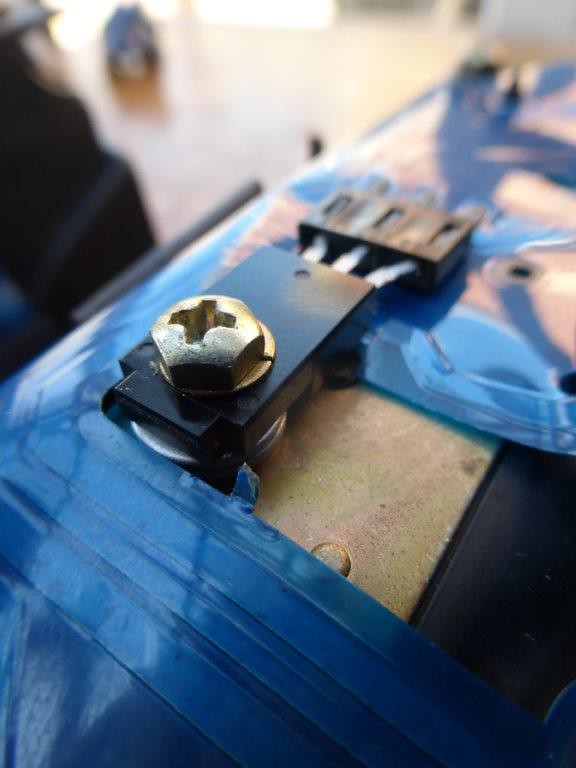
I checked the red resistor was 20.9 could this regulator be fitted wrong?
 20180803_173359
 by
Paul_Barr, on Flickr
Re: Coolant temp gauge replacement (late petrol)
Posted: 03 Aug 2018, 17:20
by itchyfeet
AngeloEvs wrote:The regulator should output a little over 10v and be consistent. The regulator has a 22 ohm between the earth and the regulator centre leg. Check it for signs of overheating or measure it to make sure it is indeed 22 ohms.
hmmm measured between earth and center leg and the 20.9 ohms is not there, high resistance
E D I T its there now but 25 ohms maybe a bad connection.