Page 2 of 33
Re: Rustoration
Posted: 30 Jan 2018, 23:25
by RogerT
Thanks multisi.
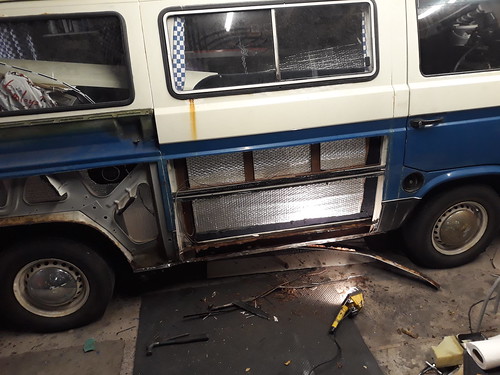
So tonight, cutting.

The view along the inside of the sill...
(after I cleaned it out)


But wait, what’s that I spy? Right at the front over the jacking point.

Silly me, it’s that bit of polystyrene that someone reinforced the jacking point with!

On a positive note, the inner sill doesn’t look too awful, it might even be salvageable?
I’ll try to get a spot weld drill tomorrow and see about cleanly removing the rest of the outer sill.
Sent from my iPhone using Tapatalk
Re: Rustoration
Posted: 31 Jan 2018, 00:38
by Porkscratching
My god sir. I doff my cap to you. I'm strapped in for this one. Best of British and fingers crossed for you.
Regards, Max.
Re: Rustoration
Posted: 31 Jan 2018, 12:39
by RogerT
Spot-weld drill purchased from
http://www.stilltools.co.uk" onclick="window.open(this.href);return false;, who are based just round the corner from my work, so no need to give my money to Amazon etc!
Re: Rustoration
Posted: 31 Jan 2018, 23:33
by RogerT
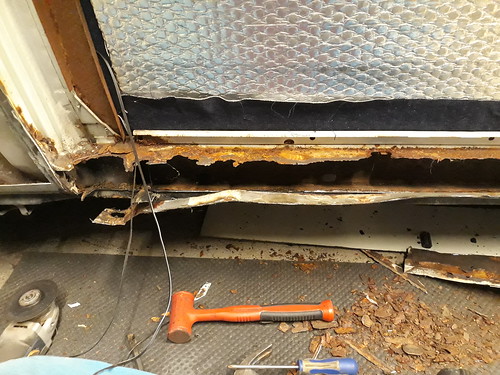
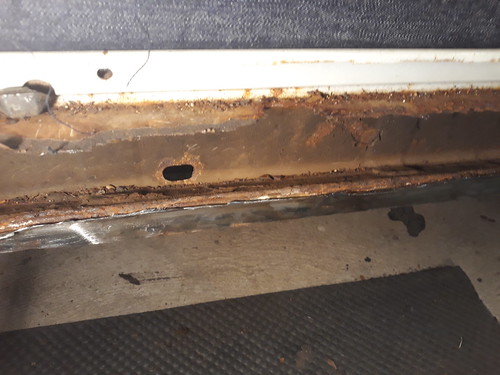
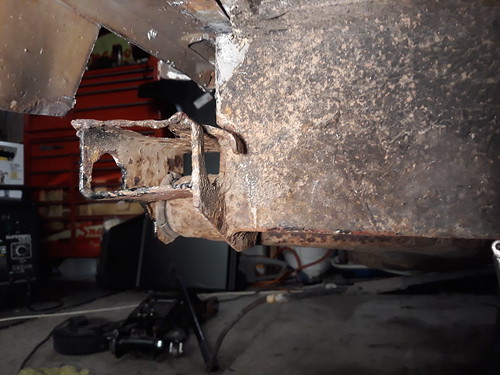
Had a closer look at the inner sill. Here is the inner face of the where the join between the inner and outer sills should be.

From underneath the sill, showing a messily welded area, devoid of protective coating.

And seen from towards the centre of the underside of the van, looking outwards. I think that is the edge of the welded on plate. (And my thumb...)

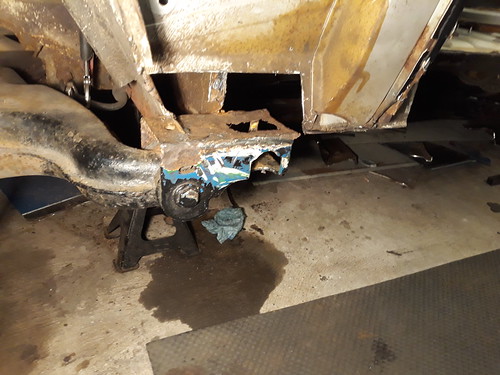
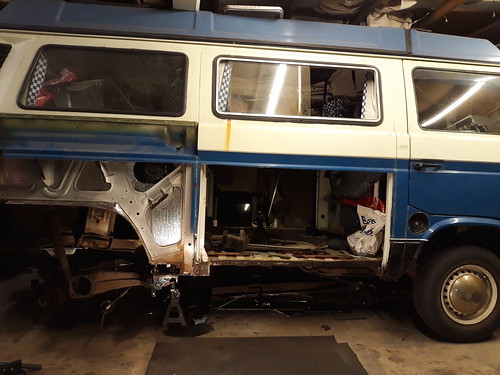
Not much keeping that inner sill, is there. Next to remove the trailing arms, and investigate above the front and rear jacking points. I know the rear JP swing arm mount is only held by a plethora of patches, and the sill above the front JP was filled with polystyrene, and was pretty knacked.
So maybe best to start from scratch with the sills.
I guess my plan is to create a solid foundation and move upwards from there.
But before I take the rear wheels off and put it on stands, I’ll need to get rid of a piece of furniture that’s tucked behind the van, before I render the van immobile! I’ll get my wife to put it onto FB or Freecycle.
Sent from my iPhone using Tapatalk
Re: Rustoration
Posted: 01 Feb 2018, 10:06
by mshaw1980
Deja vu!
I am currently in the process of doing this job but I replaced the inner sill and rear jacking point. I would do the inner sill if I were you. Will post pics later.
Re: Rustoration
Posted: 01 Feb 2018, 10:43
by RogerT
Oh, pics would be fab! I'm relying on memory mostly from reading Metalmick8y's threads, but actual pics would be great. One of the reasons for doing this thread is to help anyone else learn from my mistakes! I've gained so much from this forum it's only fair to put some back.
Re: Rustoration
Posted: 01 Feb 2018, 17:51
by mshaw1980
Ok. So the cutting begins...
 Side centre panel removal
 by
Mark Shaw, on Flickr
Floor where it joins the lower outer sill is shot...
 Side centre panel removal
 by
Mark Shaw, on Flickr
Inner sill is not looking too good...
 Inner sill and front jacking point
 by
Mark Shaw, on Flickr
Rear jacking point opened up and is bad. You can see the holes in the inner sill where it has completely corroded away...
 Rear trailing arm mount
 by
Mark Shaw, on Flickr
Inner sill removed leaving a 'floating' rear jack point...
 Inner sill removal.
 by
Mark Shaw, on Flickr
Another view of the rear jack point...
 Inner sill removal.
 by
Mark Shaw, on Flickr
View with the inner sill removed. Not much of the driver side left

 Inner sill removal.
 by
Mark Shaw, on Flickr
Rebuild pics to follow
Re: Rustoration
Posted: 01 Feb 2018, 18:06
by mshaw1980
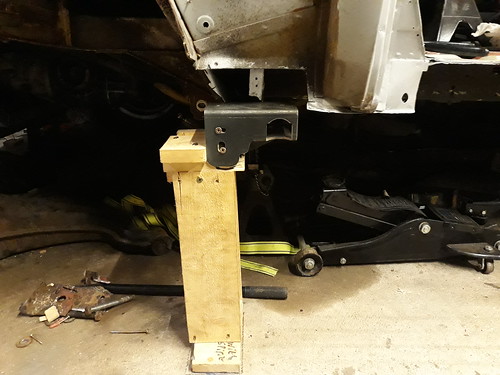
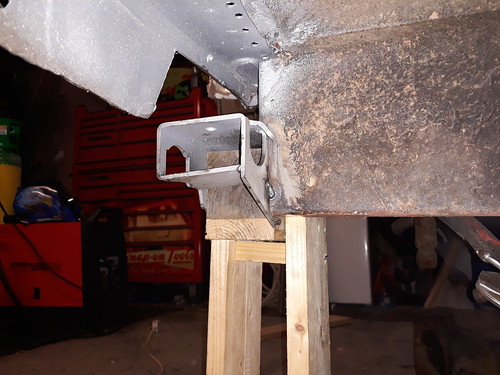
So the jig I made to fit the rear jack point. It was screwed to the floor and fitted to the old jack point. I then cut it off, fitted the new jack point to the jig and tacked it on to the rear crossmember. Looks crude but I did lots of measuring...
 Rear jack point jig
 by
Mark Shaw, on Flickr
 Rear jack point jig
 by
Mark Shaw, on Flickr
 Rear jack point jig
 by
Mark Shaw, on Flickr
Inner sill fitted on top of tacked rear jacking point. I then fabricated the rear stiffener with 1.5mm steel...
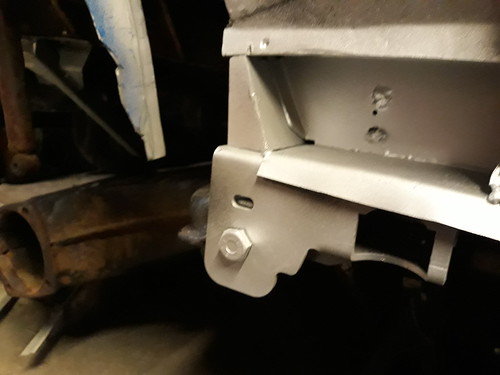 Rear Jack point welded on and boxed in
 by
Mark Shaw, on Flickr
Rear view of the stiffener tacked in...
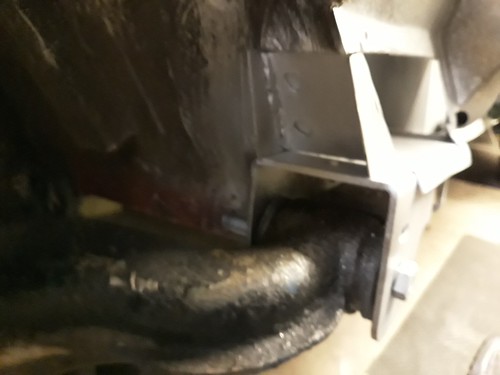 Rear Jack point welded on and boxed in
 by
Mark Shaw, on Flickr
Rear jack point now fully welded on and the box section above filled in...
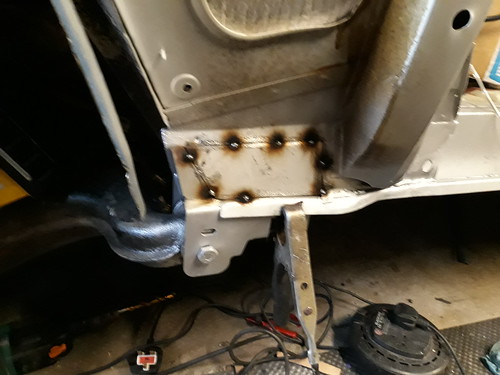 Rear Jack point welded on and boxed in
 by
Mark Shaw, on Flickr
Box section seam welded. Wont bother grinding flat as it will be stronger and it wont be seen behind the rear quarter panel...
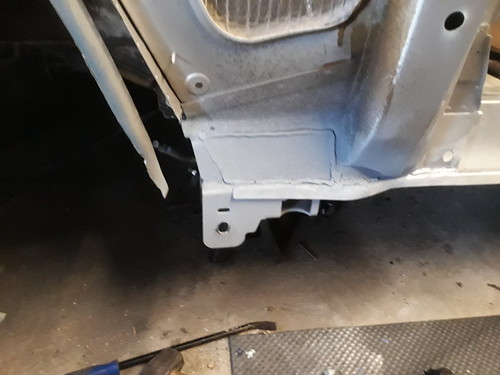 Rear Jack point welded on and boxed in
 by
Mark Shaw, on Flickr
Hope this is of some help

Re: Rustoration
Posted: 01 Feb 2018, 22:03
by RogerT
That is helpful, good to learn that the inner sill is fitted on top of the JP. My problem is that th JP is not fixed to the chassis outrigger any longer. So I’m planning to create a jig to hold the trailing arm (with the bolts for the hub carrier?) and take the JP position off that, once I have the arm lined up vertically and horizontally (the inner mount looks ok). And I’ll likely have to have the jig in two parts, with bolts to allow adjustment, so I don’t have to build it super accurate. Thinking aloud. A few steps to go before I get there. But thanks, they’re really helpful.
Re: Rustoration
Posted: 01 Feb 2018, 22:33
by mshaw1980
If where the jacking point has come away from the outrigger you can see the outline of where it was originally welded you could try and tack it back into position and then make your jig. Probably be more accurate?
Re: Rustoration
Posted: 01 Feb 2018, 22:44
by bigbadbob76
Al the best with it Roger, see you and it on sunday.
Re: Rustoration
Posted: 02 Feb 2018, 15:16
by RogerT
Mark, that’s a good idea. From that, I’m also wondering about measuring the location of any mark and just transferring that to the new JP, then tacking and offering up the arm to check alignment. Of course the JP may well be too rusty, and I know I might need to build up the outrigger first. But it’s good to have alternative plans available.
Bob, see you on Sunday
Re: Rustoration
Posted: 21 Feb 2018, 23:22
by RogerT
Went to remove my hub nut so as to get the assembly off the swing arm. Bent my 1/2” breaker bar. Ordered a 3/4” sliding T-bar instead.
Re: Rustoration
Posted: 21 Feb 2018, 23:39
by mshaw1980
Scaffold pole over your breaker bar
Re: Rustoration
Posted: 22 Feb 2018, 09:19
by multisi
You could remove hub assembly by undoing the 4 big bolts that hold it on to the swing arm without undoing the hub nut , ive done it with a carefully positioned ring spanner and used a trolley jack to do the work. Drive shaft can be undone at the gearbox end and pulls through the swing arm.


